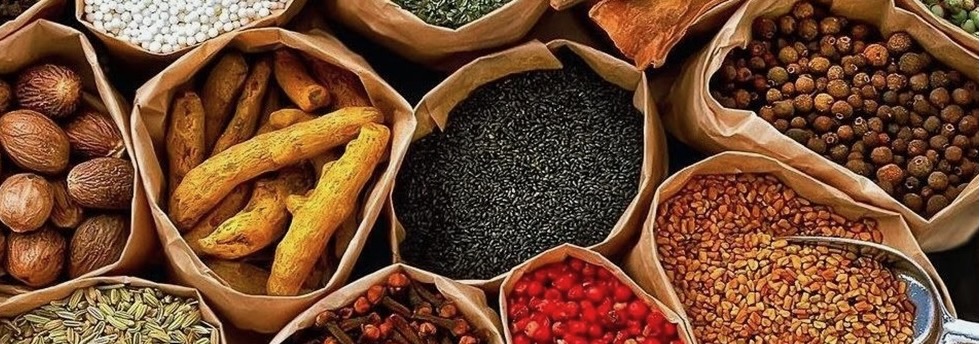
Bags of Spices

Favorite Recipes

Category: Rick

  • Garlic Oil Pizza Base

    This garlic oil base transforms your Neapolitan pizza into a light, aromatic pizza bianca. It’s perfect when you want the dough’s flavor and texture to shine without the acidity of tomato sauce. Try it with fresh mozzarella, ricotta, mushrooms, or prosciutto for a delicate, savory balance. The aglio e olio variation adds a gentle chili warmth layered into the oil itself.


    Ingredients

    • 1–2 tsp Garlic Oil (per pizza)
    • Thin slices of cooked garlic from the infused oil (optional)
    • Optional Toppings

    • Fresh mozzarella or burrata
    • Ricotta cheese
    • Mushrooms, caramelized onions, or roasted peppers
    • Prosciutto, arugula, or fresh basil
    • Aglio e Olio Variation

    • ½–1 tsp Chili Garlic Oil, blended into the garlic oil (per pizza)

    Directions

    Prepare the Dough

    Stretch or shape one portion of prepared Neapolitan pizza dough to your desired size, leaving a slightly raised edge for the crust.

    Apply the Garlic Oil Base

    Brush or spoon garlic oil evenly over the surface of the dough.

    • For subtle flavor – use about 1 tsp per pizza
    • For stronger flavor – use up to 2 tsp and scatter a few garlic slices on top

    For Aglio e Olio

    Blend chili garlic oil into the garlic oil before brushing the dough.

    • Gentle heat – ½ tsp chili garlic oil per pizza
    • Bolder heat – 1 tsp chili garlic oil per pizza

    Add Toppings

    Top lightly with cheese and desired ingredients. Avoid adding too much oil or moisture, which can soften the crust during baking.

    Bake

    Bake according to your Neapolitan dough instructions—typically at 475–500°F / 245–260°C until the crust is blistered and golden, about 1½–2 minutes in a very hot oven or on a preheated baking steel.

    Finish

    Drizzle with a touch more garlic oil after baking, if desired. Slice and serve immediately.


    Notes

    Preparation

    • Use Homemade Garlic Oil or Chili Garlic Oil for best flavor and consistency.
    • For a lighter pizza, use less oil and keep toppings minimal—Neapolitan-style pizza cooks best when lightly topped.

    Serving Suggestions

    • Top with mozzarella, ricotta, or burrata for a rich pizza bianca.
    • Add roasted vegetables, mushrooms, or caramelized onions for earthy depth.
    • Finish with prosciutto, arugula, or basil after baking for a fresh touch.

    Variations

    • For truffle oil aroma, drizzle a few drops just before serving.
    • Combine equal parts garlic and chili oil for a subtle, smoky spice.
    • Use herb-infused olive oil (e.g., rosemary or thyme) for a Mediterranean twist.
  • Garlic Oil

    Garlic oil is a simple yet flavorful staple for cooking, dipping, or drizzling. Slow-infused with fresh garlic, it adds aromatic richness to pasta, grilled vegetables, and stir-fries. The chili version adds a spicy kick perfect for noodles, dumplings, and stir-fried dishes.


    Ingredients

    • 1 cup neutral oil (canola, vegetable, or light olive oil)
    • 6–8 cloves garlic, thinly sliced
    • Optional Aromatics

    • ½ tsp crushed red pepper flakes (for heat)
    • ½ tsp dried herbs (oregano, basil, or thyme)
    • 1 small sprig fresh rosemary (for infusion)
    • Chili Garlic Oil Variation

    • 2 tbsp crushed red pepper flakes
    • 1 tbsp minced shallots or dried minced onion
    • 1 tsp sesame seeds (optional, for texture)

    Directions

    Prepare the Ingredients

    Peel and thinly slice the garlic. Gather optional herbs and spices if using.

    Infuse the Oil

    Place oil and garlic in a small saucepan or skillet.

    • For mild flavor – heat gently over low heat until small bubbles form and garlic turns pale golden (about 8–10 minutes)
    • For deeper flavor – continue cooking until garlic reaches a rich golden brown (about 12–15 minutes), but do not let it burn

    For Chili Garlic Oil

    Remove the saucepan from heat and let the oil cool for 1–2 minutes. Add the following directly to the hot oil:

    • Crushed red pepper flakes
    • Minced shallots or onion
    • Sesame seeds (if using)

    Allow the mixture to sizzle lightly for 30–60 seconds as it infuses, then cool completely before transferring to a jar.

    Cool and Strain (for Plain Garlic Oil Only)

    Remove from heat. Let the oil cool completely, then strain out the solids if a clear oil is desired.


    Notes

    Preparation

    • For food safety, always refrigerate garlic oil to prevent botulism.
    • Let refrigerated oil come to room temperature before using to restore full aroma and pourable texture.
    • To enhance flavor, include a few slices of toasted garlic or chili flakes when serving.

    Serving Suggestions

    • Use as a drizzle over pasta, grilled vegetables, or meats.
    • Brush on pizza dough for a garlic oil base before baking.
    • Use chili garlic oil for noodles, dumplings, or fried rice.

    Variations

    • Add herbs like rosemary or thyme during infusion for a Mediterranean twist.
    • Use a mix of neutral oil and sesame oil for a nutty, Asian-inspired flavor.
    • Infuse with a strip of lemon peel for a fresh, aromatic note.

    Make-Ahead & Storage

    • Transfer to a clean, dry jar after cooling.
    • Plain garlic oil – refrigerate for up to 2 weeks.
    • Chili garlic oil – refrigerate for up to 1 month.
    • Always keep stored oil chilled and discard if any cloudiness or off odors develop.
  • Neapolitan-Style Tomato Sauce

    Neapolitan-Style Tomato Sauce

    This uncooked Neapolitan-style pizza sauce preserves the bright, fresh flavor of San Marzano tomatoes—sweet, rich, and perfectly balanced for high-heat baking. Using true DOP-certified tomatoes gives an authentic taste of Naples, with a smooth texture and naturally sweet finish that perfectly complements a light, airy crust.


    Ingredients

    • (For about 6–8 pizzas)
    • 1 can (28 oz / 800 g) whole peeled San Marzano tomatoes (DOP if possible)
    • ½ tbsp table salt (adjust to taste)
    • 2 tbsp extra-virgin olive oil
    • 2–4 fresh basil leaves, torn (optional but recommended)

    Directions

    Prepare the Sauce

    Drain excess juice from tomatoes into a bowl, reserving it in case the sauce needs thinning. Crush tomatoes by hand until mostly smooth but still slightly textured—avoid over-crushing for best flavor and body.

    Stir in salt, olive oil, and basil until evenly mixed.

    Use the Sauce

    Spread thinly over stretched dough just before baking (Neapolitan Pizza Dough works beautifully). Use approximately 2–2½ oz (60–70 g) of sauce per 10–12″ pizza.

    Do not pre-cook the sauce—the natural sugars in the tomatoes caramelize under high oven heat, producing rich, authentic flavor.


    Notes

    Preparation

    • Use only high-quality San Marzano tomatoes with the DOP seal for the sweetest, least acidic results.
    • Do not blend the sauce completely smooth; a slightly rustic texture gives better flavor and adhesion.

    Serving Suggestions

    • Use as the base for Pizza Margherita—add mozzarella, parmesan, and fresh basil.
    • Try on Pizza Marinara with garlic, oregano, and a drizzle of olive oil.
    • Use in Shoarma Pizza or Carnitas Pizza for a Dutch or Mexican-inspired twist.

    Variations

    • For a smoother sauce, pulse briefly with an immersion blender (1–2 seconds only).
    • For a hint of depth, add a tiny pinch of sugar if your tomatoes are unusually acidic.
    • For a garlic-forward version, rub a cut clove of garlic over the dough before adding sauce.

    Make-Ahead & Storage

    • Store sauce in an airtight container in the refrigerator for up to 5 days.
    • Freeze for up to 3 months; thaw in the refrigerator overnight before using.
  • Neapolitan Pizza Dough

    Neapolitan Pizza Dough

    Pizza has always been a go-to meal for our family. Who can resist the combination of chewy dough, flavorful sauce, tasty toppings, and gooey cheese? Our first taste of true Neapolitan-style pizza was on our family trip to Italy—staying across the square from the Pantheon, exploring the Colosseum and Vatican museums, and often ending the day with perfectly blistered pizza from a tiny Roman restaurant. This recipe recreates that chewy, flavorful crust at home, whether you choose the cold-ferment version for deep flavor, the quick version for same-day pizza, or the freezer version for easy make-ahead dough.


    Ingredients

    • 1360 g (~3 lb) 00 flour (100%)
    • 952 g cold water (70%)
    • 27 g table salt (2%)
    • Active Dry Yeast

    • Cold Ferment: 0.41 g for 72 hours (0.03%) or 0.82 g for 48 hours (0.06%)
    • Quick Version: 2.72 g for same-day use (0.2%)
    • Freezer Version: 3.54 g for use the same day as thawed (0.26%)

    Note: Use a digital scale accurate to 0.01 g for yeast precision, or approximate to the nearest small pinch if unavailable.

    Directions

    Select Fermentation Version

    Cold Ferment (48–72 hours)

    In a large bowl, combine flour, yeast, and cold water. Mix until no dry bits remain (shaggy dough). Cover and rest 20–30 minutes.

    After resting, sprinkle salt over dough and gently pinch and squeeze to incorporate. Every 30 minutes for 2 hours, perform a set of stretch and folds (see Notes).

    After the final folds, place dough in a clean bowl, cover, and rest at room temperature (75–80°F / 23–27°C) for 1–2 hours. Divide into 8 oz (225 g) balls, lightly oil, and place in individual containers or on a floured tray covered tightly. Refrigerate 48–72 hours. Remove from refrigerator 2–3 hours before baking to come to room temperature.

    Quick Version (Same-Day)

    In a large bowl, combine flour and cold water. Mix until no dry bits remain; cover and rest 20–30 minutes.

    In a small cup, dissolve yeast in 2 tbsp warm water (105°F / 40°C) and let stand 5–10 minutes until foamy.

    Sprinkle salt over dough, then add yeast mixture. Gently pinch and squeeze to incorporate. Every 30 minutes for 2 hours, perform a set of stretch and folds (see Notes).

    After the final folds, cover and rest at warm room temperature (75–80°F / 23–27°C) for 2–3 hours, until nearly doubled. Divide into 8 oz (225 g) balls, lightly oil, and place in proofing containers or on a floured tray. Cover and proof 1–2 hours, until puffy and relaxed.

    Freezer Version (Make-Ahead)

    In a large bowl, combine flour and cold water. Mix until no dry bits remain; cover and rest 20–30 minutes.

    In a small cup, dissolve yeast in 2 tbsp warm water (105°F / 40°C) and let stand 5–10 minutes until foamy.

    Sprinkle salt over dough, then add yeast mixture. Gently pinch and squeeze to incorporate. Every 30 minutes for 2 hours, perform a set of stretch and folds (see Notes).

    After the final folds, cover and rest at warm room temperature (75–80°F / 23–27°C) for 2–3 hours, until nearly doubled. Divide into 8 oz (225 g) balls. Lightly oil, wrap tightly in plastic wrap, and place in freezer-safe bags or airtight containers. Freeze up to 3 months.

    To thaw, transfer to refrigerator for 24 hours. Then allow 1–3 hours at room temperature before stretching and baking.

    Bake the Pizzas

    Place a pizza steel on the top rack of the oven and preheat to 500–550°F (260–290°C) for at least 45 minutes. Just before baking, switch to broil for 5–10 minutes to superheat the surface.

    Stretch a dough ball gently by hand (don’t roll), top lightly with sauce, cheese, and desired toppings, and slide onto the steel. Bake 4–5 minutes, rotating halfway through. For extra char, broil the final 30–60 seconds.

    For an even closer match to wood-fired results, bake in an outdoor pizza oven at 750–850°F (400–455°C) for 60–90 seconds.


    Notes

    Preparation

    • Hydration note: The 70% hydration gives the dough an open crumb and extensible texture typical of Neapolitan-style pizza. Adjust slightly based on flour absorbency.
    • Stretch & Folds: With wet hands, grab one edge, stretch it up, and fold it over. Rotate 90°, repeat until all four sides are folded. After 3–4 rounds, the dough will feel smoother and more elastic.
    • Use minimal toppings and well-drained mozzarella to prevent sogginess during high-heat baking.
    • This dough also works for homemade pita: reduce hydration to 65%, roll ⅛–¼ inch thick, and bake 1½–2 minutes at 475–500°F (245–260°C).

    Serving Suggestions

    • Top with traditional Neapolitan tomato sauce, fresh mozzarella, and basil for a Pizza Margherita.
    • Drizzle with extra virgin olive oil after baking to enhance flavor and aroma.
    • Pair with a simple arugula salad or Italian antipasti for a complete meal.

    Variations

    • Pizza MargheritaNeapolitan tomato sauce, mozzarella, parmesan, basil; after baking add a drizzle of extra virgin olive oil.
    • Pizza MarinaraNeapolitan tomato sauce, garlic, oregano, salt; after baking add a drizzle of extra virgin olive oil.
    • Pizza CapricciosaNeapolitan tomato sauce, mozzarella, ham, artichokes, mushrooms, olives; after baking add a drizzle of extra virgin olive oil.
    • Pizza BoscaiolaNeapolitan tomato sauce, mozzarella, mushrooms, Italian sausage, and parmesan; after baking add a drizzle of extra virgin olive oil.
    • Pizza Quattro FormaggiNeapolitan tomato sauce (optional), mozzarella, ricotta, gorgonzola, parmesan, garlic, oregano (or, more traditionally, mozzarella, gorgonzola, parmigiano-reggiano, fontina; and after baking add a drizzle of extra virgin olive oil).
    • Pizza alla NapoletanaNeapolitan tomato sauce (optional), mozzarella, anchovies, capers, oregano; and after baking add a drizzle of extra virgin olive oil.
    • Pizza Prosciutto e FunghiNeapolitan tomato sauce, mozzarella, prosciutto, mushrooms; and after baking add a drizzle of extra virgin olive oil.
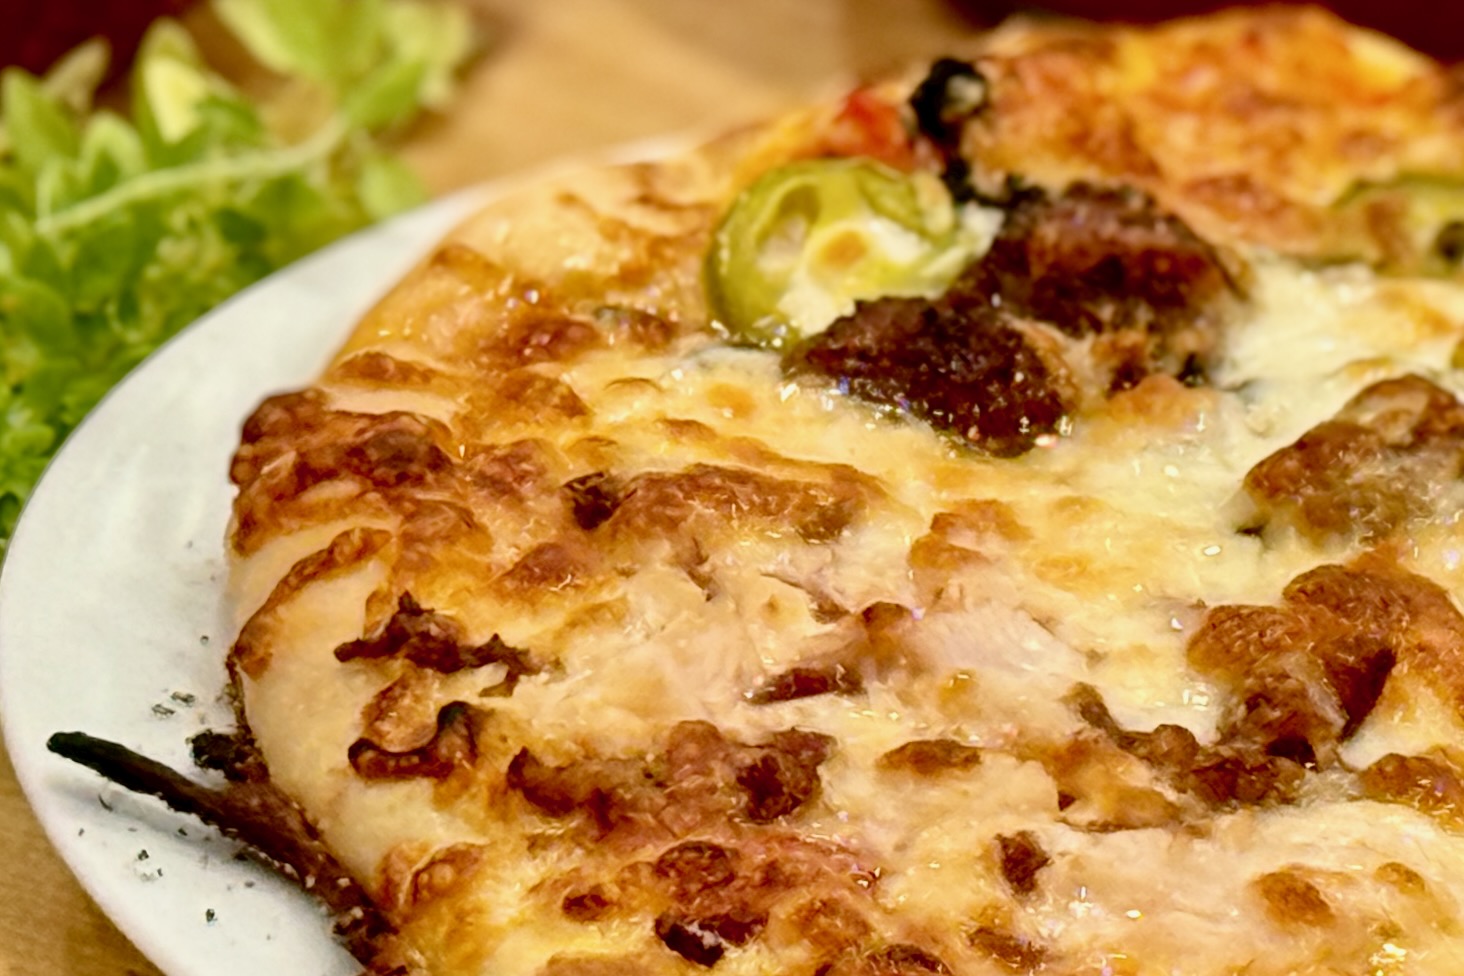
    • Spicy SausageNeapolitan tomato sauce, mozzarella, spicy Italian sausage, pickled jalapeños.
    • Sweet & SpicyNeapolitan tomato sauce, mozzarella, spicy Italian sausage, pickled jalapeños; after baking add a drizzle of honey.
    • Spinach & Sun-dried TomatoNeapolitan tomato sauce, mozzarella, provolone, ricotta, Parmesan, spinach, sun-dried tomatoes; after baking add fresh basil and a drizzle of extra virgin olive oil.
    • Loaded HawiianNeapolitan tomato sauce, mozzarella, ham, rotisseri chicken, bacon, pineapple, red onion, pickled jalapeños.
    • Shoarma PizzaNeapolitan tomato sauce, mozzarella, chicken shoarma; after baking add a drizzle of knoflooksaus (Dutch garlic sauce) and poestasaus.
    • Barbecue ChickenDr Pepper barbecue sauce, mozzarella, rotisseri chicken, bacon, pickled jalapeños.
    • Fig & PigNeapolitan tomato sauce, mozzarella, fresh sliced figs, fig jam, prosciutto, honey.
    • Fig, Pig, & Goatgarlic oil pizza base, goat cheese, fresh sliced figs, caramelized onions, prosciutto; after baking add arugula and a drizzle of honey.
    • Chicken Pestopesto sauce, mozzarella, rotisseri chicken, ricotta, thinly sliced tomatoes.
    • Mushroom & OliveNeapolitan tomato sauce, mozzarella, ham, mushroom, olives, pickled jalapeños.
    • Pear & Gorgonzolagarlic oil pizza base, thinly sliced pear, gorgonzola, mozzarella, walnuts or pecans; after baking add arugula and balsamic glaze.
    • Prosciutto & BurrataNeapolitan tomato sauce, mozzarella; after baking add torn burrata, prosciutto, arugula, and olive oil.
    • The MeatsNeapolitan tomato sauce, mozzarella, pepperoni, Italian sausage, ham, bacon.
    • Chicken, Spinach, & Fetagarlic oil pizza base, rotisserie chicken, spinach, feta, Parmesan, mozzarella.
    • Indo Satépeanut sauce thinned with coconut milk, saté ayam, mozzarella, blanched vegetables (thinly sliced carrots, small pieces of green beans, thin shavings of cabbage); after baking add bean sprouts tossed in lime juice and roasted sesame oil, thin cucumber slices, sambal, fresh cilantro, and a drizzle of ketjap manis.
    • Chicken FajitaNeapolitan tomato sauce with a sprinkle of cumin & paprika, mozzarella, Jack cheese, fajia chicken, red onion, roasted bell pepper strips, and pickled jalapeños; after baking add a drizzle of salsa verde and crema, with a squeeze of lime juice.
    • Saag Paneer—Pureed spinach “saag” base (spinach, blanched & puréed, sautéed onion, garlic, ginger, garam masala, cumin, coriander, a little chili, finished with cream or yogurt for silkiness) spread in a thin, even layer topped with paneer cubes, red onion, serrano chile slices; after baking add fresh cilantro, a light dusting of crumbled kasoori methi, and a drizzle of yogurt.
    • Carnitasgarlic oil pizza base, carnitas, mozzarella, red onion, roasted poblano chile strips, pickled jalapeños; after baking add fresh cilantro, diced white onion, crumbled cotija cheese or queso fresco, and a drizzle of salsa verde and crema.
  • Vanilla Poached Pears

    Vanilla Poached Pears

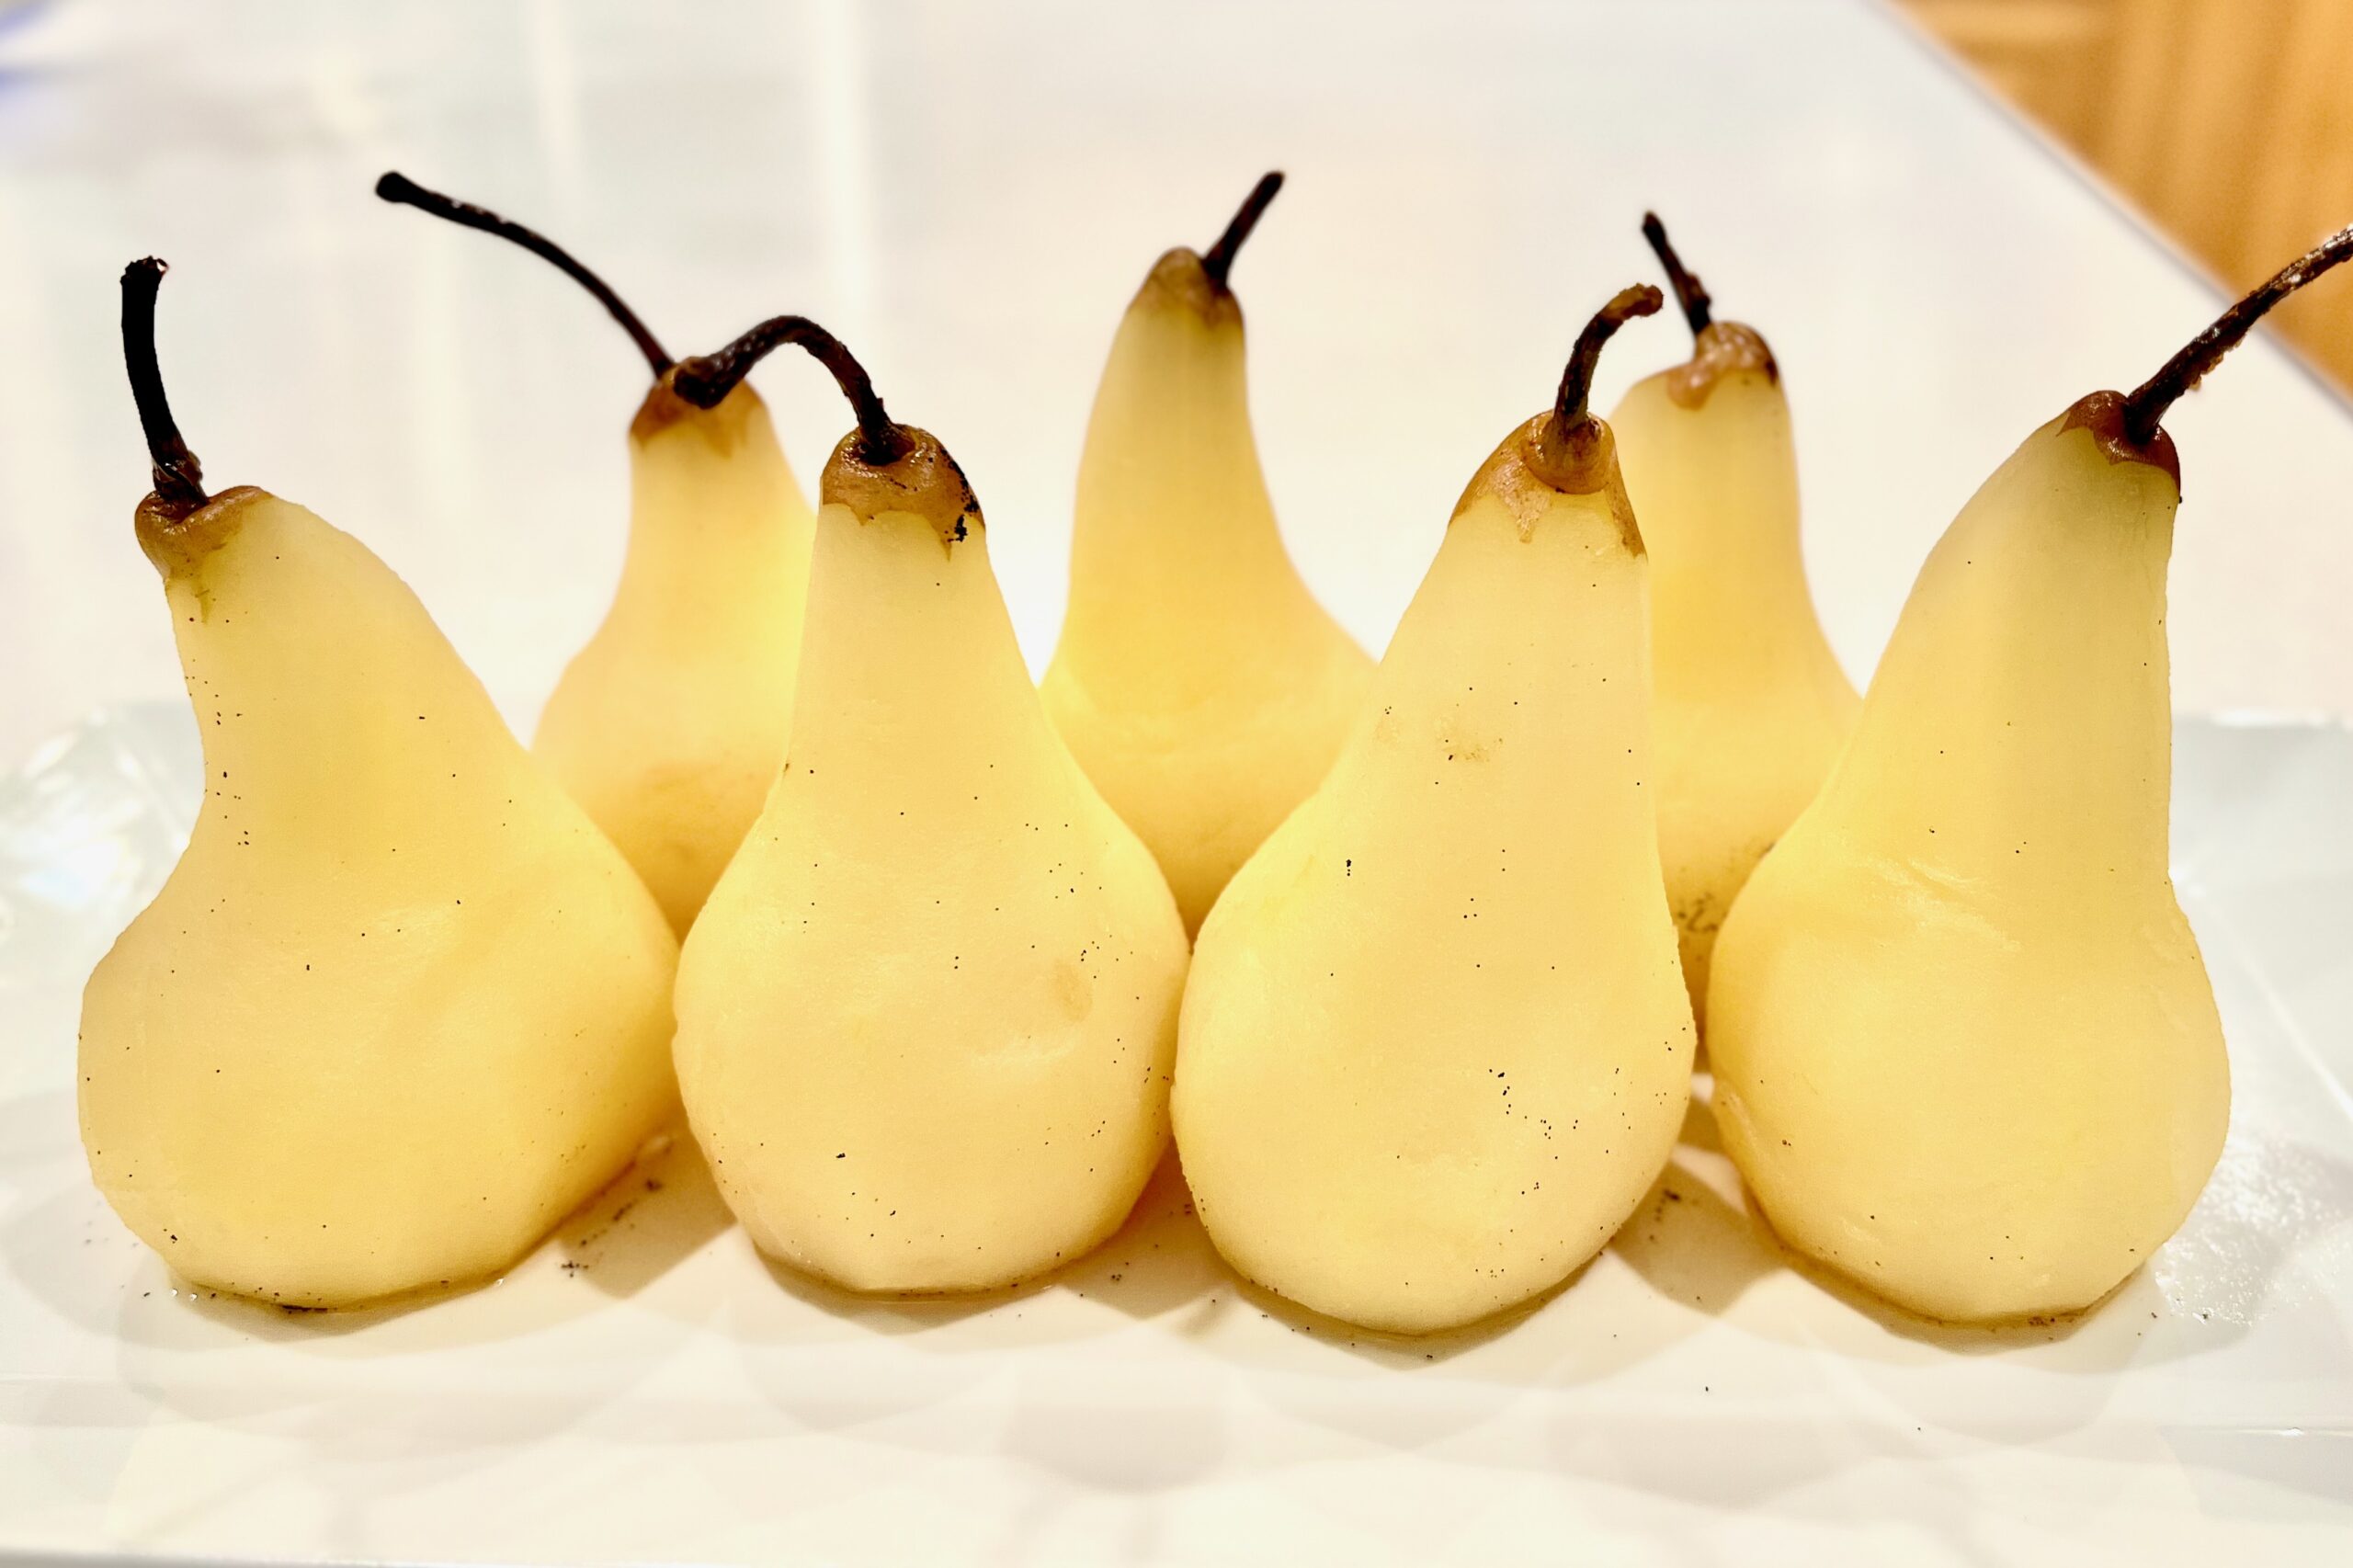
    Delicate Bosc pears are gently poached in a fragrant blend of Pinot Gris, vanilla, and cinnamon, then filled with a silky vanilla bean pastry cream. Served upright with a drizzle of reduced poaching syrup, these elegant pears make a stunning and lightly indulgent finale to any meal.


    Ingredients

      Pears

    • 1 bottle (750 ml) Pinot Gris
    • 1 cup water
    • ¾ cup sugar
    • 1–2 vanilla beans, split and seeded
    • ¼ tsp ground cinnamon
    • 6 Bosc pears, peeled with stems intact
    • Crème Pâtissière Filling

    • 1 cup whole milk
    • 1 vanilla bean, split and seeded (or 1 tsp pure vanilla extract)
    • 3 egg yolks
    • ¼ cup sugar
    • 2 tbsp cornstarch
    • 1 tbsp butter
    • Pinch of salt
    • Optional: ¼ cup lightly whipped cream, folded in after chilling for a softer texture

    Directions

    Poach the Pears

    In a large saucepan, combine Pinot Gris, water, sugar, vanilla seeds and pods, and cinnamon. Bring to a gentle boil over medium-high heat.

    Core pears from the bottom, keeping stems intact. Lower heat to maintain a steady simmer and add pears to the liquid. Cover and poach 30 minutes, or until tender when pierced with a skewer.

    Using a slotted spoon, transfer pears to a shallow dish, standing them upright. Refrigerate until cool.

    Return the poaching liquid to high heat and reduce to about 1 cup (20–25 minutes). Strain and chill for serving.

    Prepare the Crème Pâtissière

    In a saucepan, heat milk, vanilla bean seeds and pod (if using), and salt just to a simmer. Remove from heat; steep 10 minutes. Remove pod.

    In a bowl, whisk egg yolks, sugar, and cornstarch until pale and smooth.

    Gradually whisk in some of the warm milk to temper, then return mixture to the saucepan.

    Cook over medium heat, whisking constantly, until thickened and just beginning to bubble (1–2 minutes).

    Remove from heat and whisk in butter until smooth. Transfer to a bowl; cover surface with plastic wrap. Chill completely (about 1 hour).

    For a lighter texture, fold in whipped cream before using.

    Fill and Serve

    Cut a thin slice from the base of each chilled pear so it stands upright.

    Spoon or pipe the chilled crème pâtissière into the cored centers of the pears.

    Drizzle each pear with a few spoonfuls of the cooled poaching syrup. Serve upright on dessert plates, optionally garnished with a few vanilla bean flecks or edible flowers.


    Notes

    Preparation

    • The poaching syrup can be made ahead and refrigerated for up to 1 week.
    • The pastry cream can be prepared 1 day in advance; stir gently before using.
    • To help pears stand upright, cut a small flat section from the base before filling and plating.

    Serving Suggestions

    • Serve as a light finish to an elegant dinner, paired with crisp white wine or sparkling water.
    • Garnish with whipped cream, toasted almonds, or a sprig of mint for added presentation.

    Variations

    • Substitute crème fraîche or lightly sweetened whipped cream for a lighter filling.
    • Use Bartlett or Anjou pears instead of Bosc for a softer texture and milder flavor.

    Make-Ahead & Storage

    • Assemble pears up to 4 hours before serving; keep refrigerated until ready to plate.
    • Leftovers may be refrigerated up to 2 days; drizzle with syrup just before serving.
  • Mango Lassi

    Mango Lassi

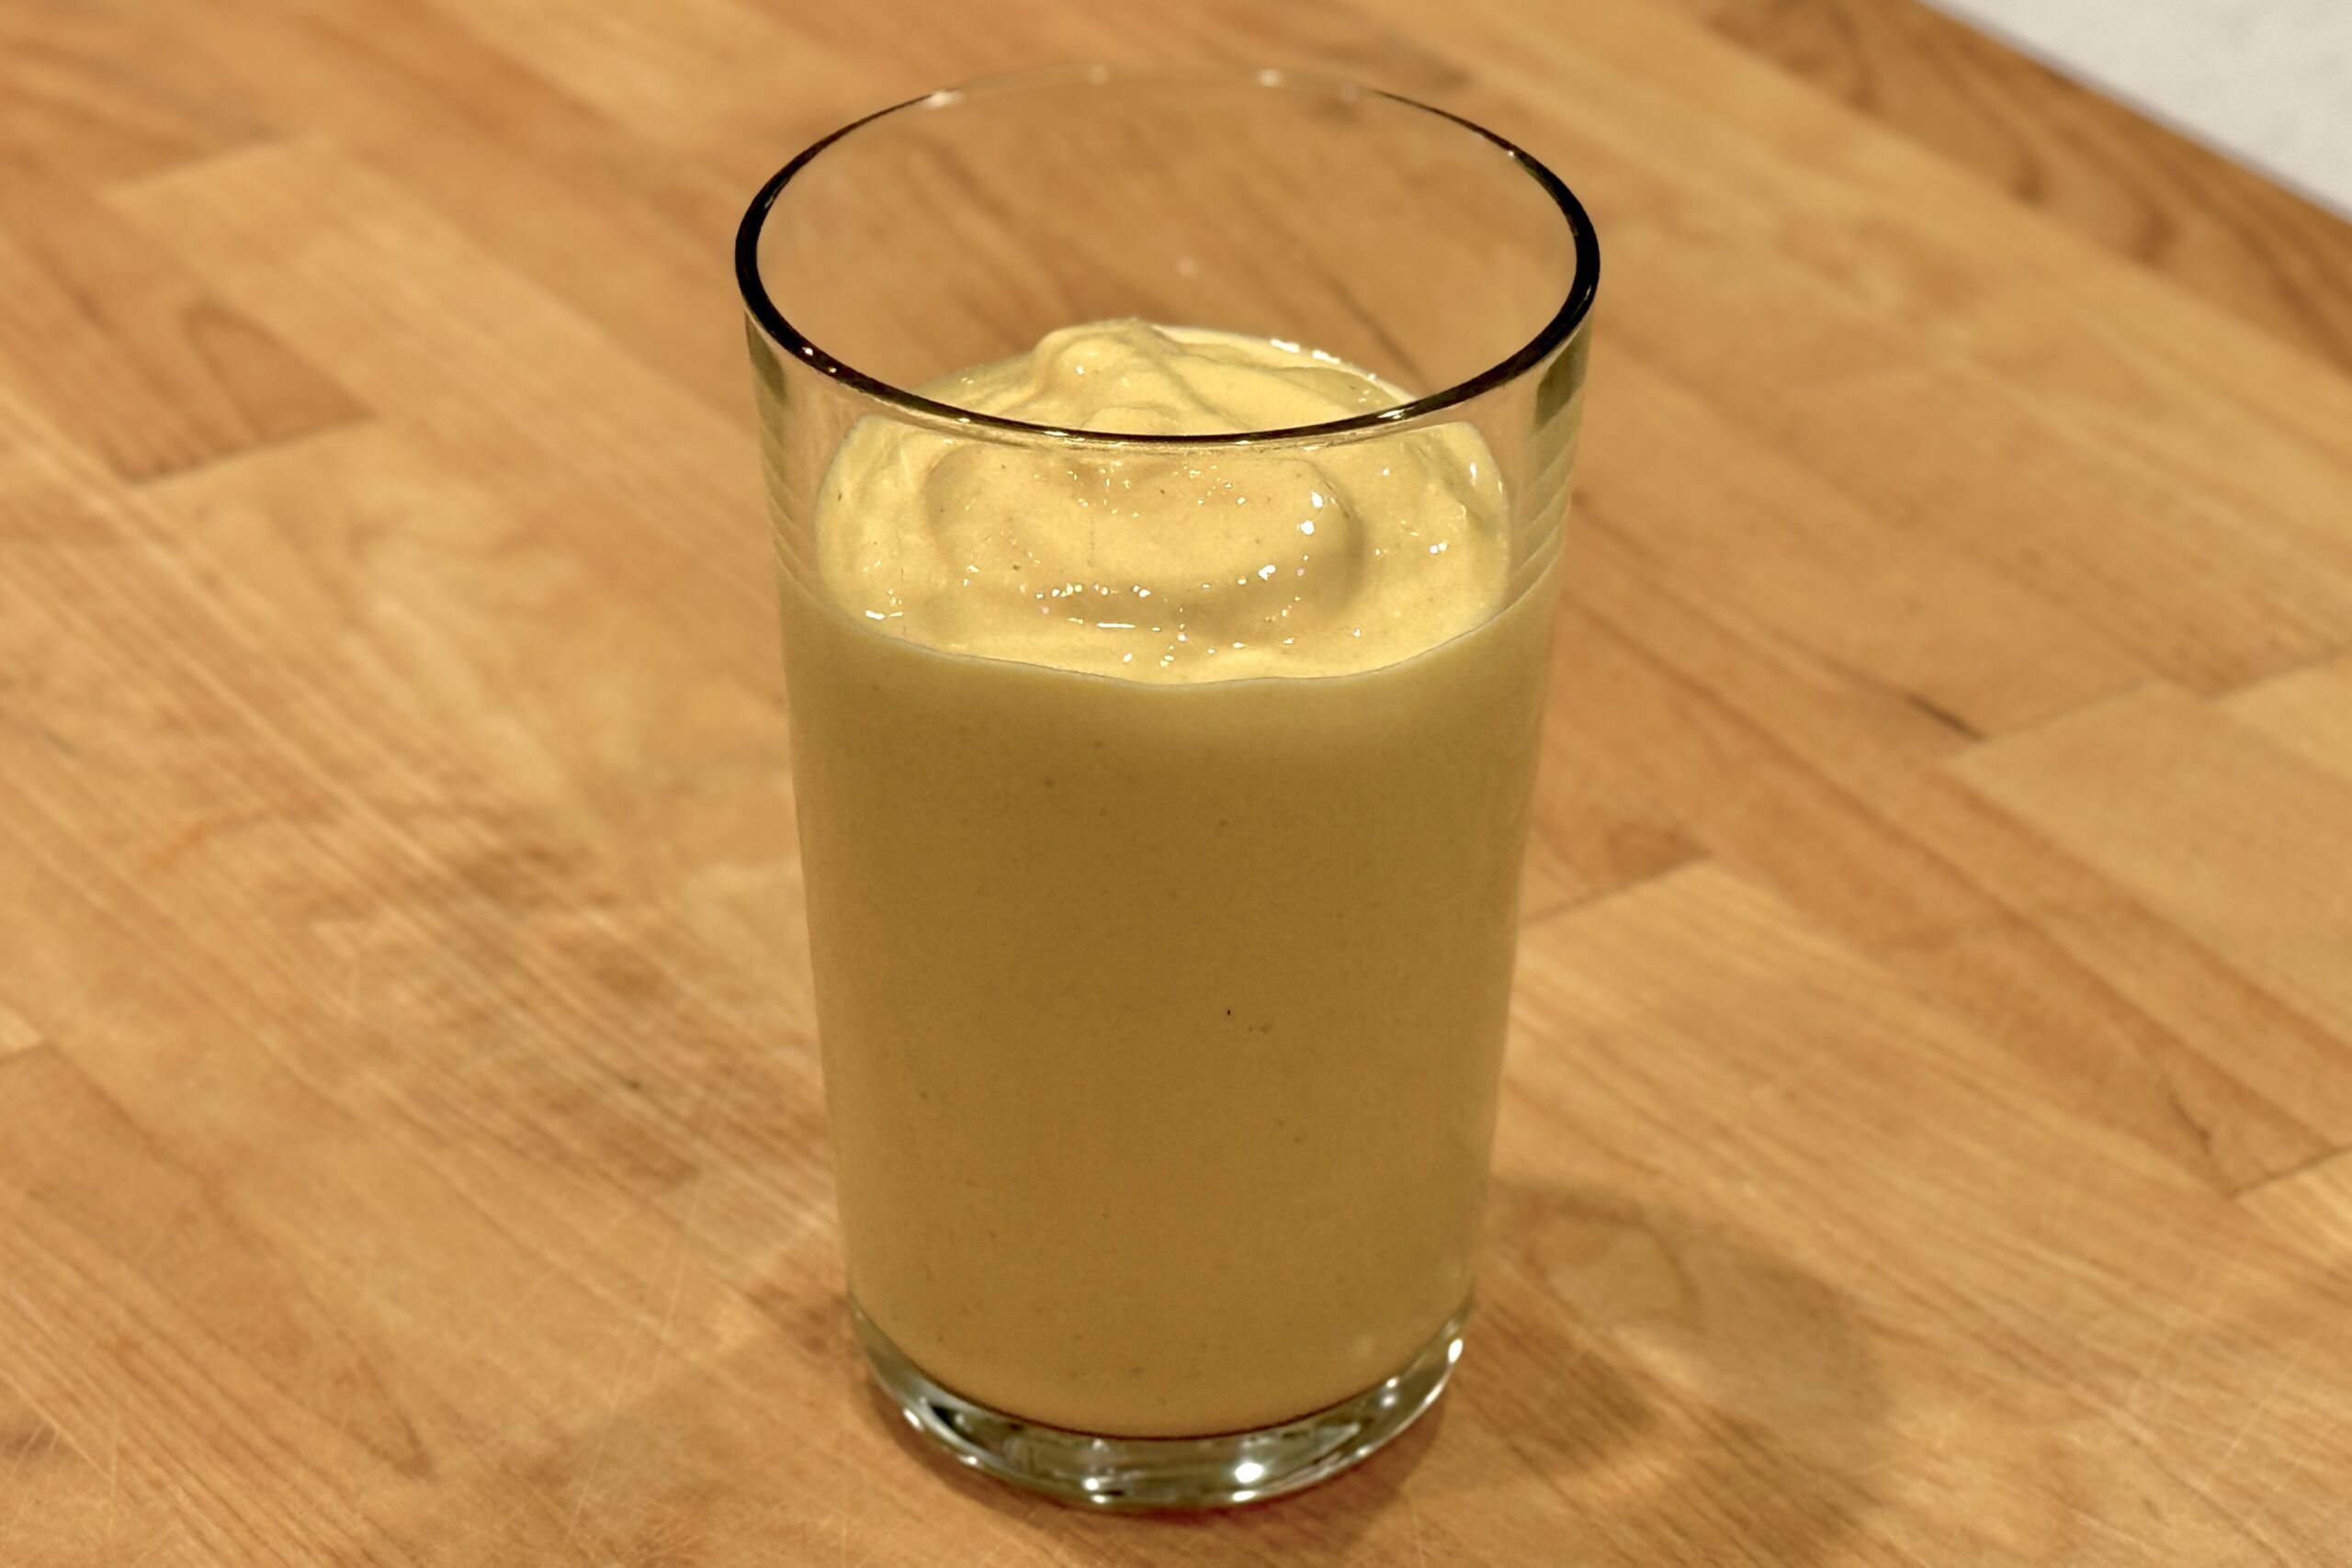
    Bright, creamy, and refreshing, this mango lassi captures the flavor of café-style versions found across India. Using rich yogurt, fragrant Alphonso mango pulp, and a touch of cardamom, it’s a perfectly balanced blend of sweet, tangy, and tropical—wonderful on its own or as a cooling companion to spicy dishes.


    Ingredients

    • 2 cups Alphonso or Kesar mango pulp (fresh or canned)
    • 2 cups mango chunks (fresh or thawed frozen)
    • 2½ cups full-fat plain yogurt
    • 1 to 1½ cups whole milk (adjust for consistency)
    • 3 to 4 tbsp sugar, honey, or mango syrup (to taste)
    • 2½ tsp fresh lime or lemon juice
    • ¼ tsp freshly ground green cardamom
    • ⅛ tsp salt
    • 1–2 tbsp sweetened condensed milk (optional, for creamier texture)
    • ⅛ tsp saffron threads, soaked in 1 tbsp warm milk (optional)
    • Garnish

    • Crushed pistachios
    • Mint chiffonade

    Directions

    Blend the Lassi

    In a blender, combine mango pulp, mango chunks, yogurt, 1 cup milk, 3 tbsp sugar or honey, lime or lemon juice, cardamom, salt, and any optional saffron or condensed milk.

    Blend until silky smooth and creamy.

    Adjust Consistency and Flavor

    Taste and adjust as desired: add more milk or cold water for a thinner consistency, or more yogurt or pulp for richness. Sweeten further to taste, and add a bit more lime juice if a brighter flavor is preferred.

    Chill and Serve

    Refrigerate for at least 30 minutes before serving, or blend with ice for a smoothie-like texture. Pour into glasses and garnish with crushed pistachios and mint.


    Notes

    Preparation

    • For the most fragrant flavor, use Alphonso or Kesar mango pulp (fresh or canned from an Indian grocery).
    • If using frozen mango, thaw partially or soak briefly in milk before blending for a smoother texture.
    • Sweetened condensed milk enhances creaminess and blends beautifully with the yogurt base.
    • A few saffron threads soaked in warm milk add delicate aroma and golden color.

    Serving Suggestions

    • Serve well chilled alongside spicy curries, tandoori dishes, or biryani.
    • Top with a dusting of ground cardamom or drizzle of mango syrup for extra indulgence.
    • For a vegan version, substitute coconut yogurt and coconut milk for a tropical variation.

    Variations

    • Blend in ½ banana for extra body and mild sweetness.
    • Add 2–3 tbsp shredded coconut for texture and flavor depth.
    • Stir in a spoonful of rosewater for a floral twist reminiscent of Indian dessert shops.
  • Naan

    Naan

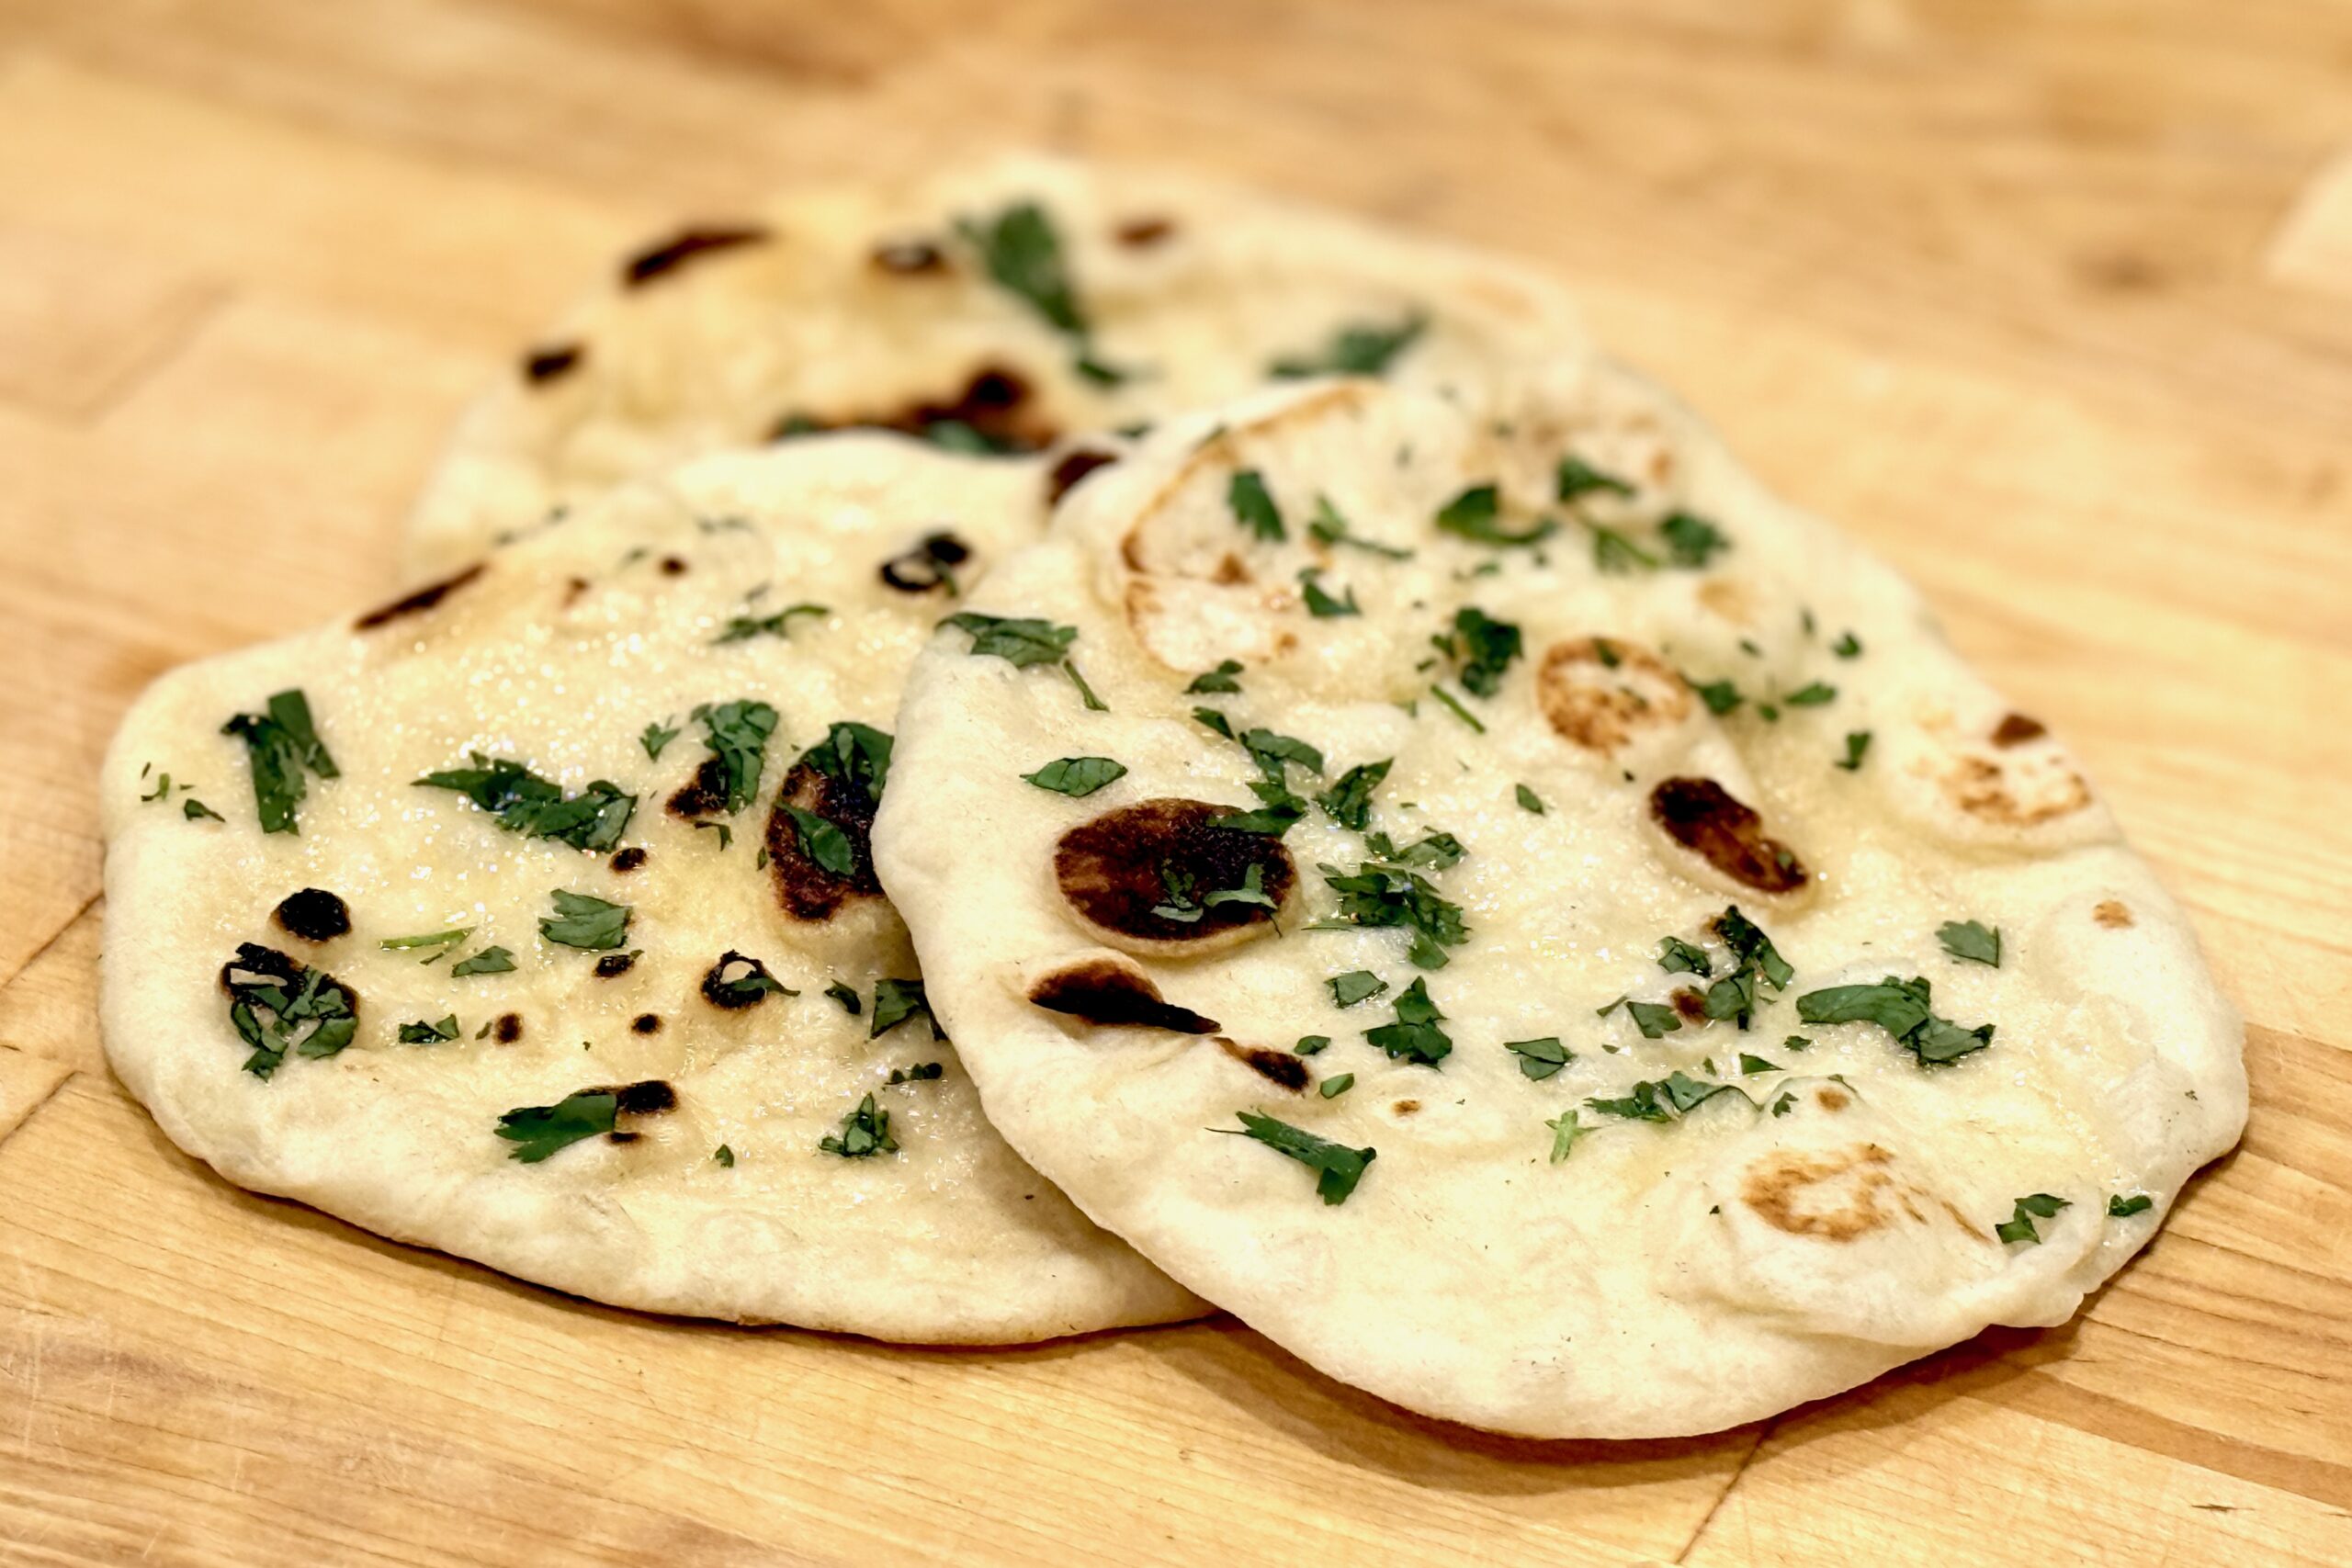
    Soft, fluffy, and beautifully blistered, this homemade naan rivals restaurant versions—without the need for a tandoor. Enriched with yogurt for tenderness and cooked quickly on a hot skillet or pizza steel, it’s perfect for scooping up curries, daal, or creamy saag paneer.


    Ingredients

    • ¾ cup warm water (about 110°F / 43°C)
    • 2¼ tsp (1 packet) active dry yeast
    • 1 tsp sugar
    • ⅓ cup whole milk plain yogurt
    • 2 tbsp neutral oil (avocado, canola, sunflower, or vegetable)
    • 1 tbsp milk or melted butter (optional)
    • ⅛ tsp baking powder (optional)
    • 1 tsp salt
    • 2–2½ cups all-purpose flour, plus more for dusting
    • Optional Toppings

    • Melted ghee or butter, for brushing
    • Chopped cilantro, garlic, or nigella seeds

    Directions

    Prepare the Dough

    In a large bowl, combine warm water, yeast, and sugar; stir and let sit 5–10 minutes, until foamy.

    Add yogurt, oil, milk or melted butter (if using), baking powder (if using), and salt. Mix in about 2 cups flour (starting with 1¾ cups and adding more as needed) until a soft, slightly sticky dough forms. Knead 6–8 minutes by hand or 5 minutes in a stand mixer, until smooth and elastic.

    Place dough in a lightly oiled bowl, cover, and let rise in a warm spot 1–2 hours, or until doubled in size.

    Shape the Naan

    Punch down dough. Divide into 8 equal pieces and shape into balls. Cover and rest 10 minutes.

    Roll each ball into a teardrop or oval about ¼-inch thick, dusting with flour as needed to prevent sticking.

    Cook the Naan

    Heat a cast-iron skillet or heavy nonstick pan over medium-high heat until very hot. Place one rolled naan in the dry skillet.

    Cook for 45–60 seconds, until bubbles form and golden brown spots appear. Flip and cook the other side 30–45 seconds. Optional: Flip once more and press gently with a spatula to encourage blistering.

    Repeat with remaining dough, adjusting heat as needed. Brush hot naan with melted butter or ghee and sprinkle with toppings if desired.

    Oven or Pizza Steel Option

    For a tandoor-style finish, place rolled dough on a preheated pizza steel in a 500°F (260°C) oven and bake 2–3 minutes until puffed and blistered. Brush immediately with ghee or butter after removing from the oven.


    Notes

    Preparation

    • Adding 1 tbsp milk or melted butter to the dough enhances softness and browning.
    • A pinch (⅛–¼ tsp) of baking powder can help naan puff more evenly on the stovetop.
    • Lightly misting the skillet or dough with water before cooking adds steam for tenderness.
    • Keep cooked naan warm in a towel-lined bowl or low oven (175°F) until serving.

    Serving Suggestions

    • Serve warm with curries, daal, Saag Paneer, or kebabs.
    • Brush with garlic butter and cilantro for restaurant-style garlic naan.
    • Use as a wrap for butter chicken or other saucy entrées.

    Variations

    • Garlic–Cilantro Naan: Brush rolled dough with garlic butter, sprinkle with chopped cilantro, then cook as usual.
    • Cheese-Stuffed Naan: Seal 2–3 tbsp grated cheese (paneer, mozzarella, or cheddar mix) inside each ball before rolling out.
    • Whole Wheat Naan: Substitute up to 50% white whole wheat flour and add 1–2 tsp extra water as needed.
    • Chilli–Herb Naan: Add ½ tsp crushed red pepper and 1 tbsp chopped herbs (cilantro, mint, or parsley) to dough.
    • Sweet Coconut Naan: Add 1 tbsp sugar to dough and fill with coconut, nuts, and a touch of cardamom.
    • Sesame or Nigella Seed Naan: Brush surface lightly with water, sprinkle seeds, and press gently before cooking.

    Make-Ahead & Storage

    • Refrigerate dough up to 24 hours; bring to room temperature before rolling.
    • Cooked naan can be frozen up to 1 month. Reheat in a 350°F oven for 5–7 minutes or on a hot skillet until warm and soft.
    • Brush with fresh ghee or butter just before serving for best flavor.
  • Saag Paneer

    Saag Paneer

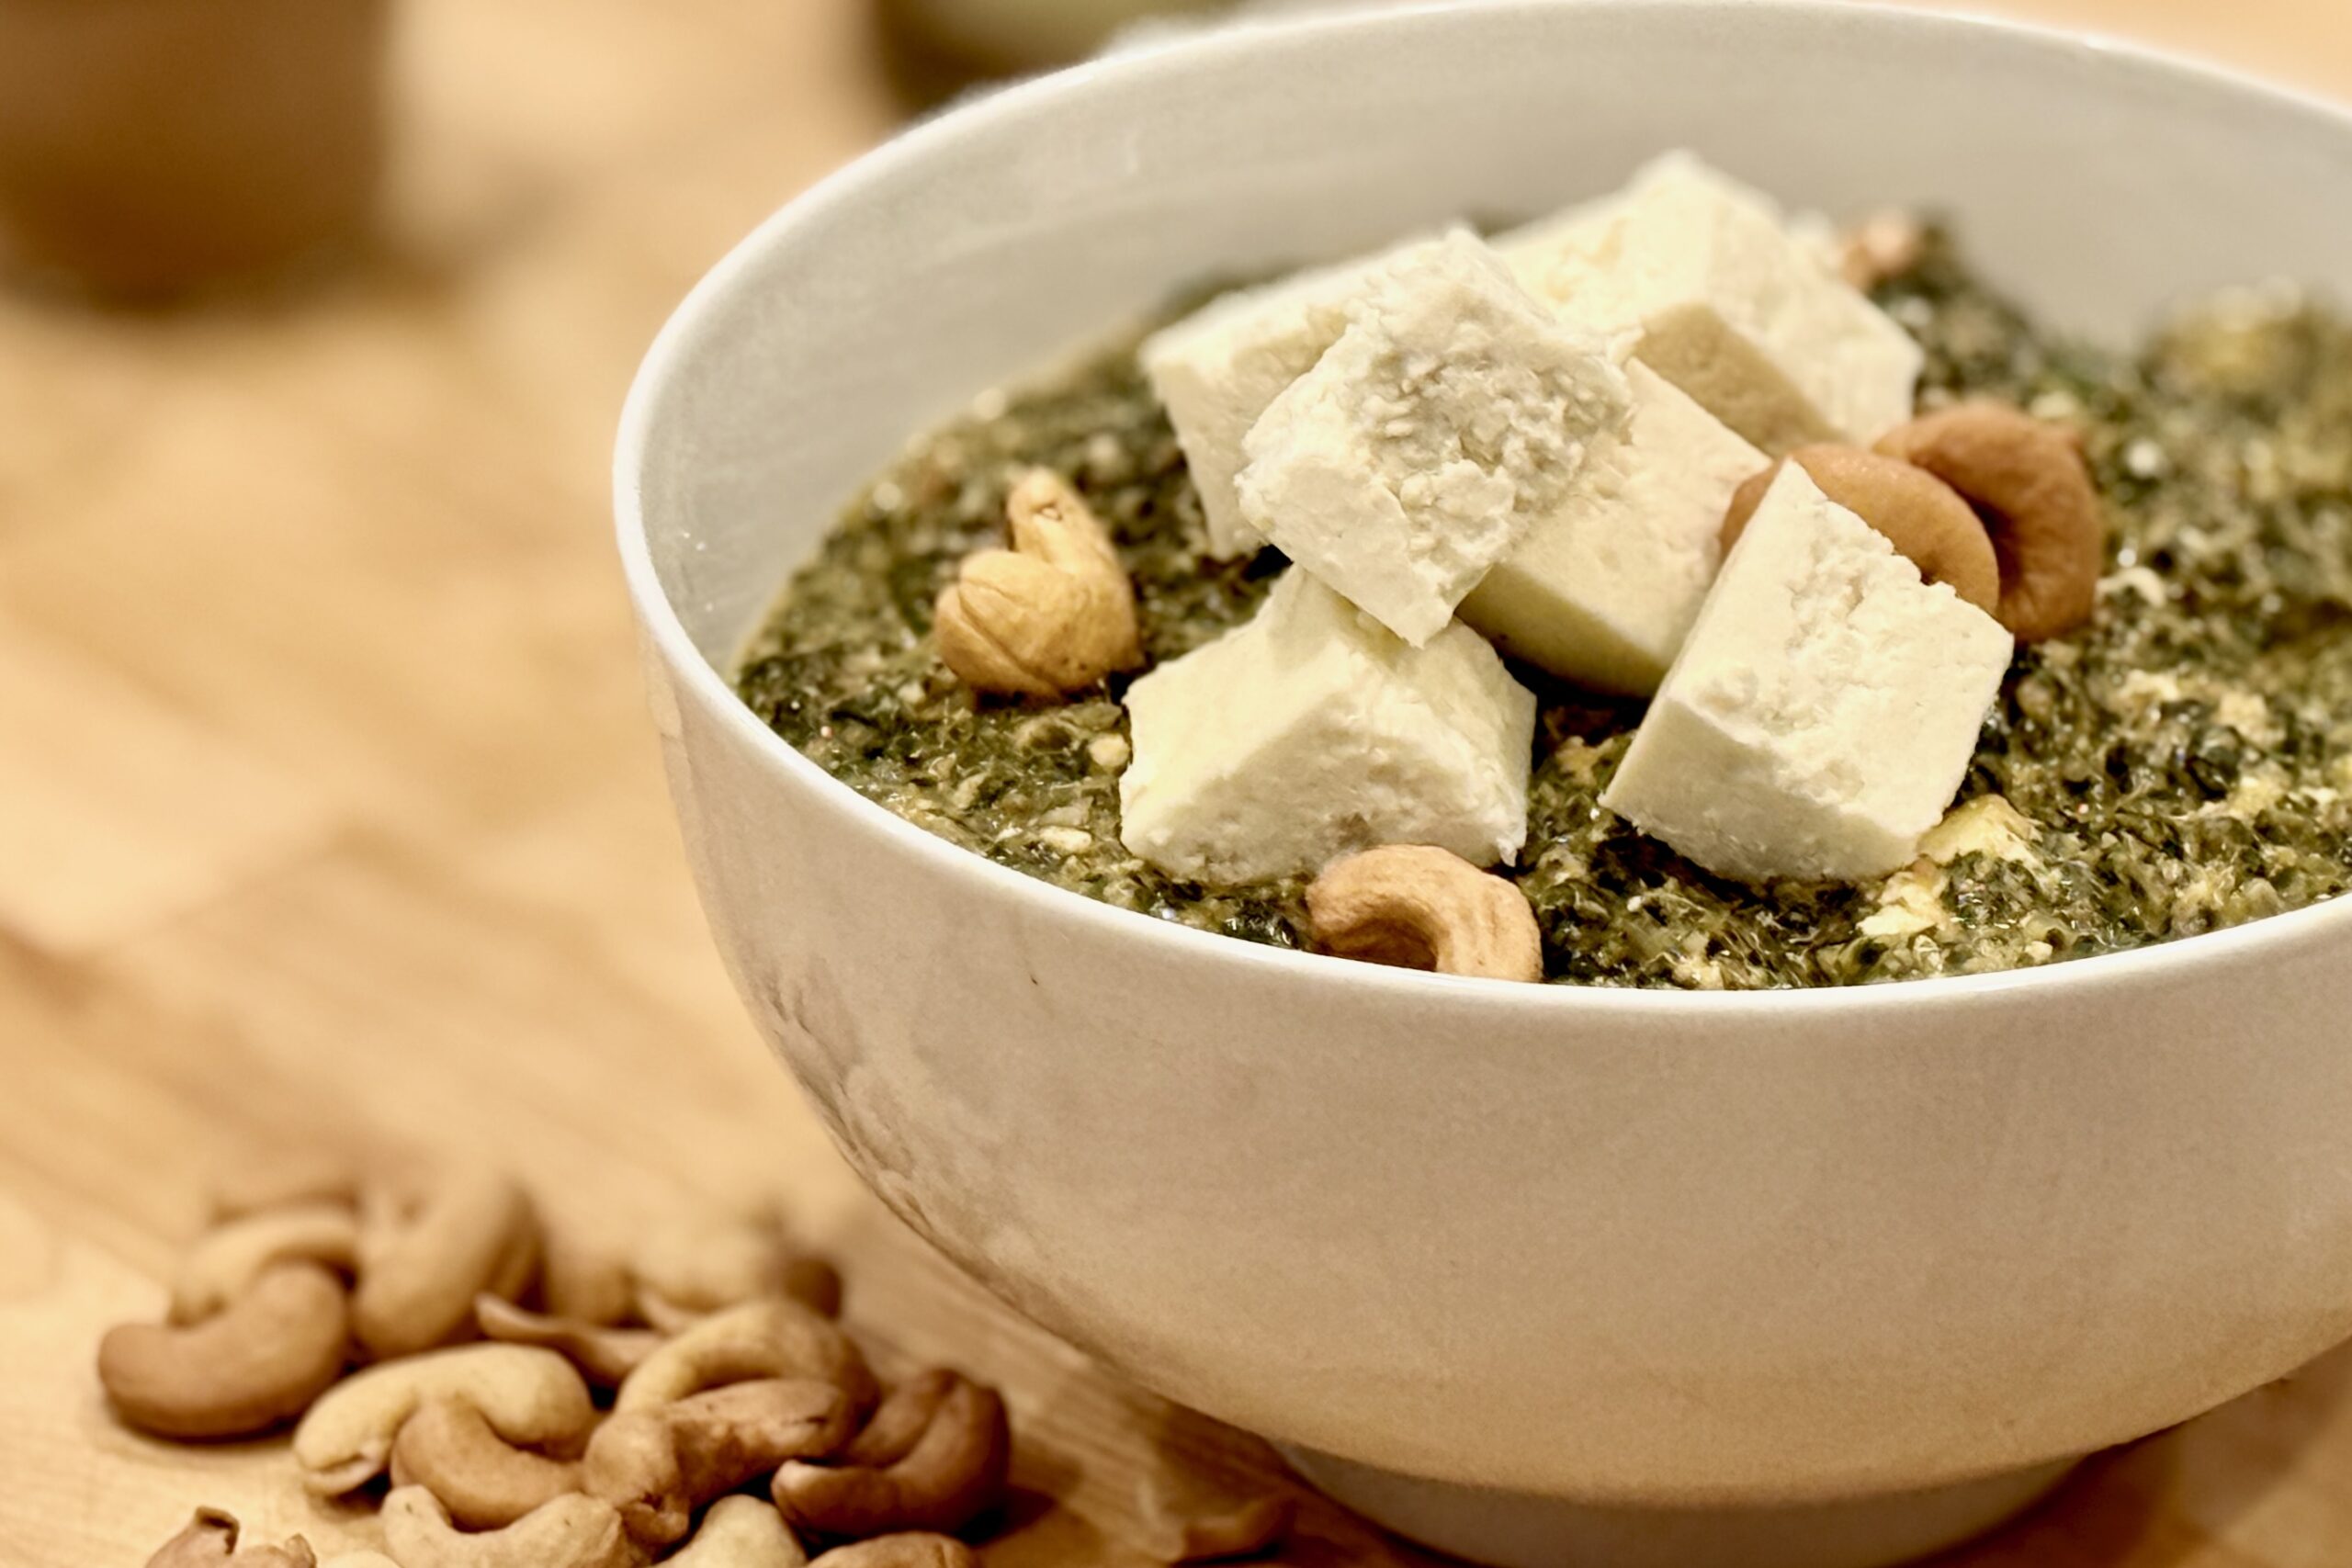
    This Saag Paneer brings together tender spinach, fragrant spices, and creamy homemade paneer for a comforting and authentic Indian dish. The rich, spiced sauce is balanced by yogurt, cream, and cashews, creating a luxurious texture and deep flavor. It’s perfect with warm basmati rice or naan, and can also be made with chicken, lamb, or beef for a hearty variation.


    Ingredients

    • 1 recipe homemade paneer (or 1 pkg 10–16 oz pre-made paneer)
    • 1 pkg (10 oz) fresh baby spinach, rinsed
    • 1 lb frozen spinach, thawed and squeezed dry
    • 3 tbsp butter
    • 1 tsp cumin seeds
    • 1 medium onion, finely chopped
    • 3–4 garlic cloves, minced
    • 1½ tsp grated fresh ginger
    • 1 serrano chile, stemmed, seeded, and minced
    • 1 tsp ground coriander
    • 1 tsp paprika
    • ½ tsp turmeric
    • ½ tsp ground cardamom
    • ¼ tsp ground cinnamon
    • 1 can (14.5 oz) diced tomatoes, drained
    • ½ cup roasted cashews, divided (blend half for creaminess, keep half chopped for texture)
    • ½ cup water
    • ½ cup plain whole-milk yogurt
    • ½ cup whole milk
    • ½ tsp garam masala (added at the end)
    • 1–2 tsp dried fenugreek leaves (kasoori methi), crumbled
    • 2 tbsp heavy cream (to finish)
    • 3 tbsp chopped fresh cilantro
    • 2 tsp salt (to taste)
    • ½ tsp pepper (to taste)
    • Additional Protein (Optional)

    • 1 lb boneless, skinless chicken thighs or breasts; lamb shoulder or leg; or beef chuck (can replace or complement paneer)

    Directions

    Prepare the Spinach

    Bring a large pot of salted water to a boil. Add fresh spinach and cook until just wilted, about 30 seconds. Drain, rinse with cold water, and squeeze out excess moisture. Roughly chop and set aside. Squeeze thawed frozen spinach to remove excess water and combine with the fresh spinach.

    Build the Base

    In a large skillet or saucepan, melt butter over medium heat. Add cumin seeds and toast for about 30 seconds until fragrant. Add onion and cook until softened and golden, 6–8 minutes. Stir in garlic, ginger, chile, coriander, paprika, turmeric, cardamom, and cinnamon; cook 30–60 seconds until aromatic.

    Add tomatoes and cook, stirring occasionally, until most of the moisture evaporates and the mixture thickens slightly, about 5–7 minutes. Stir in spinach, half of the blended cashews, and ½ cup water. Simmer uncovered 5–10 minutes, until spinach is tender and cohesive. Remove from heat.

    Blend and Enrich

    Using an immersion blender, purée the mixture directly in the pan until mostly smooth, leaving some texture. Stir in yogurt and milk. Return to low heat and simmer gently 5–10 minutes until thickened and creamy, without boiling. Adjust consistency with a splash of milk or water if needed.

    Stir in remaining chopped cashews, garam masala, fenugreek leaves, cilantro, and heavy cream. Season to taste with salt and pepper.

    Prepare the Paneer

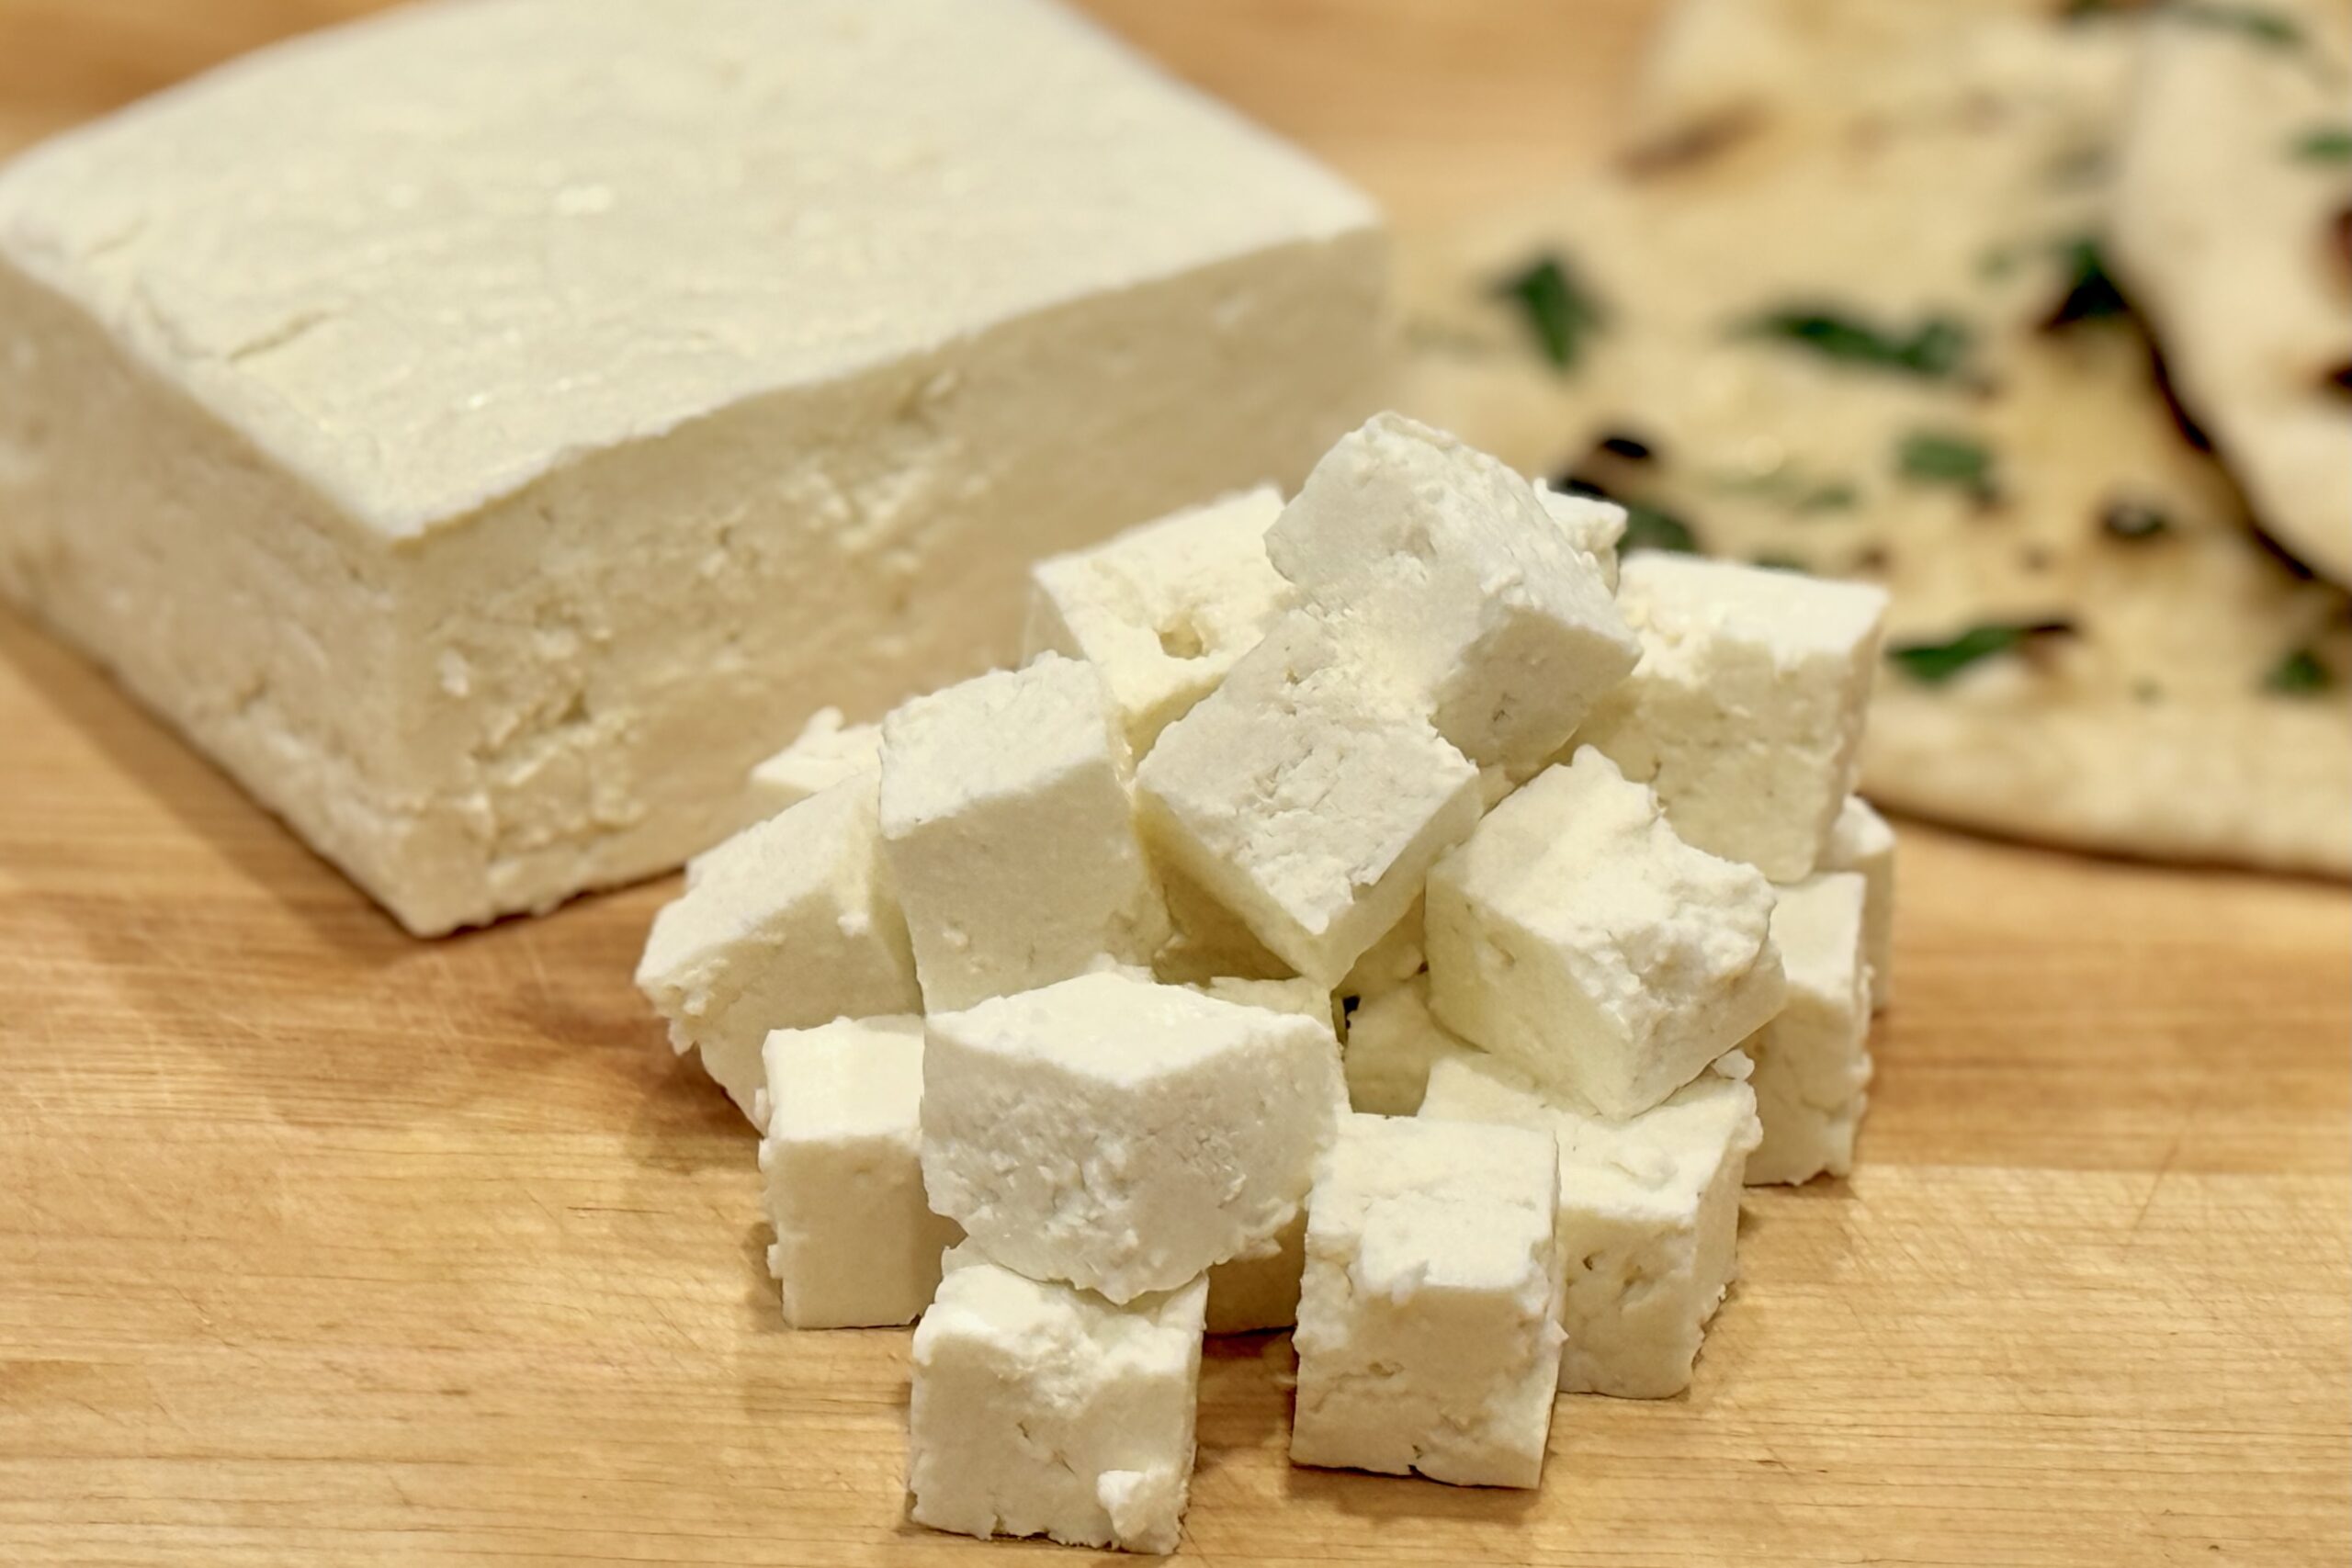
    Cut chilled paneer into bite-sized cubes. Pan-fry in a little butter or oil until golden, if desired. Reserve a few pieces for garnish. Gently fold remaining paneer into the sauce and warm through, about 2–3 minutes.

    Optional Additional Protein

    For added variety, substitute or combine paneer with cooked chicken, lamb, or beef. Follow these guidelines:

    • Chicken: Sear 1 lb boneless thighs or breasts in oil until golden and cooked through (165°F). Optionally marinate in yogurt, lemon juice, garlic, ginger, and garam masala for 30+ minutes beforehand.
    • Beef: Brown 1 lb stewing beef (chuck) in oil, then simmer in water or broth until tender, 1–1½ hours.
    • Lamb: Sear 1 lb shoulder or leg cubes in oil, then braise 1½–2 hours in broth with garlic and ginger until fork-tender. Stir a little braising liquid into the sauce for extra flavor.

    Serve

    Serve hot with basmati rice or naan. Garnish with reserved paneer, cashews, cilantro, and a drizzle of cream, if desired.


    Notes

    Preparation

    • Use all fresh or all frozen spinach if preferred; total weight should be 1½–2 lbs.
    • Do not boil after adding yogurt or milk to prevent curdling.
    • Paneer can be pan-fried or used directly; frying adds a richer texture and flavor.

    Serving Suggestions

    • Serve with basmati rice, naan, or chapati for a complete meal.
    • Pair with homemade paneer for the freshest flavor and best texture.
    • For a full Indian dinner, accompany with cucumber raita or mango chutney.

    Variations

    • Add ¼ cup heavy cream or coconut cream for a richer sauce.
    • For a vegan version, replace paneer with firm tofu and substitute coconut milk for dairy.

    Make-Ahead & Storage

    • Refrigerate leftovers up to 4 days in an airtight container.
    • Freeze up to 2 months; thaw overnight in the refrigerator before reheating.
    • Reheat gently over low heat, adding a splash of milk or water to restore consistency.
  • Paneer

    Paneer

    This traditional homemade paneer is soft, creamy, and fresh with a delicate balance of sweetness and acidity. Made simply from milk, lemon juice, and salt, it forms the foundation of countless Indian dishes—from rich curries like saag paneer to grilled kebabs or golden pan-fried cubes. The process is simple, yielding pure, fresh cheese with a texture you can’t find in store-bought versions.


    Ingredients

    • 1 gallon whole milk (not ultra-pasteurized)
    • ¼ cup lemon juice (plus 1–2 tbsp extra, if needed)
    • 1 tbsp salt

    Directions

    Prepare the Strainer

    Line a fine-mesh strainer or colander with four layers of cheesecloth or a clean cotton kitchen towel. Set the strainer over a large bowl or in the sink to catch the whey.

    Heat and Curdle the Milk

    Pour milk into a large, heavy-bottomed pot over medium-high heat, stirring occasionally to prevent scorching. When warm, add salt and continue heating until the milk comes to a gentle boil. Reduce heat to low.

    Slowly drizzle in lemon juice, 1 tbsp at a time, while gently stirring in a slow figure-eight motion. Within 10–30 seconds, curds should begin separating from the whey. If separation doesn’t occur after 2–3 tbsp, add 1–2 tbsp more until the whey runs mostly clear.

    Drain and Rinse the Curds

    Once curdled, carefully pour the mixture into the prepared strainer. Let drain 5–10 minutes to remove excess whey. Rinse the curds gently under cool running water for a few seconds to remove residual lemon flavor and acidity, taking care not to break up the curds.

    Shape and Press

    Gather the corners of the cheesecloth into a bundle and twist to squeeze out additional liquid. Flatten the cloth-wrapped bundle into a disc about 1 inch thick and place it on a plate or cutting board. Set a heavy weight—such as a pot filled with water or canned goods—on top and press for 30–45 minutes, or until firm and sliceable.

    Chill and Store

    Unwrap the paneer and refrigerate for at least 1 hour before cutting. Store in an airtight container for 3–4 days.


    Notes

    Preparation

    • Paneer can also be formed using a paneer or tofu press; compress 30–45 minutes, or until firm and sliceable.
    • Rinsing the curds lightly improves flavor and keeps the texture tender.
    • Whole milk is essential for rich, creamy paneer; low-fat milk yields drier results.

    Serving Suggestions

    • Cube and fry until golden for dishes like saag paneer or matar paneer.
    • Grill or skewer with vegetables for paneer tikka.
    • Crumble into curries or use as a filling for samosas or wraps.

    Make-Ahead & Storage

    • Refrigerate up to 4 days in an airtight container.
    • Freeze up to 2 months; thaw overnight in the refrigerator before using.
    • Once thawed, pat dry before pan-frying or grilling.
  • Jalapeño-Bacon Smoked Mac & Cheese

    Jalapeño-Bacon Smoked Mac & Cheese

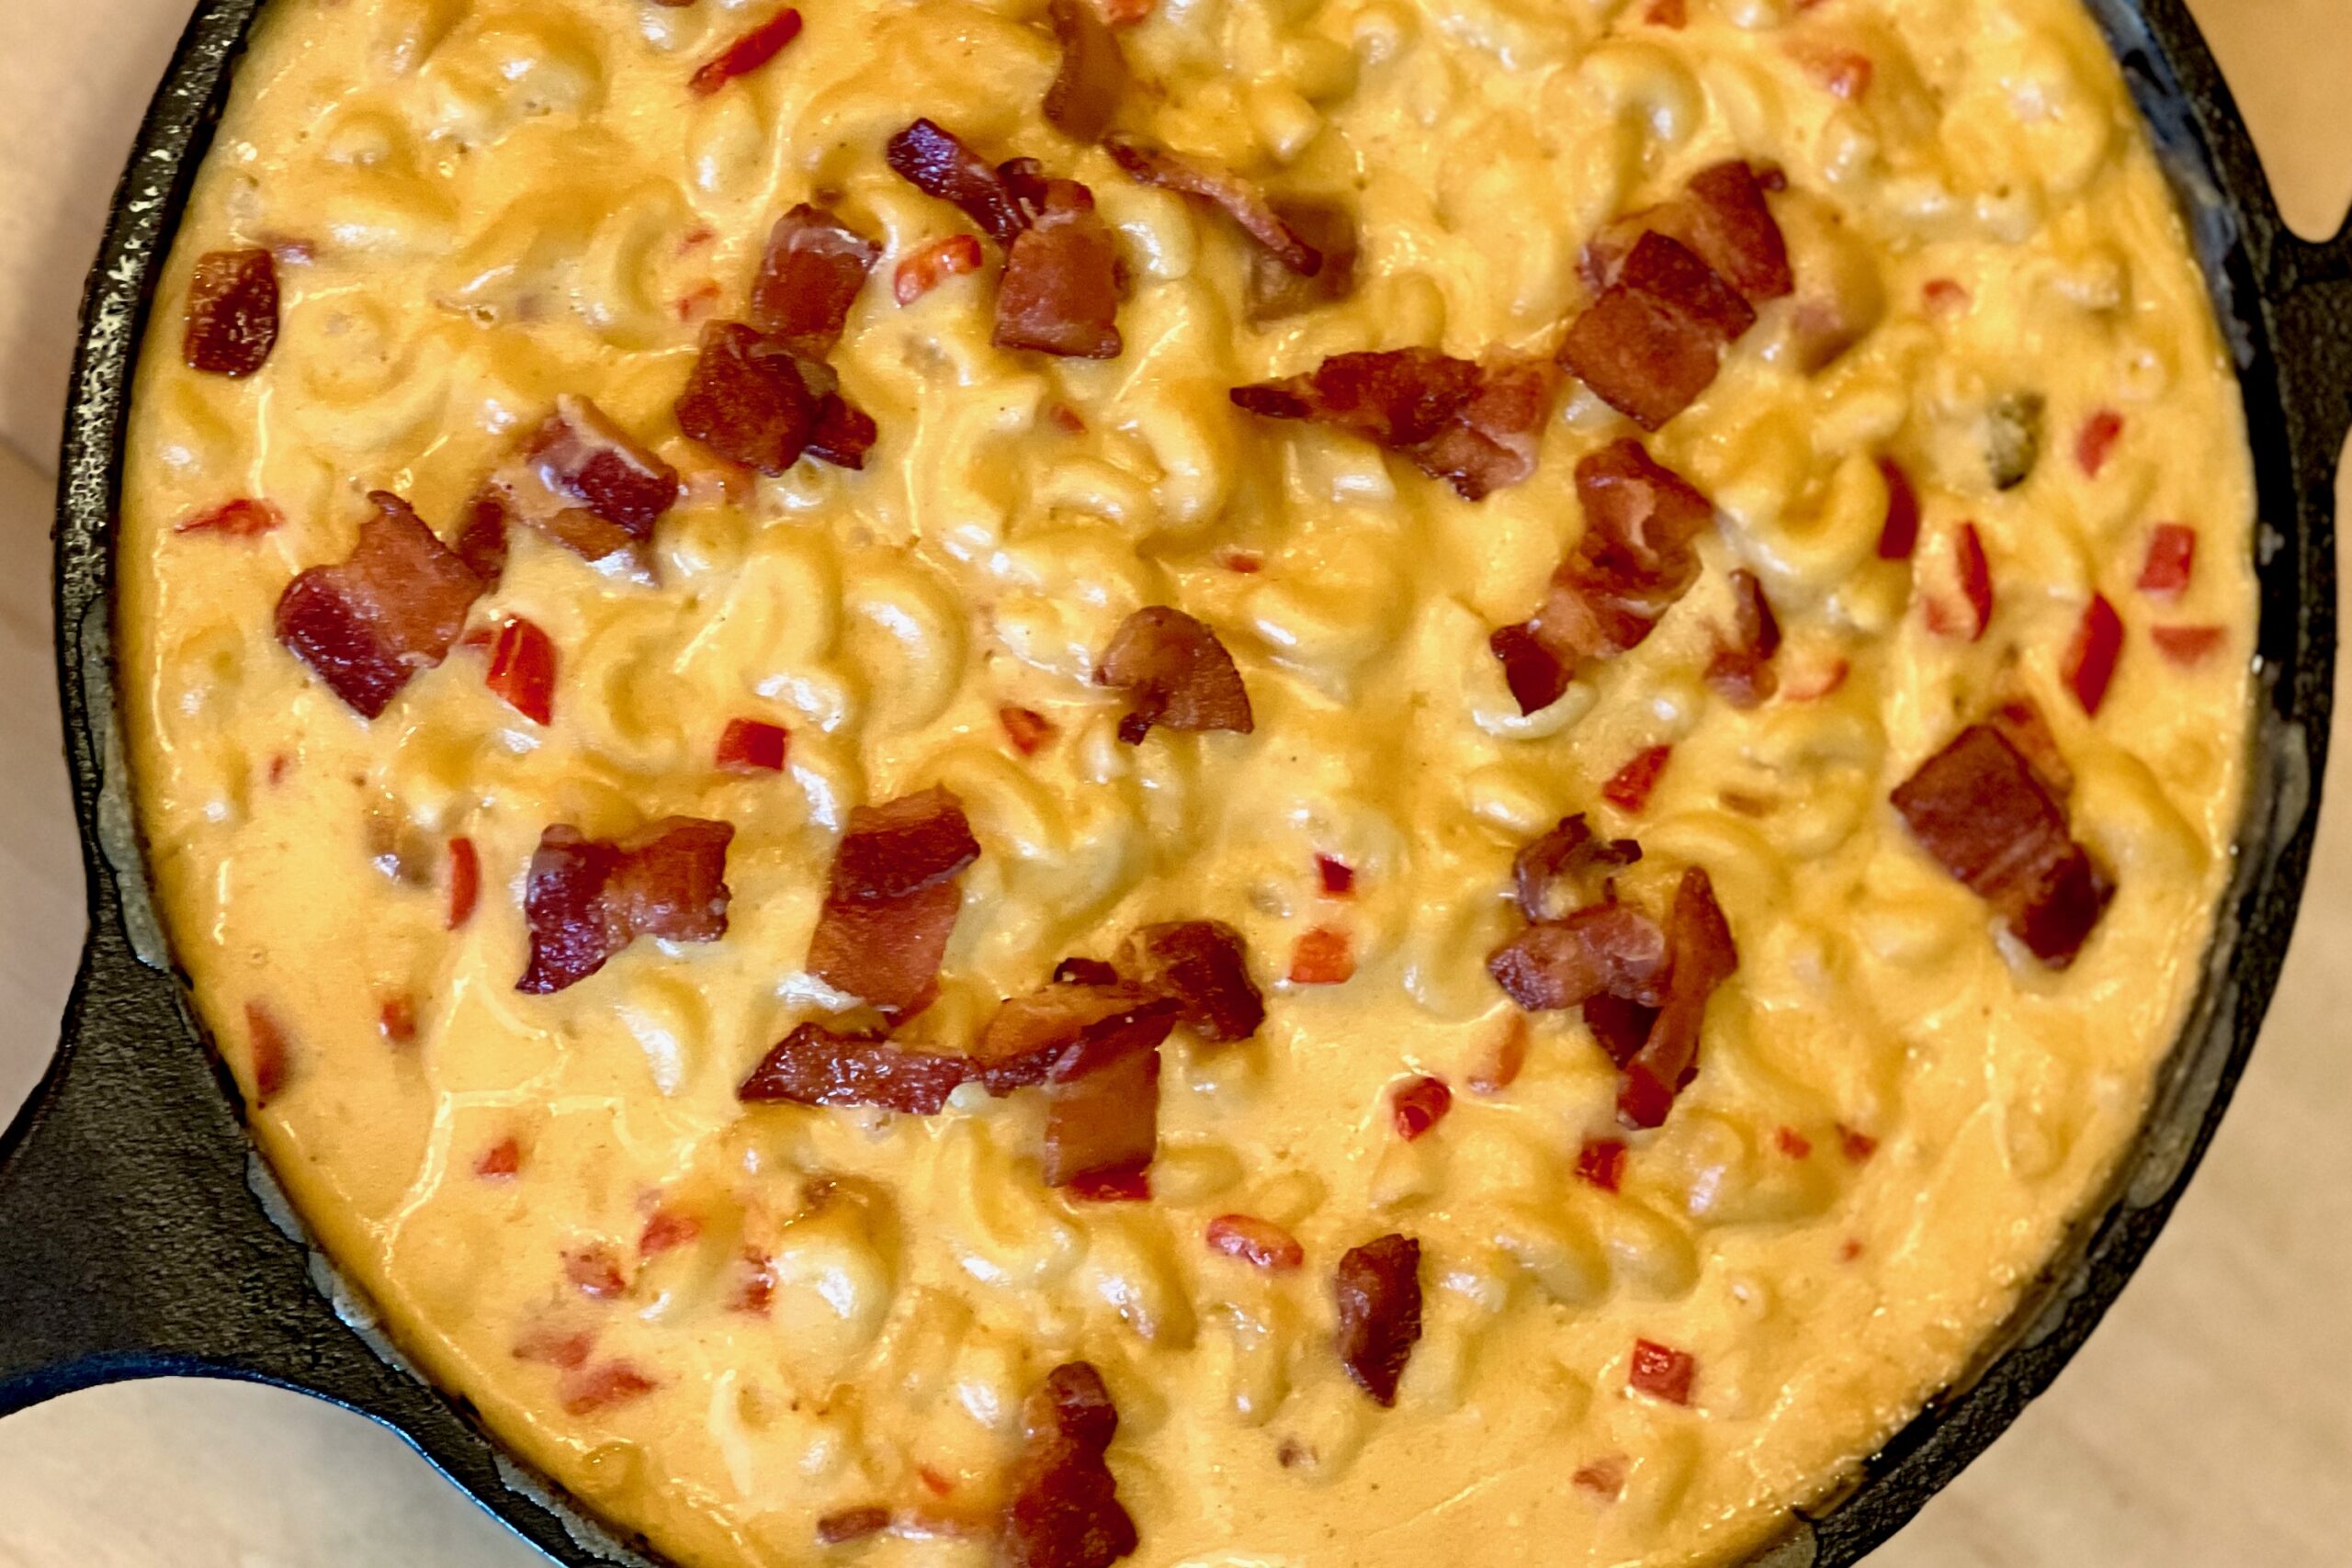
    Smoky, creamy, and loaded with layers of bold flavor, our family’s Jalapeño Bacon Smoked Mac & Cheese takes this comfort classic to the next level. A silky, stabilized cheese sauce coats tender pasta, balanced by the heat of jalapeños, the savoriness of crisp bacon, and often covered in a golden layer of broiled cheese. It’s indulgent yet refined—the kind of mac and cheese that steals the show at any family gathering.


    Ingredients

      Pasta Base

    • 1 lb elbow macaroni
    • salt, for boiling
    • Bacon & Jalapeños

    • 1 lb thick-cut bacon, chopped
    • 1½ cups jalapeños, finely diced with seeds & veins removed
    • 1 tbsp reserved bacon fat
    • Cheese Sauce

    • ¼ cup butter
    • ⅓ cup all-purpose flour
    • ½ tsp smoked paprika
    • ½ tsp dry mustard
    • ½ tsp onion powder
    • ¼ tsp garlic powder
    • 4 cups whole milk
    • 1½ cups heavy cream
    • 1½ tsp sodium citrate
    • 8 oz cream cheese, cubed
    • 8 oz sharp cheddar, grated
    • 8 oz colby jack, grated
    • 4 oz gouda, grated
    • 4 oz emmentaler, grated
    • salt and pepper, to taste
    • Garnish

    • reserved crispy bacon
    • thin jalapeño slices or fresh chives (optional)

    Directions

    Cook the Pasta

    Bring a large pot of salted water to a boil. Add macaroni and cook 2–3 minutes less than al dente, leaving it slightly firm. Drain and rinse under cold water to halt cooking; set aside.

    Prepare the Bacon & Jalapeños

    In a large skillet, cook bacon over medium heat until crisp. Remove with a slotted spoon and drain on paper towels, reserving about 1 tbsp rendered fat.

    Add diced jalapeños to the reserved bacon fat and sauté 2–3 minutes until fragrant and slightly softened. Set aside, reserving some bacon for garnish.

    Make the Roux & Base

    In a large saucepan or cast-iron skillet, melt butter over medium heat. Whisk in flour, smoked paprika, dry mustard, onion powder, and garlic powder; cook 1–2 minutes, whisking constantly until fragrant and lightly golden.

    Gradually whisk in milk and cream until smooth and combined.

    Incorporate Sodium Citrate

    Whisk in sodium citrate until fully dissolved. Bring the mixture just below a simmer—do not boil—to create the base for a smooth, stable sauce.

    Add the Cheeses

    Remove the pan from heat. Add cream cheese, stirring until melted and smooth. Gradually whisk in the grated cheeses in small handfuls, allowing each addition to melt before adding the next. Season to taste with salt and pepper; the sauce should be glossy and pourable.

    Combine

    Fold in cooked bacon (reserve a handful for garnish) and sautéed jalapeños. Add pasta and stir to coat evenly.

    If the sauce thickens too much, stir in a splash of reserved pasta water or milk to loosen.

    Smoke the Mac & Cheese

    Preheat pellet grill to 165°F / 74°C. Transfer mac and cheese to a greased 12-inch cast-iron pan or baking dish. Smoke uncovered for 1–2 hours, stirring after 15 and 30 minutes for even flavor absorption.

    Increase temperature to 225°F / 107°C for the final 15 minutes to slightly tighten and toast the surface.

    Cheese Finish

    Removing from the smoker and sprinkle a thin, even layer of shredded cheddar or gouda over the top. Place under a broiler for 2–4 minutes, watching closely, until golden and bubbling with crisp edges.

    Let rest 5–10 minutes before serving.

    Garnish & Serve

    Top with reserved crispy bacon and garnish with thin jalapeño slices or fresh chives. Serve warm, directly from the skillet for best presentation.


    Notes

    Preparation

    • sodium citrate ensures a stable, silky sauce that resists separation, even during smoking or reheating.
    • cold-smoking the cheese before grating adds a deeper, more developed smoke flavor.
    • a pinch of chipotle powder or smoked salt can be used to enhance depth without adding much heat.
    • let the mac and cheese rest briefly before serving to help the sauce set slightly.

    Serving Suggestions

    • serve alongside barbecue favorites like smoked ribs, pulled pork, or brisket.
    • use leftovers as a rich filling for grilled cheese sandwiches or baked stuffed peppers.
    • top with additional crisp bacon or caramelized onions for added texture and flavor.

    Make-Ahead & Storage

    • refrigerate up to 4 days in an airtight container.
    • reheat gently in the oven or smoker at low temperature; avoid direct stovetop reheating after cheese is added.
    • freeze up to 2 months; thaw overnight in the refrigerator before reheating.