Bags of Spices

Favorite Recipes

The Huggins Family

  • Babi Panggang — Indonesian Roasted Pork

    Babi Panggang — Indonesian Roasted Pork

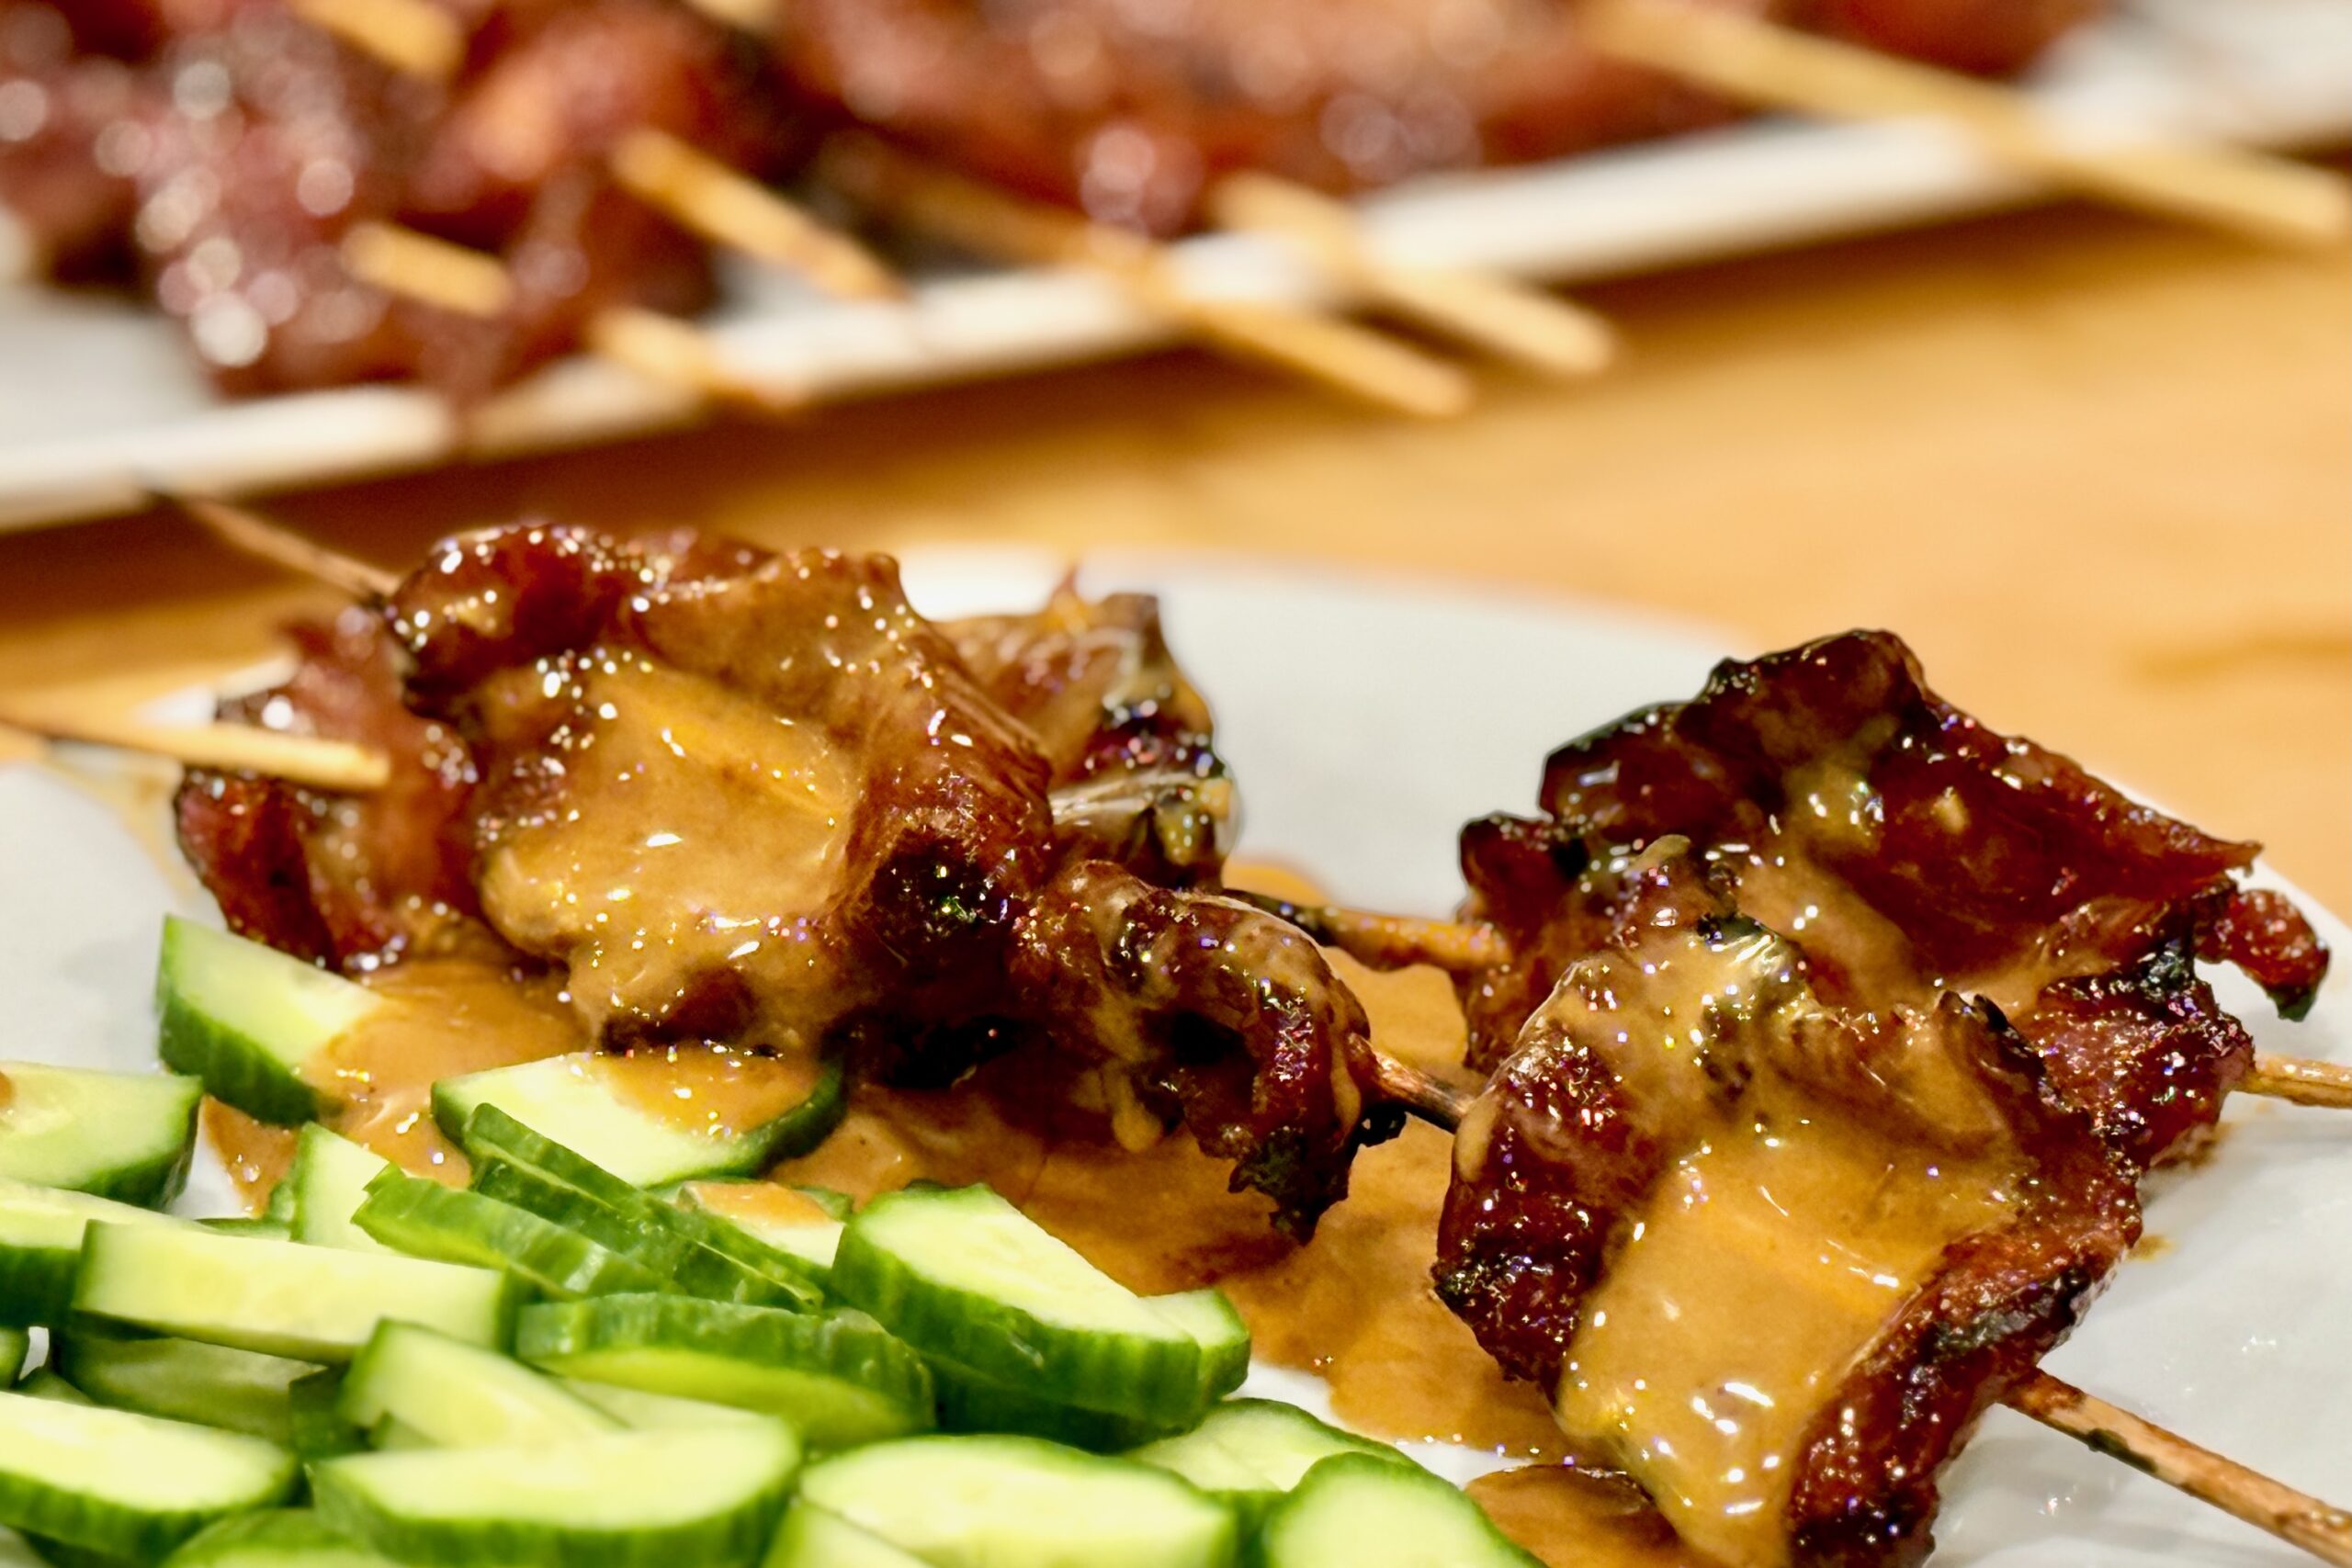
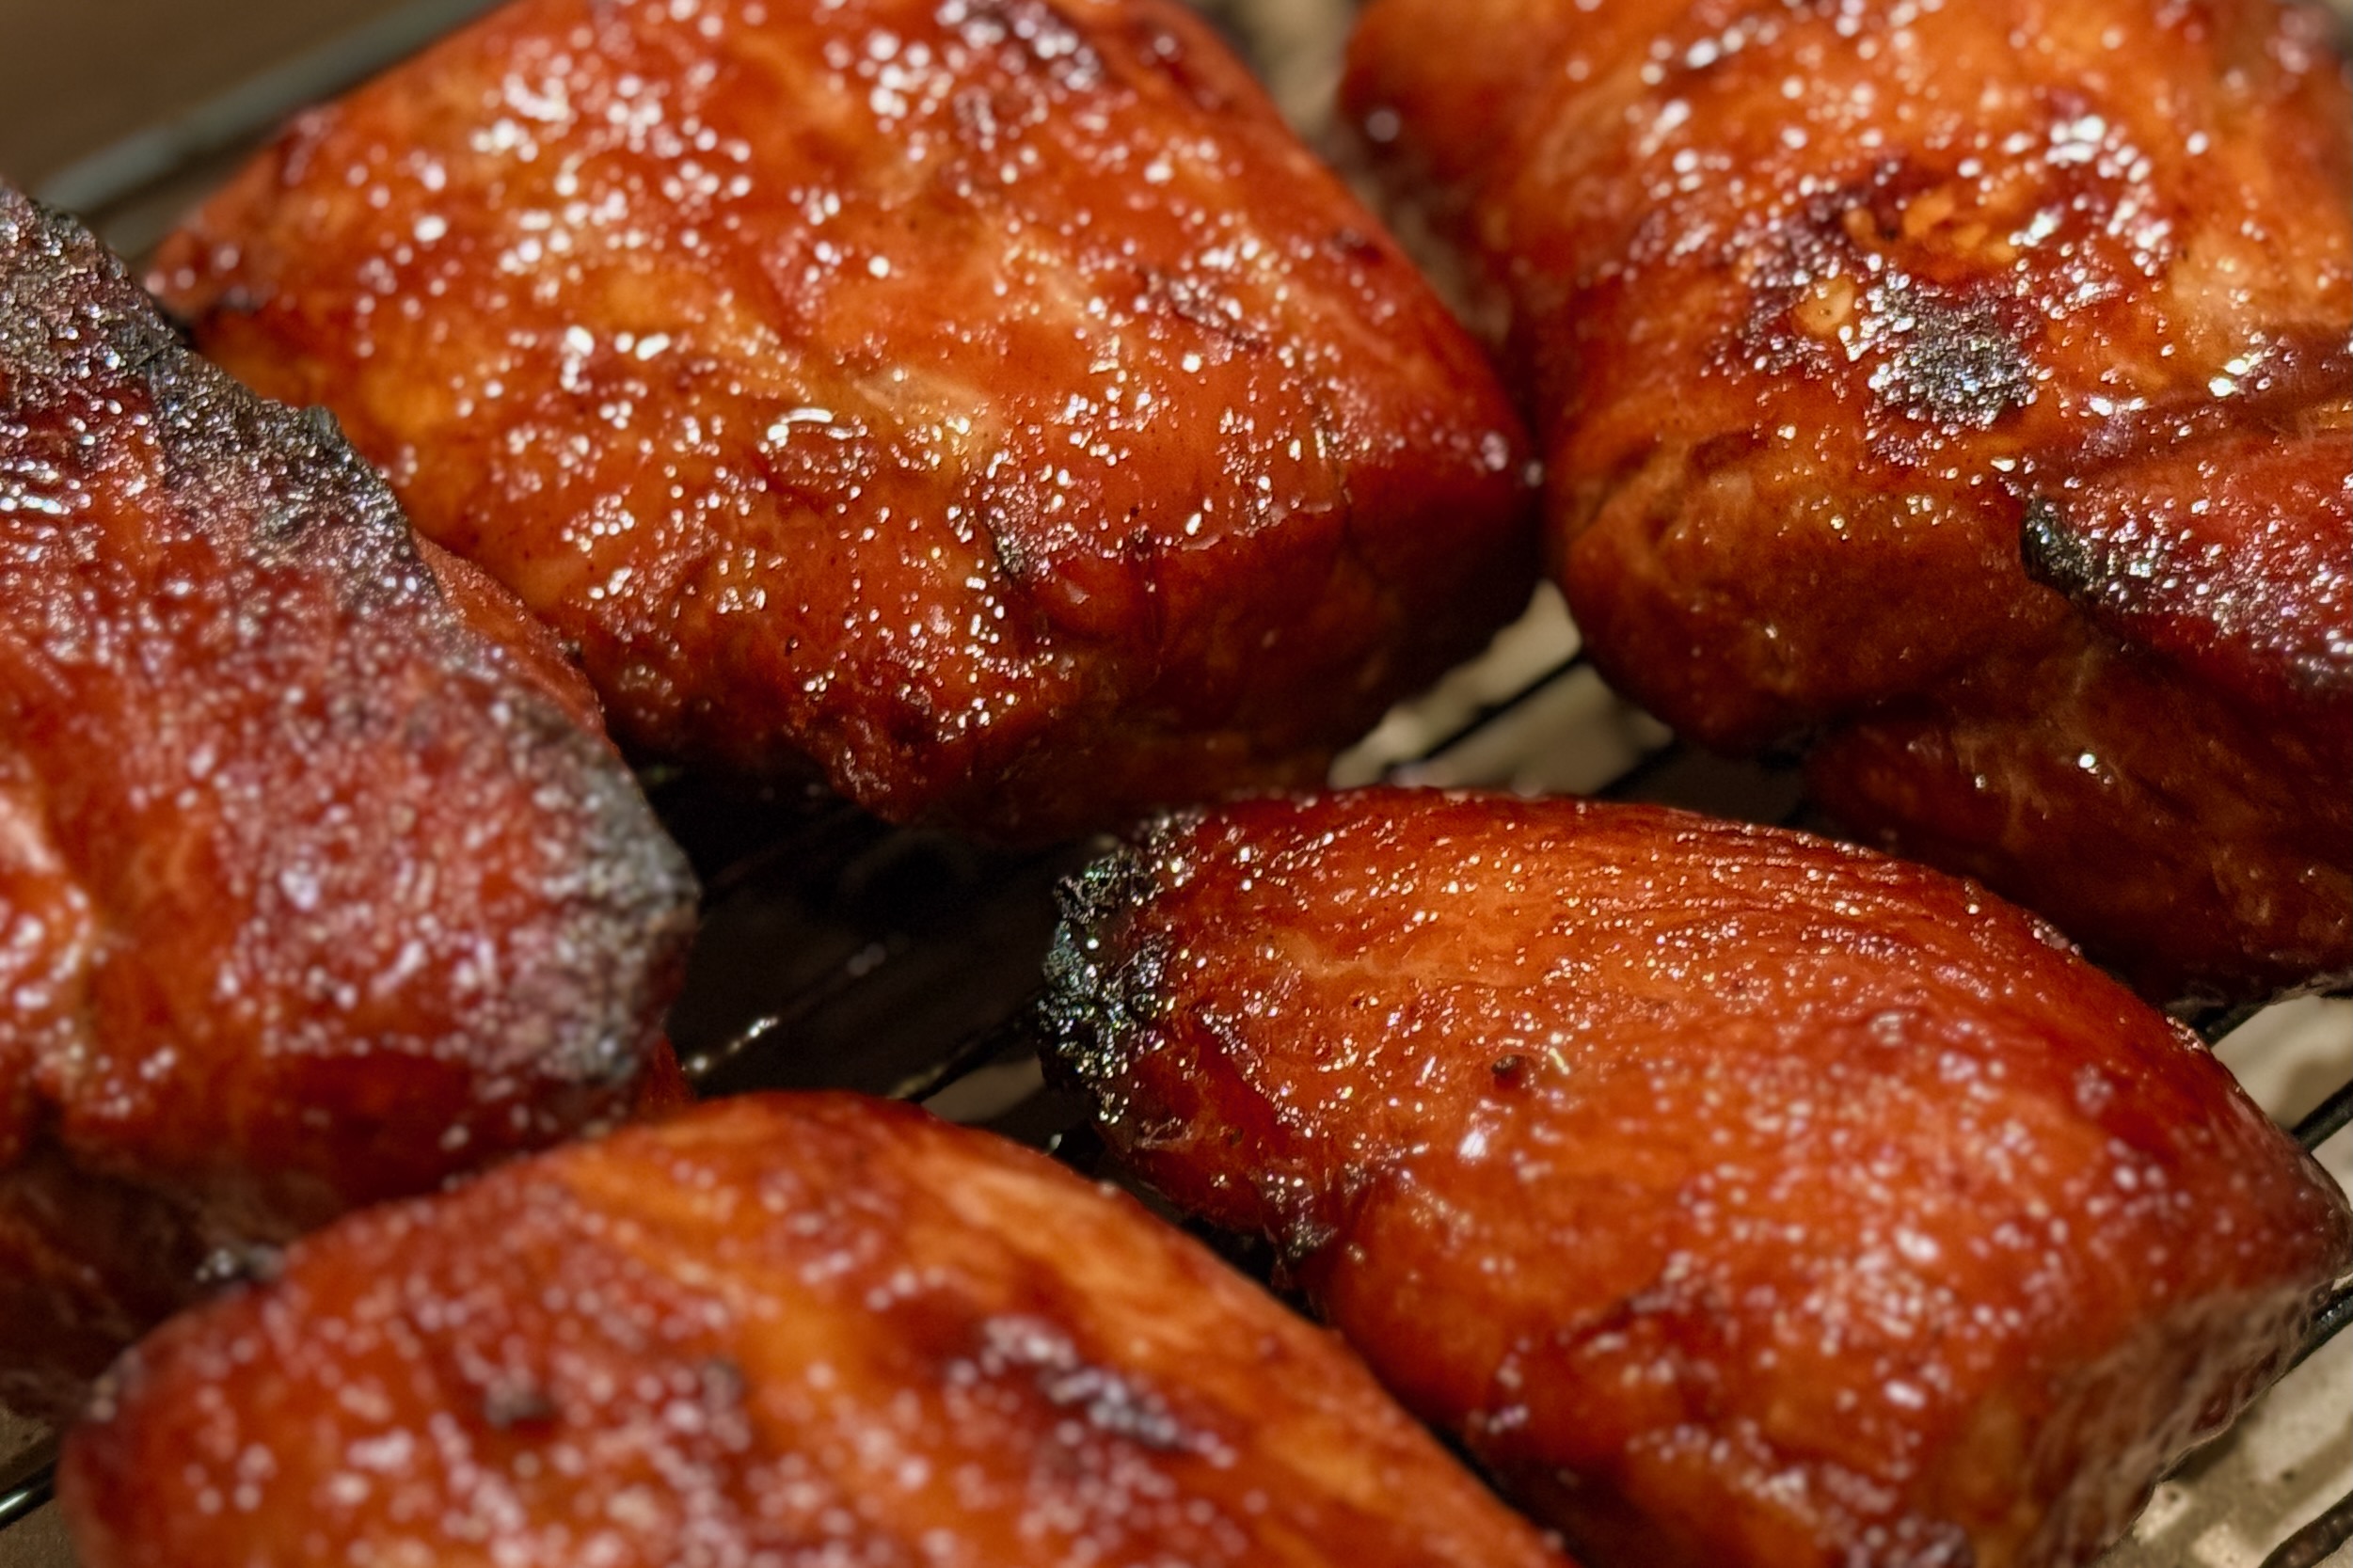
    Working in the office in the city of Bussum in The Netherlands, we’d often order take-out from our favorite Chinese-Indonesian restaurant, Tong Fong, in the neighboring city of Hilversum. One stand-out item was their delicious Babi Panggang, which was always a part of our order. I later learned that Babi Panggang is the most ordered main dish at Indonesian restaurants throughout the Netherlands. This is my attempt to recreate the vibrant flavors and textures of this delicious dish.


    Ingredients

    • 2 lb pork shoulder or belly
    • Marinade

    • ¼ cup ketjap manis
    • 2 tbsp hoisin sauce
    • 2 tbsp rice cooking wine
    • 1 tbsp brown sugar
    • 1 tbsp fresh ginger, grated
    • 1 tbsp fish sauce
    • ½ tbsp sambal oelek
    • ½ tbsp sambal badjak
    • ½ tsp toasted sesame oil (optional)
    • ¼ tsp Chinese five spice (optional)
    • 2 cloves garlic, minced
    • Juice and zest of 1 lime
    • Sweet & Sour Red Sauce

    • 1 tbsp vegetable oil
    • 1 small onion, finely chopped
    • 2–3 cloves garlic, minced
    • 2 tsp grated ginger
    • ½ tsp sambal oelek
    • 3 tbsp tomato paste
    • ¼ tsp chicken powder
    • ¼ cup sweet chili sauce
    • 3 tbsp ketchup
    • 2 tbsp lime juice
    • 2 tbsp seasoned rice vinegar
    • 1 tbsp Tamarind Paste
    • 1 tbsp ketjap manis
    • 1 tsp fish sauce
    • ¾ cup chicken stock or water
    • ¼ cup brown sugar (adjust to taste)
    • 1 tbsp cornstarch mixed with 1 tbsp water

    Directions

    Marinate the Pork

    Combine all marinade ingredients, stirring until the sugar has completely dissolved. Pour into a resealable container or vacuum-seal bag. Add the pork, coating thoroughly. Seal and marinate in the refrigerator for 4–12 hours.

    Sweet & Sour Red Sauce

    Heat oil in a saucepan over medium heat. Sauté onion until lightly browned; add garlic, ginger, and sambal, and cook until fragrant. Add tomato paste and chicken powder; cook 1 minute to develop sweetness.

    Stir in sweet chili sauce, ketchup, lime juice, vinegar, tamarind, ketjap manis, fish sauce, stock or water, and brown sugar. Simmer 10 minutes to allow flavors to meld. Add the cornstarch slurry and simmer until glossy and thickened. Blend with an immersion blender and adjust thickness with additional stock, if needed.

    Preparation #1: Sous Vide

    Preheat sous vide bath to 170°F / 77°C for pork shoulder (130°F / 55°C for pork loin or tenderloin; 150°F / 65°C for pork belly). Submerge vacuum-sealed pork and marinade in the water bath and heat for 12–24 hours (2–8 hours for pork loin or tenderloin).

    Remove from the bag and pat dry. Brush with oil and finish under a broiler set to high for 4–5 minutes to crisp the top. Brush with red sauce during broiling and allow it to develop a few bits of char.

    Slice and serve over rice with a generous amount of sauce. Serve with acar ketimun (pickled vegetables), cucumber salad, fried cabbage, and/or blanched green beans tossed with garlic and sesame oil.

    Preparation #2: Oven

    Preheat oven to 350°F / 177°C. Place pork on a rack in a baking tray. Reserve marinade and boil in a saucepan for 5 minutes. Roast pork for 30–40 minutes per pound, or until internal temperature reaches 190°F / 88°C, basting with the boiled marinade halfway through.

    Rest pork for 20 minutes. Pat dry, brush with oil, and finish under a broiler set to high for 4–5 minutes to crisp the top. Optionally, baste with the red sauce while broiling and allow it to develop slight char.

    Slice and serve over rice with a generous amount of sauce. Serve with acar ketimun, cucumber salad, fried cabbage, and/or blanched green beans tossed with garlic and sesame oil.

    Preparation #3: Pellet Grill

    Preheat pellet grill to 250°F / 120°C. Smoke until internal temperature reaches 187°F / 86°C, basting halfway through. Rest pork for 30 minutes.

    Pat dry, brush with oil, and finish under a broiler set to high for 4–5 minutes to crisp the top. Optionally, baste with the red sauce while broiling and allow it to develop light char.

    Slice and serve over rice with a generous amount of sauce. Serve with acar ketimun, cucumber salad, fried cabbage, and/or blanched green beans tossed with garlic and sesame oil.


    Notes

    Preparation

    • Fattier cuts such as pork shoulder or belly are preferred, but pork loin or tenderloin (especially when using the sous vide method, with times and temperatures adjusted accordingly) can also be used. Take care not to overcook leaner cuts.
    • Preparation #1, Sous Vide, is the preferred method for the most tender and flavorful result.

    Serving Suggestions

    • Serve sliced Babi Panggang over rice with plenty of red sauce spooned on top.
    • Pair with acar ketimun, fried cabbage, cucumber salad, or blanched green beans with garlic and sesame oil.
  • Char Siu

    Char Siu

    With 60 first cousins on just the Huggins side, family parties are rarely small. It isn’t unusual to have 40 to 75 guests for dinner at our get-togethers. Cooking for that many people forces a bit of food-preparation creativity, and this char siu takes advantage of sous-vide precision to simplify the process. For a more traditional method, the pork can also be cooked and basted over a hot charcoal grill for deep, smoky flavor.


    Ingredients

    • 3–4 lbs pork shoulder, cut into 3–4 long strips, about 2 inches thick (see Notes for pork belly option)
    • Marinade:

    • ¾ cup soy sauce
    • ½ cup hoisin sauce
    • ½ cup Shaoxing wine (or dry sherry)
    • ½ cup rock sugar, crushed (or ¼ cup rock sugar + ¼ cup white sugar)
    • 2 tbsp oyster sauce (optional, adds depth)
    • 2 tbsp grated fresh ginger
    • 4 garlic cloves, minced
    • 1 tsp toasted sesame oil
    • 1 tsp Chinese five-spice powder
    • ½ tsp ground white pepper
    • ⅛ tsp pink curing salt #1 (optional, for rosy interior)
    • 3–5 drops red food coloring (optional, classic look)
    • Glaze:

    • 1 cup reserved marinade, strained
    • ¼–⅓ cup honey

    Directions

    Marinate the Pork

    Whisk together all marinade ingredients except the curing salt and honey. Reserve 1 cup of marinade, strain, and refrigerate for the glaze.

    Add curing salt to the remaining marinade. Place pork strips in vacuum-seal bags or heavy zipper bags and add the marinade. Seal and refrigerate at least 8–12 hours, up to 24 hours.

    For best flavor and color penetration, turn the bags occasionally during marinating.

    Sous-Vide Cook

    Preheat the sous-vide water bath to 65°C (149°F). Submerge the sealed pork and cook for 12–16 hours.

    When done, remove the pork and transfer to a rack set over a sheet pan. Pat dry gently.

    Prepare the Glaze

    In a small saucepan, combine the reserved marinade with honey. Simmer over medium heat until reduced by about half and syrupy. Keep warm.

    Dry and Broil

    Let the pork rest uncovered on the rack for 15–20 minutes so the surface becomes slightly tacky. This helps the glaze adhere during broiling.

    Preheat your broiler (or charcoal grill) to very hot. Brush the pork with glaze and broil 6–8 minutes total, turning and re-glazing every 1–2 minutes until lacquered with caramelized edges and light char.

    Keep pork about 6 inches from the broiler to prevent burning. Final internal temperature should be approximately 68–70°C (155–158°F), though the meat is already fully cooked from the sous-vide process.

    Rest and Serve

    Let pork rest 5 minutes, then slice into thick pieces. Drizzle with warm glaze before serving.


    Notes

    Preparation

    • Crushing rock sugar before measuring ensures accurate sweetness and easier dissolving.
    • Optional curing salt deepens the rosy color but does not affect flavor.
    • Turning the pork during marinating promotes even seasoning and color.

    Serving Suggestions

    • Serve over steamed jasmine rice or noodles.
    • Pair with pickled cucumbers or a crisp slaw to balance richness.
    • Excellent in bao buns or sliced thinly for Fried Rice with Shrimp & Char Siu.

    Variations

    • Pork Belly Version: Remove skin, cut into 1½–2-inch strips, reduce sugar to ⅓ cup total, sous-vide at 70°C (158°F) for 10–12 hours, broil from 8 inches away, glazing every minute.
    • Grill Instead of Broil: Cook over hot charcoal, glazing and turning every 1–2 minutes until lacquered.
    • Extra Caramelization: Increase honey in the glaze up to ½ cup for a deeper lacquer.

    Make-Ahead & Storage

    • Pork can be marinated up to 24 hours in advance.
    • Sous-vide cooked pork can be chilled in the sealed bags up to 48 hours before finishing.
    • Leftovers keep 3–4 days refrigerated; broil briefly to refresh the glaze.
  • Sweet Potato Gnocchi

    Sweet Potato Gnocchi

    After our family took a cooking class together—where we learned to make and shape classic gnocchi—we gathered again on a Sunday evening and had a light-bulb moment: what if we made gnocchi with roasted sweet potatoes? Roasting the sweet potatoes deepens their flavor and keeps the dumplings light yet richly savory. Finished in a nutty browned butter and crisp sage leaves, each pillowy bite evokes cozy autumn warmth—without drifting into dessert territory.


    Ingredients

    • Gnocchi:

    • 2 lb (900 g) orange-flesh sweet potatoes (about 2 large)
    • 1 large egg yolk
    • ¾–1 cup (90–120 g) all-purpose flour, plus more for dusting (start with ¾ cup)
    • ½ tsp table salt
    • ¼ tsp white pepper (or black pepper)
    • pinch nutmeg (optional; up to ⅛ tsp)
    • 2–3 tbsp finely grated parmesan (optional; adds savory depth)
    • semolina or additional flour, for dusting the tray
    • To Serve:

    • 1 batch Browned Butter & Sage Sauce
    • finely grated parmesan, for finishing (optional)

    Directions

    Roast the Sweet Potatoes

    Roast sweet potatoes at 400ºF (205ºC) until completely tender, 45–60 minutes. Split open and let steam escape for 10–15 minutes to reduce moisture. Scoop out the flesh.

    Rice and Cool

    Pass warm sweet potato flesh through a ricer (or mash very thoroughly). Measure 2 packed cups (450–500 g). Spread briefly on a sheet pan to steam off residual moisture, then cool until just warm.

    Make the Dough

    In a bowl, combine sweet potato, egg yolk, salt, pepper, optional nutmeg, and parmesan. Sprinkle ¾ cup (90 g) flour over the top. Fold gently with a bench scraper or spatula until a soft dough forms. It should be supple and just slightly tacky. If sticky, add flour 1 tbsp at a time.

    Test for Texture

    Bring a small pot of well-salted water to a boil. Roll and boil a small test nugget. If it falls apart or tastes mushy, knead in 1 tbsp flour and test again. Avoid overworking the dough.

    Shape the Gnocchi

    Lightly flour the counter and divide dough into four pieces. Roll each into a ¾-inch (2 cm) rope and cut into ¾-inch (2 cm) pieces. Optionally roll on a gnocchi board or fork. Transfer pieces to a semolina- or flour-dusted sheet pan.

    Boil

    Bring a large pot of well-salted water to a boil. Cook gnocchi in batches. They will sink, then float. Cook 30–60 seconds after floating, then lift gently with a spider directly into a warm bowl.

    Serve

    Toss gently with Browned Butter & Sage Sauce, loosening with a splash of cooking water as needed. Finish with parmesan and serve immediately.


    Notes

    Preparation

    • Roasting reduces moisture and prevents dense or gummy dough.
    • Flour amounts vary based on moisture. Add just enough to make dough manageable.
    • A potato ricer ensures the lightest texture; avoid food processors, which make puree gluey.
    • Nutmeg is optional. Keep to a tiny pinch for a savory balance.
    • Parmesan in the dough deepens savoriness and firms texture slightly.

    Serving Suggestions

    • Classic pairing: Browned Butter & Sage Sauce.
    • Also works with simple garlic–olive oil or a light gorgonzola cream.
    • Top with toasted breadcrumbs for added texture.

    Variations

    • Add 1–2 tbsp minced fresh herbs (sage, thyme, chives) to the dough.
    • Use purple sweet potatoes for a more earthy, colorful version; flour amount may vary.
    • Add ¼ cup ricotta for softer, pillowy gnocchi (increase flour slightly).

    Make-Ahead & Storage

    • Freeze uncooked gnocchi on a floured tray, then store in freezer bags up to 2 months. Boil from frozen; add 1–2 minutes to cook time.
    • Refrigerate cooked gnocchi lightly coated in oil up to 2 days. Rewarm gently in sauce.
    • Refrigerate raw dough tightly wrapped up to 24 hours; dust with a little flour if it hydrates.
  • Dark Chocolate Buttermilk Ice Cream

    Dark Chocolate Buttermilk Ice Cream

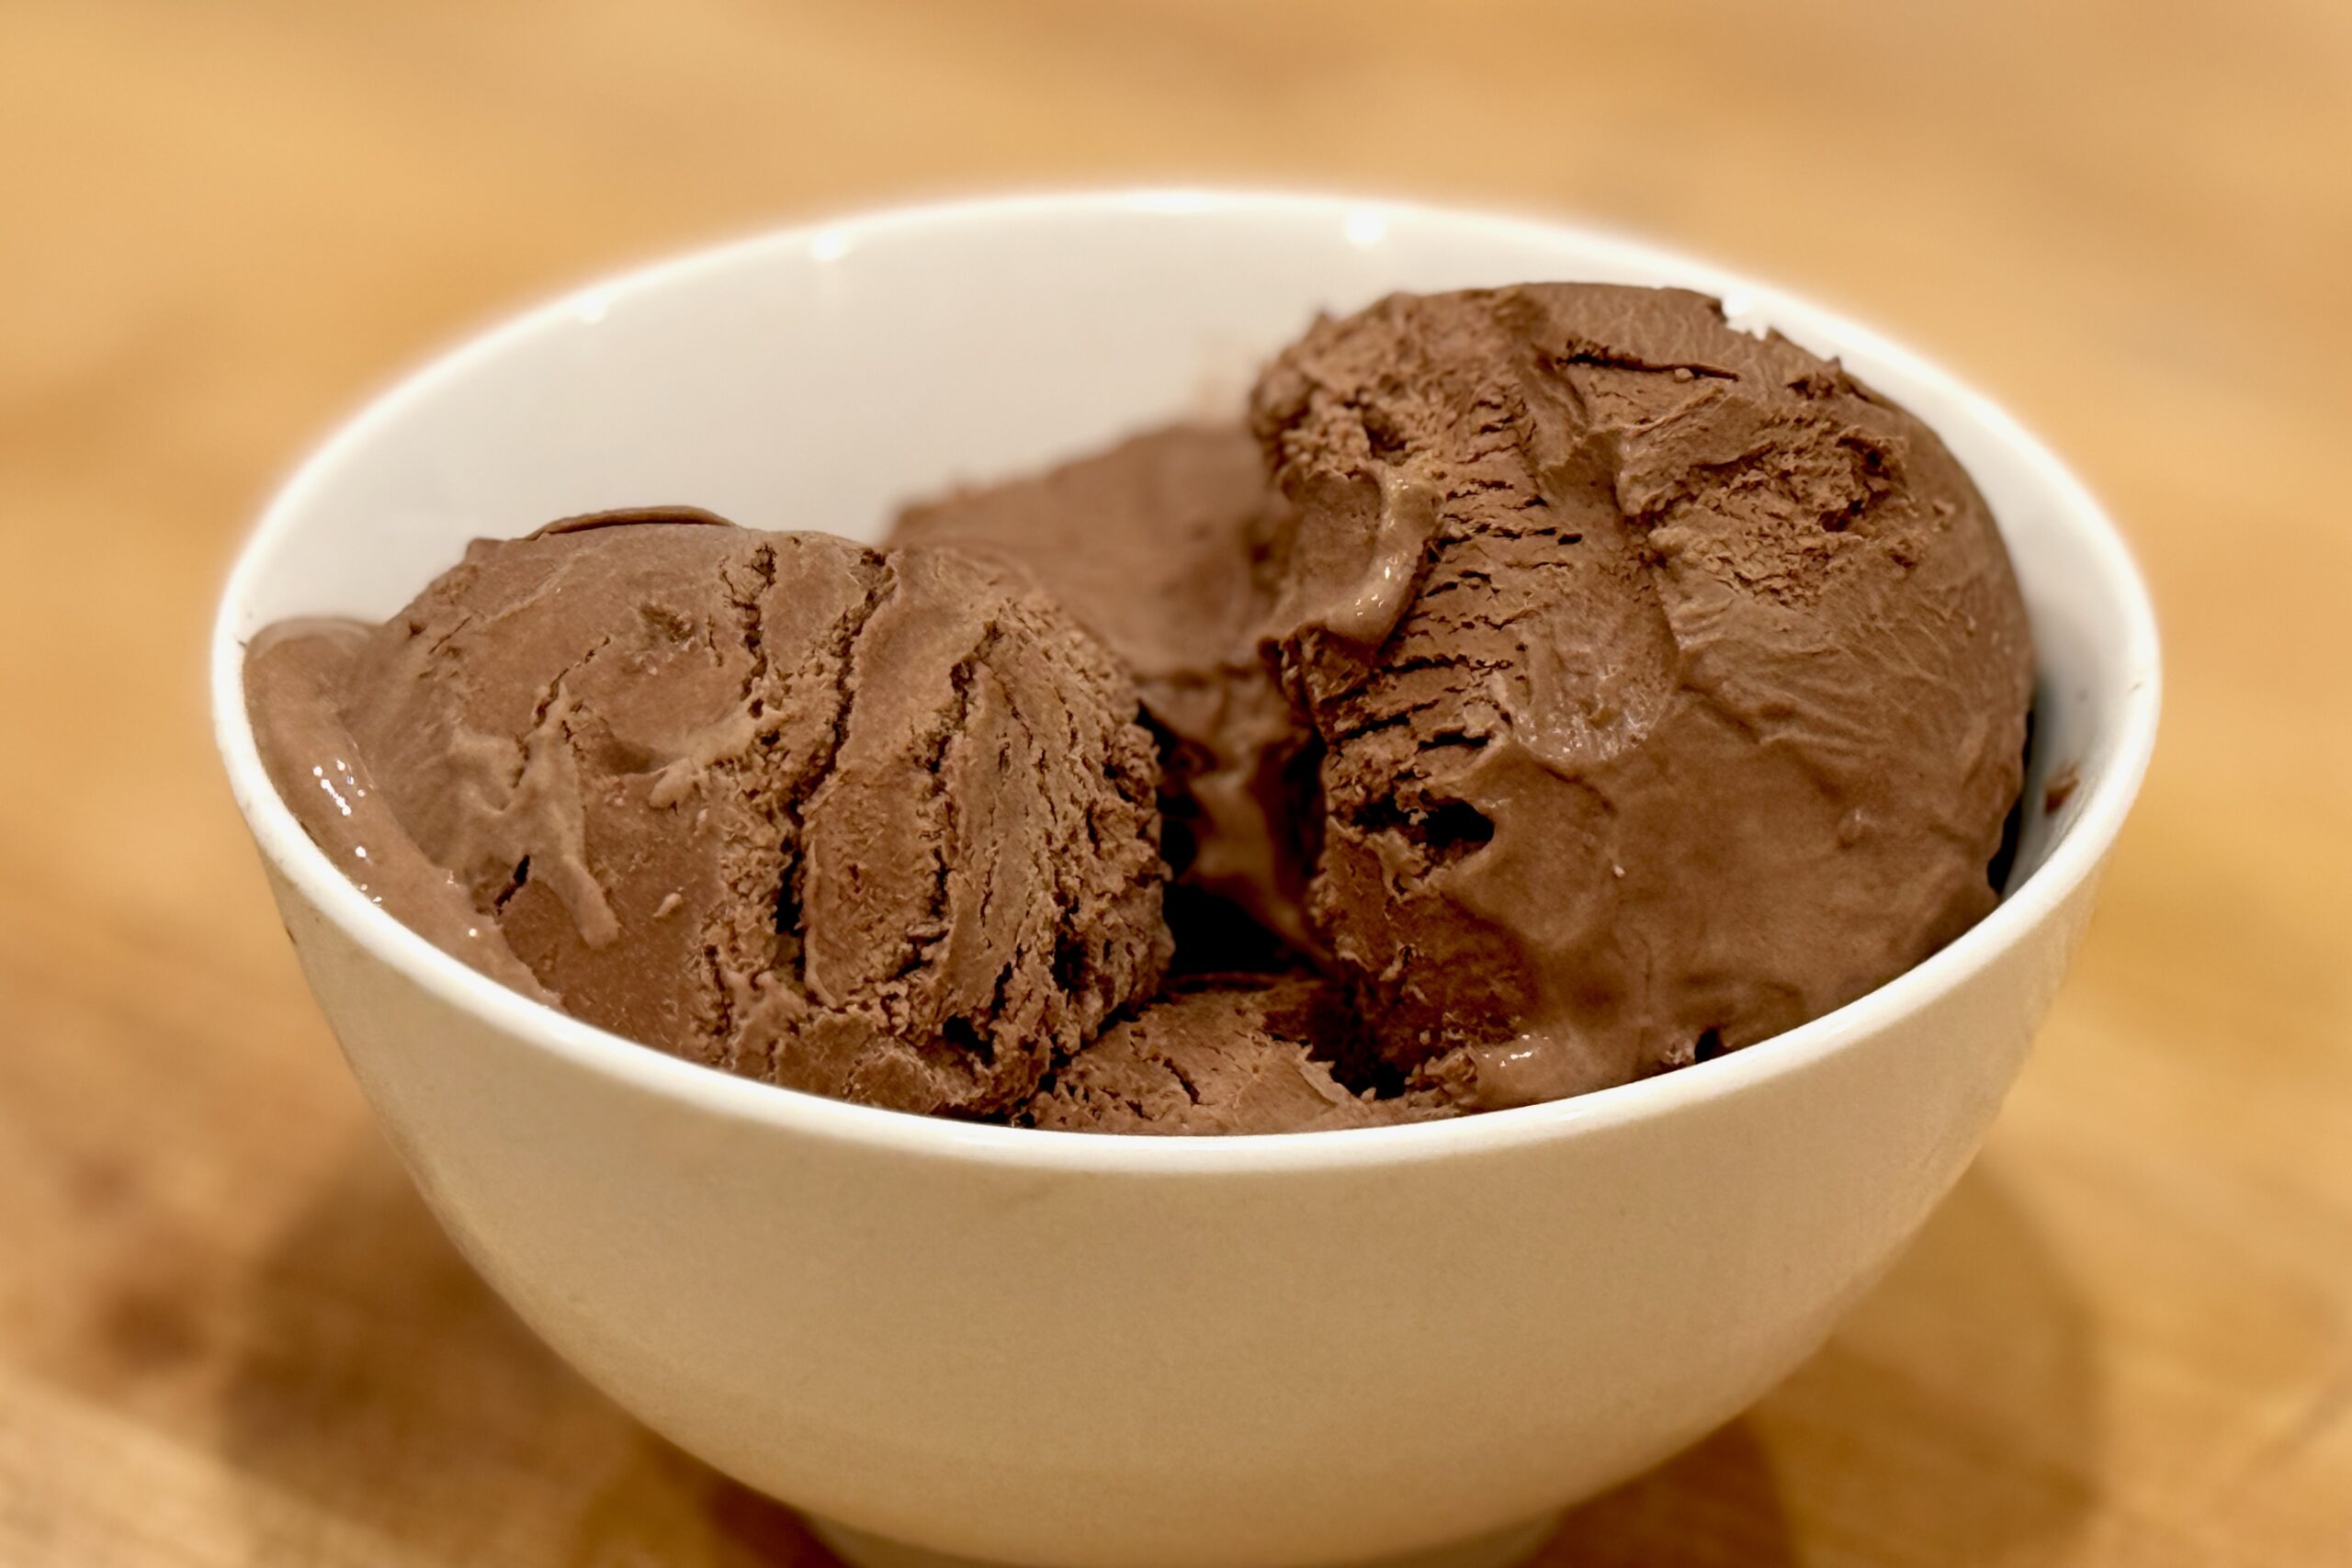
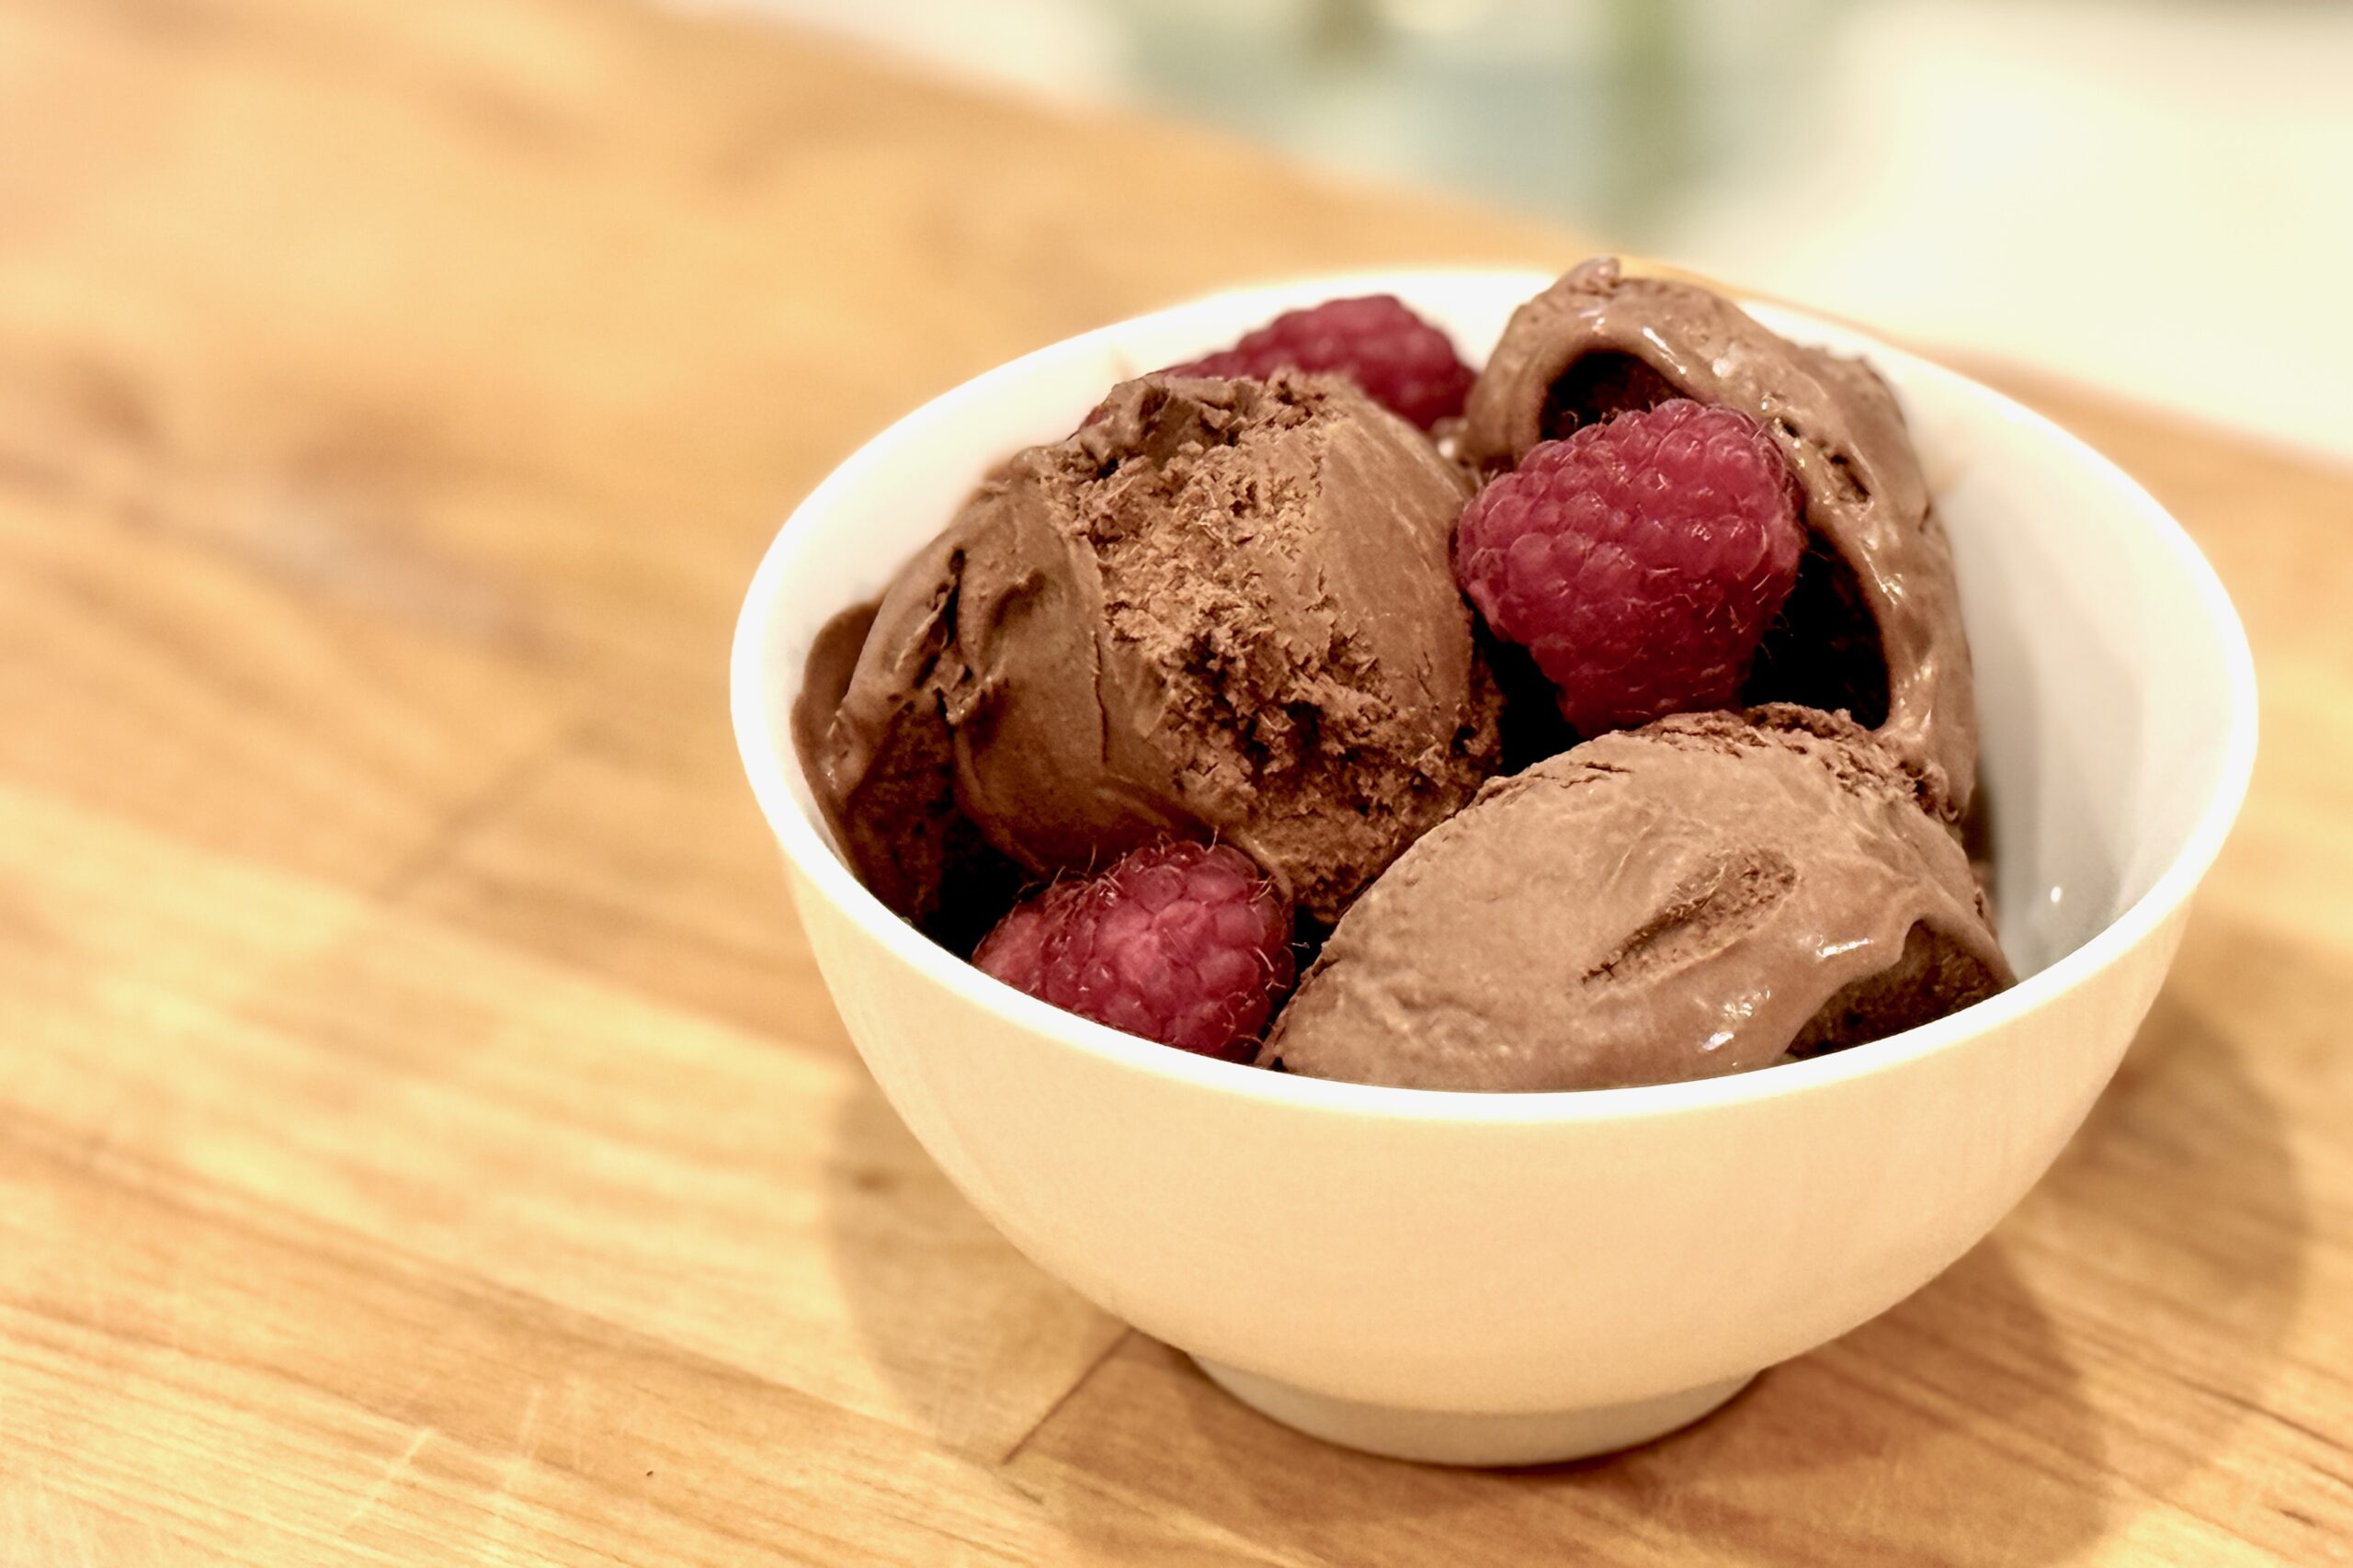
    Rich, silky, and deeply flavored, this dark chocolate ice cream balances Dutch-process cocoa and melted dark chocolate with the subtle tang of buttermilk for a clean, sophisticated finish. Smooth, scoopable, and layered with complex cocoa notes, it evokes the character of fine European chocolate.


    Ingredients

    Chocolate Custard Base:

    • 1½ cups heavy cream
    • 1 cup whole milk
    • ¾ cup sugar, divided
    • ½ cup Dutch-process cocoa powder
    • 4 oz dark chocolate (60–70%), finely chopped
    • 4 egg yolks
    • ½ tsp instant espresso powder (optional, for depth)
    • ½ tsp vanilla extract
    • pinch table salt
    • ⅛ tsp xanthan gum (stabilizer)

    After Cooking:

    • ¾ cup cold buttermilk
    • 1 tbsp light corn syrup (optional, for slightly softer texture)

    Directions

    Bloom the Cocoa

    In a medium saucepan, whisk cocoa powder with ½ cup of the milk and ¼ cup sugar to form a smooth paste. Add remaining milk, heavy cream, espresso powder (if using), and salt. Heat over medium until steaming and sugar is dissolved.

    Melt the Chocolate

    Remove from heat and whisk in the chopped dark chocolate until melted and glossy. Return briefly to low heat only if needed to melt fully.

    Make the Custard

    In a separate bowl, whisk egg yolks with remaining ½ cup sugar until pale and thick. Temper slowly with ½ cup warm chocolate mixture, then return mixture to the saucepan.

    Cook gently over low heat, stirring constantly, until custard coats the back of a spoon (170–175°F / 77–80°C). Do not boil. Remove from heat and stir in vanilla and optional corn syrup.

    Add the Xanthan Gum

    While custard is warm (below 160°F / 70°C), sprinkle xanthan gum evenly over the surface and immediately blend with an immersion blender or whisk vigorously until fully dispersed. Strain through a fine mesh sieve.

    Incorporate the Buttermilk

    Cool mixture to lukewarm (below 110°F / 43°C). Whisk in buttermilk to preserve fresh tang and prevent curdling. Chill thoroughly, preferably overnight.

    Churn & Freeze

    Churn in an ice cream maker according to manufacturer’s instructions. Transfer to a container and freeze until firm, about 4 hours.


    Notes

    Preparation

    • Xanthan gum gives smoother body and reduces iciness—use sparingly.
    • If using corn syrup, reduce total sugar to ⅔ cup to maintain balance.
    • Espresso powder intensifies chocolate flavor without adding coffee notes.
    • For extra richness, replace ½ cup of the whole milk with half-and-half.
    • Using Natural Cocoa Powder: Add ⅛ tsp baking soda during the “Bloom the Cocoa” step to reduce acidity and deepen color. Increase chocolate to 4½ oz and reduce buttermilk to ⅔ cup.

    Serving Suggestions

    • Top with dark chocolate curls or shavings.
    • Pair with espresso caramel, berries, or almond biscotti.
    • Finish with a pinch of flaky sea salt for contrast.

    Make-Ahead & Storage

    • Refrigerate the custard base up to 2 days before churning.
    • Store churned ice cream in an airtight container up to 1 week.
    • Soften 5–10 minutes at room temperature before serving.
  • Raspberry Buttermilk Ice Cream

    Raspberry Buttermilk Ice Cream

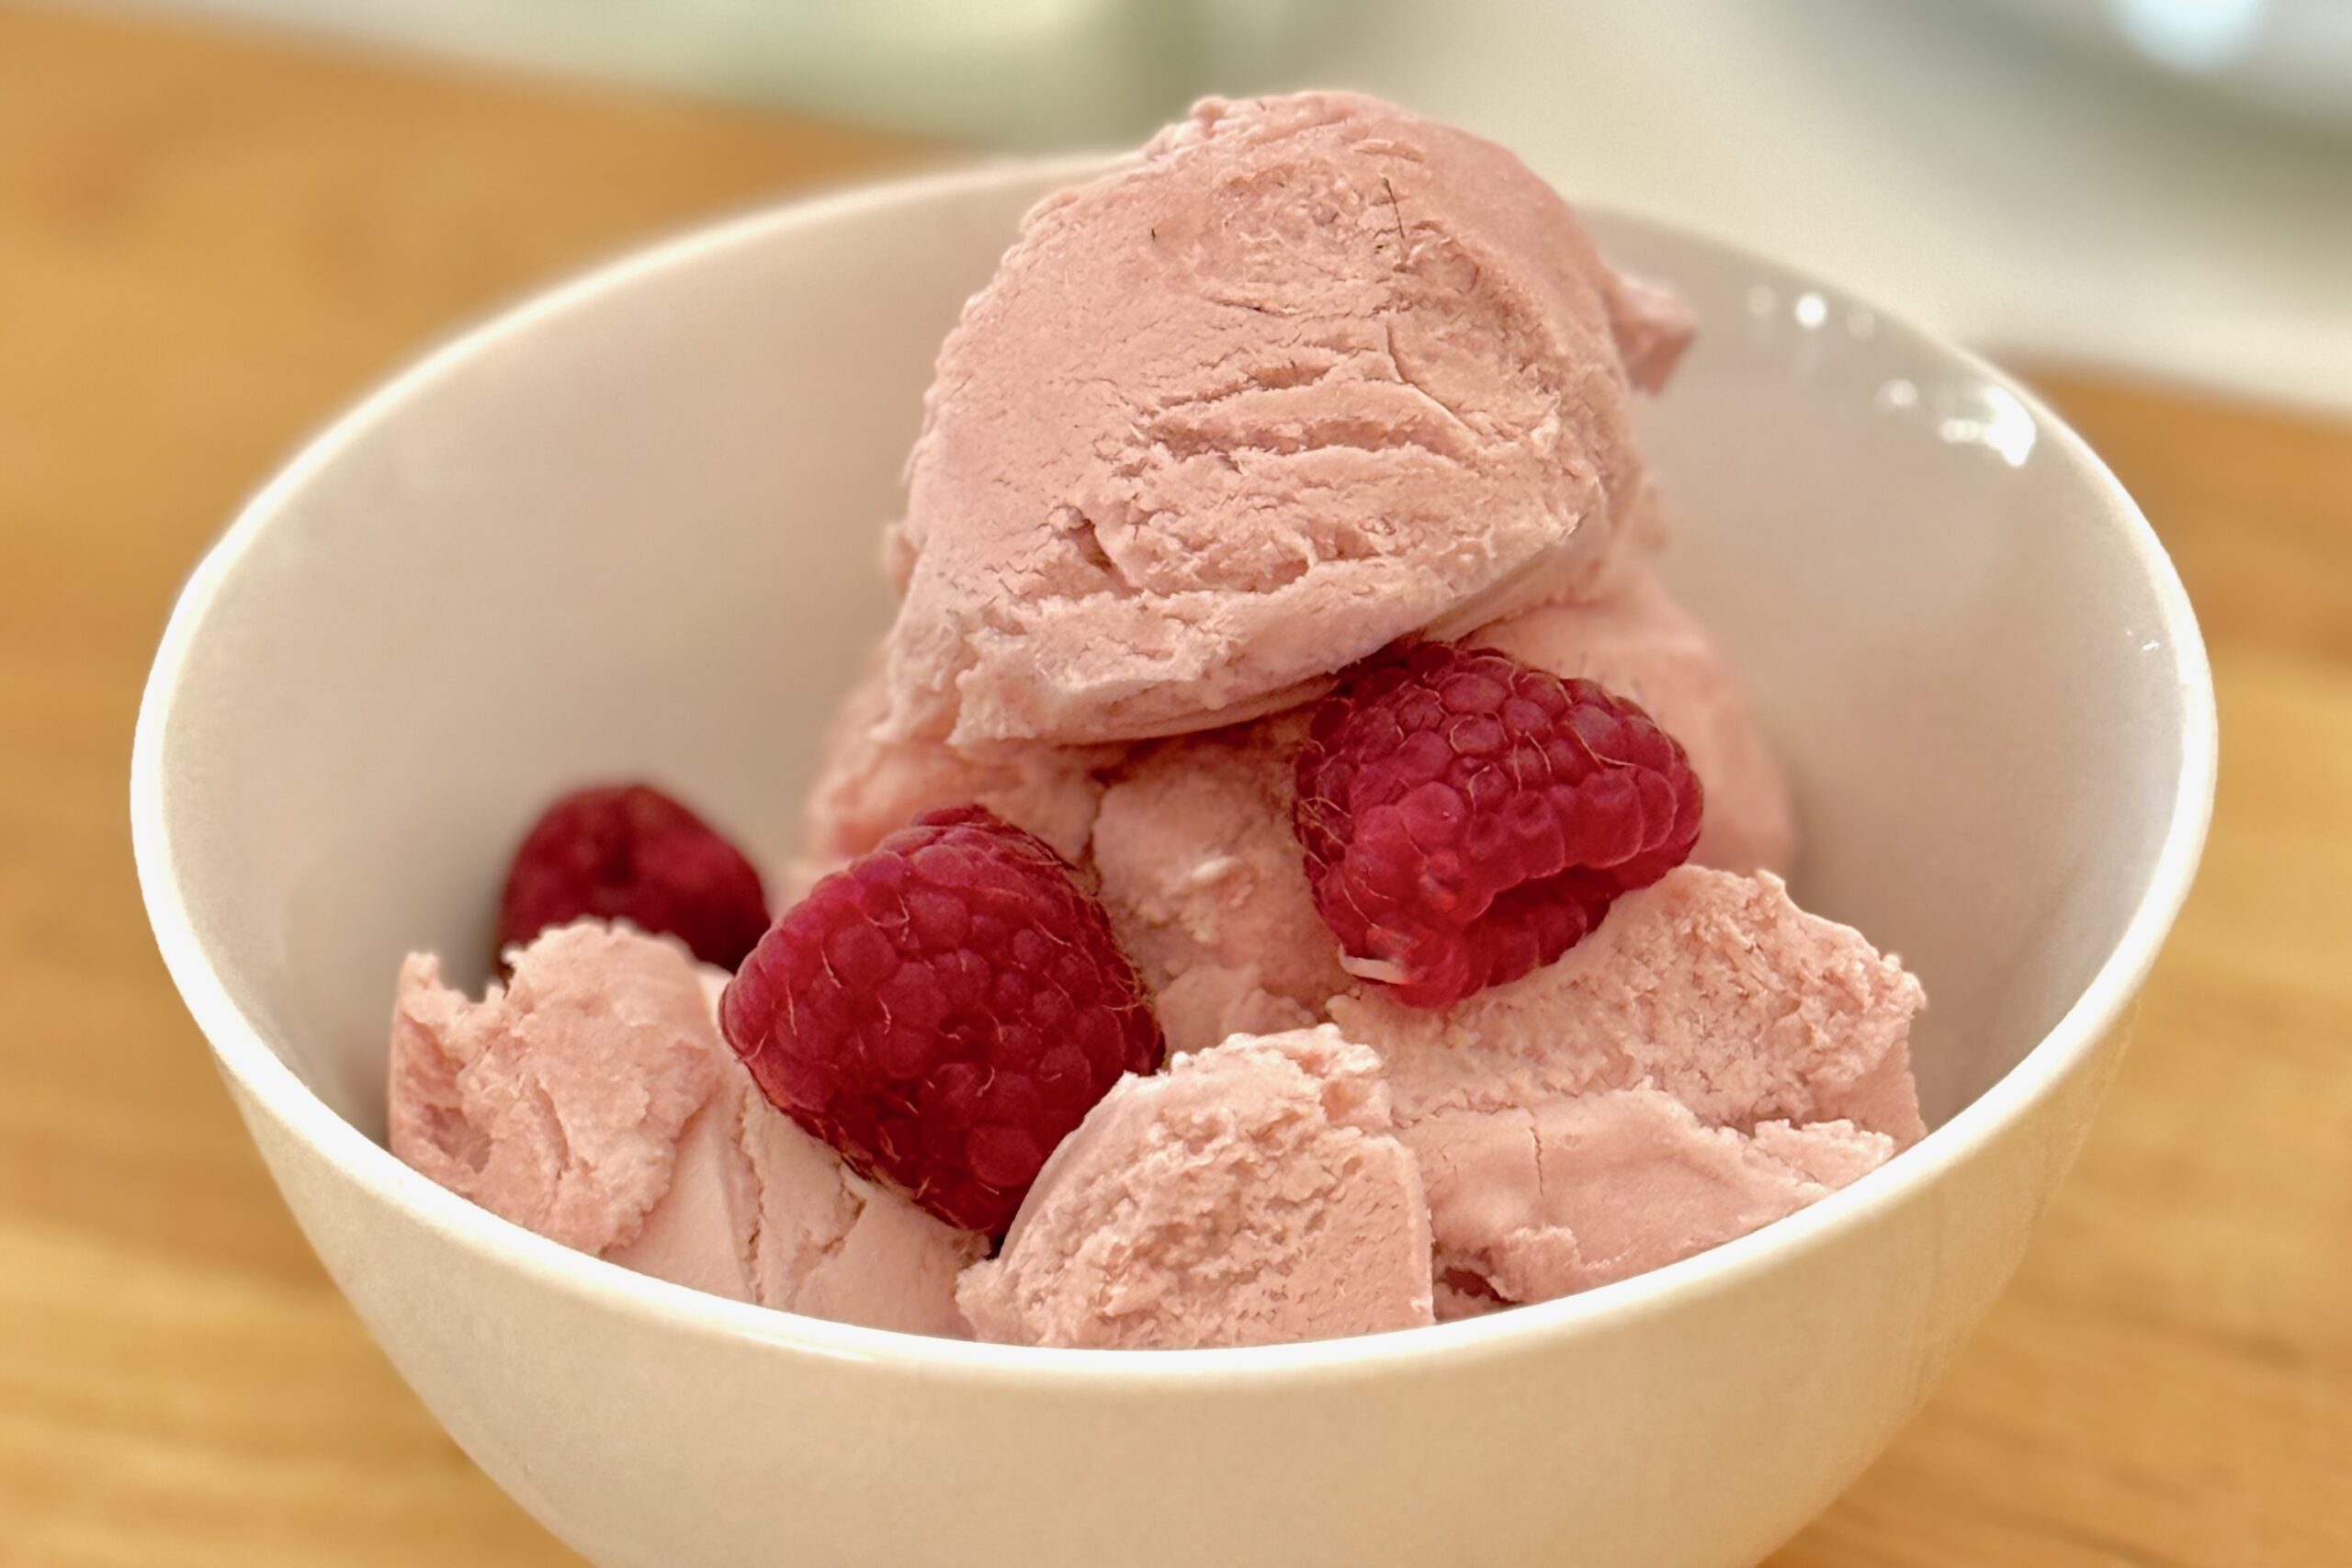
    This raspberry buttermilk ice cream is creamy, tangy, and fruit-forward. The rich custard base is tempered carefully to avoid any eggy flavor, while the buttermilk adds refreshing tartness that enhances the bright, fresh taste of raspberries. Inspired by a recipe shared by our friend Holly (her version here), this variation delivers a silky, balanced ice cream with just the right mix of sweetness and tang.


    Ingredients

    Custard Base:

    • 3 large egg yolks
    • ¾ cup sugar
    • 1 cup milk
    • 1 cup heavy cream
    • 1 cup cold buttermilk
    • ½ tsp vanilla extract

    Raspberry Purée:

    • 1½ cups fresh or frozen raspberries
    • 2 tbsp sugar (adjust to taste)
    • ½ tsp lemon juice (optional, brightens flavor)

    Directions

    Prepare the Raspberry Purée

    In a small saucepan, combine raspberries, sugar, and lemon juice. Cook over medium heat, stirring occasionally, until the berries break down and the mixture thickens slightly (about 5–7 minutes). Strain through a fine-mesh sieve to remove seeds. Cool completely.

    Prepare the Custard Base

    In a medium saucepan, heat the milk and sugar over medium heat until steaming (do not boil). In a separate bowl, whisk egg yolks until smooth. Slowly pour about ½ cup of the hot milk into the yolks while whisking constantly to temper. Return the mixture to the saucepan.

    Cook the Custard

    Cook over medium-low heat, stirring constantly, until the mixture thickens slightly and coats the back of a spoon (170–175°F / 77–79°C). Do not boil. Immediately strain the custard through a fine-mesh sieve into a bowl set over an ice bath. Stir until cooled to room temperature.

    Chill & Combine

    Once completely cool, stir in the heavy cream, buttermilk, vanilla, and raspberry purée. Refrigerate at least 4 hours or overnight.

    Freeze

    Churn in an ice cream maker according to the manufacturer’s instructions. Transfer to a freezer-safe container and freeze until firm, about 4–6 hours.


    Notes

    Preparation

    • Keep the custard below 175°F / 79°C to avoid eggy flavor and preserve raspberry aroma.
    • Strain both the purée and the custard for a silky, seed-free texture.
    • Adjust sugar based on the sweetness of your raspberries.

    Serving Suggestions

    • Serve with fresh raspberries or a raspberry coulis.
    • Top with crushed shortbread or vanilla wafers for crunch.
    • Pairs beautifully with lemon bars or angel food cake.

    Make-Ahead & Storage

    • Raspberry purée can be made 2–3 days ahead and refrigerated.
    • Custard base can be refrigerated up to 2 days before churning.
    • Store churned ice cream up to 1 week in an airtight container.
    • Let soften 5–10 minutes before serving.
  • Hot Fudge Sauce

    Hot Fudge Sauce

    This classic hot fudge sauce delivers the rich, chewy texture and glossy finish of an old-fashioned ice cream parlor fudge. Thick and silky when warm, it sets with just a hint of chew where it meets cold ice cream—perfect for sundaes or swirling into homemade ice cream. A small batch of true nostalgia, made from real chocolate, cocoa, and butter.


    Ingredients

    • ½ cup sugar
    • ⅓ cup light corn syrup
    • ⅓ cup water (for chewier texture, reduce to ¼ cup)
    • ¼ cup Dutch-process cocoa powder
    • 2 oz dark chocolate (60–70%), finely chopped
    • 2 tbsp unsalted butter
    • ¼ tsp vanilla extract
    • pinch table salt

    Directions

    Make the Fudge Base

    In a small saucepan, whisk together the sugar, corn syrup, water, and cocoa powder until smooth. Bring to a gentle boil over medium heat, stirring constantly. Continue cooking 3–5 minutes, until the mixture thickens slightly and develops a glossy sheen. Longer cooking creates a chewier, old-fashioned texture.

    Finish the Sauce

    Remove from heat and whisk in the chopped chocolate, butter, vanilla, and salt until melted and smooth. Avoid excessive stirring as the sauce cools to maintain gloss and elasticity.

    Cool & Store

    Let cool to your preferred consistency before using. The sauce thickens as it cools but should remain spoonable. For nostalgic, chewy fudge, drizzle slightly warm over cold ice cream.


    Notes

    Preparation

    • For deeper chocolate flavor, increase chopped chocolate to 3 oz.
    • Cooking the syrup mixture longer produces a chewier, more traditional fudge texture.
    • If using natural cocoa instead of Dutch-process, add ⅛ tsp baking soda during heating to neutralize acidity and preserve smoothness.
    • Use dark chocolate between 60–70% cacao for ideal balance.

    Serving Suggestions

    • Drizzle over ice cream for a glossy, chewy hot fudge topping.
    • Layer into homemade ice cream as a ripple.
    • Serve warm over brownies, cheesecake, or banana splits.
    • Pairs beautifully with peppermint, peanut butter, vanilla, or coffee ice creams.

    Make-Ahead & Storage

    • Store in a sealed jar up to 2 weeks.
    • Warm gently before serving using a double boiler or short microwave bursts.
    • If too thick after chilling, whisk in 1–2 tsp warm cream or milk to loosen.
  • Speculoos Ribbon Ice Cream

    Speculoos Ribbon Ice Cream

    I first fell in love with speculaas while living in The Netherlands—those crisp, caramelized cookies scented with cinnamon, nutmeg, and clove were unlike anything I’d tasted before. Though the rest of our family has only visited, our Dutch and German ancestry, and our holiday traditions, have long reflected this heritage. Each Christmas, we bake homemade speculaas as part of our celebration, their aroma filling the house with warm spice and nostalgia. This ice cream captures that same spirit in a creamy, elegant dessert: a smooth vanilla–buttermilk base swirled with ribbons of cookie butter and flecked with crushed speculaas for texture and depth.


    Ingredients

      Ice Cream Base

    • 2 cups heavy cream
    • ½ cup whole milk
    • ½ cup buttermilk (added after cooking)
    • ½ cup sugar
    • 5 egg yolks
    • ½ tsp vanilla extract
    • pinch table salt
    • ⅛ tsp cinnamon (optional)
    • pinch nutmeg (optional)
    • Mix-Ins

    • ⅔ cup Speculoos or Biscoff cookie butter
    • ½ cup crushed speculaas or Biscoff cookies (for layering and garnish)

    Directions

    Make the Custard Base

    In a saucepan, warm the milk, cream, sugar, salt, and optional spices over medium heat until steaming and the sugar dissolves.


    Temper the Yolks

    In a medium bowl, whisk the egg yolks until thick and pale. Slowly temper with ½ cup of the hot milk mixture, whisking constantly, then return all to the saucepan.


    Cook the Custard

    Cook gently over low heat, stirring constantly, until the custard coats the back of a spoon (170–175°F / 77–80°C). Do not boil.


    Finish & Chill

    Strain through a fine mesh sieve into a clean bowl. Stir in the vanilla. Allow to cool slightly, then stir in the buttermilk. Chill thoroughly, preferably overnight.


    Churn & Layer

    Churn the chilled base in an ice cream maker according to the manufacturer’s directions.

    Warm the cookie butter just until pourable. As you transfer the churned ice cream to its container, alternate layers of ice cream, drizzled cookie butter, and crushed cookies. Swirl gently with a butter knife without overmixing. Freeze until firm.


    Notes

    Preparation

    • The buttermilk brightens the flavor and balances the sweetness of the cookie butter.
    • Use whole milk instead of buttermilk for a richer, sweeter ice cream.
    • Add a pinch of cinnamon, clove, or ginger for extra “speculaas” aroma.
    • Reserve some crushed cookies for topping—they soften over time in the ice cream.

    Serving Suggestions

    • Top with freshly crushed speculaas for added crunch.
    • Serve with warm caramel sauce or cinnamon whipped cream.
    • Excellent alongside apple pie, poached pears, or Dutch-style oliebollen.

    Variations

    • Cookie Butter Crunch: Toss crushed cookies with a little melted butter and freeze before layering.
    • Swirl Boost: Melt an additional ¼ cup cookie butter and drizzle through the top third before freezing.
    • Speculoos Latte: Add 1 tsp espresso powder to the warm custard base.

    Make-Ahead & Storage

    • Refrigerate the unchurned custard for up to 2 days.
    • Store churned ice cream airtight for up to 1 week.
    • Let soften at room temperature 5–10 minutes before serving.
  • Chocolate Hazelnut Ice Cream

    Chocolate Hazelnut Ice Cream

    Creamy and decadent, this chocolate hazelnut ice cream blends the richness of dark chocolate and toasted hazelnuts with the smooth sweetness of Nutella. A silky custard base creates luxurious texture, while cocoa deepens the chocolate flavor and balances the sweetness beautifully. It’s a family favorite—one that every member agrees on without debate—its velvety texture and nutty aroma reminding us of fine Belgian chocolates. Whether shared after Sunday dinner or enjoyed quietly by the fire, this ice cream captures both indulgence and comfort in every scoop.


    Ingredients

    Chocolate Custard Base:

    • 2 cups heavy cream
    • 1 cup whole milk
    • ½ cup sugar, divided
    • 5 egg yolks
    • ½ tsp vanilla extract
    • ½ cup Nutella (or other chocolate-hazelnut spread)
    • 2 tbsp unsweetened cocoa powder
    • pinch table salt
    • ½ cup toasted hazelnuts, coarsely chopped (for folding in or topping; optional)

    Directions

    Warm the Chocolate Base

    In a saucepan, whisk together the milk, cream, ¼ cup sugar, cocoa powder, and salt. Warm over medium heat until steaming and the sugar dissolves.

    Make the Custard

    In a medium bowl, whisk the egg yolks with the remaining ¼ cup sugar until pale and thick. Slowly temper with ½ cup of the warm chocolate mixture while whisking constantly, then return everything to the saucepan.

    Cook over low heat, stirring constantly, until the custard coats the back of a spoon (170–175°F / 77–80°C). Do not boil.

    Finish & Chill

    Strain through a fine mesh sieve into a clean bowl. Whisk in vanilla and Nutella until smooth and fully blended. Chill thoroughly, preferably overnight.

    Churn & Add Hazelnuts

    Churn the chilled base in an ice cream maker according to manufacturer’s instructions. Fold in toasted hazelnuts or use them as a topping when serving.


    Notes

    Preparation

    • For richer chocolate flavor, replace ¼ cup of the Nutella with 2 oz melted dark chocolate (60–70% cacao).
    • For a smoother texture, add ⅛ tsp xanthan gum to the warm base before chilling.
    • Straining ensures a velvety custard and removes any curdled bits.

    Serving Suggestions

    • Top with toasted hazelnuts or shaved dark chocolate.
    • Pair with mocha brownies, vanilla shortbread, or salted caramel sauce.
    • Serve with fresh berries for a bright contrast.

    Make-Ahead & Storage

    • Refrigerate the custard base up to 2 days before churning.
    • Store churned ice cream for up to 1 week for best texture.
    • Let soften 5–10 minutes at room temperature before serving.
  • Dark Chocolate Almond Fudge Ribbon Ice Cream

    Dark Chocolate Almond Fudge Ribbon Ice Cream

    Deep, velvety chocolate ice cream brightened with a touch of espresso and balanced by creamy buttermilk, swirled with a glossy chocolate–almond fudge ribbon that stays silky even when frozen. The result is rich, spoonable, and layered with dark chocolate flavor and fragrant almond.


    Ingredients

      Chocolate Custard Base

    • 2 cups heavy cream
    • 1 cup whole milk
    • ½ cup sugar, divided
    • 5 egg yolks
    • 4 oz bittersweet chocolate (60–70%), finely chopped
    • 2 tbsp unsweetened cocoa powder
    • ½ tsp instant espresso powder
    • ½ tsp vanilla extract
    • pinch table salt
    • ½ cup cold buttermilk (added after cooking)
    • Chocolate–Almond Fudge Ribbon

    • ½ cup sugar
    • ⅓ cup unsweetened cocoa powder (Dutch-process recommended)
    • ⅓ cup heavy cream
    • ¼ cup water
    • 2 tbsp light corn syrup
    • 2 tbsp butter
    • ¾–1 tsp almond extract (to taste)
    • ½ tsp vanilla extract
    • pinch table salt
    • Optional Garnish

    • Chopped toasted almonds
    • Flaky sea salt

    Directions

    Prepare the Chocolate Custard Base

    In a saucepan, whisk together the milk, cream, cocoa powder, ¼ cup sugar, espresso powder, and salt. Warm over medium heat until steaming and the sugar dissolves. Remove from heat and whisk in the chopped chocolate until smooth.

    In a separate bowl, whisk the egg yolks with the remaining ¼ cup sugar until thick and pale. Slowly temper with ½ cup of the warm chocolate mixture, whisking constantly, then return everything to the saucepan.

    Cook over low heat, stirring constantly, until the custard coats the back of a spoon (170–175°F / 77–80°C). Do not boil. Strain through a fine mesh sieve into a clean bowl, then stir in the vanilla. Allow to cool slightly, then stir in the cold buttermilk. Chill completely, preferably overnight.

    Make the Chocolate–Almond Fudge Ribbon

    In a small saucepan, whisk together sugar, cocoa powder, water, and corn syrup. Bring to a gentle simmer and cook for 1–2 minutes. Remove from heat; whisk in butter, cream, vanilla, almond extract, and salt. Let cool completely, then refrigerate until thickened but still pourable.

    Churn and Layer

    Churn the chilled chocolate custard in an ice cream maker according to the manufacturer’s instructions. As you transfer it to a container, alternate layers of ice cream and thin ribbons of the fudge sauce. Swirl lightly with a butter knife for a marbled effect without overmixing. Freeze 4–6 hours until firm.


    Notes

    Preparation

    • Chill the fudge ribbon fully before layering; warm sauce will sink instead of ribboning.
    • For a deeper chocolate profile, replace 1 tbsp cocoa with 1 tbsp Dutch-process cocoa.
    • Increase almond extract up to 1 tsp to intensify almond flavor.

    Serving Suggestions

    • Top with chopped toasted almonds for crunch.
    • Add flaky sea salt for contrast and brightness.
    • Serve with biscotti, chocolate cake, or espresso in an affogato.

    Variations

    • Mocha Almond: Increase espresso powder to 1 tsp.
    • Black Forest: Replace almond extract with kirsch; swirl in cherry compote.
    • Chocolate–Orange: Add ½ tsp orange zest; replace almond extract with orange extract.

    Make-Ahead & Storage

    • Refrigerate churn-ready custard up to 48 hours.
    • Store churned ice cream up to 1 week for best texture.
    • Let stand 5–10 minutes before serving for optimal scoopability.
  • Cilantro Lime Rice (Instant Pot)

    Cilantro Lime Rice (Instant Pot)

    This Instant Pot version of Cilantro-Lime Rice delivers the same bright, aromatic flavor as the stovetop method in a fraction of the time. Jasmine rice cooks up fluffy and tender with perfect lime-cilantro balance—ideal for tacos, fajitas, enchiladas, or grilled meats. Click here for the stovetop version of this recipe.


    Ingredients

    • 1 cup jasmine rice, rinsed and drained
    • 1 tbsp butter or olive oil
    • 1 cup chicken broth (or water + ¼ tsp salt)
    • Zest of 1 lime
    • 1–1½ tbsp fresh lime juice (added after cooking)
    • ½ cup cilantro leaves, finely chopped
    • ⅛ tsp sugar (optional, to balance acidity)
    • Salt to taste

    Optional Add-Ins

    • 1 small clove garlic, minced (sauté before adding rice)
    • 1 bay leaf (for subtle herbal aroma)

    Directions

    Rinse the Rice

    Rinse jasmine rice in a fine-mesh strainer under cold water until the water runs mostly clear to remove excess starch. Drain well.

    Sauté

    Set the Instant Pot to Sauté. Melt butter or heat oil, then add garlic if using. Stir in drained rice and toast for 1–2 minutes until lightly fragrant.

    Press Cancel to stop the sauté function.

    Pressure Cook

    Add chicken broth and a pinch of salt. Stir once to distribute evenly, then secure the lid and set the valve to Sealing.

    Cook on High Pressure for 3 minutes. Allow pressure to release naturally for 10 minutes, then manually release any remaining steam.

    Finish the Rice

    Fluff the rice gently with a fork. Stir in lime zest, lime juice, cilantro, and sugar (if using). Taste and adjust seasoning with more salt or lime juice as needed.

    Let rest uncovered for 2–3 minutes to allow excess steam to escape before serving.

    Serve

    Serve warm as a side or base for tacos, fajitas, enchiladas, or grilled meats. Garnish with additional cilantro and lime zest if desired.


    Notes

    Preparation

    • Use a 1:1 ratio of rice to liquid for the Instant Pot—no evaporation means less liquid is required than on the stove.
    • Do not add lime juice before pressure cooking; acid interferes with proper rice hydration.
    • Natural release for 10 minutes ensures fluffy, evenly cooked grains.
    • Let rice rest uncovered for a few minutes after fluffing to release steam and maintain perfect texture.

    Serving Suggestions

    • Pairs beautifully with tacos, fajitas, grilled shrimp, or chicken.
    • Use as a flavorful base for burrito bowls or enchilada platters.
    • For color and brightness, top with extra cilantro and a sprinkle of lime zest before serving.

    Variations

    • Subtle Coconut Version: Replace ¼ cup of broth with ¼ cup unsweetened coconut milk (use ¾ cup broth + ¼ cup coconut milk). Adds gentle richness and a faint coconut aroma while maintaining lime-cilantro brightness.
    • Coconut-Forward Version: Replace ½ cup of broth with ½ cup coconut milk (use ½ cup broth + ½ cup coconut milk). Yields a creamier, tropical variation—use 2 tbsp lime juice and slightly more salt to balance flavor.
    • Use coconut versions for fusion dishes like Korean Pulled Pork Tacos, jerk chicken, or grilled shrimp where a creamy contrast enhances spice and smoke.
    • For added aromatics, sauté a small piece of shallot or a few cilantro stems with the rice.

    Make-Ahead & Storage

    • Cooked rice can be held warm in the Instant Pot for up to 30 minutes before adding lime and cilantro.
    • Refrigerate leftovers in an airtight container for up to 3 days; reheat with a splash of broth or water to restore moisture.
    • Not recommended for freezing—fresh cilantro and lime flavor are best enjoyed fresh.
  • Mexican Rice

    Mexican Rice

    Fluffy, richly flavored Mexican rice made in the Instant Pot without the risk of burning. Toasted rice builds a subtle nuttiness before sautéed onion and garlic deepen the base, and a homemade Mexican Tomato Sauce brings vibrant color, gentle heat, and balanced acidity. Instead of relying on shortcuts or canned blends alone, this method layers flavor intentionally — blooming the aromatics, coating each grain in oil, and carefully controlling the liquid ratio so the rice steams rather than stews. The result is tender, separate grains with that signature restaurant-style texture and a savory backbone strong enough to stand alongside tacos, Enchiladas, Carnitas, or grilled Carne Asada — yet balanced enough to enjoy on its own.


    Ingredients

    • 3 cups basmati rice, rinsed and drained
    • 3 tbsp avocado oil
    • 1 tbsp lard (optional, for richness)
    • ½ tsp annatto powder (optional, for color)
    • 1½ cups prepared Mexican Tomato Sauce
    • 2¾ cups chicken broth
    • ½ tsp table salt
    • ½ medium onion, diced
    • 1–2 jalapeños, diced
    • 1 tbsp butter (for finishing)
    • fresh cilantro, chopped, for garnish
    • lime wedges, for serving

    Directions

    Rinse the Rice

    Place rice in a fine-mesh strainer and rinse under cold running water for 1–2 minutes, or until the water runs mostly clear. Drain well.

    Sauté the Aromatics

    Heat a deep sauté pan over medium-high heat; add 1 tbsp avocado oil. When shimmering, add onion and jalapeño. Sauté until the edges of the onion begin to brown and the jalapeño softens slightly. Transfer the mixture to a bowl and set aside.

    Toast the Rice

    Add remaining 2 tbsp avocado oil and the lard (if using) to the same pan. Once the oil is hot, add the drained rice and cook, stirring occasionally, until lightly golden and fragrant, 5–7 minutes.

    Stir in annatto powder (if using) for 30 seconds, just until color deepens. Deglaze the pan with a few tablespoons of chicken broth, scraping up any toasted bits. Transfer the rice to the Instant Pot.

    Layer and Pressure Cook

    Pour the remaining chicken broth into the Instant Pot over the rice. Sprinkle in salt but do not stir. Gently pour the Mexican Tomato Sauce over the top—again, do not stir. This layering prevents the thicker sauce from touching the bottom and triggering a burn warning.

    Secure the lid and set to Pressure Cook – High for 3 minutes. Allow pressure to release naturally for 10 minutes with Keep Warm on, then turn off Keep Warm and release any remaining pressure manually.

    Fluff and Finish

    Let the rice rest for 2–3 minutes after opening the lid. Fluff gently with a fork, then fold in the reserved jalapeño mixture and the butter. Allow residual heat to melt the butter and evenly coat the grains.

    Let rest uncovered for 3–5 minutes before serving to release excess steam and preserve texture.

    Serve

    Garnish with chopped cilantro and serve with lime wedges. For a stronger tomato flavor, drizzle with additional Mexican Tomato Sauce before serving.


    Notes

    Preparation

    • Total liquid increased to 4¼ cups (2¾ cups broth + 1½ cups sauce) for even cooking and no burn warnings.
    • Layer liquids—broth first, sauce last—and avoid stirring before cooking.
    • Deglaze the pan after toasting the rice to remove any stuck bits that can trigger burn errors.
    • Natural release for 10 minutes ensures fluffy, separate grains without overcooking.
    • Rest uncovered briefly after fluffing to let excess steam escape for perfect texture.

    Serving Suggestions

    Variations

    • Substitute vegetable broth for chicken broth for a vegetarian version.
    • For deeper color and richness, always include annatto and lard.
    • For milder heat, use just one jalapeño or remove the seeds before dicing.

    Make-Ahead & Storage

    • This rice reheats beautifully and maintains texture when stored properly.
    • Refrigerate in an airtight container up to 4 days.
    • Reheat gently on the stove or in the microwave with a splash of broth to restore moisture.
    • Freeze up to 2 months; thaw overnight in the refrigerator before reheating.
  • Steak Doneness & Target Temperature Guide

    Steak Temperatures: When to Remove Steaks From the Grill

    Doneness Level Remove From Heat At Rested Target Temp
    Rare 118°F (48°C) 120°F (50°C)
    Medium Rare 125°F (52°C) 130°F (55°C)
    Medium 135°F (58°C) 140°F (60°C)
    Medium Well 144°F (62°C) 150°F (65°C)
    Well Done 154°F (68°C) 160°F (70°C)
  • Beer  Battered Halibut

    Beer Battered Halibut

    Each year I attended the same trade show in London. While I love the city, I didn’t love traveling without my wife—especially this trip because it always fell during her birthday week. The year we decided she’d come along was eventful, to say the least. But before we get to London, some backstory.

    Pregnancy was not something that came easy for us. A lot of very fun attempts, but at least to that point, no resulting pregnancies. Before we left I shared a dream where while in London she’d told me she was pregnant. We laughed as we continued to prepare for the trip.

    Wile I worked the show, my beautiful bride explored the city. On her birthday, we met up after my work day to celebrate with a delicious dinner followed by the theatre to see ‘Les Misérables’—an unforgettable night!

    Back at the hotel, she disappeared into the bathroom. Moments later I heard her voice, “I think we’re pregnant.” I laughed—until she rounded the corner with a pregnancy test, the two pink lines unmistakable. That London trip became our first family journey with our two sons. Later, five and seven years after the whirlwind of welcoming twins, we were blessed with two beautiful daughters, completing our little family.

    As a remembrance of our London getaway, and our life-changing news, I created this recipe; my not-so-authentic version of fish and chips.


    Ingredients

    • 4–6 halibut filet portions
    • 1½ cups (185g) all-purpose flour, plus extra for coating filets
    • 1¼ cups (160g) corn starch
    • 2 tsp baking powder
    • ½ tsp table salt
    • ½ tsp white pepper (optional)
    • 1 can (16 oz / 475 ml) light beer
    • Optional Batter Add-Ins:

      • garlic powder
      • onion powder
      • paprika
      • shoarma spice blend
      • Old Bay

    Directions

    Prepare the Fish:

    Preheat 2″ to 3″ of neutral oil in a skillet or deep fryer to 350º–375ºF. Coat cold halibut filets on all sides with flour; place on a wire rack set over a baking sheet and refrigerate.

    Make the Batter:

    In a large bowl, whisk together flour, corn starch, baking powder, salt, and white pepper. Whisk in enough ice-cold beer to reach the consistency of a thin pancake batter. Refrigerate the batter for 10 minutes to rest and chill.

    Fry the Halibut:

    Dip each filet into the chilled batter and allow excess to drip off. Fry for 1–2 minutes per side, or until crispy and deep golden brown.

    Transfer to a wire rack and immediately sprinkle lightly with salt. Allow the oil temperature to return to 350º–375ºF before frying the next batch.

    Serve hot with Belgian frites, tartar sauce, and/or malt vinegar.


    Notes

    Preparation

    • Keeping the fish cold is essential—cold fillets meeting hot oil creates the highest-crisp batter.
    • Use ice-cold beer. Colder batter expands more rapidly when fried, creating a lighter, airier crust.
    • Halibut works beautifully, but cod, haddock, or rockfish are excellent alternatives.
    • To prevent sticking, make sure your oil is at temp before adding the first piece.

    Serving Suggestions

    • Serve with tartar sauce, malt vinegar, or a squeeze of fresh lemon.
    • Belgian-style frites or hand-cut fries complement the crispy halibut perfectly.
    • A quick cabbage slaw with lemon and dill keeps the plate light and balanced.

    Variations

    • Add ½ tsp paprika or smoked paprika for a deeper color and warmth.
    • Shoarma spice or Old Bay give a fun twist while keeping the classic texture.
    • Substitute half the beer with sparkling water for an extra-light batter.
    • For heat, add a pinch of cayenne or chili powder.

    Make-Ahead & Storage

    Fish and chips are best eaten immediately, but here are some tips:

    • If needed, keep fried pieces warm on a wire rack in a 225ºF oven for up to 20 minutes.
    • Leftovers may be reheated in an air fryer at 375ºF for 4–6 minutes to restore crispness.
    • Batter can be mixed dry (without beer) up to 2 days ahead; just whisk in cold beer before frying.
  • Tartar Sauce

    Tartar Sauce

    This creamy, tangy tartar sauce comes together in minutes and tastes far fresher than anything store-bought. Bright citrus, briny capers, and herbs make it a perfect companion for fried fish, crab cakes, or roasted vegetables.


    Ingredients

    • 1 cup mayonnaise
    • ½ cup dill relish
    • 1 tbsp capers, rinsed and chopped
    • 1 tbsp fresh parsley (or 1 tsp dried)
    • 1 small shallot, finely chopped (or ½ tsp onion powder)
    • 1 tbsp lemon or lime juice
    • 1 tsp lemon or lime zest
    • 2 tsp Worcestershire sauce
    • 1 tsp Dijon mustard
    • ¼ tsp Tapatío hot sauce
    • salt & pepper, to taste
    • Optional Add-Ins

    • 1 tbsp fresh tarragon (or 1 tsp dried)
    • ½ tbsp fresh dill (or ½ tsp dried)
    • 1 tsp honey
    • ¼ cup crème fraîche or sour cream

    Directions

    Mix the Sauce

    Whisk together all ingredients in a bowl until well combined.

    Chill for at least 1 hour before serving to let the flavors meld.


    Notes

    Preparation

    • Please taste and adjust acidity—add more citrus juice if serving with rich fried foods.
    • For a chunkier texture, use whole dill pickles and hand-chop them instead of relish.
    • Fresh herbs brighten the sauce significantly, but dried herbs still work well.

    Serving Suggestions

    • Serve with Beer Battered Halibut, fish sticks, crab cakes, or shrimp.
    • Use as a spread for fish sandwiches or grilled chicken.
    • Try as a dip for roasted potatoes or fries.

    Variations

    • Swap dill relish for chopped cornichons for a sharper, French-style flavor.
    • Add a pinch of smoked paprika for a subtle smoky note.
    • Fold in a spoonful of crème fraîche for a lighter, silkier version.

    Make-Ahead & Storage

    • Keeps 4–5 days in the refrigerator in an airtight container.
    • Stir before serving, as some separation is normal.
    • Not suitable for freezing due to the mayonnaise base.
  • Espiau’s Vinaigrette

    Espiau’s Vinaigrette

    In the 1970s and 1980s, our family would frequently make the drive to Pomona to eat at Espiau’s Mexican Restaurant. At that time it was located on the west end of Holt. The restaurant dates back to the early 20th century and was founded by an early Pomona Valley pioneer. The business moved to Claremont in the 1990s and can still be found in the Claremont Village. Our family’s favorite dish there is the Tostada Salad. Their tostada is unique. Instead of salsa, theirs is topped with a vinaigrette. This recipe is my attempt to replicate their dressing.


    Ingredients

    • 1 cup red wine vinegar
    • 3 tbsp water
    • ¾ cup vegetable oil
    • ⅓ cup sugar
    • 2 tbsp Lowry’s seasoned salt
    • 1 tbsp onion powder
    • ¼ tsp black pepper, finely ground
    • ¼ tsp dried oregano

    Directions

    Mix the Dressing

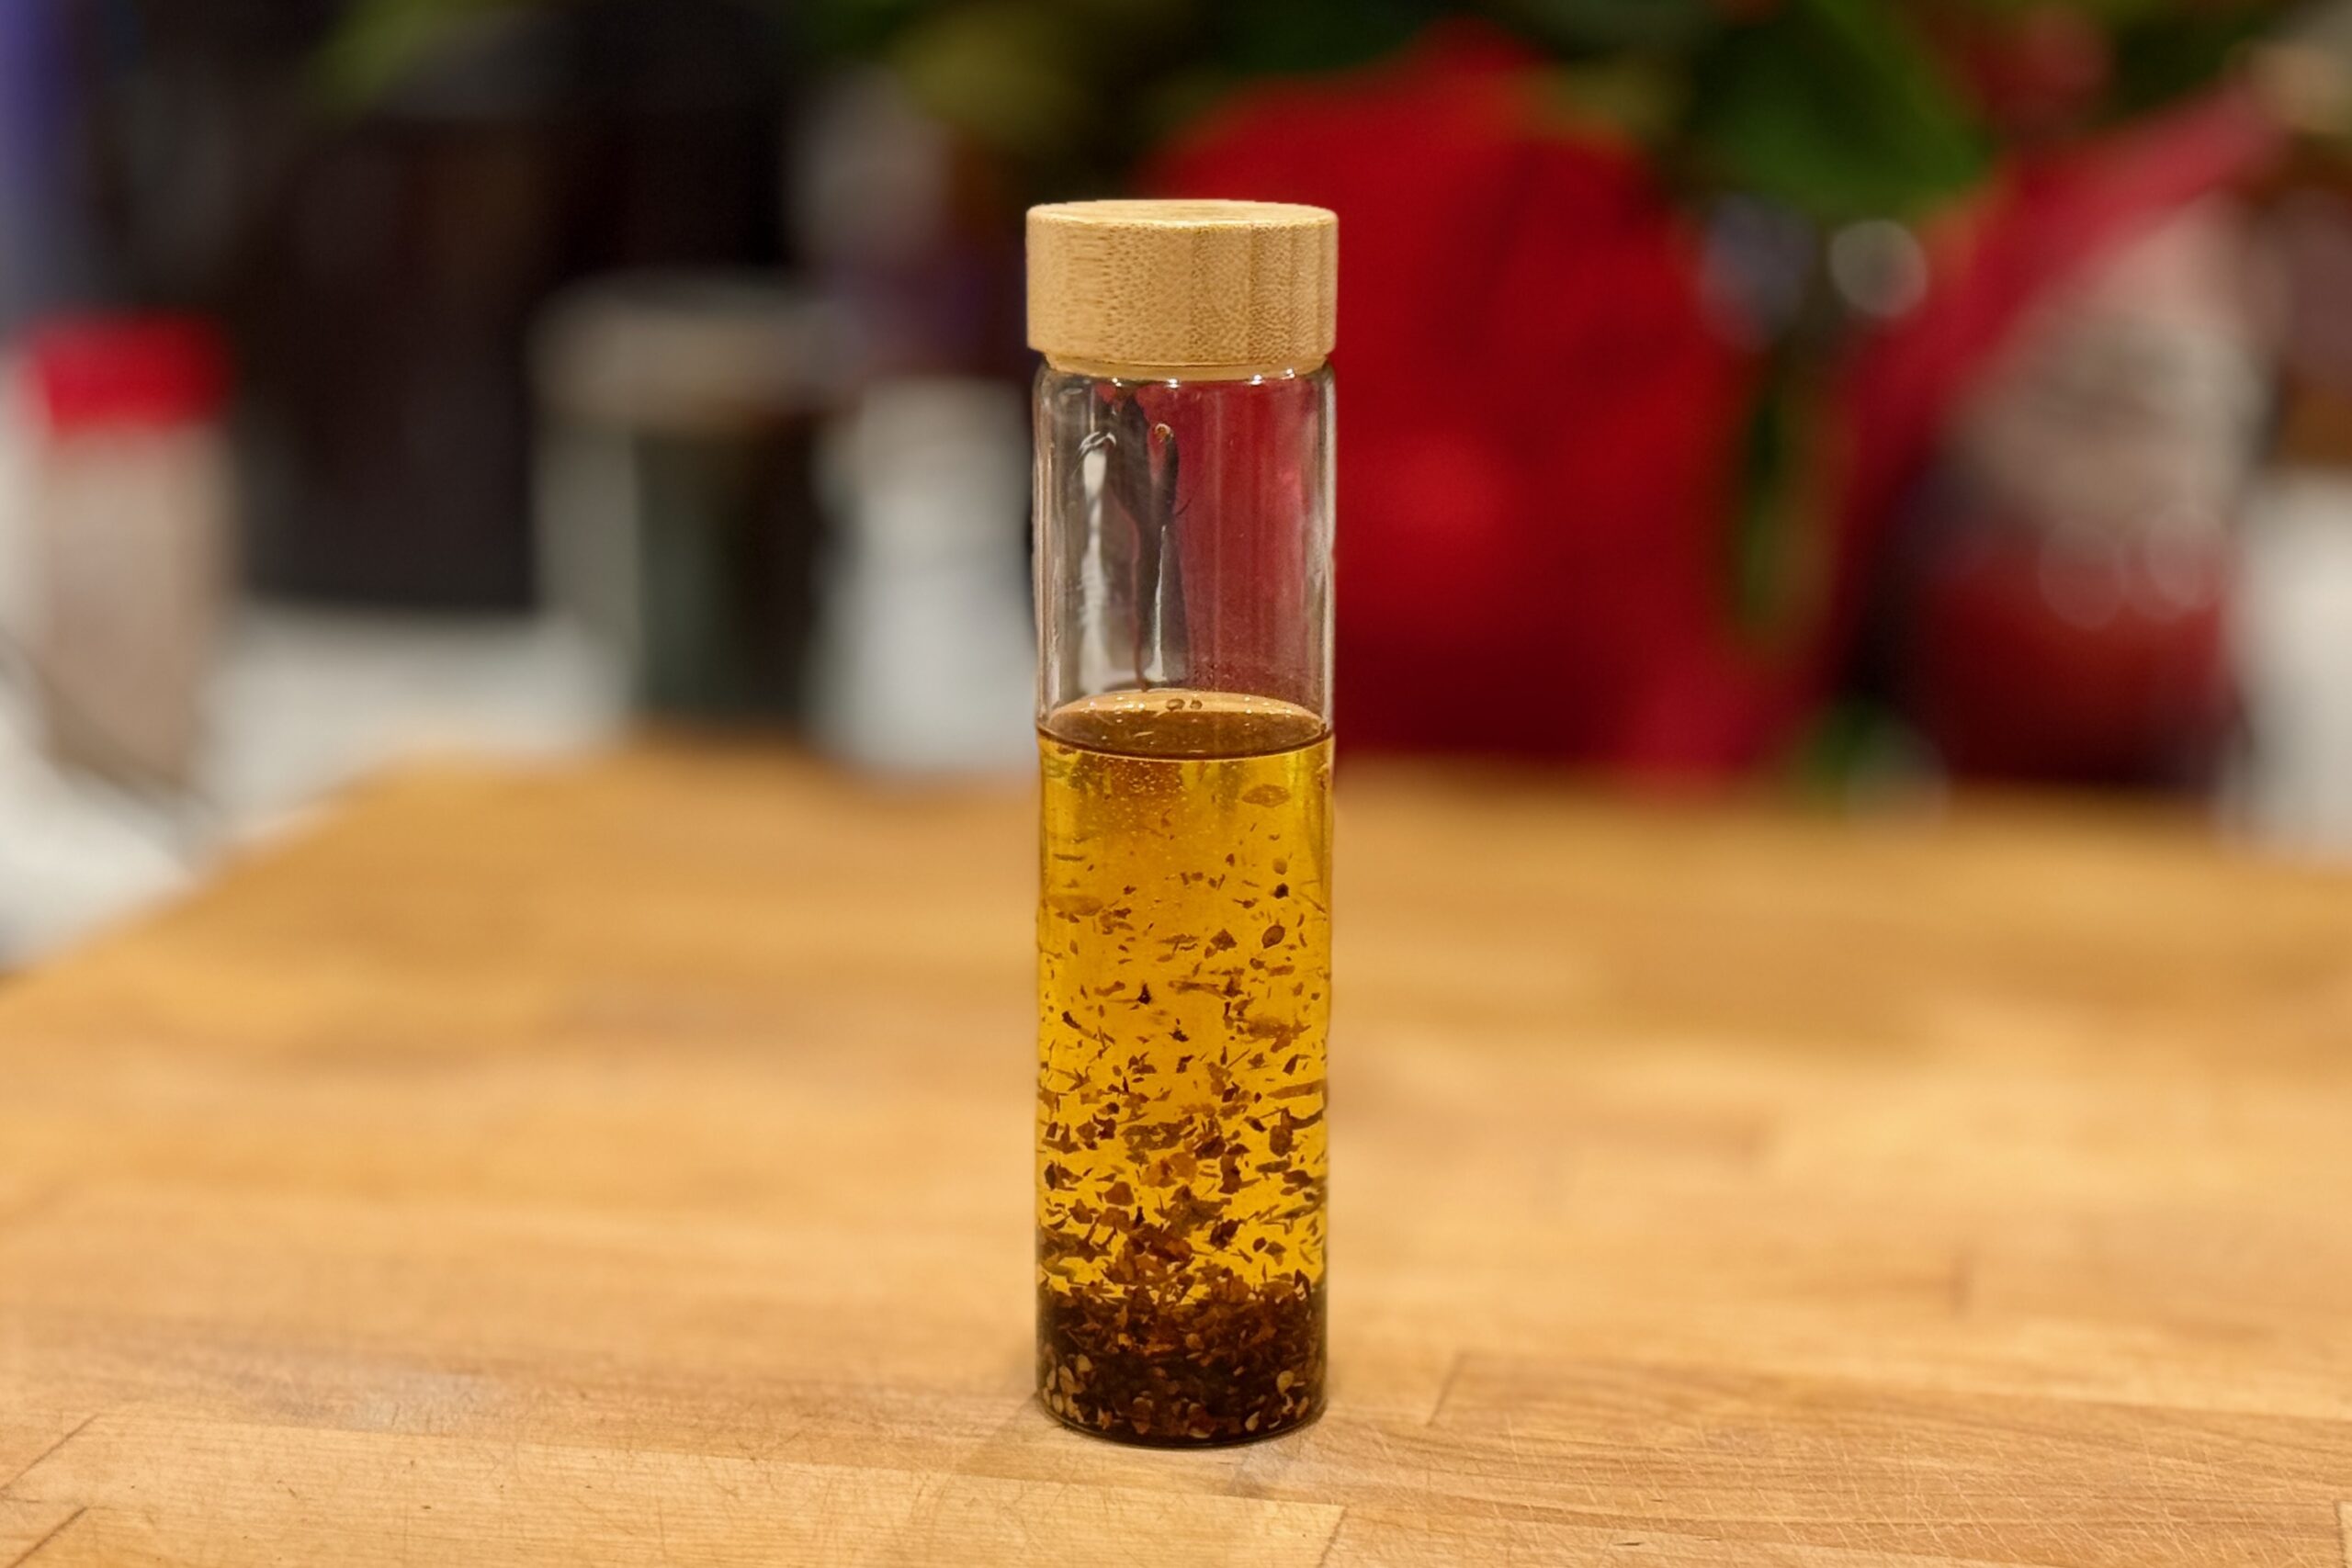
    Place all ingredients in a jar; shake to combine. Allow several hours for flavors to meld. Store in refrigerator.


    Notes

    Preparation

    Extra-virgin olive oil or avocado oil may be used, but both become semi-solid in the refrigerator. Let the dressing rest at room temperature or place the sealed jar under warm water until fluid again.

    Shake well before each use—the sugar and spices will naturally settle since this vinaigrette contains no emulsifiers.

    The flavor improves dramatically after resting. Overnight is ideal, allowing the oregano to bloom, the vinegar to soften, and the seasoning to fully dissolve.

    Serving Suggestions

    To mimic Espiau’s tostada experience, allow the vinaigrette to warm slightly before serving. The aromatics brighten when the dressing is not ice-cold.

    Excellent on tostadas, chopped salads, shredded cabbage, grilled chicken salads, sliced cucumbers, tomatoes, and mixed vegetables.

    Variations

    For a low-calorie or low-carbohydrate option, substitute monk fruit sweetener. Start with the full ⅓ cup equivalent and adjust to taste after resting.

    For a sharper dressing, increase black pepper or add a pinch of crushed red pepper flakes.

    Make-Ahead & Storage

    This vinaigrette keeps well for 7–10 days in the refrigerator. The high acidity helps preserve the flavor, though it is best within the first week.

    If the dressing tastes too sharp immediately after mixing, allow more resting time—its acidity mellows as the aromatics hydrate.

  • Poutine

    Poutine

    Poutine is the ultimate Canadian comfort classic—crispy hot fries, soft squeaky cheese curds, and rich gravy melting everything into one irresistible bite. It’s simple, hearty, and perfect for nights when you want something warm and satisfying without overthinking the prep.


    Ingredients

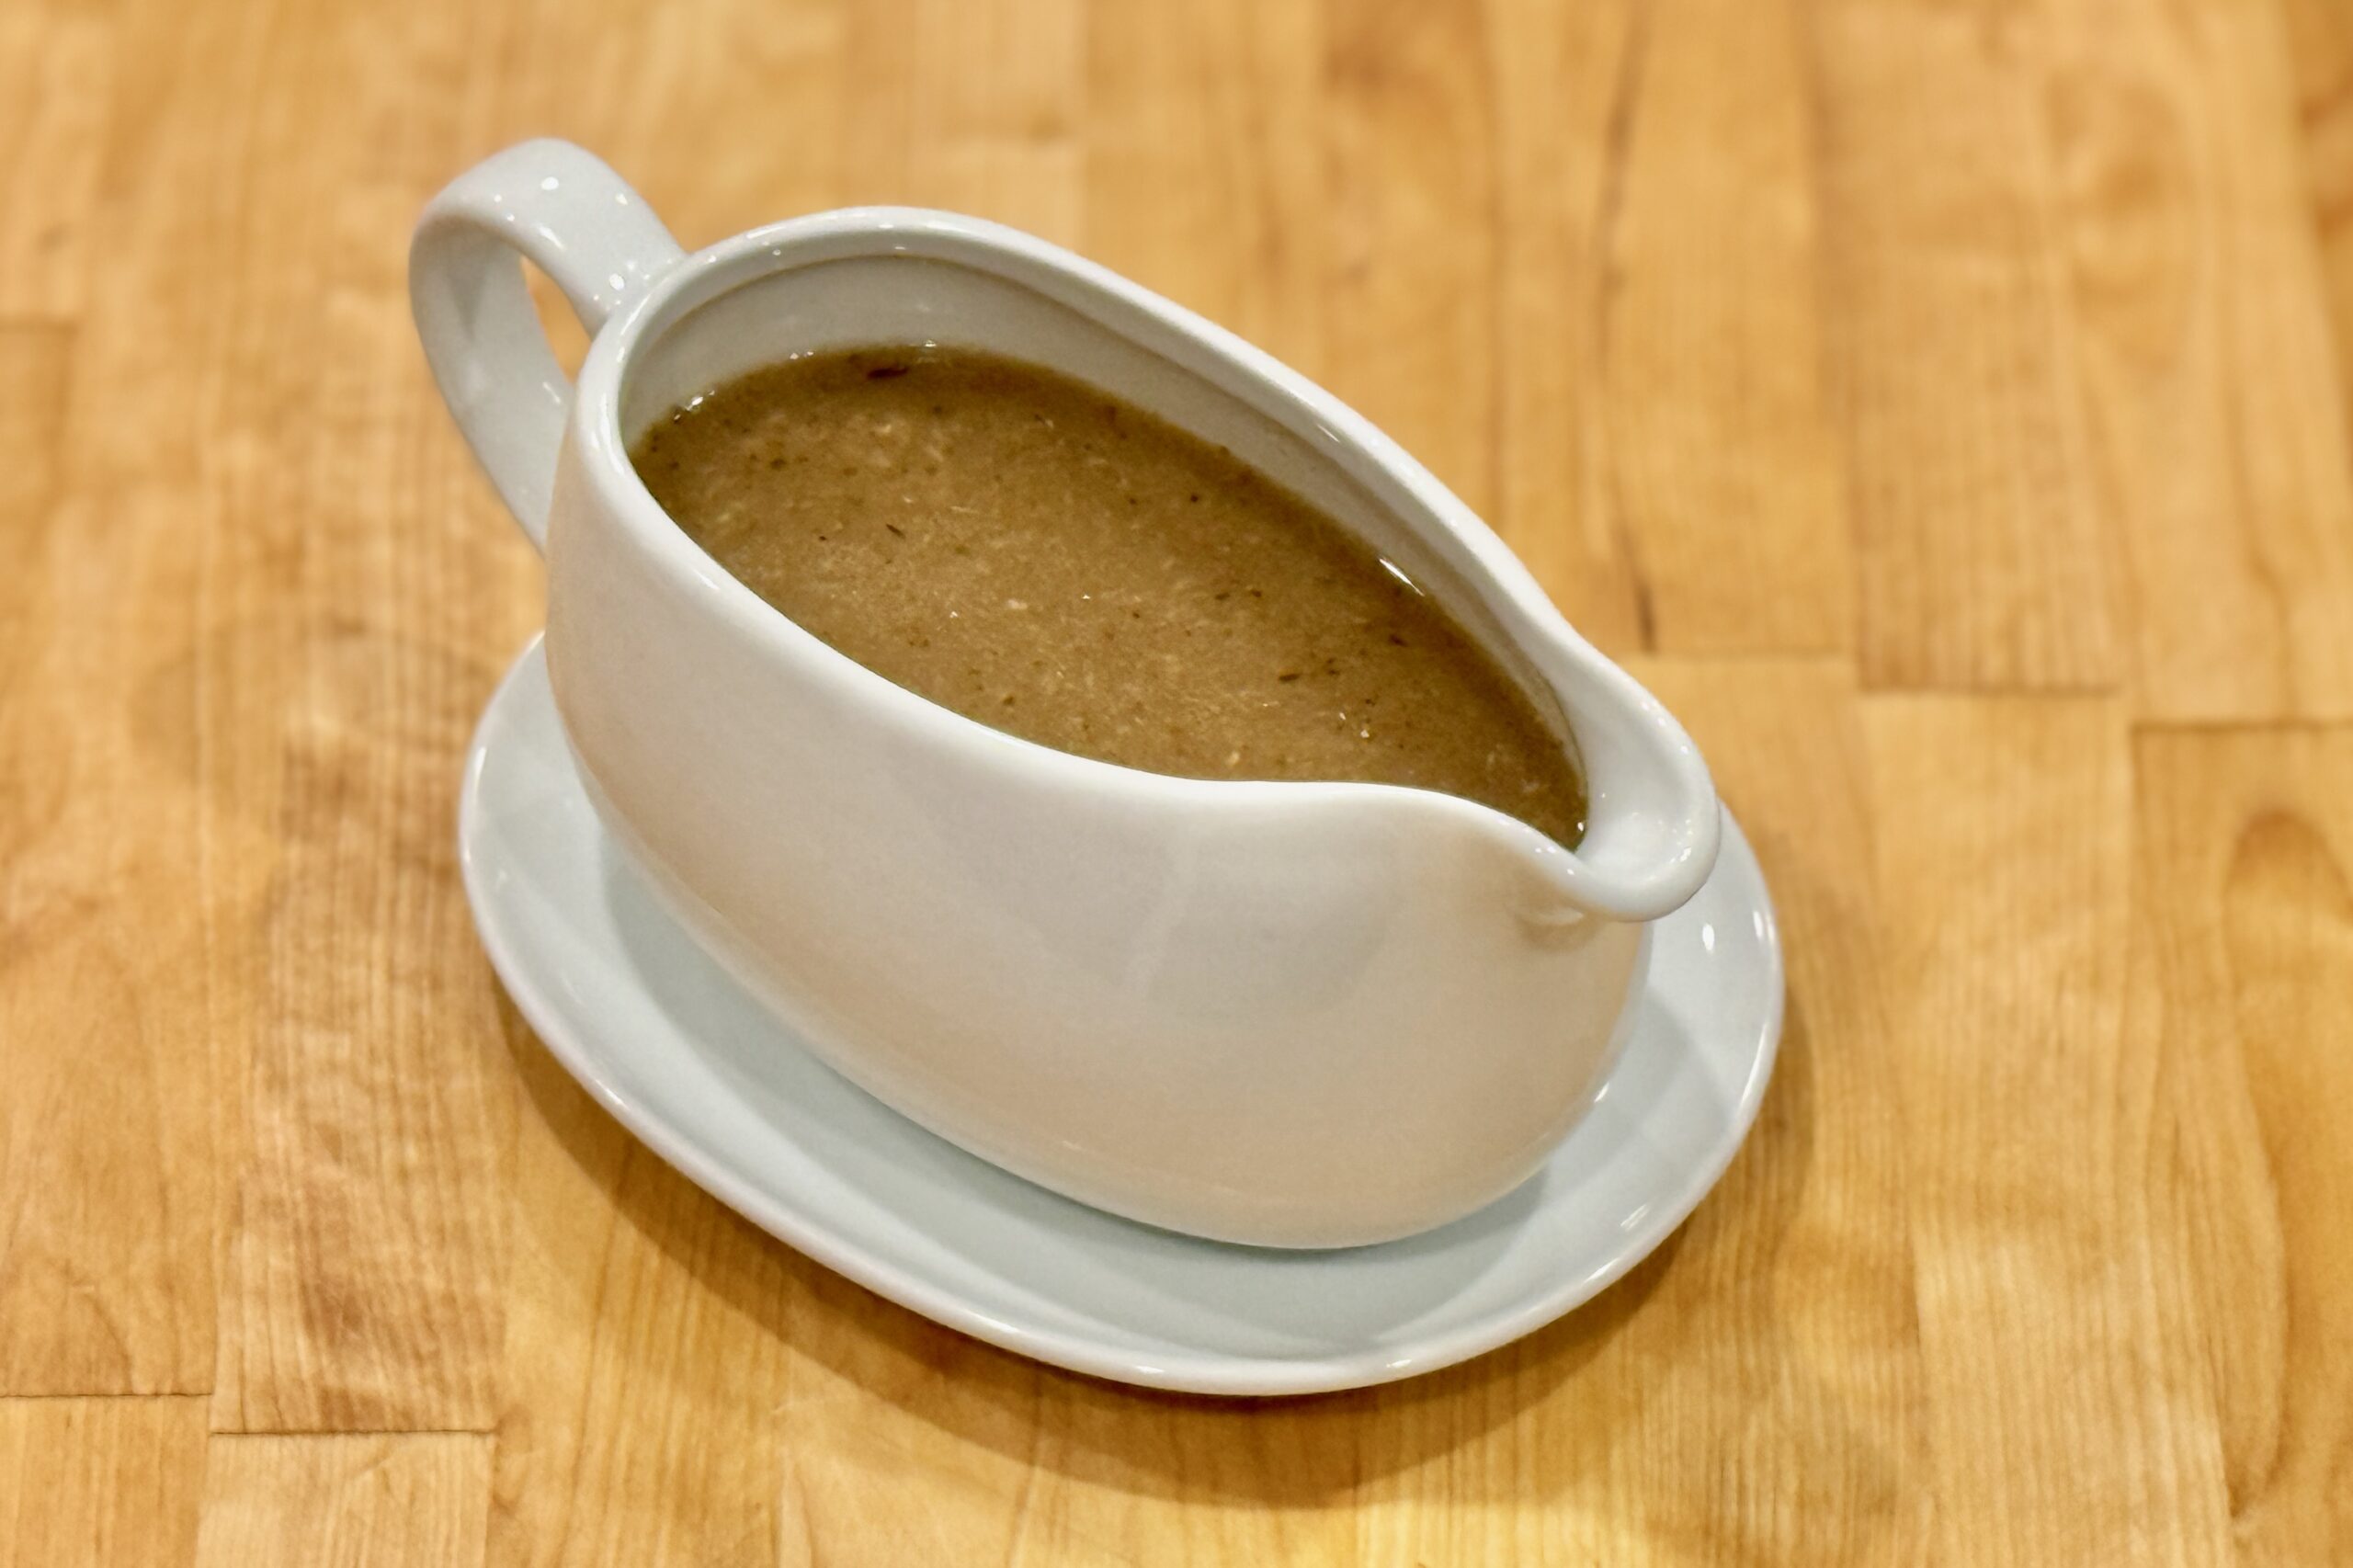
    • Southern gravy
    • Belgian frites, or oven fried fries
    • white cheddar cheese curds

    Directions

    Assemble the Poutine

    Plate hot fries and sprinkle generously with cheese curds. Cover with hot gravy and serve immediately.


    Notes

    Preparation

    • For best texture, use hot, freshly cooked fries so the curds soften slightly but don’t fully melt.
    • If your cheese curds are refrigerated, let them sit at room temperature for 15–20 minutes before assembling for maximum “squeak.”
    • Warm gravy thoroughly just before serving so it coats evenly and heats the curds.

    Serving Suggestions

    • Add shredded rotisserie chicken, pulled pork, or leftover brisket for a heartier variation.
    • Top with chopped green onions or a sprinkle of smoked paprika for extra flavor depth.
    • Serve alongside burgers, grilled meats, or as a standalone comfort meal.

    Variations

    • Use mushroom gravy instead of brown gravy for a vegetarian option.
    • Try peppercorn gravy for a bolder, steakhouse-style version.
    • Make it “fully loaded” with bacon, caramelized onions, or jalapeños.

    Make-Ahead & Storage

    • Fries are best freshly cooked; avoid storing once assembled as they become soggy.
    • Gravy can be made up to 3 days ahead and reheated gently before serving.
    • Cheese curds keep well refrigerated for 1–2 weeks; bring to room temperature before using.
  • Mango Lassi

    Mango Lassi

    Bright, creamy, and refreshing, this mango lassi captures the flavor of café-style versions found across India. Using rich yogurt, fragrant Alphonso mango pulp, and a touch of cardamom, it’s a perfectly balanced blend of sweet, tangy, and tropical—wonderful on its own or as a cooling companion to spicy dishes.


    Ingredients

    • 2 cups Alphonso or Kesar mango pulp (fresh or canned)
    • 2 cups mango chunks (fresh or thawed frozen)
    • 2½ cups full-fat plain yogurt
    • 1 to 1½ cups whole milk (adjust for consistency)
    • 3 to 4 tbsp sugar, honey, or mango syrup (to taste)
    • 2½ tsp fresh lime or lemon juice
    • ¼ tsp freshly ground green cardamom
    • ⅛ tsp salt
    • 1–2 tbsp sweetened condensed milk (optional, for creamier texture)
    • ⅛ tsp saffron threads, soaked in 1 tbsp warm milk (optional)
    • Garnish

    • Crushed pistachios
    • Mint chiffonade

    Directions

    Blend the Lassi

    In a blender, combine mango pulp, mango chunks, yogurt, 1 cup milk, 3 tbsp sugar or honey, lime or lemon juice, cardamom, salt, and any optional saffron or condensed milk.

    Blend until silky smooth and creamy.

    Adjust Consistency and Flavor

    Taste and adjust as desired: add more milk or cold water for a thinner consistency, or more yogurt or pulp for richness. Sweeten further to taste, and add a bit more lime juice if a brighter flavor is preferred.

    Chill and Serve

    Refrigerate for at least 30 minutes before serving, or blend with ice for a smoothie-like texture. Pour into glasses and garnish with crushed pistachios and mint.


    Notes

    Preparation

    • For the most fragrant flavor, use Alphonso or Kesar mango pulp (fresh or canned from an Indian grocery).
    • If using frozen mango, thaw partially or soak briefly in milk before blending for a smoother texture.
    • Sweetened condensed milk enhances creaminess and blends beautifully with the yogurt base.
    • A few saffron threads soaked in warm milk add delicate aroma and golden color.

    Serving Suggestions

    • Serve well chilled alongside spicy curries, tandoori dishes, or biryani.
    • Top with a dusting of ground cardamom or drizzle of mango syrup for extra indulgence.
    • For a vegan version, substitute coconut yogurt and coconut milk for a tropical variation.

    Variations

    • Blend in ½ banana for extra body and mild sweetness.
    • Add 2–3 tbsp shredded coconut for texture and flavor depth.
    • Stir in a spoonful of rosewater for a floral twist reminiscent of Indian dessert shops.
  • Bua Loy Nam Khing

    Bua Loy Nam Khing

    This comforting Thai dessert pairs soft, chewy sesame glutinous balls with a fragrant, mildly spicy ginger syrup. Served warm, it is soothing, aromatic, and especially welcome on cool evenings or after a rich meal. The ginger broth is simple but deeply flavorful, highlighting the contrast between the syrup’s warmth and the tender, nutty rice balls.


    Ingredients

      Sesame Glutinous Balls:

    • 1 recipe Sesame Glutinous Balls, prepared (or one 15-count package frozen sesame glutinous balls)
    • Ginger Syrup:

    • 7 cups (1650 ml) water
    • 2 cups (400 g) packed brown sugar (or use half brown sugar, half palm sugar for a more traditional flavor)
    • ¼ tsp table salt
    • 4 inches (10 cm) fresh ginger, peeled, sliced into coins, and lightly bruised
    • Garnish:

    • 1–2 tsp toasted sesame seeds

    Directions

    Make the Ginger Syrup

    In a medium pot, bring the water to a boil. Add the sugars and salt, stirring until dissolved. Reduce heat to a gentle simmer, then add the bruised ginger slices. Simmer 15–25 minutes until the syrup becomes fragrant, slightly spicy, and a deep amber color. Taste and adjust for strength; simmer longer for stronger ginger flavor.

    Finish the Dessert

    Remove from heat and strain out the ginger slices. Add the prepared sesame glutinous balls to the warm syrup and allow them to heat through for 2–3 minutes.

    Serve

    Ladle the warm syrup and glutinous balls into small bowls. Sprinkle with toasted sesame seeds and serve immediately.


    Notes

    Preparation

    • Palm sugar deepens the flavor and gives the syrup a more traditional Thai character.
    • Lightly bruising the ginger releases more flavor without overpowering the syrup.
    • If using frozen sesame balls, boil them until they float before adding to the syrup.

    Serving Suggestions

    • Add a splash of coconut milk for a creamy variation.
    • Serve with extra toasted sesame seeds for added aroma.
    • Pair with fresh fruit like sliced pear or steamed pumpkin for contrast.

    Make-Ahead & Storage

    • Ginger syrup keeps up to 5 days refrigerated.
    • Store glutinous balls separately to maintain texture.
    • Rewarm syrup gently; add balls immediately before serving.
  • Semmelknödel — Bavarian Bread Dumplings

    Semmelknödel — Bavarian Bread Dumplings

    Classic Bavarian bread dumplings made from day-old rolls soaked in milk, enriched with butter, onion, and parsley. These light, tender dumplings are a beloved side dish across southern Germany — perfect with roast meats, mushroom gravies, or our family favorite, Southern Brown Gravy.


    Ingredients

    • 250 g day-old crusty white bread or Kaiser rolls, cut into 1 cm cubes
    • 200 ml whole milk (warm)
    • 2 medium eggs (or 1 large + 1 medium, see notes)
    • 1 large onion, finely chopped
    • 2 tbsp butter (or clarified butter for authentic flavor)
    • 1 small bunch fresh parsley, finely chopped
    • 50 g diced bacon (optional, for Speckknödel)
    • Salt and freshly ground black pepper, to taste
    • Pinch of grated nutmeg (optional but traditional)
    • Breadcrumbs, as needed (2–4 tbsp)

    Directions

    Prepare Bread Base

    Place bread cubes in a large mixing bowl. Pour warm milk evenly over them and toss gently to coat. Let stand for 10–15 minutes, or until the milk is mostly absorbed and the bread has softened.

    Cook Aromatics

    In a skillet, melt butter over medium heat. Add onion and sauté until translucent, about 3–4 minutes. If using bacon, add it and cook until lightly crisp. Add the chopped parsley and stir briefly to release aroma. Remove from heat and let cool slightly.

    Combine Mixture

    Add the sautéed mixture to the soaked bread. Mix in eggs, salt, pepper, and nutmeg. Stir gently until evenly combined. If the mixture feels too wet or sticky, add breadcrumbs 1 tbsp at a time until it just holds together — it should be soft and slightly tacky, not dry.

    Shape Dumplings

    With lightly wet or oiled hands, form the mixture into balls slightly smaller than a tennis ball (about 6–7 cm). Test one dumpling in simmering water — if it breaks apart, knead a bit more or add a spoonful of breadcrumbs to the mixture.

    Cook

    Bring a large pot of salted water to a gentle simmer (not a rolling boil). Add dumplings carefully and simmer for 15–20 minutes, turning occasionally, until they float to the surface and feel firm when lifted with a slotted spoon.

    Serve

    Drain well and serve hot with mushroom gravy, roast pork, or Southern Brown Gravy. For leftovers, slice cold dumplings and pan-fry them in butter for a crisp Bavarian breakfast (Knödelgröstl).


    Notes

    Preparation

    • Use firm, crusty bread such as baguette, French bread, or Kaiser rolls. Avoid enriched sandwich loaves. Lightly toasting the cubes before soaking enhances flavor and improves texture.
    • If using large eggs, start with one and add the second only if needed for binding.
    • A pinch of nutmeg adds warmth and authenticity.
    • For subtle complexity, stir in a small spoonful of German, ground, or Dijon mustard with the eggs.
    • For even texture, test one dumpling first; adjust with breadcrumbs or milk as needed.

    Serving Suggestions

    • Serve with mushroom gravy, pork roast (Schweinebraten), or Southern Brown Gravy.
    • Slice leftover dumplings and fry in butter for a crispy Bavarian breakfast (Knödelgröstl).

    Variations

    • Speckknödel: Add diced bacon to the mixture for a heartier version.
    • Kräuterknödel: Double the herbs; include chives and a touch of dill.
    • Käseknödel: Add 50–80 g grated Bergkäse or Gruyère for a richer dumpling.

    Make-Ahead & Storage

    • Refrigerate cooked dumplings for up to 3 days in an airtight container.
    • Reheat gently in simmering water or pan-fry in butter before serving.
  • Cilantro Lime Rice (Stovetop)

    Cilantro Lime Rice (Stovetop)

    Fluffy jasmine rice infused with fresh lime and cilantro—simple, bright, and perfectly balanced to complement tacos, grilled meats, or saucy dishes. A touch of butter enhances richness while the zest and juice keep every bite fresh and aromatic. Click here for the Instant Pot version of this recipe.


    Ingredients

    • 1 cup jasmine rice, rinsed and drained
    • 1 tbsp butter
    • 1½ cups chicken broth (or vegetable broth)
    • 1 clove garlic, minced (optional)
    • Zest of 1 lime
    • 1–1½ tbsp fresh lime juice (to taste)
    • ½ cup cilantro leaves, finely chopped
    • ⅛ tsp sugar (to round acidity)
    • Salt to taste

    Directions

    Toast the Rice

    In a saucepan or rice cooker insert, melt butter over medium heat. Add rice (and garlic, if using) and sauté 2–3 minutes until grains appear glossy and lightly golden.

    Cook the Rice

    Add broth and a generous pinch of salt. Stir once, bring to a simmer, then cover and reduce heat to low. Cook for 15 minutes, then remove from heat and let stand, covered, for 10 minutes to finish steaming.

    Finish with Lime and Cilantro

    In a small pan, warm lime zest with a few drops of butter until aromatic (optional but enhances flavor).

    Fluff rice gently with a fork and fold in lime zest, lime juice, cilantro, and sugar. Taste and adjust salt or lime as desired.

    Serve

    Serve warm as a side or base for tacos, grilled meats, or saucy dishes where a bright, citrusy accent balances richness.


    Notes

    Preparation

    • Rinse jasmine rice until water runs mostly clear to remove excess starch and keep grains fluffy.
    • Let cooked rice rest 10 minutes before fluffing to allow steam to redistribute for perfect texture.
    • Warming lime zest in butter releases aromatic oils and coats grains more evenly.
    • Adjust lime and salt balance at the end—rice should taste bright but not sharp.

    Serving Suggestions

    • Pairs beautifully with tacos, fajitas, or grilled seafood.
    • Excellent base for burrito bowls or enchilada platters.
    • Top with extra cilantro and a sprinkle of lime zest for presentation.

    Variations

    • Subtle Coconut Version: Replace ¼ cup of broth with ¼ cup unsweetened coconut milk (1¼ cups broth + ¼ cup coconut milk). Adds gentle creaminess and a faint coconut aroma while maintaining lime-cilantro brightness.
    • Coconut-Forward Version: Replace ½ cup of broth with ½ cup coconut milk (1 cup broth + ½ cup coconut milk). Creates a richer, tropical flavor—use 2 tbsp lime juice and season more assertively with salt.
    • Use coconut versions for fusion dishes like Korean Pulled Pork Tacos, jerk chicken, or grilled shrimp where a creamy contrast enhances spice and smoke.

    Make-Ahead & Storage

    • Cooked rice can be held warm for up to 30 minutes before adding lime and cilantro.
    • Refrigerate leftovers in an airtight container up to 3 days; reheat gently with a drizzle of broth or water to restore moisture.
    • Fresh cilantro and lime juice should always be added just before serving for best color and flavor.