Bags of Spices

Favorite Recipes

Gluten Free

Gluten-free comfort food — a mix of naturally gluten-free dishes and thoughtfully adapted classics, crafted to deliver full flavor and family-friendly results without compromise.

  • Blue Cheese Steak Sauce

    Blue Cheese Steak Sauce

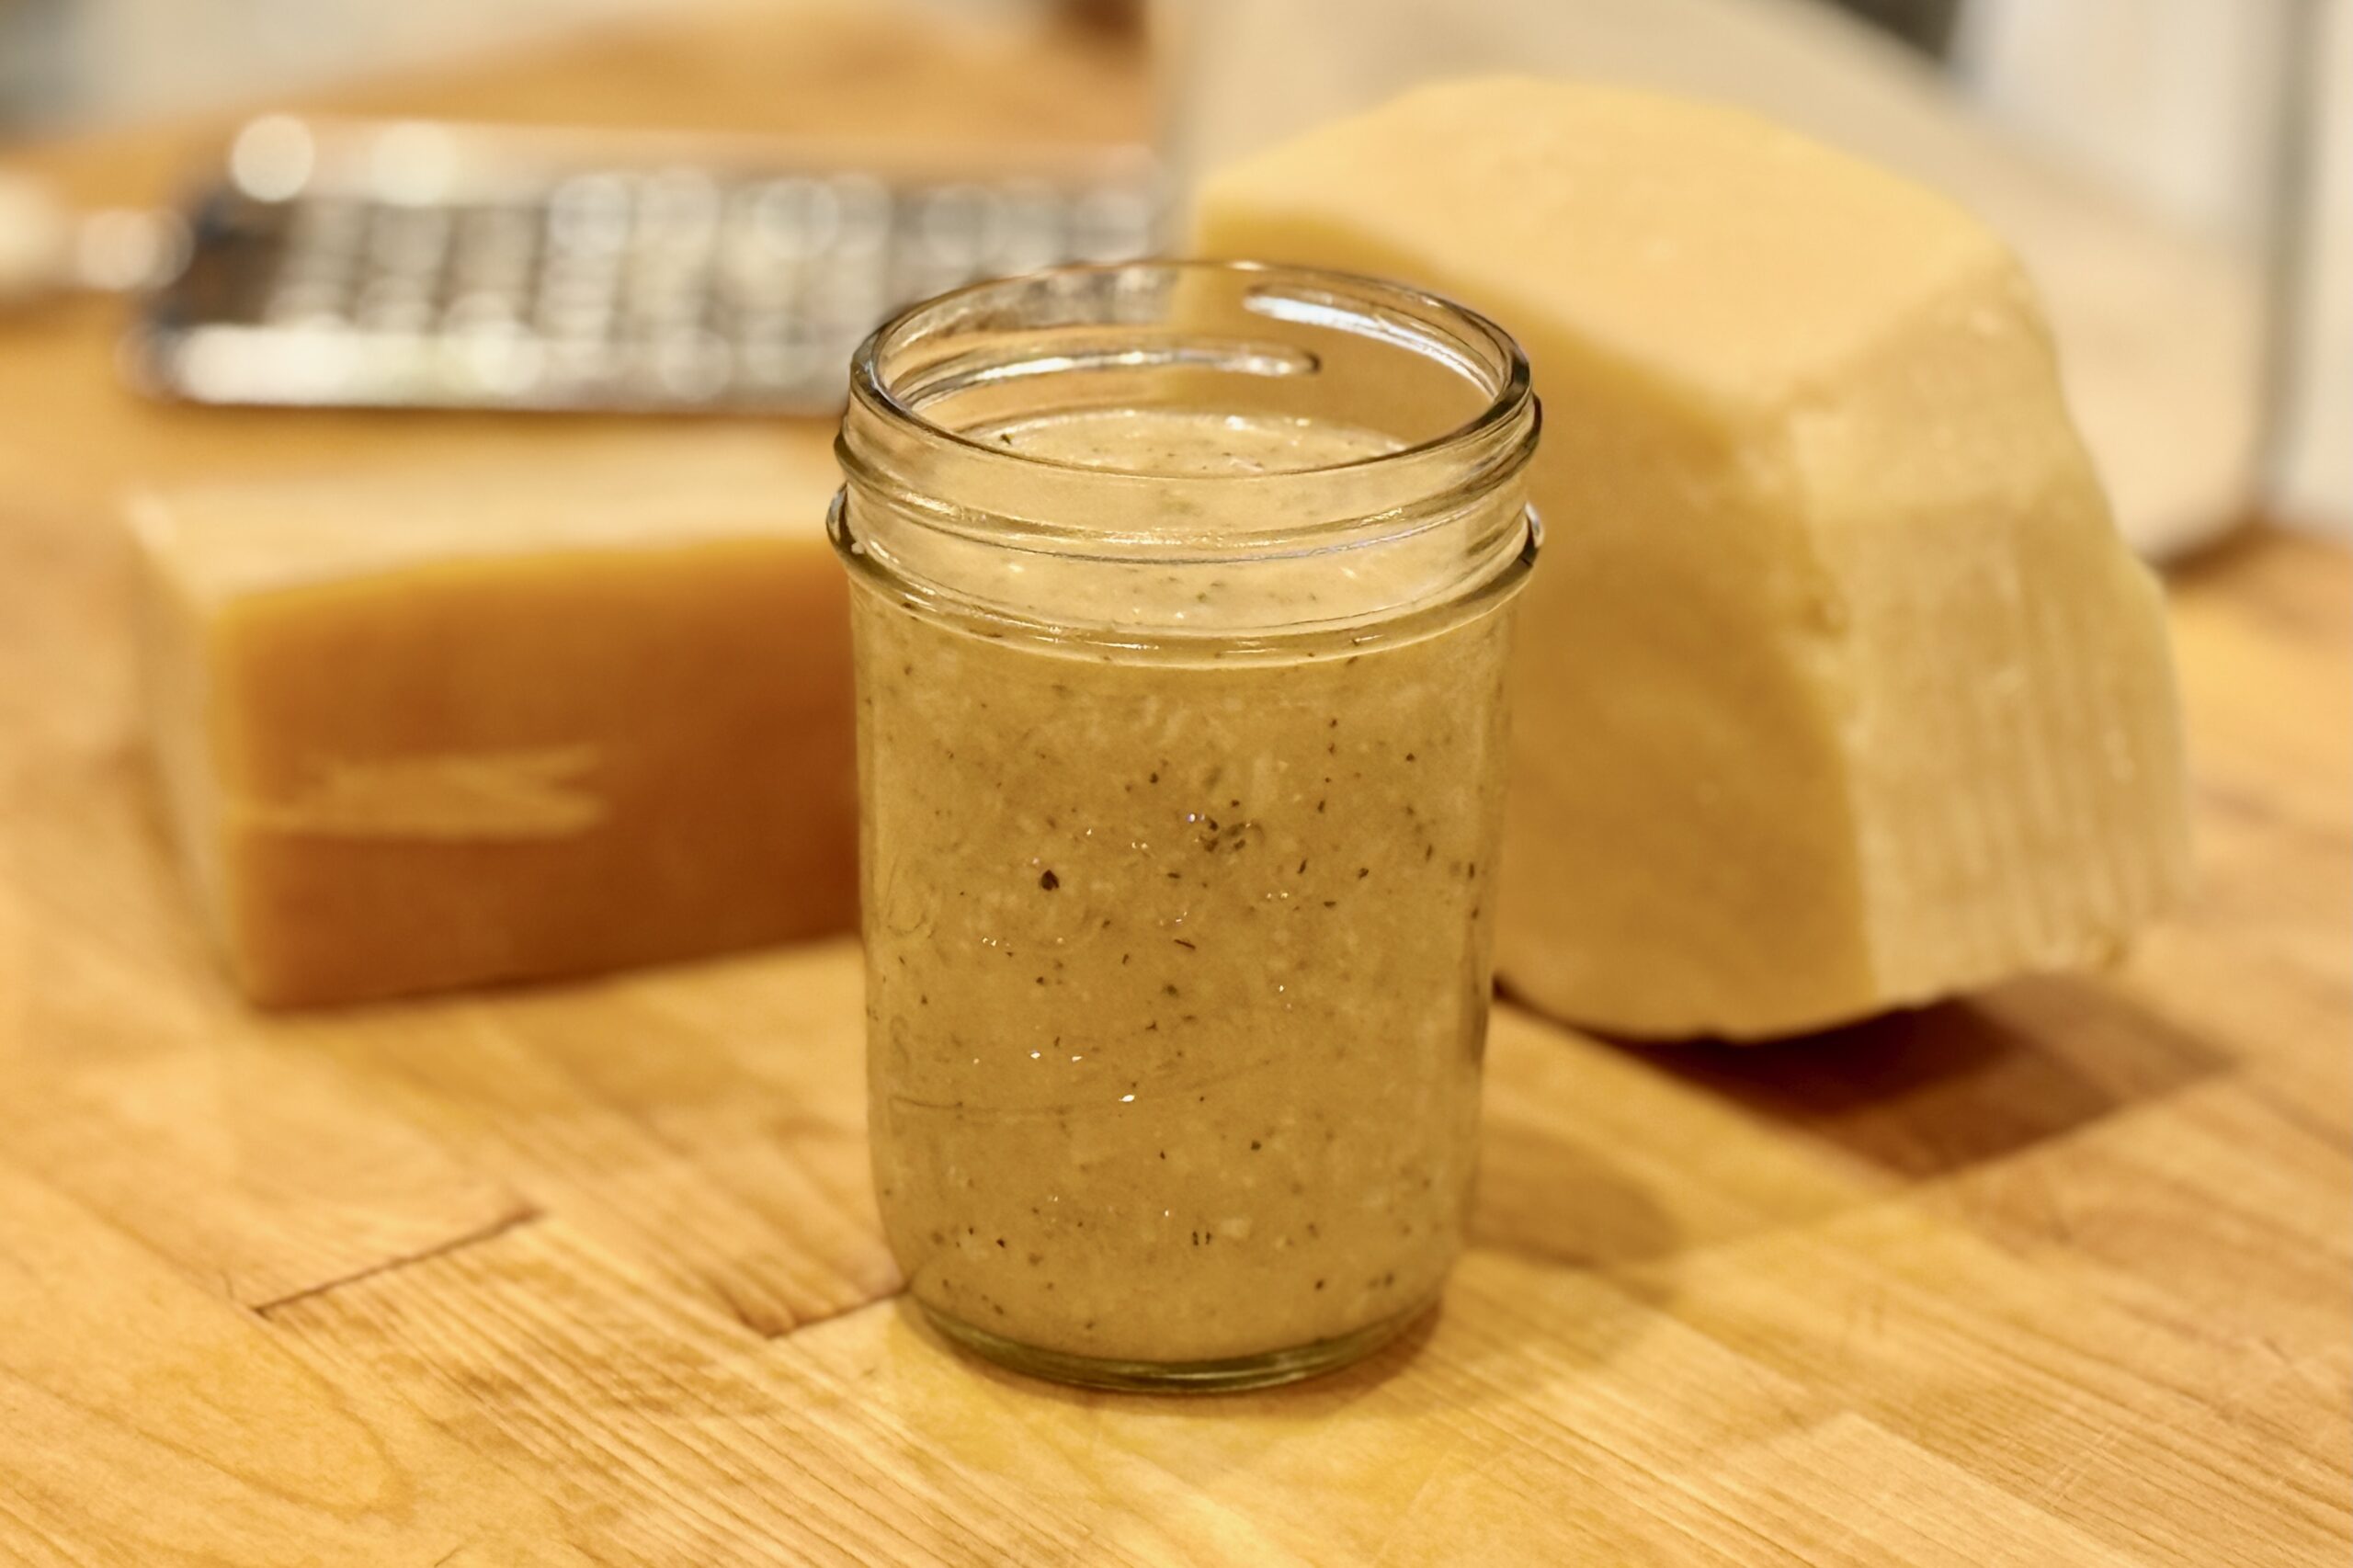
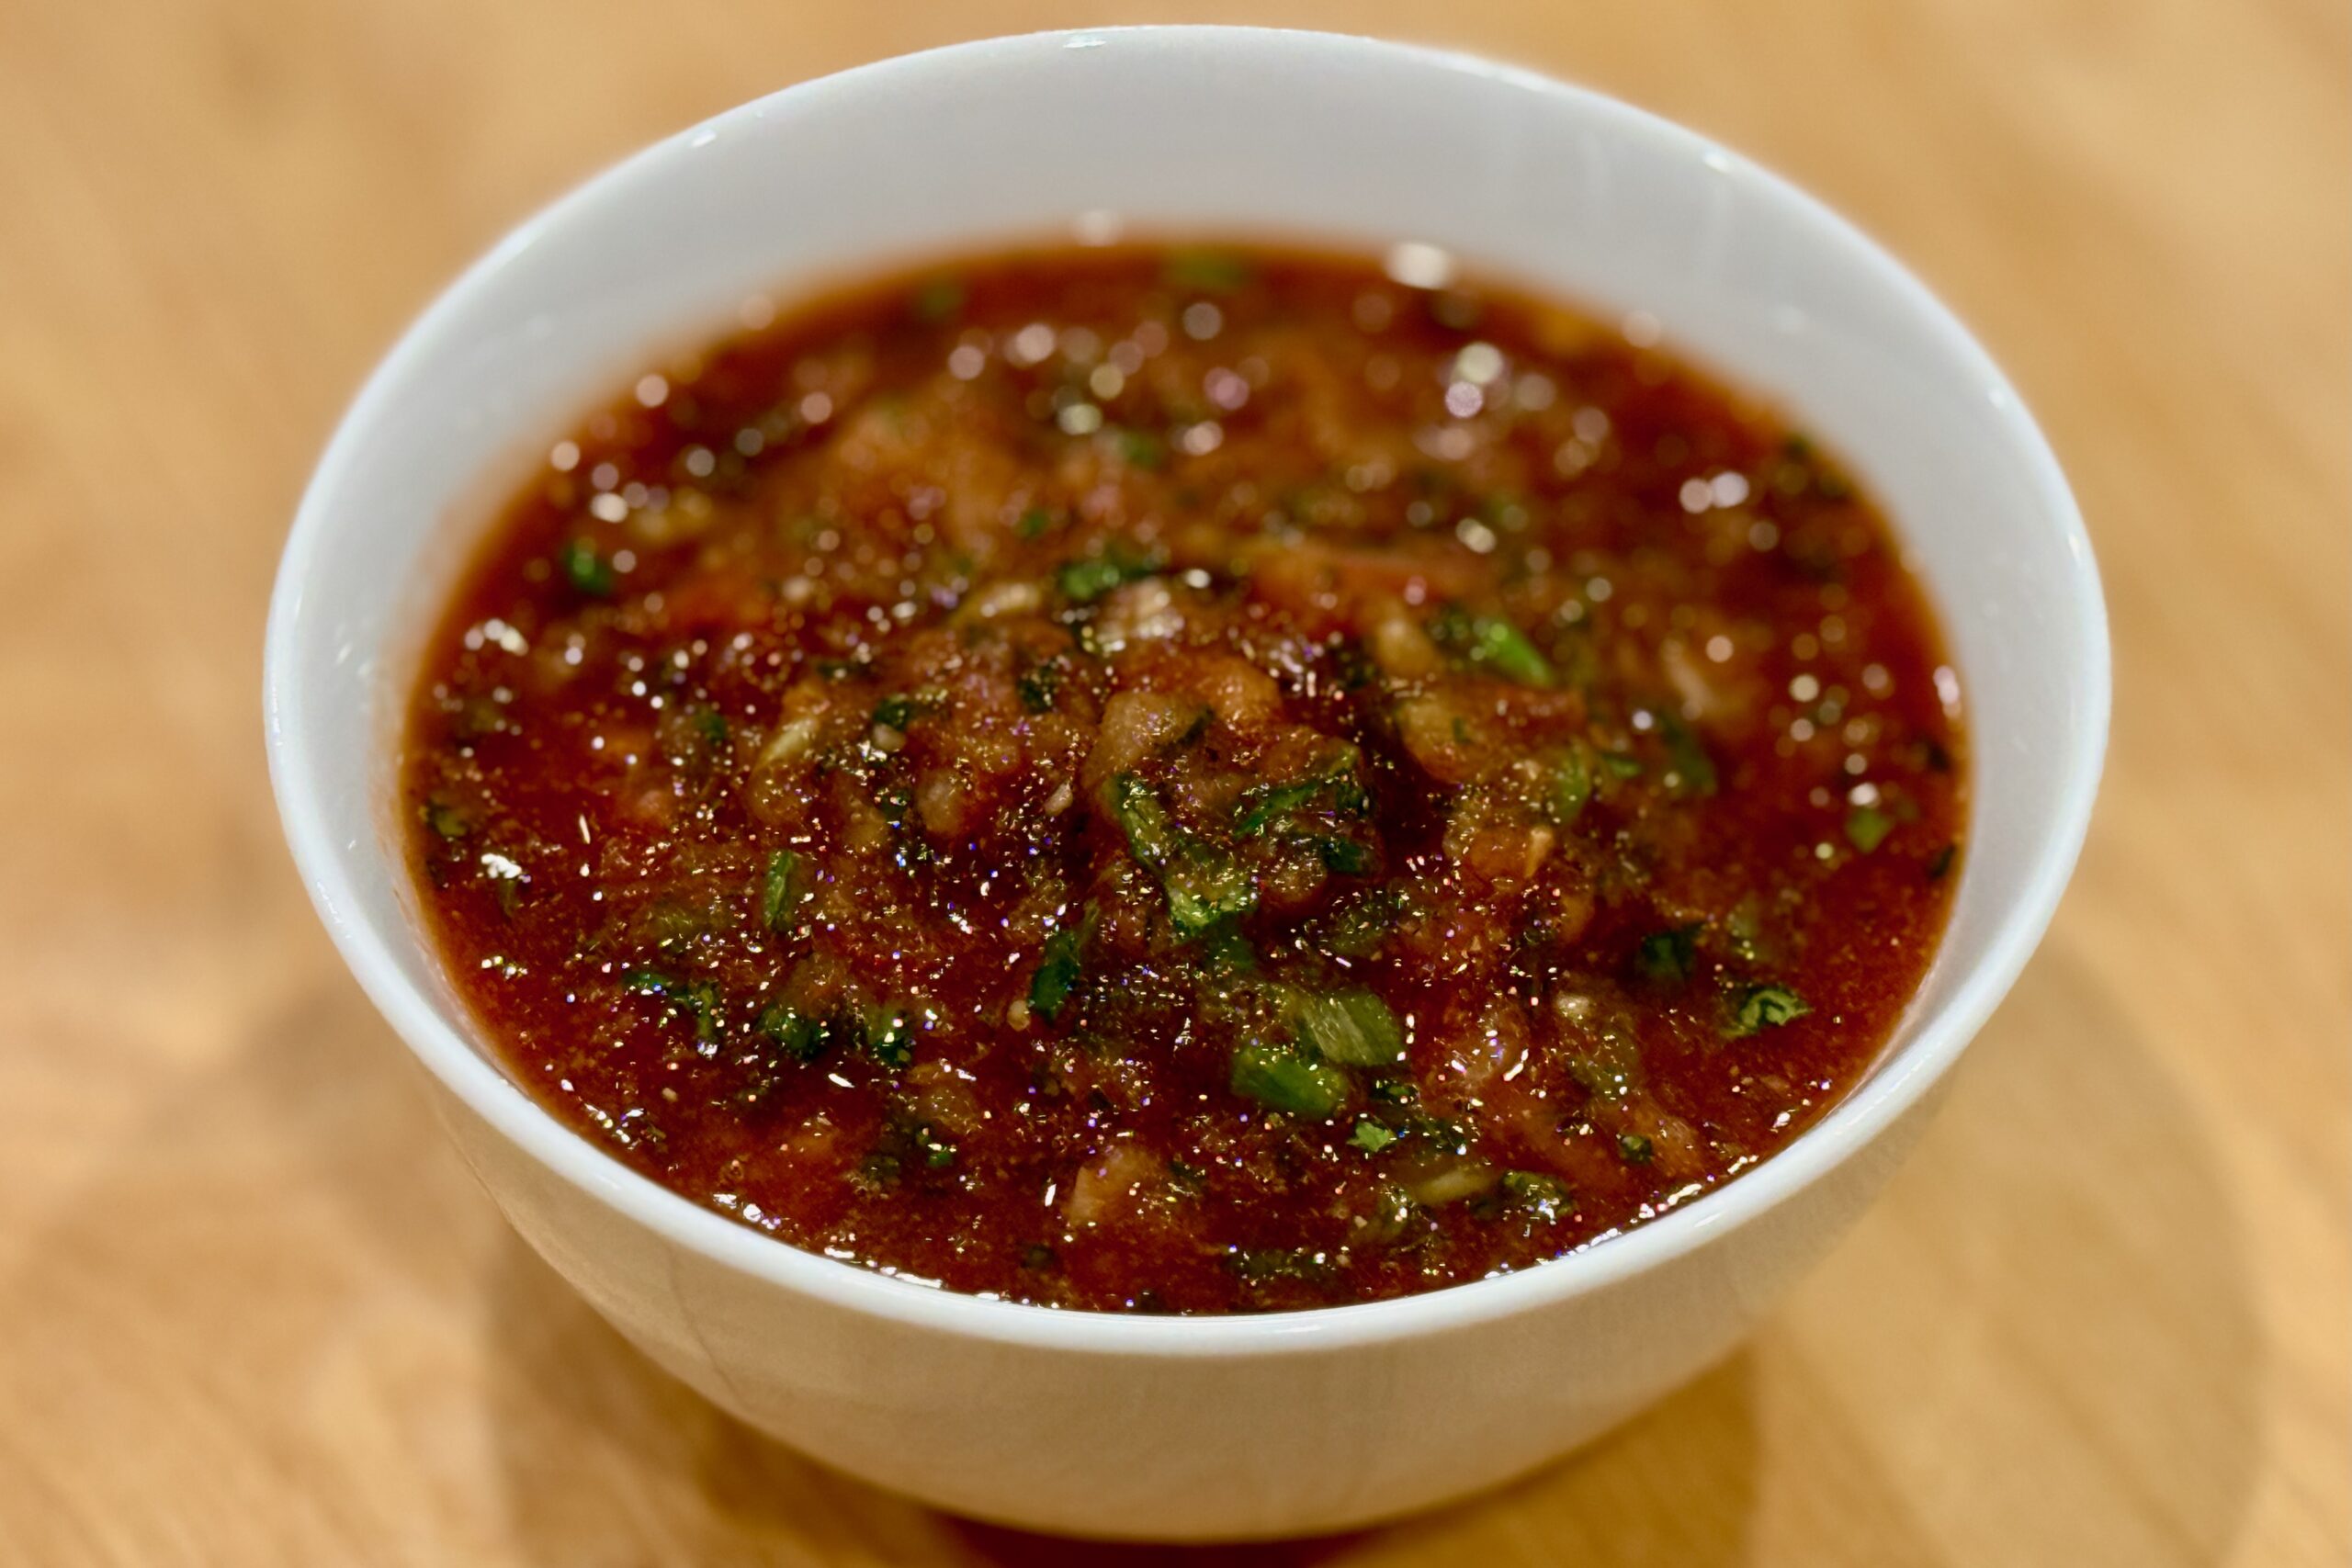
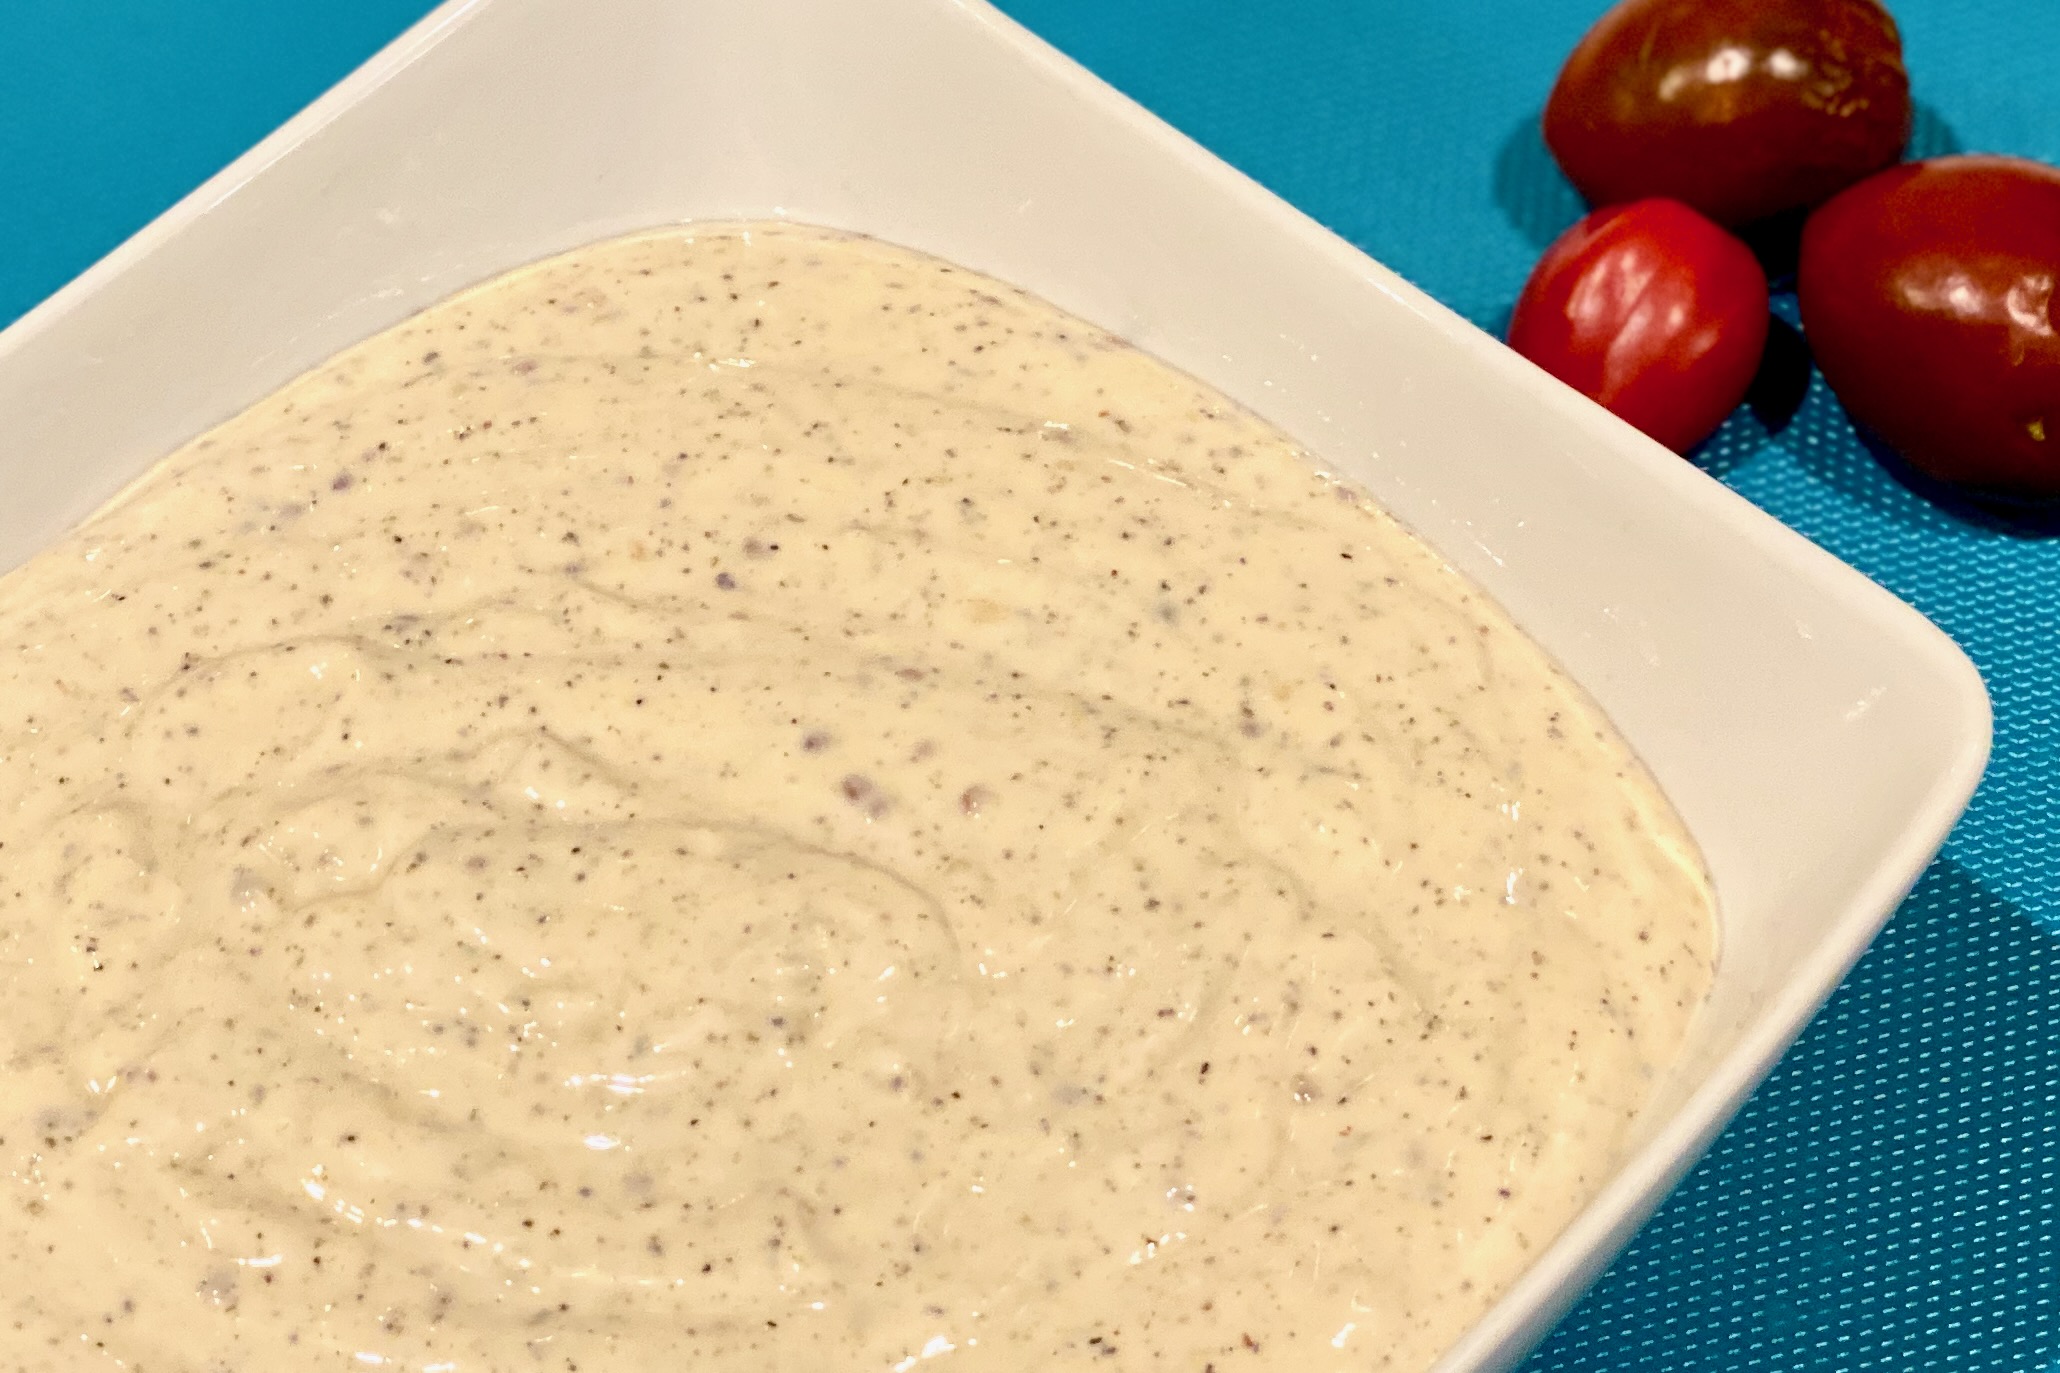
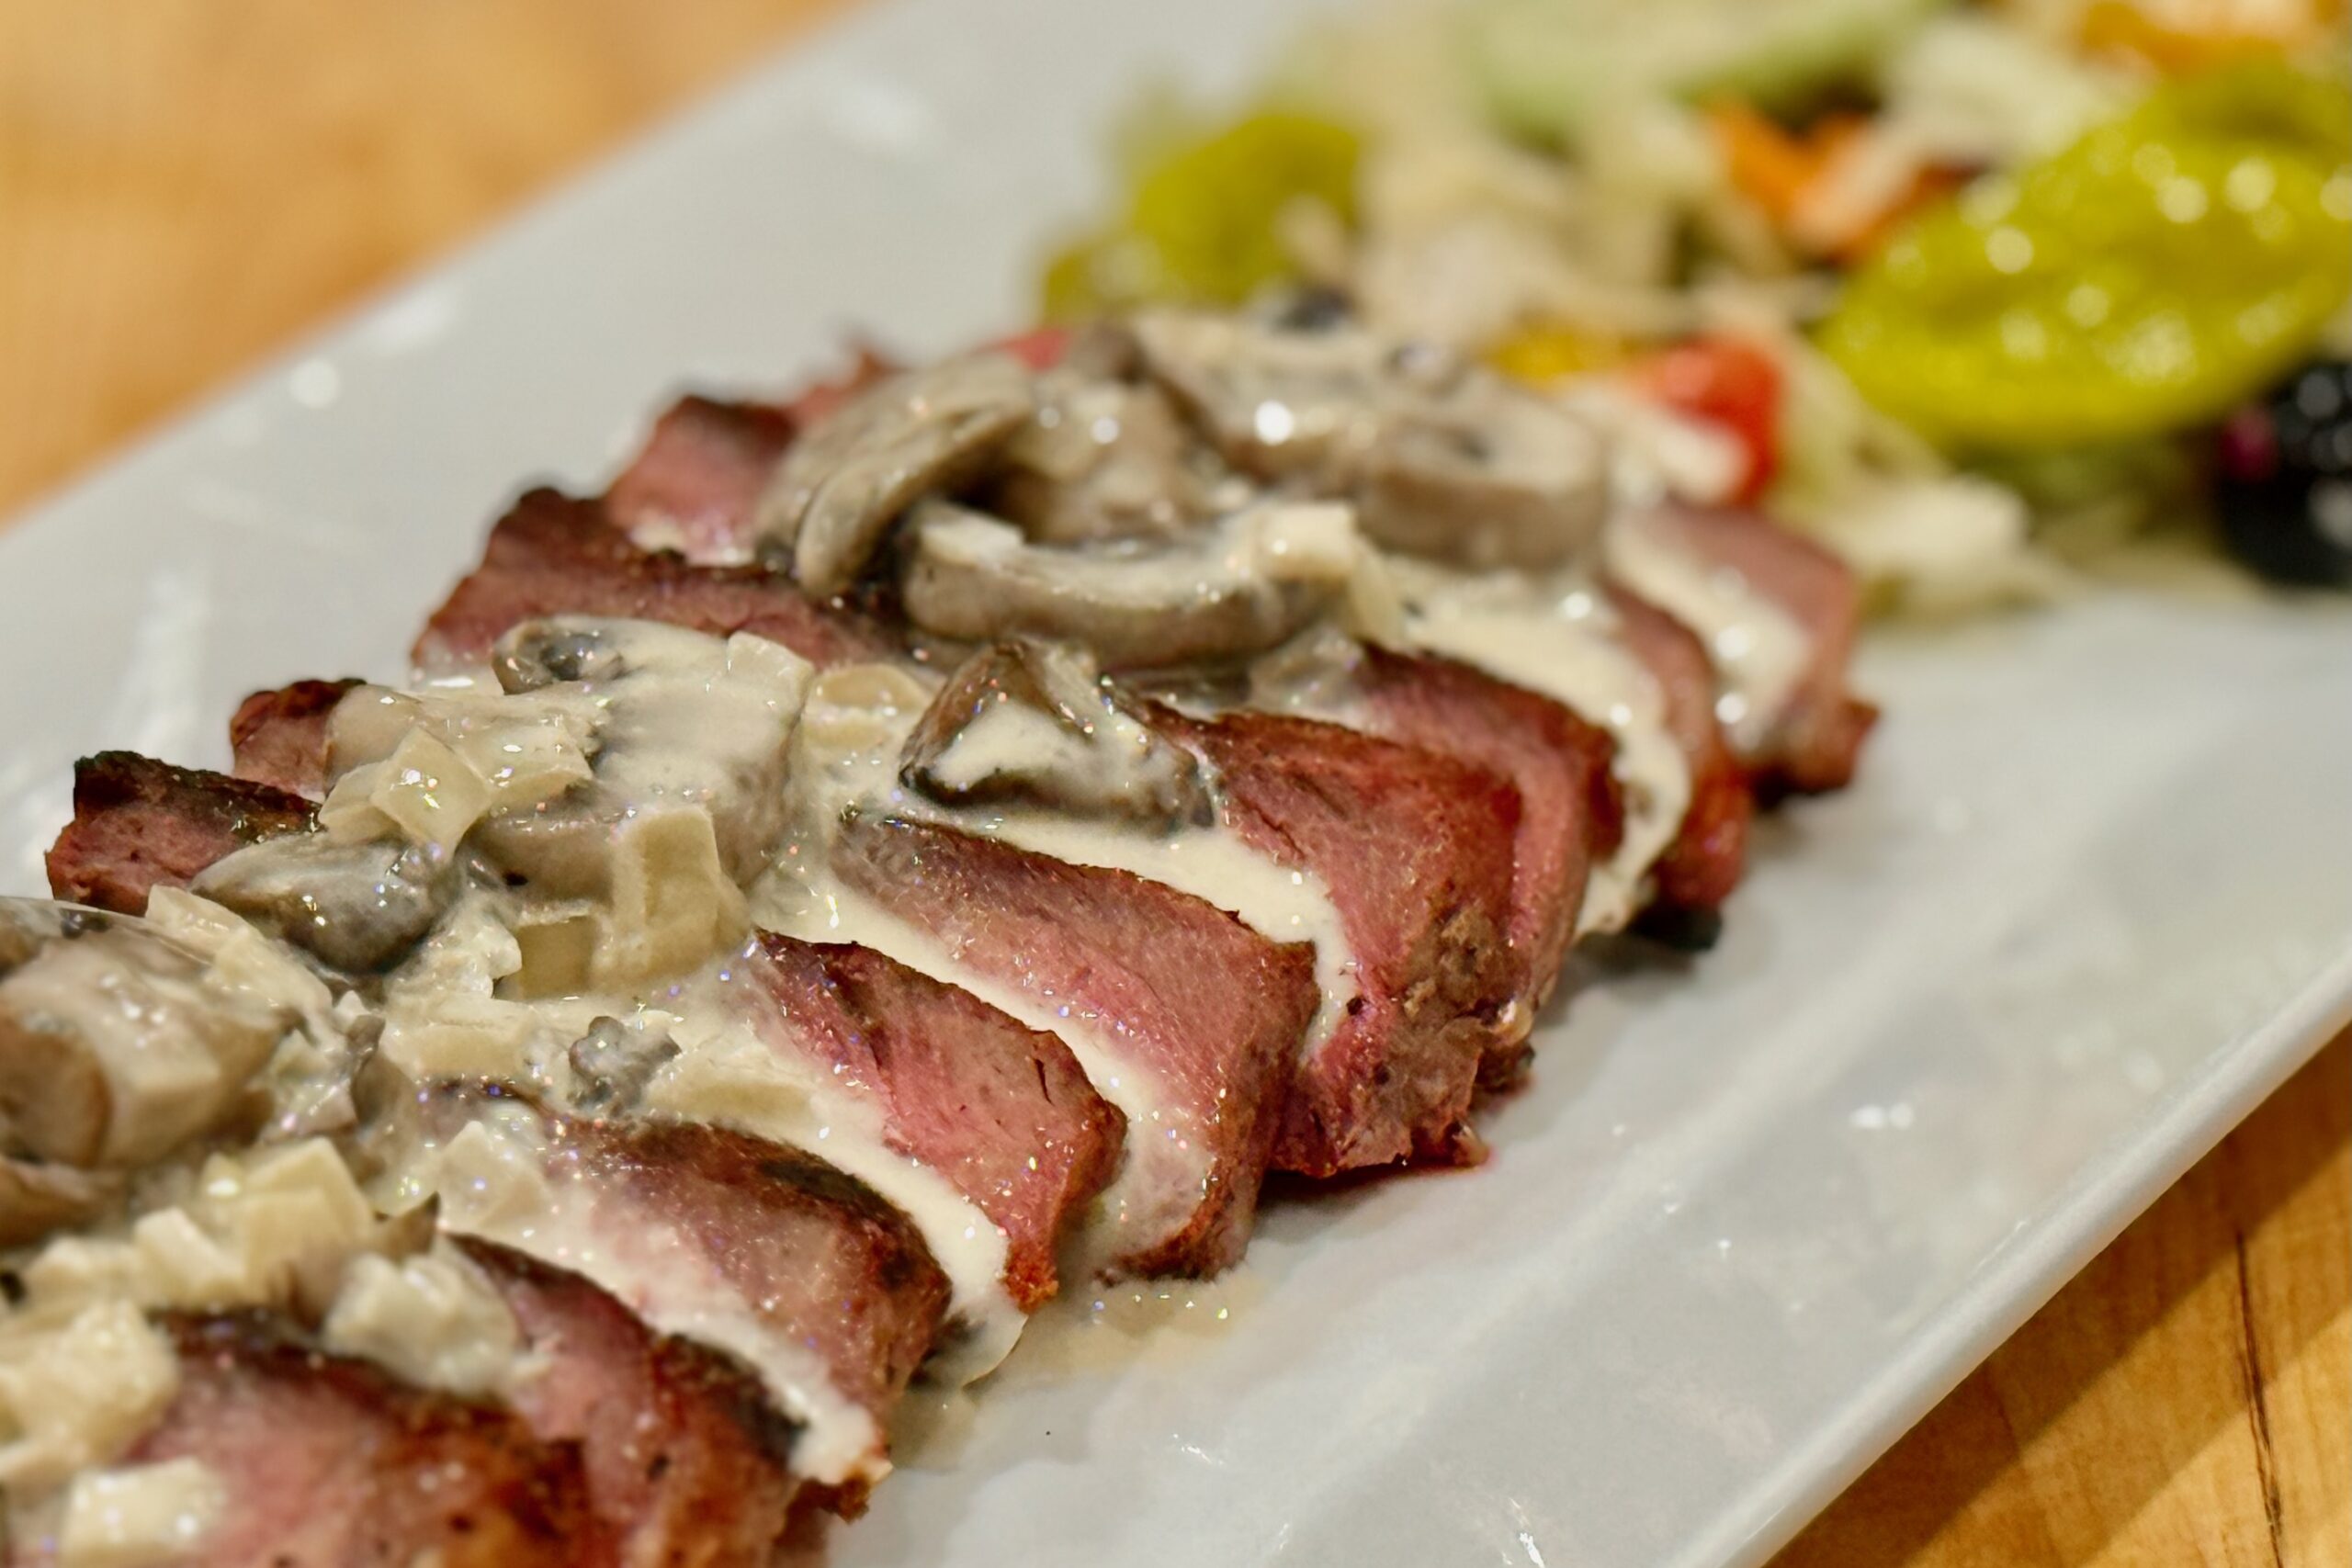
    This steakhouse-style blue cheese sauce is built for ribeyes: deeply savory mushrooms, sweet sautéed onions, and a creamy gorgonzola finish that clings to the meat without overpowering it. A small splash of Shaoxing wine or dry sherry lifts the whole pan, and a touch of sambal adds mild background warmth (not heat). Spoon it over grilled steaks and finish with freshly ground black pepper for that final, restaurant-quality edge.


    Ingredients

    • ¼ cup butter
    • 1½ lb mushrooms, sliced
    • 1 large yellow onion, sliced pole-to-pole
    • 2 tbsp Shaoxing cooking wine or dry sherry
    • ½ tsp sambal oelek
    • 2 cups Alfredo sauce (homemade or store-bought)
    • 6 oz gorgonzola cheese, crumbled
    • Freshly ground black pepper, for finishing

    Directions

    Brown the Mushrooms

    Melt the butter in a large sauté pan over medium-high heat. Add the mushrooms and cook, stirring occasionally, until they release their liquid, the liquid evaporates, and the mushrooms begin to brown.

    Add the onion and continue cooking until softened and lightly caramelized.

    Deglaze and Build the Sauce

    Add the Shaoxing wine or sherry, stirring to loosen any browned bits. Cook until the liquid is mostly evaporated, then stir in the sambal oelek.

    Reduce heat to medium. Add the Alfredo sauce and warm gently.

    Stir in the gorgonzola and heat until mostly melted and integrated, leaving some small pieces intact for texture. Taste and add salt only if needed.

    Serve

    Spoon the sauce over grilled or barbecued ribeye steaks and finish with freshly ground black pepper just before serving.


    Notes

    Preparation

    • Different Alfredo sauces and blue cheeses vary in saltiness—taste at the end and add salt only if needed.
    • For the best steakhouse flavor, let the mushrooms cook until their liquid evaporates and they actually brown before adding the onions.

    Serving Suggestions

    • Yield: Enough for 6–8 steaks (as a generous topping).
    • Finish with freshly ground black pepper on the plated, sauced steak for the brightest aroma and cleanest bite.

    Variations

    • The ½ tsp sambal oelek is meant as mild background warmth. For very mild, reduce to ¼ tsp.
    • A small pinch of cayenne pepper may be substituted for the sambal oelek.

    Make-Ahead & Storage

    • Refrigerate in an airtight container for up to 4 days.
    • Reheat gently over low heat, stirring often. If the sauce thickens too much, loosen with a splash of milk or cream.
    • Avoid boiling after the cheese is added to help prevent separation.
  • Italian Salad Dressing

    Italian Salad Dressing

    This Italian-American salad dressing has been a Huggins family favorite for years—the kind you want to keep in the fridge for weeknight salads, Sunday dinners, and drizzling over a big antipasto platter. It balances tangy red wine vinegar, a touch of sweetness, and nutty Romano cheese, with just enough warmth from cayenne to keep things interesting. A bit of xanthan gum helps it stay emulsified and pourable, so it feels as smooth and reliable as your favorite pizzeria house dressing.


    Ingredients

    • ½ cup red wine vinegar
    • ⅓ cup water
    • ¼ cup vegetable oil
    • 2 tbsp light olive oil
    • ¼ cup sugar
    • ½ tbsp table salt
    • ½ tbsp lemon juice
    • ½ tsp garlic powder
    • ¼ tsp xanthan gum
    • ¼ tsp dried parsley flakes
    • ⅛ tsp dried oregano
    • ⅛ tsp cayenne pepper
    • ⅛ tsp MSG (optional)
    • 1½ oz Romano cheese, finely grated

    Directions

    Blend the Base:

    Add the red wine vinegar, water, vegetable oil, light olive oil, sugar, table salt, lemon juice, garlic powder, xanthan gum, dried parsley, dried oregano, cayenne pepper, and MSG (if using) to a blender.

    Blend on low speed for about 10–15 seconds, just until the sugar is dissolved and the mixture looks slightly thickened and evenly emulsified. Avoid over-blending so the dressing does not become too thick.

    Add the Cheese & Chill:

    Transfer the dressing to a bottle or jar. Add the finely grated Romano cheese, secure the lid, and shake until the cheese is evenly dispersed.

    Refrigerate at least 1 hour, preferably overnight, to allow the flavors to meld and the herbs to hydrate. Shake well before serving.


    Notes

    Preparation

    • Blend only until the dressing looks slightly thickened and emulsified; over-blending can make the xanthan gum thicken the dressing more than desired.
    • Adding the Romano cheese after blending keeps the texture pleasantly speckled and helps prevent the dressing from becoming gritty.
    • For best flavor, let the dressing rest in the refrigerator overnight so the herbs fully hydrate and the acidity rounds out.
    • If the dressing thickens in the refrigerator, let it sit at room temperature for a few minutes and shake well before serving.
    • MSG is optional but enhances the savory notes from the Romano cheese and makes the dressing taste a bit more “restaurant-style.”

    Serving Suggestions

    • Use on classic green salads with romaine or iceberg, tomatoes, cucumbers, olives, and red onion.
    • Drizzle over chopped salads, Italian-style subs, or an antipasto platter with cured meats, cheeses, and marinated vegetables.
    • For a simple marinade for chicken or vegetables, reduce the sugar to 2–3 tbsp per batch of dressing, then marinate for 30–60 minutes before cooking. The reduced sugar helps minimize burning on the grill or in a hot pan.

    Variations

    • Herb-Forward Italian Dressing: Increase dried parsley to ½ tsp and dried oregano to ½ tsp. Add ½ tsp dried basil for a more pronounced Italian herb profile. Allow to sit overnight so the herbs fully hydrate.
    • Optional Add-Ins: Stir in 1–2 tsp very finely minced red bell pepper for a classic Italian-American pizzeria vibe, ½–1 tsp Dijon mustard for a touch of tang and extra emulsification, or a small pinch of celery seed for an old-school “house dressing” flavor.
    • Fresh Garlic Option (Same-Day Use): If you plan to use the dressing the same day, you may substitute the garlic powder with ½ tsp very finely minced fresh garlic. For food safety and flavor, use within 24 hours and keep refrigerated.
    • Roasted Garlic Variation: For a sweeter, mellow garlic note, replace the garlic powder with 1 tsp mashed roasted garlic. This variation keeps well for several days in the refrigerator and adds a deeper, rounder garlic flavor.

    Make-Ahead & Storage

    • Store the dressing in an airtight bottle or jar in the refrigerator for up to 1 week when made with garlic powder.
    • If using fresh garlic, use within 24 hours for best flavor and food safety.
    • The cheese and xanthan gum will cause the dressing to thicken slightly over time; let it warm at room temperature for a few minutes and shake well before serving.
    • Always use a clean spoon or pour directly from the bottle to help maximize shelf life.
  • Acar Ketimun — Indonesian Pickled Cucumber

    Acar Ketimun — Indonesian Pickled Cucumber

    Bright, crisp, and refreshingly tangy, acar ketimun is a classic Indonesian quick pickle made with cucumbers, carrots, shallots, and chilies in a lightly sweet-sour vinegar brine. A pinch of turmeric gives the vegetables their traditional golden hue, while the quick pickle balances rich dishes like satay, nasi goreng, and bahmi goreng with fresh acidity and crunch.


    Ingredients

    • 2 medium cucumbers, halved lengthwise, seeded, and sliced into thin half-moons
    • 1 small carrot, julienned (optional but traditional)
    • 1 small shallot, thinly sliced
    • 1–2 small red chilies, thinly sliced (optional)
    • ½ cup rice vinegar (or white vinegar)
    • 3 tbsp sugar
    • ½ tsp table salt
    • ¼ cup water
    • ¼ tsp ground turmeric

    Directions

    Prepare the Pickling Brine

    In a small saucepan, combine the vinegar, sugar, salt, water, and turmeric.

    Warm gently over low heat just until the sugar dissolves. Do not boil. Remove from heat and allow the mixture to cool to room temperature.

    Prepare the Vegetables

    Place the sliced cucumber, carrot, shallot, and chilies in a bowl.

    Pickle

    Pour the cooled pickling liquid over the vegetables and toss to combine.

    Cover and refrigerate for at least 30 minutes before serving. The flavor improves after 2–3 hours.


    Notes

    Preparation

    • Seeding the cucumbers helps keep the pickle crisp and prevents excess water from diluting the brine.
    • Thin slicing allows the vegetables to absorb the brine quickly, giving good flavor even with short chilling times.
    • Turmeric adds the traditional golden color seen in many Indonesian acar served with rijsttafel.

    Serving Suggestions

    • Serve alongside Bahmi Goreng, nasi goreng, or Indonesian satay.
    • The bright acidity cuts through rich, savory dishes flavored with ketjap manis.
    • Also excellent with grilled chicken, pork skewers, or fried rice dishes.

    Variations

    • Bahmi Goreng Version: For a sharper pickle that pairs especially well with fried noodles, reduce the sugar to 2 tbsp and increase the vinegar to ⅔ cup.
    • No-Chili Version: Omit the chilies for a completely mild pickle.
    • Extra Crunch: Add thinly sliced cabbage or lightly blanched green beans.

    Make-Ahead & Storage

    • Best flavor develops after 2–3 hours of chilling.
    • Keeps well refrigerated for up to 3 days.
    • The vegetables will soften slightly over time but remain flavorful.
  • Classic Tamarind Chutney

    Classic Tamarind Chutney

    This classic tamarind chutney is clean, bright, and beautifully balanced—sweet enough to round the sharp acidity of tamarind, but not heavy or syrupy. Made from tamarind paste, sugar, and a few simple seasonings, it’s the foundation for countless chaat dishes and sauces. Kept simple for maximum versatility and easily customizable with dates and spices for richer variations.


    Ingredients

    • ½ cup tamarind paste (store-bought; or use our homemade Tamarind Paste from Whole Pods)
    • ¾ cup water
    • ⅓–½ cup sugar (start with ⅓ cup; adjust to taste)
    • ½ tsp table salt
    • ¼ tsp ground cumin (preferably roasted)

    Directions

    Simmer the Chutney

    In a small saucepan, whisk together tamarind paste and water until smooth.

    Add sugar, table salt, and ground cumin. Bring to a gentle simmer over medium heat.

    Simmer 5–8 minutes, stirring occasionally, until slightly thickened and glossy. The chutney should lightly coat the back of a spoon but remain pourable.

    Remove from heat and cool completely. The chutney will thicken slightly as it cools.


    Notes

    Preparation

    • Taste and adjust sweetness after simmering. Tamarind acidity varies by brand; add sugar gradually until balanced.
    • If using jaggery, substitute equal weight for sugar and dissolve fully before simmering.
    • For a more traditional chaat flavor, replace up to half the table salt with black salt (kala namak).

    Serving Suggestions

    • Use as a chutney for chaat, drizzle over roasted snacks, or serve as a dipping sauce for pakoras and samosas.

    Variations

    • Mild Heat: Add a pinch of Kashmiri red chili powder while simmering.
    • Hot: Add ¼ tsp cayenne or finely minced fresh chili.
    • Date–Tamarind Style: Simmer with 2–3 finely chopped Medjool dates and blend smooth for a richer, deeper sweetness (great for date–tamarind reductions).

    Make-Ahead & Storage

    • Refrigerate in an airtight container up to 2 weeks.
    • If thickened too much after refrigeration, whisk in 1–2 tsp warm water.
    • This chutney freezes well for up to 3 months.
  • Corn with Poblano Chiles

    Corn with Poblano Chiles

    Sweet corn, sautéed onion, and diced poblano come together in a simple, buttery Mexican side dish with a bright lime finish — perfect alongside tacos, grilled meats, enchiladas, and more.


    Ingredients

    • 1 large poblano chile
    • 2 tbsp butter
    • 1 small to medium white or yellow onion, diced small
    • 1½ lb frozen sweet corn (or 4 cups corn kernels)
    • fresh lime juice (to taste)
    • table salt (to taste)
    • black pepper (to taste)

    Directions

    Char the Poblano

    Char the poblano over a gas flame (or under a broiler, turning as needed) until the skin is blistered and blackened in spots.

    Transfer to a bowl and cover (or place in a bag) for 5–10 minutes to steam. Peel off the loose charred skin, remove stem and seeds, and dice small.

    Sauté the Onion and Corn

    In a large skillet over medium-high heat, melt the butter. Add the diced onion and sauté until softened and translucent (about 4–6 minutes).

    Add the corn and cook, stirring occasionally, until hot and lightly caramelized in spots (about 5–8 minutes).

    Finish

    Stir in the diced poblano and cook 1–2 minutes to warm through.

    Season with salt and pepper to taste, then finish with lime juice to taste. Serve warm.


    Notes

    Preparation

    • For the most flexible flavor, keep the onion soft and translucent (not browned) so the dish stays bright and works with a wide range of Mexican meals.

    Serving Suggestions

    Variations

    • Optional cumin: For a slightly warmer, more traditional Mexican note, add about ⅛ tsp ground cumin while seasoning. Keep it subtle.
    • strong>Optional cilantro: Stir in 1–2 tbsp chopped fresh cilantro at the end, or use it as a garnish for a brighter finish.

    Make-Ahead & Storage

    • Store leftovers covered in the refrigerator for up to 3–4 days.
    • Reheat gently in a skillet (best texture) or in the microwave. Add a small squeeze of lime after reheating to wake the flavors back up.
  • Chunky El Pato Salsa

    Chunky El Pato Salsa

    A bright, chunky salsa that combines the bold chile‑tomato base of El Pato salsa de chile fresco with fresh diced tomato, onions, jalapeño, cilantro, and balanced seasonings — perfect with chips or Mexican dishes.


    Ingredients

    • 1 can (7.75 oz) El Pato salsa de chile fresco
    • 1 medium Roma tomato (about 1 cup diced, seeds removed)
    • ½ cup finely diced white or red onion
    • 2 green onions, thinly sliced
    • 1 medium jalapeño, seeded and diced (adjust heat to taste)
    • ½ cup fresh cilantro, chopped
    • Juice of 1 lime (about 2 Tbsp)
    • ½ tsp ground cumin (optional)
    • ⅛–¼ tsp dried Mexican oregano
    • ¼ tsp sugar (balances acidity)
    • ½ tsp kosher salt (adjust to taste)
    • ½ tsp freshly ground black pepper
    • 1 small garlic clove, minced (optional)

    Directions

    Prep the Fresh Ingredients

    Dice the Roma tomato, finely dice the white or red onion, slice the green onions, seed and dice the jalapeño, chop the cilantro, and mince the garlic if using. Removing seeds and excess juice from the tomato helps keep the salsa chunky and prevents it from becoming watery (a common pico de gallo technique).

    This base of fresh ingredients mirrors classic fresh salsa compositions of tomato, onion, jalapeño, lime, and cilantro.

    Combine and Season

    In a medium bowl, combine the diced tomato, onion, green onions, jalapeño, and cilantro. Add the El Pato salsa de chile fresco and gently fold until the fresh ingredients are evenly mixed with the base.

    Add the lime juice, cumin (if using), Mexican oregano, sugar, salt, and black pepper. Stir to combine thoroughly, then taste and adjust salt, lime, or heat as needed — seasoning balance is key in fresh salsa recipes.

    Cover and refrigerate for at least 30–60 minutes so the flavors meld before serving.


    Notes

    Preparation

    • Draining excess tomato juice and removing seeds helps retain a chunky texture rather than a watery salsa — a key fresh salsa practice.
    • Taste for salt and acidity after chilling — chilling can slightly soften perceived seasoning, and fresh salsas often benefit from final adjustment.

    Serving Suggestions

    • Serve with tortilla chips as a classic appetizer or snack.
    • Use as a condiment for tacos, grilled meats, quesadillas, or eggs for brightness and texture.

    Variations

    • Mild: Remove all jalapeño seeds or substitute with mild peppers.
    • Smoky: Lightly char the jalapeño or tomato before dicing for a subtle smoky depth.
    • Extra Heat: Include some jalapeño seeds or add serrano peppers for more spice.

    Make-Ahead & Storage

    • Refrigerate in an airtight container for 3–4 days; flavors continue to develop and often taste even better after resting.
    • If excess liquid collects, drain before serving to maintain chunkiness.
  • Chile de Arbol Salsa

    Chile de Arbol Salsa

    This Salsa de Chile de Árbol is designed as a bold, heat-forward accent salsa—deeply savory, lightly smoky, and intensely flavorful. It’s meant to be used sparingly, adding sharp chile heat and depth rather than serving as the primary salsa. Paired with milder options, it brings balance and flexibility to the table, letting everyone tailor heat to their own comfort level.


    Ingredients

    • 6–8 dried chile de árbol, stems removed
    • 5–6 tomatillos, husked and rinsed
    • ⅓ medium onion
    • 1 roma tomato
    • 2 cloves garlic (1 roasted, 1 raw)
    • ½ tsp chicken & tomato bouillon, plus more to taste
    • Salt, to taste

    Directions

    Toast and Soak the Chiles

    Lightly toast the chile de árbol in a dry skillet over medium heat just until fragrant, being careful not to darken or burn them.

    Transfer the chiles to a bowl, cover with hot water, and soak for about 10 minutes. Drain well.

    For a slightly more controlled heat, split 2–3 of the chiles and shake out the seeds before blending.

    Roast the Vegetables

    Roast the tomatillos and onion (and garlic clove if roasting both) on a hot skillet, griddle, or under a broiler until blistered and lightly charred.

    Add the roma tomato late and roast just until the skin splits and lightly browns.

    Blend the Salsa

    Add the soaked chiles, roasted vegetables, remaining raw garlic, and bouillon to a blender. Blend until smooth and thick.

    Adjust consistency with a small amount of reserved soaking liquid if needed. Taste and adjust salt or bouillon to preference.


    Notes

    Preparation

    • This salsa is intentionally concentrated and heat-forward; a small amount goes a long way.
    • Removing seeds from a portion of the chiles moderates heat without sacrificing chile flavor.

    Serving Suggestions

    • Serve as the hot component alongside a milder salsa verde.
    • Pair with cooling elements such as crema, sour cream, avocado crema, or cilantro-lime crema.
    • Excellent with tacos, eggs, grilled meats, beans, or rice—use sparingly for heat and depth.

    Variations

    • For a slightly smokier profile, toast the chiles a bit longer while staying below the point of bitterness.
    • Add ½ tsp neutral oil to the blender for a rounder mouthfeel and aroma carry.

    Make-Ahead & Storage

    • Store refrigerated in a sealed container for up to 5 days.
    • Flavor improves slightly after resting overnight.
  • Anijsmelk — Dutch Star-Anise Steamer

    Anijsmelk — Dutch Star-Anise Steamer

    Anijsmelk, the classic star-anise–flavored steamer of the Netherlands, is one of my favorite Dutch treats—simple, soothing, and steeped in nostalgia. Traditionally made by stirring anise-flavored sugar cubes (Anijsblokjes) into warm milk, it’s a comforting drink to warm your soul on a cold winter’s night. This homemade version captures that flavor with whole star anise and a touch of sweetness.


    Ingredients

    • 1 qt milk
    • 5–10 whole star anise
    • ⅛ tsp ground anise seed (optional, for rounder flavor)
    • 1–4 tbsp sugar, to taste (about 1 tsp per cup)
    • Small knob of butter or splash of cream (optional, for richness)

    Directions

    Infuse the Milk

    In a medium saucepan, warm the milk with the star anise over medium-low heat until steaming but not boiling. Reduce heat to low and let steep gently for 5–10 minutes, tasting occasionally to check flavor strength.

    Finish the Drink

    When the milk reaches your desired anise intensity, remove from heat and discard the star anise pods. Stir in sugar to taste and, if desired, add a small knob of butter or splash of cream for extra richness. Whisk briefly to create a light froth.

    Serve

    Pour hot into a teacup or mug and enjoy immediately. Optionally dust with a pinch of ground anise or cinnamon. Serve alongside a small Dutch biscuit or slice of buttered bread for an authentic touch.


    Notes

    Preparation

    • For the most authentic flavor, use a mix of whole star anise and a small pinch of ground anise seed.
    • Warm gently—avoid boiling, which can cause the milk to curdle or the flavor to become harsh.
    • Steep covered to preserve the delicate aroma of the anise.

    Serving Suggestions

    • Traditionally enjoyed as a bedtime drink or on cold evenings.
    • Serve in a warm ceramic cup with a dusting of ground anise, cinnamon, or nutmeg.
    • Pair with speculaas cookies or buttered toast for a cozy Dutch treat.

    Variations

    • Substitute honey or vanilla sugar for a more nuanced sweetness.
    • Add a drop of almond or vanilla extract for a gentle twist.
    • For a creamier version, replace 1 cup of milk with light cream.
  • Pão de Queijo — Brazilian Cheese Rolls

    Pão de Queijo — Brazilian Cheese Rolls

    Crisp on the outside and chewy within, these Brazilian cheese rolls—known as Pão de Queijo—are irresistibly airy and full of cheesy flavor. Made from tapioca flour, they’re naturally gluten-free and come together quickly in a blender for an easy, crowd-pleasing treat.


    Ingredients

    • 1 egg
    • 1 cup milk
    • ½ cup vegetable oil
    • 1¾ cups tapioca flour
    • ½ cup parmesan, grated
    • ½ cup mozzarella, cheddar, or jack cheese, grated
    • ½ tsp table salt

    Directions

    Prepare the Batter

    Preheat oven to 350°F (175°C). Spray a 24-cup mini muffin tin with nonstick cooking spray.

    In a blender, combine egg, milk, and oil. Blend for 30 seconds, then add the remaining ingredients and blend for another 30 seconds until smooth.

    Bake

    Pour batter into the prepared muffin cups, filling each about ¾ full. Bake for 20–25 minutes, or until the cheese rolls are puffed and golden.

    Serve warm for the best texture. Makes about 35–40 cheese rolls.

    Store

    Allow cheese rolls to cool completely before storing. Place in an airtight container and refrigerate up to 3 days or freeze up to 1 month. Reheat in a 350°F oven for 5–10 minutes until warmed through.


    Notes

    Preparation

    • Avocado oil is preferred, but olive oil or any neutral vegetable oil works well.
    • Tapioca flour gives Pão de Queijo its signature chewy texture—do not substitute with wheat flour.

    Serving Suggestions

    • Serve as a snack, breakfast bread, or alongside soups and stews.
    • Enjoy warm with butter, cream cheese, or fruit preserves for a sweet-savory contrast.

    Variations

    • Add ½ tsp garlic powder or minced herbs for extra flavor.
    • Swap in pepper jack for a spicy version or gouda for a milder flavor.

    Make-Ahead & Storage

    • Refrigerate baked rolls up to 3 days in an airtight container.
    • Freeze baked or unbaked batter portions up to 1 month.
    • Reheat frozen rolls directly in a 350°F oven for 10–12 minutes until hot and crisp.
  • Alabama White Barbecue Sauce

    Alabama White Barbecue Sauce

    Alabama white barbecue sauce is one of those condiments that quietly steals the show—sharp, peppery, and creamy enough to cling to smoked chicken and pulled pork without ever feeling heavy. This version leans into that classic tang with apple cider vinegar, stone-ground mustard, horseradish, and plenty of black pepper, plus just enough optional sweetness and umami to round the bite. It’s the kind of sauce people remember after a cookout and ask for by name, whether you’re brushing it on grilled chicken thighs, serving it alongside ribs, or drizzling it over a piled-high pulled pork sandwich.


    Ingredients

    • 1 cup mayonnaise
    • 3 tbsp apple cider vinegar
    • 1½ tbsp prepared stone-ground mustard
    • 2-3 tsp prepared horseradish, to taste
    • 2 tsp coarsely ground black pepper, lightly toasted
    • ¾ tsp table salt
    • ½ tsp garlic powder
    • ¾ tsp onion powder
    • ¾ tsp Worcestershire sauce
    • ½ tsp hot sauce (such as Louisiana-style), or to taste
    • ½–1 tsp honey or sugar, to taste (optional, recommended)
    • ½ tsp fresh lemon juice (optional, for brightness)
    • ⅛ tsp MSG or 1–2 tsp dill pickle brine (optional, for extra depth)

    Directions

    Mix the Sauce

    Place the coarsely ground black pepper in a small dry skillet over medium-low heat and toast for 20–30 seconds, just until fragrant. Remove from heat and let cool slightly.

    In a medium bowl, whisk together the mayonnaise, apple cider vinegar, stone-ground mustard, horseradish, black pepper, salt, garlic powder, onion powder, Worcestershire sauce, hot sauce, honey or sugar (if using), lemon juice (if using), and either MSG or dill pickle brine (if using) until completely smooth and well combined.

    Adjust and Chill

    Taste and adjust seasoning: add a splash more vinegar for extra tang, a bit more honey or sugar to round the acidity, or additional hot sauce and horseradish for more heat. The sauce should taste slightly sharper and more intense than you want it to finish, as the flavors will mellow while chilling.

    Cover and refrigerate for at least 2 hours, preferably overnight, to allow the flavors to blend and the pepper to soften. Stir well before serving. Use within about 1 week.


    Notes

    Preparation

    • Use a good-quality, full-fat mayonnaise for best texture and flavor; reduced-fat mayo will make the sauce thinner and less stable.
    • Prepared horseradish varies in strength—start on the low end and add more to taste once everything is mixed.
    • The optional honey or sugar doesn’t make the sauce noticeably sweet; it simply softens the acidity and heat for a more rounded, restaurant-style finish.
    • Toasting the black pepper is optional but enhances its aroma and adds a slightly deeper, smokier note.

    Serving Suggestions

    • Brush over grilled or smoked chicken during the last 3–5 minutes of cooking, then serve extra on the side for dipping.
    • Drizzle over pulled pork sandwiches or use as a sandwich spread in place of plain mayonnaise.
    • Serve as a dipping sauce for smoked turkey, ribs, or grilled vegetables.
    • Thin slightly with water or buttermilk to create a drizzle for grain bowls, roasted potatoes, or chopped salads.

    Variations

    • Salad Dressing: For a creamy, tangy salad dressing, whisk in 2–3 tbsp buttermilk per 1 cup of sauce until pourable. Adjust salt and pepper to taste.
    • Sandwich Spread: For a slightly looser spread for sandwiches or pulled pork, whisk in about 1 tbsp buttermilk per 1 cup of sauce, or simply use the sauce as-is.
    • Extra-Spicy Version: Increase the hot sauce to 1–1½ tsp, add more horseradish to taste, and consider a pinch of cayenne for a lingering heat.
    • Smoky Version: Add ⅛–¼ tsp smoked paprika or a few drops of liquid smoke for a subtle smoky note.
    • Herb Variation: Stir in 1–2 tbsp finely chopped fresh parsley, chives, or dill just before serving for a fresher, greener profile.

    Make-Ahead & Storage

    • This sauce is best made at least a few hours in advance; overnight chilling gives the most balanced flavor.
    • Store in an airtight container in the refrigerator for up to 1 week, stirring before each use.
    • Because the base is mayonnaise, do not freeze; the emulsion will break once thawed.
    • Always use clean utensils when dipping into the sauce to maximize its shelf life.
  • Cilantro-Lime Crema

    Cilantro-Lime Crema

    Smooth, tangy, and fresh—this cilantro-lime crema adds a bright, herby finish to tacos, enchiladas, grilled meats, and especially Chilaquiles Verdes. The balance of sour cream and mayonnaise gives it a silky texture that clings beautifully while staying light and refreshing.


    Ingredients

    • ¾ cup sour cream
    • ¼ cup mayonnaise
    • ½ cup fresh cilantro (leaves plus tender stems)
    • 1½ tbsp lime juice (plus ½ tsp reserved for finishing)
    • 1 tsp lime zest
    • 1 small clove garlic, grated or minced
    • ¼ tsp table salt
    • 1–2 tbsp water, as needed to thin

    Optional Add-Ins

    • ½ small jalapeño (seeded) for mild heat and vibrant color
    • 1 tsp pickled jalapeño brine for extra tang and brightness
    • A few drops chipotle adobo liquid for a smoky, savory variation

    Directions

    Blend the Crema

    Combine sour cream, mayonnaise, cilantro, lime juice, lime zest, garlic, salt, and 1 tbsp water in a blender or small food processor.

    Pulse several times, then blend until smooth and light green. If too thick, add more water a teaspoon at a time until the crema reaches a drizzleable consistency.

    Finish and Adjust

    Stir in the reserved ½ tsp lime juice for a burst of fresh citrus at the end. Taste and adjust seasoning—add more salt or lime juice to balance tang and creaminess.

    For a thinner drizzle, whisk in an extra splash of water.

    Serve or Chill

    Transfer to an airtight container and refrigerate for at least 30 minutes to let flavors meld. Stir before using. Serve cold or at cool room temperature.


    Notes

    Preparation

    • Combining sour cream and mayonnaise gives the crema a silky body that clings beautifully to food.
    • Include cilantro stems for extra aroma and a brighter green hue.
    • Blend briefly (10–15 seconds) to preserve color; over-blending can dull the green.
    • Add reserved lime juice at the end to refresh flavor after blending.

    Serving Suggestions

    • Drizzle over tacos, enchiladas, burrito bowls, or grilled meats.
    • Perfect accompaniment for Chilaquiles Verdes.
    • Use as a dipping sauce for vegetables or empanadas.

    Variations

    • Add ½ small jalapeño for mild heat and brighter color.
    • Blend in ¼ avocado for a creamier, thicker crema; reduce water slightly.
    • For smoky flavor, replace garlic with ½ tsp chipotle adobo sauce.

    Make-Ahead & Storage

    • Refrigerate in an airtight container up to 5 days; stir before serving.
    • Flavor deepens after a few hours as the lime and garlic infuse.
    • Not suitable for freezing—fresh herbs and dairy will separate.
  • Cilantro Lime Rice (Instant Pot)

    Cilantro Lime Rice (Instant Pot)

    This Instant Pot version of Cilantro-Lime Rice delivers the same bright, aromatic flavor as the stovetop method in a fraction of the time. Jasmine rice cooks up fluffy and tender with perfect lime-cilantro balance—ideal for tacos, fajitas, enchiladas, or grilled meats. Click here for the stovetop version of this recipe.


    Ingredients

    • 1 cup jasmine rice, rinsed and drained
    • 1 tbsp butter or olive oil
    • 1 cup chicken broth (or water + ¼ tsp salt)
    • Zest of 1 lime
    • 1–1½ tbsp fresh lime juice (added after cooking)
    • ½ cup cilantro leaves, finely chopped
    • ⅛ tsp sugar (optional, to balance acidity)
    • Salt to taste

    Optional Add-Ins

    • 1 small clove garlic, minced (sauté before adding rice)
    • 1 bay leaf (for subtle herbal aroma)

    Directions

    Rinse the Rice

    Rinse jasmine rice in a fine-mesh strainer under cold water until the water runs mostly clear to remove excess starch. Drain well.

    Sauté

    Set the Instant Pot to Sauté. Melt butter or heat oil, then add garlic if using. Stir in drained rice and toast for 1–2 minutes until lightly fragrant.

    Press Cancel to stop the sauté function.

    Pressure Cook

    Add chicken broth and a pinch of salt. Stir once to distribute evenly, then secure the lid and set the valve to Sealing.

    Cook on High Pressure for 3 minutes. Allow pressure to release naturally for 10 minutes, then manually release any remaining steam.

    Finish the Rice

    Fluff the rice gently with a fork. Stir in lime zest, lime juice, cilantro, and sugar (if using). Taste and adjust seasoning with more salt or lime juice as needed.

    Let rest uncovered for 2–3 minutes to allow excess steam to escape before serving.

    Serve

    Serve warm as a side or base for tacos, fajitas, enchiladas, or grilled meats. Garnish with additional cilantro and lime zest if desired.


    Notes

    Preparation

    • Use a 1:1 ratio of rice to liquid for the Instant Pot—no evaporation means less liquid is required than on the stove.
    • Do not add lime juice before pressure cooking; acid interferes with proper rice hydration.
    • Natural release for 10 minutes ensures fluffy, evenly cooked grains.
    • Let rice rest uncovered for a few minutes after fluffing to release steam and maintain perfect texture.

    Serving Suggestions

    • Pairs beautifully with tacos, fajitas, grilled shrimp, or chicken.
    • Use as a flavorful base for burrito bowls or enchilada platters.
    • For color and brightness, top with extra cilantro and a sprinkle of lime zest before serving.

    Variations

    • Subtle Coconut Version: Replace ¼ cup of broth with ¼ cup unsweetened coconut milk (use ¾ cup broth + ¼ cup coconut milk). Adds gentle richness and a faint coconut aroma while maintaining lime-cilantro brightness.
    • Coconut-Forward Version: Replace ½ cup of broth with ½ cup coconut milk (use ½ cup broth + ½ cup coconut milk). Yields a creamier, tropical variation—use 2 tbsp lime juice and slightly more salt to balance flavor.
    • Use coconut versions for fusion dishes like Korean Pulled Pork Tacos, jerk chicken, or grilled shrimp where a creamy contrast enhances spice and smoke.
    • For added aromatics, sauté a small piece of shallot or a few cilantro stems with the rice.

    Make-Ahead & Storage

    • Cooked rice can be held warm in the Instant Pot for up to 30 minutes before adding lime and cilantro.
    • Refrigerate leftovers in an airtight container for up to 3 days; reheat with a splash of broth or water to restore moisture.
    • Not recommended for freezing—fresh cilantro and lime flavor are best enjoyed fresh.
  • Cilantro Lime Rice (Stovetop)

    Cilantro Lime Rice (Stovetop)

    Fluffy jasmine rice infused with fresh lime and cilantro—simple, bright, and perfectly balanced to complement tacos, grilled meats, or saucy dishes. A touch of butter enhances richness while the zest and juice keep every bite fresh and aromatic. Click here for the Instant Pot version of this recipe.


    Ingredients

    • 1 cup jasmine rice, rinsed and drained
    • 1 tbsp butter
    • 1½ cups chicken broth (or vegetable broth)
    • 1 clove garlic, minced (optional)
    • Zest of 1 lime
    • 1–1½ tbsp fresh lime juice (to taste)
    • ½ cup cilantro leaves, finely chopped
    • ⅛ tsp sugar (to round acidity)
    • Salt to taste

    Directions

    Toast the Rice

    In a saucepan or rice cooker insert, melt butter over medium heat. Add rice (and garlic, if using) and sauté 2–3 minutes until grains appear glossy and lightly golden.

    Cook the Rice

    Add broth and a generous pinch of salt. Stir once, bring to a simmer, then cover and reduce heat to low. Cook for 15 minutes, then remove from heat and let stand, covered, for 10 minutes to finish steaming.

    Finish with Lime and Cilantro

    In a small pan, warm lime zest with a few drops of butter until aromatic (optional but enhances flavor).

    Fluff rice gently with a fork and fold in lime zest, lime juice, cilantro, and sugar. Taste and adjust salt or lime as desired.

    Serve

    Serve warm as a side or base for tacos, grilled meats, or saucy dishes where a bright, citrusy accent balances richness.


    Notes

    Preparation

    • Rinse jasmine rice until water runs mostly clear to remove excess starch and keep grains fluffy.
    • Let cooked rice rest 10 minutes before fluffing to allow steam to redistribute for perfect texture.
    • Warming lime zest in butter releases aromatic oils and coats grains more evenly.
    • Adjust lime and salt balance at the end—rice should taste bright but not sharp.

    Serving Suggestions

    • Pairs beautifully with tacos, fajitas, or grilled seafood.
    • Excellent base for burrito bowls or enchilada platters.
    • Top with extra cilantro and a sprinkle of lime zest for presentation.

    Variations

    • Subtle Coconut Version: Replace ¼ cup of broth with ¼ cup unsweetened coconut milk (1¼ cups broth + ¼ cup coconut milk). Adds gentle creaminess and a faint coconut aroma while maintaining lime-cilantro brightness.
    • Coconut-Forward Version: Replace ½ cup of broth with ½ cup coconut milk (1 cup broth + ½ cup coconut milk). Creates a richer, tropical flavor—use 2 tbsp lime juice and season more assertively with salt.
    • Use coconut versions for fusion dishes like Korean Pulled Pork Tacos, jerk chicken, or grilled shrimp where a creamy contrast enhances spice and smoke.

    Make-Ahead & Storage

    • Cooked rice can be held warm for up to 30 minutes before adding lime and cilantro.
    • Refrigerate leftovers in an airtight container up to 3 days; reheat gently with a drizzle of broth or water to restore moisture.
    • Fresh cilantro and lime juice should always be added just before serving for best color and flavor.
  • Aguachile Rojo de Camaron

    Aguachile Rojo de Camaron

    Our family’s take on northern Mexican aguachile rojo: quick-blanched shrimp finished in fresh lime, a vivid red base of toasted dried chiles and Camaronazo, and a crisp bed of cucumber, red onion, cilantro, and just-ripe avocado. Bright, spicy, and ice-cold—made to serve immediately with tostadas, salsa negra, and wedges of lime.


    Ingredients

      Shrimp & Lime Cure

    • 2 lb large raw shrimp, peeled, deveined, halved lengthwise
    • 1 cup fresh lime juice (just enough to cover shrimp)
    • 2 tsp table salt, divided (to season curing liquid and sauce)
    • Vegetables & Herbs

    • 1 red onion, very thinly sliced
    • 3 cucumbers, thin half-moons
    • 3 avocados, diced (add just before serving)
    • ½ bunch cilantro, chopped, plus leaves for garnish
    • radishes, thinly sliced (garnish, optional)
    • lime wedges, for serving
    • Red Base

    • 24–28 oz Camaronazo spicy tomato cocktail with shrimp
    • 4 dried chiles de árbol
    • 2 dried pequín chiles
    • 1 dried guajillo chile
    • 1 clove garlic
    • ¼ tsp chicken bouillon powder (Knorr-style), or to taste
    • Optional Balancers

    • ½ tsp sugar (to soften bitterness from toasted chiles)
    • 1–2 tbsp soy sauce or Maggi seasoning (depth; Sinaloan style)
    • 2–3 tbsp cold water (only if base is too thick)

    Directions

    Blanch and Cure the Shrimp

    Bring a pot of well-salted water to a gentle boil. Add shrimp and blanch 10–15 seconds—just until edges blush pink—then immediately transfer to an ice bath to stop cooking. Drain well and pat dry.

    Place shrimp in a shallow bowl and pour in just enough fresh lime juice to cover. Refrigerate 20–25 minutes, stirring once halfway, until opaque and slightly firm. Avoid over-marinating.

    Soak the Onion

    Soak sliced red onion in ice water for 10 minutes to mellow sharpness and keep a crisp bite; drain thoroughly.

    Toast & Hydrate the Chiles

    Toast árbol, pequín, and guajillo chiles in a dry skillet over medium heat until fragrant, ~30 seconds per side. Remove stems and most seeds.

    Soak guajillo in hot water 10 minutes to soften; reserve a spoonful of soaking liquid.

    Blend the Red Base

    Blend about ¼ of the Camaronazo with toasted chiles, garlic, 1 tsp of the salt, chicken bouillon, and a splash of guajillo soaking liquid until completely smooth and vivid red.

    Add remaining Camaronazo and optional soy sauce or Maggi; pulse to combine. If using, add sugar to round bitterness.

    If the base is too thick, add 2–3 tbsp cold water. If it tastes too sweet, brighten with more lime. Taste and adjust salt at the end.

    Combine the Vegetables

    In a large chilled bowl, mix cucumber, drained onion, and chopped cilantro. Pour in the red base and stir to coat evenly.

    Finish with Shrimp & Avocado

    Add the cured shrimp along with their lime marinade; fold gently to combine so the broth stays bright and balanced.

    Add avocado just before serving and fold lightly to keep the cubes intact.

    Serve

    Serve immediately in chilled bowls or on tostadas. Garnish with cilantro leaves, sliced radish, and lime wedges; drizzle with salsa negra or salsa macha if desired.


    Notes

    Preparation

    • Blanching locks in a crisp, restaurant-quality texture; the short lime cure finishes the “cook” without turning mushy.
    • Toast all dried chiles briefly to deepen flavor and color; soak guajillo for a smoother blend.
    • Onion soak: 10 minutes in ice water keeps texture while taming harshness.
    • If the base is too thick, add 2–3 tbsp cold water; if sweetness dominates, add a squeeze of lime; always taste and adjust salt at the end.
    • Add avocado only at the end to prevent bruising and mushiness.

    Serving Suggestions

    • Serve with crisp tostadas (not just chips) for structure and crunch.
    • Add thinly sliced radish and extra cilantro leaves for color and freshness.
    • Offer salsa negra or salsa macha for a glossy, smoky-spicy drizzle.
    • Pass extra lime wedges at the table for last-second brightness.

    Variations

    • Soy sauce or Maggi (1–2 tbsp) adds savory depth common in Sinaloan versions—use to taste.
    • A pinch of sugar (½ tsp) can smooth bitterness from well-toasted chiles.
    • For extra heat, add another árbol or a small amount of the chile seeds; for milder heat, reduce árbol/pequín.

    Make-Ahead & Storage

    • The red chile base can be blended up to 1 day ahead; keep refrigerated and whisk before using.
    • Blanch shrimp and chill the onion/cucumber ahead, but cure shrimp in lime and add avocado just before serving.
    • Best served immediately once assembled; leftovers lose texture quickly—consume the same day.
  • Braised Fennel

    Braised Fennel

    This elegant side transforms fennel’s natural sweetness into something truly special. Lightly caramelized and gently braised with shallots, garlic, and white wine, the tender fennel is finished with butter, lemon zest, and fresh fennel fronds for a glossy, aromatic dish worthy of any restaurant table.


    Ingredients

    • 2–3 fennel bulbs, trimmed and quartered lengthwise (cores intact)
    • 2 tbsp olive oil or butter
    • 1 shallot, thinly sliced
    • 1 clove garlic, thinly sliced
    • ¼ cup dry white wine or 1 tbsp lemon juice
    • 1 cup chicken stock
    • ½ tsp honey (optional)
    • 1 tbsp butter (for finishing)
    • salt and freshly ground black pepper, to taste
    • zest of ½ lemon, for garnish
    • chopped fennel fronds or parsley, for garnish

    Directions

    Brown the Fennel

    In a large sauté pan, heat olive oil or butter over medium-high heat. Add fennel quarters cut-side down and cook until deeply golden on both cut sides, about 3–4 minutes per side. Remove and set aside.

    Build the Aromatic Base

    Add shallot and garlic to the pan; sauté 30 seconds, just until fragrant. Deglaze with white wine (or lemon juice), scraping up any browned bits.

    Braise

    Add chicken stock and honey, if using. Return fennel to the pan, cut-side up. Bring to a simmer, reduce heat to low, and cover. Braise gently for 15–20 minutes, turning once, until fennel is tender but still holds its shape.

    Glaze & Finish

    Remove the lid and simmer uncovered for 5–7 minutes more, allowing the liquid to reduce into a glossy glaze. Stir in butter off heat to finish the sauce and season with salt and pepper.

    Serve

    Transfer fennel to a serving dish and drizzle with the reduced pan juices. Garnish with lemon zest and chopped fennel fronds or parsley before serving.


    Notes

    Preparation

    • Proper browning is essential—golden edges enhance both flavor and appearance.
    • Use vegetable stock for a vegetarian version.
    • Finishing with butter gives the glaze a rich, silky texture.

    Serving Suggestions

    • Serve as a side with roasted chicken, fish, or creamy polenta.
    • For a richer presentation, finish with freshly grated Parmesan or a drizzle of aged balsamic.
    • Add a sprinkle of toasted breadcrumbs or flaky salt for texture.

    Make-Ahead & Storage

    • Can be braised up to 1 day ahead; cool and refrigerate in its cooking liquid.
    • Reheat gently over low heat, spooning juices over the fennel to re-glaze.
    • Best served warm, but can also be enjoyed at room temperature as part of an antipasto spread.