Bags of Spices

Favorite Recipes

Instant Pot

Smart, time-saving pressure cooker recipes — deeply flavored results with hands-off convenience.

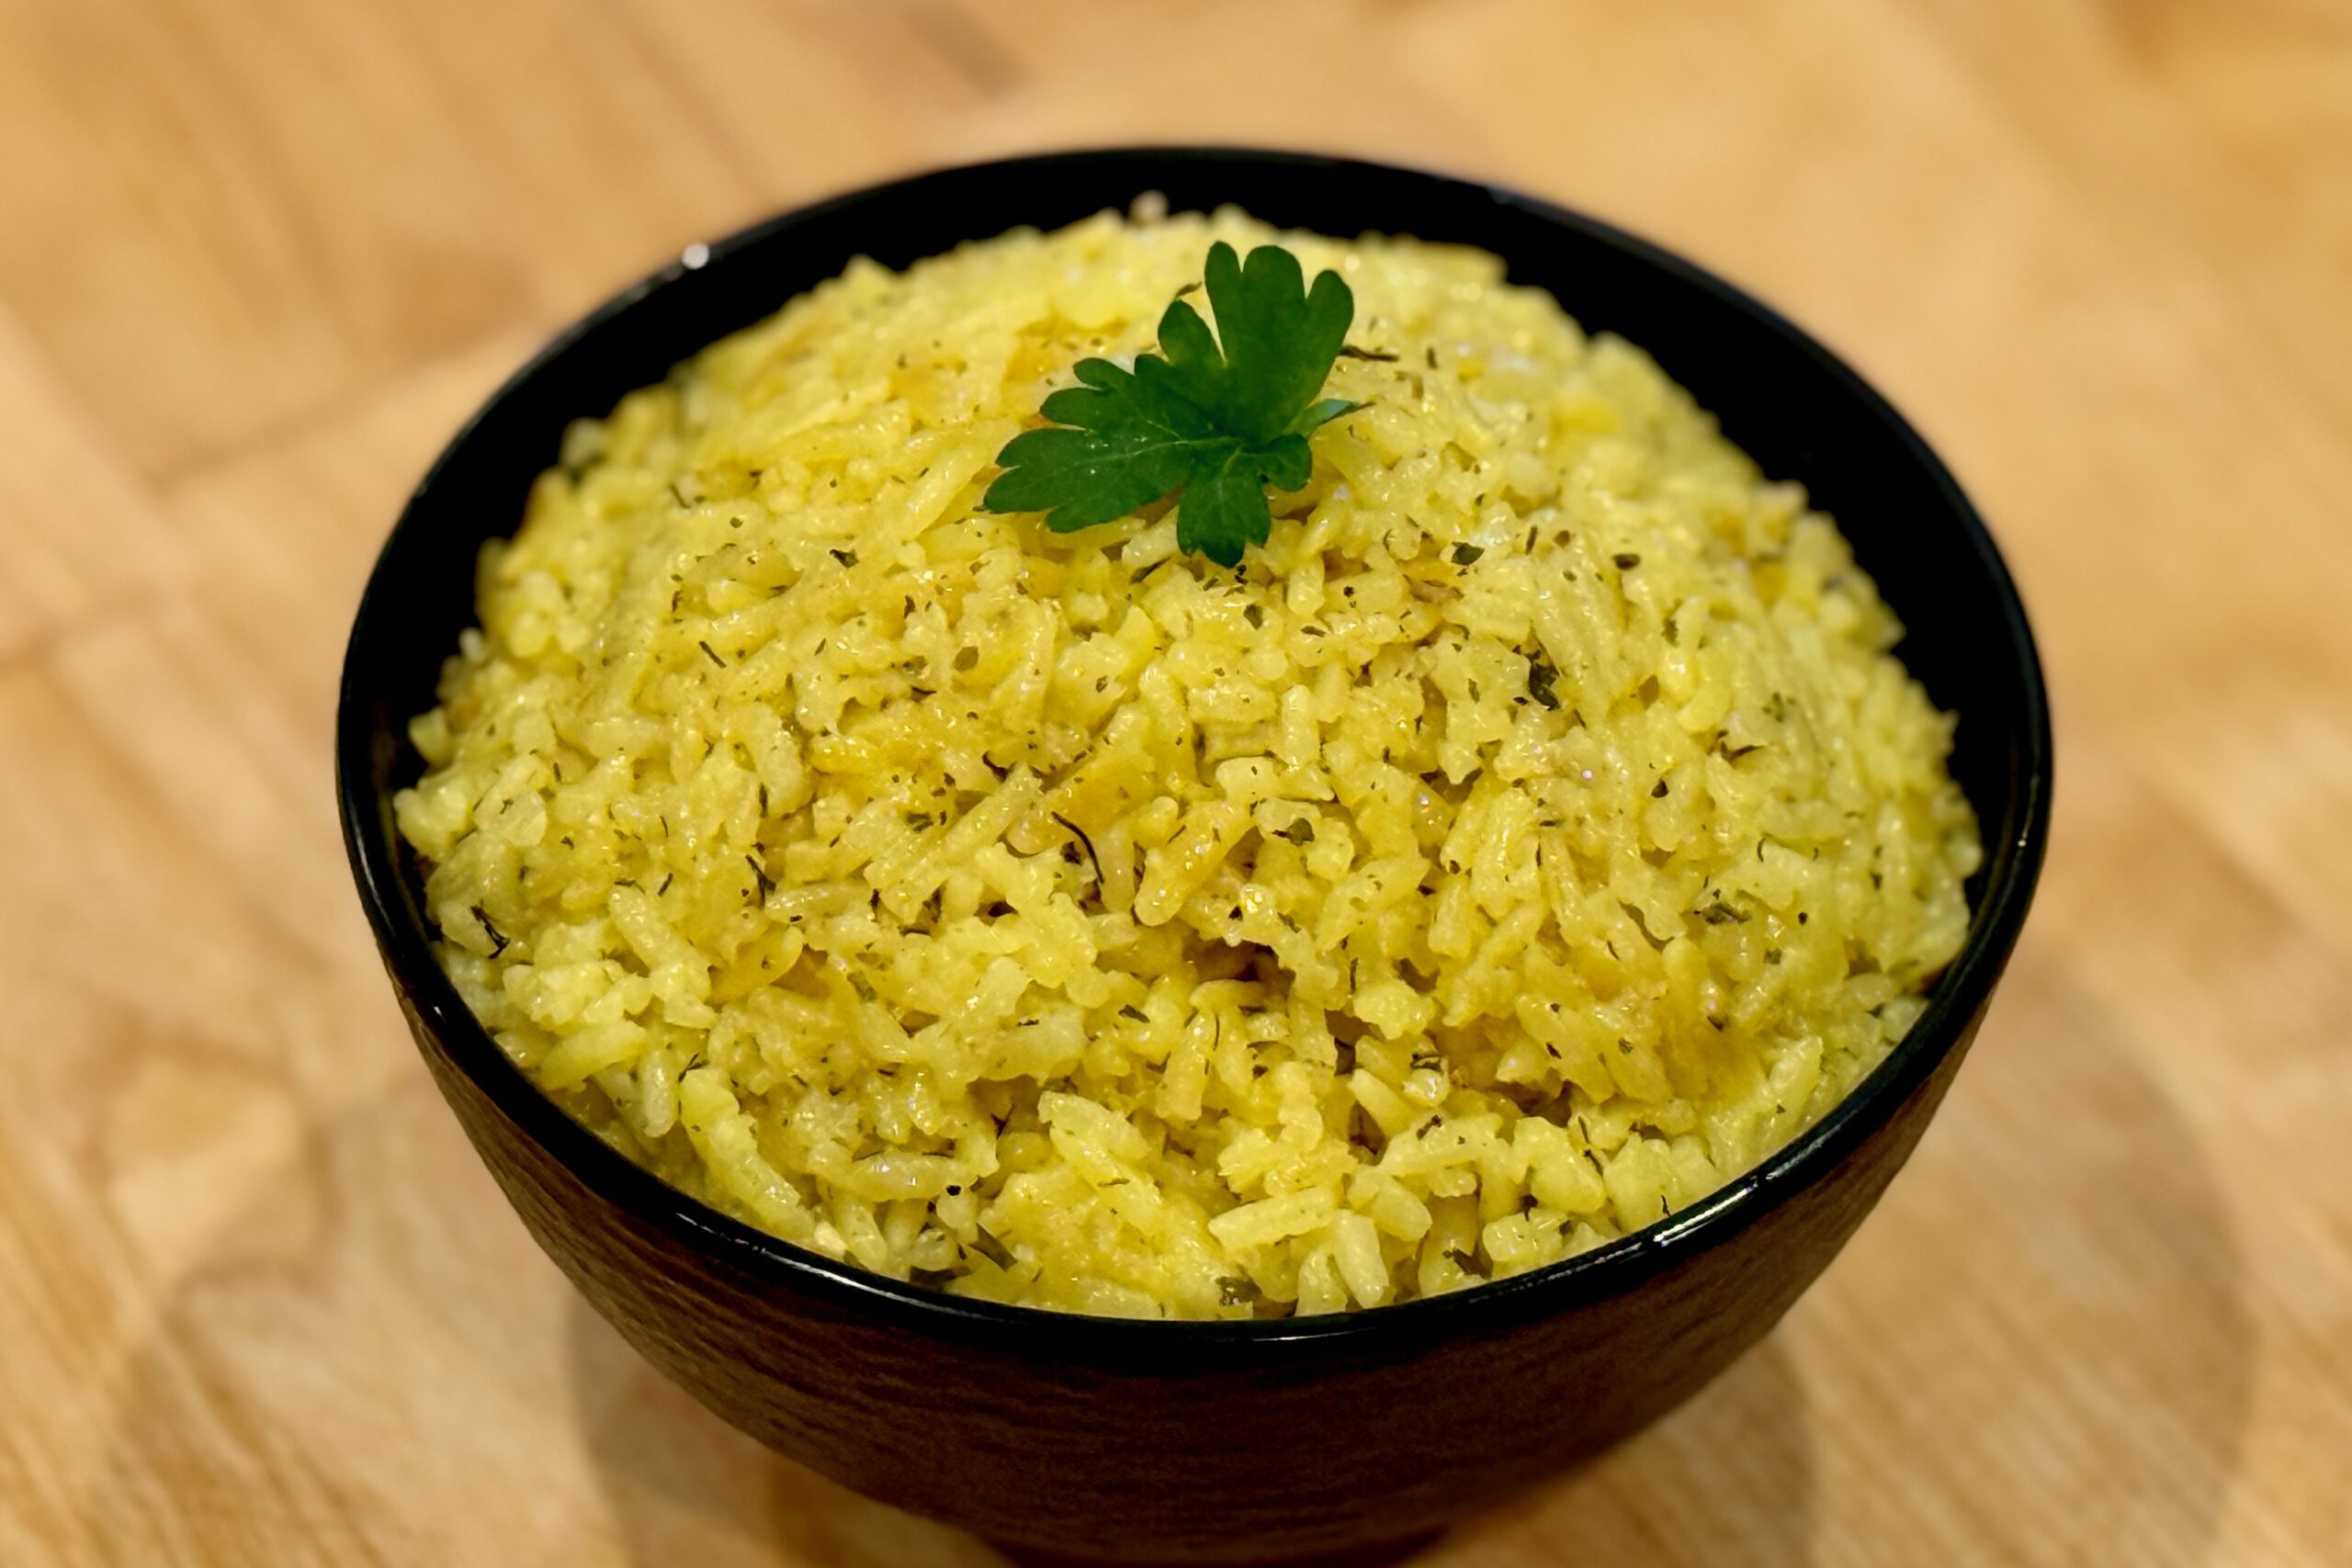
  • Greek Lemon Rice

    Greek Lemon Rice

    Bright, savory, and finished with plenty of lemon, this Greek-style rice is an easy way to round out a chicken gyro dinner. Onion, garlic, broth, dill, and parsley build a simple but flavorful base, while a touch of butter adds richness and a tiny pinch of turmeric gives the rice a warm golden color without changing the flavor.


    Ingredients

    • 1 cup (185 g) long-grain white rice, rinsed
    • 1 tbsp (10 g) orzo pasta (optional)
    • 1¼ cups (300 ml) chicken broth
    • 2 tbsp (30 ml) olive oil
    • ¼ cup (40 g) finely diced onion
    • 2 cloves garlic, minced
    • 1½ tsp fresh dill, chopped (or ½ tsp dried)
    • 1½ tsp fresh parsley, finely chopped (or ½ tsp dried)
    • ¼ tsp black pepper
    • ⅛ tsp turmeric
    • ¼ tsp onion powder
    • 1 small bay leaf
    • 1 tsp chicken bouillon (optional but recommended, preferably Better Than Bouillon)
    • 2 tbsp (30 ml) fresh lemon juice
    • 1 tsp lemon zest (optional)
    • 1 tbsp (14 g) butter
    • table salt, to taste

    Directions

    Sauté the Aromatics

    Heat a medium skillet over medium heat. Add the olive oil and cook the onion for about 5–7 minutes, stirring occasionally, until softened and lightly golden.

    Add the garlic and cook for 30 seconds, just until fragrant.

    Toast the Rice

    Add the rinsed rice and optional orzo to the skillet. Cook for 1 to 2 minutes, stirring frequently, until lightly toasted and coated in the oil.

    Transfer the mixture to the Instant Pot insert.

    Add the Liquid and Seasonings

    Stir in the chicken broth, dill, parsley, black pepper, turmeric, onion powder, bay leaf, and chicken bouillon, if using. Do not add the lemon juice yet.

    Pressure Cook

    Lock the lid and cook on High Pressure for 4 minutes.

    Let the pressure release naturally for 10 minutes, then carefully vent any remaining pressure.

    Finish the Rice

    Remove the bay leaf. Fluff the rice gently with a fork. Stir in the lemon juice, lemon zest if using, and butter.

    Taste and season with table salt as needed. Serve warm, with an extra squeeze of lemon if desired.

    Yield: 4 servings.


    Notes

    Preparation

    • Rinsing the rice helps the finished texture stay fluffy and prevents excess stickiness.
    • The turmeric is used only for color and should remain subtle so the rice keeps its classic Greek flavor profile.
    • Cooking the onion until lightly golden adds depth and sweetness that helps balance the bright lemon flavor.
    • The sauté step can also be done directly in the Instant Pot using the Sauté function if preferred.

    Variations

    • With Orzo: The optional orzo adds texture and gives the rice a more traditional Greek pilaf character.
    • Fresh or Dried Herbs: Fresh herbs provide the brightest flavor, but dried dill and parsley work very well for a convenient pantry version.
    • With Oregano: A small pinch of dried oregano can be added if you want the rice to echo the flavors in gyro-seasoned meat.

    Serving Suggestions

    • Serve alongside Chicken Gyro, souvlaki, grilled chicken, or lamb.
    • Finish with extra lemon wedges and a spoonful of tzatziki for a full taverna-style plate.

    Make-Ahead & Storage

    This rice reheats well and can be made ahead for meal prep or larger dinners.

    • Refrigerate leftovers in an airtight container for up to 4 days.
    • Reheat gently with a small splash of broth or water to loosen the rice.
    • Add a fresh squeeze of lemon after reheating to brighten the flavor.
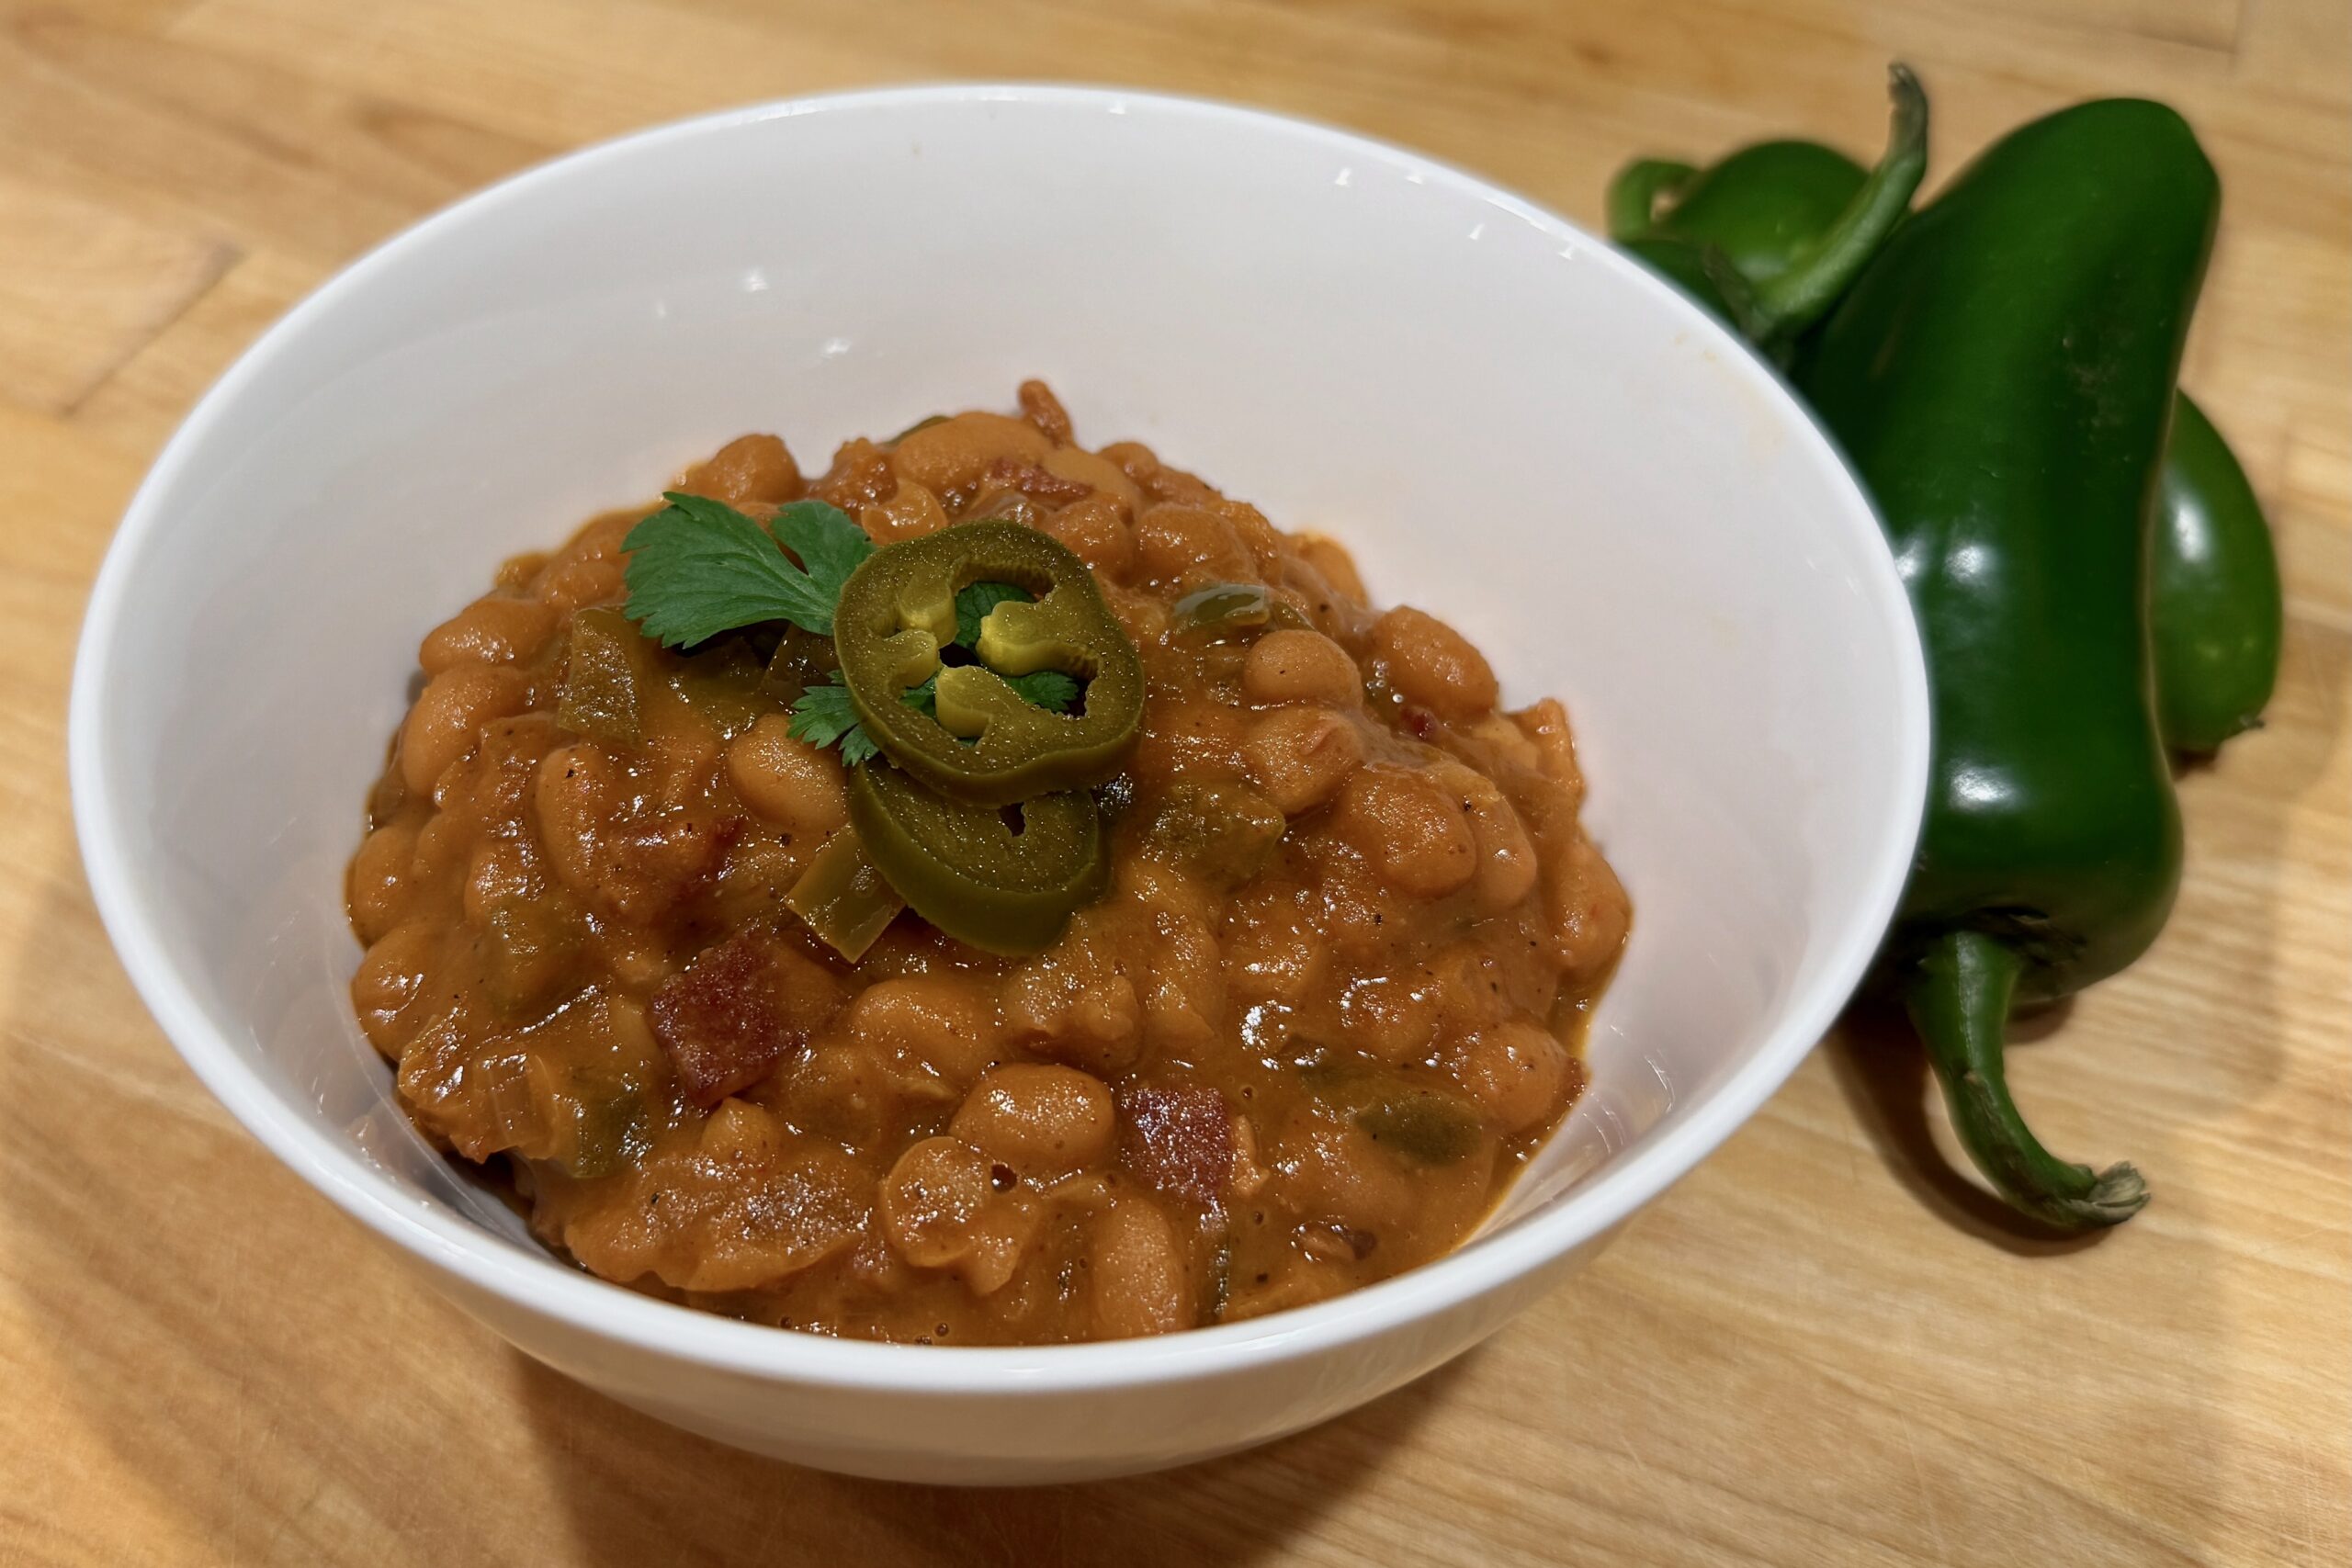
  • Dr Pepper Baked Beans

    Dr Pepper Baked Beans

    Inspired by the sweet, smoky profile of our Dr Pepper Barbecue Sauce, these baked beans are built for deep flavor and balanced texture from the start. Navy beans are cooked until just tender, then simmered in a rich sauce of reduced Dr Pepper, bacon, onion, molasses, tomato paste, and chipotle. Finished with layered acidity, the result is bold, glossy, and barbecue-ready—perfect alongside pulled pork, smoked meats, and a full backyard spread.


    Ingredients

    Beans

    • 2 cups, 1 lb (454 g), navy beans
    • Water, for cooking

    Dr Pepper Base

    • 1 bottle, 20 fl oz (591 ml), Dr Pepper, divided

    Sauce And Seasoning

    • ½ cup (120 g) ketchup
    • ¼ cup (80 g) molasses
    • 1 tbsp (21 g) honey
    • 2 tbsp (33 g) tomato paste
    • 1 tbsp hickory liquid smoke
    • 1 tbsp liquid aminos
    • 1½ tsp fish sauce
    • 1 tsp dry mustard
    • 1 tsp prepared yellow mustard
    • 1¼ tsp chipotle chili powder
    • ½ tsp garlic powder
    • ½ tsp ginger powder
    • ½ tsp galangal powder, or substitute an additional ½ tsp ginger powder
    • ½ tsp table salt, plus more to taste if needed
    • ½ tsp black pepper

    Aromatics And Bacon

    • 1 lb (454 g) thick-cut bacon, diced
    • 1 medium yellow onion, finely diced
    • 1 bell pepper, diced

    Acid And Finishing

    • 2–3 tbsp (30–45 ml) apple cider vinegar, divided
    • 1 tsp tamarind paste (optional but recommended)

    Directions

    Cook The Beans

    Rinse the beans and place them in the Instant Pot. Cover with water by 1–2 inches (2.5–5 cm).

    Cook on High Pressure for 25–28 minutes, then allow a 10-minute natural release before manually releasing the remaining pressure. Drain and set aside. Beans should be tender but still hold their shape.

    Reduce The Dr Pepper

    Pour 1 cup (240 ml) of the Dr Pepper into a small saucepan and simmer over medium heat until reduced to a thick syrup, about 10–15 minutes. Set aside. Reserve the remaining Dr Pepper for the sauce.

    Build The Flavor Base

    Using the Instant Pot on Sauté mode or a large heavy pot on the stove, cook the bacon until rendered and lightly crisp. Transfer the bacon to a plate and reserve, leaving about 2–3 tbsp (30–45 ml) bacon fat in the pot.

    Add the onion with a small pinch of salt and cook for 8–12 minutes, stirring occasionally, until softened and lightly golden.

    Add the bell pepper and cook for 2–3 minutes, until slightly softened.

    Add the tomato paste and cook for 1–2 minutes, stirring constantly, until slightly darkened and fragrant.

    Build The Sauce

    Add the reduced Dr Pepper syrup, the remaining Dr Pepper, ketchup, molasses, honey, liquid smoke, liquid aminos, fish sauce, dry mustard, prepared mustard, chipotle chili powder, garlic powder, ginger powder, galangal powder, table salt, and black pepper.

    Stir well and bring to a simmer.

    Simmer The Beans

    Add the cooked beans and half of the bacon to the sauce.

    Simmer uncovered for 20–30 minutes, stirring occasionally, until the beans are well coated and the sauce is rich and glossy.

    Add 1 tbsp (15 ml) of the apple cider vinegar during this simmering stage, along with the tamarind paste if using.

    Finish And Balance

    Stir in the remaining bacon.

    Add the remaining 1–2 tbsp (15–30 ml) vinegar to taste, depending on how bright and tangy you want the finished beans.

    Taste and adjust with additional salt if needed. Simmer briefly to integrate, then serve.

    Yield: 10 servings.


    Notes

    Preparation

    • Cooking the beans just to tender (not soft) prevents them from breaking down during the final simmer.
    • Reducing part of the Dr Pepper separately concentrates its flavor and gives the finished sauce a deeper, more distinctive character.
    • Blooming the tomato paste in bacon fat adds richness and helps avoid a flat ketchup-heavy flavor.

    Variations

    • Using canned beans: Substitute 3½–4 cans (15–15.5 oz / 425–439 g each) navy or Great Northern beans, drained and rinsed. Skip the pressure cooking step. After building the sauce, simmer it for 10–15 minutes to thicken, then add the beans and simmer gently for just 10–15 minutes to heat through and coat without overcooking.
    • Less Sweet: If you prefer a slightly less sweet result, reduce the honey to 2 tsp.
    • Classic Acidity: For a slightly more classic profile, omit the tamarind paste and rely entirely on apple cider vinegar for the acidity.
    • Extra Barbecue Flavor: For a more pronounced barbecue character, stir in 2–3 tbsp (30–45 ml) of Dr Pepper Barbecue Sauce near the end of cooking.
    • Root Beer or Cola: Root beer or cola may be substituted for Dr Pepper, though the flavor profile will shift slightly.

    Serving Suggestions

    • Serve with smoked pulled pork, ribs, smoked chicken, or burgers.
    • This is especially good as part of a barbecue plate with cole slaw and Jalapeño-Bacon Smoked Mac & Cheese.
    • Top with extra crisp bacon, sliced green onions, chopped cilantro, pickled jalapeños, or fried shallots if desired.

    Make-Ahead & Storage

    • The flavor improves after resting overnight.
    • Refrigerate up to 4 days.
    • Reheat gently over low heat with a splash of water or Dr Pepper if needed to loosen the sauce.
    • Freeze up to 2 months. Thaw overnight in the refrigerator before reheating.
  • Pho Broth

    Pho Broth

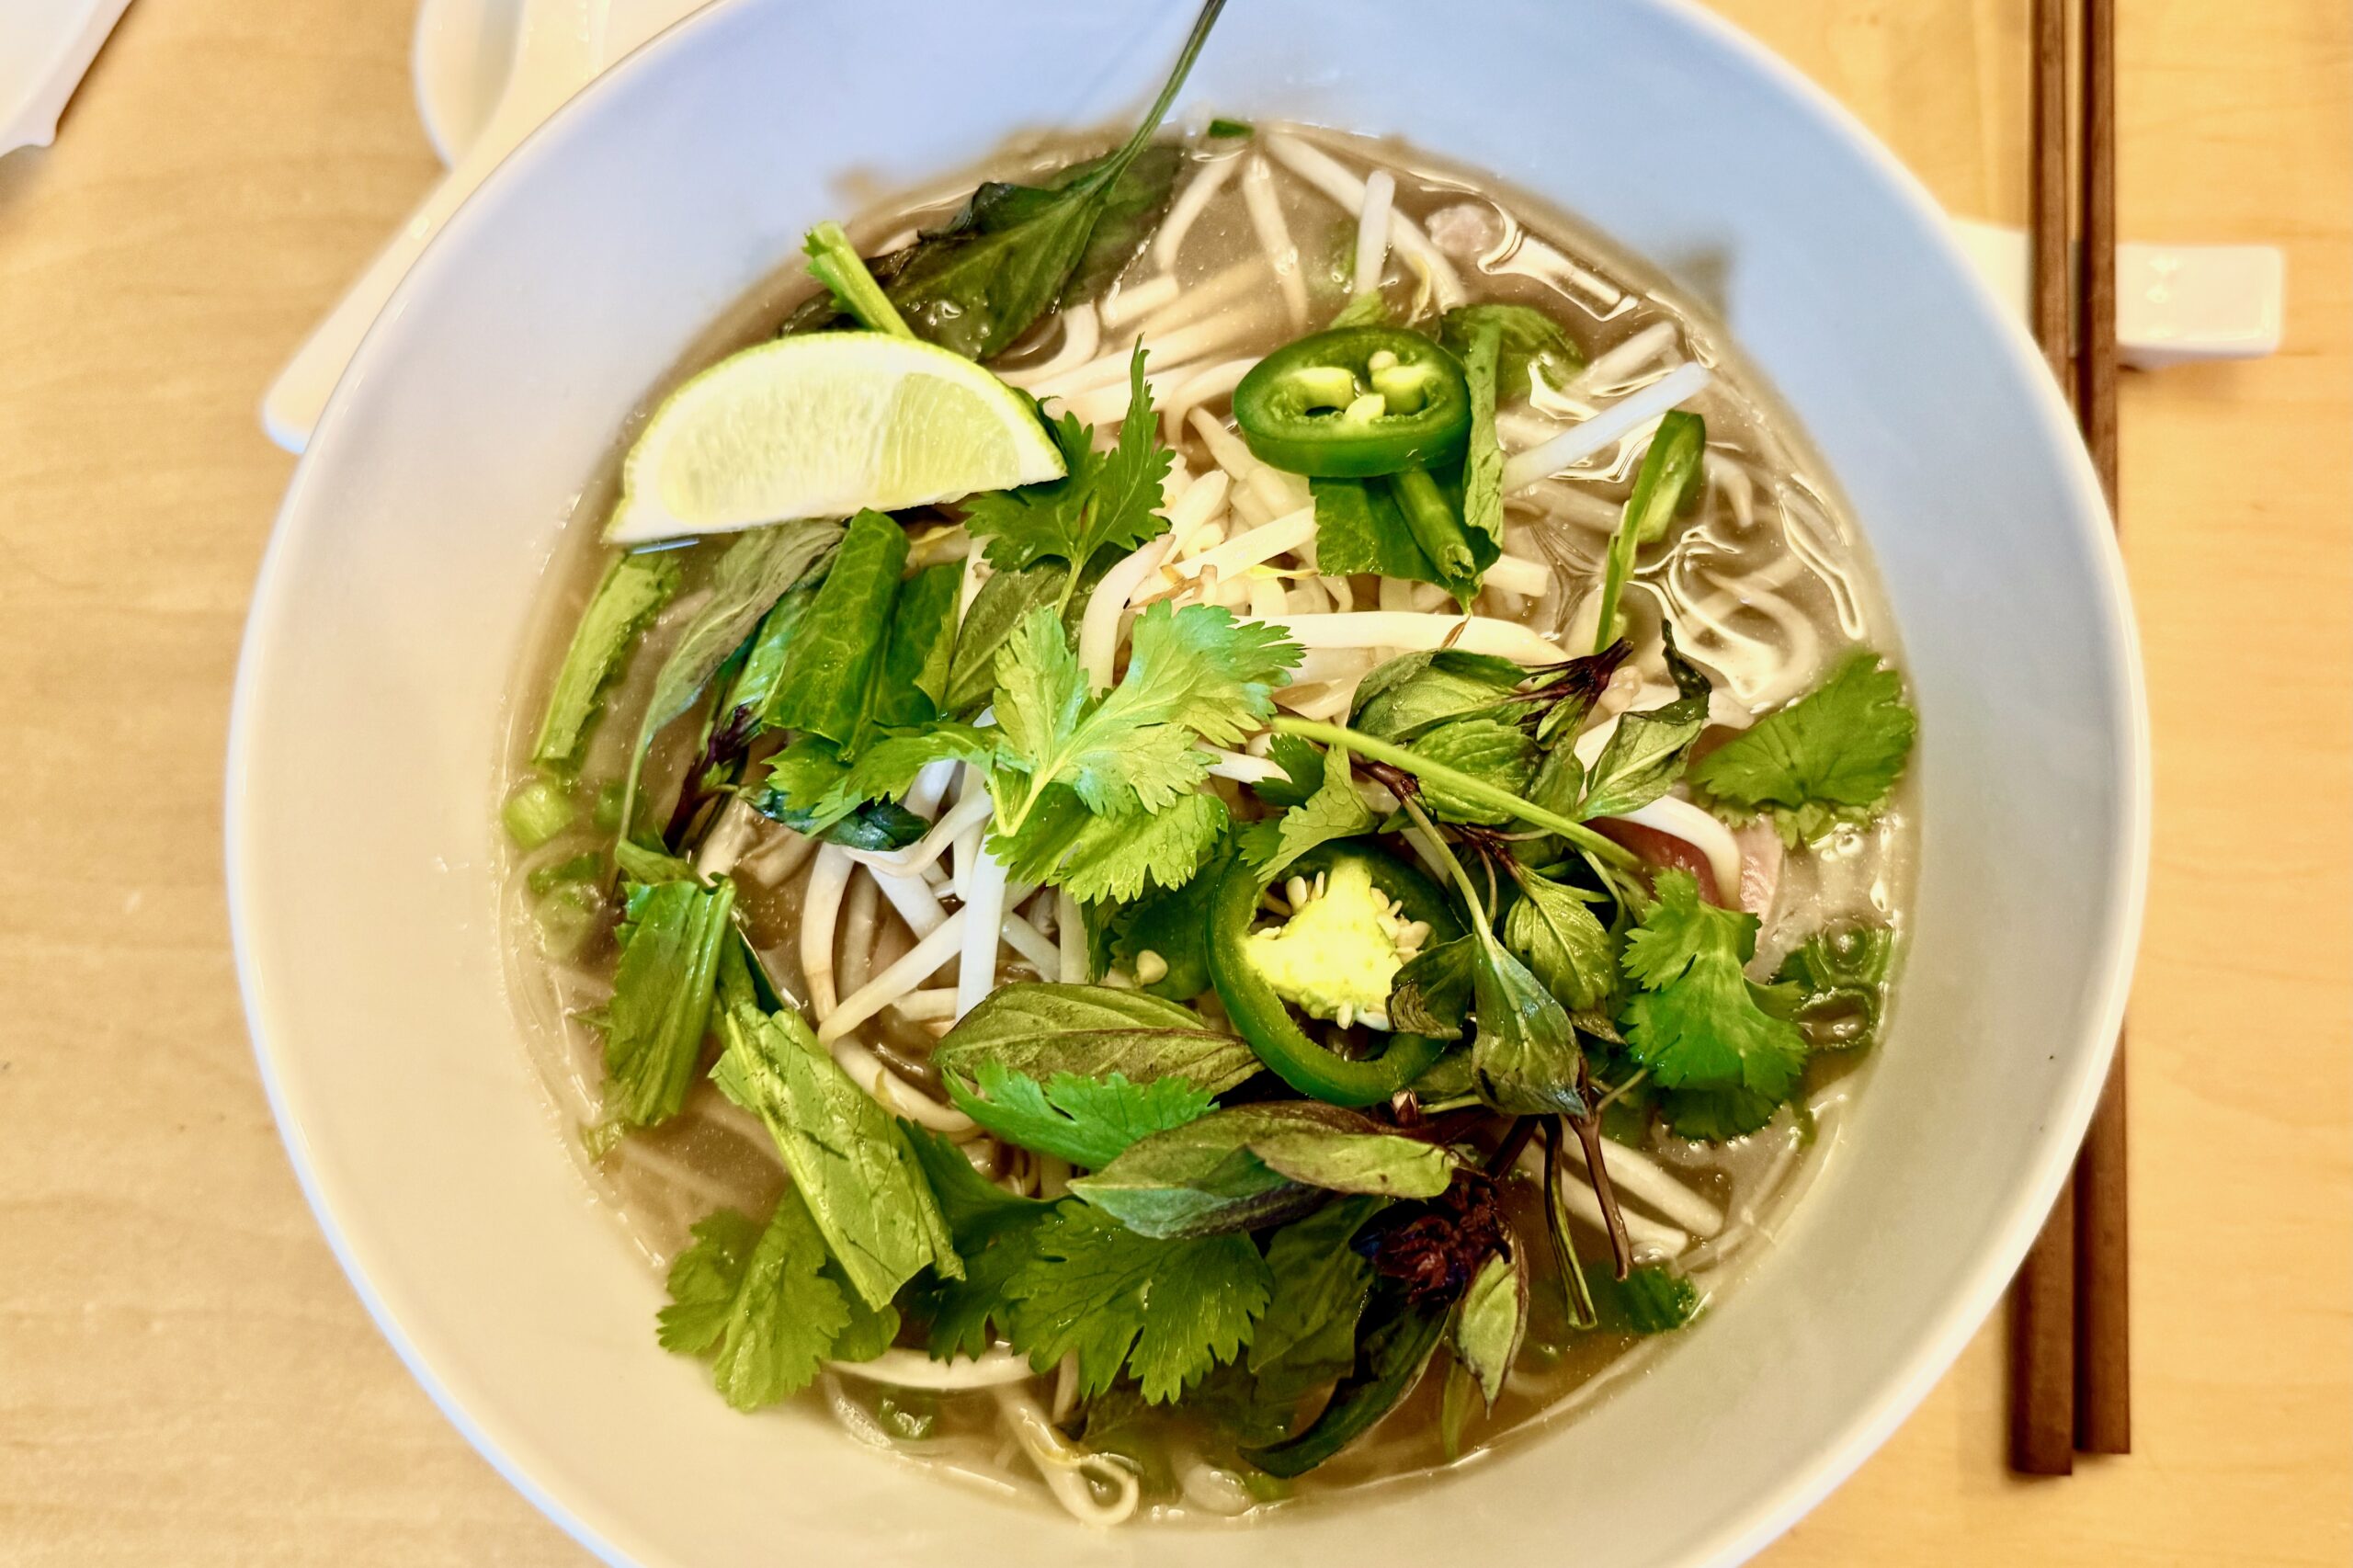
    This Instant Pot pho broth delivers deep, restaurant-style beef flavor with charred aromatics, toasted spices, and a clean, glossy finish—perfect for building steaming bowls of pho with your favorite garnishes.


    Ingredients

    • 1 onion, peeled and halved
    • 2 oz (57 g) ginger, crushed
    • 7–8 whole cloves
    • 1 cinnamon stick, broken into pieces
    • 2–3 whole star anise
    • 1 tsp whole fennel seeds
    • 1 tsp coriander seeds
    • 1 black cardamom pod (optional)
    • 2–3 lb (900–1,360 g) mixed beef bones (beef shank, neck, soup bones, oxtail, etc.), roasted until well browned
    • 2 chunks rock sugar (or palm sugar)
    • 2 tbsp (30 ml) fish sauce
    • 2 tsp table salt
    • 10–12 cups (2.4–2.8 liters) water, or enough to reach the Instant Pot max fill line
    • ½ tsp Aji-No-Moto (MSG) (optional)

    Directions

    Char the Aromatics and Spices

    Select Sauté on the Instant Pot. Add the onion, ginger, and all spices. Cook, stirring occasionally, until the onion and ginger are lightly charred and the spices are fragrant.

    Pressure Cook

    Add the roasted beef bones, rock sugar, fish sauce, table salt, optional MSG, and enough water to reach the max fill line.

    Seal the Instant Pot and cook on High Pressure for 1½ hours. Allow a natural pressure release.

    Strain and Chill

    Strain the broth through a fine-mesh strainer, then strain again through a cheesecloth-lined strainer for a clean, clear broth.

    Refrigerate until fully chilled, then remove and discard the hardened fat from the surface.

    Serve

    Reheat the broth to a rolling simmer. Ladle the steaming broth into bowls over cooked rice noodles, thinly sliced raw steak, and thinly sliced onion.

    Serve with Thai basil, bean sprouts, cilantro, sawtooth herb (culantro), sliced jalapeños, green onions, lime wedges, sambal, fish sauce, and hoisin sauce as desired.

    Yield: 3–4 servings.


    Notes

    Preparation

    • Using a whole cinnamon stick broken into pieces keeps the cinnamon flavor warm and present without the harshness that can come from ground cinnamon.
    • For the cleanest, most restaurant-style broth, do not skip the second strain through cheesecloth, and chill fully before removing the fat cap.

    Variations

    • Black Cardamom: Include the optional black cardamom pod for a deeper smoky note. Leave it out for a lighter spice profile.

    Serving Suggestions

    • Keep the broth boldly seasoned, and let each person customize at the table with lime, sambal, fish sauce, and hoisin. A small bowl of sliced jalapeño and extra herbs makes it feel like a pho-shop spread.

    Make-Ahead & Storage

    • This broth is ideal for making ahead; its flavor often improves after a night in the refrigerator.
    • Refrigerate: Store in a covered container for 4–5 days.
    • Freeze: Freeze for up to 3 months, leaving headspace for expansion.
    • Reheat: Bring to a rolling simmer before serving.
  • Chile Verde Burritos

    Chile Verde Burritos

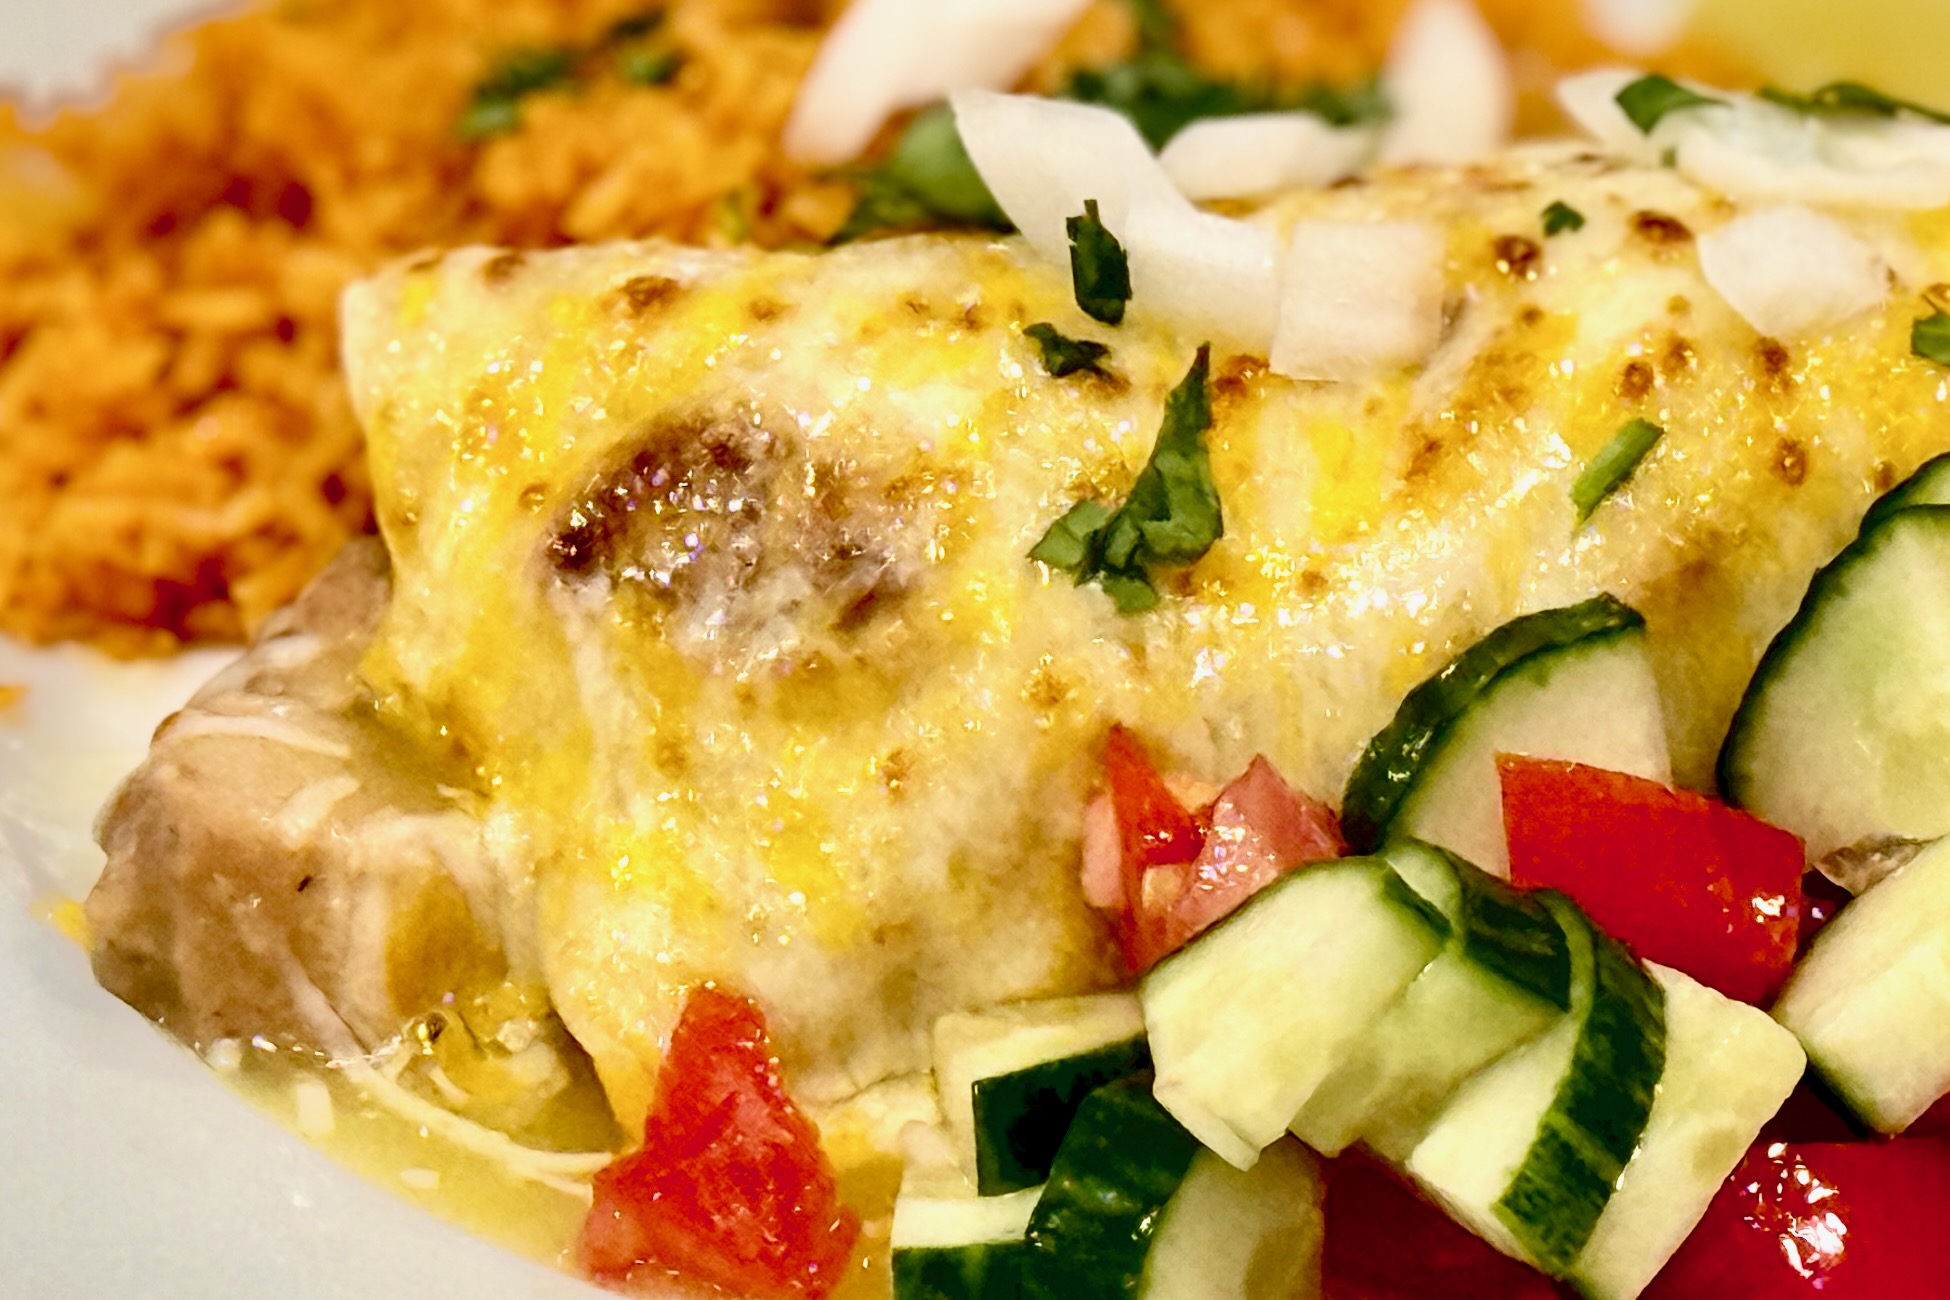
    The 9th of 11, Grandma grew up in a large family that loved to sing together while washing dishes after a delicious meal. Nobody ever walked away hungry–a tradition that continues to this day. Every year Grandma’s family would meet for a week-long family reunion. Our family and Uncle Jay’s (#10 of 11) would never miss. We’d always extend the reunion by a week, spending extra time with Uncle Jay, Aunt Barbara, and their four kids. Our adventures were so memorable that many of my favorite childhood memories include Uncle Jay’s family. The first time I remember eating these burritos was at a dinner in their home in San Jose. I still drool a little every time I think about it! This recipe is a variation of Uncle Jay’s, adapted for the Instant Pot. While his original uses red Los Palmas sauce, my version uses green enchilada sauce and a flavorful braising liquid seasoned with citrus, chiles, and spices. Pressure cooking produces tender, flavorful pork while making the recipe easier to prepare for a larger group.


    Ingredients

    • 3–4 lb (1.4–1.8 kg) pork shoulder (½ of a boneless shoulder)
    • 1 tbsp (15 ml) lard plus 2 tbsp (30 ml) avocado oil, divided
    • 2 large onions, chopped
    • 1 recipe Refried Beans
    • 1 can, 7 oz (198 g), Ortega diced green chiles, undrained
    • 1–2 cups (240–475 ml) homemade green enchilada sauce (or Los Palmas), to taste
    • jack cheese, grated
    • flour tortillas

    Braising Liquid

    • 1½ cups (355 ml) chicken broth
    • ½ cup (about 15 g) cilantro
    • ⅓ cup (80 ml) avocado oil
    • ¼ cup (60 ml) soy sauce
    • ¼ cup (60 ml) orange juice
    • 2 tbsp (30 ml) lime juice
    • 2 tsp salt
    • 1 jalapeño, minced
    • 1 tsp cumin
    • 1 tsp chipotle chili powder
    • 1 tsp ancho chili powder
    • ½ tsp garlic powder
    • ½ tsp onion powder
    • ½ tsp Mexican oregano
    • ¼ tsp cinnamon

    For Serving

    • diced white onion and chopped cilantro, to taste (optional)

    For Smothered Burritos (Optional)

    • 1 can, 28 oz (794 g), Los Palmas green enchilada sauce
    • 1 tbsp (12 g) sugar
    • ⅓ cup (80 ml) reserved braising liquid
    • ¼–½ tsp xanthan gum

    Directions

    Braise

    Slice pork shoulder into chunks of about 1 lb (454 g) each. In an Instant Pot, combine all braising liquid ingredients.

    In a skillet, heat 1 tbsp (15 ml) avocado oil and 1 tbsp (15 ml) lard; brown pork chunks on all sides and place in braising liquid.

    Place lid on Instant Pot and close steam vent. Process on high pressure for 45 minutes.

    Allow pressure to release naturally for 30 minutes.

    Combine Ingredients

    Add an additional 1 tbsp (15 ml) avocado oil to skillet and heat until shimmering. Add onion and sauté until softened and slightly browned.

    Place refried beans in a large mixing bowl; stir in sautéed onions, green chiles, and enchilada sauce.

    Remove meat from braising liquid and cut into chunks or shred; stir into refried bean mixture.

    Serve

    Serve rolled in a warm tortilla with grated jack cheese, diced white onion, and chopped cilantro.

    Serve with Salsa Verde, a side of Mexican Rice, and a tomato-cucumber salad with Espiau’s Vinaigrette.

    For smothered burritos, heat one 28 oz (794 g) can of Los Palmas green enchilada sauce. Add 1 tbsp (12 g) sugar and ⅓ cup (80 ml) of the remaining braising liquid; heat to boiling. Whisk in ¼–½ tsp xanthan gum to thicken slightly. Spoon some into the burrito, then smother with sauce and cheese; broil to melt.

    Yield: 8–10 servings.


    Notes

    Preparation

    • The seasoned braising liquid gives the pork a rich, well-developed flavor during pressure cooking, making this recipe especially convenient for serving large groups.
    • For a milder filling, use only 1 cup (240 ml) enchilada sauce; for richer sauciness, use the full 2 cups (475 ml).
    • Be sure to sauté the onions until lightly browned—this adds sweetness and depth to the bean mixture.
    • The original version of this family recipe can be found here: Original Chile Verde Burritos.

    Variations

    • Chicken: Substitute half the pork with chicken thighs for a lighter filling.
    • Hatch Chiles: Use Hatch green chiles in place of Ortega for a smokier, more robust flavor.
    • Extra Heat: To make it spicier, add an extra minced jalapeño to the bean mixture.

    Serving Suggestions

    • Great served with Mexican Rice, Salsa Verde, and plenty of fresh cilantro.
    • For a crowd, keep tortillas warm in a low oven and serve burrito fillings buffet-style.

    Make-Ahead & Storage

    • Filling can be prepared 1–2 days in advance; flavor improves as it rests.
    • Store filling separately from tortillas to prevent sogginess.
    • Leftovers freeze well for up to 3 months—thaw and reheat gently before serving.
  • Babi Panggang — Indonesian Roasted Pork

    Babi Panggang — Indonesian Roasted Pork

    Working in the office in the city of Bussum in The Netherlands, we’d often order take-out from our favorite Chinese-Indonesian restaurant, Tong Fong, in the neighboring city of Hilversum. One stand-out item was their delicious Babi Panggang, which was always a part of our order. I later learned that Babi Panggang is the most ordered main dish at Indonesian restaurants throughout the Netherlands. This is my attempt to recreate the vibrant flavors and textures of this delicious dish.


    Ingredients

    • 2 lb pork shoulder or belly
    • Marinade

    • ¼ cup ketjap manis
    • 2 tbsp hoisin sauce
    • 2 tbsp rice cooking wine
    • 1 tbsp brown sugar
    • 1 tbsp fresh ginger, grated
    • 1 tbsp fish sauce
    • ½ tbsp sambal oelek
    • ½ tbsp sambal badjak
    • ½ tsp toasted sesame oil (optional)
    • ¼ tsp Chinese five spice (optional)
    • 2 cloves garlic, minced
    • Juice and zest of 1 lime
    • Sweet & Sour Red Sauce

    • 1 tbsp vegetable oil
    • 1 small onion, finely chopped
    • 2–3 cloves garlic, minced
    • 2 tsp grated ginger
    • ½ tsp sambal oelek
    • 3 tbsp tomato paste
    • ¼ tsp chicken powder
    • ¼ cup sweet chili sauce
    • 3 tbsp ketchup
    • 2 tbsp lime juice
    • 2 tbsp seasoned rice vinegar
    • 1 tbsp Tamarind Paste
    • 1 tbsp ketjap manis
    • 1 tsp fish sauce
    • ¾ cup chicken stock or water
    • ¼ cup brown sugar (adjust to taste)
    • 1 tbsp cornstarch mixed with 1 tbsp water

    Directions

    Marinate the Pork

    Combine all marinade ingredients, stirring until the sugar has completely dissolved. Pour into a resealable container or vacuum-seal bag. Add the pork, coating thoroughly. Seal and marinate in the refrigerator for 4–12 hours.

    Sweet & Sour Red Sauce

    Heat oil in a saucepan over medium heat. Sauté onion until lightly browned; add garlic, ginger, and sambal, and cook until fragrant. Add tomato paste and chicken powder; cook 1 minute to develop sweetness.

    Stir in sweet chili sauce, ketchup, lime juice, vinegar, tamarind, ketjap manis, fish sauce, stock or water, and brown sugar. Simmer 10 minutes to allow flavors to meld. Add the cornstarch slurry and simmer until glossy and thickened. Blend with an immersion blender and adjust thickness with additional stock, if needed.

    Preparation #1: Sous Vide

    Preheat sous vide bath to 170°F / 77°C for pork shoulder (130°F / 55°C for pork loin or tenderloin; 150°F / 65°C for pork belly). Submerge vacuum-sealed pork and marinade in the water bath and heat for 12–24 hours (2–8 hours for pork loin or tenderloin).

    Remove from the bag and pat dry. Brush with oil and finish under a broiler set to high for 4–5 minutes to crisp the top. Brush with red sauce during broiling and allow it to develop a few bits of char.

    Slice and serve over rice with a generous amount of sauce. Serve with acar ketimun (pickled vegetables), cucumber salad, fried cabbage, and/or blanched green beans tossed with garlic and sesame oil.

    Preparation #2: Oven

    Preheat oven to 350°F / 177°C. Place pork on a rack in a baking tray. Reserve marinade and boil in a saucepan for 5 minutes. Roast pork for 30–40 minutes per pound, or until internal temperature reaches 190°F / 88°C, basting with the boiled marinade halfway through.

    Rest pork for 20 minutes. Pat dry, brush with oil, and finish under a broiler set to high for 4–5 minutes to crisp the top. Optionally, baste with the red sauce while broiling and allow it to develop slight char.

    Slice and serve over rice with a generous amount of sauce. Serve with acar ketimun, cucumber salad, fried cabbage, and/or blanched green beans tossed with garlic and sesame oil.

    Preparation #3: Pellet Grill

    Preheat pellet grill to 250°F / 120°C. Smoke until internal temperature reaches 187°F / 86°C, basting halfway through. Rest pork for 30 minutes.

    Pat dry, brush with oil, and finish under a broiler set to high for 4–5 minutes to crisp the top. Optionally, baste with the red sauce while broiling and allow it to develop light char.

    Slice and serve over rice with a generous amount of sauce. Serve with acar ketimun, cucumber salad, fried cabbage, and/or blanched green beans tossed with garlic and sesame oil.


    Notes

    Preparation

    • Fattier cuts such as pork shoulder or belly are preferred, but pork loin or tenderloin (especially when using the sous vide method, with times and temperatures adjusted accordingly) can also be used. Take care not to overcook leaner cuts.
    • Preparation #1, Sous Vide, is the preferred method for the most tender and flavorful result.

    Serving Suggestions

    • Serve sliced Babi Panggang over rice with plenty of red sauce spooned on top.
    • Pair with acar ketimun, fried cabbage, cucumber salad, or blanched green beans with garlic and sesame oil.
  • Cilantro Lime Rice (Instant Pot)

    Cilantro Lime Rice (Instant Pot)

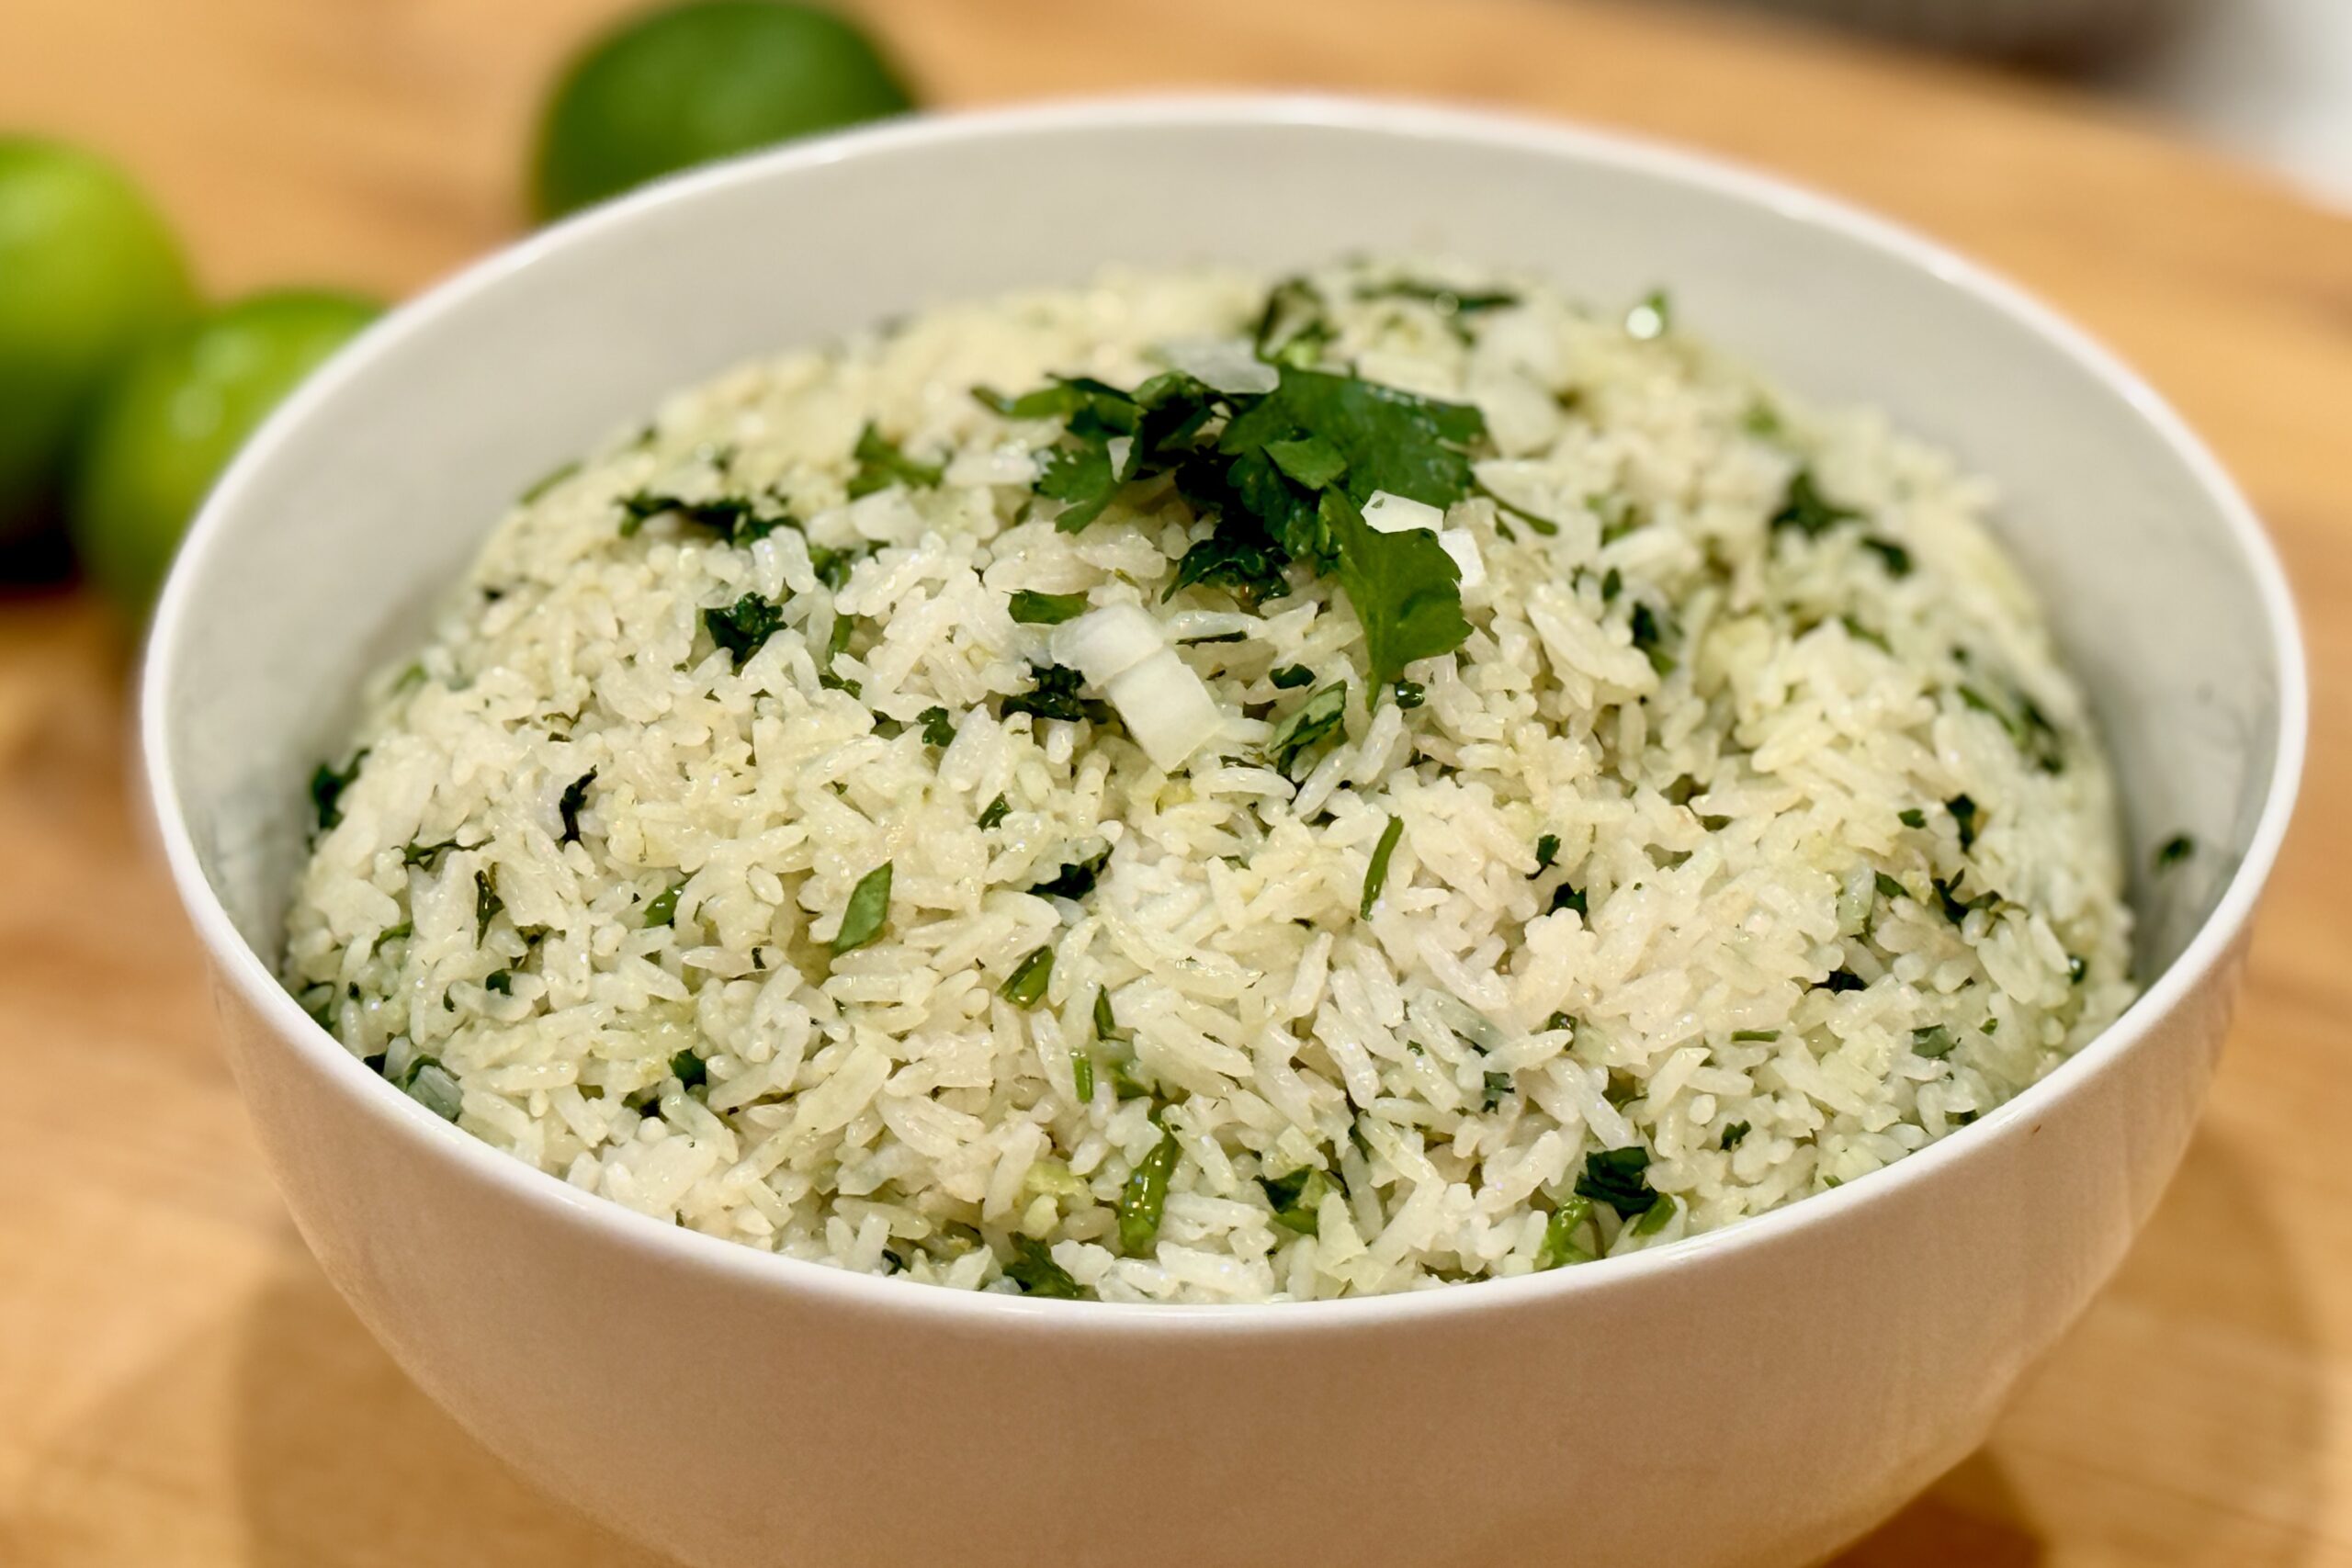
    This Instant Pot version of Cilantro-Lime Rice delivers the same bright, aromatic flavor as the stovetop method in a fraction of the time. Jasmine rice cooks up fluffy and tender with perfect lime-cilantro balance—ideal for tacos, fajitas, enchiladas, or grilled meats. Click here for the stovetop version of this recipe.


    Ingredients

    • 1 cup jasmine rice, rinsed and drained
    • 1 tbsp butter or olive oil
    • 1 cup chicken broth (or water + ¼ tsp salt)
    • Zest of 1 lime
    • 1–1½ tbsp fresh lime juice (added after cooking)
    • ½ cup cilantro leaves, finely chopped
    • ⅛ tsp sugar (optional, to balance acidity)
    • Salt to taste

    Optional Add-Ins

    • 1 small clove garlic, minced (sauté before adding rice)
    • 1 bay leaf (for subtle herbal aroma)

    Directions

    Rinse the Rice

    Rinse jasmine rice in a fine-mesh strainer under cold water until the water runs mostly clear to remove excess starch. Drain well.

    Sauté

    Set the Instant Pot to Sauté. Melt butter or heat oil, then add garlic if using. Stir in drained rice and toast for 1–2 minutes until lightly fragrant.

    Press Cancel to stop the sauté function.

    Pressure Cook

    Add chicken broth and a pinch of salt. Stir once to distribute evenly, then secure the lid and set the valve to Sealing.

    Cook on High Pressure for 3 minutes. Allow pressure to release naturally for 10 minutes, then manually release any remaining steam.

    Finish the Rice

    Fluff the rice gently with a fork. Stir in lime zest, lime juice, cilantro, and sugar (if using). Taste and adjust seasoning with more salt or lime juice as needed.

    Let rest uncovered for 2–3 minutes to allow excess steam to escape before serving.

    Serve

    Serve warm as a side or base for tacos, fajitas, enchiladas, or grilled meats. Garnish with additional cilantro and lime zest if desired.


    Notes

    Preparation

    • Use a 1:1 ratio of rice to liquid for the Instant Pot—no evaporation means less liquid is required than on the stove.
    • Do not add lime juice before pressure cooking; acid interferes with proper rice hydration.
    • Natural release for 10 minutes ensures fluffy, evenly cooked grains.
    • Let rice rest uncovered for a few minutes after fluffing to release steam and maintain perfect texture.

    Serving Suggestions

    • Pairs beautifully with tacos, fajitas, grilled shrimp, or chicken.
    • Use as a flavorful base for burrito bowls or enchilada platters.
    • For color and brightness, top with extra cilantro and a sprinkle of lime zest before serving.

    Variations

    • Subtle Coconut Version: Replace ¼ cup of broth with ¼ cup unsweetened coconut milk (use ¾ cup broth + ¼ cup coconut milk). Adds gentle richness and a faint coconut aroma while maintaining lime-cilantro brightness.
    • Coconut-Forward Version: Replace ½ cup of broth with ½ cup coconut milk (use ½ cup broth + ½ cup coconut milk). Yields a creamier, tropical variation—use 2 tbsp lime juice and slightly more salt to balance flavor.
    • Use coconut versions for fusion dishes like Korean Pulled Pork Tacos, jerk chicken, or grilled shrimp where a creamy contrast enhances spice and smoke.
    • For added aromatics, sauté a small piece of shallot or a few cilantro stems with the rice.

    Make-Ahead & Storage

    • Cooked rice can be held warm in the Instant Pot for up to 30 minutes before adding lime and cilantro.
    • Refrigerate leftovers in an airtight container for up to 3 days; reheat with a splash of broth or water to restore moisture.
    • Not recommended for freezing—fresh cilantro and lime flavor are best enjoyed fresh.
  • Mexican Rice

    Mexican Rice

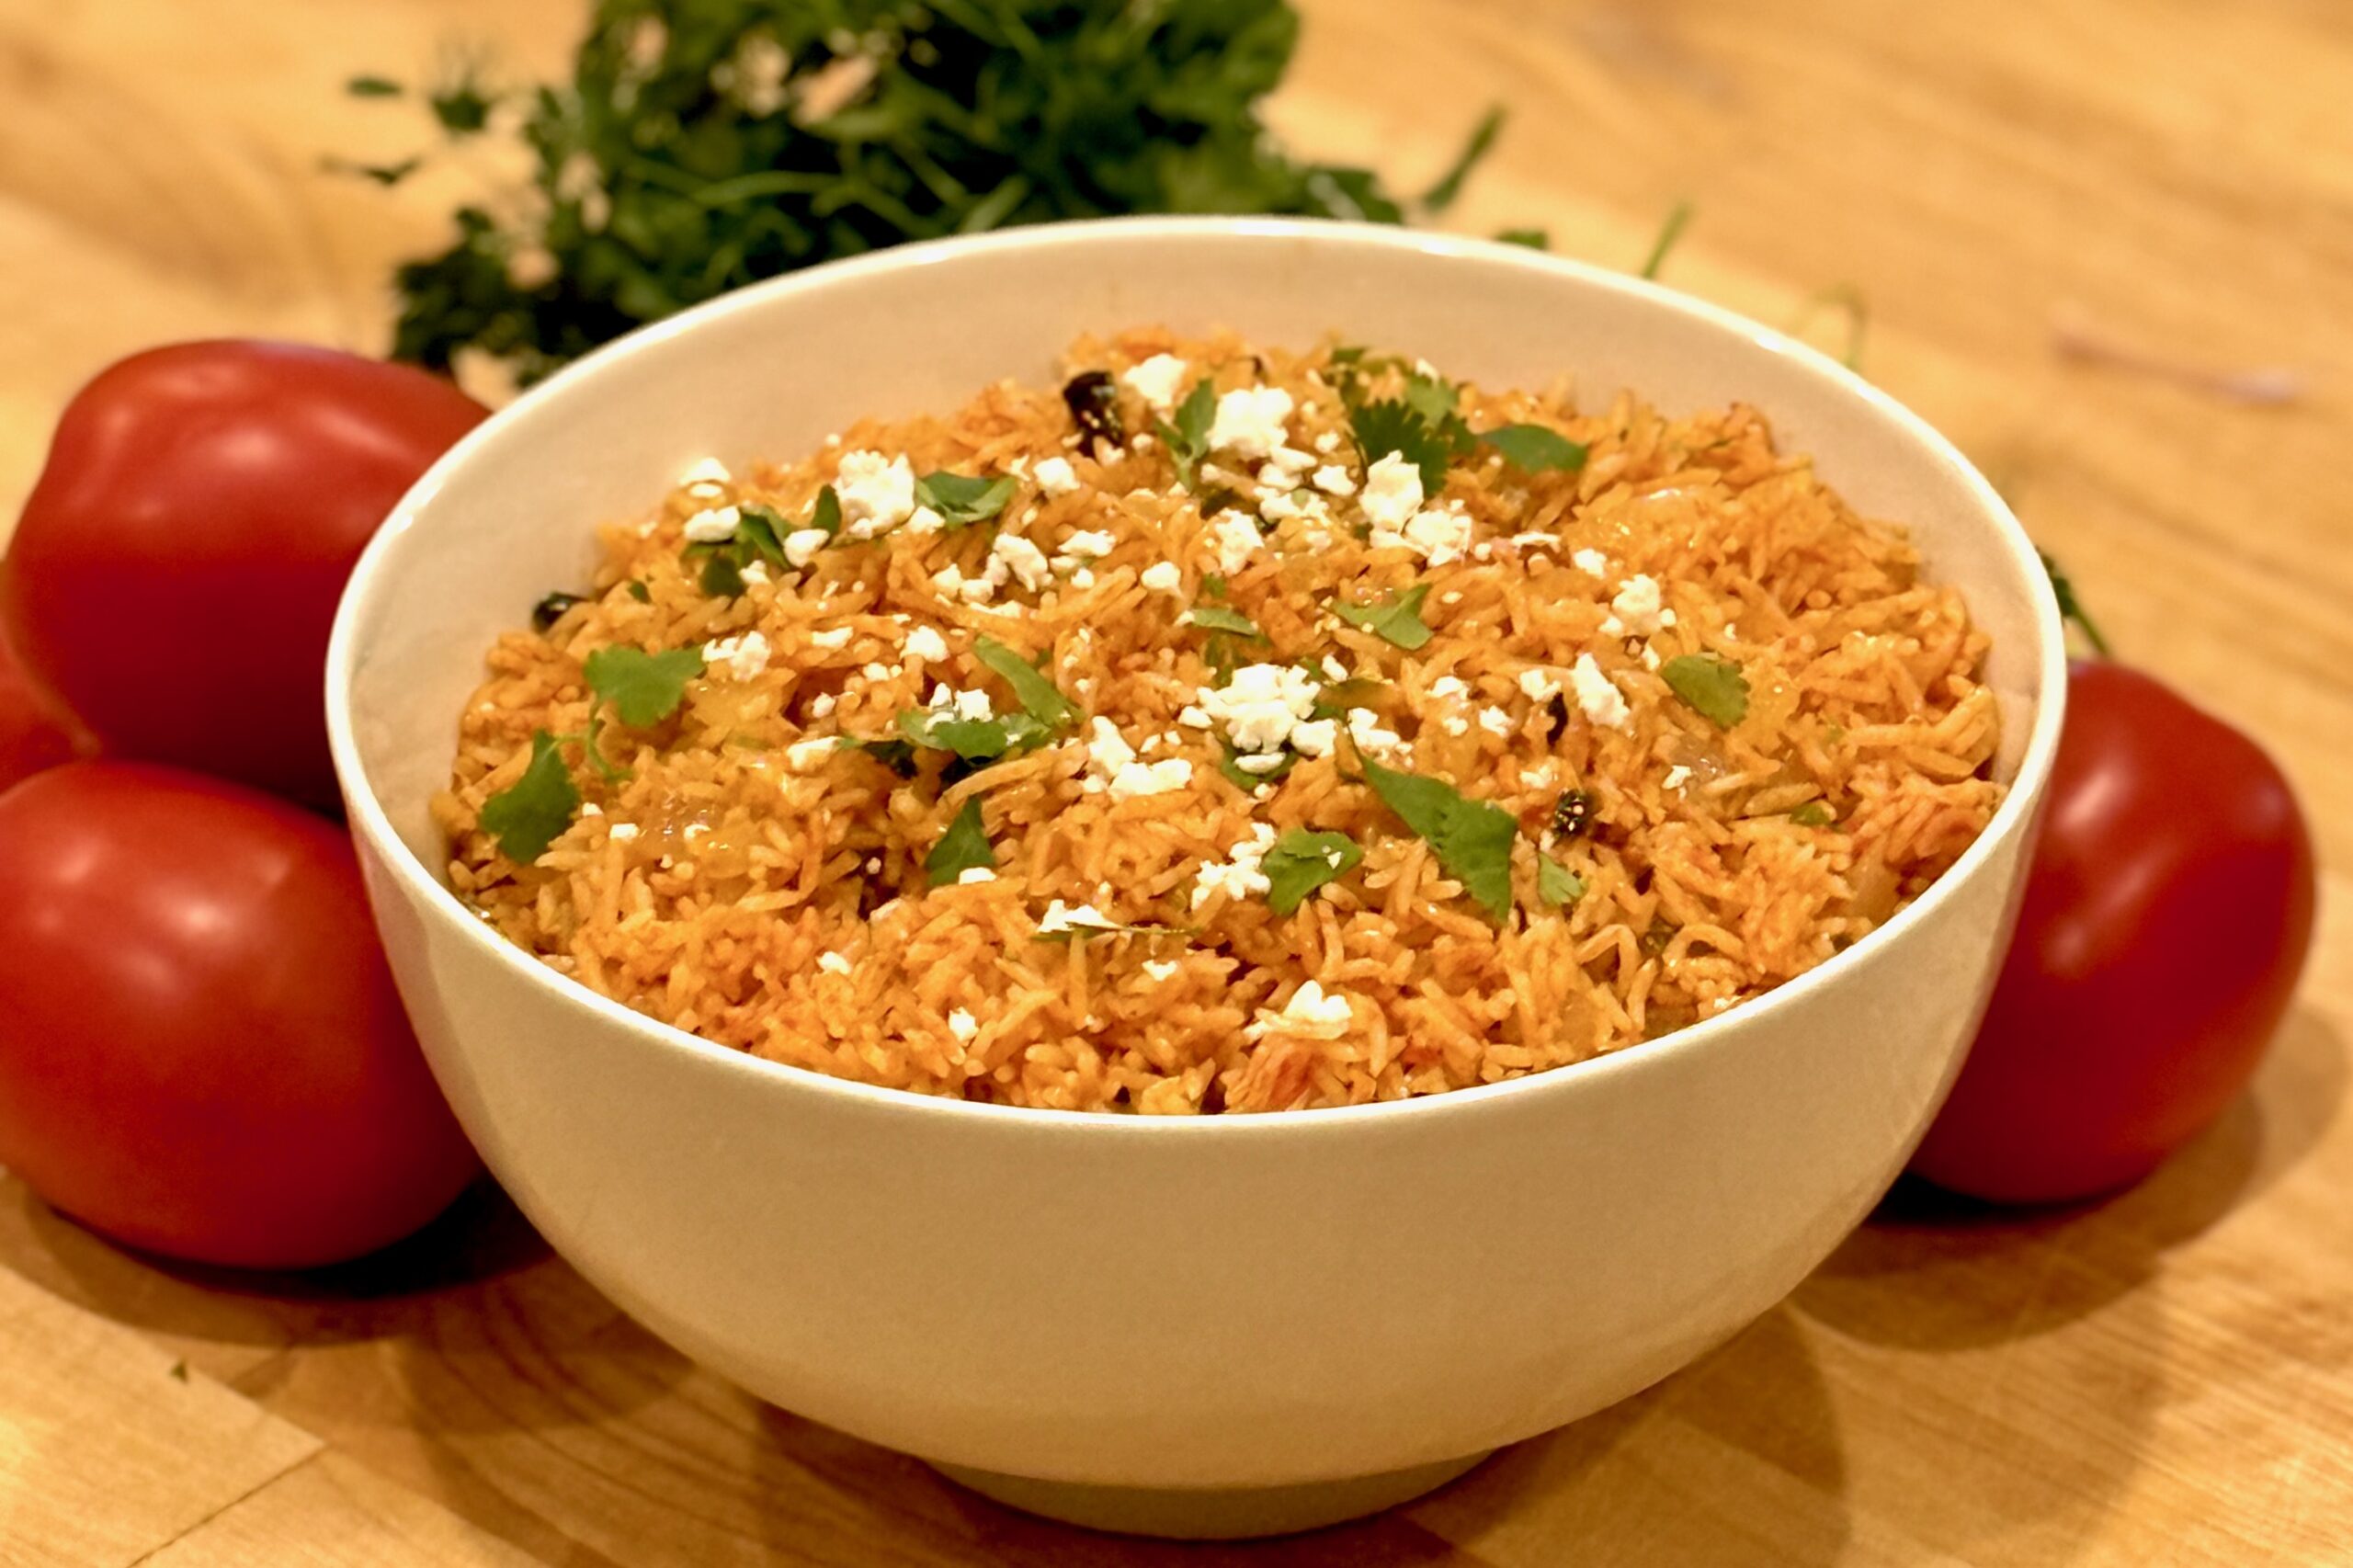
    Fluffy, richly flavored Mexican rice made in the Instant Pot without the risk of burning. Toasted rice builds a subtle nuttiness before sautéed onion and jalapeños deepen the base, and a homemade Mexican Tomato Sauce brings vibrant color, gentle heat, and balanced acidity. Instead of relying on shortcuts or canned blends alone, this method layers flavor intentionally — blooming the aromatics, coating each grain in oil, and carefully controlling the liquid ratio so the rice steams rather than stews. The result is tender, separate grains with that signature restaurant-style texture and a savory backbone strong enough to stand alongside tacos, Enchiladas, Carnitas, or grilled Carne Asada — yet balanced enough to enjoy on its own.


    Ingredients

    • 3 cups (about 555 g) long-grain white rice
    • 3 tbsp (45 ml) avocado oil, divided
    • ½ medium onion (about 75 g), diced
    • 1–2 jalapeños, diced
    • ½ tsp achiote powder
    • 3 cups (710 ml) chicken broth
    • 1 tsp Better Than Bouillon chicken base
    • 1½ cups (355 ml) prepared Mexican Tomato Sauce, divided
    • 1 tbsp (14 g) butter, for finishing
    • fresh cilantro, chopped, for garnish
    • lime wedges, for serving

    Directions

    Rinse the Rice

    Place the rice in a fine-mesh strainer and rinse under cold running water for 1–2 minutes, or until the water runs mostly clear. Drain well.

    Sauté the Aromatics

    Heat a deep sauté pan over medium-high heat and add 1 tbsp (15 ml) avocado oil. When shimmering, add the onion and jalapeños. Sauté until the edges of the onion begin to brown and the jalapeños soften slightly. Transfer the mixture to a bowl and set aside.

    Toast the Rice

    Add the remaining 2 tbsp (30 ml) avocado oil to the same pan. Add the drained rice and cook, stirring occasionally, until lightly golden and fragrant, 5–7 minutes.

    Stir in the achiote powder and cook for 30 seconds, just until the color deepens. Transfer the rice to the Instant Pot.

    Heat the Cooking Liquid

    In the same pan, combine the chicken broth, Better Than Bouillon, and ¼ cup (60 ml) of the Mexican Tomato Sauce. Heat until steaming, scraping the pan to incorporate any flavorful browned bits.

    Pressure Cook

    Pour the hot broth mixture over the rice and stir briefly to distribute it evenly.

    Secure the lid and cook on High Pressure for 4 minutes. Allow the pressure to release naturally for 10 minutes, then carefully release any remaining pressure.

    Warm the Finishing Sauce

    While the rice cooks, return the sautéed onion and jalapeños to the pan. Add the remaining 1¼ cups (295 ml) Mexican Tomato Sauce and warm gently for 3–5 minutes.

    Finish and Serve

    Open the Instant Pot and gently fold in all of the warm tomato-sauce, onion, and jalapeño mixture along with the butter. Replace the lid without sealing and let the rice rest for 5 minutes, then fluff gently.

    Garnish with chopped cilantro and serve with lime wedges.

    Yield: 6 servings.


    Notes

    Preparation

    • Heating the broth before pressure cooking helps the Instant Pot reach pressure more quickly.
    • Folding the tomato sauce into the finished rice preserves its flavor while reducing the chance of scorching.

    Variations

    • Basmati Rice: Substitute the same amount of basmati rice and cook on High Pressure for 3 minutes, followed by the same 10-minute natural release.
    • Milder Heat: Use one jalapeño or remove the seeds before dicing.
    • Vegetarian: Substitute vegetable broth and vegetable bouillon base for the chicken broth and chicken base.

    Serving Suggestions

    Make-Ahead & Storage

    • Refrigerate in an airtight container for up to 4 days.
    • Reheat gently on the stove or in the microwave with a splash of broth to restore moisture.
    • Freeze for up to 2 months; thaw overnight in the refrigerator before reheating.
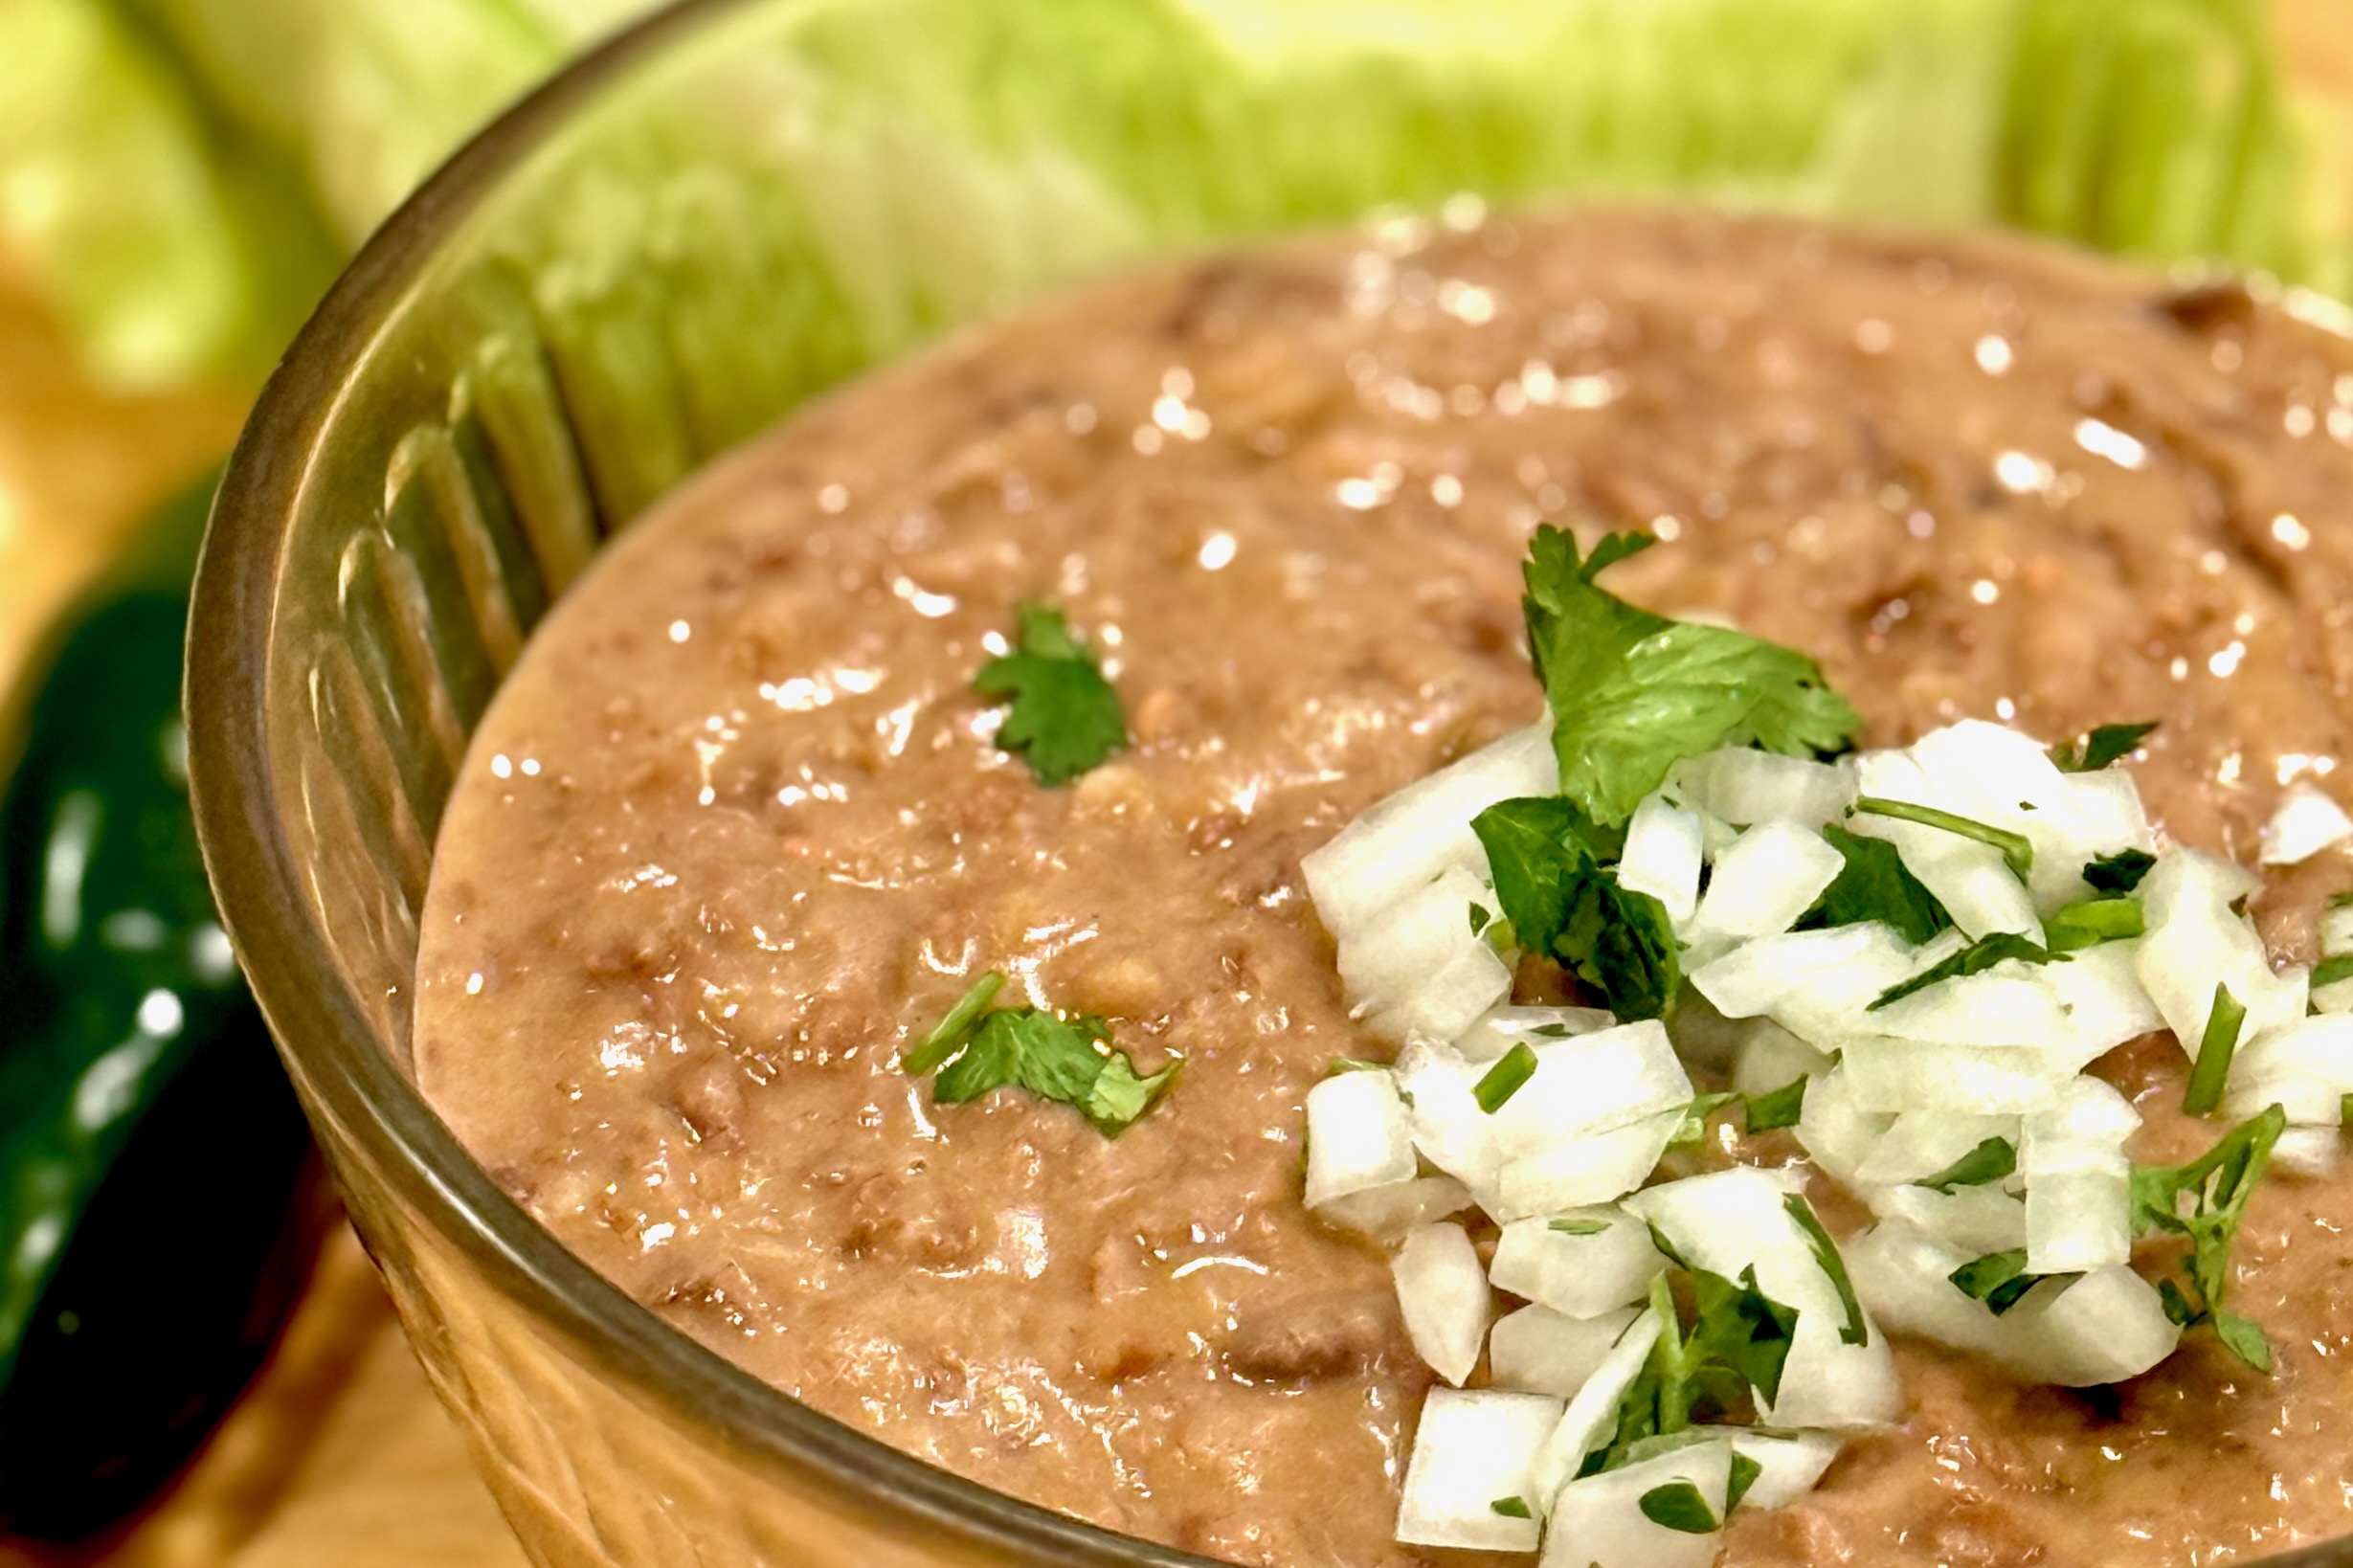
  • Refried Beans

    Refried Beans

    Rich, creamy, and deeply savory, our family’s recipe for refried beans captures the heart of traditional Mexican cooking with a fraction of the usual time. Each bite balances earthy depth and a hint of sweetness from slow-simmered pinto beans. Whether tucked inside burritos, layered beside Mexican rice, or served simply with warm tortillas, they bring comfort and authenticity to any meal—and once you’ve made them this way, you may never reach for canned beans again.


    Ingredients

      Beans

    • 2 cups dry pinto beans, rinsed and drained
    • 1 onion, diced (or 1 tbsp onion powder)
    • 1 tsp table salt (omit if using tomato bouillon)
    • ½ tsp ground cumin
    • 4½ cups chicken broth or water
    • Fat (Choose One or a Blend)

    • 2–3 tbsp avocado oil, lard, butter, or a combination
    • Optional Flavor Boosters

    • ¼ cup Mexican Tomato Sauce (recommended for deeper flavor)
    • OR 1 tbsp tomato bouillon (omit salt)
    • OR ½ tsp soy sauce or Maggi (for umami depth without tomato flavor)
    • Optional Add-Ins

    • ⅛ tsp Mexican oregano
    • 1 tsp garlic powder (add after cooking)
    • 1 sachet ham bouillon or sazón (optional, for savory richness)

    Directions

    Sauté Aromatics (Optional but Recommended)

    Using the Sauté function, heat 1 tbsp of the fat in the Instant Pot. Add diced onion and cook 2–3 minutes until translucent and fragrant. If using onion powder, add with cumin.

    Deglaze with a splash of broth if any browning occurs.

    Cook the Beans

    Add pinto beans, broth, cumin, and salt to the pot. If using butter, reserve it for after cooking. If using Mexican Tomato Sauce for integrated flavor, stir it in now—or stir it in later during the refry step as a finisher.

    Set to Pressure Cook – High for 60 minutes. When complete, allow natural release for 10–15 minutes, then release remaining pressure manually.

    Mash or Refry

    Mash to desired smoothness using a potato masher, hand mixer, or immersion blender. Add liquid as needed for consistency. For authentic refried texture, heat remaining fat in a large skillet over medium-high heat. Add mashed beans to skillet, stirring occasionally until thickened and slightly toasty, about 5 minutes. If using Mexican Tomato Sauce as a finisher, add 2–3 tbsp during this stage and cook until slightly reduced and glossy.

    Rest and Serve

    For best flavor, refrigerate overnight and reheat before serving. The beans thicken slightly as they cool, deepening both flavor and texture.


    Notes

    Preparation

    • For richer flavor, add ¼ cup Mexican Tomato Sauce during cooking or mashing, OR ½ tsp soy sauce/Maggi during mashing, OR 1 tbsp tomato bouillon during cooking. Omit these boosters if serving entrées with green sauce bases.
    • Mashing the beans in hot fat develops a nutty flavor and glossy, restaurant-style finish.
    • Beans improve overnight as flavors meld and starches set.

    Serving Suggestions

    Variations

    • Use lard for the most traditional flavor, butter for a richer finish, or avocado oil for a cleaner everyday version.
    • For a deeper red-style bean, use Mexican Tomato Sauce or tomato bouillon. For a more neutral bean, use soy sauce or Maggi instead.

    Make-Ahead & Storage

    • Refrigerate up to 5 days in an airtight container.
    • Freeze up to 3 months; thaw overnight in the refrigerator before reheating.
    • Reheat gently on the stovetop or in the microwave, adding a splash of broth or water to loosen if thickened.