Bags of Spices

Favorite Recipes

Dutch

Family Dutch heritage recipes — street snacks, holiday treats, café favorites, Indonesian-Dutch fusion, and nostalgic comforts.

  • Patatje Verde — Mexican-Inspired Dutch Frites

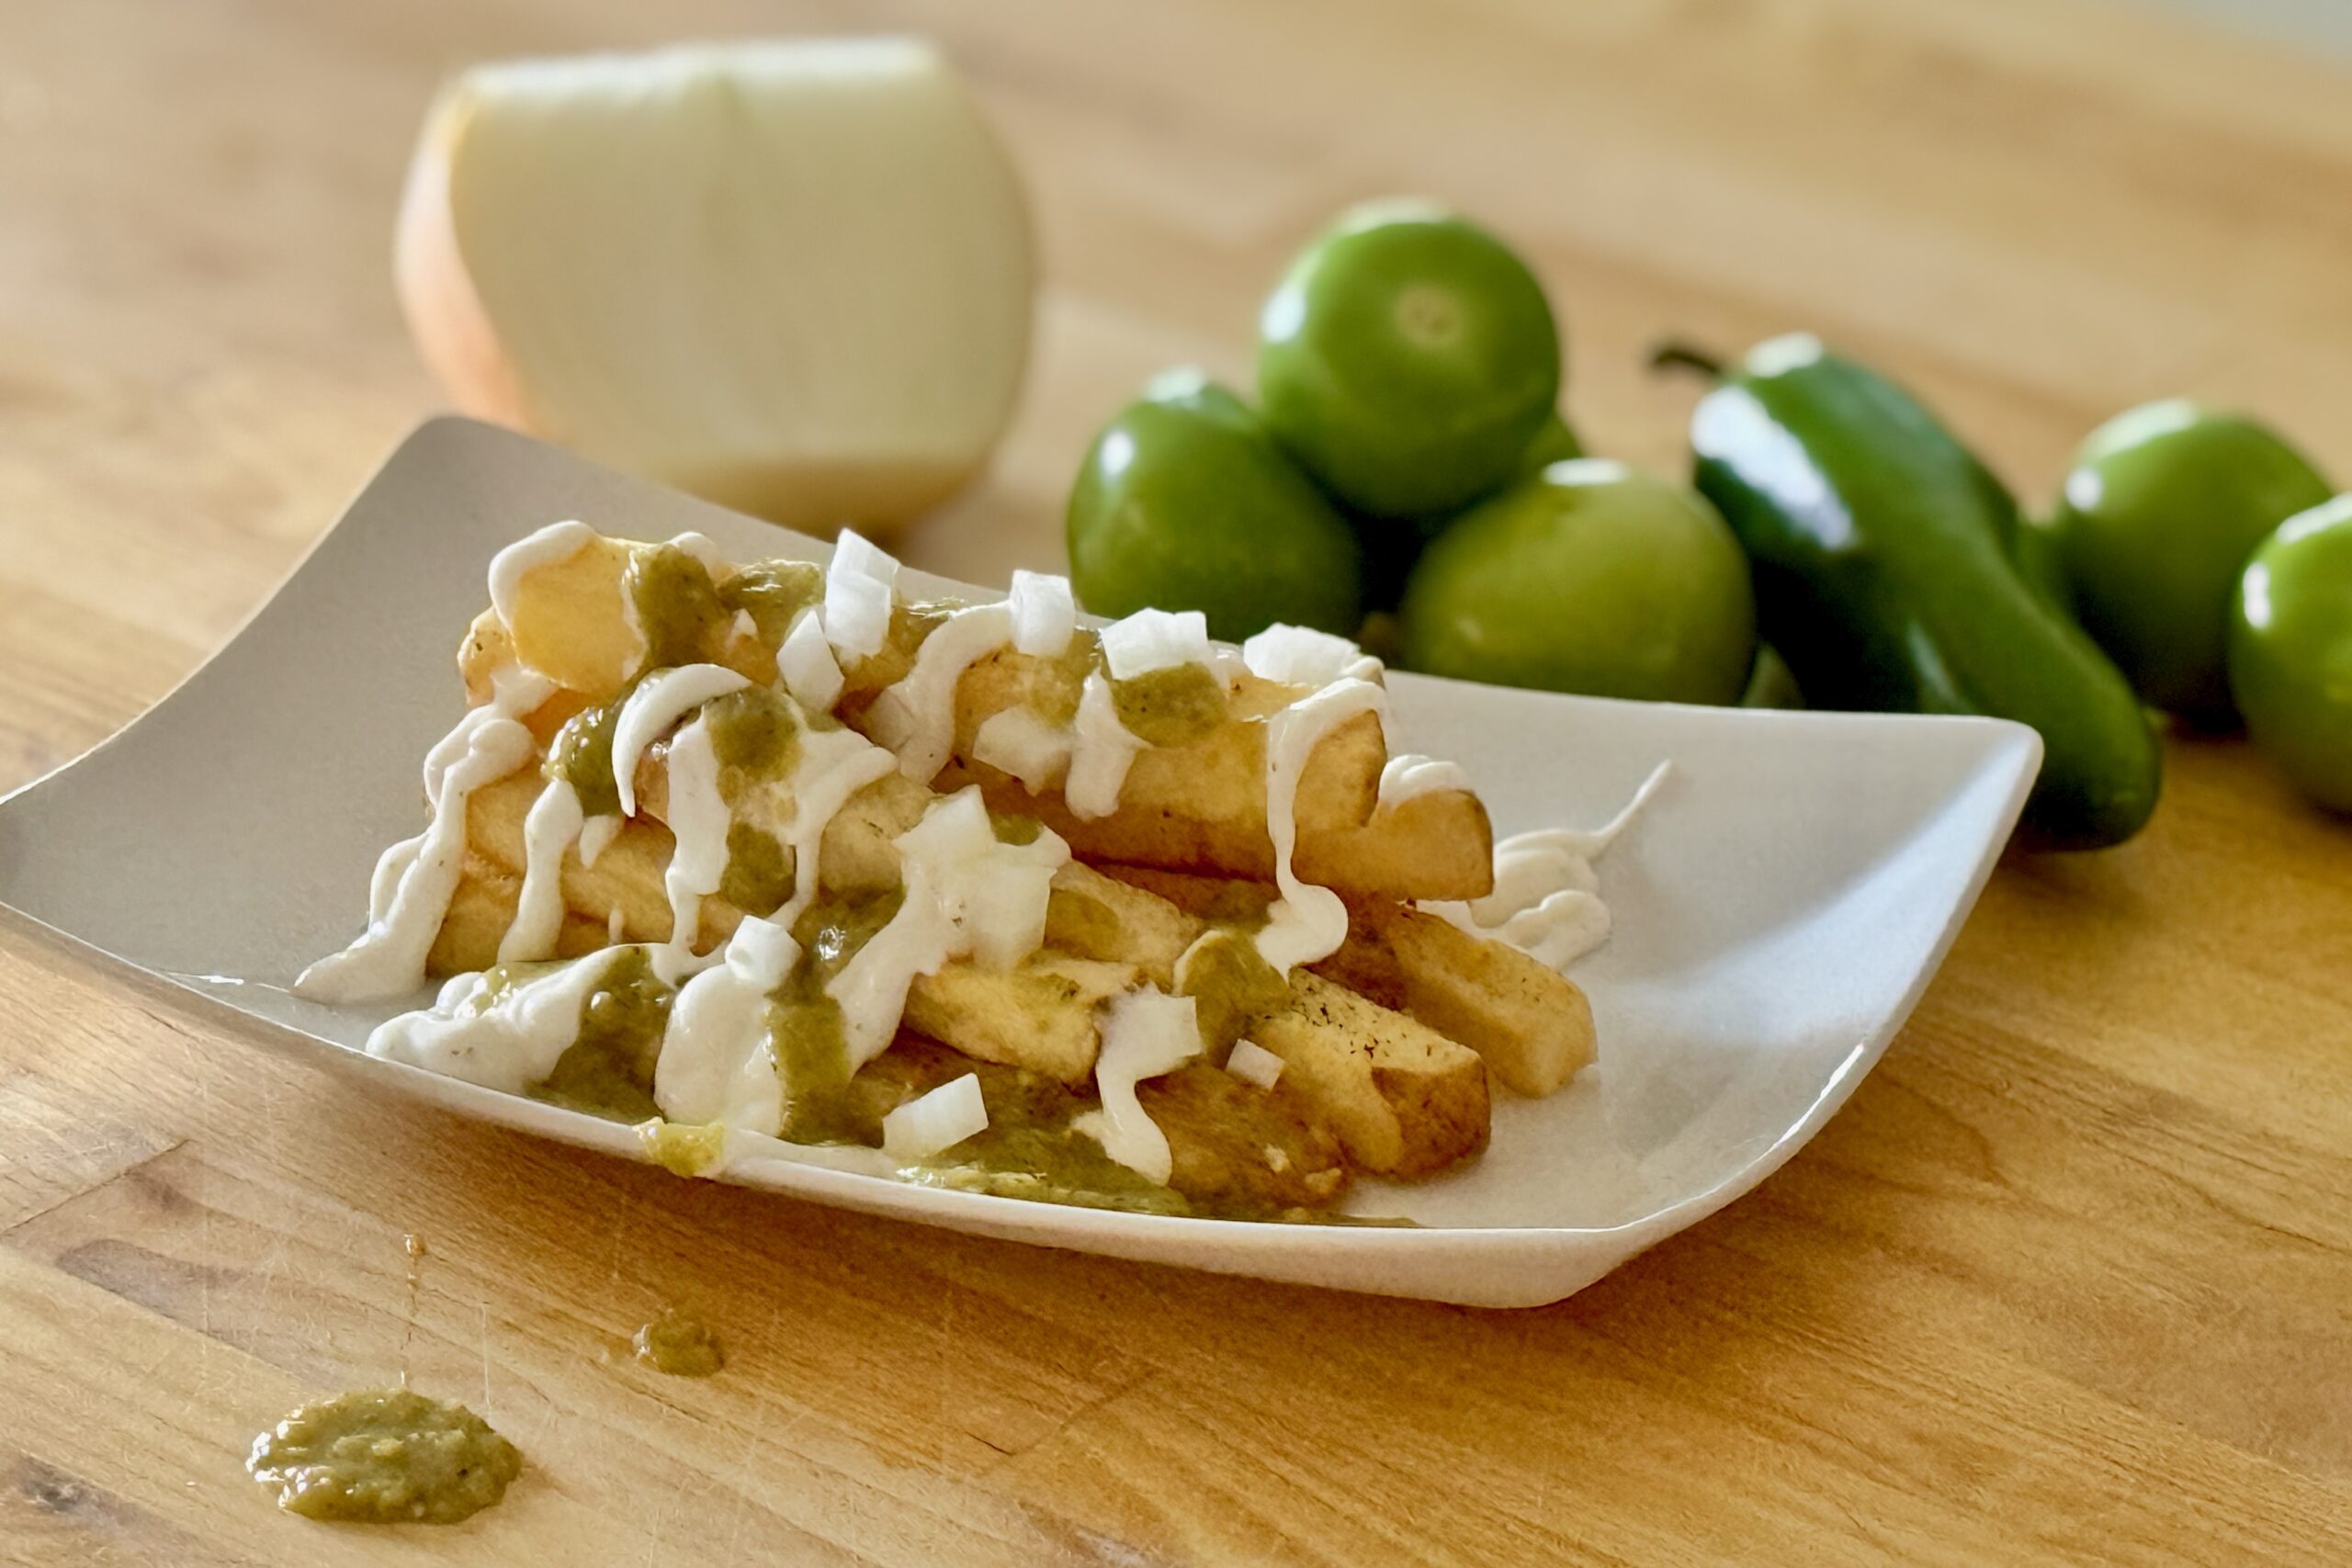
    Patatje Verde — Mexican-Inspired Dutch Frites

    Inspired by Dutch snackbar favorites patat speciaal and patatje oorlog, Patatje Verde gives golden, crisp frites a Mexican-inspired finish. Roasted Anaheim chiles and tomatillos make a bright, gently sweet and tangy green sauce, drizzled separately with cool, creamy frietssaus in equal amounts and finished with finely diced white onions. Enjoy these frites on their own or alongside Chile Verde Burritos.


    Ingredients

    Frites

    • 4 lb (1.8 kg) russet potatoes
    • Neutral frying oil, as needed
    • Table salt, to taste

    Roasted Green Chile Sauce

    • About 7 medium tomatillos (300 g), husked and rinsed
    • Roasted Anaheim chiles (240 g after peeling, stemming, and seeding)
    • 1 large jalapeño (60 g), stem removed, seeds and membranes intact
    • 4 cloves garlic, peeled
    • About ⅓ cup (50 g) white onion, cut into large wedges
    • 2 tbsp (30 ml) avocado oil
    • 2 tsp sugar
    • 1 tsp apple cider vinegar
    • 1 tsp ground cumin
    • ½ tsp Mexican oregano
    • ½ tsp table salt, plus more to taste
    • 4 tsp (20 ml) fresh lime juice
    • Water or chicken broth, only if needed

    Frietssaus and Toppings

    • Prepared House Mayonnaise, using the frietssaus variation, for drizzling
    • 1 cup (about 150 g) finely diced white onion
    • Finely chopped cilantro, optional

    Directions

    Roast the Anaheim Chiles

    Preheat the broiler to high. Broil the Anaheim chiles, turning as needed, until their skins blister and char. Place in a covered bowl for about 10 minutes, then peel, remove stems and seeds, and measure 240 g of prepared chiles.

    Prepare the Green Chile Sauce

    Arrange the tomatillos, jalapeño, and large onion wedges on a baking sheet. Tuck the garlic cloves beneath the onion wedges so the onion protects them from direct heat. Broil for 6–10 minutes, turning the tomatillos and jalapeño as needed, until softened with lightly charred spots. Check that the garlic is tender but not burned.

    Blend the roasted vegetables and garlic with the Anaheim chiles, sugar, apple cider vinegar, cumin, oregano, and salt until smooth. Add only enough water or chicken broth to help the blender turn, if necessary.

    Heat the avocado oil in a saucepan over medium heat. Carefully add the blended sauce, reduce heat to medium-low, and simmer, stirring occasionally, for about 8–12 minutes or until thick enough to cling to frites. Remove from heat and stir in the full 4 tsp (20 ml) lime juice. Taste and adjust salt if needed. Keep warm or let cool to room temperature.

    Prepare the Frites

    Cut the potatoes into frites about ⅜–½ inch (1 cm) thick. Soak in cold water for at least 20 minutes, then drain and dry thoroughly.

    Heat the frying oil to 275–300°F (135–150°C). Fry in batches for 4–6 minutes until tender but not browned. Remove and cool for 20–30 minutes.

    Increase the oil temperature to 375°F (190°C). Fry the potatoes again in batches for 3–5 minutes until golden and crisp. Drain briefly and season immediately with salt.

    Assemble the Patatje Verde

    Divide the hot frites among serving dishes. Drizzle the cool frietssaus and green chile sauce separately, in equal amounts, creating contrasting ribbons over the fries; do not blend the sauces together. Finish with finely diced raw white onion and optional cilantro. Serve immediately.

    Yield: Approximately 8–12 side servings.


    Notes

    Preparation

    • Anaheim chile weight: Measure 240 g after roasting, peeling, and removing stems and seeds. Buy extra fresh chiles to account for trimming losses.
    • Jalapeño: Use 60 g with the seeds and membranes intact for the tested-style heat level. Pepper heat varies.
    • Two distinct sauces: Use equal amounts of frietssaus and green chile sauce, drizzled individually over the frites rather than mixed ahead.
    • Texture: Reduce the green sauce until smooth and spoonable so it coats rather than soaks the crisp potatoes.

    Variations

    • Canned Green Chiles: Replace the 240 g roasted Anaheim chiles with two 4 oz (113 g each) cans of diced green chiles, lightly drained. Add directly to the blender; their flavor will be milder and less roasted.
    • More Heat: Substitute serrano chiles for some or all of the jalapeño, starting with less than 60 g and adjusting to taste because serranos are typically hotter.

    Serving Suggestions

    • Serve on their own as a Dutch-Mexican snackbar-style dish or alongside Chile Verde Burritos.
    • For burritos with frites inside, add a modest handful of freshly fried potatoes and use only a small amount of sauce to avoid a soggy filling.

    Make-Ahead & Storage

    • Refrigerate the green chile sauce in an airtight container for up to 3–4 days; reheat gently before serving if desired.
    • Keep frietssaus chilled according to the House Mayonnaise recipe.
    • Par-fry the potatoes earlier in the day, cool and refrigerate, then complete the second frying just before serving. Assemble only when ready to eat.
  • Shoarma Burgers

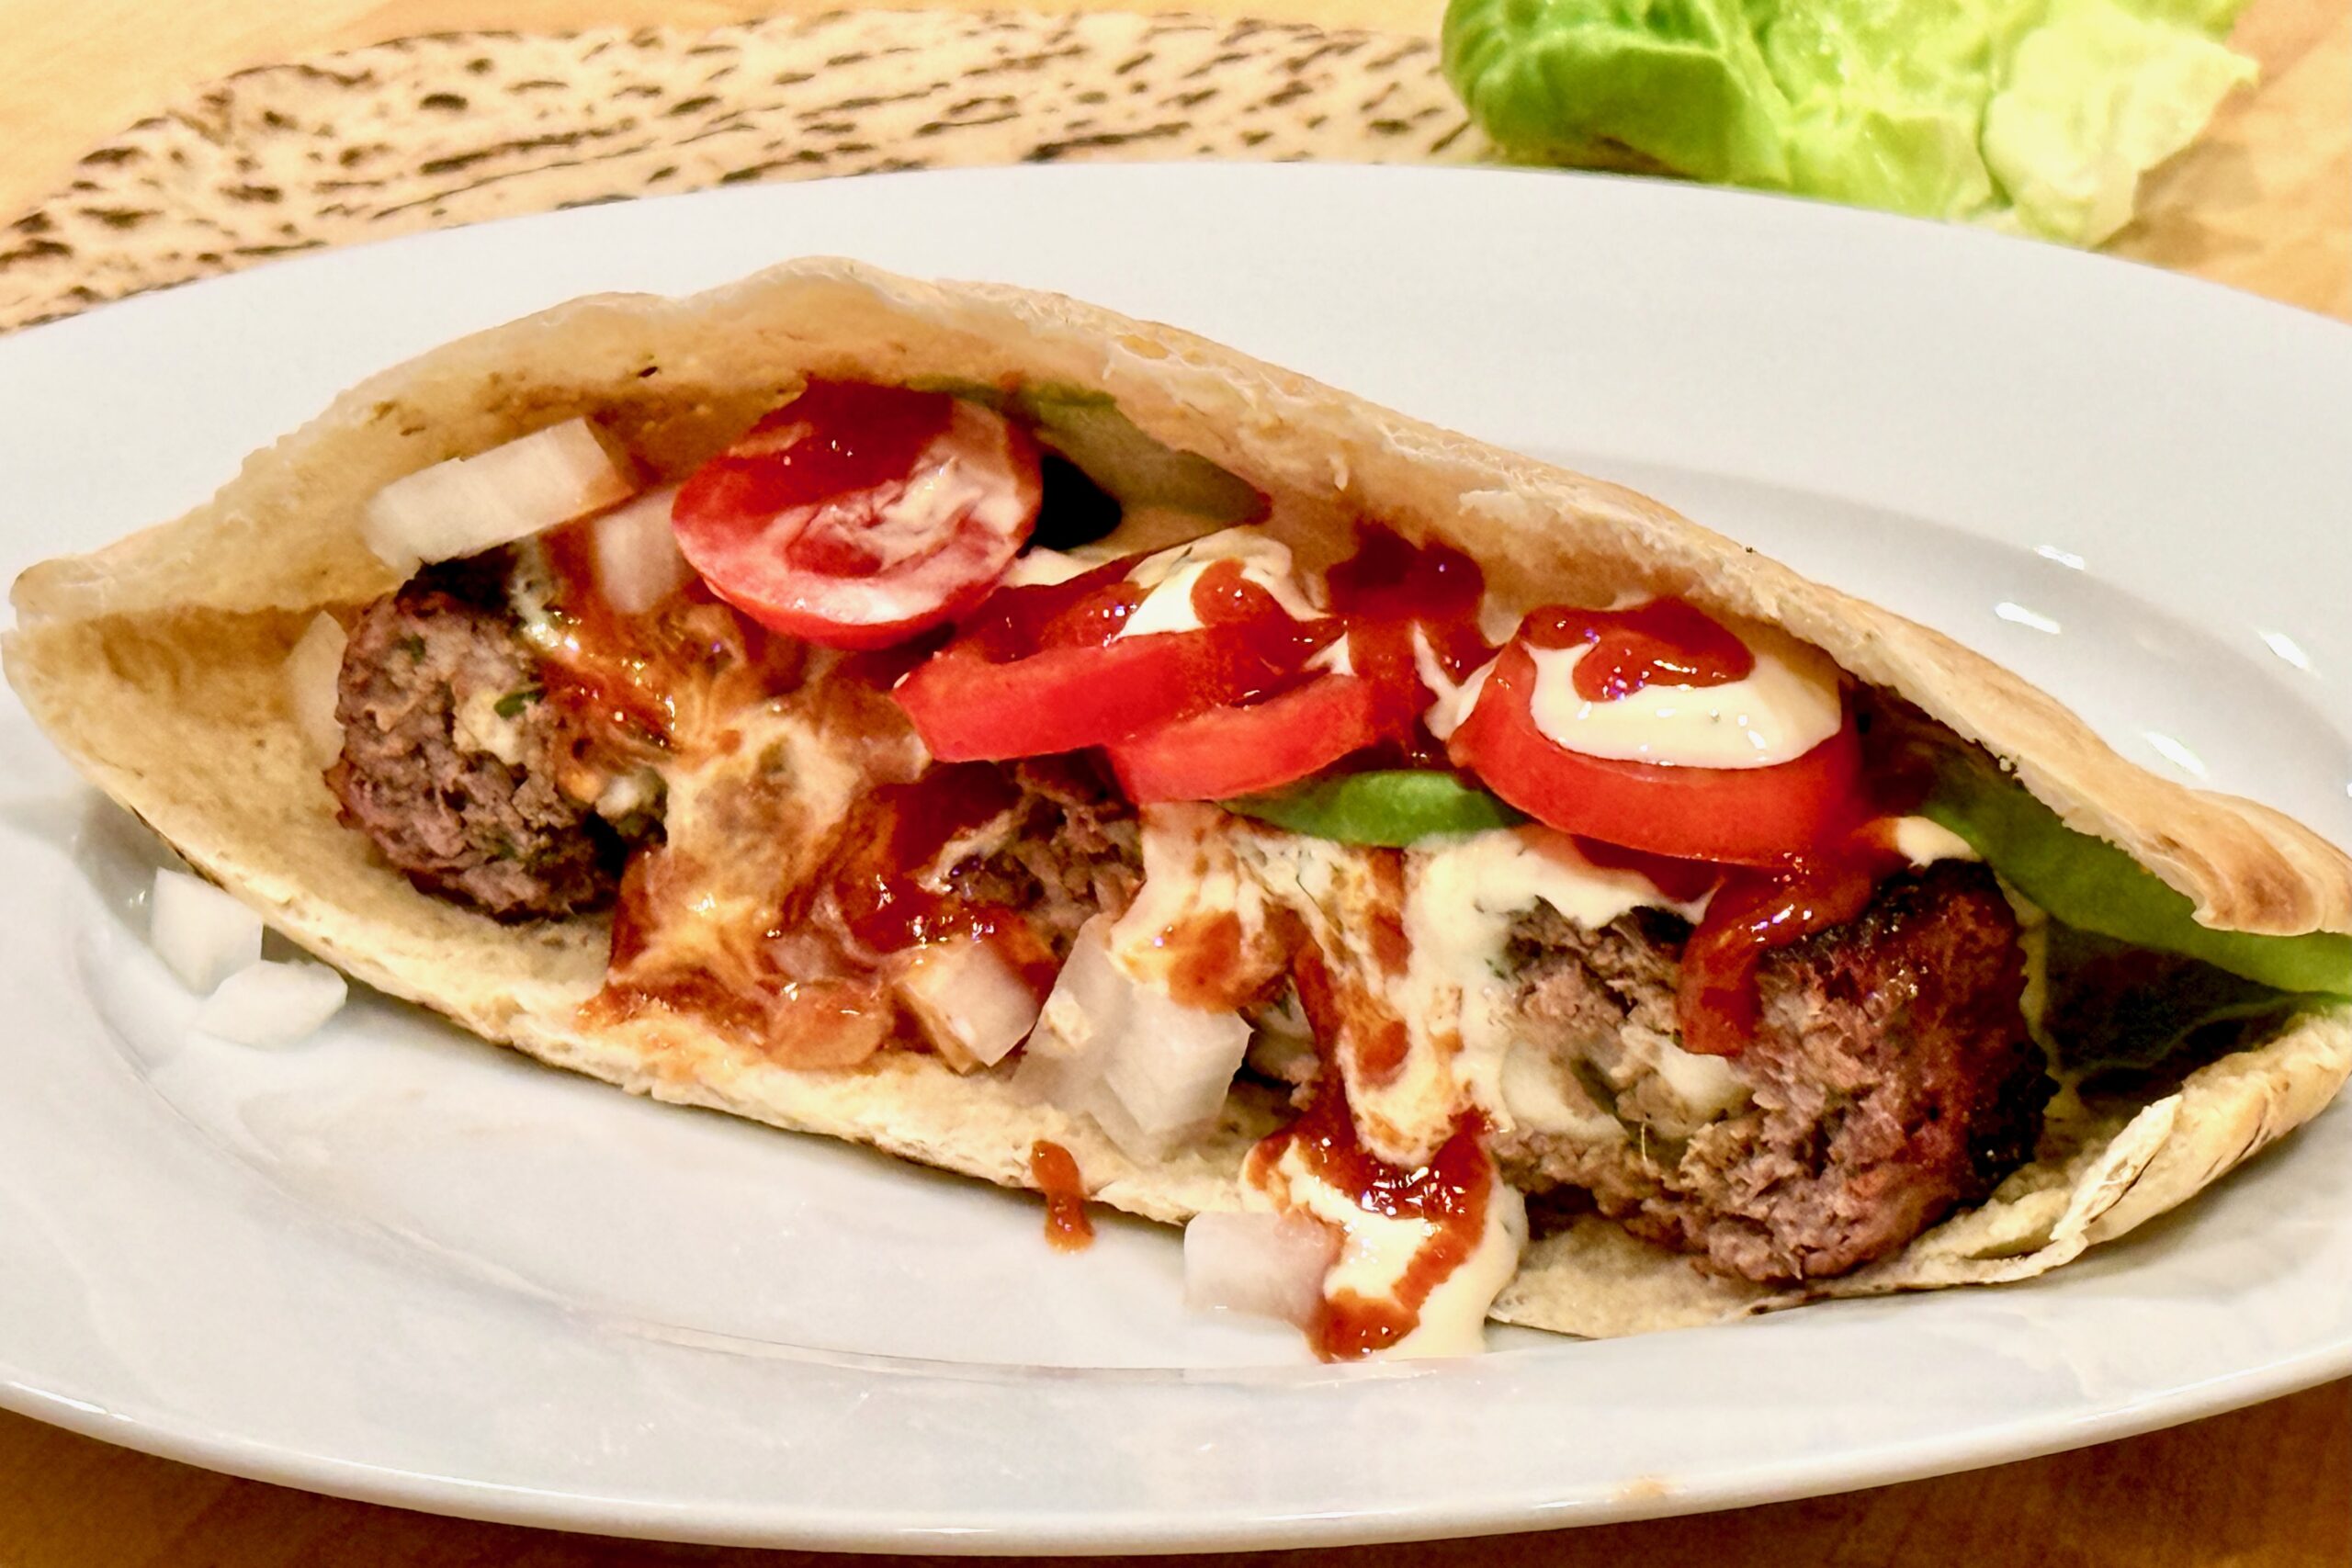
    Shoarma Burgers

    These cheese-stuffed shoarma burgers have been my son’s favorite dinner for years. The beef-and-pork patties are seasoned with Dutch shoarma kruiden, grilled over charcoal, and served in warm pita with butter lettuce, ripe tomatoes, shoarmasaus, knoflooksaus, and sambal oelek at the table. Fill them with mild fresh mozzarella or tangy goat cheese—or make some of each, as we usually do.


    Ingredients

    Shoarma Burgers

    • 2 lb (907 g) ground beef
    • 1 lb (454 g) ground pork
    • 1 tbsp sambal oelek
    • 1½ tbsp finely chopped or grated fresh garlic
    • 1 tbsp grated fresh ginger
    • 2 tsp table salt
    • 3.5 g MSG
    • 4 tbsp shoarma kruiden
    • ¼ cup (60 g) plain yogurt
    • ¼ cup (60 ml) finely chopped fresh cilantro
    • Fresh sliced mozzarella, 0.9–1.1 oz (25–30 g), or goat cheese, 1.1–1.2 oz (30–35 g), per burger

    For Serving

    • 7 pita breads or hamburger buns
    • butter lettuce leaves
    • ripe sliced tomatoes, preferably garden tomatoes
    • shoarmasaus
    • knoflooksaus
    • lime wedges
    • sambal oelek

    Directions

    Prepare the Sauces

    Prepare the shoarmasaus and knoflooksaus at least 4 hours before serving, preferably the night before, so their flavors have time to develop.

    Mix the Meat

    Place the ground beef, ground pork, sambal oelek, garlic, ginger, salt, MSG, shoarma kruiden, yogurt, and cilantro in a large bowl. Mix thoroughly by hand until the seasonings are evenly distributed and the meat becomes cohesive and slightly tacky. A portion pressed together should hold its shape without cracking or crumbling. Keep the mixture as cold as possible while working.

    Fill and Shape the Patties

    Divide the meat mixture into 7 equal portions. Working with one portion at a time, place approximately half in the bottom of a burger press or shape it by hand to create a solid base. Place 0.9–1.1 oz (25–30 g) fresh sliced mozzarella or 1.1–1.2 oz (30–35 g) goat cheese in the center, leaving a generous border around the cheese. Cover completely with the remaining meat and form into a thick patty, approximately 8.8 oz (250 g) including the filling.

    Smooth and gently compress the exterior. Carefully inspect the top, bottom, and edges, pinching closed every seam or opening through which the cheese could escape. Repeat with the remaining meat and cheese.

    Chill the Patties

    Arrange the formed patties on a covered tray and refrigerate for at least 1 hour before grilling.

    Prepare the Charcoal Grill

    Prepare a charcoal grill for two-zone cooking, with a hot direct-heat area and a cooler indirect-heat area. Clean and lightly oil the grill grate.

    Grill the Burgers

    Place the chilled patties over direct heat and grill until well browned. Turn carefully without pressing down with a spatula. If the exteriors brown before the centers are cooked, move the patties to the cooler side of the grill, close the lid, and finish over indirect heat.

    Cook until the meat surrounding the cheese reaches 160°F (71°C). Insert an instant-read thermometer horizontally through the side of each patty, aiming for the meat rather than the cheese filling. Transfer to a platter and rest for 3–5 minutes.

    Finish and Assemble

    Squeeze a lime wedge lightly over each rested burger. Warm the pita bread briefly on the grill, then fill each pita with a burger, butter lettuce, ripe sliced tomato, shoarmasaus, and knoflooksaus. Hamburger buns may be substituted for the pita. Serve immediately with additional sambal oelek and lime wedges at the table.

    Yield: 7 burgers.


    Notes

    Preparation

    • Fresh mozzarella creates a mild, melty center and is generally preferred by younger children.
    • Goat cheese provides a tangier, more pronounced filling.
    • Keep the cheese cold and compact in the center of each patty to make the burgers easier to seal.
    • A burger press makes the stuffed patties easier to shape, but they can also be formed and sealed by hand.
    • Mixing until the meat becomes slightly tacky helps the large patties hold together on the grill.
    • Do not press the patties with a spatula while grilling, as this can force the cheese through the sealed exterior.

    Make-Ahead & Storage

    • The sauces are best prepared the day before serving.
    • The patties may be formed, covered, and refrigerated earlier the same day.
    • Refrigerate leftover cooked burgers in an airtight container up to 3 days.
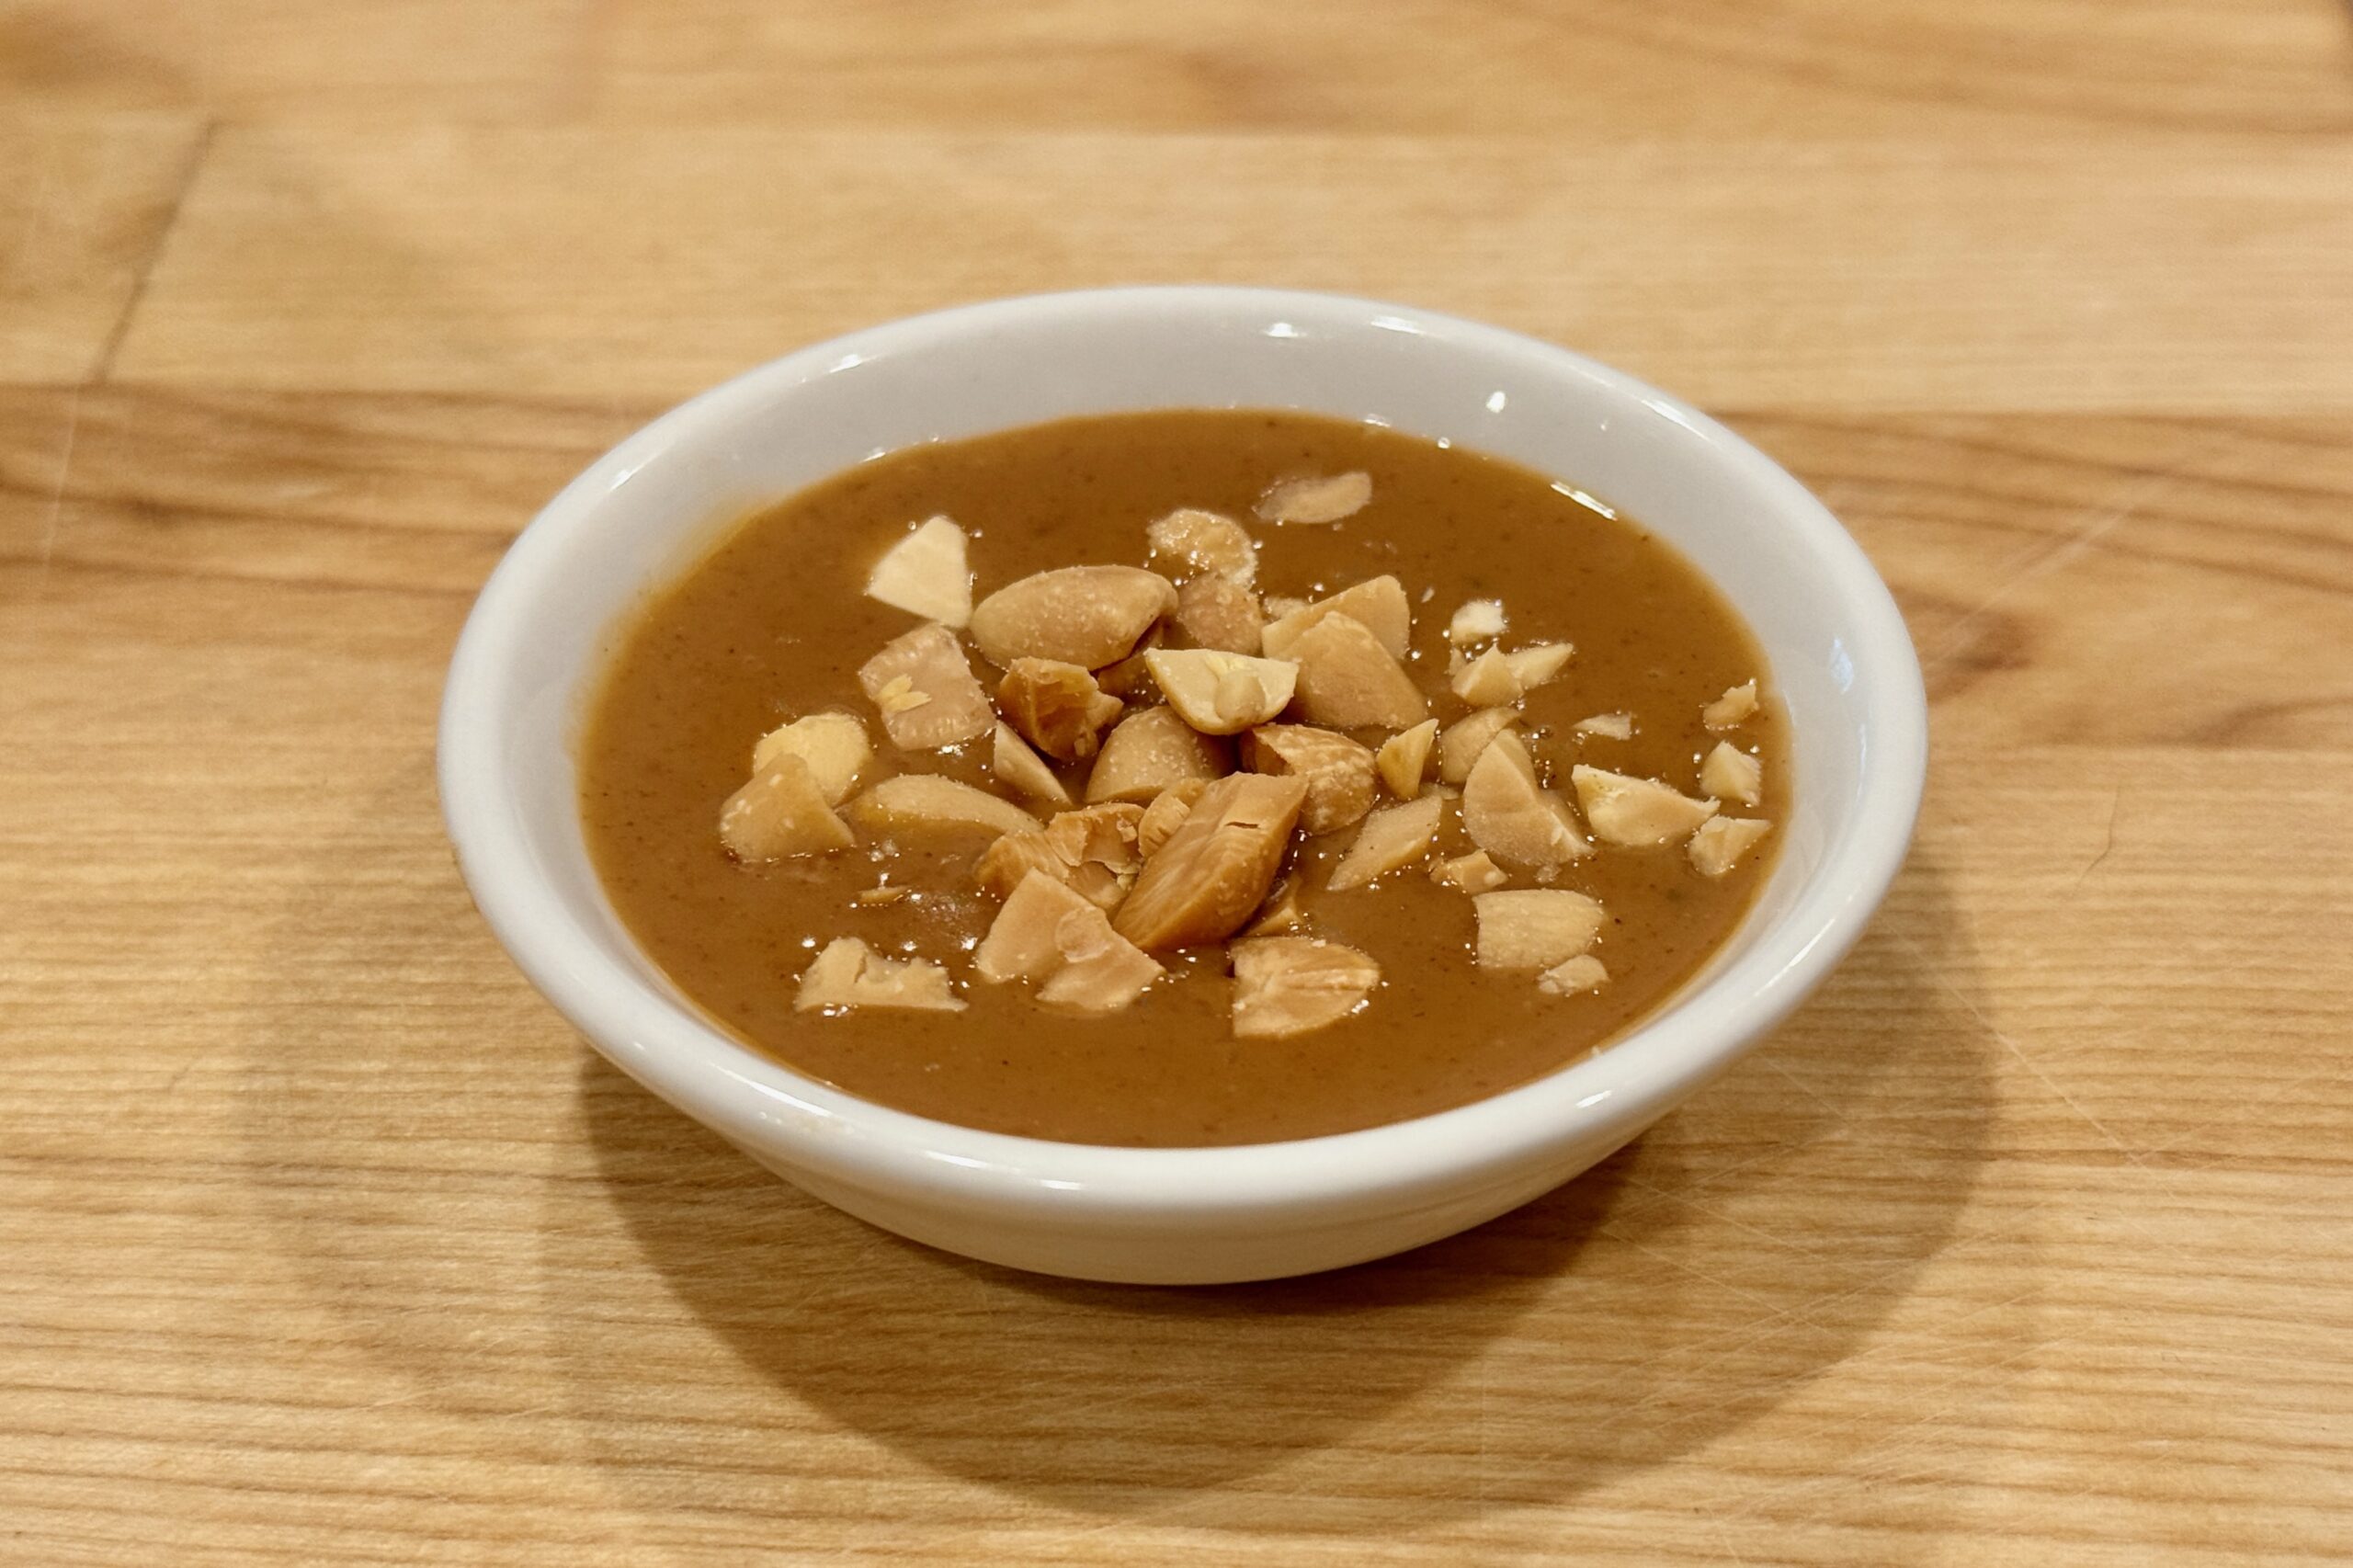
  • Spring Roll Peanut Dipping Sauce

    Spring Roll Peanut Dipping Sauce

    This spring roll peanut dipping sauce is unapologetically peanut-forward — creamy, savory, and deeply satisfying, with the Dutch-Indonesian flavor logic I fell in love with in The Netherlands. Ketjap manis and hoisin bring a mellow sweetness and depth, coconut milk keeps it silky, and a small spoonful of tamarind adds the subtle tang that makes the peanuts pop instead of tasting heavy. It’s the kind of sauce you’ll want to keep in the fridge so fresh spring rolls (and plenty of other things) always have a rich, nutty sidekick.


    Ingredients

    • ½ cup (128 g) creamy peanut butter
    • ½ tsp (about 1 clove) garlic, minced
    • 1 tbsp (15 ml) lime juice
    • 2 tbsp (30 ml) ketjap manis
    • 2 tbsp (30 ml) hoisin sauce
    • 1 tsp (5 ml) Tamarind Paste from Whole Tamarind Pods
    • 1 can (14 oz / 400 ml) coconut milk
    • 1 tsp fresh ginger, minced
    • ½ tsp red curry powder
    • ½ tsp sambal oelek
    • 1½ tsp fish sauce
    • 2 tbsp (18 g) peanuts, crushed (for topping)

    Directions

    Make the Sauce

    In a saucepan over medium heat, combine the peanut butter and minced garlic. Stir continuously for 1–2 minutes, until the mixture is smooth and fragrant.

    Add the lime juice, ketjap manis, hoisin sauce, and tamarind paste, stirring to combine.

    Gradually whisk in the coconut milk, followed by the ginger, red curry powder, sambal oelek, and fish sauce.

    Continue cooking, stirring occasionally, until the sauce is heated through and just begins to simmer. Remove from the heat and transfer to a serving bowl. Sprinkle with the crushed peanuts just before serving.

    Yield: About 2½ cups (590 ml).


    Notes

    Preparation

    • Consistency: This sauce thickens as it cools. If it gets too thick, whisk in warm water 1 tbsp (15 ml) at a time until dippable.
    • Balance: Tamarind and lime should read as a gentle tang in the background—not sour. If the sauce tastes too sharp, add 1–2 tbsp (15–30 ml) coconut milk to soften it.
    • Heat Level: As written, the sauce is moderately spicy. For a milder, family-friendly version, reduce the sambal oelek to ¼ tsp, or to taste.

    Variations

    • Extra Spicy: Increase the sambal oelek to 1 tsp, or add ¼ tsp cayenne.
    • More Peanut Texture: Stir in an additional 1–2 tbsp (9–18 g) crushed peanuts off the heat, then top as usual.
    • More Savory: Add an extra ½ tsp fish sauce and a squeeze of lime to keep the sauce balanced.

    Serving Suggestions

    • Serve with fresh spring rolls (gỏi cuốn) or summer rolls.
    • Use as a satay-style dip for grilled chicken, shrimp, or tofu.
    • Drizzle over rice bowls, noodle bowls, or steamed vegetables.

    Make-Ahead & Storage

    • Make Ahead: The flavors settle and improve after a few hours or overnight in the refrigerator.
    • Refrigerate: Cool completely, then store in a sealed container for up to 5 days.
    • Reheat: Warm gently over low heat or microwave in short bursts, whisking often. Add a splash of water as needed; avoid boiling.
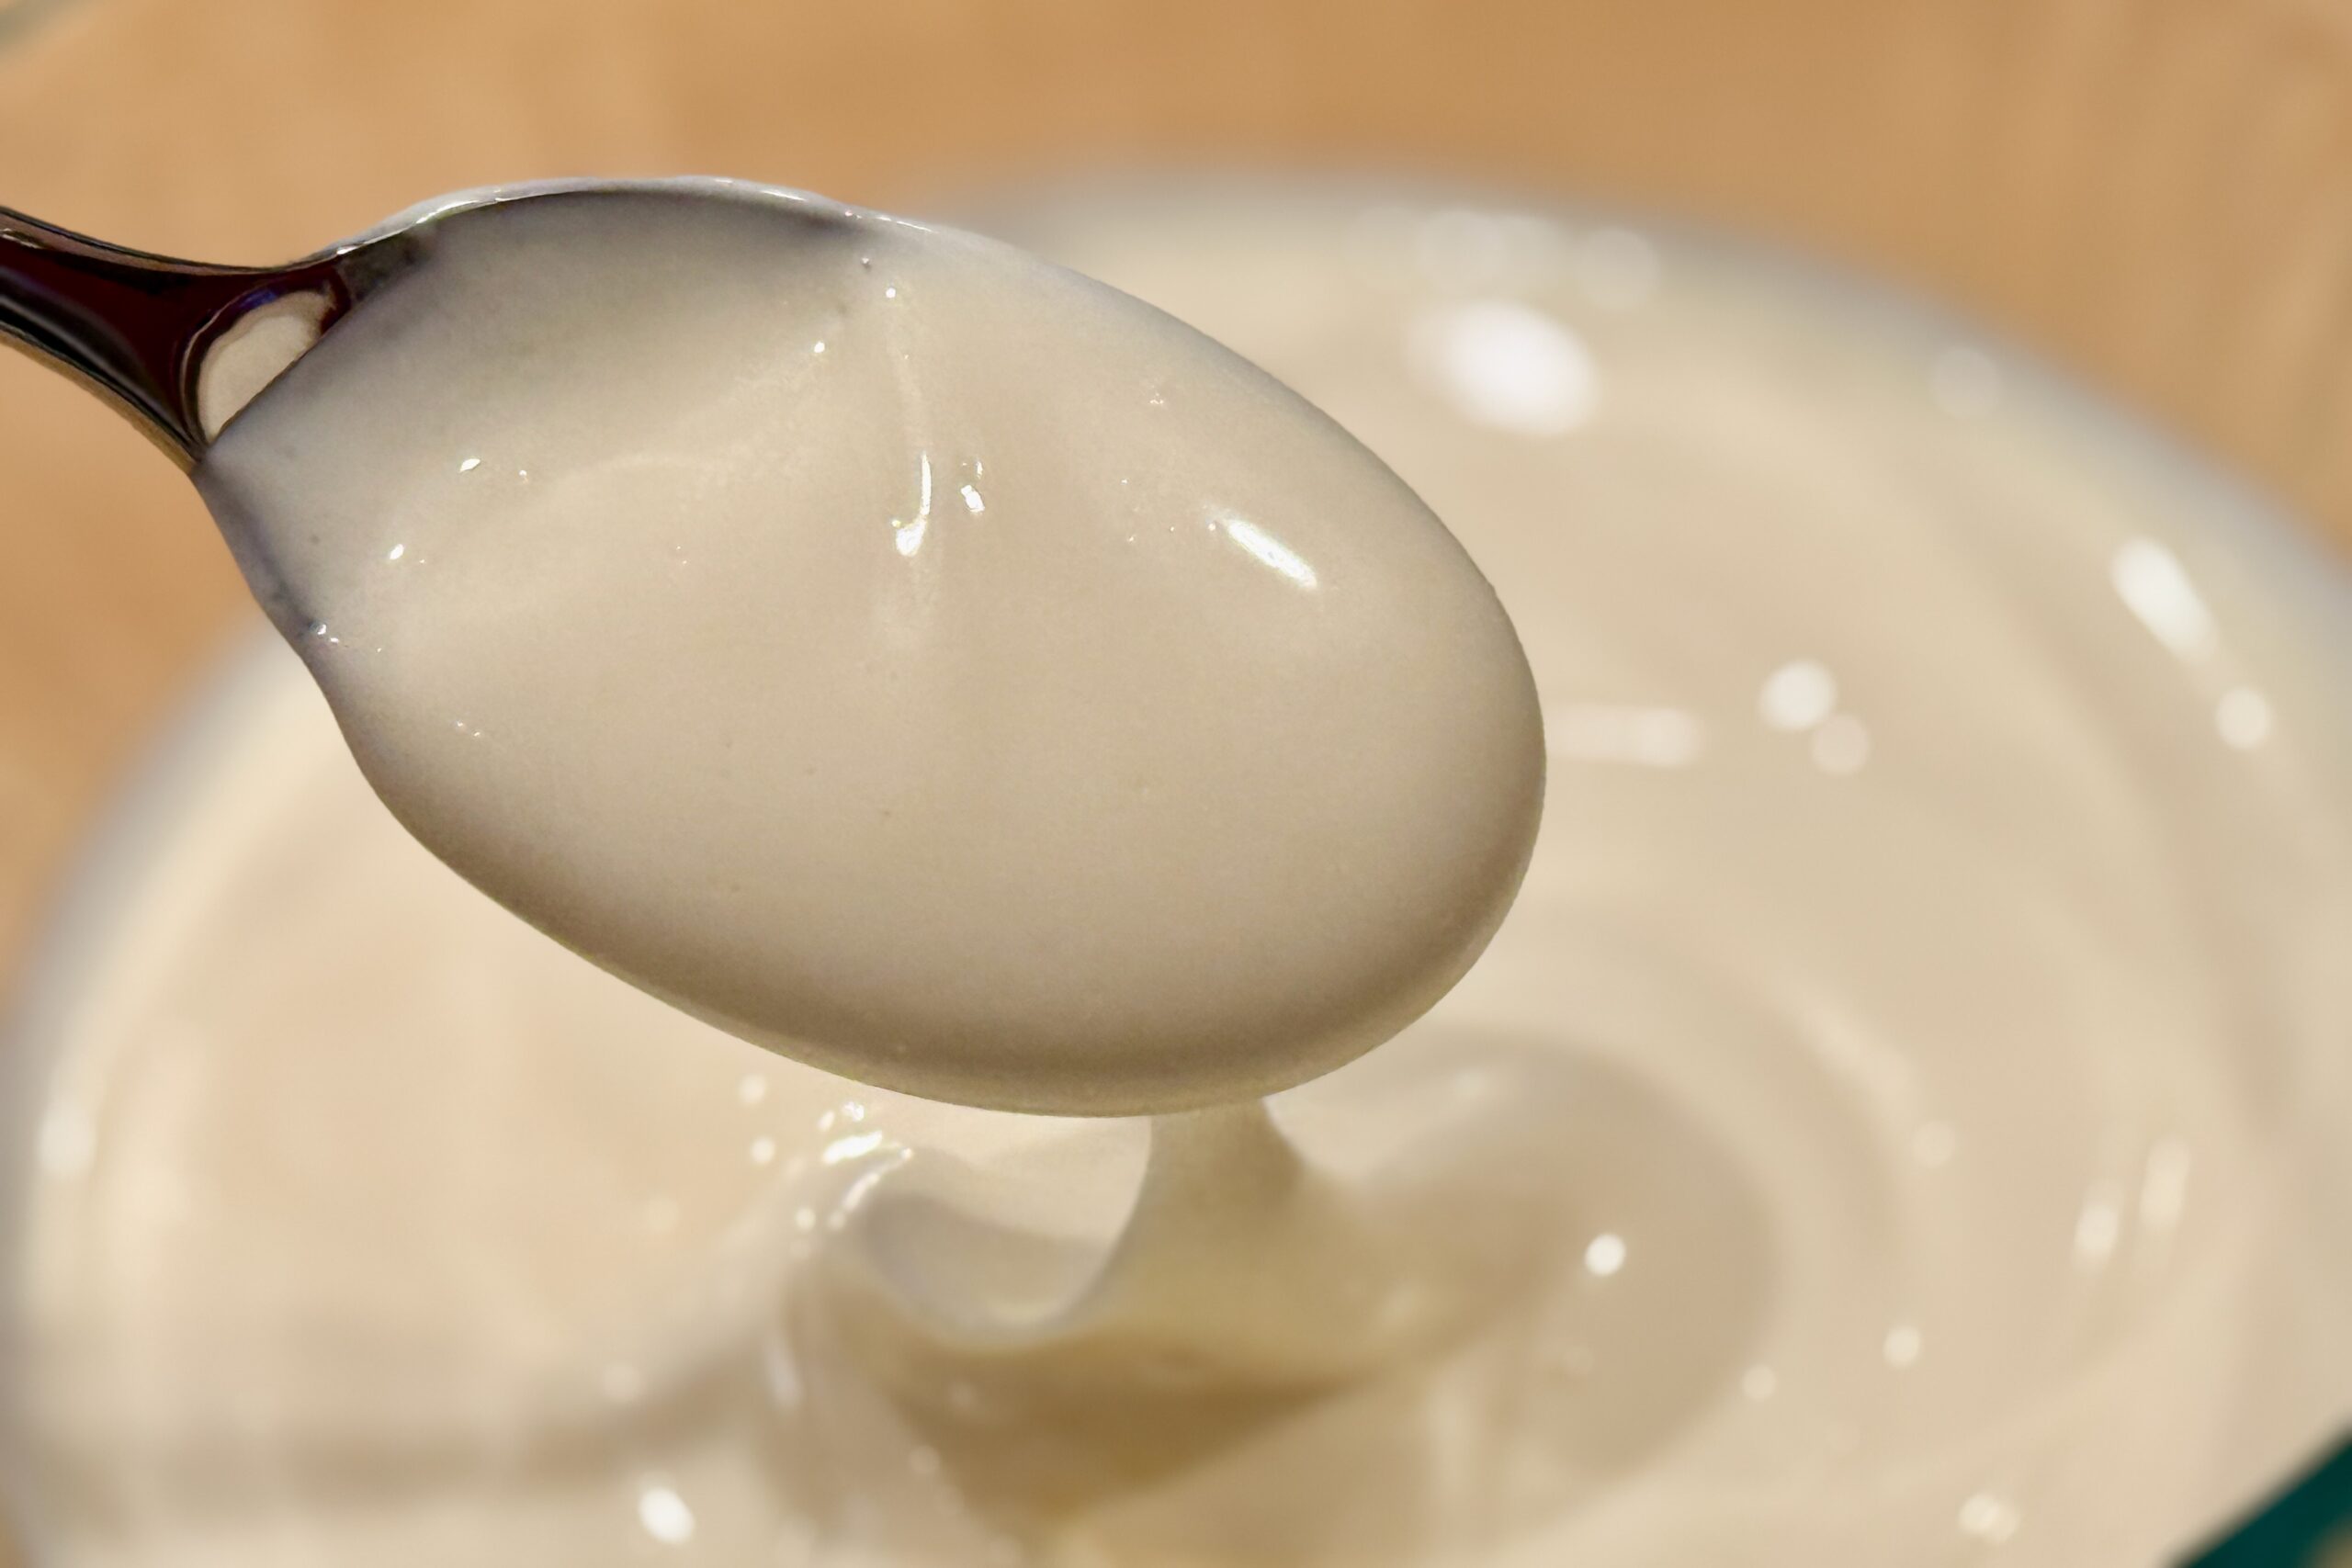
  • Dutch Mayonnaise — Calvé-Style from American Mayo

    Dutch Mayonnaise — Calvé-Style from American Mayo

    Dutch mayonnaise is tangier, slightly sweeter, and noticeably lighter in flavor than most American mayonnaises. Brands like Calvé and Remia are designed to complement fries and snack-bar sauces without overwhelming them—especially when paired with shoarmasaus, kerrieketchup, or poestasaus. This simple adjustment transforms standard American mayonnaise (such as Best Foods or Hellmann’s) into a closer approximation of Dutch-style mayo, making it a better match for patat, broodjes, and classic Dutch snackbar dishes.


    Ingredients

    • 1 cup American mayonnaise (Best Foods / Hellmann’s recommended)
    • 1½–2 tsp white wine vinegar or distilled vinegar
    • 1 tsp sugar
    • 1–2 tbsp neutral oil or water (to lighten texture)
    • pinch table salt (optional, to taste)

    Directions

    Adjust the Mayonnaise

    In a bowl, whisk together the mayonnaise, vinegar, sugar, and 1 tbsp oil or water until smooth. Taste and adjust vinegar or sugar slightly if needed—the mayo should taste brighter and lighter than American-style mayonnaise.

    Set the Flavor

    Cover and refrigerate for at least 30 minutes to allow the flavor to settle. Whisk again before serving.


    Notes

    Preparation

    • Dutch mayonnaise is tangier than American mayo but not sharply acidic.
    • The small amount of sugar is important—it softens the acidity and mimics Dutch formulations.
    • Lightening with oil or water helps reduce the heavy mouthfeel typical of American mayonnaise.
    • Taste the mayo cold, as it will be served.

    Serving Suggestions

    • Serve with fries or patat as a stand-alone sauce.
    • Use as the mayonnaise component in patat speciaal with Kerrieketchup – Dutch Curry Ketchup.
    • Pair with Shoarmasaus – Dutch Shoarma Red Sauce or Poestasaus – Spicy Dutch Kebab Sauce.
    • Use as the base for Knoflooksaus or other Dutch-style sauces.

    Variations

    • Calvé-Leaning: Increase vinegar slightly and keep the texture light.
    • Remia-Leaning: Use the full 2 tbsp oil or water for a looser, more pourable mayo.
    • Frietsaus-Style: Replace half the mayonnaise with plain yogurt or milk for a lighter Dutch fry sauce.

    Make-Ahead & Storage

    • Refrigerate in an airtight container up to 1 week.
    • Whisk briefly before serving if the texture thickens.
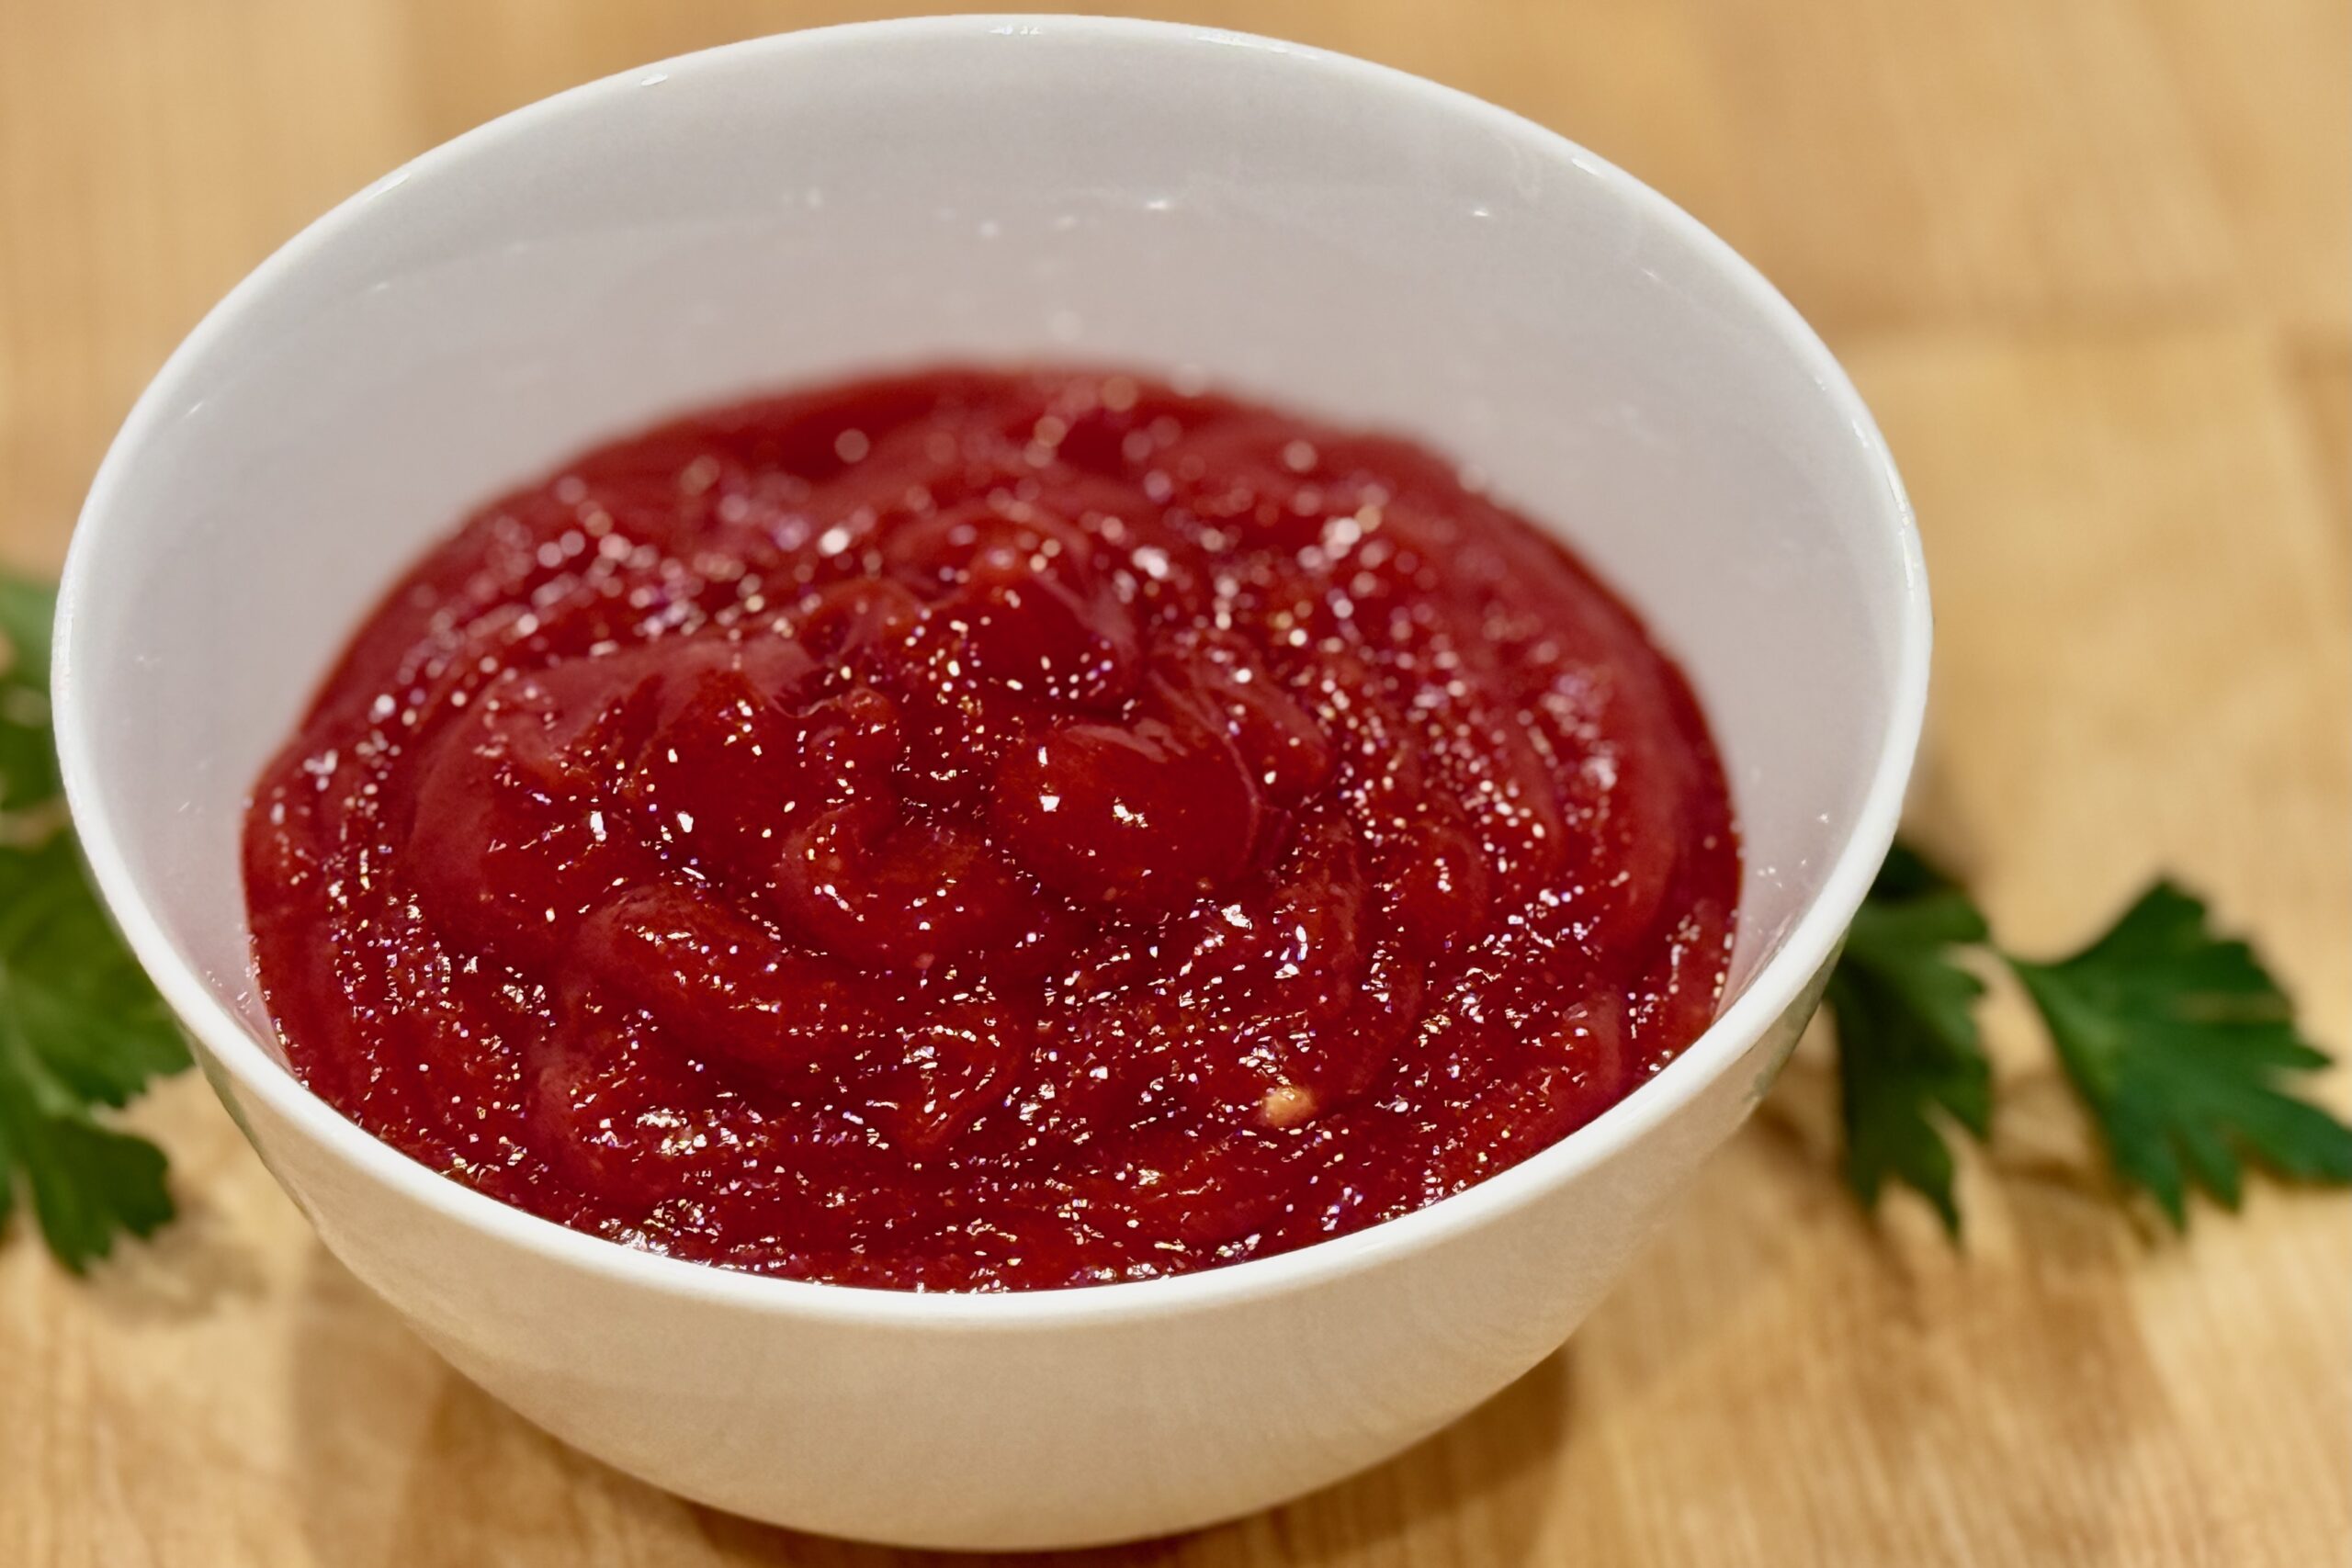
  • Shoarmasaus – Dutch Red Shawarma Sauce

    Shoarmasaus – Dutch Red Shawarma Sauce

    This Dutch shoarmasaus is the mild red tomato sauce served alongside knoflooksaus at shoarma shops and snack bars across the Netherlands. Lightly sweet, gently tangy, and intentionally restrained, it is designed to balance spiced meat without competing for attention. If you are looking for the other classic Dutch red snackbar sauces, try Kerrieketchup – Dutch Curry Ketchup for patat speciaal, or Poestasaus – Spicy Dutch Kebab Sauce for a chili-forward kick more common in döner and kebab shops.


    Ingredients

    • ¾ cup tomato ketchup
    • 1½ tbsp tomato paste
    • 2 tbsp water, plus more as needed after chilling
    • 1–1½ tsp sugar
    • ½ tsp sweet paprika
    • ¼ tsp onion powder
    • ¼ tsp mild curry powder
    • pinch sambal oelek or cayenne (optional)
    • ¼ tsp table salt, or to taste
    • 1 tbsp white or apple cider vinegar

    Directions

    Combine the Sauce

    Combine the ketchup, tomato paste, water, sugar, paprika, onion powder, curry powder, sambal oelek or cayenne (if using), and salt in a small saucepan. Whisk until smooth.

    Cook the Sauce

    Cook over medium-low heat, stirring frequently, until the sauce just begins to simmer. Reduce the heat to low and cook gently for 5 minutes, stirring often. Do not allow the sauce to boil vigorously or reduce heavily.

    Add the Vinegar

    Remove the saucepan from the heat and stir in the vinegar. Taste and adjust the salt, sugar, or vinegar as needed. The sauce should be lightly sweet and tangy, with mild background warmth rather than pronounced heat.

    Cool and Chill

    Cool completely, then cover and refrigerate for at least 4 hours, preferably overnight. Once thoroughly chilled, stir well and thin with 1–2 tbsp additional water if needed.


    Notes

    Preparation

    • This sauce is intentionally mild; heat should be barely perceptible, if present at all.
    • The brief cooking time mellows the tomato paste and allows the paprika, curry powder, and onion powder to blend into the sauce without developing a heavy, barbecue-style flavor.
    • Adding the vinegar after cooking preserves its brightness.
    • The curry powder provides a warm background note that balances the paprika without turning the sauce into curry ketchup.
    • No garlic is added by design, preserving contrast with knoflooksaus.
    • Always make final seasoning and consistency adjustments after the sauce is completely cold.

    Serving Suggestions

    • Serve alongside Dutch-style shoarma with knoflooksaus.
    • Drizzle over pita sandwiches, fries, or grilled meats.
    • Offer sambal oelek at the table for those who prefer extra heat.

    Variations

    • Classic Snackbar Style: Thin with 1–2 additional tbsp water after chilling and use only 1 tsp sugar.
    • Deeper Tomato Flavor: Add an extra ½ tbsp tomato paste and a few additional drops of vinegar.
    • Late-Night Shoarmazaak: Increase the sambal oelek to ½ tsp for a gently warming finish.
    • Curry-Forward House Sauce: Increase the mild curry powder to ½ tsp for a more noticeable curry note.

    Make-Ahead & Storage

    • Best made at least 4 hours ahead; the flavor improves overnight.
    • Refrigerate in an airtight container up to 1 week.
    • Stir well before serving and thin with a little water if needed.
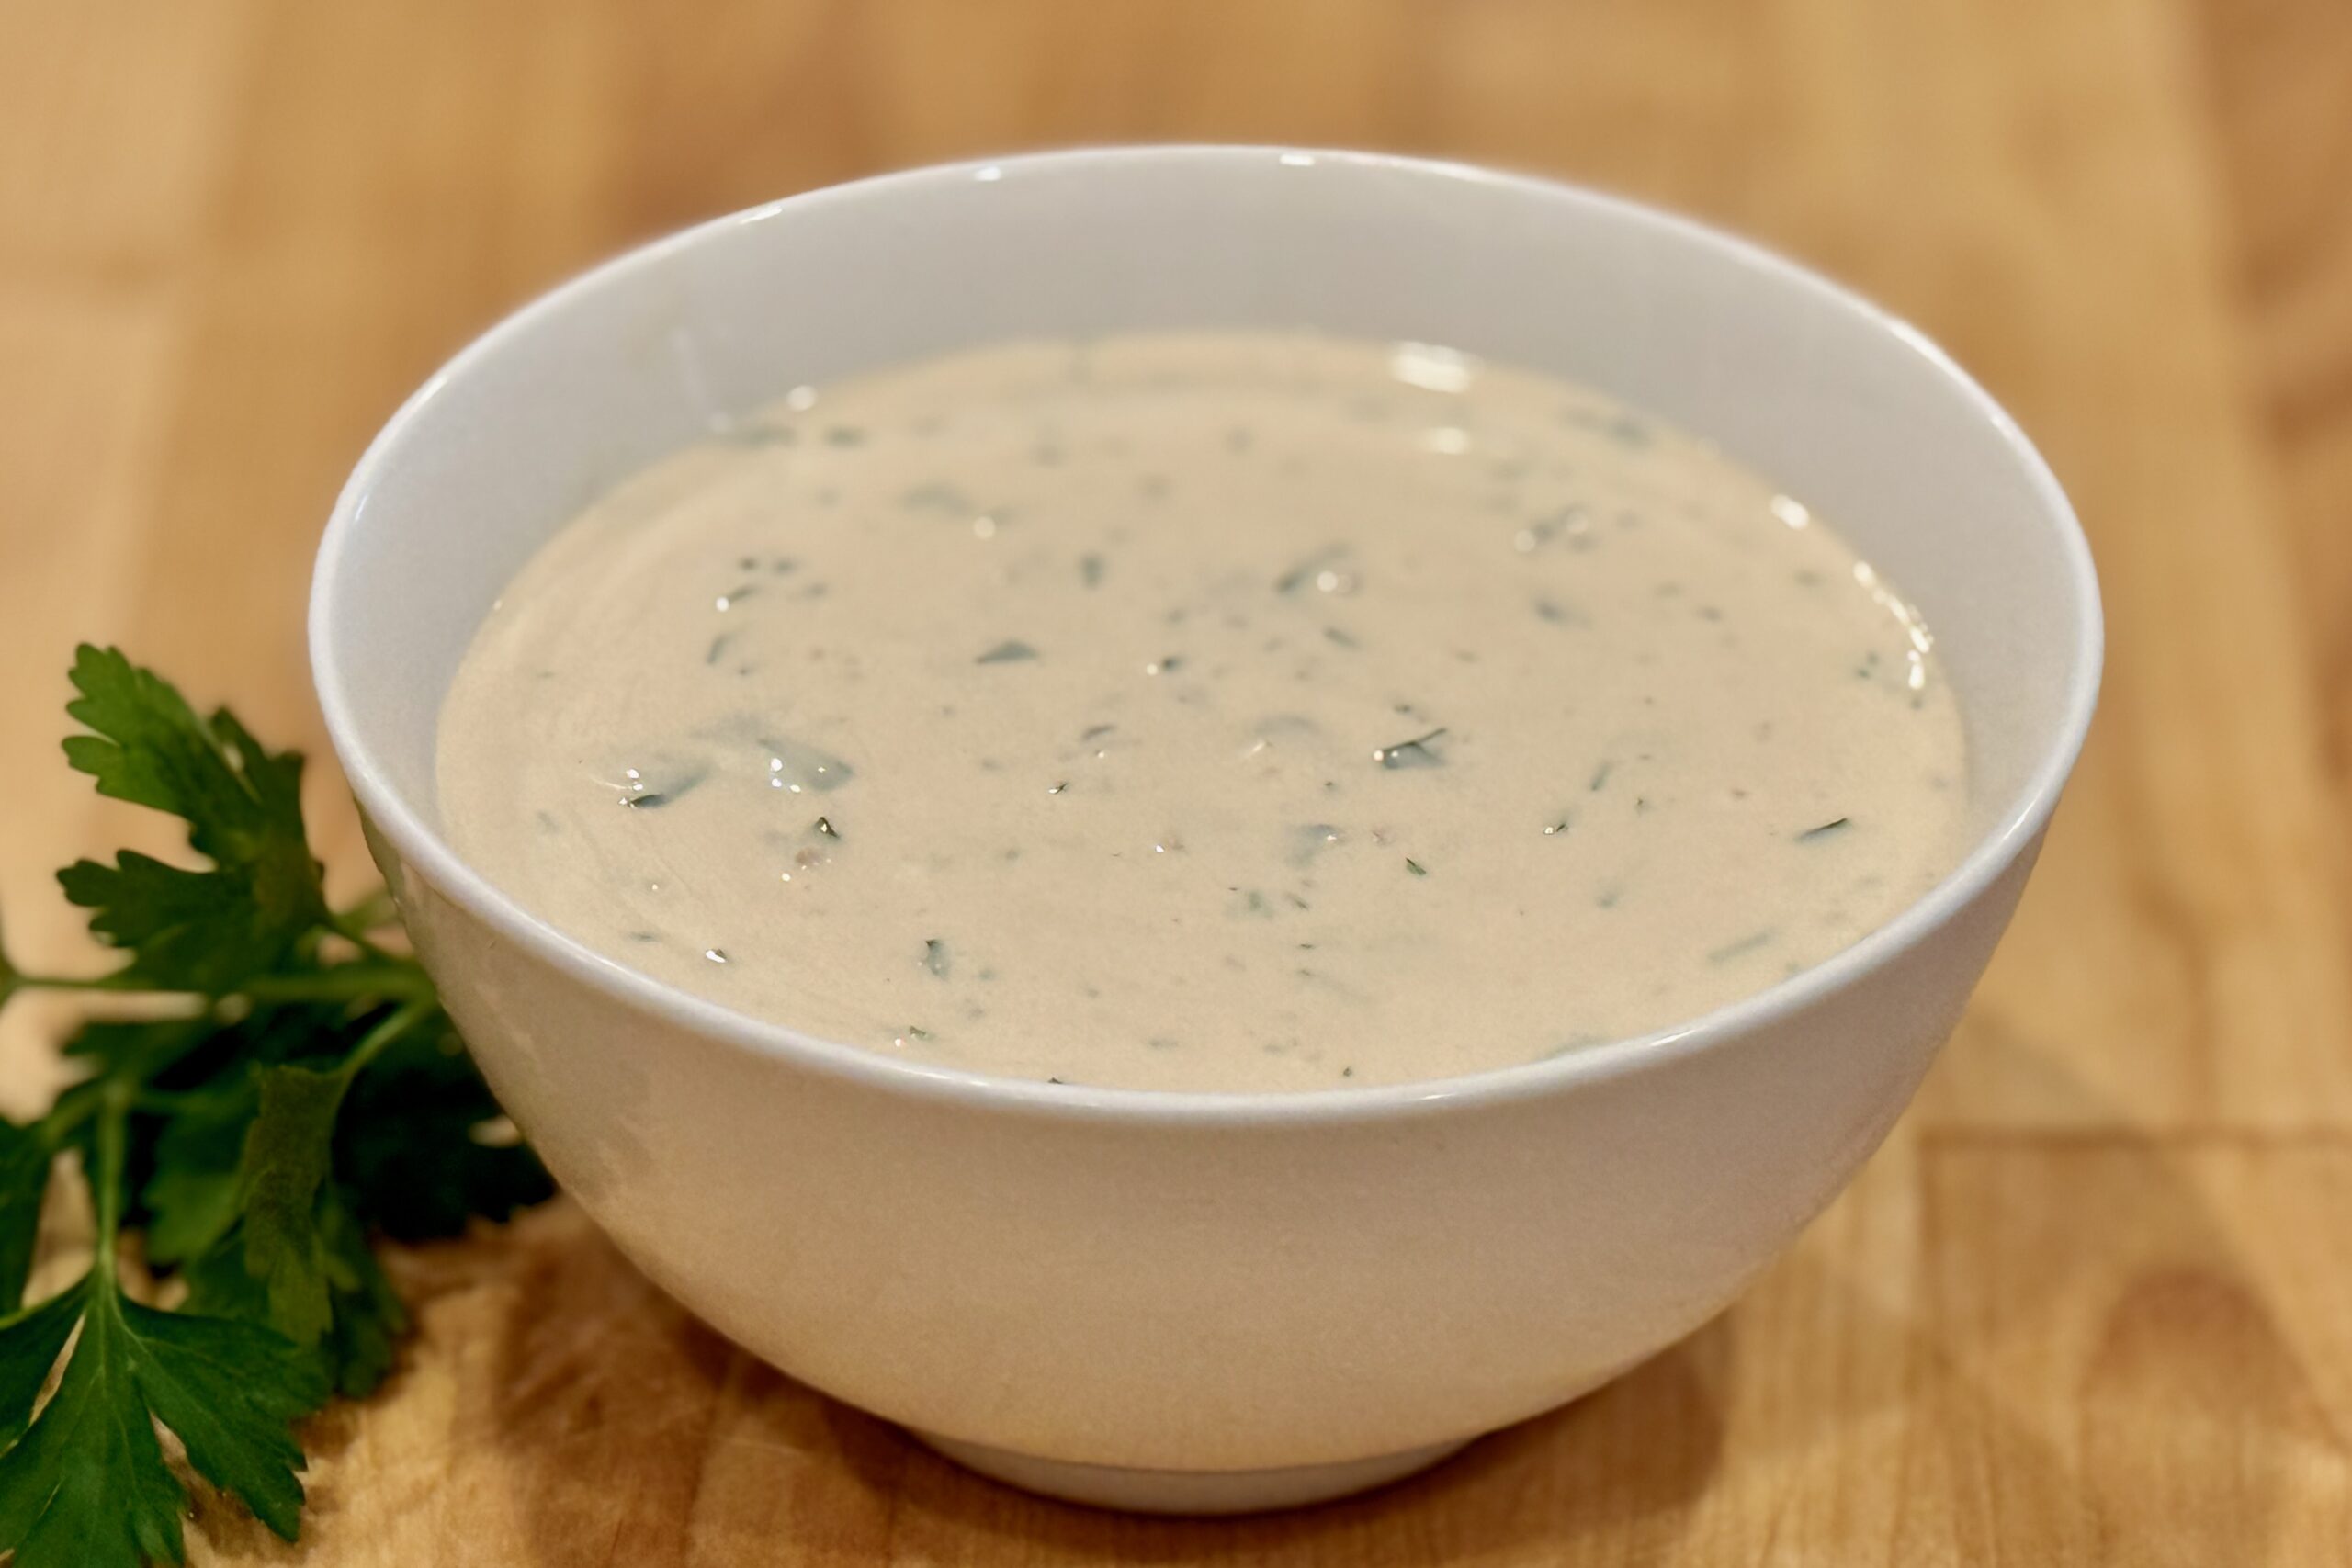
  • Knoflooksaus — Dutch Garlic Sauce

    Knoflooksaus — Dutch Garlic Sauce

    This creamy, garlicky sauce is a staple of Dutch shoarma restaurants and late-night snack bars. Smooth, tangy, and richly flavored with garlic and parsley, it’s perfect for serving with shoarma, fries, grilled meats, or pita bread—bringing a taste of The Netherlands to your kitchen.


    Ingredients

    • 2 cups Dutch mayonnaise (e.g., Remia, Calvé, or Zaanse)
    • ¾ cup Greek yogurt
    • 3 tbsp finely grated fresh garlic (or 4–5 tbsp mild garlic paste)
    • 3 tbsp parsley, very finely minced
    • 2 tsp ketjap manis, plus more to taste
    • ¼ tsp table salt
    • ½ tsp white wine vinegar or lemon juice (optional, for a brighter tang)
    • ⅛ tsp white pepper (optional)

    Directions

    Mellow the Garlic

    In a bowl, combine the Greek yogurt and grated garlic. Let stand 10–15 minutes to lightly mellow the garlic before adding the mayonnaise.

    Mix the Sauce

    Add the Dutch mayonnaise, parsley, ketjap manis, salt, and (if using) the vinegar or lemon juice and white pepper. Stir until smooth and evenly blended.

    Chill and Develop Flavor

    Cover and refrigerate for at least 4 hours, or overnight, to allow the flavors to mellow and the sauce to thicken.


    Notes

    Preparation

    • For a milder garlic flavor, reduce the garlic to 2 tbsp and let the sauce rest overnight.
    • For the most authentic Dutch flavor, use Dutch mayonnaise (such as Calvé or Remia). If using American mayonnaise (e.g., Best Foods or Hellmann’s), adjust it first using our Dutch Mayonnaise — Calvé-Style from American Mayo recipe before making the sauce.
    • Use mild garlic paste if you prefer a smoother, less pungent profile.
    • Parsley should be minced very finely to avoid a chewy texture; adjust to taste.
    • Ketjap manis is meant to round the flavor, not sweeten the sauce—start with 2 tsp and add more only if needed.

    Serving Suggestions

    • Serve with Dutch-style shoarma.
    • Drizzle over fries, grilled meats, or kebabs.
    • Use as a dip for pita bread or fresh vegetables.

    Variations

    • Brighter tang: Add the optional vinegar or lemon juice (or increase slightly) for a lighter, snack-bar-style lift.
    • Smoother profile: Use mild garlic paste and reduce parsley slightly.

    Make-Ahead & Storage

    • Best made at least 4 hours in advance for full flavor development.
    • Refrigerate in an airtight container up to 5 days.
    • Stir before serving; sauce naturally thickens as it chills.
  • Shoarma Kruiden — Dutch-Inspired Shawarma Spice Mix

    Shoarma Kruiden — Dutch-Inspired Shawarma Spice Mix

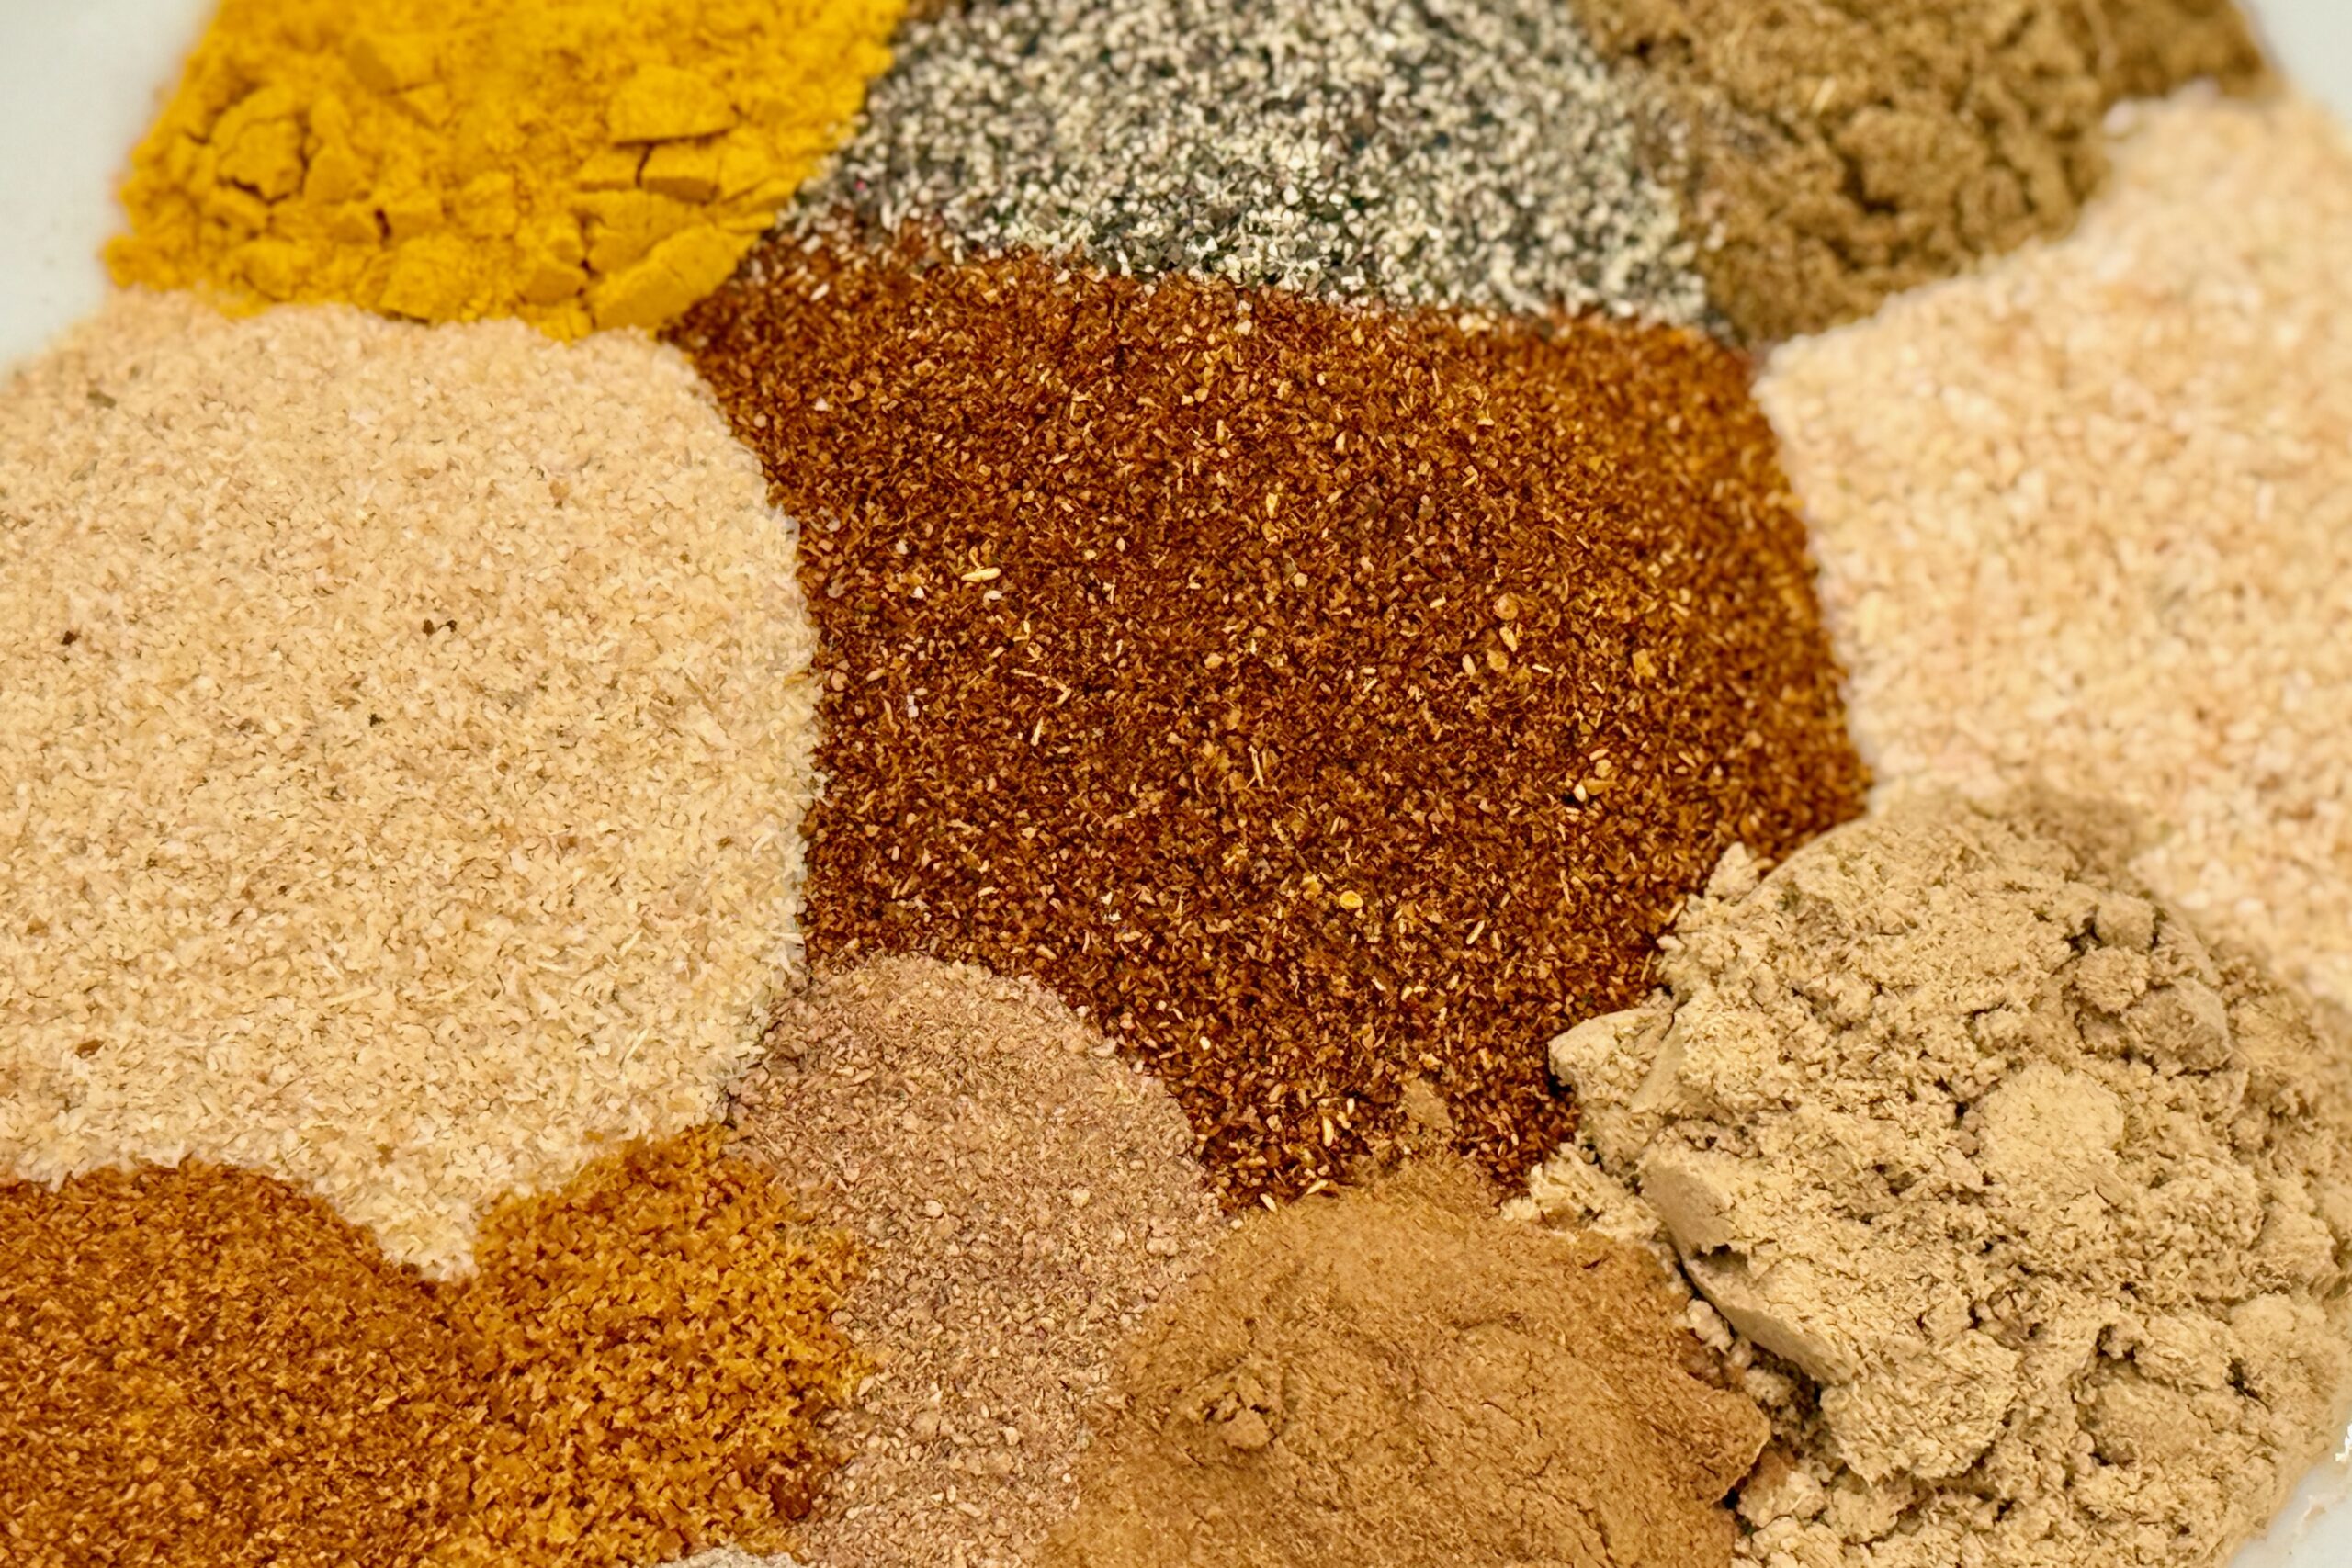
    This shoarma kruiden blend captures the warm, paprika-forward flavor of Dutch shoarma shops—perfect for keeping on hand so you can quickly season meat for broodje shoarma, wraps, and grilled dishes whenever the craving hits.


    Ingredients

    Paprika Base

    • 2 tbsp paprika
    • 2 tsp garlic powder
    • 2 tsp onion powder

    Warm, Savory Spices

    • 2 tsp ground coriander
    • 1½ tsp ground cumin
    • 1 tsp ground ginger
    • ¾ tsp lovage leaf powder
    • ⅛ tsp ground fenugreek seed
    • ⅜ tsp ground allspice
    • ½ tsp ground cinnamon
    • ½ tsp ground black pepper
    • ¼ tsp ground nutmeg
    • ⅛ tsp ground mace
    • ⅛ tsp ground cloves

    Color & Heat

    • ½ tsp turmeric
    • ¼ tsp cayenne pepper (adjust to taste)

    Optional (Authentic for Some Shops)

    • ⅛ tsp ground fennel

    Directions

    Prepare the Spice Mix

    In a small bowl, combine the paprika, garlic powder, onion powder, coriander, cumin, ginger, lovage, fenugreek, allspice, cinnamon, black pepper, nutmeg, mace, cloves, turmeric, cayenne, and fennel (if using). Mix thoroughly until the spices are evenly blended.

    Transfer the shoarma kruiden to an airtight jar or spice container. Label and store in a cool, dark cupboard.

    For general use, plan on about 1 tbsp shoarma kruiden per 1 lb (450 g) meat, adjusting to taste.


    Notes

    Preparation

    • This blend is intentionally prepared without salt, since many Dutch shoarma shops season the meat separately. Salt your meat to taste before or during cooking.
    • For the most vibrant flavor, use fresh spices and replace the mix every 6 months or so; older spices are still safe but lose potency over time.
    • If your spices are coarse or slightly clumpy, you can pulse the finished blend a few times in a spice grinder to create a finer, more uniform texture.
    • Because this mix is quite aromatic, store it in a well-sealed container away from light and heat to preserve its Dutch shoarma character.

    Serving Suggestions

    • Use about 1 tbsp shoarma kruiden per 1 lb (450 g) thinly sliced chicken thigh, pork shoulder, turkey, or lamb for classic Dutch-style shoarma.
    • For a dry-style preparation common in shoarma shops, toss the seasoned meat with 1–2 tbsp neutral oil and cook in a hot skillet or on a griddle until browned and lightly crisp at the edges.
    • For a simple wet marinade, combine 1 tbsp shoarma kruiden with 1 tbsp oil or plain yogurt and 1 tsp lemon juice per 1 lb (450 g) meat. Marinate 1–12 hours before cooking.
    • Serve the cooked meat in warm pita or Turkish bread as a broodje shoarma, with shredded lettuce, tomato, onion, and Dutch-style garlic sauce (knoflooksaus).
    • This blend also works well for sheet-pan dinners, grilled skewers, or roasted vegetables for a Dutch shoarma-inspired twist.

    Variations

    • Sweeter Dutch-Snackbar Style: Add 1 tsp sugar to the full batch of shoarma kruiden. The sugar will lightly caramelize on the griddle and echo the slightly sweeter flavor of some late-night shoarma shops.
    • Spicier (Rotterdam-Lean): Increase the cayenne to ½–¾ tsp for a more assertive heat while still keeping the overall Dutch flavor profile.
    • Warmer Dutch-Indo Aroma: For a slightly richer, Amsterdam-leaning warmth, increase the ginger to 1½ tsp and the mace to ¼ tsp, keeping the other spices the same.
    • Salted Convenience Blend: If you prefer an all-in-one seasoning, you can add 1 tbsp table salt to the full batch. When using this salted version, reduce or omit any additional salt added directly to the meat.

    Make-Ahead & Storage

    • Prepare a double or triple batch and store it in a tightly sealed jar so you always have shoarma kruiden ready for quick meals.
    • For best flavor, use within about 6 months; the blend will remain safe beyond that, but the aromatics will gradually lose intensity.
    • If you live in a hot climate, you can store the jar in the refrigerator or freezer to help preserve the essential oils in the spices.
    • Always use a clean, dry measuring spoon when scooping from the jar to prevent moisture from clumping the spices.
  • Snert — Erwtensoep — Dutch Split Pea Soup

    Snert — Erwtensoep — Dutch Split Pea Soup

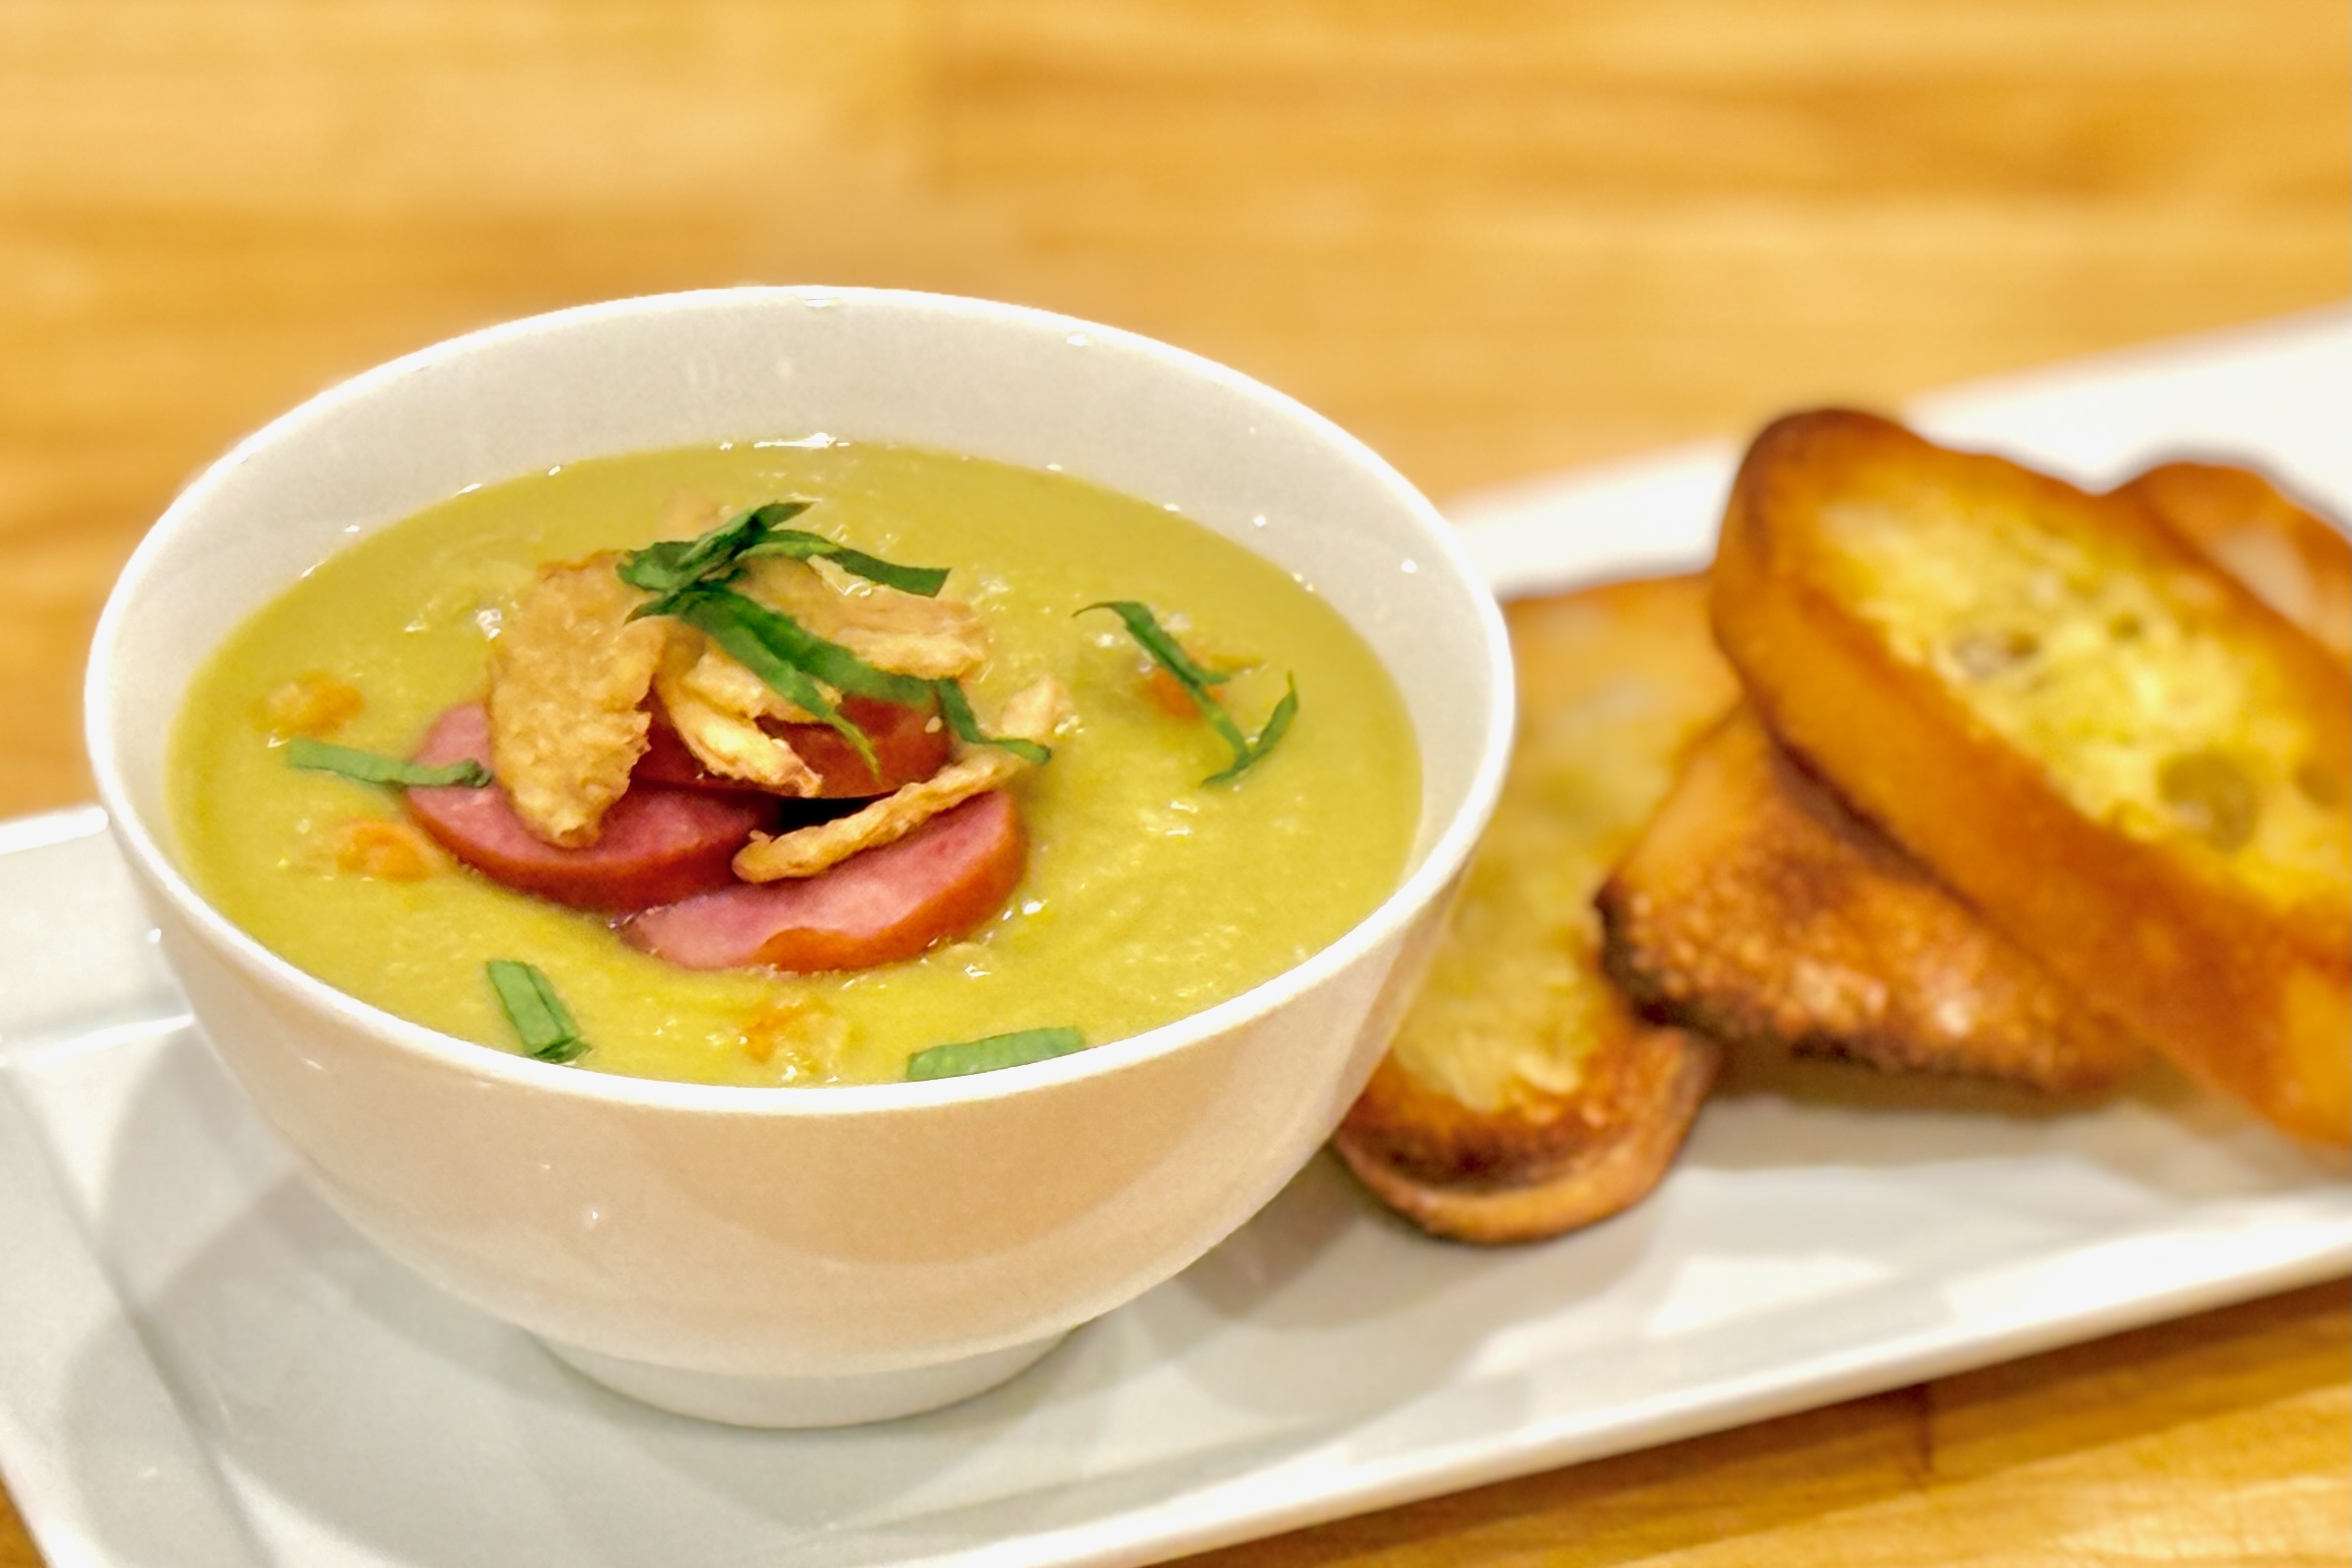
    Snert, or Dutch split pea soup, is a beloved winter tradition in the Netherlands. This hearty, comforting soup warms cold bodies after a day of skating on frozen canals. Every family has its own cherished version, often prepared a day in advance so the flavors can deepen and the soup can thicken to its signature consistency—thick enough that a spoon can stand upright in the bowl. I first tasted snert in the province of Friesland, just after watching ice skaters compete in the Elfstedentocht, the legendary eleven-city race that only takes place in years when the ice is thick enough to carry thousands of racers across the canals.


    Ingredients

      For the Stock

    • 2 smoked ham hocks (about 2 lb total)
    • 10 cups (2.4 L) low-sodium chicken stock
    • 1 onion, halved
    • 1 celery stalk, cut in chunks
    • 1 small carrot, cut in chunks
    • 1 bay leaf
    • 4 parsley stems
    • ½ tsp black peppercorns
    • For the Soup

    • 4 cups (800 g) dried green split peas, rinsed
    • 2 tbsp unsalted butter
    • 1 medium onion, finely diced
    • 1 leek (white and light green parts only), thinly sliced
    • 2 celery stalks, finely diced (reserve a few leaves for garnish)
    • 1 medium carrot, finely diced
    • ½ small celeriac (or 1 potato), finely diced
    • ½ tsp dried thyme
    • ¼ tsp white pepper
    • ½ cup (120 ml) dry white wine (optional but adds brightness)
    • To Finish

    • 8 oz (225 g) rookworst or smoked sausage, thinly sliced
    • 1–2 tsp apple cider vinegar (to taste)
    • Kosher or table salt, to taste
    • Small knob of butter or splash of cream (optional, for gloss)
    • Celery leaves, celery leaf oil or finely chopped parsley, for garnish

    Directions

    Make the Stock (Can Be Done a Day Ahead)

    Place ham hocks, chicken stock, onion, celery, carrot, bay leaf, parsley stems, and peppercorns in a large pot. Bring to a simmer and cook gently for 1½ hours, skimming foam as needed.

    Strain the stock through a fine mesh sieve and set aside. Discard the vegetables but reserve the hocks for meat later.

    Build the Flavor Base

    In a clean soup pot, melt the butter over medium heat. Add onion, leek, celery, carrot, and celeriac. Sweat gently (do not brown) for 6–8 minutes until softened and aromatic. Add thyme and white pepper.

    Deglaze and Simmer

    If using, pour in white wine and simmer 1–2 minutes to reduce slightly. Add split peas and enough of the strained ham stock to cover by about 1 inch (you’ll have some stock left to adjust consistency later). Bring to a simmer, then reduce heat to low and cook gently for 1½–2 hours, stirring occasionally, until peas have completely softened.

    Blend for Smoothness

    Remove from heat. Transfer about ¾ of the soup to a blender (or use an immersion blender) and puree until silky smooth. Pass through a fine mesh sieve or chinois for a restaurant-quality texture.

    Return the puree to the pot along with the remaining unblended portion for a touch of rustic body.

    Add Meats and Adjust Seasoning

    Remove skin and bones from the ham hocks, finely dice the meat, and stir it into the soup with the sliced sausage. Simmer gently for 15–20 minutes to meld flavors.

    Add vinegar, salt, and black pepper to taste. For a glossy finish, swirl in a small knob of butter or a splash of cream.

    Fine-Tune Texture

    Adjust consistency with reserved stock as needed. We prefer that it be thick enough to coat the back of a spoon, but not so dense that it feels heavy, although many like it thick enough to stand a spoon in it.

    Serve

    Ladle the soup into wide, shallow bowls. Arrange a few slices of sausage and cubes of ham neatly in the center. Garnish with a few drops of celery leaf oil or a drizzle of olive oil. Add finely chopped celery leaves or micro herbs for color and freshness. Optionally, serve with a crisp rye toast point or small bacon tuile on the rim.


    Notes

    Preparation

    • Keep heat gentle during simmering to preserve the soup’s bright green hue.
    • The vinegar is key—it sharpens the flavor and keeps it from feeling heavy.
    • Passing through a fine sieve gives the soup that unmistakable restaurant-level smoothness.
    • Like all good snert, it deepens in flavor overnight. Reheat gently and adjust texture before serving.

    EASY RUSTIC VERSION

    Ingredients

    • 4 cups dried split peas, rinsed
    • 2 ham hocks
    • 8 chicken bouillon cubes
    • 1 onion, finely diced
    • 1 bunch leeks, thinly sliced (green tops discarded)
    • 1 bunch celery (including leaves), finely chopped
    • 2 bay leaves
    • kielbasa (or smoked sausage), cut into disks
    • vinegar

    Directions

    Combine all ingredients except kielbasa and vinegar in a crock pot; add water to about 1 inch from the top of the crock pot. Cook on high for approximately 8 hours.

    Remove hocks and bay leaves; slice meat from hocks and add back to soup (discard bones and skin).

    Stir in kielbasa and cook for an additional hour. Add a small amount of vinegar just prior to serving to brighten the flavor.

  • Anijsmelk — Dutch Star-Anise Steamer

    Anijsmelk — Dutch Star-Anise Steamer

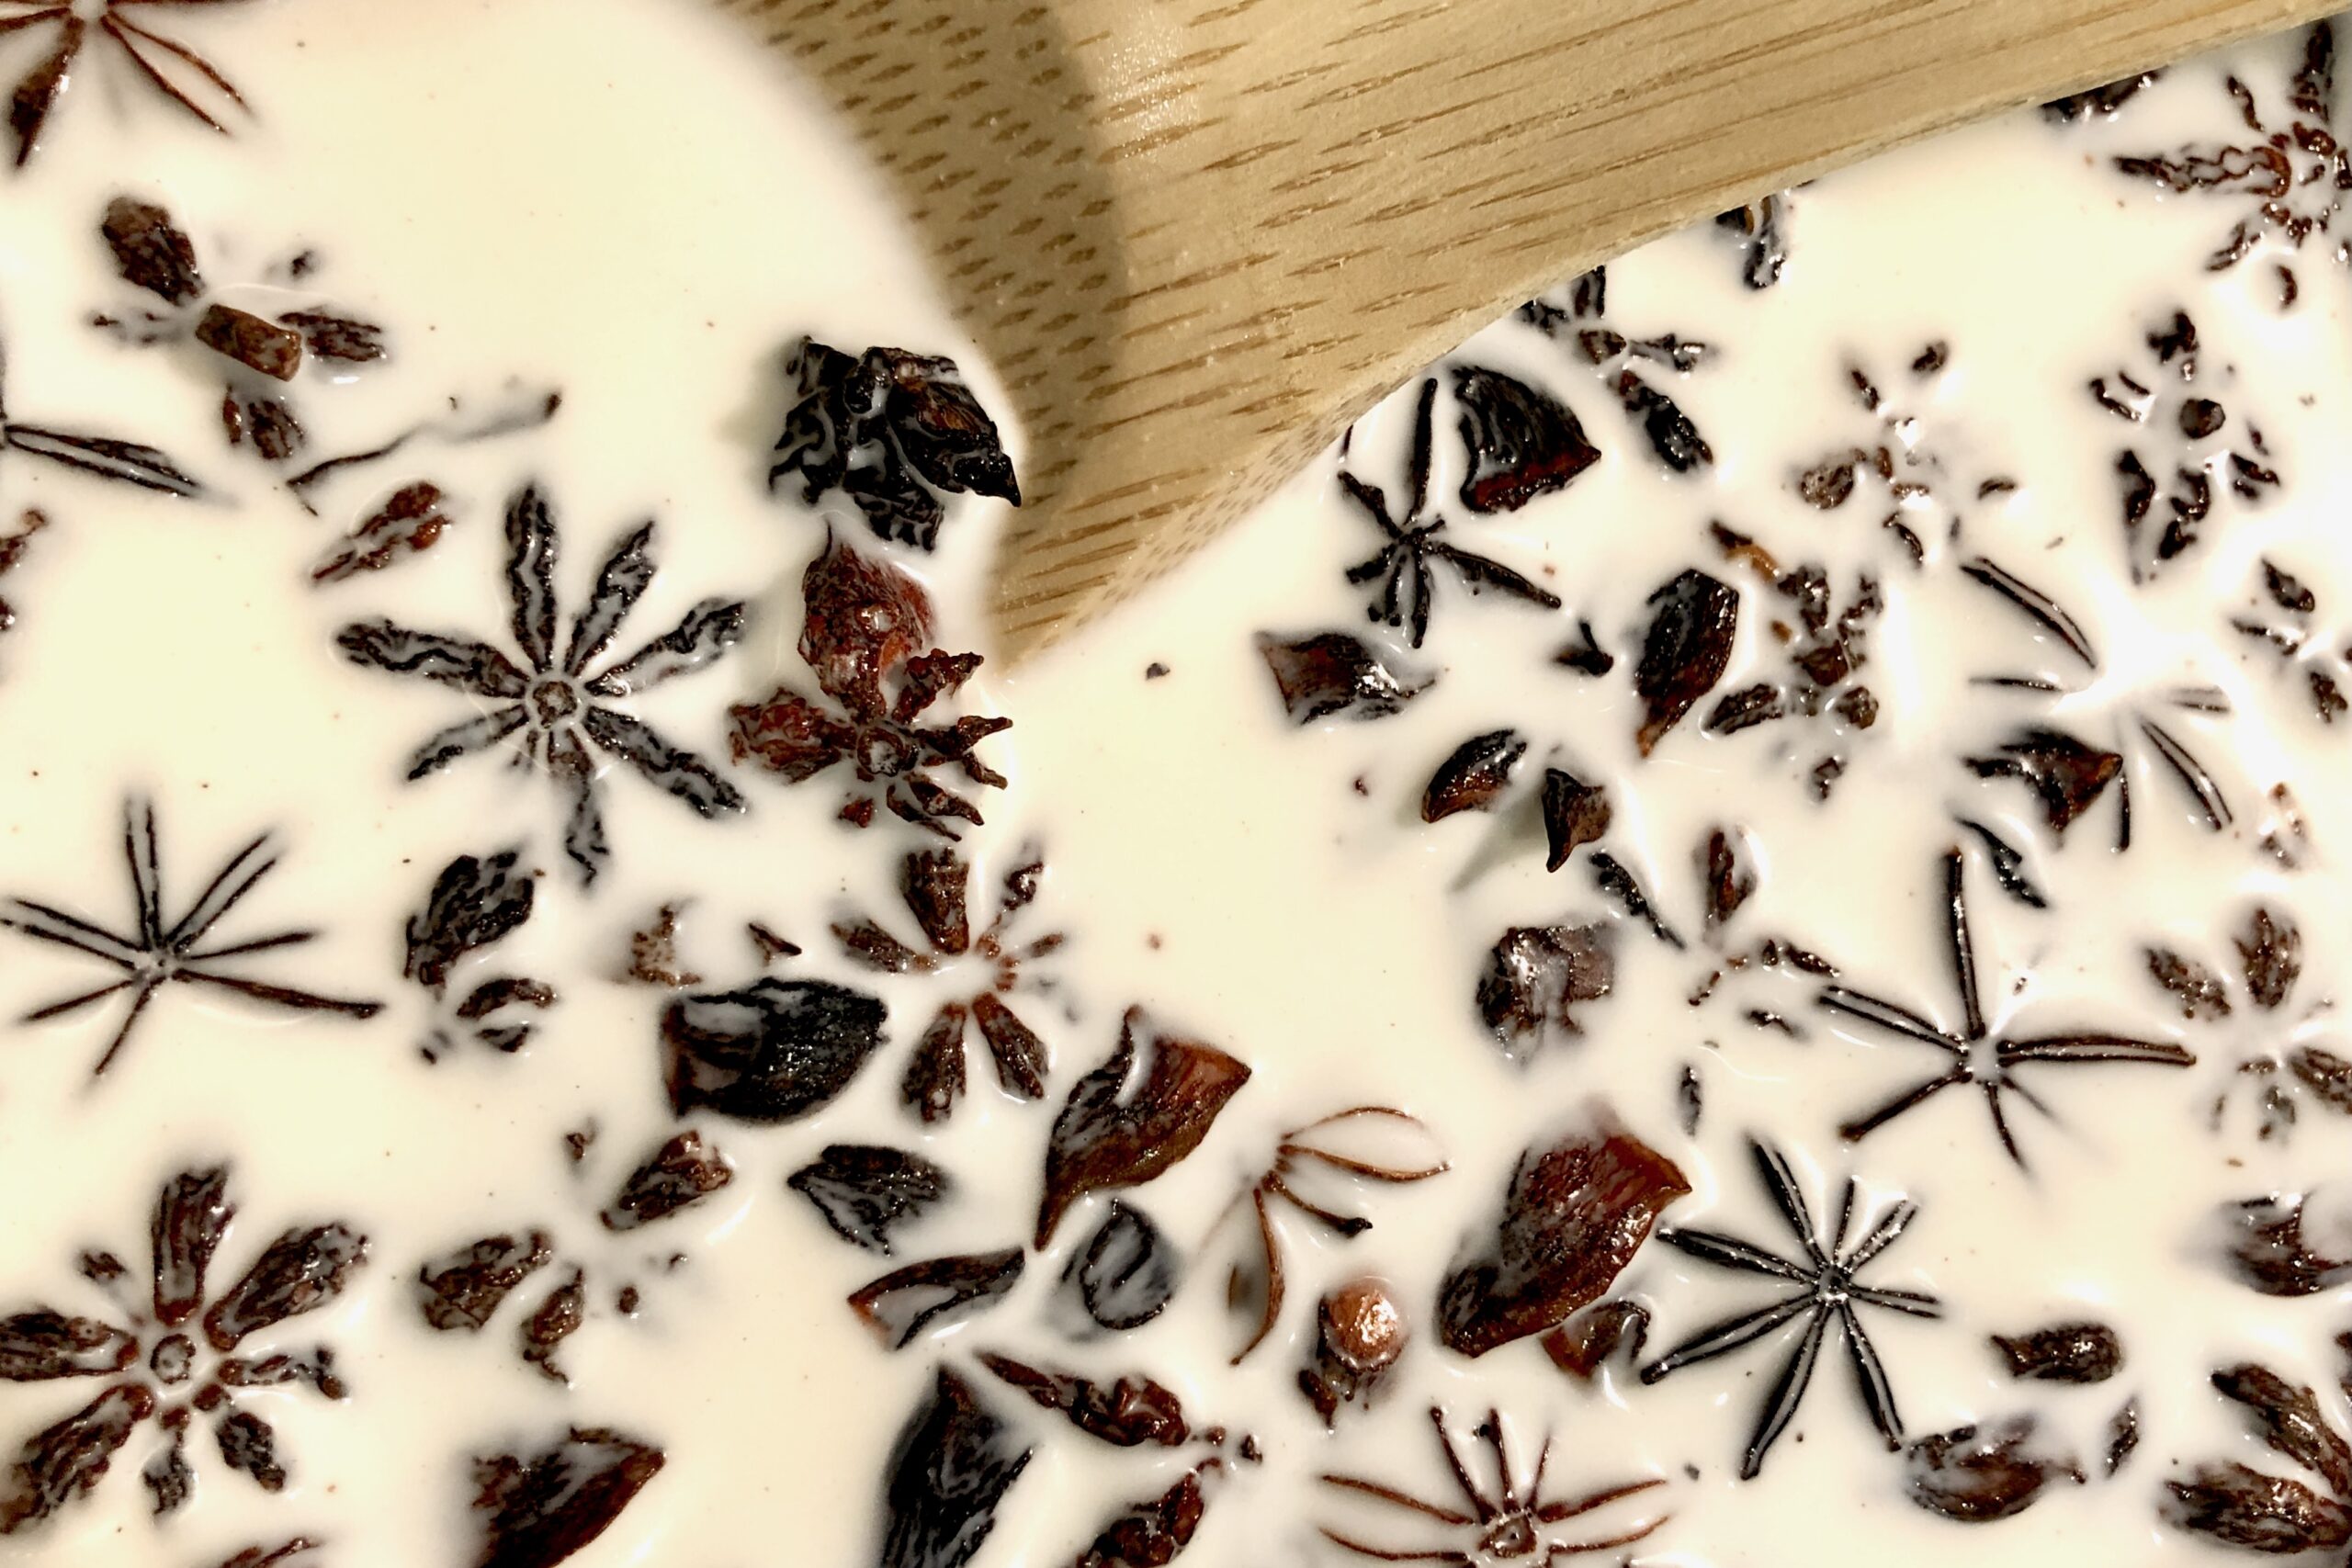
    Anijsmelk, the classic star-anise–flavored steamer of the Netherlands, is one of my favorite Dutch treats—simple, soothing, and steeped in nostalgia. Traditionally made by stirring anise-flavored sugar cubes (Anijsblokjes) into warm milk, it’s a comforting drink to warm your soul on a cold winter’s night. This homemade version captures that flavor with whole star anise and a touch of sweetness.


    Ingredients

    • 1 qt milk
    • 5–10 whole star anise
    • ⅛ tsp ground anise seed (optional, for rounder flavor)
    • 1–4 tbsp sugar, to taste (about 1 tsp per cup)
    • Small knob of butter or splash of cream (optional, for richness)

    Directions

    Infuse the Milk

    In a medium saucepan, warm the milk with the star anise over medium-low heat until steaming but not boiling. Reduce heat to low and let steep gently for 5–10 minutes, tasting occasionally to check flavor strength.

    Finish the Drink

    When the milk reaches your desired anise intensity, remove from heat and discard the star anise pods. Stir in sugar to taste and, if desired, add a small knob of butter or splash of cream for extra richness. Whisk briefly to create a light froth.

    Serve

    Pour hot into a teacup or mug and enjoy immediately. Optionally dust with a pinch of ground anise or cinnamon. Serve alongside a small Dutch biscuit or slice of buttered bread for an authentic touch.


    Notes

    Preparation

    • For the most authentic flavor, use a mix of whole star anise and a small pinch of ground anise seed.
    • Warm gently—avoid boiling, which can cause the milk to curdle or the flavor to become harsh.
    • Steep covered to preserve the delicate aroma of the anise.

    Serving Suggestions

    • Traditionally enjoyed as a bedtime drink or on cold evenings.
    • Serve in a warm ceramic cup with a dusting of ground anise, cinnamon, or nutmeg.
    • Pair with speculaas cookies or buttered toast for a cozy Dutch treat.

    Variations

    • Substitute honey or vanilla sugar for a more nuanced sweetness.
    • Add a drop of almond or vanilla extract for a gentle twist.
    • For a creamier version, replace 1 cup of milk with light cream.
  • Boterkoek

    Boterkoek

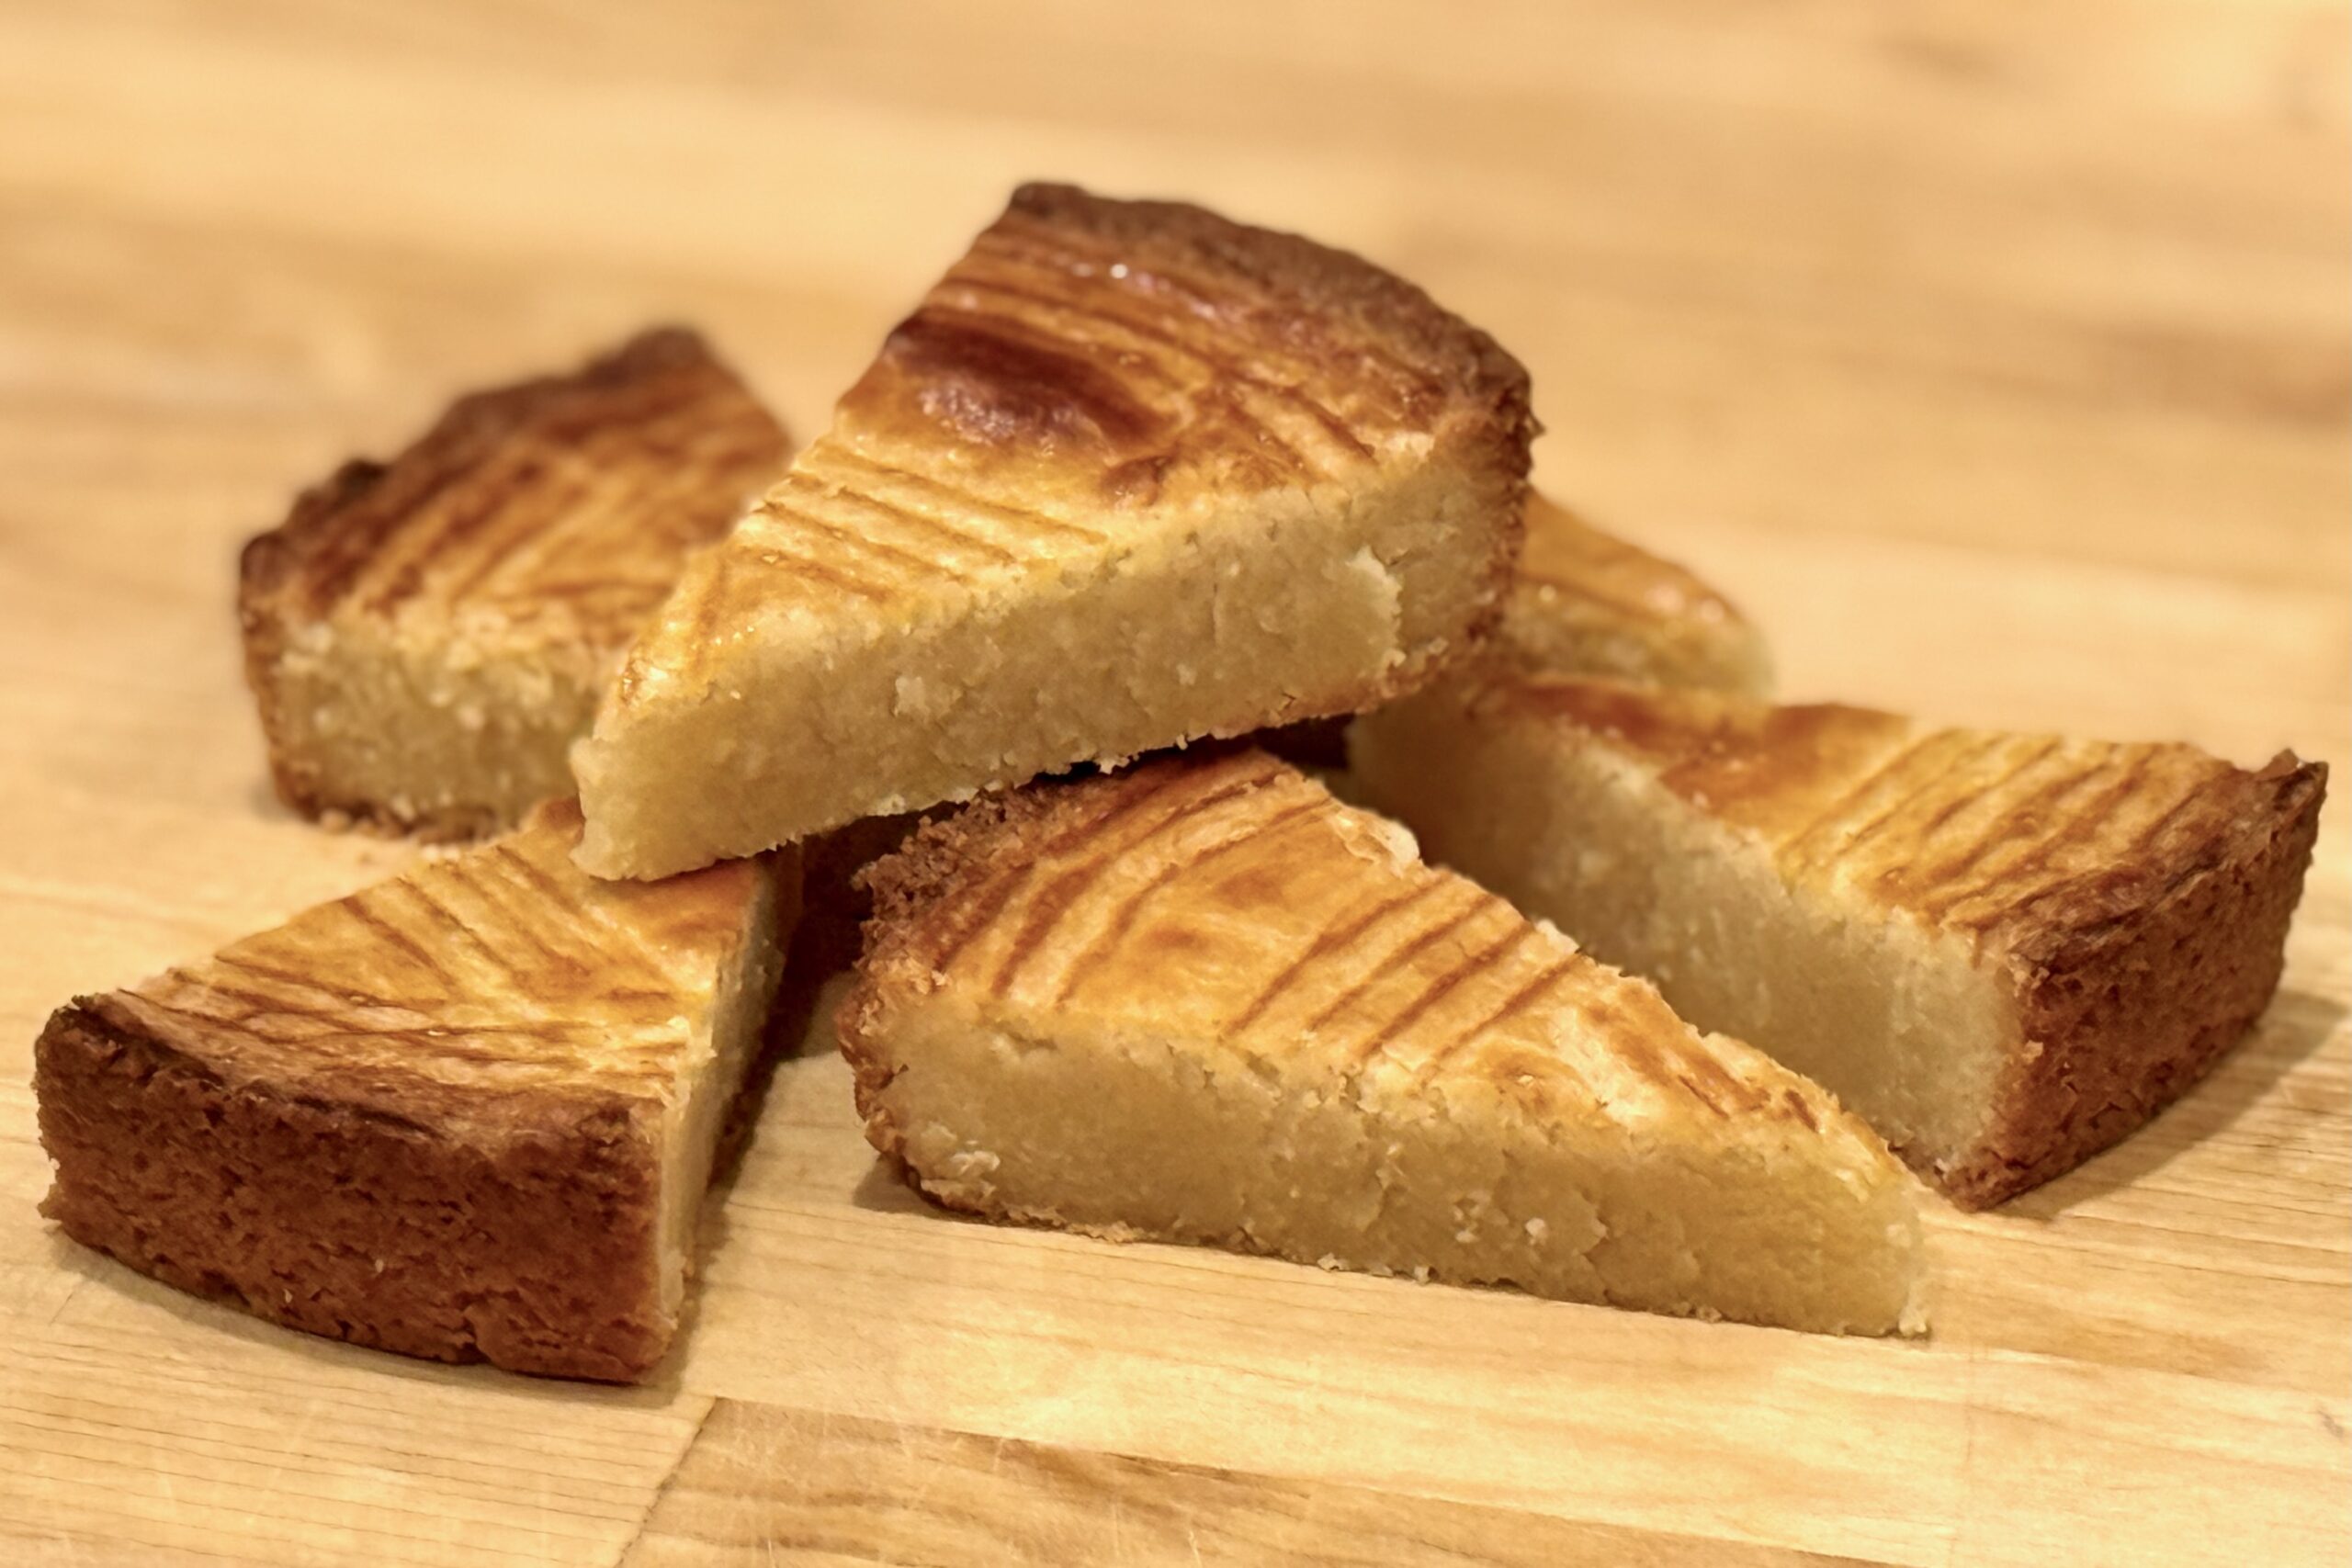
    Oma Rasch was a spunky little lady, full of equal parts sugar and spice. I fondly remember the fun we had while I lived in her second-story row house on Krugerstraat in Den Helder, at the northernmost point of North Holland. Even in her 80s, she climbed the steep, treacherous staircase each day and set off on her bicycle to run errands. She was always willing to help as I worked to learn Dutch, once telling me, after I repeated a particularly colorful word, “There are no bad words, just words you shouldn’t use around nette mensen (respectable people).” A common treat in her home was homemade boterkoek—rich, golden, and fragrant. Whenever we walked in and smelled that buttery aroma, we knew we were in for ‘een lekker toetje’, a truly ‘heerlijk’ dessert.


    Ingredients

    • 1 cup (2 sticks) unsalted butter, at room temperature
    • 1 cup sugar
    • 2 cups all-purpose flour
    • ¼ tsp table salt
    • 1 large egg, lightly beaten, divided
    • ½ tbsp milk or buttermilk (for egg wash)
    • Optional Flavor Variations:

      • Citrus: Zest of ½ a lemon, lime, or orange, plus a small splash of juice
      • Almond: ½–1 tsp almond extract, topped with almond halves before baking
      • Speculaas: 1–1½ tsp speculaaskruiden (Dutch speculaas spice blend)
      • Ginger: 1–2 tbsp finely chopped crystallized ginger folded into the dough
      • Vanilla Sugar: 1–2 tbsp vanilla sugar mixed into the dough or sprinkled lightly on top

    Directions

    Prepare the Pan and Oven:

    Preheat the oven to 350°F (175°C). Butter an 8- or 9-inch round cake pan, then line the bottom with a circle of parchment paper. Lightly dust the sides with flour and tap out any excess. A springform or removable-bottom pan makes unmolding and slicing easier, but a standard pan works as well.

    Mix the Dough:

    In a small bowl, lightly beat the egg with a fork. Transfer about 1 tbsp of the beaten egg to a separate small bowl, add the milk or buttermilk, and whisk to combine for the egg wash. Set aside.

    In a medium mixing bowl, combine the butter and sugar. Beat just until smooth, creamy, and well combined (do not whip until light and fluffy—you want a dense boterkoek, not a cake). Add the remaining beaten egg (from the larger portion) and mix only until incorporated. If using any flavorings (citrus zest, almond extract, speculaaskruiden, crystallized ginger, or vanilla sugar), mix them in at this stage.

    Add the flour and salt. Using a spatula or wooden spoon, fold and stir just until no dry flour remains and the dough comes together. The dough will be stiff but cohesive; avoid overmixing.

    Chill the Dough:

    Scrape the dough onto a sheet of plastic wrap and pat it into a thick disk. Wrap tightly and refrigerate for 20–30 minutes, until firm but still pliable. Overchilling will make the dough harder to press evenly into the pan.

    Press, Crosshatch, and Glaze:

    Transfer the chilled dough to the prepared pan. Using your fingertips or the back of a spoon, press it evenly into the pan, smoothing the surface and making sure it reaches all the way to the edges.

    Using the tines of a fork, lightly score a crosshatch pattern across the top of the dough. For the cleanest lines, wipe the fork between strokes as needed.

    Gently brush the surface with a thin, even layer of the egg wash. Avoid pooling, especially around the edges, which can create hard spots as it bakes.

    Bake:

    Bake at 350°F (175°C) for 25–35 minutes, until the edges are deep golden brown and the center is just set and a lighter golden color. The top should not puff dramatically. Begin checking around 25 minutes, rotating the pan if needed for even browning. The boterkoek will continue to firm as it cools.

    Cool, Rest, and Serve:

    Remove the pan from the oven and place it on a wire rack. Let the boterkoek cool completely in the pan. Once cool, run a thin knife around the edge to loosen, then invert or release from the pan and remove the parchment.

    For the best flavor and texture, allow the boterkoek to rest for several hours or overnight before slicing. Cut into small wedges (it is rich) and serve at room temperature.


    Notes

    Preparation

    • Use unsalted butter for the cleanest flavor and better control over salt. The butter should be cool room temperature—soft enough to press a finger into, but not greasy or melting.
    • Be careful not to over-aerate the butter and sugar; mixing just until smooth (rather than light and fluffy) keeps the boterkoek dense and tender, as it should be.
    • For easy release and clean slices, butter the pan and line the bottom with parchment. A springform or removable-bottom pan is especially handy if you plan to unmold it for serving on a platter.
    • Approximately equal amounts of butter, sugar, and flour by weight are used in this recipe, which is traditional for Dutch boterkoek and gives it its rich, close-crumb texture.
    • Altitude adjustments (high altitude ~4,750 ft / 1,450 m): Because this is a dense, non-leavened cake, ingredient changes are usually unnecessary. Begin checking for doneness a few minutes early and remove from the oven once the edges are deep golden and the center is just set. At sea level, follow the base recipe and bake until the center is just set and no longer looks wet.

    Serving Suggestions

    • Cut into small wedges or narrow bars—boterkoek is rich and meant to be enjoyed in modest slices.
    • Serve alongside afternoon coffee, as is common in Dutch homes.
    • For a simple dessert, pair with lightly sweetened whipped cream and fresh berries or stone fruit.
    • Include on a cookie or dessert tray with other Dutch favorites such as speculaas or stroopwafels.

    Variations

    • Citrus Boterkoek: Add the finely grated zest of ½ a lemon, lime, or orange, plus a small splash of juice, to the dough along with the egg. This adds a bright, fragrant edge that balances the richness.
    • Almond Boterkoek: Add ½–1 tsp almond extract to the dough, then press blanched or sliced almonds gently into the top before baking. Almond is a very traditional flavor; start with the smaller amount of extract and increase to taste.
    • Speculaas Boterkoek: Add 1–1½ tsp speculaaskruiden (Dutch speculaas spice blend) with the flour for a warm, spiced version that’s especially nice around the holidays.
    • Ginger Boterkoek: Fold 1–2 tbsp finely chopped crystallized ginger into the dough before pressing it into the pan for pockets of sweet, spicy heat.
    • Vanilla Sugar Boterkoek: Replace 1–2 tbsp of the sugar with vanilla sugar, or sprinkle a light dusting of vanilla sugar over the top right after baking for extra aroma.

    Make-Ahead & Storage

    • Boterkoek is an excellent make-ahead dessert. The flavor and texture actually improve after resting for several hours or overnight.
    • Once completely cool, wrap tightly or store in an airtight container at room temperature for up to 3–4 days.
    • For longer storage, wrap wedges or the whole boterkoek well and freeze for up to 2 months. Thaw at room temperature in the wrapping to preserve moisture.
    • If the surface softens slightly after storage, a brief rest uncovered at room temperature will help the top regain a gentle firmness.