Bags of Spices

Favorite Recipes

Origin

Explore recipes by their culinary heritage — international flavors, cultural traditions, and global comfort foods.

  • Korean Pulled-Pork Tacos

    Korean Pulled-Pork Tacos

    Inspired by the flavors of Korean bulgogi and Mexican street tacos, this fusion dish brings together tender sous-vide pork shoulder marinated in a sweet-savory Korean-style sauce, then shredded, crisped, and served in warm tortillas with fresh toppings. The result is rich umami, bright acidity, and a touch of heat—echoing the street-food creativity that made Korean tacos famous. It’s also fast becoming one of our family’s most requested Sunday dinners, especially when served with cilantro lime rice made with a hint of coconut milk. Around our table, there’s still a friendly debate over which is better—corn tortillas for their texture, or soft flour tortillas that soak up every drop of sauce.


    Ingredients

    • 3 lb boneless pork shoulder, trimmed of excess fat and silver skin

    Marinade:

    • ⅓ cup sugar
    • 2 tsp ajinomoto (optional)
    • 4 tsp onion powder
    • 1 tsp black pepper
    • 2 tbsp garlic, finely chopped
    • 4 tsp sambal oelek
    • 3 tbsp sesame oil
    • ⅔ cup mirin
    • ½ cup soy sauce
    • 1–1½ tsp liquid smoke

    Finishing Brush:

    • ½ cup reserved marinade + ½ cup honey

    Creamy Drizzle:

    • ¼ cup reserved marinade base
    • 1 cup Greek yogurt
    • 2–3 tbsp fresh lime juice (adjust to taste)
    • 1 tsp gochujang or extra sambal (optional)
    • or substitute Cilantro Lime Crema

    Pickled Cucumber (and Optional Daikon):

    • 1 medium cucumber (or cucumber + daikon/radish), thinly sliced
    • 2 tbsp rice vinegar
    • 1 tsp sugar
    • ¼ tsp table salt
    • ½ tsp sesame oil

    Sriracha Slaw:

    • 2 cups shredded cabbage (green or mixed)
    • 1 cup shredded carrot
    • 2 tbsp lime juice
    • 1 tbsp sesame oil
    • 2–3 tbsp sriracha (to taste)
    • 2 tsp sugar (to taste)
    • ½ tsp ajinomoto (optional)
    • salt, to taste

    To Serve:

    • Corn or Flour tortillas (8–10, warmed)
    • Chopped fresh cilantro
    • Toasted sesame seeds
    • Diced raw onion
    • Lime wedges

    Directions

    Marinate the Pork

    Mix all marinade ingredients. Reserve ¾ cup of the mixture: ½ cup for the finishing brush, ¼ cup for the creamy drizzle. Add the remaining marinade to the pork in a sealed bag. Refrigerate 8–12 hours.

    Sous-Vide the Pork

    Heat sous-vide bath to 165°F (74°C). Cook sealed pork 18–24 hours. This produces a tender, shreddable texture.

    Make the Pickled Cucumber

    Combine cucumber with vinegar, sugar, salt, and sesame oil. Rest 10–15 minutes; drain lightly.

    Make the Sriracha Slaw

    Toss cabbage and carrot with lime juice, sesame oil, sriracha, and salt.

    Make the Creamy Drizzle

    Whisk ¼ cup reserved marinade with yogurt, lime juice, and optional gochujang or sambal.

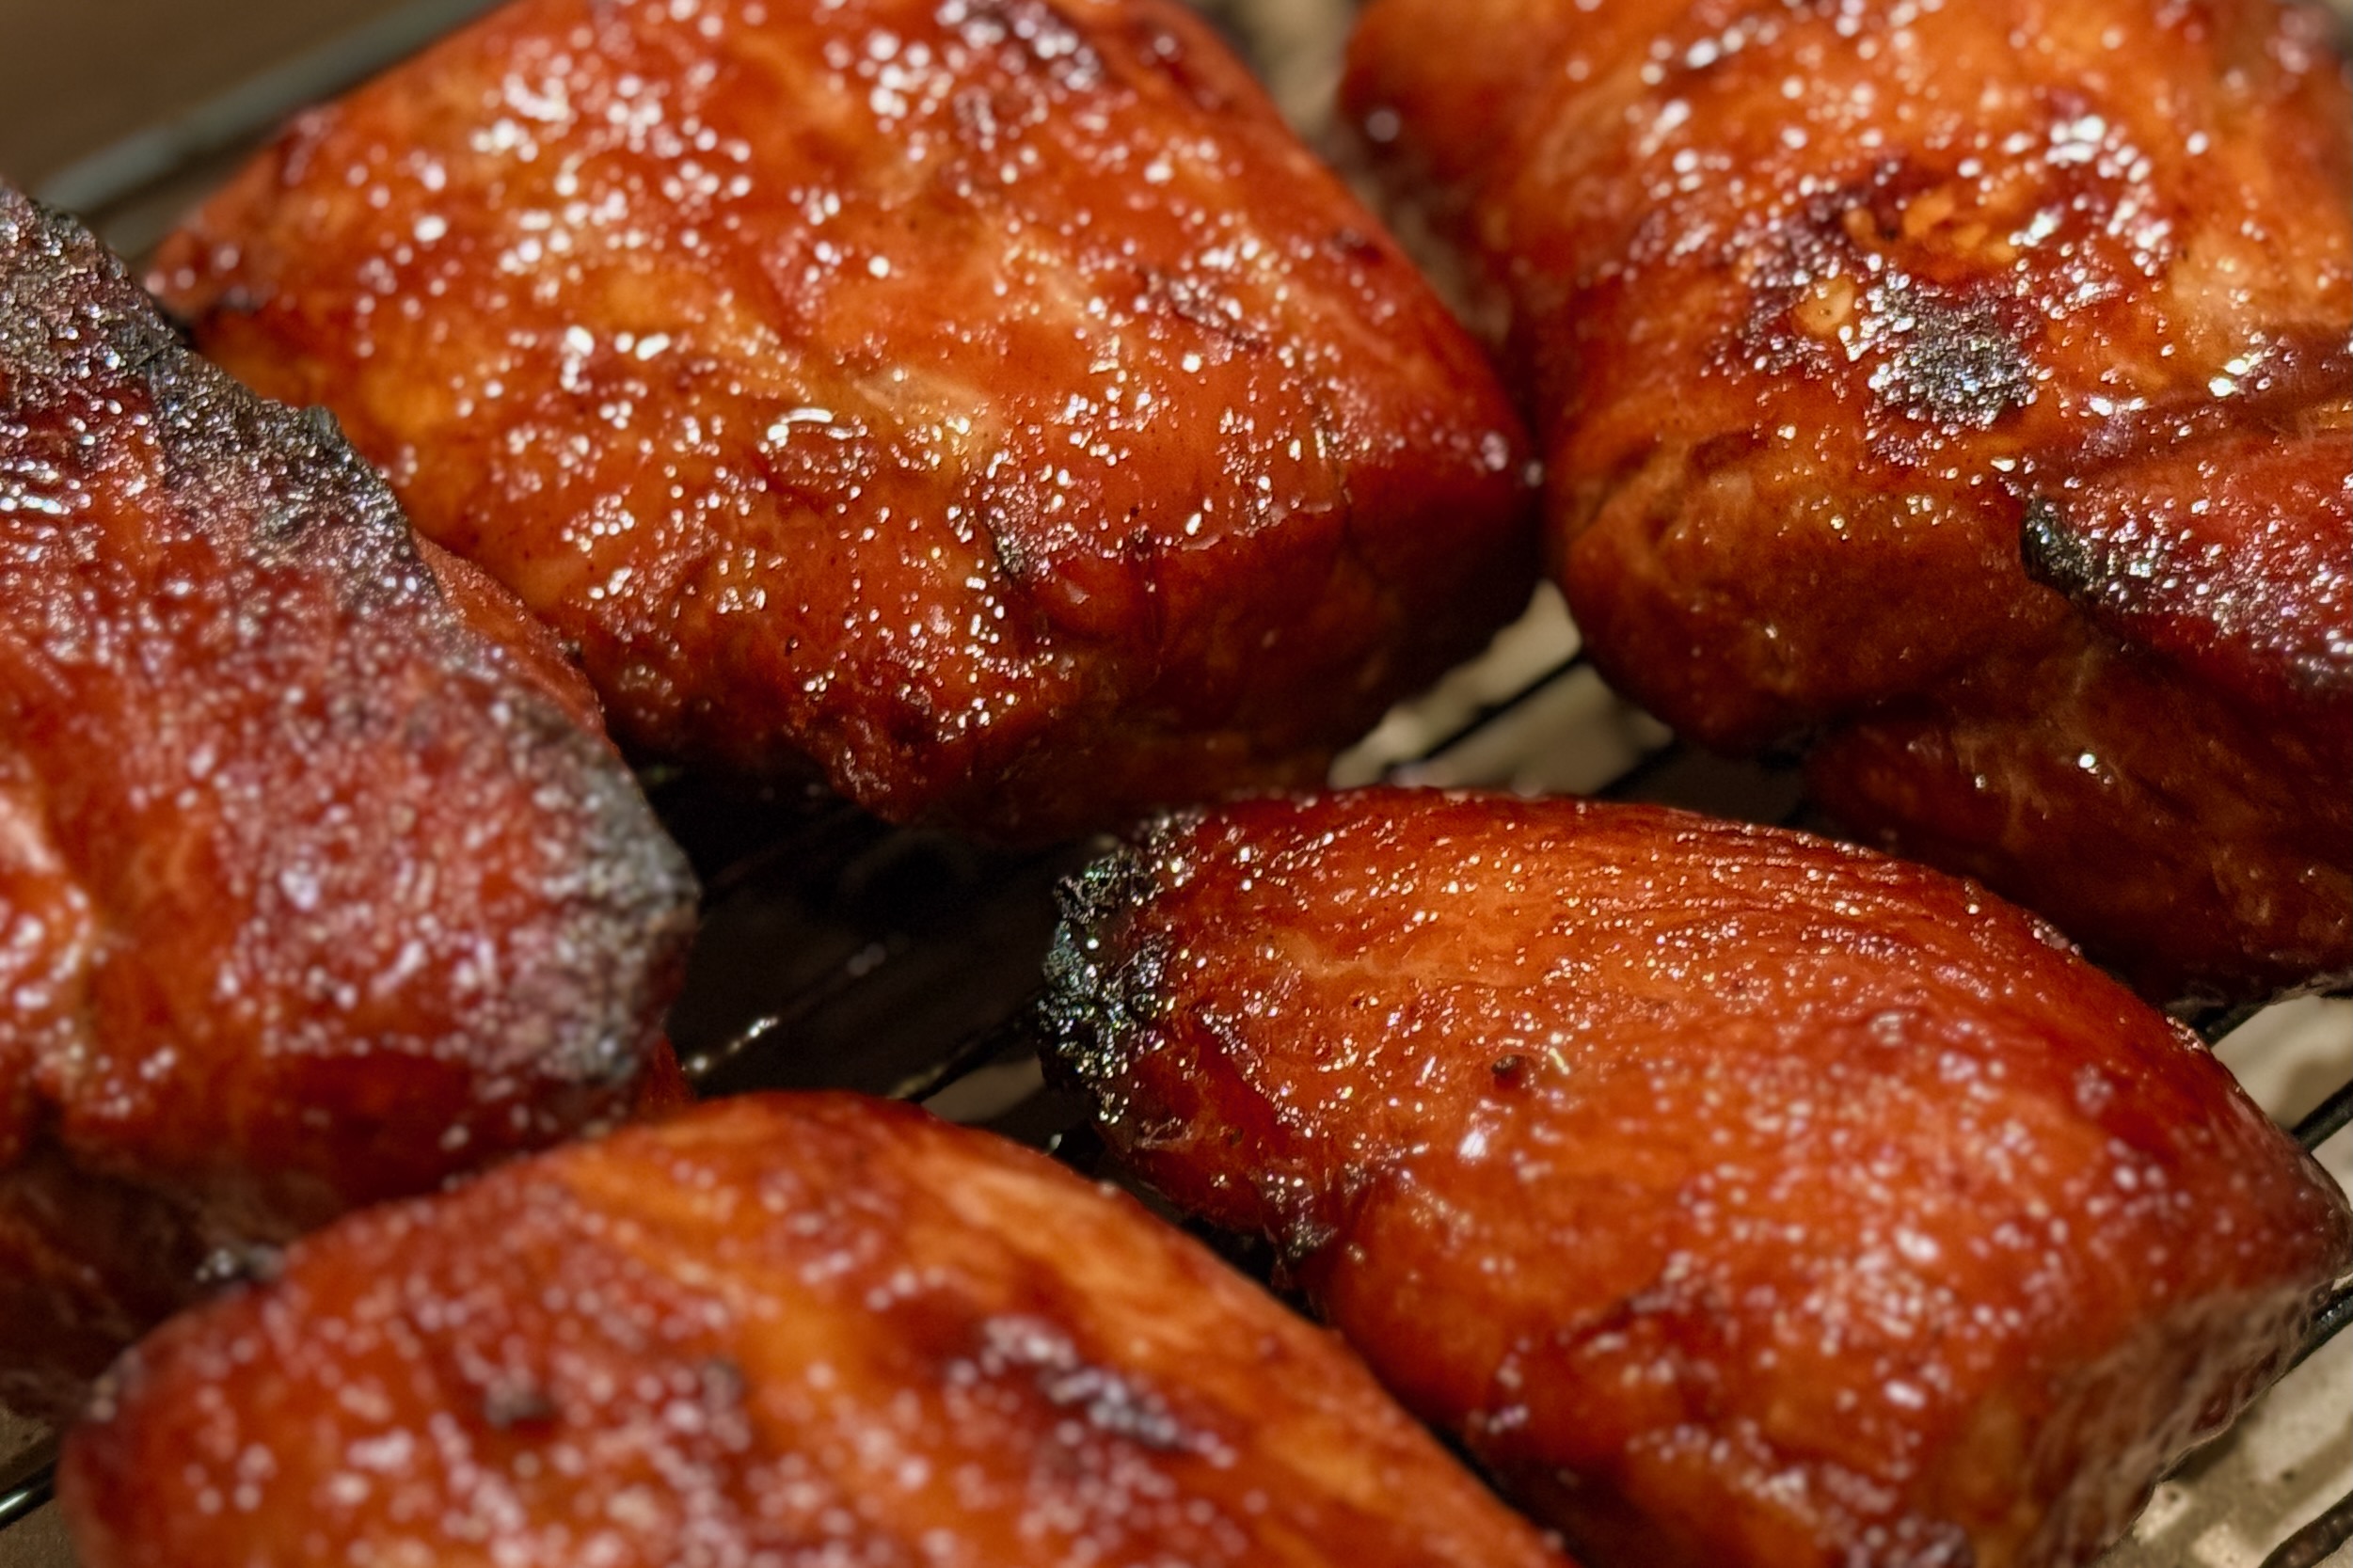
    Shred and Crisp the Pork

    Remove pork and reserve cooking juices. Shred pork. Spread on sheet pan and brush with the finishing mixture. Broil until edges crisp. Drizzle ⅓–½ cup of the reserved cooking juices over pork to keep it moist.
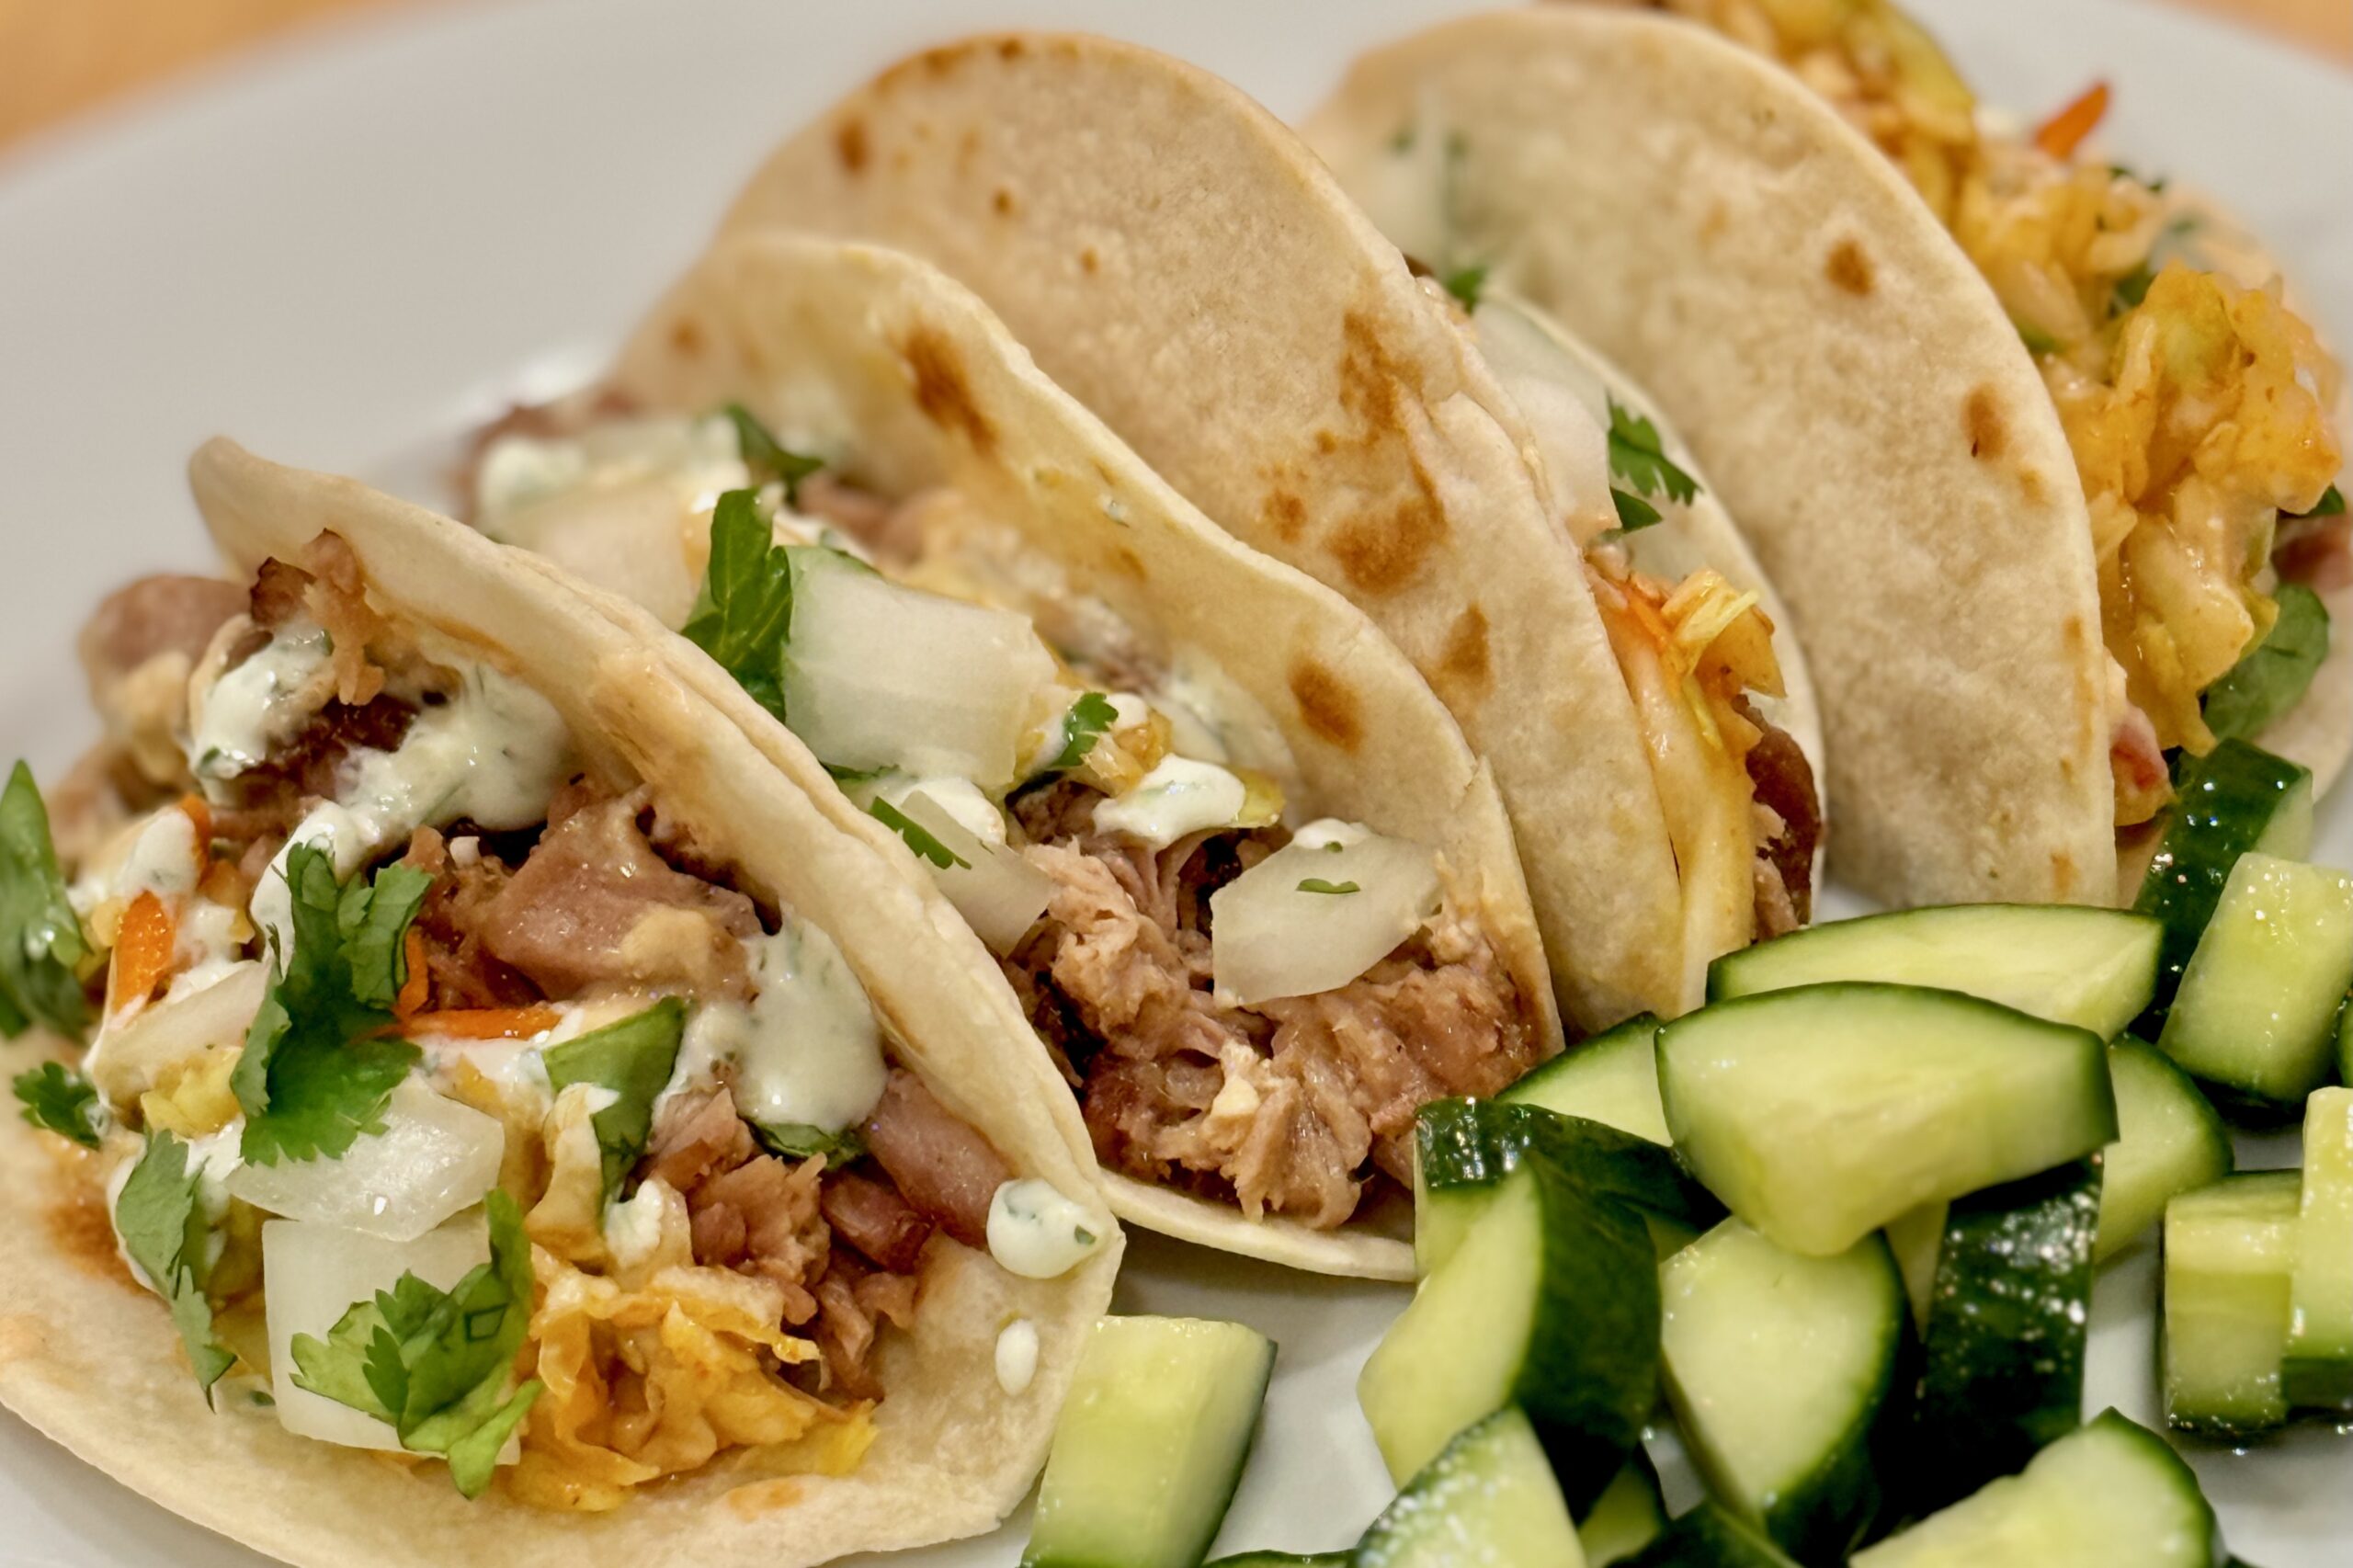
    Assemble the Tacos

    Warm tortillas. Layer pork, pickled cucumber, and slaw. Top with the creamy drizzle (or Cilantro Lime Crema). Garnish with cilantro, sesame seeds, onion, and lime.


    Notes

    Preparation

    • Use evenly sized pork pieces for consistent sous-vide cooking.
    • Reserved cooking juices add essential moisture and depth.
    • Monitor broiling closely—honey burns fast.
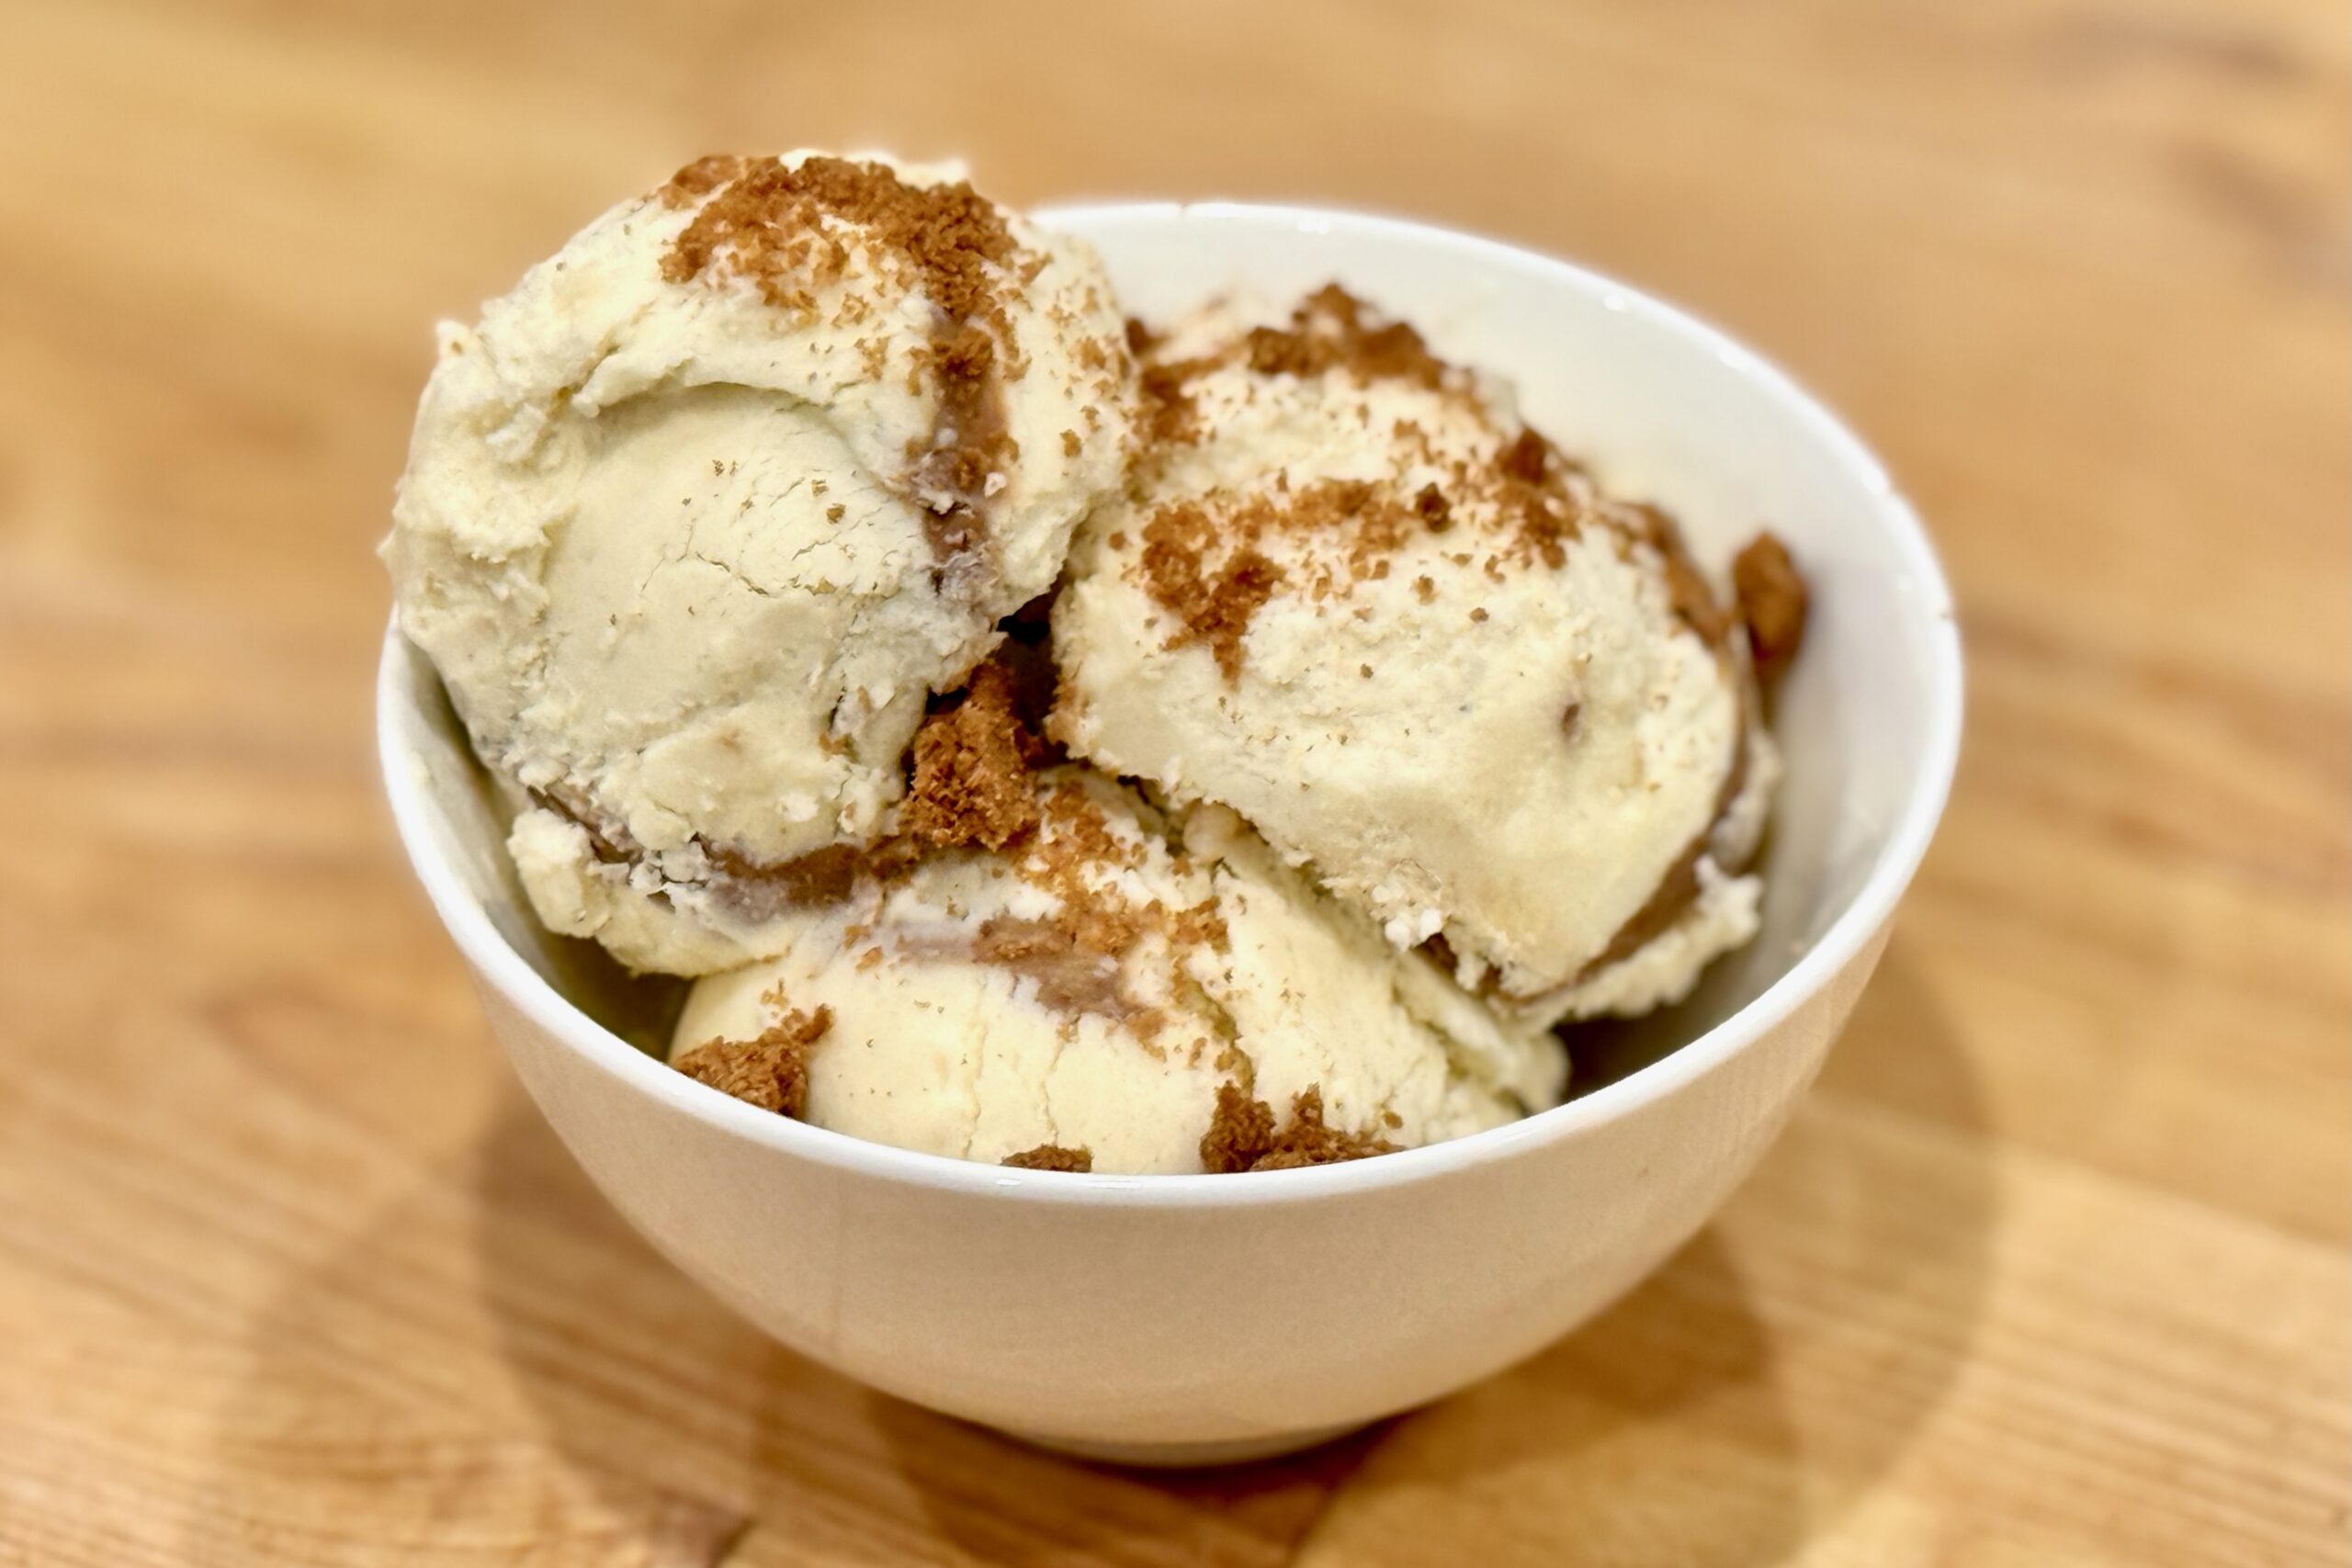
    Serving Suggestions

    • Serve with cilantro-lime rice, sliced avocado, cabbage slaw, pickled onions, and sprinkled with sesame seeds.
    • Substitute cilantro-lime crema for the creamy drizzle, or as another flavorful addition—the combination of both sauces is delicious.
    • A squeeze of fresh lime brightens the flavors.

    Variations

    • Swap pork shoulder for boneless beef short ribs.
    • Use corn tortillas for a lighter street-taco style.
    • Increase sambal or gochujang for extra heat.

    Make-Ahead & Storage

    • Sous-vide pork can be made 1 day ahead; chill in ice bath before refrigerating.
    • Store shredded pork with 2–3 tbsp cooking juices; refrigerate 3–4 days or freeze 2–3 months.
    • Briefly re-broil to restore crisp edges before serving.
  • Babi Panggang — Indonesian Roasted Pork

    Babi Panggang — Indonesian Roasted Pork

    Working in the office in the city of Bussum in The Netherlands, we’d often order take-out from our favorite Chinese-Indonesian restaurant, Tong Fong, in the neighboring city of Hilversum. One stand-out item was their delicious Babi Panggang, which was always a part of our order. I later learned that Babi Panggang is the most ordered main dish at Indonesian restaurants throughout the Netherlands. This is my attempt to recreate the vibrant flavors and textures of this delicious dish.


    Ingredients

    • 2 lb pork shoulder or belly
    • Marinade

    • ¼ cup ketjap manis
    • 2 tbsp hoisin sauce
    • 2 tbsp rice cooking wine
    • 1 tbsp brown sugar
    • 1 tbsp fresh ginger, grated
    • 1 tbsp fish sauce
    • ½ tbsp sambal oelek
    • ½ tbsp sambal badjak
    • ½ tsp toasted sesame oil (optional)
    • ¼ tsp Chinese five spice (optional)
    • 2 cloves garlic, minced
    • Juice and zest of 1 lime
    • Sweet & Sour Red Sauce

    • 1 tbsp vegetable oil
    • 1 small onion, finely chopped
    • 2–3 cloves garlic, minced
    • 2 tsp grated ginger
    • ½ tsp sambal oelek
    • 3 tbsp tomato paste
    • ¼ tsp chicken powder
    • ¼ cup sweet chili sauce
    • 3 tbsp ketchup
    • 2 tbsp lime juice
    • 2 tbsp seasoned rice vinegar
    • 1 tbsp tamarind paste
    • 1 tbsp ketjap manis
    • 1 tsp fish sauce
    • ¾ cup chicken stock or water
    • ¼ cup brown sugar (adjust to taste)
    • 1 tbsp cornstarch mixed with 1 tbsp water

    Directions

    Marinate the Pork

    Combine all marinade ingredients, stirring until the sugar has completely dissolved. Pour into a resealable container or vacuum-seal bag. Add the pork, coating thoroughly. Seal and marinate in the refrigerator for 4–12 hours.

    Sweet & Sour Red Sauce

    Heat oil in a saucepan over medium heat. Sauté onion until lightly browned; add garlic, ginger, and sambal, and cook until fragrant. Add tomato paste and chicken powder; cook 1 minute to develop sweetness.

    Stir in sweet chili sauce, ketchup, lime juice, vinegar, tamarind, ketjap manis, fish sauce, stock or water, and brown sugar. Simmer 10 minutes to allow flavors to meld. Add the cornstarch slurry and simmer until glossy and thickened. Blend with an immersion blender and adjust thickness with additional stock, if needed.

    Preparation #1: Sous Vide

    Preheat sous vide bath to 170°F / 77°C for pork shoulder (130°F / 55°C for pork loin or tenderloin; 150°F / 65°C for pork belly). Submerge vacuum-sealed pork and marinade in the water bath and heat for 12–24 hours (2–8 hours for pork loin or tenderloin).

    Remove from the bag and pat dry. Brush with oil and finish under a broiler set to high for 4–5 minutes to crisp the top. Brush with red sauce during broiling and allow it to develop a few bits of char.

    Slice and serve over rice with a generous amount of sauce. Serve with acar ketimun (pickled vegetables), cucumber salad, fried cabbage, and/or blanched green beans tossed with garlic and sesame oil.

    Preparation #2: Oven

    Preheat oven to 350°F / 177°C. Place pork on a rack in a baking tray. Reserve marinade and boil in a saucepan for 5 minutes. Roast pork for 30–40 minutes per pound, or until internal temperature reaches 190°F / 88°C, basting with the boiled marinade halfway through.

    Rest pork for 20 minutes. Pat dry, brush with oil, and finish under a broiler set to high for 4–5 minutes to crisp the top. Optionally, baste with the red sauce while broiling and allow it to develop slight char.

    Slice and serve over rice with a generous amount of sauce. Serve with acar ketimun, cucumber salad, fried cabbage, and/or blanched green beans tossed with garlic and sesame oil.

    Preparation #3: Pellet Grill

    Preheat pellet grill to 250°F / 120°C. Smoke until internal temperature reaches 187°F / 86°C, basting halfway through. Rest pork for 30 minutes.

    Pat dry, brush with oil, and finish under a broiler set to high for 4–5 minutes to crisp the top. Optionally, baste with the red sauce while broiling and allow it to develop light char.

    Slice and serve over rice with a generous amount of sauce. Serve with acar ketimun, cucumber salad, fried cabbage, and/or blanched green beans tossed with garlic and sesame oil.


    Notes

    Preparation

    • Fattier cuts such as pork shoulder or belly are preferred, but pork loin or tenderloin (especially when using the sous vide method, with times and temperatures adjusted accordingly) can also be used. Take care not to overcook leaner cuts.
    • Preparation #1, Sous Vide, is the preferred method for the most tender and flavorful result.

    Serving Suggestions

    • Serve sliced Babi Panggang over rice with plenty of red sauce spooned on top.
    • Pair with acar ketimun, fried cabbage, cucumber salad, or blanched green beans with garlic and sesame oil.
  • Char Siu

    Char Siu

    With 60 first cousins on just the Huggins side, family parties are rarely small. It isn’t unusual to have 40 to 75 guests for dinner at our get-togethers. Cooking for that many people forces a bit of food-preparation creativity, and this char siu takes advantage of sous-vide precision to simplify the process. For a more traditional method, the pork can also be cooked and basted over a hot charcoal grill for deep, smoky flavor.


    Ingredients

    • 3–4 lbs pork shoulder, cut into 3–4 long strips, about 2 inches thick (see Notes for pork belly option)
    • Marinade:

    • ¾ cup soy sauce
    • ½ cup hoisin sauce
    • ½ cup Shaoxing wine (or dry sherry)
    • ½ cup rock sugar, crushed (or ¼ cup rock sugar + ¼ cup white sugar)
    • 2 tbsp oyster sauce (optional, adds depth)
    • 2 tbsp grated fresh ginger
    • 4 garlic cloves, minced
    • 1 tsp toasted sesame oil
    • 1 tsp Chinese five-spice powder
    • ½ tsp ground white pepper
    • ⅛ tsp pink curing salt #1 (optional, for rosy interior)
    • 3–5 drops red food coloring (optional, classic look)
    • Glaze:

    • 1 cup reserved marinade, strained
    • ¼–⅓ cup honey

    Directions

    Marinate the Pork

    Whisk together all marinade ingredients except the curing salt and honey. Reserve 1 cup of marinade, strain, and refrigerate for the glaze.

    Add curing salt to the remaining marinade. Place pork strips in vacuum-seal bags or heavy zipper bags and add the marinade. Seal and refrigerate at least 8–12 hours, up to 24 hours.

    For best flavor and color penetration, turn the bags occasionally during marinating.

    Sous-Vide Cook

    Preheat the sous-vide water bath to 65°C (149°F). Submerge the sealed pork and cook for 12–16 hours.

    When done, remove the pork and transfer to a rack set over a sheet pan. Pat dry gently.

    Prepare the Glaze

    In a small saucepan, combine the reserved marinade with honey. Simmer over medium heat until reduced by about half and syrupy. Keep warm.

    Dry and Broil

    Let the pork rest uncovered on the rack for 15–20 minutes so the surface becomes slightly tacky. This helps the glaze adhere during broiling.

    Preheat your broiler (or charcoal grill) to very hot. Brush the pork with glaze and broil 6–8 minutes total, turning and re-glazing every 1–2 minutes until lacquered with caramelized edges and light char.

    Keep pork about 6 inches from the broiler to prevent burning. Final internal temperature should be approximately 68–70°C (155–158°F), though the meat is already fully cooked from the sous-vide process.

    Rest and Serve

    Let pork rest 5 minutes, then slice into thick pieces. Drizzle with warm glaze before serving.


    Notes

    Preparation

    • Crushing rock sugar before measuring ensures accurate sweetness and easier dissolving.
    • Optional curing salt deepens the rosy color but does not affect flavor.
    • Turning the pork during marinating promotes even seasoning and color.

    Serving Suggestions

    • Serve over steamed jasmine rice or noodles.
    • Pair with pickled cucumbers or a crisp slaw to balance richness.
    • Excellent in bao buns or sliced thinly for fried rice.

    Variations

    • Pork Belly Version: Remove skin, cut into 1½–2-inch strips, reduce sugar to ⅓ cup total, sous-vide at 70°C (158°F) for 10–12 hours, broil from 8 inches away, glazing every minute.
    • Grill Instead of Broil: Cook over hot charcoal, glazing and turning every 1–2 minutes until lacquered.
    • Extra Caramelization: Increase honey in the glaze up to ½ cup for a deeper lacquer.

    Make-Ahead & Storage

    • Pork can be marinated up to 24 hours in advance.
    • Sous-vide cooked pork can be chilled in the sealed bags up to 48 hours before finishing.
    • Leftovers keep 3–4 days refrigerated; broil briefly to refresh the glaze.
  • Sweet Potato Gnocchi

    Sweet Potato Gnocchi

    After our family took a cooking class together—where we learned to make and shape classic gnocchi—we gathered again on a Sunday evening and had a light-bulb moment: what if we made gnocchi with roasted sweet potatoes? Roasting the sweet potatoes deepens their flavor and keeps the dumplings light yet richly savory. Finished in a nutty browned butter and crisp sage leaves, each pillowy bite evokes cozy autumn warmth—without drifting into dessert territory.


    Ingredients

    • Gnocchi:

    • 2 lb (900 g) orange-flesh sweet potatoes (about 2 large)
    • 1 large egg yolk
    • ¾–1 cup (90–120 g) all-purpose flour, plus more for dusting (start with ¾ cup)
    • ½ tsp table salt
    • ¼ tsp white pepper (or black pepper)
    • pinch nutmeg (optional; up to ⅛ tsp)
    • 2–3 tbsp finely grated parmesan (optional; adds savory depth)
    • semolina or additional flour, for dusting the tray
    • To Serve:

    • 1 batch Browned Butter & Sage Sauce
    • finely grated parmesan, for finishing (optional)

    Directions

    Roast the Sweet Potatoes

    Roast sweet potatoes at 400ºF (205ºC) until completely tender, 45–60 minutes. Split open and let steam escape for 10–15 minutes to reduce moisture. Scoop out the flesh.

    Rice and Cool

    Pass warm sweet potato flesh through a ricer (or mash very thoroughly). Measure 2 packed cups (450–500 g). Spread briefly on a sheet pan to steam off residual moisture, then cool until just warm.

    Make the Dough

    In a bowl, combine sweet potato, egg yolk, salt, pepper, optional nutmeg, and parmesan. Sprinkle ¾ cup (90 g) flour over the top. Fold gently with a bench scraper or spatula until a soft dough forms. It should be supple and just slightly tacky. If sticky, add flour 1 tbsp at a time.

    Test for Texture

    Bring a small pot of well-salted water to a boil. Roll and boil a small test nugget. If it falls apart or tastes mushy, knead in 1 tbsp flour and test again. Avoid overworking the dough.

    Shape the Gnocchi

    Lightly flour the counter and divide dough into four pieces. Roll each into a ¾-inch (2 cm) rope and cut into ¾-inch (2 cm) pieces. Optionally roll on a gnocchi board or fork. Transfer pieces to a semolina- or flour-dusted sheet pan.

    Boil

    Bring a large pot of well-salted water to a boil. Cook gnocchi in batches. They will sink, then float. Cook 30–60 seconds after floating, then lift gently with a spider directly into a warm bowl.

    Serve

    Toss gently with Browned Butter & Sage Sauce, loosening with a splash of cooking water as needed. Finish with parmesan and serve immediately.


    Notes

    Preparation

    • Roasting reduces moisture and prevents dense or gummy dough.
    • Flour amounts vary based on moisture. Add just enough to make dough manageable.
    • A potato ricer ensures the lightest texture; avoid food processors, which make puree gluey.
    • Nutmeg is optional. Keep to a tiny pinch for a savory balance.
    • Parmesan in the dough deepens savoriness and firms texture slightly.

    Serving Suggestions

    • Classic pairing: Browned Butter & Sage Sauce.
    • Also works with simple garlic–olive oil or a light gorgonzola cream.
    • Top with toasted breadcrumbs for added texture.

    Variations

    • Add 1–2 tbsp minced fresh herbs (sage, thyme, chives) to the dough.
    • Use purple sweet potatoes for a more earthy, colorful version; flour amount may vary.
    • Add ¼ cup ricotta for softer, pillowy gnocchi (increase flour slightly).

    Make-Ahead & Storage

    • Freeze uncooked gnocchi on a floured tray, then store in freezer bags up to 2 months. Boil from frozen; add 1–2 minutes to cook time.
    • Refrigerate cooked gnocchi lightly coated in oil up to 2 days. Rewarm gently in sauce.
    • Refrigerate raw dough tightly wrapped up to 24 hours; dust with a little flour if it hydrates.
  • Dark Chocolate Buttermilk Ice Cream

    Dark Chocolate Buttermilk Ice Cream

    Rich, silky, and deeply flavored, this dark chocolate ice cream balances Dutch-process cocoa and melted dark chocolate with the subtle tang of buttermilk for a clean, sophisticated finish. Smooth, scoopable, and layered with complex cocoa notes, it evokes the character of fine European chocolate.


    Ingredients

    Chocolate Custard Base:

    • 1½ cups heavy cream
    • 1 cup whole milk
    • ¾ cup sugar, divided
    • ½ cup Dutch-process cocoa powder
    • 4 oz dark chocolate (60–70%), finely chopped
    • 4 egg yolks
    • ½ tsp instant espresso powder (optional, for depth)
    • ½ tsp vanilla extract
    • pinch table salt
    • ⅛ tsp xanthan gum (stabilizer)

    After Cooking:

    • ¾ cup cold buttermilk
    • 1 tbsp light corn syrup (optional, for slightly softer texture)

    Directions

    Bloom the Cocoa

    In a medium saucepan, whisk cocoa powder with ½ cup of the milk and ¼ cup sugar to form a smooth paste. Add remaining milk, heavy cream, espresso powder (if using), and salt. Heat over medium until steaming and sugar is dissolved.

    Melt the Chocolate

    Remove from heat and whisk in the chopped dark chocolate until melted and glossy. Return briefly to low heat only if needed to melt fully.

    Make the Custard

    In a separate bowl, whisk egg yolks with remaining ½ cup sugar until pale and thick. Temper slowly with ½ cup warm chocolate mixture, then return mixture to the saucepan.

    Cook gently over low heat, stirring constantly, until custard coats the back of a spoon (170–175°F / 77–80°C). Do not boil. Remove from heat and stir in vanilla and optional corn syrup.

    Add the Xanthan Gum

    While custard is warm (below 160°F / 70°C), sprinkle xanthan gum evenly over the surface and immediately blend with an immersion blender or whisk vigorously until fully dispersed. Strain through a fine mesh sieve.

    Incorporate the Buttermilk

    Cool mixture to lukewarm (below 110°F / 43°C). Whisk in buttermilk to preserve fresh tang and prevent curdling. Chill thoroughly, preferably overnight.

    Churn & Freeze

    Churn in an ice cream maker according to manufacturer’s instructions. Transfer to a container and freeze until firm, about 4 hours.


    Notes

    Preparation

    • Xanthan gum gives smoother body and reduces iciness—use sparingly.
    • If using corn syrup, reduce total sugar to ⅔ cup to maintain balance.
    • Espresso powder intensifies chocolate flavor without adding coffee notes.
    • For extra richness, replace ½ cup of the whole milk with half-and-half.
    • Using Natural Cocoa Powder: Add ⅛ tsp baking soda during the “Bloom the Cocoa” step to reduce acidity and deepen color. Increase chocolate to 4½ oz and reduce buttermilk to ⅔ cup.

    Serving Suggestions

    • Top with dark chocolate curls or shavings.
    • Pair with espresso caramel, berries, or almond biscotti.
    • Finish with a pinch of flaky sea salt for contrast.

    Make-Ahead & Storage

    • Refrigerate the custard base up to 2 days before churning.
    • Store churned ice cream in an airtight container up to 1 week.
    • Soften 5–10 minutes at room temperature before serving.
  • Raspberry Buttermilk Ice Cream

    Raspberry Buttermilk Ice Cream

    This raspberry buttermilk ice cream is creamy, tangy, and fruit-forward. The rich custard base is tempered carefully to avoid any eggy flavor, while the buttermilk adds refreshing tartness that enhances the bright, fresh taste of raspberries. Inspired by a recipe shared by our friend Holly (her version here), this variation delivers a silky, balanced ice cream with just the right mix of sweetness and tang.


    Ingredients

    Custard Base:

    • 3 large egg yolks
    • ¾ cup sugar
    • 1 cup milk
    • 1 cup heavy cream
    • 1 cup cold buttermilk
    • ½ tsp vanilla extract

    Raspberry Purée:

    • 1½ cups fresh or frozen raspberries
    • 2 tbsp sugar (adjust to taste)
    • ½ tsp lemon juice (optional, brightens flavor)

    Directions

    Prepare the Raspberry Purée

    In a small saucepan, combine raspberries, sugar, and lemon juice. Cook over medium heat, stirring occasionally, until the berries break down and the mixture thickens slightly (about 5–7 minutes). Strain through a fine-mesh sieve to remove seeds. Cool completely.

    Prepare the Custard Base

    In a medium saucepan, heat the milk and sugar over medium heat until steaming (do not boil). In a separate bowl, whisk egg yolks until smooth. Slowly pour about ½ cup of the hot milk into the yolks while whisking constantly to temper. Return the mixture to the saucepan.

    Cook the Custard

    Cook over medium-low heat, stirring constantly, until the mixture thickens slightly and coats the back of a spoon (170–175°F / 77–79°C). Do not boil. Immediately strain the custard through a fine-mesh sieve into a bowl set over an ice bath. Stir until cooled to room temperature.

    Chill & Combine

    Once completely cool, stir in the heavy cream, buttermilk, vanilla, and raspberry purée. Refrigerate at least 4 hours or overnight.

    Freeze

    Churn in an ice cream maker according to the manufacturer’s instructions. Transfer to a freezer-safe container and freeze until firm, about 4–6 hours.


    Notes

    Preparation

    • Keep the custard below 175°F / 79°C to avoid eggy flavor and preserve raspberry aroma.
    • Strain both the purée and the custard for a silky, seed-free texture.
    • Adjust sugar based on the sweetness of your raspberries.

    Serving Suggestions

    • Serve with fresh raspberries or a raspberry coulis.
    • Top with crushed shortbread or vanilla wafers for crunch.
    • Pairs beautifully with lemon bars or angel food cake.

    Make-Ahead & Storage

    • Raspberry purée can be made 2–3 days ahead and refrigerated.
    • Custard base can be refrigerated up to 2 days before churning.
    • Store churned ice cream up to 1 week in an airtight container.
    • Let soften 5–10 minutes before serving.
  • Hot Fudge Sauce

    Hot Fudge Sauce

    This classic hot fudge sauce delivers the rich, chewy texture and glossy finish of an old-fashioned ice cream parlor fudge. Thick and silky when warm, it sets with just a hint of chew where it meets cold ice cream—perfect for sundaes or swirling into homemade ice cream. A small batch of true nostalgia, made from real chocolate, cocoa, and butter.


    Ingredients

    • ½ cup sugar
    • ⅓ cup light corn syrup
    • ⅓ cup water (for chewier texture, reduce to ¼ cup)
    • ¼ cup Dutch-process cocoa powder
    • 2 oz dark chocolate (60–70%), finely chopped
    • 2 tbsp unsalted butter
    • ¼ tsp vanilla extract
    • pinch table salt

    Directions

    Make the Fudge Base

    In a small saucepan, whisk together the sugar, corn syrup, water, and cocoa powder until smooth. Bring to a gentle boil over medium heat, stirring constantly. Continue cooking 3–5 minutes, until the mixture thickens slightly and develops a glossy sheen. Longer cooking creates a chewier, old-fashioned texture.

    Finish the Sauce

    Remove from heat and whisk in the chopped chocolate, butter, vanilla, and salt until melted and smooth. Avoid excessive stirring as the sauce cools to maintain gloss and elasticity.

    Cool & Store

    Let cool to your preferred consistency before using. The sauce thickens as it cools but should remain spoonable. For nostalgic, chewy fudge, drizzle slightly warm over cold ice cream.


    Notes

    Preparation

    • For deeper chocolate flavor, increase chopped chocolate to 3 oz.
    • Cooking the syrup mixture longer produces a chewier, more traditional fudge texture.
    • If using natural cocoa instead of Dutch-process, add ⅛ tsp baking soda during heating to neutralize acidity and preserve smoothness.
    • Use dark chocolate between 60–70% cacao for ideal balance.

    Serving Suggestions

    • Drizzle over ice cream for a glossy, chewy hot fudge topping.
    • Layer into homemade ice cream as a ripple.
    • Serve warm over brownies, cheesecake, or banana splits.
    • Pairs beautifully with peppermint, peanut butter, vanilla, or coffee ice creams.

    Make-Ahead & Storage

    • Store in a sealed jar up to 2 weeks.
    • Warm gently before serving using a double boiler or short microwave bursts.
    • If too thick after chilling, whisk in 1–2 tsp warm cream or milk to loosen.
  • Speculoos Ribbon Ice Cream

    Speculoos Ribbon Ice Cream

    I first fell in love with speculaas while living in The Netherlands—those crisp, caramelized cookies scented with cinnamon, nutmeg, and clove were unlike anything I’d tasted before. Though the rest of our family has only visited, our Dutch and German ancestry, and our holiday traditions, have long reflected this heritage. Each Christmas, we bake homemade speculaas as part of our celebration, their aroma filling the house with warm spice and nostalgia. This ice cream captures that same spirit in a creamy, elegant dessert: a smooth vanilla–buttermilk base swirled with ribbons of cookie butter and flecked with crushed speculaas for texture and depth.


    Ingredients

      Ice Cream Base

    • 2 cups heavy cream
    • ½ cup whole milk
    • ½ cup buttermilk (added after cooking)
    • ½ cup sugar
    • 5 egg yolks
    • ½ tsp vanilla extract
    • pinch table salt
    • ⅛ tsp cinnamon (optional)
    • pinch nutmeg (optional)
    • Mix-Ins

    • ⅔ cup Speculoos or Biscoff cookie butter
    • ½ cup crushed speculaas or Biscoff cookies (for layering and garnish)

    Directions

    Make the Custard Base

    In a saucepan, warm the milk, cream, sugar, salt, and optional spices over medium heat until steaming and the sugar dissolves.


    Temper the Yolks

    In a medium bowl, whisk the egg yolks until thick and pale. Slowly temper with ½ cup of the hot milk mixture, whisking constantly, then return all to the saucepan.


    Cook the Custard

    Cook gently over low heat, stirring constantly, until the custard coats the back of a spoon (170–175°F / 77–80°C). Do not boil.


    Finish & Chill

    Strain through a fine mesh sieve into a clean bowl. Stir in the vanilla. Allow to cool slightly, then stir in the buttermilk. Chill thoroughly, preferably overnight.


    Churn & Layer

    Churn the chilled base in an ice cream maker according to the manufacturer’s directions.

    Warm the cookie butter just until pourable. As you transfer the churned ice cream to its container, alternate layers of ice cream, drizzled cookie butter, and crushed cookies. Swirl gently with a butter knife without overmixing. Freeze until firm.


    Notes

    Preparation

    • The buttermilk brightens the flavor and balances the sweetness of the cookie butter.
    • Use whole milk instead of buttermilk for a richer, sweeter ice cream.
    • Add a pinch of cinnamon, clove, or ginger for extra “speculaas” aroma.
    • Reserve some crushed cookies for topping—they soften over time in the ice cream.

    Serving Suggestions

    • Top with freshly crushed speculaas for added crunch.
    • Serve with warm caramel sauce or cinnamon whipped cream.
    • Excellent alongside apple pie, poached pears, or Dutch-style oliebollen.

    Variations

    • Cookie Butter Crunch: Toss crushed cookies with a little melted butter and freeze before layering.
    • Swirl Boost: Melt an additional ¼ cup cookie butter and drizzle through the top third before freezing.
    • Speculoos Latte: Add 1 tsp espresso powder to the warm custard base.

    Make-Ahead & Storage

    • Refrigerate the unchurned custard for up to 2 days.
    • Store churned ice cream airtight for up to 1 week.
    • Let soften at room temperature 5–10 minutes before serving.
  • Mango Gelato

    Mango Gelato

    This bright and silky gelato captures the pure flavor of ripe mangoes in classic Italian style—smooth, dense, and refreshingly balanced. The natural sweetness of the fruit shines through a light dairy base, while a touch of vanilla or spiced rum adds warmth and depth. Each scoop feels like a taste of summer, golden, fragrant, and intensely mango-forward.


    Ingredients

      Base:

    • 2 cups ripe mango purée (strained to remove fibers; from about 3–4 large mangoes or 16 oz frozen mango)
    • 1 cup whole milk
    • ¼ cup heavy cream
    • ⅔ cup sugar
    • ⅛ tsp xanthan gum (stabilizer)
    • 1 tbsp fresh lemon juice
    • pinch table salt
    • ½ tsp vanilla extract (optional; rounds flavor)
    • 1 tbsp spiced rum (optional; softens texture and adds warmth)

    Directions

    Prepare the Mango Purée

    Peel and cube ripe mangoes, or use thawed frozen mango chunks. Purée until completely smooth in a blender or food processor, then strain through a fine mesh sieve to remove fibers. Measure 2 cups purée, cover, and refrigerate.

    Make the Dairy Base

    In a small saucepan, whisk together milk, cream, sugar, and salt. Heat gently over medium heat until steaming and the sugar is fully dissolved. Remove from heat and cool slightly, about 10–15 minutes.

    Combine & Stabilize

    In a blender, combine the cooled milk mixture, mango purée, lemon juice, vanilla, and rum (if using). Sprinkle xanthan gum evenly over the surface and immediately blend on high for 30–45 seconds until emulsified and slightly thickened.

    Chill the Base

    Transfer to a covered container and refrigerate until very cold, at least 4 hours or overnight for best texture.

    Churn & Freeze

    Churn the chilled base in an ice cream maker according to manufacturer instructions until thick and velvety. Transfer to a container and freeze 3–4 hours to firm fully.


    Notes

    Preparation

    • Xanthan gum improves creaminess and prevents iciness; a little goes a long way.
    • Lemon juice brightens the mango flavor and balances natural sweetness.
    • If mangoes are less sweet, increase sugar slightly (up to ¾ cup total).
    • For a richer variation, substitute coconut milk for the whole milk.

    Serving Suggestions

    • Serve with diced fresh mango or mango coulis for extra fruit intensity.
    • Top with toasted coconut flakes or macadamia nuts for added texture.
    • Pair with lime cookies or shortbread for contrast.

    Make-Ahead & Storage

    • Refrigerate the blended base for up to 2 days before churning.
    • Store churned gelato in an airtight container for up to 1 week.
    • Allow to soften at room temperature for 5–10 minutes before scooping.
  • Chocolate Hazelnut Ice Cream

    Chocolate Hazelnut Ice Cream

    Creamy and decadent, this chocolate hazelnut ice cream blends the richness of dark chocolate and toasted hazelnuts with the smooth sweetness of Nutella. A silky custard base creates luxurious texture, while cocoa deepens the chocolate flavor and balances the sweetness beautifully. It’s a family favorite—one that every member agrees on without debate—its velvety texture and nutty aroma reminding us of fine Belgian chocolates. Whether shared after Sunday dinner or enjoyed quietly by the fire, this ice cream captures both indulgence and comfort in every scoop.


    Ingredients

    Chocolate Custard Base:

    • 2 cups heavy cream
    • 1 cup whole milk
    • ½ cup sugar, divided
    • 5 egg yolks
    • ½ tsp vanilla extract
    • ½ cup Nutella (or other chocolate-hazelnut spread)
    • 2 tbsp unsweetened cocoa powder
    • pinch table salt
    • ½ cup toasted hazelnuts, coarsely chopped (for folding in or topping; optional)

    Directions

    Warm the Chocolate Base

    In a saucepan, whisk together the milk, cream, ¼ cup sugar, cocoa powder, and salt. Warm over medium heat until steaming and the sugar dissolves.

    Make the Custard

    In a medium bowl, whisk the egg yolks with the remaining ¼ cup sugar until pale and thick. Slowly temper with ½ cup of the warm chocolate mixture while whisking constantly, then return everything to the saucepan.

    Cook over low heat, stirring constantly, until the custard coats the back of a spoon (170–175°F / 77–80°C). Do not boil.

    Finish & Chill

    Strain through a fine mesh sieve into a clean bowl. Whisk in vanilla and Nutella until smooth and fully blended. Chill thoroughly, preferably overnight.

    Churn & Add Hazelnuts

    Churn the chilled base in an ice cream maker according to manufacturer’s instructions. Fold in toasted hazelnuts or use them as a topping when serving.


    Notes

    Preparation

    • For richer chocolate flavor, replace ¼ cup of the Nutella with 2 oz melted dark chocolate (60–70% cacao).
    • For a smoother texture, add ⅛ tsp xanthan gum to the warm base before chilling.
    • Straining ensures a velvety custard and removes any curdled bits.

    Serving Suggestions

    • Top with toasted hazelnuts or shaved dark chocolate.
    • Pair with mocha brownies, vanilla shortbread, or salted caramel sauce.
    • Serve with fresh berries for a bright contrast.

    Make-Ahead & Storage

    • Refrigerate the custard base up to 2 days before churning.
    • Store churned ice cream for up to 1 week for best texture.
    • Let soften 5–10 minutes at room temperature before serving.