Bags of Spices

Favorite Recipes

Sides, Soups & Salads

Cozy bowls, fresh sides, and dishes that complete the plate — from warm stews to crisp salads and comforting vegetables.

  • Southern-Style Sweet Potatoes

    Southern-Style Sweet Potatoes

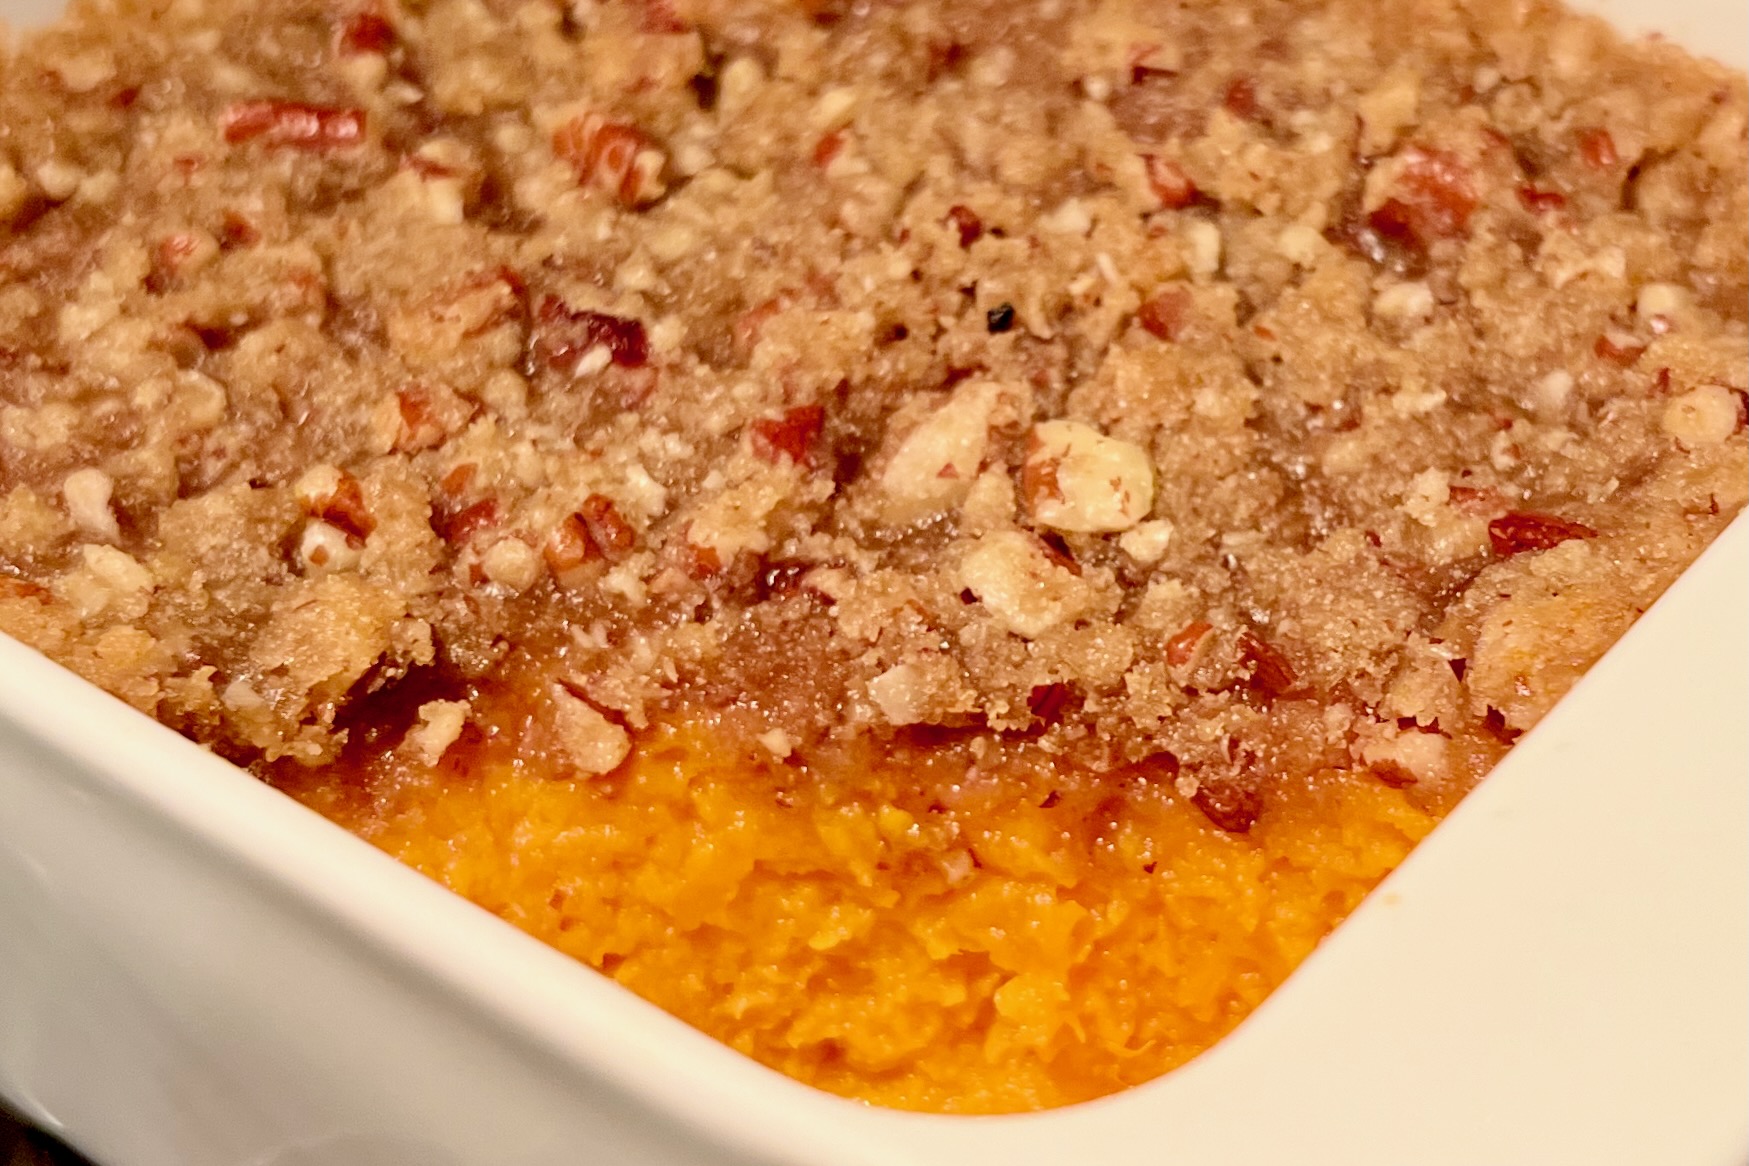
    Great Grandma Lena was a proper Southern lady. Born on August 11, 1901, in Missouri, her family moved by covered wagon to Dover, Arkansas when she was three years old—a journey that took more than a week. At seventeen, she married Wilmer (Sr.), and Grandpa (Jr.) was the youngest of their four children. In 1936, the family made the trek to Southern California in a car with a rumble seat. Made in honor of Great Grandma Lena, these sweet potatoes have become a Thanksgiving tradition. Updated to highlight the natural sweetness of roasted sweet potatoes and topped with a buttery brown sugar–pecan crumble, this timeless side dish remains a cherished part of our holiday table.


    Ingredients

      Sweet Potato Mixture

    • ¼ cup sugar
    • ½ tsp table salt
    • 1 tsp vanilla extract
    • 4 cups roasted sweet potatoes, mashed
    • 3–4 large eggs, well beaten
    • ½ cup butter, melted
    • 2 tbsp heavy cream (optional, if mixture is too thick)
    • Topping

    • 1½ cups brown sugar
    • ½ cup flour
    • ⅓ cup butter, melted
    • 1½ cups pecans, chopped and lightly toasted

    Directions

    Prepare the Oven and Topping

    Preheat oven to 350ºF (175ºC). In a small bowl, combine the brown sugar, flour, melted butter, and toasted pecans. Mix until evenly combined and crumbly. Set aside.

    Make the Sweet Potato Mixture

    In a large mixing bowl, combine the sugar, salt, vanilla, mashed roasted sweet potatoes, beaten eggs, and melted butter. Stir until smooth and evenly combined. If the mixture feels overly thick, stir in 2 tbsp heavy cream to loosen slightly.

    Assemble and Bake

    Butter a medium baking dish and pour in the sweet potato mixture, spreading evenly. Sprinkle the prepared topping over the surface.

    Bake uncovered for 30 minutes, or until the center is set and the topping is golden brown. Let rest for at least 30 minutes before serving.

    Serve

    Serve warm as-is or drizzle lightly with maple syrup for extra richness. This casserole is a holiday favorite, especially alongside roast turkey or ham.


    Notes

    Preparation

    • Roasting the sweet potatoes deepens their natural sweetness and enhances flavor compared to boiling.
    • Using 3 eggs results in a slightly denser, more velvety texture, while 4 eggs yield a lighter, more custard-like consistency.
    • If the mixture feels too thick, add 2 tbsp cream or milk for a smoother texture.
    • Toasted pecans add a richer, nuttier flavor to the topping—toast at 350ºF (175ºC) for 5–7 minutes, until fragrant.
    • Find our family’s original recipe on our legacy website.

    Serving Suggestions

    • Perfect for Thanksgiving or Christmas dinners alongside turkey, ham, or roast chicken.
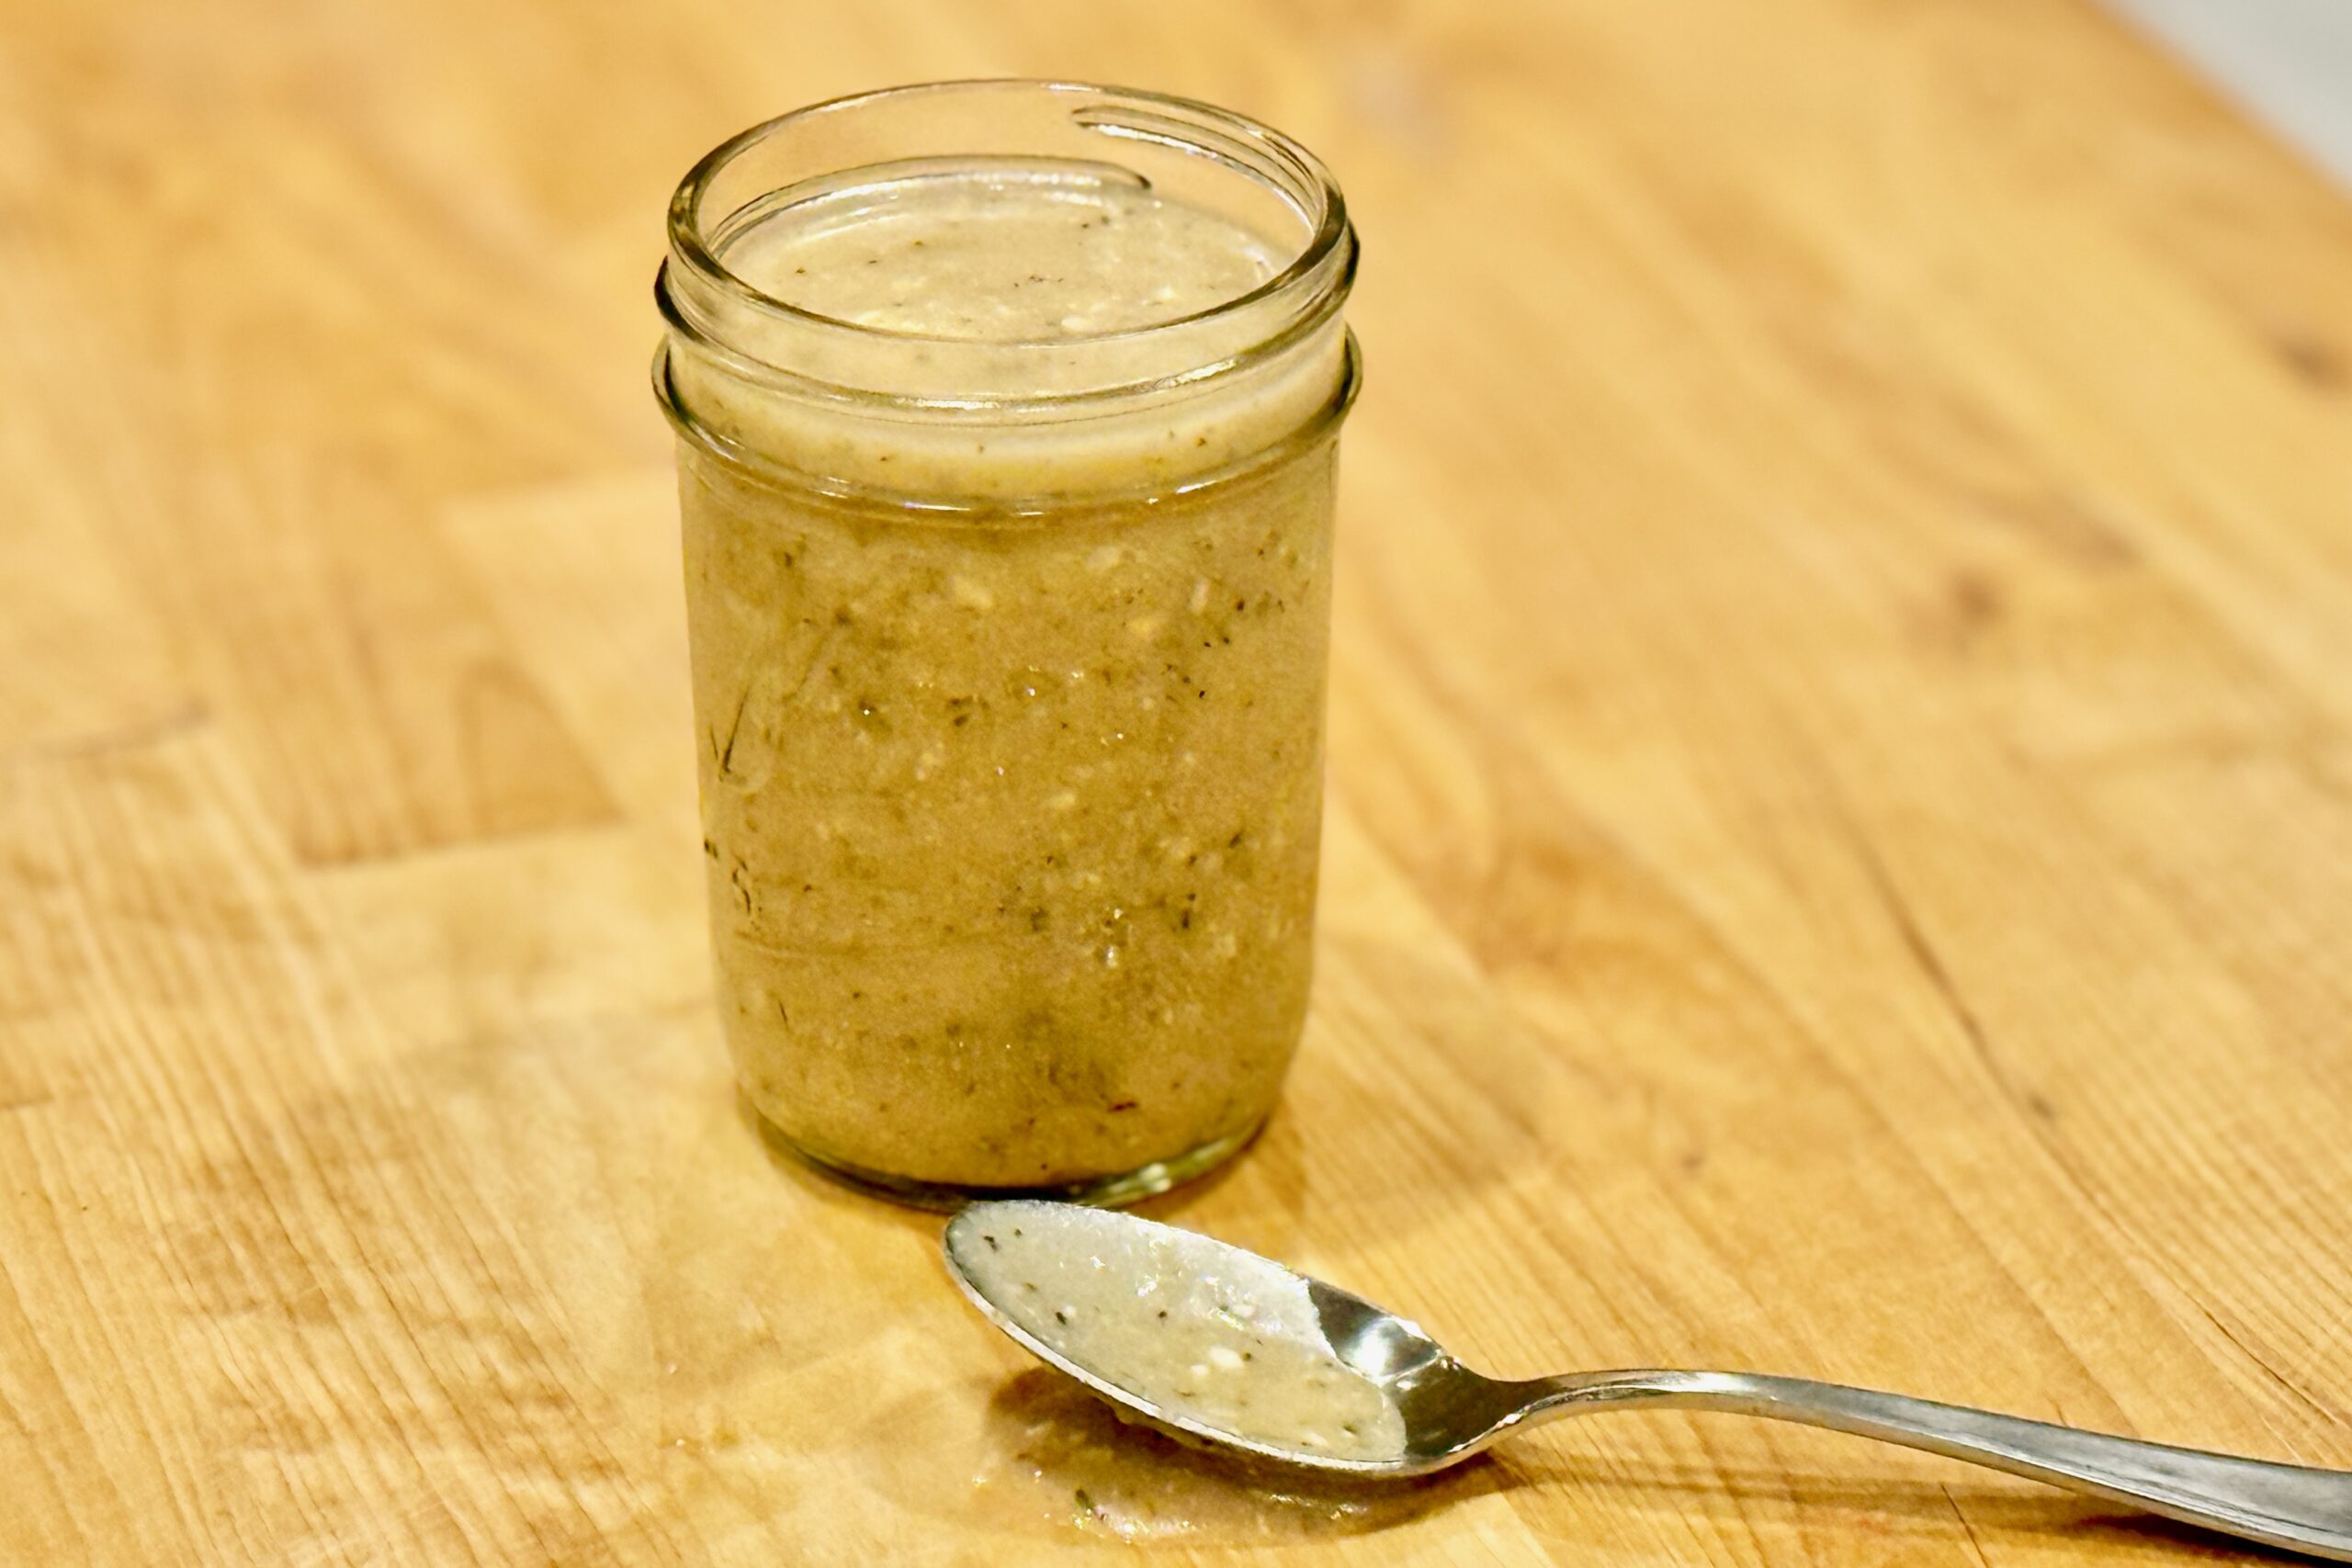
    • Pairs beautifully with Southern-Style Brown Gravy for a savory-sweet balance.
    • Serve leftovers warmed for breakfast with a drizzle of cream or maple syrup.

    Make-Ahead & Storage

    • Prepare through assembly (unbaked), cover, and refrigerate for up to 2 days. Bake just before serving.
    • Freeze (unbaked or baked) for up to 1 month. Thaw overnight in the refrigerator before baking or reheating.
    • Reheat covered at 325ºF (165ºC) for 20–25 minutes, or until heated through.
    • Store leftovers refrigerated up to 4 days or frozen up to 1 month.
  • Paneer

    Paneer

    This traditional homemade paneer is soft, creamy, and fresh with a delicate balance of sweetness and acidity. Made simply from milk, lemon juice, and salt, it forms the foundation of countless Indian dishes—from rich curries like saag paneer to grilled kebabs or golden pan-fried cubes. The process is simple, yielding pure, fresh cheese with a texture you can’t find in store-bought versions.


    Ingredients

    • 1 gallon whole milk (not ultra-pasteurized)
    • ¼ cup lemon juice (plus 1–2 tbsp extra, if needed)
    • 1 tbsp salt

    Directions

    Prepare the Strainer

    Line a fine-mesh strainer or colander with four layers of cheesecloth or a clean cotton kitchen towel. Set the strainer over a large bowl or in the sink to catch the whey.

    Heat and Curdle the Milk

    Pour milk into a large, heavy-bottomed pot over medium-high heat, stirring occasionally to prevent scorching. When warm, add salt and continue heating until the milk comes to a gentle boil. Reduce heat to low.

    Slowly drizzle in lemon juice, 1 tbsp at a time, while gently stirring in a slow figure-eight motion. Within 10–30 seconds, curds should begin separating from the whey. If separation doesn’t occur after 2–3 tbsp, add 1–2 tbsp more until the whey runs mostly clear.

    Drain and Rinse the Curds

    Once curdled, carefully pour the mixture into the prepared strainer. Let drain 5–10 minutes to remove excess whey. Rinse the curds gently under cool running water for a few seconds to remove residual lemon flavor and acidity, taking care not to break up the curds.

    Shape and Press

    Gather the corners of the cheesecloth into a bundle and twist to squeeze out additional liquid. Flatten the cloth-wrapped bundle into a disc about 1 inch thick and place it on a plate or cutting board. Set a heavy weight—such as a pot filled with water or canned goods—on top and press for 30–45 minutes, or until firm and sliceable.

    Chill and Store

    Unwrap the paneer and refrigerate for at least 1 hour before cutting. Store in an airtight container for 3–4 days.


    Notes

    Preparation

    • Paneer can also be formed using a paneer or tofu press; compress 30–45 minutes, or until firm and sliceable.
    • Rinsing the curds lightly improves flavor and keeps the texture tender.
    • Whole milk is essential for rich, creamy paneer; low-fat milk yields drier results.

    Serving Suggestions

    • Cube and fry until golden for dishes like saag paneer or matar paneer.
    • Grill or skewer with vegetables for paneer tikka.
    • Crumble into curries or use as a filling for samosas or wraps.

    Make-Ahead & Storage

    • Refrigerate up to 4 days in an airtight container.
    • Freeze up to 2 months; thaw overnight in the refrigerator before using.
    • Once thawed, pat dry before pan-frying or grilling.
  • Jalapeño-Bacon Smoked Mac & Cheese

    Jalapeño-Bacon Smoked Mac & Cheese

    Smoky, creamy, and loaded with layers of bold flavor, our family’s Jalapeño Bacon Smoked Mac & Cheese takes this comfort classic to the next level. A silky, stabilized cheese sauce coats tender pasta, balanced by the heat of jalapeños, the savoriness of crisp bacon, and often covered in a golden layer of broiled cheese. It’s indulgent yet refined—the kind of mac and cheese that steals the show at any family gathering.


    Ingredients

      Pasta Base

    • 1 lb elbow macaroni
    • salt, for boiling
    • Bacon & Jalapeños

    • 1 lb thick-cut bacon, chopped
    • 1½ cups jalapeños, finely diced with seeds & veins removed
    • 1 tbsp reserved bacon fat
    • Cheese Sauce

    • ¼ cup butter
    • ⅓ cup all-purpose flour
    • ½ tsp smoked paprika
    • ½ tsp dry mustard
    • ½ tsp onion powder
    • ¼ tsp garlic powder
    • 4 cups whole milk
    • 1½ cups heavy cream
    • 1½ tsp sodium citrate
    • 8 oz cream cheese, cubed
    • 8 oz sharp cheddar, grated
    • 8 oz colby jack, grated
    • 4 oz gouda, grated
    • 4 oz emmentaler, grated
    • salt and pepper, to taste
    • Garnish

    • reserved crispy bacon
    • thin jalapeño slices or fresh chives (optional)

    Directions

    Cook the Pasta

    Bring a large pot of salted water to a boil. Add macaroni and cook 2–3 minutes less than al dente, leaving it slightly firm. Drain and rinse under cold water to halt cooking; set aside.

    Prepare the Bacon & Jalapeños

    In a large skillet, cook bacon over medium heat until crisp. Remove with a slotted spoon and drain on paper towels, reserving about 1 tbsp rendered fat.

    Add diced jalapeños to the reserved bacon fat and sauté 2–3 minutes until fragrant and slightly softened. Set aside, reserving some bacon for garnish.

    Make the Roux & Base

    In a large saucepan or cast-iron skillet, melt butter over medium heat. Whisk in flour, smoked paprika, dry mustard, onion powder, and garlic powder; cook 1–2 minutes, whisking constantly until fragrant and lightly golden.

    Gradually whisk in milk and cream until smooth and combined.

    Incorporate Sodium Citrate

    Whisk in sodium citrate until fully dissolved. Bring the mixture just below a simmer—do not boil—to create the base for a smooth, stable sauce.

    Add the Cheeses

    Remove the pan from heat. Add cream cheese, stirring until melted and smooth. Gradually whisk in the grated cheeses in small handfuls, allowing each addition to melt before adding the next. Season to taste with salt and pepper; the sauce should be glossy and pourable.

    Combine

    Fold in cooked bacon (reserve a handful for garnish) and sautéed jalapeños. Add pasta and stir to coat evenly.

    If the sauce thickens too much, stir in a splash of reserved pasta water or milk to loosen.

    Smoke the Mac & Cheese

    Preheat pellet grill to 165°F / 74°C. Transfer mac and cheese to a greased 12-inch cast-iron pan or baking dish. Smoke uncovered for 1–2 hours, stirring after 15 and 30 minutes for even flavor absorption.

    Increase temperature to 225°F / 107°C for the final 15 minutes to slightly tighten and toast the surface.

    Cheese Finish

    Removing from the smoker and sprinkle a thin, even layer of shredded cheddar or gouda over the top. Place under a broiler for 2–4 minutes, watching closely, until golden and bubbling with crisp edges.

    Let rest 5–10 minutes before serving.

    Garnish & Serve

    Top with reserved crispy bacon and garnish with thin jalapeño slices or fresh chives. Serve warm, directly from the skillet for best presentation.


    Notes

    Preparation

    • sodium citrate ensures a stable, silky sauce that resists separation, even during smoking or reheating.
    • cold-smoking the cheese before grating adds a deeper, more developed smoke flavor.
    • a pinch of chipotle powder or smoked salt can be used to enhance depth without adding much heat.
    • let the mac and cheese rest briefly before serving to help the sauce set slightly.

    Serving Suggestions

    • serve alongside barbecue favorites like smoked ribs, pulled pork, or brisket.
    • use leftovers as a rich filling for grilled cheese sandwiches or baked stuffed peppers.
    • top with additional crisp bacon or caramelized onions for added texture and flavor.

    Make-Ahead & Storage

    • refrigerate up to 4 days in an airtight container.
    • reheat gently in the oven or smoker at low temperature; avoid direct stovetop reheating after cheese is added.
    • freeze up to 2 months; thaw overnight in the refrigerator before reheating.
  • Char Siu

    Char Siu

    With 60 first cousins on just the Huggins side, family parties are rarely small. It isn’t unusual to have 40 to 75 guests for dinner at our get-togethers. Cooking for that many people forces a bit of food-preparation creativity, and this char siu takes advantage of sous-vide precision to simplify the process. For a more traditional method, the pork can also be cooked and basted over a hot charcoal grill for deep, smoky flavor.


    Ingredients

    • 3–4 lbs pork shoulder, cut into 3–4 long strips, about 2 inches thick (see Notes for pork belly option)
    • Marinade:

    • ¾ cup soy sauce
    • ½ cup hoisin sauce
    • ½ cup Shaoxing wine (or dry sherry)
    • ½ cup rock sugar, crushed (or ¼ cup rock sugar + ¼ cup white sugar)
    • 2 tbsp oyster sauce (optional, adds depth)
    • 2 tbsp grated fresh ginger
    • 4 garlic cloves, minced
    • 1 tsp toasted sesame oil
    • 1 tsp Chinese five-spice powder
    • ½ tsp ground white pepper
    • ⅛ tsp pink curing salt #1 (optional, for rosy interior)
    • 3–5 drops red food coloring (optional, classic look)
    • Glaze:

    • 1 cup reserved marinade, strained
    • ¼–⅓ cup honey

    Directions

    Marinate the Pork

    Whisk together all marinade ingredients except the curing salt and honey. Reserve 1 cup of marinade, strain, and refrigerate for the glaze.

    Add curing salt to the remaining marinade. Place pork strips in vacuum-seal bags or heavy zipper bags and add the marinade. Seal and refrigerate at least 8–12 hours, up to 24 hours.

    For best flavor and color penetration, turn the bags occasionally during marinating.

    Sous-Vide Cook

    Preheat the sous-vide water bath to 65°C (149°F). Submerge the sealed pork and cook for 12–16 hours.

    When done, remove the pork and transfer to a rack set over a sheet pan. Pat dry gently.

    Prepare the Glaze

    In a small saucepan, combine the reserved marinade with honey. Simmer over medium heat until reduced by about half and syrupy. Keep warm.

    Dry and Broil

    Let the pork rest uncovered on the rack for 15–20 minutes so the surface becomes slightly tacky. This helps the glaze adhere during broiling.

    Preheat your broiler (or charcoal grill) to very hot. Brush the pork with glaze and broil 6–8 minutes total, turning and re-glazing every 1–2 minutes until lacquered with caramelized edges and light char.

    Keep pork about 6 inches from the broiler to prevent burning. Final internal temperature should be approximately 68–70°C (155–158°F), though the meat is already fully cooked from the sous-vide process.

    Rest and Serve

    Let pork rest 5 minutes, then slice into thick pieces. Drizzle with warm glaze before serving.


    Notes

    Preparation

    • Crushing rock sugar before measuring ensures accurate sweetness and easier dissolving.
    • Optional curing salt deepens the rosy color but does not affect flavor.
    • Turning the pork during marinating promotes even seasoning and color.

    Serving Suggestions

    • Serve over steamed jasmine rice or noodles.
    • Pair with pickled cucumbers or a crisp slaw to balance richness.
    • Excellent in bao buns or sliced thinly for Fried Rice with Shrimp & Char Siu.

    Variations

    • Pork Belly Version: Remove skin, cut into 1½–2-inch strips, reduce sugar to ⅓ cup total, sous-vide at 70°C (158°F) for 10–12 hours, broil from 8 inches away, glazing every minute.
    • Grill Instead of Broil: Cook over hot charcoal, glazing and turning every 1–2 minutes until lacquered.
    • Extra Caramelization: Increase honey in the glaze up to ½ cup for a deeper lacquer.

    Make-Ahead & Storage

    • Pork can be marinated up to 24 hours in advance.
    • Sous-vide cooked pork can be chilled in the sealed bags up to 48 hours before finishing.
    • Leftovers keep 3–4 days refrigerated; broil briefly to refresh the glaze.
  • Cilantro Lime Rice (Instant Pot)

    Cilantro Lime Rice (Instant Pot)

    This Instant Pot version of Cilantro-Lime Rice delivers the same bright, aromatic flavor as the stovetop method in a fraction of the time. Jasmine rice cooks up fluffy and tender with perfect lime-cilantro balance—ideal for tacos, fajitas, enchiladas, or grilled meats. Click here for the stovetop version of this recipe.


    Ingredients

    • 1 cup jasmine rice, rinsed and drained
    • 1 tbsp butter or olive oil
    • 1 cup chicken broth (or water + ¼ tsp salt)
    • Zest of 1 lime
    • 1–1½ tbsp fresh lime juice (added after cooking)
    • ½ cup cilantro leaves, finely chopped
    • ⅛ tsp sugar (optional, to balance acidity)
    • Salt to taste

    Optional Add-Ins

    • 1 small clove garlic, minced (sauté before adding rice)
    • 1 bay leaf (for subtle herbal aroma)

    Directions

    Rinse the Rice

    Rinse jasmine rice in a fine-mesh strainer under cold water until the water runs mostly clear to remove excess starch. Drain well.

    Sauté

    Set the Instant Pot to Sauté. Melt butter or heat oil, then add garlic if using. Stir in drained rice and toast for 1–2 minutes until lightly fragrant.

    Press Cancel to stop the sauté function.

    Pressure Cook

    Add chicken broth and a pinch of salt. Stir once to distribute evenly, then secure the lid and set the valve to Sealing.

    Cook on High Pressure for 3 minutes. Allow pressure to release naturally for 10 minutes, then manually release any remaining steam.

    Finish the Rice

    Fluff the rice gently with a fork. Stir in lime zest, lime juice, cilantro, and sugar (if using). Taste and adjust seasoning with more salt or lime juice as needed.

    Let rest uncovered for 2–3 minutes to allow excess steam to escape before serving.

    Serve

    Serve warm as a side or base for tacos, fajitas, enchiladas, or grilled meats. Garnish with additional cilantro and lime zest if desired.


    Notes

    Preparation

    • Use a 1:1 ratio of rice to liquid for the Instant Pot—no evaporation means less liquid is required than on the stove.
    • Do not add lime juice before pressure cooking; acid interferes with proper rice hydration.
    • Natural release for 10 minutes ensures fluffy, evenly cooked grains.
    • Let rice rest uncovered for a few minutes after fluffing to release steam and maintain perfect texture.

    Serving Suggestions

    • Pairs beautifully with tacos, fajitas, grilled shrimp, or chicken.
    • Use as a flavorful base for burrito bowls or enchilada platters.
    • For color and brightness, top with extra cilantro and a sprinkle of lime zest before serving.

    Variations

    • Subtle Coconut Version: Replace ¼ cup of broth with ¼ cup unsweetened coconut milk (use ¾ cup broth + ¼ cup coconut milk). Adds gentle richness and a faint coconut aroma while maintaining lime-cilantro brightness.
    • Coconut-Forward Version: Replace ½ cup of broth with ½ cup coconut milk (use ½ cup broth + ½ cup coconut milk). Yields a creamier, tropical variation—use 2 tbsp lime juice and slightly more salt to balance flavor.
    • For added aromatics, sauté a small piece of shallot or a few cilantro stems with the rice.

    Make-Ahead & Storage

    • Cooked rice can be held warm in the Instant Pot for up to 30 minutes before adding lime and cilantro.
    • Refrigerate leftovers in an airtight container for up to 3 days; reheat with a splash of broth or water to restore moisture.
    • Not recommended for freezing—fresh cilantro and lime flavor are best enjoyed fresh.
  • Mexican Rice

    Mexican Rice

    Fluffy, richly flavored Mexican rice made in the Instant Pot without the risk of burning. Toasted rice builds a subtle nuttiness before sautéed onion and garlic deepen the base, and a homemade Mexican Tomato Sauce brings vibrant color, gentle heat, and balanced acidity. Instead of relying on shortcuts or canned blends alone, this method layers flavor intentionally — blooming the aromatics, coating each grain in oil, and carefully controlling the liquid ratio so the rice steams rather than stews. The result is tender, separate grains with that signature restaurant-style texture and a savory backbone strong enough to stand alongside tacos, Enchiladas, Carnitas, or grilled Carne Asada — yet balanced enough to enjoy on its own.


    Ingredients

    • 3 cups basmati rice, rinsed and drained
    • 3 tbsp avocado oil
    • 1 tbsp lard (optional, for richness)
    • ½ tsp annatto powder (optional, for color)
    • 1½ cups prepared Mexican Tomato Sauce
    • 2¾ cups chicken broth
    • ½ tsp table salt
    • ½ medium onion, diced
    • 1–2 jalapeños, diced
    • 1 tbsp butter (for finishing)
    • fresh cilantro, chopped, for garnish
    • lime wedges, for serving

    Directions

    Rinse the Rice

    Place rice in a fine-mesh strainer and rinse under cold running water for 1–2 minutes, or until the water runs mostly clear. Drain well.

    Sauté the Aromatics

    Heat a deep sauté pan over medium-high heat; add 1 tbsp avocado oil. When shimmering, add onion and jalapeño. Sauté until the edges of the onion begin to brown and the jalapeño softens slightly. Transfer the mixture to a bowl and set aside.

    Toast the Rice

    Add remaining 2 tbsp avocado oil and the lard (if using) to the same pan. Once the oil is hot, add the drained rice and cook, stirring occasionally, until lightly golden and fragrant, 5–7 minutes.

    Stir in annatto powder (if using) for 30 seconds, just until color deepens. Deglaze the pan with a few tablespoons of chicken broth, scraping up any toasted bits. Transfer the rice to the Instant Pot.

    Layer and Pressure Cook

    Pour the remaining chicken broth into the Instant Pot over the rice. Sprinkle in salt but do not stir. Gently pour the Mexican Tomato Sauce over the top—again, do not stir. This layering prevents the thicker sauce from touching the bottom and triggering a burn warning.

    Secure the lid and set to Pressure Cook – High for 3 minutes. Allow pressure to release naturally for 10 minutes with Keep Warm on, then turn off Keep Warm and release any remaining pressure manually.

    Fluff and Finish

    Let the rice rest for 2–3 minutes after opening the lid. Fluff gently with a fork, then fold in the reserved jalapeño mixture and the butter. Allow residual heat to melt the butter and evenly coat the grains.

    Let rest uncovered for 3–5 minutes before serving to release excess steam and preserve texture.

    Serve

    Garnish with chopped cilantro and serve with lime wedges. For a stronger tomato flavor, drizzle with additional Mexican Tomato Sauce before serving.


    Notes

    Preparation

    • Total liquid increased to 4¼ cups (2¾ cups broth + 1½ cups sauce) for even cooking and no burn warnings.
    • Layer liquids—broth first, sauce last—and avoid stirring before cooking.
    • Deglaze the pan after toasting the rice to remove any stuck bits that can trigger burn errors.
    • Natural release for 10 minutes ensures fluffy, separate grains without overcooking.
    • Rest uncovered briefly after fluffing to let excess steam escape for perfect texture.

    Serving Suggestions

    Variations

    • Substitute vegetable broth for chicken broth for a vegetarian version.
    • For deeper color and richness, always include annatto and lard.
    • For milder heat, use just one jalapeño or remove the seeds before dicing.

    Make-Ahead & Storage

    • This rice reheats beautifully and maintains texture when stored properly.
    • Refrigerate in an airtight container up to 4 days.
    • Reheat gently on the stove or in the microwave with a splash of broth to restore moisture.
    • Freeze up to 2 months; thaw overnight in the refrigerator before reheating.
  • Espiau’s Vinaigrette

    Espiau’s Vinaigrette

    In the 1970s and 1980s, our family would frequently make the drive to Pomona to eat at Espiau’s Mexican Restaurant. At that time it was located on the west end of Holt. The restaurant dates back to the early 20th century and was founded by an early Pomona Valley pioneer. The business moved to Claremont in the 1990s and can still be found in the Claremont Village. Our family’s favorite dish there is the Tostada Salad. Their tostada is unique. Instead of salsa, theirs is topped with a vinaigrette. This recipe is my attempt to replicate their dressing.


    Ingredients

    • 1 cup red wine vinegar
    • 3 tbsp water
    • ¾ cup vegetable oil
    • ⅓ cup sugar
    • 2 tbsp Lowry’s seasoned salt
    • 1 tbsp onion powder
    • ¼ tsp black pepper, finely ground
    • ¼ tsp dried oregano

    Directions

    Mix the Dressing

    Place all ingredients in a jar; shake to combine. Allow several hours for flavors to meld. Store in refrigerator.


    Notes

    Preparation

    Extra-virgin olive oil or avocado oil may be used, but both become semi-solid in the refrigerator. Let the dressing rest at room temperature or place the sealed jar under warm water until fluid again.

    Shake well before each use—the sugar and spices will naturally settle since this vinaigrette contains no emulsifiers.

    The flavor improves dramatically after resting. Overnight is ideal, allowing the oregano to bloom, the vinegar to soften, and the seasoning to fully dissolve.

    Serving Suggestions

    To mimic Espiau’s tostada experience, allow the vinaigrette to warm slightly before serving. The aromatics brighten when the dressing is not ice-cold.

    Excellent on tostadas, chopped salads, shredded cabbage, grilled chicken salads, sliced cucumbers, tomatoes, and mixed vegetables.

    Variations

    For a low-calorie or low-carbohydrate option, substitute monk fruit sweetener. Start with the full ⅓ cup equivalent and adjust to taste after resting.

    For a sharper dressing, increase black pepper or add a pinch of crushed red pepper flakes.

    Make-Ahead & Storage

    This vinaigrette keeps well for 7–10 days in the refrigerator. The high acidity helps preserve the flavor, though it is best within the first week.

    If the dressing tastes too sharp immediately after mixing, allow more resting time—its acidity mellows as the aromatics hydrate.

  • Poutine

    Poutine

    Poutine is the ultimate Canadian comfort classic—crispy hot fries, soft squeaky cheese curds, and rich gravy melting everything into one irresistible bite. It’s simple, hearty, and perfect for nights when you want something warm and satisfying without overthinking the prep.


    Ingredients

    • Southern gravy
    • Belgian frites, or oven fried fries
    • white cheddar cheese curds

    Directions

    Assemble the Poutine

    Plate hot fries and sprinkle generously with cheese curds. Cover with hot gravy and serve immediately.


    Notes

    Preparation

    • For best texture, use hot, freshly cooked fries so the curds soften slightly but don’t fully melt.
    • If your cheese curds are refrigerated, let them sit at room temperature for 15–20 minutes before assembling for maximum “squeak.”
    • Warm gravy thoroughly just before serving so it coats evenly and heats the curds.

    Serving Suggestions

    • Add shredded rotisserie chicken, pulled pork, or leftover brisket for a heartier variation.
    • Top with chopped green onions or a sprinkle of smoked paprika for extra flavor depth.
    • Serve alongside burgers, grilled meats, or as a standalone comfort meal.

    Variations

    • Use mushroom gravy instead of brown gravy for a vegetarian option.
    • Try peppercorn gravy for a bolder, steakhouse-style version.
    • Make it “fully loaded” with bacon, caramelized onions, or jalapeños.

    Make-Ahead & Storage

    • Fries are best freshly cooked; avoid storing once assembled as they become soggy.
    • Gravy can be made up to 3 days ahead and reheated gently before serving.
    • Cheese curds keep well refrigerated for 1–2 weeks; bring to room temperature before using.
  • Semmelknödel — Bavarian Bread Dumplings

    Semmelknödel — Bavarian Bread Dumplings

    Classic Bavarian bread dumplings made from day-old rolls soaked in milk, enriched with butter, onion, and parsley. These light, tender dumplings are a beloved side dish across southern Germany — perfect with roast meats, mushroom gravies, or our family favorite, Southern Brown Gravy.


    Ingredients

    • 250 g day-old crusty white bread or Kaiser rolls, cut into 1 cm cubes
    • 200 ml whole milk (warm)
    • 2 medium eggs (or 1 large + 1 medium, see notes)
    • 1 large onion, finely chopped
    • 2 tbsp butter (or clarified butter for authentic flavor)
    • 1 small bunch fresh parsley, finely chopped
    • 50 g diced bacon (optional, for Speckknödel)
    • Salt and freshly ground black pepper, to taste
    • Pinch of grated nutmeg (optional but traditional)
    • Breadcrumbs, as needed (2–4 tbsp)

    Directions

    Prepare Bread Base

    Place bread cubes in a large mixing bowl. Pour warm milk evenly over them and toss gently to coat. Let stand for 10–15 minutes, or until the milk is mostly absorbed and the bread has softened.

    Cook Aromatics

    In a skillet, melt butter over medium heat. Add onion and sauté until translucent, about 3–4 minutes. If using bacon, add it and cook until lightly crisp. Add the chopped parsley and stir briefly to release aroma. Remove from heat and let cool slightly.

    Combine Mixture

    Add the sautéed mixture to the soaked bread. Mix in eggs, salt, pepper, and nutmeg. Stir gently until evenly combined. If the mixture feels too wet or sticky, add breadcrumbs 1 tbsp at a time until it just holds together — it should be soft and slightly tacky, not dry.

    Shape Dumplings

    With lightly wet or oiled hands, form the mixture into balls slightly smaller than a tennis ball (about 6–7 cm). Test one dumpling in simmering water — if it breaks apart, knead a bit more or add a spoonful of breadcrumbs to the mixture.

    Cook

    Bring a large pot of salted water to a gentle simmer (not a rolling boil). Add dumplings carefully and simmer for 15–20 minutes, turning occasionally, until they float to the surface and feel firm when lifted with a slotted spoon.

    Serve

    Drain well and serve hot with mushroom gravy, roast pork, or Southern Brown Gravy. For leftovers, slice cold dumplings and pan-fry them in butter for a crisp Bavarian breakfast (Knödelgröstl).


    Notes

    Preparation

    • Use firm, crusty bread such as baguette, French bread, or Kaiser rolls. Avoid enriched sandwich loaves. Lightly toasting the cubes before soaking enhances flavor and improves texture.
    • If using large eggs, start with one and add the second only if needed for binding.
    • A pinch of nutmeg adds warmth and authenticity.
    • For subtle complexity, stir in a small spoonful of German, ground, or Dijon mustard with the eggs.
    • For even texture, test one dumpling first; adjust with breadcrumbs or milk as needed.

    Serving Suggestions

    • Serve with mushroom gravy, pork roast (Schweinebraten), or Southern Brown Gravy.
    • Slice leftover dumplings and fry in butter for a crispy Bavarian breakfast (Knödelgröstl).

    Variations

    • Speckknödel: Add diced bacon to the mixture for a heartier version.
    • Kräuterknödel: Double the herbs; include chives and a touch of dill.
    • Käseknödel: Add 50–80 g grated Bergkäse or Gruyère for a richer dumpling.

    Make-Ahead & Storage

    • Refrigerate cooked dumplings for up to 3 days in an airtight container.
    • Reheat gently in simmering water or pan-fry in butter before serving.
  • Cilantro Lime Rice

    Cilantro Lime Rice

    Fluffy jasmine rice infused with fresh lime and cilantro—simple, bright, and perfectly balanced to complement tacos, grilled meats, or saucy dishes. A touch of butter enhances richness while the zest and juice keep every bite fresh and aromatic. Click here for the Instant Pot version of this recipe.


    Ingredients

    • 1 cup jasmine rice, rinsed and drained
    • 1 tbsp butter
    • 1½ cups chicken broth (or vegetable broth)
    • 1 clove garlic, minced (optional)
    • Zest of 1 lime
    • 1–1½ tbsp fresh lime juice (to taste)
    • ½ cup cilantro leaves, finely chopped
    • ⅛ tsp sugar (to round acidity)
    • Salt to taste

    Directions

    Toast the Rice

    In a saucepan or rice cooker insert, melt butter over medium heat. Add rice (and garlic, if using) and sauté 2–3 minutes until grains appear glossy and lightly golden.

    Cook the Rice

    Add broth and a generous pinch of salt. Stir once, bring to a simmer, then cover and reduce heat to low. Cook for 15 minutes, then remove from heat and let stand, covered, for 10 minutes to finish steaming.

    Finish with Lime and Cilantro

    In a small pan, warm lime zest with a few drops of butter until aromatic (optional but enhances flavor).

    Fluff rice gently with a fork and fold in lime zest, lime juice, cilantro, and sugar. Taste and adjust salt or lime as desired.

    Serve

    Serve warm as a side or base for tacos, grilled meats, or saucy dishes where a bright, citrusy accent balances richness.


    Notes

    Preparation

    • Rinse jasmine rice until water runs mostly clear to remove excess starch and keep grains fluffy.
    • Let cooked rice rest 10 minutes before fluffing to allow steam to redistribute for perfect texture.
    • Warming lime zest in butter releases aromatic oils and coats grains more evenly.
    • Adjust lime and salt balance at the end—rice should taste bright but not sharp.

    Serving Suggestions

    • Pairs beautifully with tacos, fajitas, or grilled seafood.
    • Excellent base for burrito bowls or enchilada platters.
    • Top with extra cilantro and a sprinkle of lime zest for presentation.

    Variations

    • Subtle Coconut Version: Replace ¼ cup of broth with ¼ cup unsweetened coconut milk (1¼ cups broth + ¼ cup coconut milk). Adds gentle creaminess and a faint coconut aroma while maintaining lime-cilantro brightness.
    • Coconut-Forward Version: Replace ½ cup of broth with ½ cup coconut milk (1 cup broth + ½ cup coconut milk). Creates a richer, tropical flavor—use 2 tbsp lime juice and season more assertively with salt.
    • Use coconut versions for fusion dishes like Korean Pulled-Pork Tacos, jerk chicken, or grilled shrimp where a creamy contrast enhances spice and smoke.

    Make-Ahead & Storage

    • Cooked rice can be held warm for up to 30 minutes before adding lime and cilantro.
    • Refrigerate leftovers in an airtight container up to 3 days; reheat gently with a drizzle of broth or water to restore moisture.
    • Fresh cilantro and lime juice should always be added just before serving for best color and flavor.
  • Tom Kha–Style Soup with Meatballs & Rice

    Tom Kha–Style Soup with Meatballs & Rice

    This comforting Thai-style soup bridges the gap between Tom Kha Gai and Khao Tom. Like Tom Kha Gai, it features fragrant aromatics—lemongrass, galangal, and kaffir lime leaves—for the signature balance of tangy, savory, and lightly sweet flavors. But instead of a coconut-rich broth, it leans toward the clear, soothing style of Khao Tom, with tender pork (or pork-and-chicken) meatballs and a small scoop of rice added just before serving. The result is a light yet aromatic soup that feels familiar and refreshingly different.


    Ingredients

    Meatballs:

    • ¾ lb (340 g) ground pork
    • ¼ lb (115 g) ground chicken (or use all pork)
    • 1 tbsp chili-garlic sauce (garlic sambal oelek)
    • 1 tsp fresh ginger or galangal, finely grated
    • 1 tbsp fish sauce
    • 1 tsp white pepper (or black pepper)
    • ½ tsp table salt
    • 1 tsp cornstarch (optional — improves springy texture)
    • 1 tbsp finely chopped cilantro stems or scallion whites (optional)

    Soup Base:

    • 1 tbsp neutral oil (vegetable, canola, or peanut; or lard)
    • 3 large shallots, halved and thinly sliced
    • 2 stalks lemongrass, white parts only, bruised and halved
    • 3 slices fresh galangal (or 1½ tsp thin-sliced ginger)
    • 1 tbsp fresh ginger, grated
    • 3 kaffir lime leaves, torn in half
    • 3–4 cloves garlic, smashed
    • 1–2 small Thai chiles, lightly crushed (optional)
    • 6 cups (1.4 L) chicken stock or light broth
    • 1 tbsp fish sauce (to taste)
    • 1 tsp palm sugar or light brown sugar
    • 1–2 tsp soy sauce (optional, for depth)
    • ½ cup fresh cilantro, chopped (added at the end)
    • juice of 1 lime (1½–2 tbsp, added at the end)
    • optional: ¼–½ cup coconut milk, for a lightly creamy finish
    • 1 cup cooked jasmine rice, warmed (added to bowl before serving)

    Garnishes:

    • 1–2 tsp coconut cream from the top of an undisturbed can (optional)
    • fresh cilantro leaves
    • thinly sliced scallions
    • fried shallots or garlic
    • soft-, medium-, or hard-boiled eggs, halved
    • lime wedges
    • thinly sliced red chiles or chile oil (optional)

    Directions

    Prepare the Meatballs

    In a medium bowl, combine pork, chicken, chili-garlic sauce, ginger, fish sauce, white pepper, salt, cornstarch (if using), and cilantro stems or scallion whites. Mix gently until combined but not sticky. Roll into small ¾–1 inch balls.

    Build the Aromatic Broth

    Heat oil in a large saucepan over medium. Add shallots and sauté until golden. Add lemongrass, galangal, kaffir lime leaves, garlic, and chiles. Stir until fragrant, then add chicken broth. Simmer 15 minutes to infuse.

    Cook the Meatballs

    Remove lemongrass. Add meatballs and simmer 5–6 minutes until cooked through. Skim any foam.

    Season & Finish

    Add fish sauce, palm sugar, soy sauce, and cilantro. Adjust seasoning. Remove from heat and stir in lime juice.

    Assemble the Bowls

    Place ¼–½ cup warm jasmine rice in each bowl. Ladle soup and meatballs over top. Garnish with coconut cream, cilantro, scallions, fried shallots, sliced chiles, and lime.


    Notes

    Preparation

    • Sautéing shallots first adds sweetness and depth.
    • Use both galangal and kaffir lime leaves if possible for true Tom Kha flavor.
    • For a creamier finish, stir in coconut milk at the end.
    • For porridge-like consistency, simmer a small amount of rice in the broth before serving.

    Serving Suggestions

    • Top generously with fried shallots or garlic.
    • Add soft- or medium-boiled eggs for a heartier meal.
    • Serve with lime wedges for brightness.

    Make-Ahead & Storage

    • Meatballs can be formed 24 hours ahead and refrigerated.
    • Broth can be made ahead and reheated, adding herbs and lime at the end.
    • Stores 2–3 days; keep rice separate to avoid mushiness.
  • Greek Salad Dressing with Feta & Olives

    Greek Salad Dressing with Feta & Olives

    This Greek-inspired salad dressing layers bright red wine vinegar and lemon juice with briny feta, savory anchovy, and a whisper of olives for a bold, restaurant-style flavor. It’s thick enough to cling to crisp lettuce and chopped vegetables, yet pourable enough for drizzling over Greek salads, grain bowls, and grilled chicken.


    Ingredients

    • ¼ cup red wine vinegar
    • ¼ cup lemon juice
    • ¼ cup water
    • 1 tbsp sugar
    • ½ tbsp dried oregano
    • 1 tsp garlic powder
    • 1 tsp onion powder
    • 1 tsp table salt
    • ¼ tsp xanthan gum
    • 2 anchovy fillets (or ½ tbsp fish sauce)
    • ⅓ cup extra virgin olive oil
    • ⅓ cup avocado oil (or canola)
    • ¼ cup feta, crumbled
    • 2 tbsp black or Kalamata olives, finely chopped (optional)
    • Black pepper, to taste

    Directions

    Blend the Base:

    In a food processor or blender, combine the red wine vinegar, lemon juice, water, sugar, dried oregano, garlic powder, onion powder, salt, xanthan gum, and anchovy fillets (or fish sauce). Blend until smooth and the seasonings are fully combined.

    Emulsify the Oils:

    With the food processor or blender running on low speed, slowly drizzle in the olive oil and avocado oil in a thin, steady stream. Continue blending until the dressing is fully emulsified and slightly thickened.

    Add Feta and Olives:

    Add the crumbled feta and, if using, the finely chopped olives. Pulse just until the feta and olives are broken up and evenly distributed for a slightly chunky, textured dressing.

    For a creamier, smoother dressing, blend a bit longer until the feta is mostly incorporated into the emulsion.

    Season and Chill:

    Taste and adjust the seasoning, adding more salt if needed and black pepper to taste.

    Transfer the dressing to a jar or bottle and refrigerate for at least 30 minutes before serving to allow the flavors to meld and the dressing to thicken slightly.


    Notes

    Preparation

    • Blend the base long enough to fully dissolve the sugar and hydrate the dried oregano before adding the oils.
    • Drizzle the oils in slowly for the most stable emulsion, especially if not using xanthan gum.
    • Use good-quality, briny feta for the best flavor and a creamy, rich finish.
    • Finely chop the olives so they distribute evenly without creating large salty bites.
    • Shake or stir well before each use, especially if the dressing has been refrigerated overnight.

    Serving Suggestions

    • Drizzle over classic Greek salads with romaine, cucumbers, tomatoes, red onion, olives, and extra feta.
    • Toss with chopped salads, grain bowls, or pasta salads for a bright, tangy kick.
    • Use as a quick marinade for chicken, pork, or shrimp before grilling or roasting.
    • Spoon over sliced tomatoes, cucumbers, and red onions for a simple side dish.

    Variations

    • Extra Creamy: Blend the feta fully into the dressing and add an extra 2 tbsp feta for a thicker, more luxurious texture.
    • Olive-Forward: Increase the chopped olives to 3–4 tbsp and leave the feta slightly chunky for more bursts of briny flavor.
    • Milder Anchovy: Start with 1 anchovy fillet or 1 tsp fish sauce, then adjust to taste if you prefer a subtler umami note.
    • No Xanthan Gum: Omit the xanthan gum for a more traditional vinaigrette-style dressing—just shake well before serving as it will separate over time.

    Make-Ahead & Storage

    • Refrigeration: Store in an airtight jar or bottle in the refrigerator.
    • Storage Time: For best quality and food safety, use within 4–5 days due to the feta and anchovy/fish sauce.
    • Before Serving: The dressing will thicken when chilled; let it sit at room temperature for 10–15 minutes and shake or stir well before using.
    • Separation: Some separation is normal. If not using xanthan gum, shake vigorously to re-emulsify before each use.
  • Mushroom Bisque

    Mushroom Bisque

    A deeply savory, velvety mushroom bisque built on layers of browned mushrooms, aromatic garlic, gentle herbs, and a touch of sherry. A slow simmer develops richness without heaviness, while soy sauce adds depth and umami. Finished with a swirl of crema, it is earthy, comforting, and elegant—perfect for cool evenings or a refined first course.


    Ingredients

      Soup Base

    • 4 tbsp (55 g) unsalted butter, divided
    • 1 medium onion, finely diced
    • 2 lbs (900 g) mixed fresh mushrooms, sliced (see Notes)
    • 1 tsp table salt, plus more to taste
    • ¼ tsp freshly ground black pepper
    • 2–3 cloves garlic, finely chopped
    • 2 tbsp dry sherry (or more to taste)
    • 4 cups (950 ml) chicken stock, divided (or vegetable stock)
    • 3 tbsp (25 g) all-purpose flour
    • 1 cup (240 ml) half and half or light cream
    • 1 large bay leaf
    • ⅛ tsp dried thyme (or ¼ tsp fresh)
    • 1 tsp soy sauce (increased from ½ tsp for deeper umami)
    • ½–1 tsp sambal oelek (optional, for gentle heat)
    • Optional Enhancements

    • ½ oz dried porcini mushrooms, rehydrated and chopped, with soaking liquid strained
    • To Serve

    • Crema for drizzling (plain or flavored—see Notes)
    • Thyme sprigs, sautéed mushroom slices, or chives for garnish

    Directions

    Sauté the Aromatics and Mushrooms

    In a large saucepan or Dutch oven, melt 2 tbsp butter over medium heat. Add the onion and cook 3–4 minutes until softened. Add mushrooms, salt, and pepper. Cook 10–12 minutes, stirring occasionally, until mushrooms release their liquid and begin to brown. Add garlic and cook 1 minute until fragrant.

    Deglaze and Simmer

    Add sherry and cook 1 minute, scraping up browned bits. Add 3 cups chicken stock, bay leaf, thyme, soy sauce, and optional porcini mushrooms with their strained soaking liquid. Bring to a gentle simmer, cover, and cook 20 minutes to deepen flavor. Remove bay leaf.

    Prepare the Roux Base

    In a separate saucepan, melt remaining 2 tbsp butter over medium heat. Whisk in flour and cook 2–3 minutes until lightly golden. Slowly whisk in remaining 1 cup chicken stock, then the half and half, cooking until smooth and slightly thickened.

    Combine and Purée

    Add the mushroom mixture to the roux base. Purée with an immersion blender until smooth, or blend in batches. For a rustic texture, reserve 1 cup mushrooms before blending and stir them in afterward.

    Season and Finish

    Return soup to low heat. Add sambal oelek if using. Taste and adjust with salt, pepper, sherry, or soy sauce as desired. Simmer 5 minutes to meld flavors.

    Serve

    Ladle into bowls and finish with a light drizzle of crema. Garnish with sautéed mushrooms, thyme, or chives.


    Notes

    Preparation

    • Browning mushrooms before adding liquid deepens flavor significantly.
    • Use a mix of mushrooms for depth—cremini, shiitake, oyster, or button.
    • Porcini add a noticeable boost of umami; highly recommended.
    • Blend smooth for a classic bisque or leave some mushroom pieces for texture.
    • Simmering longer (rather than adding more flour) develops richness naturally.

    Serving Suggestions

    • Drizzle with crema to balance richness and add gentle tang.
    • For enhanced crema, whisk in a splash of sherry, white pepper, thyme oil, or a pinch of soy sauce.
    • Serve with crusty bread, garlic croutons, or a simple green salad.
    • Add a few sautéed mushrooms or a swirl of mushroom oil for presentation.

    Variations

    • Vegetarian: Use vegetable stock and a splash of soy sauce for depth.
    • Rustic Mushroom Soup: Blend only half the soup and keep the rest chunky.
    • Truffle Version: Finish with a few drops of truffle oil.

    Make-Ahead & Storage

    • Refrigerate up to 3 days; flavors deepen overnight.
    • Freeze without dairy addition; add half and half after reheating for best texture.
    • Rewarm gently over low heat to avoid separation.
  • Braised Fennel

    Braised Fennel

    This elegant side transforms fennel’s natural sweetness into something truly special. Lightly caramelized and gently braised with shallots, garlic, and white wine, the tender fennel is finished with butter, lemon zest, and fresh fennel fronds for a glossy, aromatic dish worthy of any restaurant table.


    Ingredients

    • 2–3 fennel bulbs, trimmed and quartered lengthwise (cores intact)
    • 2 tbsp olive oil or butter
    • 1 shallot, thinly sliced
    • 1 clove garlic, thinly sliced
    • ¼ cup dry white wine or 1 tbsp lemon juice
    • 1 cup chicken stock
    • ½ tsp honey (optional)
    • 1 tbsp butter (for finishing)
    • salt and freshly ground black pepper, to taste
    • zest of ½ lemon, for garnish
    • chopped fennel fronds or parsley, for garnish

    Directions

    Brown the Fennel

    In a large sauté pan, heat olive oil or butter over medium-high heat. Add fennel quarters cut-side down and cook until deeply golden on both cut sides, about 3–4 minutes per side. Remove and set aside.

    Build the Aromatic Base

    Add shallot and garlic to the pan; sauté 30 seconds, just until fragrant. Deglaze with white wine (or lemon juice), scraping up any browned bits.

    Braise

    Add chicken stock and honey, if using. Return fennel to the pan, cut-side up. Bring to a simmer, reduce heat to low, and cover. Braise gently for 15–20 minutes, turning once, until fennel is tender but still holds its shape.

    Glaze & Finish

    Remove the lid and simmer uncovered for 5–7 minutes more, allowing the liquid to reduce into a glossy glaze. Stir in butter off heat to finish the sauce and season with salt and pepper.

    Serve

    Transfer fennel to a serving dish and drizzle with the reduced pan juices. Garnish with lemon zest and chopped fennel fronds or parsley before serving.


    Notes

    Preparation

    • Proper browning is essential—golden edges enhance both flavor and appearance.
    • Use vegetable stock for a vegetarian version.
    • Finishing with butter gives the glaze a rich, silky texture.

    Serving Suggestions

    • Serve as a side with roasted chicken, fish, or creamy polenta.
    • For a richer presentation, finish with freshly grated Parmesan or a drizzle of aged balsamic.
    • Add a sprinkle of toasted breadcrumbs or flaky salt for texture.

    Make-Ahead & Storage

    • Can be braised up to 1 day ahead; cool and refrigerate in its cooking liquid.
    • Reheat gently over low heat, spooning juices over the fennel to re-glaze.
    • Best served warm, but can also be enjoyed at room temperature as part of an antipasto spread.
  • Refried Beans

    Refried Beans

    Rich, creamy, and deeply savory, our family’s recipe for refried beans captures the heart of traditional Mexican cooking with a fraction of the usual time. Each bite balances earthy depth and a hint of sweetness from slow-simmered pinto beans. Whether tucked inside burritos, layered beside Mexican rice, or served simply with warm tortillas, they bring comfort and authenticity to any meal—and once you’ve made them this way, you may never reach for canned beans again.


    Ingredients

      Beans

    • 2 cups dry pinto beans, rinsed and drained
    • 1 onion, diced (or 1 tbsp onion powder)
    • 1 tsp table salt
    • ½ tsp ground cumin
    • 5 cups chicken broth or water
    • Fat (Choose One or a Blend)

    • 2–3 tbsp avocado oil, lard, butter, or a combination
    • Optional Flavor Boosters

    • ¼ cup Mexican Tomato Sauce (recommended for deeper flavor)
    • OR ½ tsp soy sauce or Maggi (for umami depth without tomato flavor)
    • Optional Add-Ins

    • ⅛ tsp Mexican oregano
    • 1 tsp garlic powder (add after cooking)
    • 1 sachet ham bouillon or sazón (optional, for savory richness)

    Directions

    Sauté Aromatics (Optional but Recommended)

    Using the Sauté function, heat 1 tbsp of the fat in the Instant Pot. Add diced onion and cook 2–3 minutes until translucent and fragrant. If using onion powder, add during the Mash step.

    Deglaze with a splash of broth if any browning occurs.

    Cook the Beans

    Add pinto beans, broth, cumin, and salt to the pot. (If using butter, reserve it for after cooking.) If using Mexican Tomato Sauce for integrated flavor, stir it in now—or stir it in later during the refry step as a finisher.

    Set to Pressure Cook – High for 60 minutes. When complete, allow natural release for 10–15 minutes, then release remaining pressure manually.

    Mash or Refry

    Drain beans lightly, reserving at least ½ cup of the cooking liquid. For classic mashed texture, return beans to the pot, add fat, and mash to desired smoothness using a potato masher, hand mixer, or immersion blender. Add liquid as needed for consistency.

    For authentic refried texture, heat remaining fat in a large skillet over medium-high heat. Add beans and mash directly in the pan, stirring occasionally until thickened and slightly toasty (about 5 minutes). Stir in reserved broth as needed for a silky, spreadable consistency. If using Mexican Tomato Sauce as a finisher, add 2–3 tbsp during this stage and cook until slightly reduced and glossy.

    Rest and Serve

    For best flavor, refrigerate overnight and reheat before serving. The beans thicken slightly as they cool, deepening both flavor and texture.


    Notes

    Preparation

    • For richer flavor, add ¼ cup Mexican Tomato Sauce or ½ tsp soy sauce/Maggi during cooking or mashing (omit if serving entrées with green sauce bases).
    • Mashing the beans in hot fat develops a nutty flavor and glossy, restaurant-style finish.
    • Reserve some cooking liquid and add as needed to reach your preferred consistency.
    • Beans improve overnight as flavors meld and starches set.

    Serving Suggestions

    Make-Ahead & Storage

    • Refrigerate up to 5 days in an airtight container.
    • Freeze up to 3 months; thaw overnight in the refrigerator before reheating.
    • Reheat gently on the stovetop or in the microwave, adding a splash of broth or water to loosen if thickened.