Bags of Spices

Favorite Recipes

Ice Cream, Gelato, & Sorbet

Small-batch frozen desserts — custards, gelatos, swirls, ribbons, sorbets, and nostalgic favorites.

  • Dark Chocolate Buttermilk Ice Cream

    Dark Chocolate Buttermilk Ice Cream

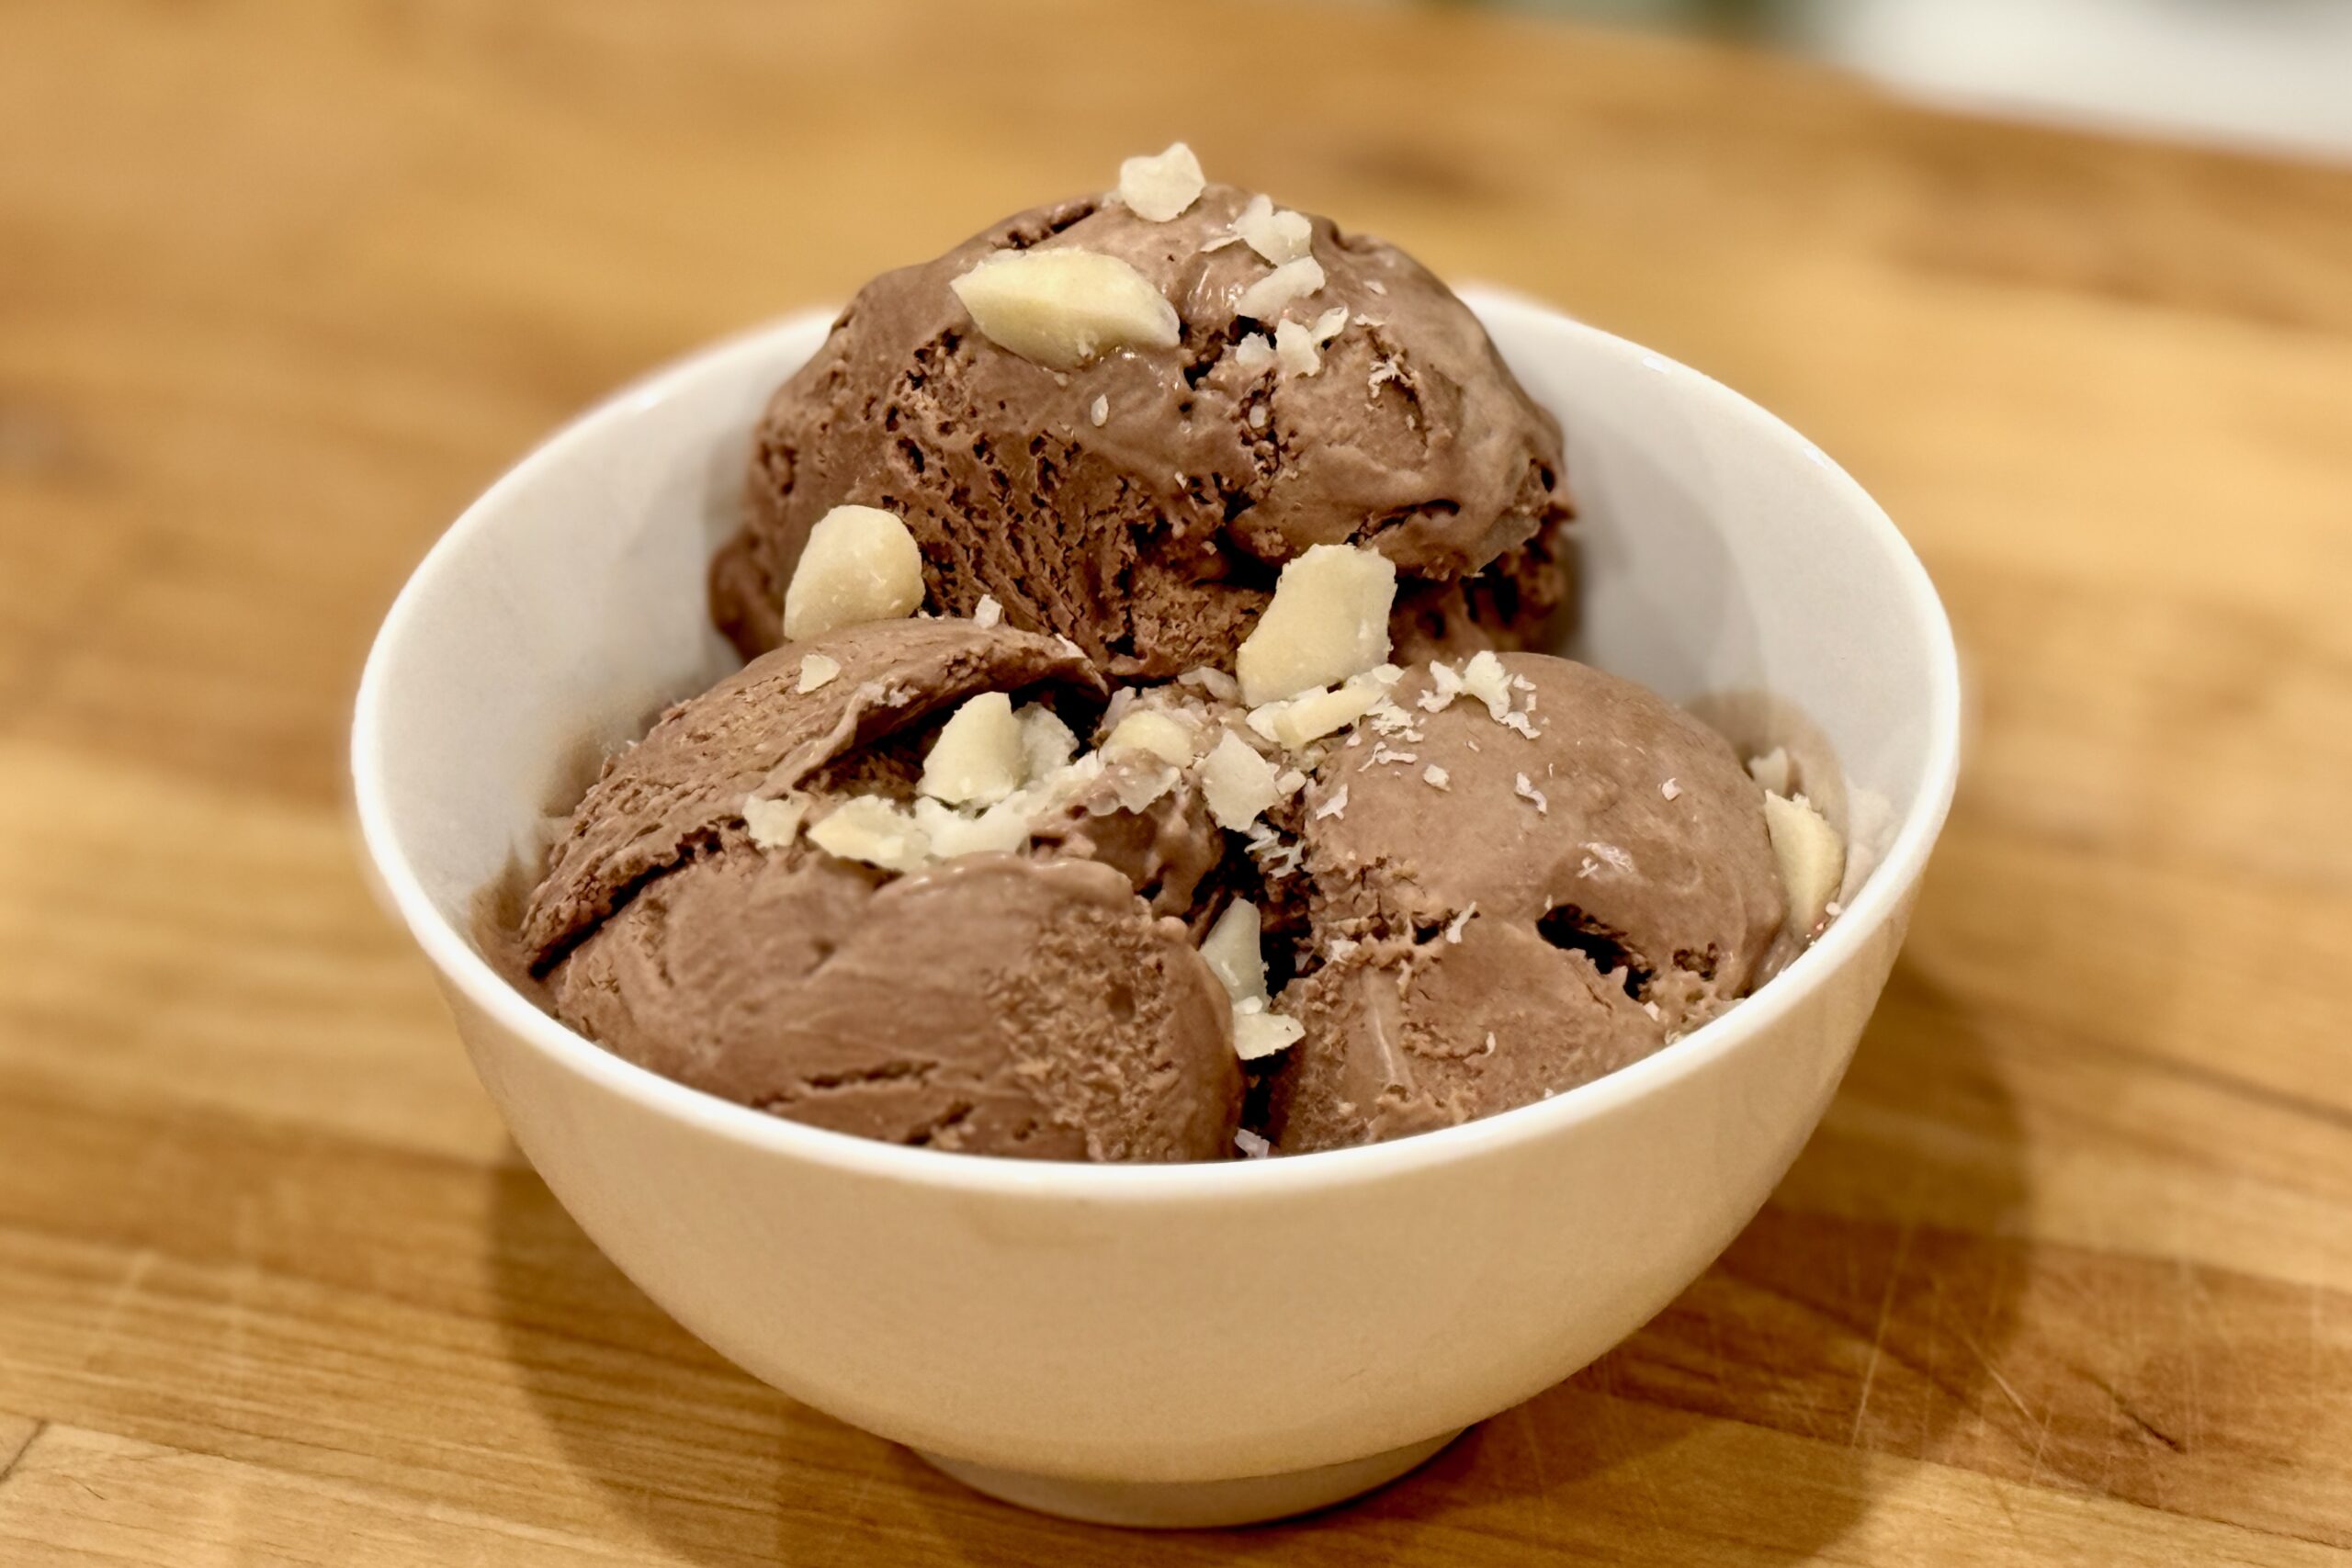
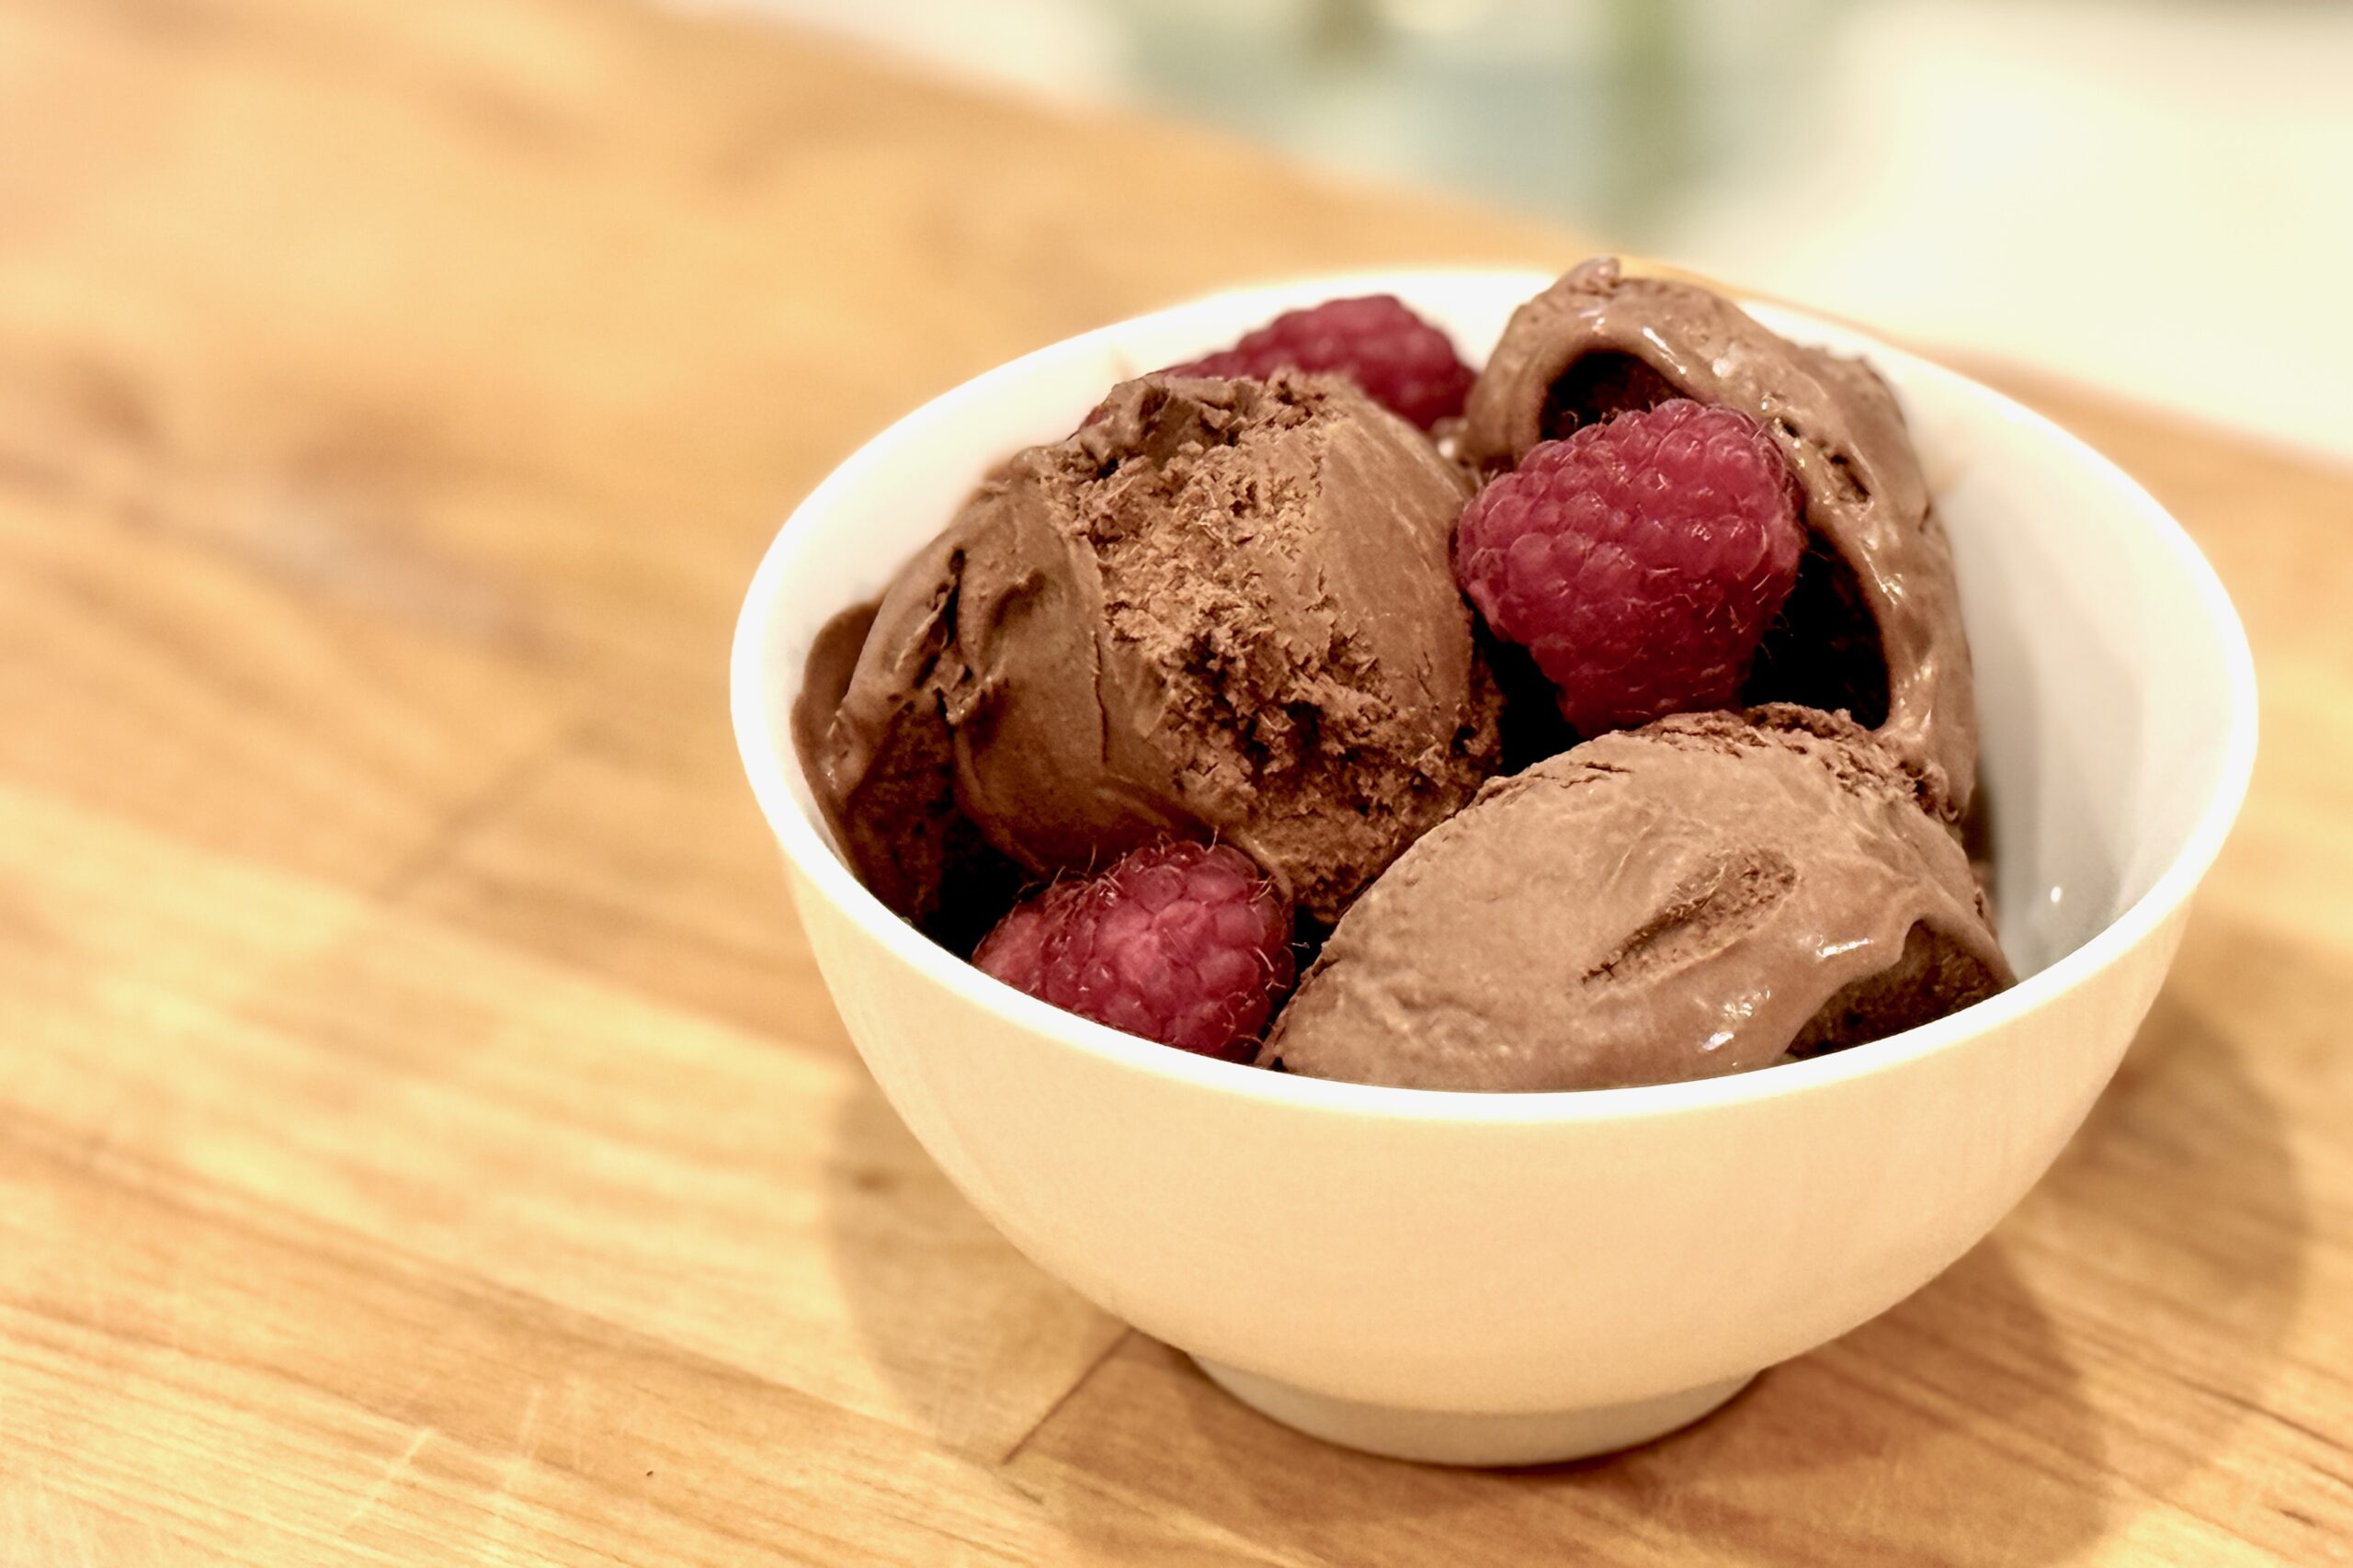
    Rich, silky, and deeply flavored, this dark chocolate ice cream balances Dutch-process cocoa and melted dark chocolate with the subtle tang of buttermilk for a clean, sophisticated finish. Smooth, scoopable, and layered with complex cocoa notes, it evokes the character of fine European chocolate.


    Ingredients

    Chocolate Custard Base:

    • 1½ cups heavy cream
    • 1 cup whole milk
    • ¾ cup sugar, divided
    • ½ cup Dutch-process cocoa powder
    • 4 oz dark chocolate (60–70%), finely chopped
    • 4 egg yolks
    • ½ tsp instant espresso powder (optional, for depth)
    • ½ tsp vanilla extract
    • pinch table salt
    • ⅛ tsp xanthan gum (stabilizer)

    After Cooking:

    • ¾ cup cold buttermilk
    • 1 tbsp light corn syrup (optional, for slightly softer texture)

    Directions

    Bloom the Cocoa

    In a medium saucepan, whisk cocoa powder with ½ cup of the milk and ¼ cup sugar to form a smooth paste. Add remaining milk, heavy cream, espresso powder (if using), and salt. Heat over medium until steaming and sugar is dissolved.

    Melt the Chocolate

    Remove from heat and whisk in the chopped dark chocolate until melted and glossy. Return briefly to low heat only if needed to melt fully.

    Make the Custard

    In a separate bowl, whisk egg yolks with remaining ½ cup sugar until pale and thick. Temper slowly with ½ cup warm chocolate mixture, then return mixture to the saucepan.

    Cook gently over low heat, stirring constantly, until custard coats the back of a spoon (170–175°F / 77–80°C). Do not boil. Remove from heat and stir in vanilla and optional corn syrup.

    Add the Xanthan Gum

    While custard is warm (below 160°F / 70°C), sprinkle xanthan gum evenly over the surface and immediately blend with an immersion blender or whisk vigorously until fully dispersed. Strain through a fine mesh sieve.

    Incorporate the Buttermilk

    Cool mixture to lukewarm (below 110°F / 43°C). Whisk in buttermilk to preserve fresh tang and prevent curdling. Chill thoroughly, preferably overnight.

    Churn & Freeze

    Churn in an ice cream maker according to manufacturer’s instructions. Transfer to a container and freeze until firm, about 4 hours.


    Notes

    Preparation

    • Xanthan gum gives smoother body and reduces iciness—use sparingly.
    • If using corn syrup, reduce total sugar to ⅔ cup to maintain balance.
    • Espresso powder intensifies chocolate flavor without adding coffee notes.
    • For extra richness, replace ½ cup of the whole milk with half-and-half.
    • Using Natural Cocoa Powder: Add ⅛ tsp baking soda during the “Bloom the Cocoa” step to reduce acidity and deepen color. Increase chocolate to 4½ oz and reduce buttermilk to ⅔ cup.

    Serving Suggestions

    • Top with dark chocolate curls or shavings.
    • Pair with espresso caramel, berries, or almond biscotti.
    • Finish with a pinch of flaky sea salt for contrast.

    Make-Ahead & Storage

    • Refrigerate the custard base up to 2 days before churning.
    • Store churned ice cream in an airtight container up to 1 week.
    • Soften 5–10 minutes at room temperature before serving.
  • Raspberry Buttermilk Ice Cream

    Raspberry Buttermilk Ice Cream

    This raspberry buttermilk ice cream is creamy, tangy, and fruit-forward. The rich custard base is tempered carefully to avoid any eggy flavor, while the buttermilk adds refreshing tartness that enhances the bright, fresh taste of raspberries. Inspired by a recipe shared by our friend Holly (her version here), this variation delivers a silky, balanced ice cream with just the right mix of sweetness and tang.


    Ingredients

    Custard Base:

    • 3 large egg yolks
    • ¾ cup sugar
    • 1 cup milk
    • 1 cup heavy cream
    • 1 cup cold buttermilk
    • ½ tsp vanilla extract

    Raspberry Purée:

    • 1½ cups fresh or frozen raspberries
    • 2 tbsp sugar (adjust to taste)
    • ½ tsp lemon juice (optional, brightens flavor)

    Directions

    Prepare the Raspberry Purée

    In a small saucepan, combine raspberries, sugar, and lemon juice. Cook over medium heat, stirring occasionally, until the berries break down and the mixture thickens slightly (about 5–7 minutes). Strain through a fine-mesh sieve to remove seeds. Cool completely.

    Prepare the Custard Base

    In a medium saucepan, heat the milk and sugar over medium heat until steaming (do not boil). In a separate bowl, whisk egg yolks until smooth. Slowly pour about ½ cup of the hot milk into the yolks while whisking constantly to temper. Return the mixture to the saucepan.

    Cook the Custard

    Cook over medium-low heat, stirring constantly, until the mixture thickens slightly and coats the back of a spoon (170–175°F / 77–79°C). Do not boil. Immediately strain the custard through a fine-mesh sieve into a bowl set over an ice bath. Stir until cooled to room temperature.

    Chill & Combine

    Once completely cool, stir in the heavy cream, buttermilk, vanilla, and raspberry purée. Refrigerate at least 4 hours or overnight.

    Freeze

    Churn in an ice cream maker according to the manufacturer’s instructions. Transfer to a freezer-safe container and freeze until firm, about 4–6 hours.


    Notes

    Preparation

    • Keep the custard below 175°F / 79°C to avoid eggy flavor and preserve raspberry aroma.
    • Strain both the purée and the custard for a silky, seed-free texture.
    • Adjust sugar based on the sweetness of your raspberries.

    Serving Suggestions

    • Serve with fresh raspberries or a raspberry coulis.
    • Top with crushed shortbread or vanilla wafers for crunch.
    • Pairs beautifully with lemon bars or angel food cake.

    Make-Ahead & Storage

    • Raspberry purée can be made 2–3 days ahead and refrigerated.
    • Custard base can be refrigerated up to 2 days before churning.
    • Store churned ice cream up to 1 week in an airtight container.
    • Let soften 5–10 minutes before serving.
  • Speculoos Ribbon Ice Cream

    Speculoos Ribbon Ice Cream

    I first fell in love with speculaas while living in The Netherlands—those crisp, caramelized cookies scented with cinnamon, nutmeg, and clove were unlike anything I’d tasted before. Though the rest of our family has only visited, our Dutch and German ancestry, and our holiday traditions, have long reflected this heritage. Each Christmas, we bake homemade speculaas as part of our celebration, their aroma filling the house with warm spice and nostalgia. This ice cream captures that same spirit in a creamy, elegant dessert: a smooth vanilla–buttermilk base swirled with ribbons of cookie butter and flecked with crushed speculaas for texture and depth.


    Ingredients

      Ice Cream Base

    • 2 cups heavy cream
    • ½ cup whole milk
    • ½ cup buttermilk (added after cooking)
    • ½ cup sugar
    • 5 egg yolks
    • ½ tsp vanilla extract
    • pinch table salt
    • ⅛ tsp cinnamon (optional)
    • pinch nutmeg (optional)
    • Mix-Ins

    • ⅔ cup Speculoos or Biscoff cookie butter
    • ½ cup crushed speculaas or Biscoff cookies (for layering and garnish)

    Directions

    Make the Custard Base

    In a saucepan, warm the milk, cream, sugar, salt, and optional spices over medium heat until steaming and the sugar dissolves.


    Temper the Yolks

    In a medium bowl, whisk the egg yolks until thick and pale. Slowly temper with ½ cup of the hot milk mixture, whisking constantly, then return all to the saucepan.


    Cook the Custard

    Cook gently over low heat, stirring constantly, until the custard coats the back of a spoon (170–175°F / 77–80°C). Do not boil.


    Finish & Chill

    Strain through a fine mesh sieve into a clean bowl. Stir in the vanilla. Allow to cool slightly, then stir in the buttermilk. Chill thoroughly, preferably overnight.


    Churn & Layer

    Churn the chilled base in an ice cream maker according to the manufacturer’s directions.

    Warm the cookie butter just until pourable. As you transfer the churned ice cream to its container, alternate layers of ice cream, drizzled cookie butter, and crushed cookies. Swirl gently with a butter knife without overmixing. Freeze until firm.


    Notes

    Preparation

    • The buttermilk brightens the flavor and balances the sweetness of the cookie butter.
    • Use whole milk instead of buttermilk for a richer, sweeter ice cream.
    • Add a pinch of cinnamon, clove, or ginger for extra “speculaas” aroma.
    • Reserve some crushed cookies for topping—they soften over time in the ice cream.

    Serving Suggestions

    • Top with freshly crushed speculaas for added crunch.
    • Serve with warm caramel sauce or cinnamon whipped cream.
    • Excellent alongside apple pie, poached pears, or Dutch-style oliebollen.

    Variations

    • Cookie Butter Crunch: Toss crushed cookies with a little melted butter and freeze before layering.
    • Swirl Boost: Melt an additional ¼ cup cookie butter and drizzle through the top third before freezing.
    • Speculoos Latte: Add 1 tsp espresso powder to the warm custard base.

    Make-Ahead & Storage

    • Refrigerate the unchurned custard for up to 2 days.
    • Store churned ice cream airtight for up to 1 week.
    • Let soften at room temperature 5–10 minutes before serving.
  • Mango Gelato

    Mango Gelato

    This bright and silky gelato captures the pure flavor of ripe mangoes in classic Italian style—smooth, dense, and refreshingly balanced. The natural sweetness of the fruit shines through a light dairy base, while a touch of vanilla or spiced rum adds warmth and depth. Each scoop feels like a taste of summer, golden, fragrant, and intensely mango-forward.


    Ingredients

      Base:

    • 2 cups ripe mango purée (strained to remove fibers; from about 3–4 large mangoes or 16 oz frozen mango)
    • 1 cup whole milk
    • ¼ cup heavy cream
    • ⅔ cup sugar
    • ⅛ tsp xanthan gum (stabilizer)
    • 1 tbsp fresh lemon juice
    • pinch table salt
    • ½ tsp vanilla extract (optional; rounds flavor)
    • 1 tbsp spiced rum (optional; softens texture and adds warmth)

    Directions

    Prepare the Mango Purée

    Peel and cube ripe mangoes, or use thawed frozen mango chunks. Purée until completely smooth in a blender or food processor, then strain through a fine mesh sieve to remove fibers. Measure 2 cups purée, cover, and refrigerate.

    Make the Dairy Base

    In a small saucepan, whisk together milk, cream, sugar, and salt. Heat gently over medium heat until steaming and the sugar is fully dissolved. Remove from heat and cool slightly, about 10–15 minutes.

    Combine & Stabilize

    In a blender, combine the cooled milk mixture, mango purée, lemon juice, vanilla, and rum (if using). Sprinkle xanthan gum evenly over the surface and immediately blend on high for 30–45 seconds until emulsified and slightly thickened.

    Chill the Base

    Transfer to a covered container and refrigerate until very cold, at least 4 hours or overnight for best texture.

    Churn & Freeze

    Churn the chilled base in an ice cream maker according to manufacturer instructions until thick and velvety. Transfer to a container and freeze 3–4 hours to firm fully.


    Notes

    Preparation

    • Xanthan gum improves creaminess and prevents iciness; a little goes a long way.
    • Lemon juice brightens the mango flavor and balances natural sweetness.
    • If mangoes are less sweet, increase sugar slightly (up to ¾ cup total).
    • For a richer variation, substitute coconut milk for the whole milk.

    Serving Suggestions

    • Serve with diced fresh mango or mango coulis for extra fruit intensity.
    • Top with toasted coconut flakes or macadamia nuts for added texture.
    • Pair with lime cookies or shortbread for contrast.

    Make-Ahead & Storage

    • Refrigerate the blended base for up to 2 days before churning.
    • Store churned gelato in an airtight container for up to 1 week.
    • Allow to soften at room temperature for 5–10 minutes before scooping.
  • Chocolate Hazelnut Ice Cream

    Chocolate Hazelnut Ice Cream

    Creamy and decadent, this chocolate hazelnut ice cream blends the richness of dark chocolate and toasted hazelnuts with the smooth sweetness of Nutella. A silky custard base creates luxurious texture, while cocoa deepens the chocolate flavor and balances the sweetness beautifully. It’s a family favorite—one that every member agrees on without debate—its velvety texture and nutty aroma reminding us of fine Belgian chocolates. Whether shared after Sunday dinner or enjoyed quietly by the fire, this ice cream captures both indulgence and comfort in every scoop.


    Ingredients

    Chocolate Custard Base:

    • 2 cups heavy cream
    • 1 cup whole milk
    • ½ cup sugar, divided
    • 5 egg yolks
    • ½ tsp vanilla extract
    • ½ cup Nutella (or other chocolate-hazelnut spread)
    • 2 tbsp unsweetened cocoa powder
    • pinch table salt
    • ½ cup toasted hazelnuts, coarsely chopped (for folding in or topping; optional)

    Directions

    Warm the Chocolate Base

    In a saucepan, whisk together the milk, cream, ¼ cup sugar, cocoa powder, and salt. Warm over medium heat until steaming and the sugar dissolves.

    Make the Custard

    In a medium bowl, whisk the egg yolks with the remaining ¼ cup sugar until pale and thick. Slowly temper with ½ cup of the warm chocolate mixture while whisking constantly, then return everything to the saucepan.

    Cook over low heat, stirring constantly, until the custard coats the back of a spoon (170–175°F / 77–80°C). Do not boil.

    Finish & Chill

    Strain through a fine mesh sieve into a clean bowl. Whisk in vanilla and Nutella until smooth and fully blended. Chill thoroughly, preferably overnight.

    Churn & Add Hazelnuts

    Churn the chilled base in an ice cream maker according to manufacturer’s instructions. Fold in toasted hazelnuts or use them as a topping when serving.


    Notes

    Preparation

    • For richer chocolate flavor, replace ¼ cup of the Nutella with 2 oz melted dark chocolate (60–70% cacao).
    • For a smoother texture, add ⅛ tsp xanthan gum to the warm base before chilling.
    • Straining ensures a velvety custard and removes any curdled bits.

    Serving Suggestions

    • Top with toasted hazelnuts or shaved dark chocolate.
    • Pair with mocha brownies, vanilla shortbread, or salted caramel sauce.
    • Serve with fresh berries for a bright contrast.

    Make-Ahead & Storage

    • Refrigerate the custard base up to 2 days before churning.
    • Store churned ice cream for up to 1 week for best texture.
    • Let soften 5–10 minutes at room temperature before serving.
  • Dark Chocolate Almond Fudge Ribbon Ice Cream

    Dark Chocolate Almond Fudge Ribbon Ice Cream

    Deep, velvety chocolate ice cream brightened with a touch of espresso and balanced by creamy buttermilk, swirled with a glossy chocolate–almond fudge ribbon that stays silky even when frozen. The result is rich, spoonable, and layered with dark chocolate flavor and fragrant almond.


    Ingredients

      Chocolate Custard Base

    • 2 cups heavy cream
    • 1 cup whole milk
    • ½ cup sugar, divided
    • 5 egg yolks
    • 4 oz bittersweet chocolate (60–70%), finely chopped
    • 2 tbsp unsweetened cocoa powder
    • ½ tsp instant espresso powder
    • ½ tsp vanilla extract
    • pinch table salt
    • ½ cup cold buttermilk (added after cooking)
    • Chocolate–Almond Fudge Ribbon

    • ½ cup sugar
    • ⅓ cup unsweetened cocoa powder (Dutch-process recommended)
    • ⅓ cup heavy cream
    • ¼ cup water
    • 2 tbsp light corn syrup
    • 2 tbsp butter
    • ¾–1 tsp almond extract (to taste)
    • ½ tsp vanilla extract
    • pinch table salt
    • Optional Garnish

    • Chopped toasted almonds
    • Flaky sea salt

    Directions

    Prepare the Chocolate Custard Base

    In a saucepan, whisk together the milk, cream, cocoa powder, ¼ cup sugar, espresso powder, and salt. Warm over medium heat until steaming and the sugar dissolves. Remove from heat and whisk in the chopped chocolate until smooth.

    In a separate bowl, whisk the egg yolks with the remaining ¼ cup sugar until thick and pale. Slowly temper with ½ cup of the warm chocolate mixture, whisking constantly, then return everything to the saucepan.

    Cook over low heat, stirring constantly, until the custard coats the back of a spoon (170–175°F / 77–80°C). Do not boil. Strain through a fine mesh sieve into a clean bowl, then stir in the vanilla. Allow to cool slightly, then stir in the cold buttermilk. Chill completely, preferably overnight.

    Make the Chocolate–Almond Fudge Ribbon

    In a small saucepan, whisk together sugar, cocoa powder, water, and corn syrup. Bring to a gentle simmer and cook for 1–2 minutes. Remove from heat; whisk in butter, cream, vanilla, almond extract, and salt. Let cool completely, then refrigerate until thickened but still pourable.

    Churn and Layer

    Churn the chilled chocolate custard in an ice cream maker according to the manufacturer’s instructions. As you transfer it to a container, alternate layers of ice cream and thin ribbons of the fudge sauce. Swirl lightly with a butter knife for a marbled effect without overmixing. Freeze 4–6 hours until firm.


    Notes

    Preparation

    • Chill the fudge ribbon fully before layering; warm sauce will sink instead of ribboning.
    • For a deeper chocolate profile, replace 1 tbsp cocoa with 1 tbsp Dutch-process cocoa.
    • Increase almond extract up to 1 tsp to intensify almond flavor.

    Serving Suggestions

    • Top with chopped toasted almonds for crunch.
    • Add flaky sea salt for contrast and brightness.
    • Serve with biscotti, chocolate cake, or espresso in an affogato.

    Variations

    • Mocha Almond: Increase espresso powder to 1 tsp.
    • Black Forest: Replace almond extract with kirsch; swirl in cherry compote.
    • Chocolate–Orange: Add ½ tsp orange zest; replace almond extract with orange extract.

    Make-Ahead & Storage

    • Refrigerate churn-ready custard up to 48 hours.
    • Store churned ice cream up to 1 week for best texture.
    • Let stand 5–10 minutes before serving for optimal scoopability.