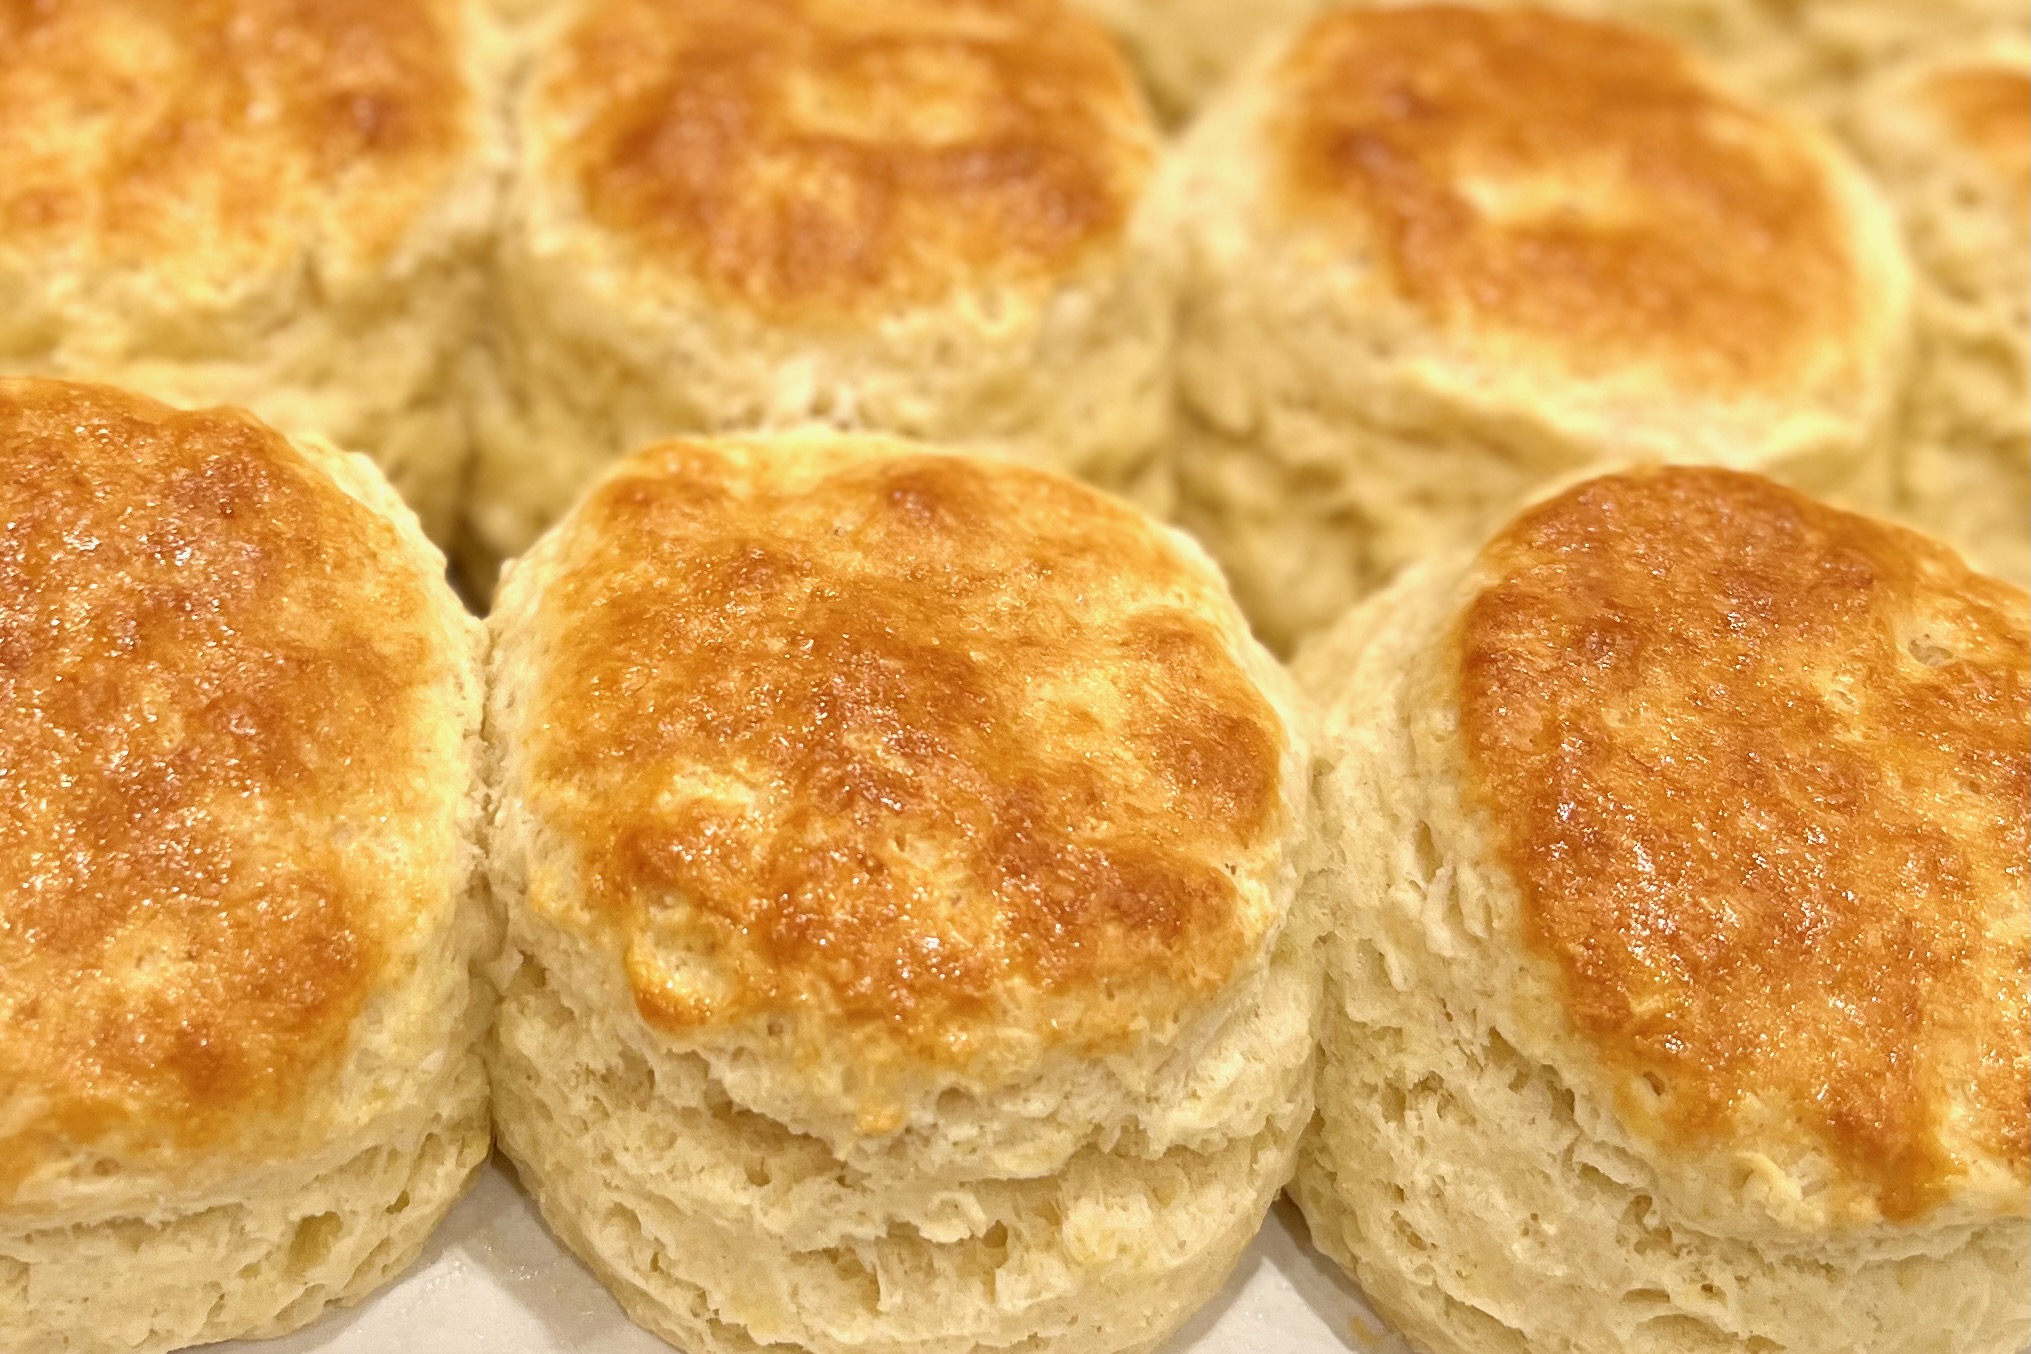
Bags of Spices

Favorite Recipes

  • Raspberry Sorbet

    Raspberry Sorbet

    Fresh raspberries, some sugar, a bit of water — that’s pretty much the whole idea here. Blend, freeze, and the result is a sorbet that tastes like summer in the best way: straightforward, refreshing, and honest.


    Ingredients

      Fruit Base:

    • about 600 g (≈ 4½ cups) fresh raspberries, OR
    • about 600 g frozen raspberries (thawed and drained)
    • Simple Syrup:

    • 250 ml (≈ 1 cup) water
    • 200 g (≈ 1 cup) granulated sugar
    • Brightening & Finishing:

    • 2 tbsp fresh lemon or lime juice (optional, to brighten)
    • 1 tsp vanilla extract (optional, for a subtle warm note)
    • Pinch of fine salt

    Directions

    Prepare the simple syrup

    In a saucepan, combine the water and sugar. Warm gently, stirring, just until the sugar fully dissolves (no need to boil vigorously). Remove from heat and let it cool to room temperature (you can speed this by placing the saucepan in an ice-bath or refrigerating).

    Prepare the raspberries

    If using fresh raspberries: rinse and drain them well. If using frozen: thaw fully and drain any excess liquid—reserve any juice released during thawing.

    Place the raspberries in a blender or food-processor and purée until smooth.

    For a smoother texture, strain the raspberry purée through a fine-mesh sieve into a bowl to remove seeds (this improves final mouth-feel).

    Combine the mix

    Stir the cooled simple syrup into the raspberry purée. Then add the lemon (or lime) juice, vanilla (if using), and the pinch of salt. Taste and adjust—if the raspberries are very tart, you might add a little more syrup (but avoid adding extra water, which can lead to icier texture).

    Chill the mixture

    Cover and refrigerate the mixture for at least 1 hour (or until completely cold). This helps the freezing process and improves texture.

    Freeze / churn

    Follow your ice-cream maker or freezing method instructions. Pour in the chilled raspberry mixture and churn or freeze until it reaches a smooth, scoopable consistency (typically about 20 minutes of churning, depending on machine).

    After churning, transfer the sorbet into a freezer-safe container, press a piece of plastic wrap directly onto the surface (to prevent ice crystals), then cover and freeze for an additional 2–3 hours to firm up.

    Serve

    Remove sorbet from the freezer about 5–10 minutes before serving so it softens slightly and is easy to scoop. Serve in chilled bowls or cones, optionally garnished with fresh raspberries or a mint sprig.


    Notes

    Preparation

    • Using a sieve to remove raspberry seeds significantly improves texture—especially for such a delicate dessert.
    • Make sure your fruit base is very cold before churning or freezing—it helps yield a smoother final result.
    • Be cautious about reducing sugar too far: insufficient sugar may lead to a very icy texture.

    Serving Suggestions

    • Serve as a palate-cleanser after a rich meal: the tart raspberry flavor is perfect to refresh the palate.
    • Pair with fresh raspberries and a drizzle of raspberry coulis or a crisp cookie for contrast.
    • For a touch of indulgence: serve alongside a small piece of dark chocolate or a shortbread crumb.

    Variations

    • Mixed Berry Sorbet: Use half raspberries, half strawberries or blueberries—keep total fruit at ~600 g.
    • Low-Sugar Version: Reduce sugar to about 170 g. The texture will be a little firmer and possibly icier, but still flavorful.

    Make-Ahead & Storage

    • Sorbet can be prepared up to 3 days ahead and stored in a well-sealed container in the freezer. Remove ~10 minutes before serving to soften.
    • If you notice ice crystals forming on the surface during storage, press plastic wrap directly onto the surface next time before sealing.
    • For best texture, consume within one week—after that, ice-crystal growth may degrade mouth-feel and flavour.
  • Tamarind Paste from Whole Tamarind Pods

    Tamarind Paste from Whole Tamarind Pods

    Homemade tamarind concentrate is deeper, brighter, and more aromatic than anything from a jar. Starting with whole tamarind pods, you strip away the shells, soak and mash the pulp, then slowly reduce it to a thick, spoonable paste that keeps well and adds complex sweet-sour flavor to curries, chutneys, sauces, and marinades.


    Ingredients

    • 200 g (about 7 oz) whole dried tamarind pods
    • 240 ml (1 cup) hot water, plus more as needed to barely cover the pulp

    Directions

    Prepare the Tamarind Pods

    Crack and peel away the brittle outer shells of the tamarind pods. Remove and discard any stringy veins. You should be left with sticky, dark brown pulp with seeds and fibers attached.

    Soak and Soften the Pulp

    Place the cleaned tamarind pulp in a heatproof bowl. Pour hot water over the pulp, using just enough to barely cover it (start with about 1 cup). Let soak for 15–20 minutes, or until the pulp is very soft and pliable.

    Mash and Extract the Pulp

    Using clean hands or a sturdy spoon, squeeze, mash, and knead the softened tamarind in the water. Work the pulp thoroughly to dissolve as much as possible into the liquid. The mixture should become thick, cloudy, and pulpy, with seeds and tough fibers separating out.

    Strain the Tamarind

    Set a fine-mesh strainer over a clean bowl. Working in batches if needed, pour the tamarind mixture into the strainer and press firmly with the back of a spoon or a spatula to force the smooth pulp through.

    Scrape the underside of the strainer to collect any clinging pulp. Discard the seeds and fibrous solids when they are mostly dry and no longer release pulp. You should now have a thick, pourable tamarind purée.

    Reduce to a Concentrate (Optional but Recommended)

    Transfer the strained tamarind purée to a small saucepan. Set over low heat and bring to a gentle simmer, stirring frequently to prevent sticking or scorching.

    Simmer for 5–10 minutes, or until the purée thickens into a glossy, spoonable paste similar to tomato paste. The goal is to evaporate excess water and intensify the flavor, not to boil vigorously. Remove from heat and let cool to room temperature.

    Cool, Portion, and Store

    Once completely cool, transfer the tamarind concentrate to a clean, dry jar, or portion it into 1–2 tbsp amounts in an ice cube tray for easy use in recipes.

    Refrigerate the concentrate for up to 3–4 weeks, or freeze for longer storage (up to 6 months). Thaw frozen portions in the refrigerator or at room temperature before using.


    Notes

    Preparation

    • From 200 g whole tamarind pods, you can expect roughly 40–60 g of thick concentrate once reduced, depending on how much water you use and how far you cook it down.
    • Use only enough hot water to barely cover the pulp; extra water makes the reduction step longer and can dilute the flavor.
    • Stir constantly near the end of the simmering step—tamarind is high in natural sugars and can stick or scorch if left unattended.
    • If you prefer a slightly looser paste (closer to some commercial tamarind pastes), shorten the simmering time and stop as soon as the purée coats the back of a spoon.

    Serving Suggestions

    • Use 1–2 tsp concentrate to add tangy depth to curries, dals, and lentil soups.
    • Whisk into chutneys, dipping sauces, and barbecue glazes for a sweet-sour backbone.
    • Stir a spoonful into pad thai sauce, tamarind-based stir-fries, or noodle dishes.
    • Combine with sugar, salt, and spices for tamarind drinks, aguas frescas, or sherbets.

    Variations

    • From Tamarind Block: Substitute 200 g compressed tamarind block for the pods. Break into chunks, soak in hot water as directed, then mash, strain, and reduce in the same way.
    • Tamarind Purée (No Reduction): Skip the simmering step and use the strained tamarind purée as-is when recipes call for “tamarind pulp” or “tamarind purée” rather than concentrate.
    • Stronger or Milder Concentrate: For a stronger concentrate, simmer a bit longer to a very thick paste; for a milder one, keep the paste slightly looser and use more by volume in recipes.

    Make-Ahead & Storage

    • Refrigerator: Store tamarind concentrate in a clean, airtight jar for up to 3–4 weeks.
    • Freezer: Portion into 1–2 tbsp amounts (for example, in an ice cube tray) and freeze for up to 6 months.
    • Use Clean Utensils: Always use a clean spoon to scoop out concentrate to help maximize shelf life and prevent spoilage.
    • Thawing: Thaw frozen portions in the refrigerator or at cool room temperature before stirring into sauces or liquids.
  • Stuffing

    Stuffing

    This hearty holiday dressing—my riff on Opa’s classic stuffing—has become a Huggins family favorite. Rich and savory from the sausage, brightened with dried cranberries, and full of satisfying texture from toasted bread, mushrooms, nuts, and water chestnuts, it’s a flavorful and festive side dish that perfectly complements any roast or holiday meal.


    Ingredients

      Sausage Mixture

    • 1 lb hot sausage, uncased
    • 1 lb sage (or regular) sausage, uncased
    • Vegetables

    • 2 cans (4 oz each) water chestnuts, drained and chopped
    • 2 onions, diced (divided)
    • 2–3 cups celery, thinly sliced (with leaves)
    • 1 lb mushrooms, sliced
    • Broth & Seasoning Base

    • 4-5 cups chicken stock (start with 4 cups and add more as needed)
    • ¾ cup (1½ sticks / 170 g) butter
    • 1 tbsp Italian seasoning (or Herbes de Provence)
    • 1 tbsp parsley flakes
    • 2 tsp marjoram flakes
    • 1 tsp ground sage (add ½ tsp more if not using sage sausage)
    • ¾ tsp white pepper
    • ¼ tsp oregano leaves
    • ¼–½ tsp MSG (optional, for umami)
    • Bread

    • 16 cups bread cubes from 2 large baguettes, cut ½–¾″ and dried overnight or lightly toasted
    • Add-Ins

    • 1 cup dried sweetened cranberries
    • ½ cup roasted pistachios or pine nuts
    • ¼ cup pepitas (optional)
    • 1 cup diced apple or pear (optional, for sweetness)
    • Fresh chopped parsley or sage (optional, for garnish)

    Directions

    Cook the Sausage

    Place both sausages in a large sauté pan and cook over medium heat, breaking into small pieces, just until no longer pink. Do not brown. Transfer to a bowl and drain excess fat, reserving 1–2 tbsp only if desired for added flavor.

    Wipe the pan clean before continuing.

    Sauté the Aromatics

    Add a pat of butter to the clean pan along with 1½ onions, the celery, and the chopped water chestnuts. Cook over medium heat until onions turn translucent with no browning. Transfer to a holding bowl.

    Add remaining onion, mushrooms, another small pat of butter, and a pinch of salt to the pan. Sauté until mushrooms soften and release their moisture, then add a splash of rice wine to help them stay light. Cook only until tender, not browned. Transfer to the vegetable bowl.

    Build the Flavor Base

    In a large stockpot, bring chicken stock and butter to a boil. Add Italian seasoning (or Herbes de Provence), parsley flakes, marjoram, sage, white pepper, oregano, and MSG (if using). Simmer 2–3 minutes to bloom the herbs.

    Stir in the onion–celery–mushroom mixture and return just to a simmer.

    Hydrate the Bread

    Remove pot from heat, add all dried bread cubes, and gently fold until moistened. Cover and let sit 5–10 minutes to absorb the liquid.

    Combine and Adjust

    Once the bread has absorbed the broth, gently fold in the sausage, cranberries, pistachios (or pine nuts), pepitas, and diced apple or pear if using. Reserve a handful of cranberries and nuts for topping.

    If too moist, spread stuffing on a baking sheet and dry briefly in a 350°F (175°C) oven.

    Bake

    Transfer stuffing to two greased 9×13-inch pans. Bake uncovered at 375°F (190°C) for 20–25 minutes, or until lightly crisped. Broil briefly if desired. Top with reserved cranberries and nuts; garnish with parsley or sage if using.


    Notes

    Preparation

    • Dry bread cubes in a 350°F (175°C) oven for 10–15 minutes, stirring once; aim to dry without browning.
    • Rehydrate cranberries in warm stock for plumper texture.
    • MSG adds clean umami depth without darkening the stuffing.
    • Keeping vegetables unbrowned and adding sausage/mushrooms after broth absorption helps maintain a lighter color.

    Serving Suggestions

    • Serve alongside roasted turkey, chicken, pork, or a holiday roast.
    • Pairs beautifully with Southern-style brown gravy or a mushroom gravy.
    • Finish with fresh parsley or sage for brightness.

    Variations

    • For vegetarian stuffing, replace sausage with extra mushrooms and add a bit more MSG for umami.
    • Use roasted hazelnuts or pecans in place of pistachios or pine nuts for a different flavor profile.
    • Add 1 cup diced apple or pear for gentle sweetness.

    Make-Ahead & Storage

    • Assemble unbaked stuffing up to 2 days in advance; cover and refrigerate. Let stand 30 minutes before baking.
    • Freeze unbaked stuffing up to 1 month; thaw overnight before baking.
    • Reheat leftovers covered with foil at 325°F (165°C) for 20–25 minutes.
  • Melon Sorbet

    Melon Sorbet

    There’s something unmistakable about the smell of a ripe cantaloupe on a hot day—it fills the kitchen and tells you it’s time for something cold and refreshing. This sorbet brings that moment to life: sweet melon, a clean simple syrup, and just enough citrus to sharpen the flavor. It’s bold, bright, and every bit as satisfying as cutting into a perfect summer melon.

    Ingredients

      Fruit Base

    • about 600 g (≈ 4½ cups) diced ripe cantaloupe
    • Simple Syrup

    • 250 ml (≈ 1 cup) water
    • 200 g (≈ 1 cup) granulated sugar
    • Brightening & Finishing

    • 2 tbsp fresh lemon juice (or lime juice)
    • Optional: 1 tsp vanilla extract (for a subtle warm note)
    • Pinch of fine salt

    Directions

    Prepare the Simple Syrup

    In a saucepan, combine the water and sugar. Warm gently, stirring, just until the sugar fully dissolves (no need to boil vigorously). Remove from heat and let it cool to room temperature. You can speed the process by using an ice bath or refrigerating the syrup.

    Ensure the syrup is completely cool before combining with the fruit.

    Prepare the Melon

    Dice the cantaloupe and place it in a blender or food processor. Purée until completely smooth. Taste—if your melon is extremely ripe, you may not need much additional sweetening beyond the syrup already included.

    Combine the Mix

    Stir the cooled simple syrup into the melon purée. Add the lemon (or lime) juice, vanilla (if using), and a pinch of salt.

    Taste and adjust—if the melon is particularly mild, a little extra citrus can help brighten the flavor.

    Chill the Mixture

    Cover and refrigerate the mixture for at least 1 hour, or until completely cold, to improve freezing and texture.

    Freeze / Churn

    Follow your ice-cream maker or freezing method instructions. Pour in the chilled melon mixture and churn until smooth and thick, usually about 20 minutes depending on your machine.

    Transfer the sorbet to a freezer-safe container, press plastic wrap directly onto the surface, cover, and freeze for 2–3 hours to firm up.

    Serve

    Let the sorbet sit at room temperature for 5–10 minutes before scooping. Serve in chilled bowls, optionally topped with fresh melon or mint.


    Notes

    Preparation

    • Melons vary in sweetness; always taste the purée before combining with the syrup. Adjust citrus as needed for balance.
    • Ensure the fruit mixture is fully chilled before churning—this noticeably improves texture.
    • A small pinch of salt enhances the natural melon flavor and keeps the sorbet from tasting flat.

    Serving Suggestions

    • Serve with fresh cantaloupe or honeydew for a layered melon experience.
    • A drizzle of honey or a squeeze of lime adds brightness and contrast.
    • Pair with shortbread, vanilla cookies, or a small square of white chocolate for a richer dessert.

    Variations

    • Honeydew Sorbet: Substitute honeydew or a blend of honeydew and cantaloupe.
    • Mint-Melon: Add 4–6 fresh mint leaves before blending for a cool herbal twist.
    • Low-Sugar Version: Reduce sugar to 170 g; final texture will be firmer and slightly icier.

    Make-Ahead & Storage

    • Store sorbet in a sealed container for up to 3 days for best texture.
    • Press plastic wrap directly onto the surface before sealing to minimize ice-crystal formation.
    • For easiest scooping, let the sorbet sit 5–10 minutes at room temperature before serving.
  • Nutty Coconut Ice Cream

    Nutty Coconut Ice Cream

    Jane’s favorite ice cream, and Opa’s, has always been Nutty Coconut—a flavor that balances creamy coconut sweetness with the satisfying crunch of toasted nuts. This homemade version captures that nostalgic combination in a silky coconut custard base, layered with toasted coconut, almonds, and pecans. Smooth, nutty, and tropical, it’s a rich yet refreshing treat that brings a little taste of the islands to every scoop.


    Ingredients

    Coconut Custard Base:

    • 1 can (14 oz) full-fat coconut milk
    • 1 cup heavy cream
    • ¾ cup sugar
    • 4 large egg yolks
    • pinch table salt
    • ½ tsp coconut extract
    • ½ tsp vanilla extract

    Add-Ins:

    • ¾ cup sweetened shredded coconut, toasted
    • ½ cup chopped toasted pecans
    • ½ cup chopped toasted almonds

    Directions

    Prepare the Toasted Nuts & Coconut

    Spread the shredded coconut, pecans, and almonds on a parchment-lined baking sheet. Toast at 325°F until fragrant and golden—about 5–8 minutes for coconut and 8–10 minutes for nuts. Cool completely and set aside.

    Make the Coconut Custard Base

    In a medium saucepan, whisk together coconut milk, heavy cream, half the sugar, and salt. Heat until steaming but not boiling.

    In a separate bowl, whisk egg yolks with the remaining sugar until pale and thick. Slowly temper with ½ cup hot coconut mixture, then return everything to the saucepan.

    Cook over low heat, stirring constantly, until the custard coats the back of a spoon (170–175°F / 77–80°C). Do not boil.

    Finish & Chill

    Strain through a fine mesh sieve into a clean bowl. Stir in coconut and vanilla extracts. Cover and chill thoroughly—preferably overnight.

    Churn & Add Mix-Ins

    Churn the chilled custard in an ice cream maker according to manufacturer’s instructions. Add toasted coconut and nuts during the last minute of churning. Freeze until firm, about 4 hours.


    Notes

    Preparation

    • Use full-fat coconut milk for best texture; light coconut milk makes the base thinner.
    • Replace half the heavy cream with coconut cream for deeper coconut flavor.
    • Lightly salt the toasted nuts before cooling to balance sweetness.
    • Strain the custard to ensure a perfectly smooth base.

    Serving Suggestions

    • Top with extra toasted coconut for crunch.
    • Pair with warm caramel sauce or pineapple compote.
    • Serve alongside grilled fruit for a tropical dessert.

    Make-Ahead & Storage

    • Refrigerate the custard base up to 2 days before churning.
    • Store churned ice cream in an airtight container for up to 1 week.
    • Let soften 5–10 minutes before scooping.
  • Fresh Cranberry Relish

    Fresh Cranberry Relish

    Bright, tart, and wonderfully simple, this fresh cranberry relish has been a family favorite for generations. With just three ingredients and no cooking required, it brings a vibrant burst of color and flavor to the holiday table—refreshing, tangy, and perfectly balanced alongside rich main dishes.


    Ingredients

    • 1 pkg (12 oz) fresh cranberries
    • 1 orange, peeled
    • 1 cup sugar
    • Pinch of salt
    • ½ tsp orange zest (optional)

    Directions

    Prepare the Cranberries

    Wash cranberries thoroughly and drain well. Place in a food processor and pulse until the berries are in small, roughly even pieces. Transfer to a mixing bowl and sprinkle with sugar. Stir to coat and set aside.

    Process the Orange

    Place the peeled orange in the food processor and blend until liquefied. Stir in a pinch of salt and orange zest (if using). Pour the orange mixture over the sugared cranberries and mix thoroughly to combine.

    Chill and Serve

    Refrigerate for 1–3 hours before serving to allow the flavors to meld while keeping the relish bright and fresh. Serve chilled.


    Notes

    Preparation

    • Use firm, fresh cranberries for the best texture and flavor balance.
    • A pinch of salt helps enhance the fruit’s natural sweetness and depth.
    • Optional orange zest adds brightness and a hint of bitterness for complexity.

    Serving Suggestions

    • Serve alongside roasted turkey, ham, or pork for a refreshing contrast.
    • Use as a topping for yogurt, oatmeal, or cheesecake for a festive touch.
    • Garnish with pomegranate arils or toasted chopped pecans for added color and texture.

    Make-Ahead & Storage

    • Can be prepared 1–3 hours in advance for the best fresh flavor.
    • Store leftovers covered in the refrigerator for up to 3 days.
    • Stir before serving to redistribute juices and refresh the texture.
  • Southern-Style Sweet Potatoes

    Southern-Style Sweet Potatoes

    Great Grandma Lena was a proper Southern lady. Born on August 11, 1901, in Missouri, her family moved by covered wagon to Dover, Arkansas when she was three years old—a journey that took more than a week. At seventeen, she married Wilmer (Sr.), and Grandpa (Jr.) was the youngest of their four children. In 1936, the family made the trek to Southern California in a car with a rumble seat. Made in honor of Great Grandma Lena, these sweet potatoes have become a Thanksgiving tradition. Updated to highlight the natural sweetness of roasted sweet potatoes and topped with a buttery brown sugar–pecan crumble, this timeless side dish remains a cherished part of our holiday table.


    Ingredients

      Sweet Potato Mixture

    • ¼ cup sugar
    • ½ tsp table salt
    • 1 tsp vanilla extract
    • 4 cups roasted sweet potatoes, mashed
    • 3–4 large eggs, well beaten
    • ½ cup butter, melted
    • 2 tbsp heavy cream (optional, if mixture is too thick)
    • Topping

    • 1½ cups brown sugar
    • ½ cup flour
    • ⅓ cup butter, melted
    • 1½ cups pecans, chopped and lightly toasted

    Directions

    Prepare the Oven and Topping

    Preheat oven to 350ºF (175ºC). In a small bowl, combine the brown sugar, flour, melted butter, and toasted pecans. Mix until evenly combined and crumbly. Set aside.

    Make the Sweet Potato Mixture

    In a large mixing bowl, combine the sugar, salt, vanilla, mashed roasted sweet potatoes, beaten eggs, and melted butter. Stir until smooth and evenly combined. If the mixture feels overly thick, stir in 2 tbsp heavy cream to loosen slightly.

    Assemble and Bake

    Butter a medium baking dish and pour in the sweet potato mixture, spreading evenly. Sprinkle the prepared topping over the surface.

    Bake uncovered for 30 minutes, or until the center is set and the topping is golden brown. Let rest for at least 30 minutes before serving.

    Serve

    Serve warm as-is or drizzle lightly with maple syrup for extra richness. This casserole is a holiday favorite, especially alongside roast turkey or ham.


    Notes

    Preparation

    • Roasting the sweet potatoes deepens their natural sweetness and enhances flavor compared to boiling.
    • Using 3 eggs results in a slightly denser, more velvety texture, while 4 eggs yield a lighter, more custard-like consistency.
    • If the mixture feels too thick, add 2 tbsp cream or milk for a smoother texture.
    • Toasted pecans add a richer, nuttier flavor to the topping—toast at 350ºF (175ºC) for 5–7 minutes, until fragrant.
    • Find our family’s original recipe on our legacy website.

    Serving Suggestions

    • Perfect for Thanksgiving or Christmas dinners alongside turkey, ham, or roast chicken.
    • Pairs beautifully with Southern-Style Brown Gravy for a savory-sweet balance.
    • Serve leftovers warmed for breakfast with a drizzle of cream or maple syrup.

    Make-Ahead & Storage

    • Prepare through assembly (unbaked), cover, and refrigerate for up to 2 days. Bake just before serving.
    • Freeze (unbaked or baked) for up to 1 month. Thaw overnight in the refrigerator before baking or reheating.
    • Reheat covered at 325ºF (165ºC) for 20–25 minutes, or until heated through.
    • Store leftovers refrigerated up to 4 days or frozen up to 1 month.
  • Southern-Style Brown Gravy

    Southern-Style Brown Gravy

    Rich, savory, and silky smooth, this Southern-style brown gravy combines beef and chicken base for perfectly balanced depth. A touch of butter adds luxurious body, while optional MSG and soy sauce enhance umami. Choose your preferred thickener—each yields a slightly different texture, from velvety to glossy restaurant-style richness.


    Ingredients

    • 2½ cups boiling water
    • 1½ tbsp beef base
    • 1½ tbsp chicken base
    • ½ tsp onion powder
    • ½ tsp black pepper
    • ¼ tsp dried sage
    • ⅛ tsp dried thyme
    • ⅛ tsp dried marjoram (or rosemary)
    • ½ tsp MSG (Aji-no-moto, Accent, etc.), optional but highly recommended
    • 2–3 tbsp butter
    • Meat drippings, fat skimmed (optional)
    • ½ tsp soy sauce, Worcestershire sauce, or coconut aminos (optional, to taste)
    • Choose One Thickening Method

      • Potato Starch (silky consistency): Mix 2 tbsp potato starch with 2 tbsp cold water to form a slurry; whisk into simmering gravy until thickened.
      • Cornstarch + Xanthan Gum (stable): Mix 2 tbsp cornstarch + ⅛ tsp xanthan gum with 2 tbsp cold water; whisk thoroughly, then whisk into simmering gravy. The xanthan gum can be omitted, but the gravy will be more stable and glossy if included.
      • Clear Jel (silky & stable): For regular Clear Jel (not instant), mix 2 tbsp Clear Jel with 2 tbsp cold water and whisk into simmering gravy until smooth. This is my go-to method.

    Directions

    Prepare the Broth

    In a medium saucepan, combine boiling water, beef base, chicken base, onion powder, black pepper, sage, thyme, marjoram, and MSG (if using). Stir in meat drippings, if available, and bring to a boil over medium-high heat.

    Thicken the Gravy

    Stir your chosen slurry to recombine, then slowly whisk it into the simmering broth in a thin, steady stream. Cook 1–2 minutes, whisking constantly, until the gravy thickens and becomes smooth.

    Finish and Adjust

    Remove from heat and whisk in butter until fully incorporated. Taste and adjust seasoning as needed. If too salty, add a splash of water or chicken broth. Stir in soy sauce, Worcestershire sauce, or coconut aminos for extra depth, if desired. If too thick, whisk in a little hot water or broth; if too thin, add a small amount of slurry and simmer until thickened.


    Notes

    Preparation

    • Potato starch creates a soft, silky finish; Clear Jel gives the most stable, restaurant-quality texture.
    • Adding both beef and chicken bases produces the most balanced flavor—rich but not overpowering.
    • For a more chicken-forward flavor, use 2 tbsp chicken base and 1 tbsp beef base; for beef-forward flavor, use 2 tbsp beef base and 1 tbsp chicken base.
    • Better Than Bouillon bases work especially well for this recipe.

    Serving Suggestions

    • Perfect alongside mashed potatoes, chicken-fried steak, meatloaf, or Semmelknödel (Bavarian bread dumplings).
    • Use as a finishing gravy for roast beef or pork, or as a dipping sauce for biscuits.

    Make-Ahead & Storage

    • This gravy reheats beautifully and can be prepared in advance for convenience.
    • Refrigerate in an airtight container for up to 4 days.
    • Reheat gently on the stove over low heat, whisking to restore texture.
    • For longer storage, freeze for up to 2 months; thaw overnight in the refrigerator and reheat slowly.
  • Garlic Oil

    Garlic Oil

    Garlic oil is a simple yet flavorful staple for cooking, dipping, or drizzling. Slow-infused with fresh garlic, it adds aromatic richness to pasta, grilled vegetables, and stir-fries. The chili version adds a spicy kick perfect for noodles, dumplings, and stir-fried dishes.


    Ingredients

    • 1 cup neutral oil (canola, vegetable, or light olive oil)
    • 6–8 cloves garlic, thinly sliced
    • Optional Aromatics

    • ½ tsp crushed red pepper flakes (for heat)
    • ½ tsp dried herbs (oregano, basil, or thyme)
    • 1 small sprig fresh rosemary (for infusion)
    • Chili Garlic Oil Variation

    • 2 tbsp crushed red pepper flakes
    • 1 tbsp minced shallots or dried minced onion
    • 1 tsp sesame seeds (optional, for texture)

    Directions

    Prepare the Ingredients

    Peel and thinly slice the garlic. Gather optional herbs and spices if using.

    Infuse the Oil

    Place oil and garlic in a small saucepan or skillet.

    • For mild flavor – heat gently over low heat until small bubbles form and garlic turns pale golden (about 8–10 minutes)
    • For deeper flavor – continue cooking until garlic reaches a rich golden brown (about 12–15 minutes), but do not let it burn

    For Chili Garlic Oil

    Remove the saucepan from heat and let the oil cool for 1–2 minutes. Add the following directly to the hot oil:

    • Crushed red pepper flakes
    • Minced shallots or onion
    • Sesame seeds (if using)

    Allow the mixture to sizzle lightly for 30–60 seconds as it infuses, then cool completely before transferring to a jar.

    Cool and Strain (for Plain Garlic Oil Only)

    Remove from heat. Let the oil cool completely, then strain out the solids if a clear oil is desired.


    Notes

    Preparation

    • For food safety, always refrigerate garlic oil to prevent botulism.
    • Let refrigerated oil come to room temperature before using to restore full aroma and pourable texture.
    • To enhance flavor, include a few slices of toasted garlic or chili flakes when serving.

    Serving Suggestions

    • Use as a drizzle over pasta, grilled vegetables, or meats.
    • Brush on pizza dough for a garlic oil base before baking.
    • Use chili garlic oil for noodles, dumplings, or fried rice.

    Variations

    • Add herbs like rosemary or thyme during infusion for a Mediterranean twist.
    • Use a mix of neutral oil and sesame oil for a nutty, Asian-inspired flavor.
    • Infuse with a strip of lemon peel for a fresh, aromatic note.

    Make-Ahead & Storage

    • Transfer to a clean, dry jar after cooling.
    • Plain garlic oil – refrigerate for up to 2 weeks.
    • Chili garlic oil – refrigerate for up to 1 month.
    • Always keep stored oil chilled and discard if any cloudiness or off odors develop.
  • Neapolitan-Style Tomato Sauce

    Neapolitan-Style Tomato Sauce

    This uncooked Neapolitan-style pizza sauce preserves the bright, fresh flavor of San Marzano tomatoes—sweet, rich, and perfectly balanced for high-heat baking. Using true DOP-certified tomatoes gives an authentic taste of Naples, with a smooth texture and naturally sweet finish that perfectly complements a light, airy crust.


    Ingredients

    • (For about 6–8 pizzas)
    • 1 can (28 oz / 800 g) whole peeled San Marzano tomatoes (DOP if possible)
    • ½ tbsp table salt (adjust to taste)
    • 2 tbsp extra-virgin olive oil
    • 2–4 fresh basil leaves, torn (optional but recommended)

    Directions

    Prepare the Sauce

    Drain excess juice from tomatoes into a bowl, reserving it in case the sauce needs thinning. Crush tomatoes by hand until mostly smooth but still slightly textured—avoid over-crushing for best flavor and body.

    Stir in salt, olive oil, and basil until evenly mixed.

    Use the Sauce

    Spread thinly over stretched dough just before baking (Neapolitan Pizza Dough works beautifully). Use approximately 2–2½ oz (60–70 g) of sauce per 10–12″ pizza.

    Do not pre-cook the sauce—the natural sugars in the tomatoes caramelize under high oven heat, producing rich, authentic flavor.


    Notes

    Preparation

    • Use only high-quality San Marzano tomatoes with the DOP seal for the sweetest, least acidic results.
    • Do not blend the sauce completely smooth; a slightly rustic texture gives better flavor and adhesion.

    Serving Suggestions

    • Use as the base for Pizza Margherita—add mozzarella, parmesan, and fresh basil.
    • Try on Pizza Marinara with garlic, oregano, and a drizzle of olive oil.
    • Use in Shoarma Pizza or Carnitas Pizza for a Dutch or Mexican-inspired twist.

    Variations

    • For a smoother sauce, pulse briefly with an immersion blender (1–2 seconds only).
    • For a hint of depth, add a tiny pinch of sugar if your tomatoes are unusually acidic.
    • For a garlic-forward version, rub a cut clove of garlic over the dough before adding sauce.

    Make-Ahead & Storage

    • Store sauce in an airtight container in the refrigerator for up to 5 days.
    • Freeze for up to 3 months; thaw in the refrigerator overnight before using.