Bags of Spices

Favorite Recipes

Baked

  • Jane’s Top Secret Carrot Cake

    Jane’s Top Secret Carrot Cake

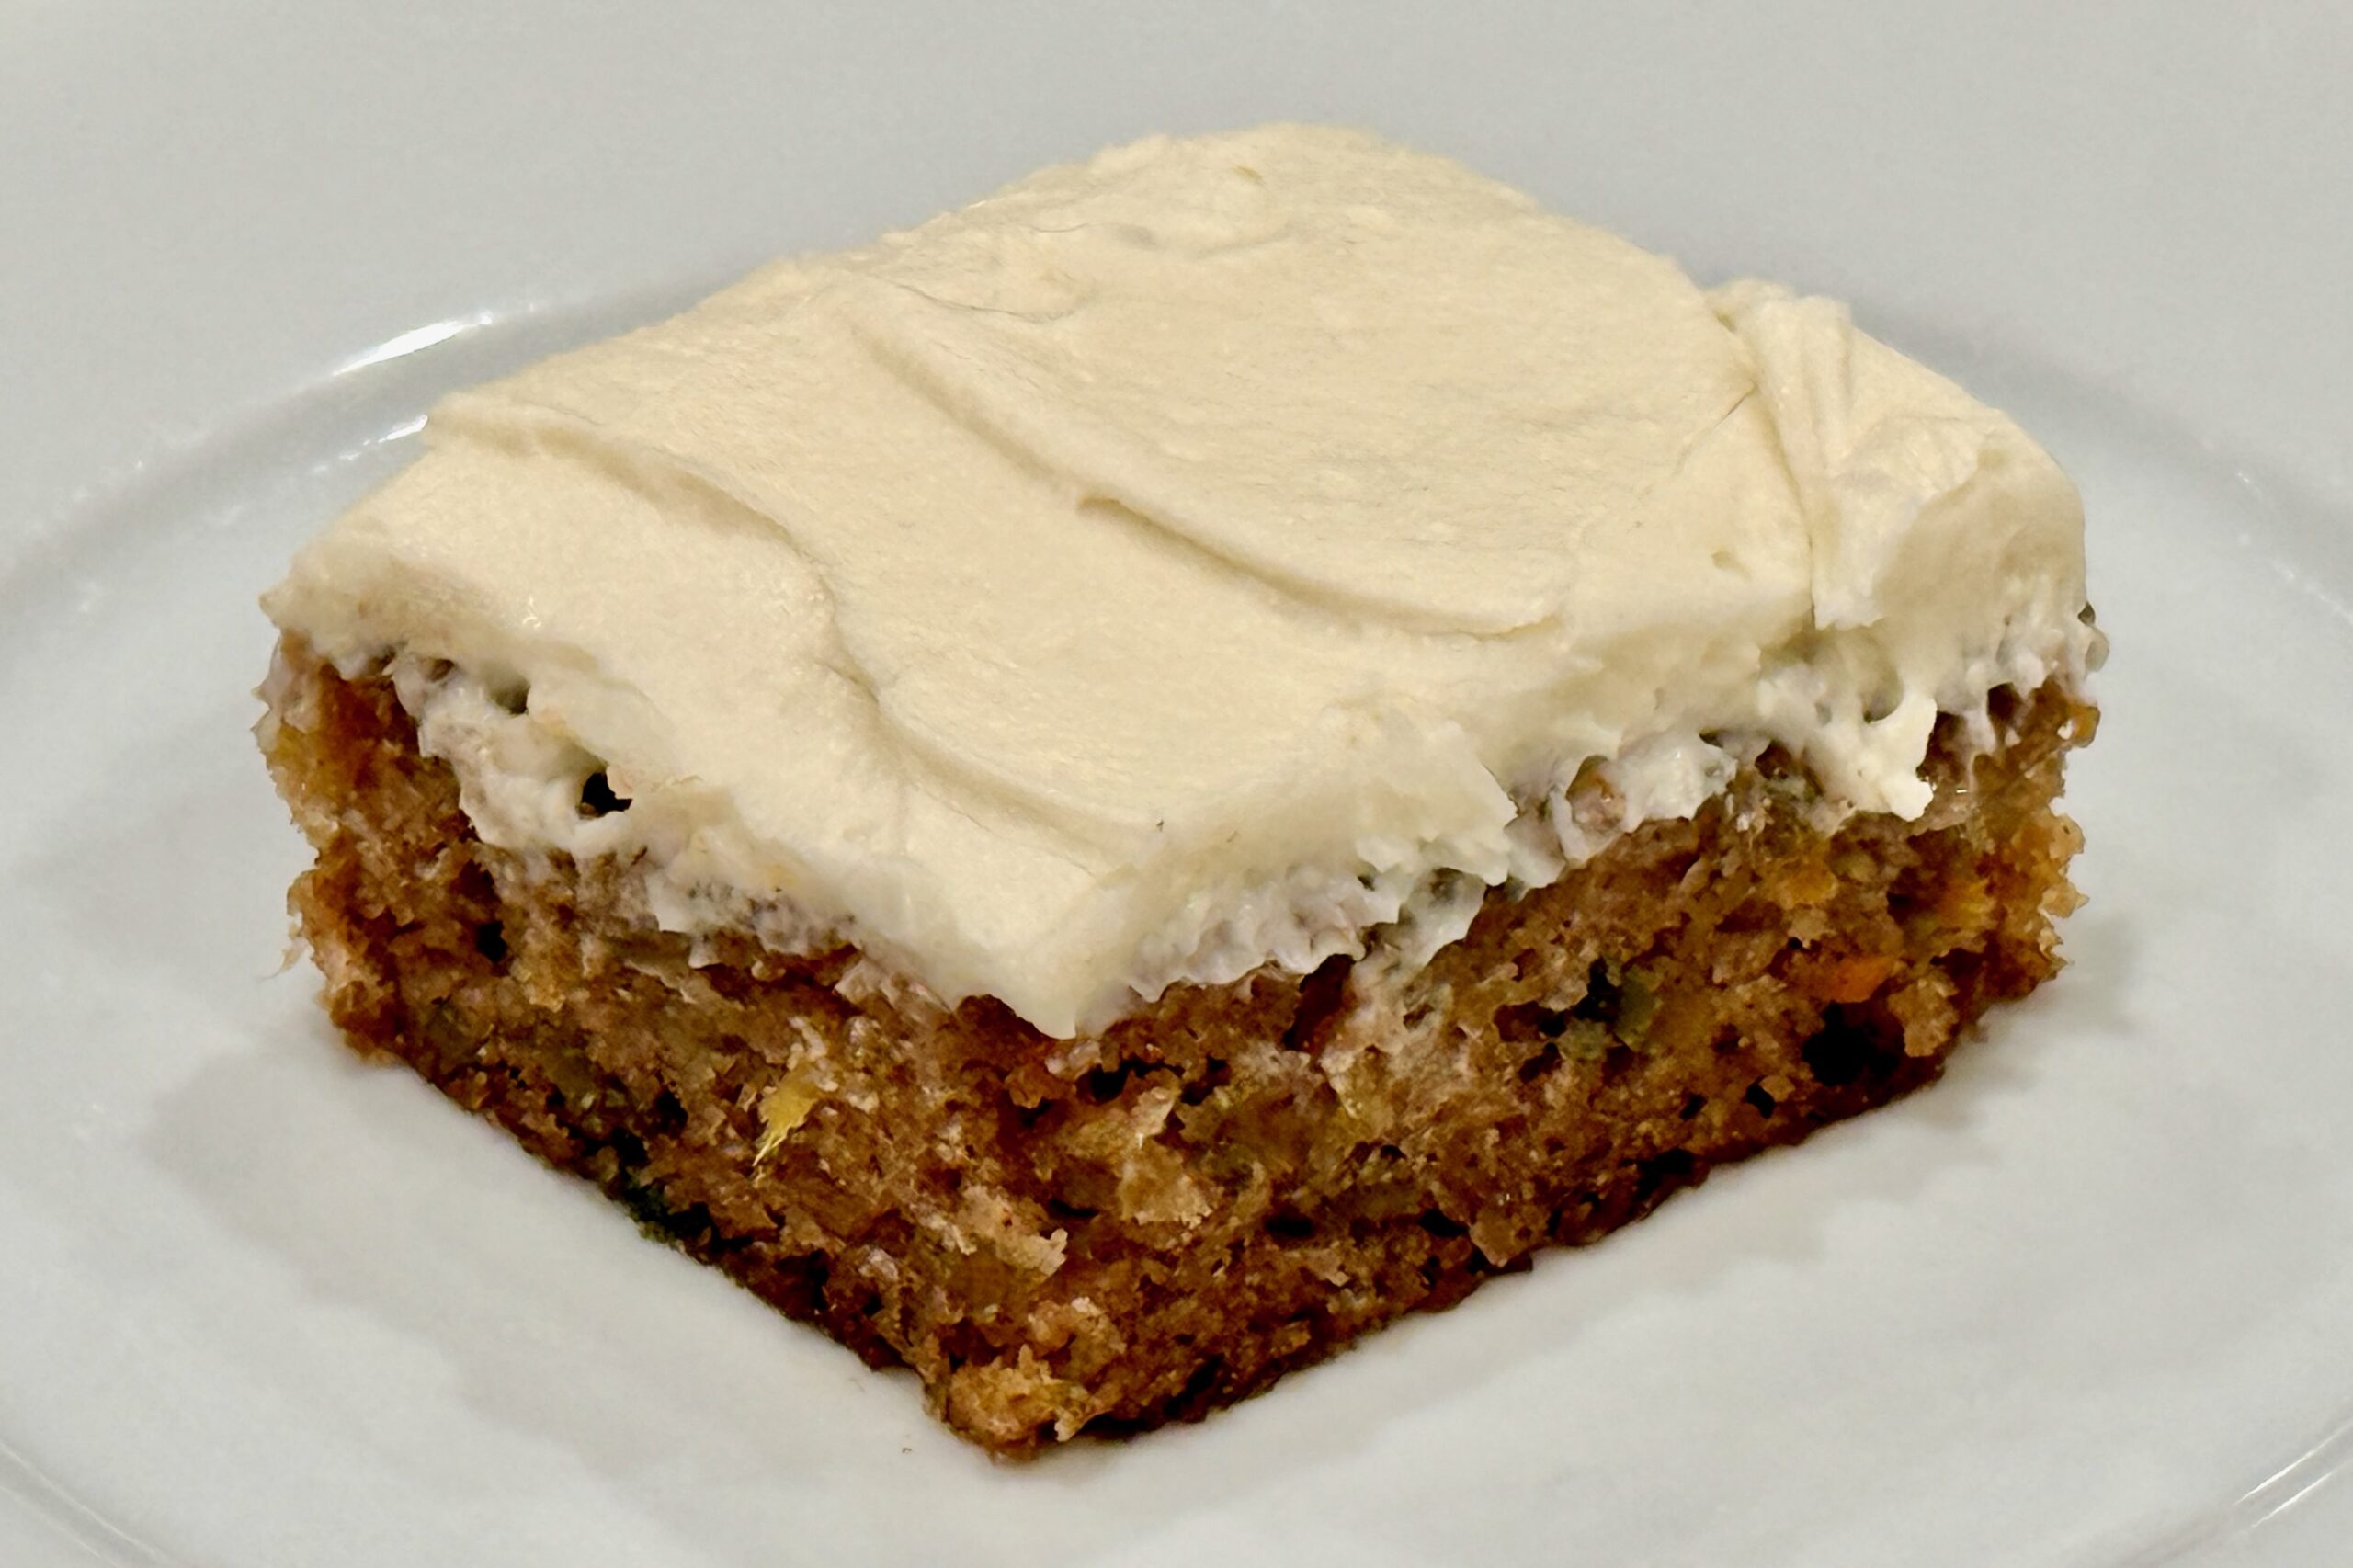
    This carrot cake has been a longtime family favorite—simple, reliable, and always a hit. Built on a classic combination of carrots, pineapple, and warm spice, it bakes up incredibly moist with a tender crumb and just the right amount of richness. Finished with a smooth, sweet cream cheese frosting, it’s the kind of cake that shows up at gatherings and quietly becomes everyone’s favorite slice.


    Ingredients

      Cake

    • 4 eggs, beaten
    • 1 cup vegetable oil
    • 1 (8 oz) can crushed pineapple, undrained
    • 2 cups sugar
    • 3 cups carrots, shredded
    • 2 cups flour
    • 1 tsp table salt
    • 2 tsp baking soda
    • 2 tsp cinnamon
    • ¼ tsp nutmeg (optional)
    • ¼ tsp ground ginger (optional)
    • 1 cup pecans, chopped and toasted
    • Icing

    • 1 cube (½ cup) butter, softened
    • 1 pkg cream cheese, softened
    • 4 cups confectioners’ sugar
    • 1 tsp vanilla
    • ¼ tsp table salt

    Directions

    Prepare the Pan

    Grease and flour a bundt pan.

    Mix the Batter

    In a large bowl, whisk together the eggs, sugar, and vegetable oil until smooth and well combined.

    Stir in the crushed pineapple (with juice) and shredded carrots.

    In a separate bowl, combine the flour, salt, baking soda, cinnamon, and optional nutmeg and ground ginger (if using).

    Fold the dry ingredients into the wet mixture until just combined.

    Fold in the toasted pecans.

    Bake

    Pour the batter into the prepared bundt pan and bake at 350°F for about 1 hour, or until a toothpick inserted into the center comes out clean.

    Let the cake cool in the pan for 15–20 minutes, then turn out onto a rack to cool completely.

    Alternative Pan Option

    Pour the batter into a greased stoneware bar pan, then bake at 350°F for 25–30 minutes, or until a toothpick comes out clean.

    Make the Icing

    In a mixing bowl, beat the butter and cream cheese together until smooth and creamy.

    Gradually add the confectioners’ sugar, mixing until fully incorporated and smooth.

    Add the vanilla and salt, and mix until well combined.

    Finish

    Spread the icing over the completely cooled cake.


    Notes

    Preparation

    • To toast nuts, spread on a baking sheet and bake at 350°F for 6–8 minutes, until fragrant.
    • Shred carrots finely for the best texture and even distribution.
    • Walnuts can be used in place of pecans if preferred.
    • High Altitude (~4,750 ft / 1400 m) – Increase the flour to 2 tbsp plus 2 tsp extra, reduce the baking soda to 1¾ tsp, and increase the baking time slightly as needed. Sea Level – Use 2 cups flour and the full 2 tsp baking soda as written.

    Serving Suggestions

    • Serve at room temperature for the best flavor and texture.
    • Great for gatherings, holidays, and family-style desserts.

    Variations

    • Add optional nutmeg and ginger for a slightly deeper, warmer spice profile.

    Make-Ahead & Storage

    • Store covered in the refrigerator for up to 4 days.
    • Bring to room temperature before serving for best texture.
    • Unfrosted cake can be wrapped and frozen for up to 2 months.
  • Chicken Parmesan

    Chicken Parmesan

    A great Chicken Parmesan starts with the sauce—and this version pushes that balance a little further. It keeps the bright, clean tomato character that belongs in Chicken Parm, but builds in more savory depth with extra bloomed tomato paste, a broader basil profile, a slightly larger shallot base, and a restrained touch of heat. Paired with thin, well-seasoned chicken, a crisp Parmesan-forward crust, and just enough cheese to bring it all together, this version leans into both texture and flavor—clean, balanced, and deeply satisfying.


    Ingredients

      Sauce

    • 2 tbsp (30 ml) extra-virgin olive oil
    • 3 tbsp (45 g) finely grated shallot, or about 1½ small shallots, very finely minced
    • 2 cloves garlic (about 6 g), minced
    • 1 tbsp (15 g) tomato paste
    • ¼ tsp dried oregano
    • ¼ tsp dried basil
    • ¼ tsp red pepper flakes
    • 1 (28 oz / 794 g) can crushed tomatoes
    • ¾ tsp (4–5 g) table salt, plus more to taste
    • ¼ tsp MSG (recommended), or 1–2 tsp finely grated Parmesan rind
    • ¼ tsp sugar (optional), only if needed for balance
    • 2 tbsp (8 g) finely chopped fresh basil
    • 1 tbsp (15 ml) good-quality extra-virgin olive oil, for finishing
    • Chicken

    • 4 large boneless, skinless chicken breasts (about 3 lb / 1.36 kg total), halved horizontally
    • 1½ tsp (8–9 g) table salt
    • ½ tsp black pepper
    • ½ tsp garlic powder
    • Breading

    • 2 large eggs
    • 2 tbsp (16 g) all-purpose flour
    • 1½ cups (150 g) finely grated Parmesan cheese
    • 1 cup (60 g) panko bread crumbs
    • 1 tsp garlic powder
    • ½ tsp dried oregano
    • ½ tsp black pepper
    • For Frying & Assembly

    • ⅔ cup (160 ml) olive oil or olive oil + neutral oil blend
    • 8 oz (225 g) whole-milk mozzarella, shredded
    • 4 oz (115 g) provolone, shredded
    • Fresh basil, torn
    • Extra freshly grated Parmesan, for finishing

    Directions

    Prepare the Sauce

    Heat 2 tbsp (30 ml) olive oil in a medium saucepan over medium heat. Add the shallot with a small pinch of salt and cook, stirring occasionally, until fully softened and lightly sweet, about 4–6 minutes.

    Stir in the tomato paste and cook, stirring constantly, until darkened slightly and concentrated, about 2 minutes.

    Add the garlic, oregano, dried basil, and red pepper flakes and cook for about 30 seconds, just until fragrant.

    Add the crushed tomatoes, ¾ tsp salt, and MSG or Parmesan rind. Bring to a simmer, then reduce heat to medium-low and cook for 25–30 minutes, stirring occasionally, until slightly thickened. As it simmers, lightly crush the tomatoes with a spoon or potato masher for a more natural texture. If needed, simmer a few minutes longer until the sauce lightly coats a spoon.

    Remove from heat and stir in the fresh basil and 1 tbsp good-quality olive oil. Taste and adjust with additional salt as needed. Add the sugar only if needed to balance acidity. Keep warm.

    Prepare the Chicken

    Place the chicken between sheets of plastic wrap and pound to an even ½-inch (1.25 cm) thickness.

    Season both sides with salt, pepper, and garlic powder. Let rest at room temperature for 15–20 minutes.

    Set Up the Breading Station

    In one shallow dish, whisk together the eggs and flour until smooth.

    In a second dish, combine the Parmesan, panko, garlic powder, oregano, and pepper.

    Bread the Chicken

    Pat the chicken dry. Dip each cutlet into the egg mixture, allowing excess to drip off, then coat thoroughly in the Parmesan-panko mixture, pressing gently so the coating adheres.

    Fry the Chicken

    Heat the oil in a large skillet over medium-high heat until shimmering.

    Working in batches, add the chicken and cook without moving until deep golden brown, about 1½–2 minutes per side.

    Transfer to a wire rack set over a sheet pan, or to a paper towel–lined plate if serving immediately.

    Broil and Assemble

    Preheat the broiler and position the rack about 4 inches (10 cm) from the heat.

    Place the chicken on a baking sheet. Spoon a light layer of sauce over each cutlet, then top with the mozzarella and provolone.

    Broil until the cheese is melted and lightly browned, 2–4 minutes.

    Finish and Serve

    Transfer to a serving platter. Spoon a small amount of additional sauce around or lightly over the chicken, then finish with fresh basil, a light dusting of freshly grated Parmesan, and a drizzle of olive oil.


    Notes

    Preparation

    • For a slightly fresher texture, you can substitute whole peeled tomatoes and crush them by hand instead of using crushed tomatoes.
    • Blooming the full tablespoon of tomato paste gives the sauce more depth without pushing it into a heavy, long-cooked style.
    • Adding the red pepper flakes with the garlic keeps the heat clean and bright without risking bitterness.
    • Hold back some of the final salt adjustment until after the sauce has reduced and the MSG or Parmesan rind has been added, since both affect perceived savoriness.
    • Do not oversauce—too much sauce will soften the crust.
    • Letting the chicken rest after seasoning improves flavor and texture.

    Serving Suggestions

    • Serve with spaghetti, garlic bread, or a simple green salad.
    • Also works well sliced over pasta or tucked into a toasted sandwich roll.

    Variations

    • Substitute fontina for provolone for a softer, more melt-focused variation.
    • Use finely grated Parmesan rind instead of MSG for a more traditional source of added savory depth.
    • Use mozzarella only for a simpler, more classic approach.

    Make-Ahead & Storage

    • The sauce can be made up to 3 days ahead and refrigerated.
    • The fried chicken can be held briefly on a wire rack in a 200–225°F (95–110°C) oven before broiling.
    • Leftovers reheat best in a 375°F (190°C) oven to help preserve the crust.
  • Brown Sugar Blondies

    Brown Sugar Blondies

    These brown sugar blondies are a simple, old-school bar cookie—rich with caramel notes, soft in the center, and the kind of dessert that disappears fast at family get-togethers. The base recipe is intentionally straightforward (one bowl, one pan), and it’s a perfect canvas for mix-ins like ginger + cranberry, chocolate chips, toasted nuts, or a cinnamon-sugar swirl.


    Ingredients

    • 2 cups brown sugar
    • 1⅔ cups all-purpose flour
    • ½ cup butter, melted
    • 3 eggs
    • 2 tsp baking powder
    • 2 tsp vanilla extract
    • ½ tsp table salt

    Directions

    Prepare the Batter

    Preheat oven to 350º. Grease a 9×13 baking dish.

    In a large bowl, combine all ingredients and mix until evenly incorporated. Spread batter evenly into the prepared pan.

    Bake and Cool

    Bake until the top is dry and the edges begin to pull away from the sides, about 25 minutes.

    Remove from the oven and cool completely before slicing.


    Notes

    Preparation

    These blondies are soft and lightly cake-like as written. For a chewier, denser blondie, make this one change:

    • Chewier Texture Option: Use 2 eggs (instead of 3) and 1 tsp baking powder (instead of 2 tsp). (All other ingredients stay the same.)

    Doneness is best judged by texture, not time:

    • A toothpick should show moist crumbs, not wet batter.
    • Overbaking will dry the bars quickly, so start checking a few minutes early if your oven runs hot.
    • For clean slices, cool completely and use a sharp knife, wiping between cuts.

    Altitude can affect baking results (especially dryness and rise):

    • High Altitude (~4,750 ft / 1400 m): Start checking 2–4 minutes early. If your blondies tend to bake up dry at altitude, add 1–2 tbsp extra melted butter to the batter.
    • Sea Level: Bake time is typically closer to the full time; keep the base butter amount as written.

    Serving Suggestions

    • Serve at room temperature for the cleanest texture and easiest slicing.
    • For a dessert-style presentation, warm individual squares briefly and serve with vanilla ice cream.

    Variations

    Stir the variation ingredients below into the batter unless otherwise noted.

    White Chocolate Toffee Blondies:

    • ¼ cup white chocolate chips (sprinkled evenly on top before baking)
    • 1 tbsp toffee bits (sprinkled evenly on top before baking)

    Ginger Cranberry Bars:

    • ½ tsp ground ginger
    • ¼ cup crystallized ginger, finely chopped
    • ½–⅔ cup dried cranberries, chopped
    • 8 oz white chocolate chips
    • Optional: ½ tsp orange zest

    Classic Walnut Blondies:

    • 1–1¼ cups walnuts, toasted and chopped
    • Optional: ½ tsp cinnamon

    Chocolate Chip Blondies:

    • 1½–2 cups semisweet or dark chocolate chips
    • Optional: a light sprinkle of flaky salt on top before baking

    Maple Pecan Blondies:

    • 1 cup pecans, toasted and chopped
    • ½ tsp cinnamon
    • Optional: add 1 tbsp maple syrup

    Espresso Toffee Blondies:

    • 1 tsp instant espresso powder
    • ¾ cup toffee bits

    Cinnamon Roll Blondies:

    Gently marble this swirl into the batter just before baking:

    • ¼ cup brown sugar
    • 1½ tsp cinnamon
    • 1 tbsp melted butter

    Apple Spice Blondies:

    • 1½ cups finely diced apple, tossed with 1 tsp flour
    • ¾ tsp cinnamon
    • ¼ tsp nutmeg

    Variation baking note:

    • Fruit-heavy or topped variations may need 1–3 additional minutes of bake time.
    • Toasting nuts before adding improves flavor and keeps them tasting fresh in the finished bars.

    Make-Ahead & Storage

    • Store tightly covered at room temperature for up to 3 days.
    • Freeze fully cooled bars (well wrapped) for up to 2 months; thaw at room temperature.
  • Boterkoek

    Boterkoek

    Oma Rasch was a spunky little lady, full of equal parts sugar and spice. I fondly remember the fun we had while I lived in her second-story row house on Krugerstraat in Den Helder, at the northernmost point of North Holland. Even in her 80s, she climbed the steep, treacherous staircase each day and set off on her bicycle to run errands. She was always willing to help as I worked to learn Dutch, once telling me, after I repeated a particularly colorful word, “There are no bad words, just words you shouldn’t use around nette mensen (respectable people).” A common treat in her home was homemade boterkoek—rich, golden, and fragrant. Whenever we walked in and smelled that buttery aroma, we knew we were in for ‘een lekker toetje’, a truly ‘heerlijk’ dessert.


    Ingredients

    • 1 cup (2 sticks) unsalted butter, at room temperature
    • 1 cup sugar
    • 2 cups all-purpose flour
    • ¼ tsp table salt
    • 1 large egg, lightly beaten, divided
    • ½ tbsp milk or buttermilk (for egg wash)
    • Optional Flavor Variations:

      • Citrus: Zest of ½ a lemon, lime, or orange, plus a small splash of juice
      • Almond: ½–1 tsp almond extract, topped with almond halves before baking
      • Speculaas: 1–1½ tsp speculaaskruiden (Dutch speculaas spice blend)
      • Ginger: 1–2 tbsp finely chopped crystallized ginger folded into the dough
      • Vanilla Sugar: 1–2 tbsp vanilla sugar mixed into the dough or sprinkled lightly on top

    Directions

    Prepare the Pan and Oven:

    Preheat the oven to 350°F (175°C). Butter an 8- or 9-inch round cake pan, then line the bottom with a circle of parchment paper. Lightly dust the sides with flour and tap out any excess. A springform or removable-bottom pan makes unmolding and slicing easier, but a standard pan works as well.

    Mix the Dough:

    In a small bowl, lightly beat the egg with a fork. Transfer about 1 tbsp of the beaten egg to a separate small bowl, add the milk or buttermilk, and whisk to combine for the egg wash. Set aside.

    In a medium mixing bowl, combine the butter and sugar. Beat just until smooth, creamy, and well combined (do not whip until light and fluffy—you want a dense boterkoek, not a cake). Add the remaining beaten egg (from the larger portion) and mix only until incorporated. If using any flavorings (citrus zest, almond extract, speculaaskruiden, crystallized ginger, or vanilla sugar), mix them in at this stage.

    Add the flour and salt. Using a spatula or wooden spoon, fold and stir just until no dry flour remains and the dough comes together. The dough will be stiff but cohesive; avoid overmixing.

    Chill the Dough:

    Scrape the dough onto a sheet of plastic wrap and pat it into a thick disk. Wrap tightly and refrigerate for 20–30 minutes, until firm but still pliable. Overchilling will make the dough harder to press evenly into the pan.

    Press, Crosshatch, and Glaze:

    Transfer the chilled dough to the prepared pan. Using your fingertips or the back of a spoon, press it evenly into the pan, smoothing the surface and making sure it reaches all the way to the edges.

    Using the tines of a fork, lightly score a crosshatch pattern across the top of the dough. For the cleanest lines, wipe the fork between strokes as needed.

    Gently brush the surface with a thin, even layer of the egg wash. Avoid pooling, especially around the edges, which can create hard spots as it bakes.

    Bake:

    Bake at 350°F (175°C) for 25–35 minutes, until the edges are deep golden brown and the center is just set and a lighter golden color. The top should not puff dramatically. Begin checking around 25 minutes, rotating the pan if needed for even browning. The boterkoek will continue to firm as it cools.

    Cool, Rest, and Serve:

    Remove the pan from the oven and place it on a wire rack. Let the boterkoek cool completely in the pan. Once cool, run a thin knife around the edge to loosen, then invert or release from the pan and remove the parchment.

    For the best flavor and texture, allow the boterkoek to rest for several hours or overnight before slicing. Cut into small wedges (it is rich) and serve at room temperature.


    Notes

    Preparation

    • Use unsalted butter for the cleanest flavor and better control over salt. The butter should be cool room temperature—soft enough to press a finger into, but not greasy or melting.
    • Be careful not to over-aerate the butter and sugar; mixing just until smooth (rather than light and fluffy) keeps the boterkoek dense and tender, as it should be.
    • For easy release and clean slices, butter the pan and line the bottom with parchment. A springform or removable-bottom pan is especially handy if you plan to unmold it for serving on a platter.
    • Approximately equal amounts of butter, sugar, and flour by weight are used in this recipe, which is traditional for Dutch boterkoek and gives it its rich, close-crumb texture.
    • Altitude adjustments (high altitude ~4,750 ft / 1,450 m): Because this is a dense, non-leavened cake, ingredient changes are usually unnecessary. Begin checking for doneness a few minutes early and remove from the oven once the edges are deep golden and the center is just set. At sea level, follow the base recipe and bake until the center is just set and no longer looks wet.

    Serving Suggestions

    • Cut into small wedges or narrow bars—boterkoek is rich and meant to be enjoyed in modest slices.
    • Serve alongside afternoon coffee, as is common in Dutch homes.
    • For a simple dessert, pair with lightly sweetened whipped cream and fresh berries or stone fruit.
    • Include on a cookie or dessert tray with other Dutch favorites such as speculaas or stroopwafels.

    Variations

    • Citrus Boterkoek: Add the finely grated zest of ½ a lemon, lime, or orange, plus a small splash of juice, to the dough along with the egg. This adds a bright, fragrant edge that balances the richness.
    • Almond Boterkoek: Add ½–1 tsp almond extract to the dough, then press blanched or sliced almonds gently into the top before baking. Almond is a very traditional flavor; start with the smaller amount of extract and increase to taste.
    • Speculaas Boterkoek: Add 1–1½ tsp speculaaskruiden (Dutch speculaas spice blend) with the flour for a warm, spiced version that’s especially nice around the holidays.
    • Ginger Boterkoek: Fold 1–2 tbsp finely chopped crystallized ginger into the dough before pressing it into the pan for pockets of sweet, spicy heat.
    • Vanilla Sugar Boterkoek: Replace 1–2 tbsp of the sugar with vanilla sugar, or sprinkle a light dusting of vanilla sugar over the top right after baking for extra aroma.

    Make-Ahead & Storage

    • Boterkoek is an excellent make-ahead dessert. The flavor and texture actually improve after resting for several hours or overnight.
    • Once completely cool, wrap tightly or store in an airtight container at room temperature for up to 3–4 days.
    • For longer storage, wrap wedges or the whole boterkoek well and freeze for up to 2 months. Thaw at room temperature in the wrapping to preserve moisture.
    • If the surface softens slightly after storage, a brief rest uncovered at room temperature will help the top regain a gentle firmness.
  • Chocolate Meringues

    Chocolate Meringues

    These Chocolate Meringues are light, crisp, and deeply chocolatey—fun to make, and bakery-fancy when piped into little stars. They’ve long been part of our Christmas Eve tradition, shared alongside several other homemade cookies during an evening spent with family and friends. Our Christmas Eve typically gathers 45–75 people for dinner, a Christmas program, and a spread of treats, and these meringues are always among the first to disappear. Expect a delicate, crisp exterior with a slightly chewy center (especially when they’re fresh). For the most reliable structure and brightest chocolate flavor, use natural cocoa powder rather than Dutch process.


    Ingredients

    • 3 egg whites (room temp)
    • ¾ tsp vanilla extract
    • ¾ cup sugar
    • ¼ cup natural cocoa powder (recommended; see notes)

    Directions

    Prepare the Pan and Bag

    Preheat oven to 300°F. Line baking sheets with parchment paper and cover with foil. Fit a pastry bag with a large open star tip (i.e. #8b).

    Whip the Meringue

    Place egg whites and vanilla in a very clean stainless steel mixing bowl. Beat on low speed until bubbles begin to form on the top of the eggs (like a bubble bath).

    Increase speed to high and beat until the egg whites form soft peaks.

    Gradually add sugar, about 2 tbsp at a time, beating until stiff peaks form (egg whites will be shiny, heavy, and stiff—don’t over beat).

    Add Cocoa and Pipe

    Gently fold in cocoa by hand until evenly incorporated.

    Pipe stars about 1½ in. diameter onto the foil.

    Alternatively, drop by rounded tsp if you don’t want to pipe.

    Bake and Cool

    Bake for about 30-35 minutes, or until lightly browned.

    Remove from foil and cool on wire racks.

    Store in a non-reactive uncovered bowl.


    Notes

    Preparation

    • Use a very clean stainless steel (or glass) bowl and clean beaters—any trace of grease can prevent the egg whites from whipping properly.
    • A stand mixer (kitchenaid) works best for consistent volume and texture.
    • Do not double this recipe—larger batches are less reliable and don’t hold structure as well.
    • Natural vs Dutch-Process Cocoa: Natural cocoa is slightly acidic and helps stabilize the egg-white foam, while also providing a brighter, sharper chocolate flavor. Dutch-process cocoa is darker and smoother in flavor but can be slightly more prone to deflating if over-folded.
    • Because cocoa powder contributes to both structure and drying, this recipe is designed specifically for chocolate meringues. Plain or non-cocoa meringues require additional stabilization (such as cream of tartar) and are best treated as separate recipes.

    Serving Suggestions

    • Add to cookie trays or dessert platters for contrast alongside butter cookies, spritz, or shortbread.

    Make-Ahead & Storage

    • Store in a cool, dry place. Humidity will soften meringues over time.
    • Best enjoyed within 1–3 days, though texture may vary depending on weather and storage conditions.