Bags of Spices

Favorite Recipes

Pork

  • Bahmi Goreng — Indonesian Fried Noodles

    Bahmi Goreng — Indonesian Fried Noodles

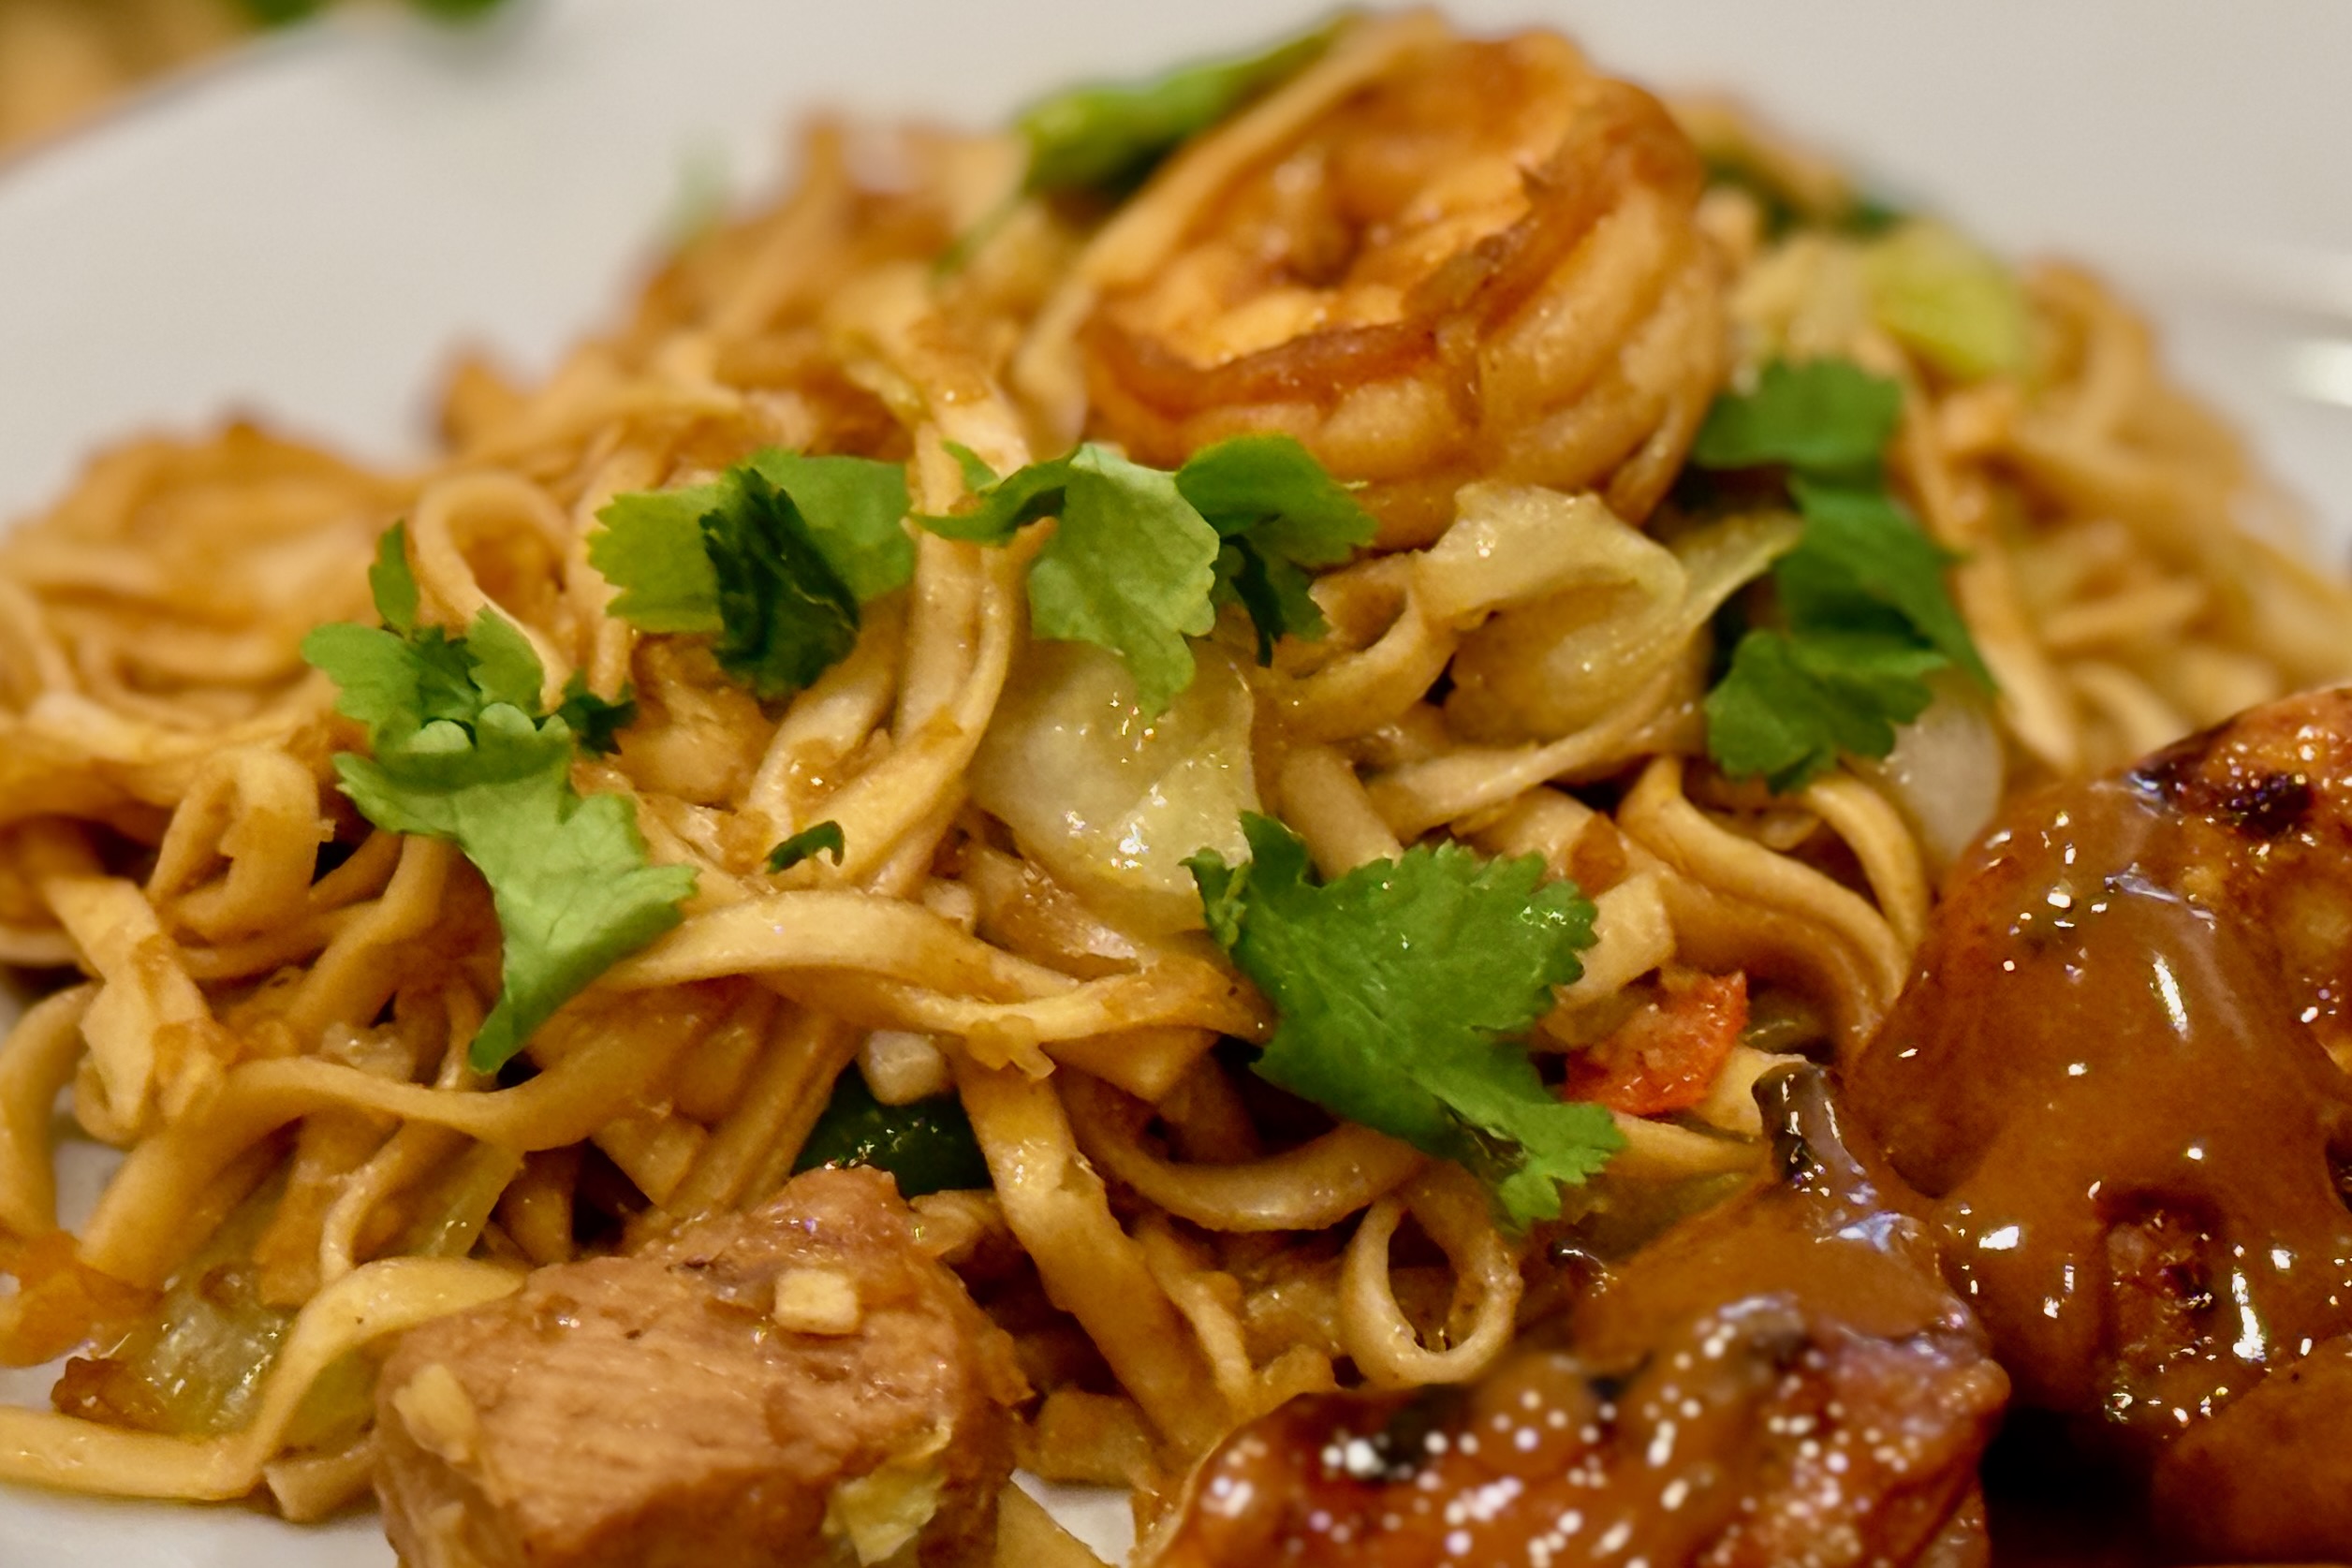
    When Jane and I returned home from our honeymoon, we talked about what to have for dinner that first Sunday back. I said Indonesian sounded great—she had no idea what I meant. That conversation started what has since become one of our favorite family food traditions. The first time I made bahmi goreng for her, the kitchen filled with the aroma of garlic, chilies, and ketjap caramelizing in a hot wok, and she was instantly hooked. Ever since, this dish has represented warmth, comfort, and the sense of adventure we shared from the very beginning. Stir-fried noodles tossed with tender chicken, pork, and shrimp, fragrant with galangal and brightened with lime, bring a taste of Indonesia to our table time and again.


    Ingredients

      Noodles

    • 12 oz (340 g) Chinese egg noodles or lo mein noodles
    • Proteins

    • 4 oz (115 g) small shrimp, peeled and halved lengthwise (optional)
    • 4 oz (115 g) chicken breast, thinly sliced
    • 4 oz (115 g) lean pork or thinly sliced beef
    • Optional Quick Marinades

    • For Shrimp: ½ tsp light soy sauce, ¼ tsp fish sauce, ¼ tsp cornstarch, pinch white pepper
    • For Pork: 1 tsp ketjap manis, ½ tsp light soy sauce, ¼ tsp cornstarch, ¼ tsp minced garlic
    • For Chicken: 1 tsp ketjap manis, ½ tsp light soy sauce, ¼ tsp cornstarch, ¼ tsp minced garlic, pinch white pepper
    • Vegetables

    • 2 cups shredded white cabbage or Chinese cabbage
    • 4 green onions, cut into 1-inch pieces
    • Bumbu (Spice Paste)

    • 3½ oz (100 g) shallots, roughly chopped
    • 4–5 cloves garlic
    • ½ oz (15 g) fresh galangal, sliced (or ½ tsp galangal powder)
    • 1–2 fresh red chilies, seeded if desired
    • 1 tbsp chopped cilantro stems
    • Seasoning Sauce

    • 2 tbsp ketjap manis (Indonesian sweet soy sauce)
    • 1 tbsp light soy sauce
    • ⅓ tsp MSG (optional but recommended)
    • ¼ tsp ground white pepper
    • ⅛ tsp turmeric
    • 1 tsp fish sauce (optional, for added umami)
    • Cooking Oil

    • 3 tbsp peanut oil, divided
    • Optional Flavor Boost

    • 1 tsp tomato paste
    • Finishing & Garnishes

    • Fresh lime juice, to taste
    • Fresh cilantro leaves
    • Fried shallots
    • Reserved chili slivers
    • Omelet shreds (optional)
    • Fried onion flakes (optional)
    • For Serving

    • Lime wedges
    • Sambal oelek or sambal badjak
    • Extra ketjap manis

    Directions

    Prepare the Noodles

    Cook the noodles according to package directions until just tender. Drain well and toss lightly with about 1 tsp of the peanut oil to prevent sticking.

    Spread the noodles out on a tray or colander and let them cool slightly while preparing the remaining ingredients.

    Optional: Marinate the Proteins

    If using the marinades, toss each protein with its respective marinade ingredients and let stand for 10–15 minutes while preparing the vegetables and bumbu.

    Prepare the Bumbu

    In a food processor or mortar and pestle, grind the shallots, garlic, galangal, chilies, and cilantro stems into a coarse aromatic paste.

    Prepare the Vegetables

    Shred the cabbage and cut the green onions into 1-inch lengths.

    Cook the Proteins

    Heat 1 tbsp peanut oil in a wok over high heat until shimmering.

    Add the chicken and pork (or beef) and spread them across the surface of the wok. Let them sear undisturbed for about 30 seconds before stir-frying.

    Continue stir-frying until just cooked through, about 2–3 minutes.

    Add the shrimp and cook briefly until pink. Transfer all proteins to a plate and set aside.

    Cook the Bumbu

    Add the remaining peanut oil to the wok.

    Add the bumbu paste and stir-fry for about 2 minutes until fragrant.

    If using the tomato paste, add it now and cook about 30 seconds until lightly caramelized.

    Build the Stir-Fry

    Add the cabbage and green onions and stir-fry for 1–2 minutes.

    Add the noodles and toss well with the aromatics.

    Return the proteins to the wok.

    Season and Finish

    Add the ketjap manis, soy sauce, MSG, white pepper, turmeric, and fish sauce if using.

    Toss everything over high heat until evenly coated and glossy. If the noodles absorb the sauce too quickly, add 1–2 tbsp hot water to loosen the sauce and help it coat the noodles.

    Finish with a squeeze of fresh lime juice.

    Serve

    Garnish with cilantro leaves, fried shallots, chili slivers, and optional omelet shreds or fried onion flakes. Serve with lime wedges, sambal, and extra ketjap manis.


    Notes

    Preparation

    • Chinese egg noodles or lo mein noodles work best for this dish.
    • If ketjap manis is unavailable, substitute 1 tbsp soy sauce mixed with 2 tsp brown sugar.
    • If using a less sweet ketjap manis, add ½ tsp brown sugar to balance the sauce.
    • A small amount of fish sauce adds savory depth similar to Indonesian shrimp paste.
    • The tomato paste adds deeper color and umami reminiscent of Dutch-Indo restaurant versions.

    Serving Suggestions

    • Serve with krupuk (Indonesian shrimp crackers).
    • A fried egg on top is a popular Indonesian presentation.
    • A side of acar timun adds refreshing contrast.

    Variations

    • Increase the chilies or add sambal badjak for a spicier Javanese-style version.
    • A light drizzle (about ½ tsp) sesame oil over the finished noodles adds subtle aroma.

    Make-Ahead & Storage

    • Best served fresh from the wok.
    • Leftovers keep up to 2 days refrigerated.
    • Reheat in a skillet with a splash of water or oil.
  • Carnitas

    Carnitas

    These carnitas take inspiration from traditional Michoacán-style cooking—slow-simmered in rich pork fat, brightened with citrus, and finished until the edges are irresistibly crisp. Whether cooked in a cowboy wok over an open flame or in a Dutch oven on the stovetop, this method delivers deeply savory, tender pork with the classic crispy bits that make great street-taco carnitas unforgettable.


    Ingredients

    • 8 lbs pork shoulder, cut into 4-inch chunks
    • 8 lbs lard (or enough to submerge pork by at least ¾)
    • 4 tbsp table salt, divided (2 tbsp sprinkled directly over the pork, 2 tbsp dissolved in ½ cup hot water)
    • ½ cup hot water
    • 1 can evaporated milk
    • 1 bottle Coca-Cola
    • Juice of 3 oranges (at least ½ cup), plus the halved oranges
    • 2–3 bay leaves
    • 15–20 whole garlic cloves, peeled
    • ½ onion, cut into wedges
    • Yield: Approximately 4.5–5 lbs carnitas (about 20–24 tacos, using 1.5–2 oz meat per street taco or 2.5–3 oz for larger tacos)

    Directions

    Season the Pork

    Sprinkle 2 tbsp salt evenly over the pork and let sit for at least 30 minutes at room temperature. Dissolve the remaining 2 tbsp salt in ½ cup hot water and set aside.

    For deeper seasoning, you can salt the pork 12–24 hours ahead: sprinkle the 2 tbsp salt over the pork, cover or leave uncovered for lightly dried edges, and refrigerate. Remove from the refrigerator 30–45 minutes before cooking.

    Initial Frying (Browning Stage)

    In a large discada (cowboy wok/plow disk) or deep Dutch oven, heat the lard to 350°F over medium heat. Add the pork in a single layer—working in batches if needed to avoid overcrowding—and cook, turning every 15 minutes, until the surfaces are deep golden brown, about 30–45 minutes.

    Prepare to Add Liquids (Safety Step)

    Reduce heat to low, then turn off the heat completely and let the lard cool until the bubbling subsides, 2–3 minutes, to reduce boil-over risk. Once the fat is calm, carefully add the evaporated milk, Coca-Cola, the salted water, freshly squeezed orange juice, the halved oranges, bay leaves, garlic cloves, and onion wedges.

    Slow Simmer (Confit Stage)

    Return heat to medium-low and maintain a gentle simmer (around 225°F), with small, lazy bubbles breaking around the edges. Cook until the pork is fork-tender and most of the liquid has evaporated, allowing the milk and Coke sugars to caramelize, about 1.5–2 hours. Stir every 20–30 minutes during the final reduction to prevent scorching.

    Finish & Crisp

    Once the liquid has fully reduced, remove and discard the bay leaves, citrus halves, and onion wedges. The pork will begin frying again in the rendered fat. Increase the heat slightly and crisp the carnitas to your preferred texture, turning occasionally until browned, crispy on the edges, and easily shreddable. Shred or chop into bite-sized pieces and serve hot.


    Notes

    Preparation

    • Salting the pork 12–24 hours in advance deepens the seasoning and can improve browning; just be sure to bring the pork toward room temperature before cooking.
    • Use enough lard to submerge the pork by at least ¾ for even cooking and browning, especially in a deep Dutch oven.
    • Always allow the lard to stop actively bubbling before adding liquids to reduce the risk of boil-over or splattering.
    • During the confit stage, aim for a gentle simmer with small bubbles around the edges of the pot rather than a vigorous boil.
    • As the liquid reduces and the sugars caramelize, stir periodically to prevent scorching on the bottom of the pan.
    • Handling this much volume can be a challenge. I always use my rimmed Discada (aka Cowboy Wok or Disco). The specific tools I use are listed on my kitchen tools page.

    Serving Suggestions

    For tacos, serve warm carnitas in heated corn tortillas with diced onion, chopped cilantro, crumbled queso fresco, and homemade Salsa Verde or Chile de Árbol Salsa.

    • Serve with lime wedges for brightness.
    • Brush tortillas lightly with pork fat before warming for taquería-style flavor.
    • Add a sprinkle of flaky salt right before serving.
    • For extra-crispy edges, reheat portions on a hot plancha or cast-iron skillet until sizzling.

    Variations

    • Pressure Cooker Shortcut: For a faster version, season the pork as directed and place it in a pressure cooker or Instant Pot with the orange juice, halved oranges, bay leaves, garlic, onion, and about 1 cup water (omit the lard, Coke, and evaporated milk at this stage). Cook on high pressure for 35 minutes, then allow a natural release. Once tender, transfer the drained pork to a large pan with lard, Coke, and evaporated milk, then simmer and fry as directed to caramelize and crisp the edges.

    Make-Ahead & Storage

    • Cool carnitas to room temperature, then refrigerate in an airtight container with some of the cooking fat spooned over the top for up to 4–5 days.
    • For longer storage, freeze cooled carnitas (with a thin layer of fat) in freezer-safe bags or containers for up to 3 months. Thaw overnight in the refrigerator before reheating.
    • To reheat, warm carnitas in a skillet over medium to medium-high heat with a spoonful of reserved fat, spreading the meat into an even layer and allowing the edges to crisp before stirring.
    • Reheated carnitas often develop even better texture and flavor after a second round of crisping.
  • Chile Verde Burritos

    Chile Verde Burritos

    The 9th of 11, Grandma grew up in a large family that loved to sing together while washing dishes after a delicious meal. Nobody ever walked away hungry–a tradition that continues to this day. Every year Grandma’s family would meet for a week-long family reunion. Our family and Uncle Jay’s (#10 of 11) would never miss. We’d always extend the reunion by a week, spending extra time with Uncle Jay, Aunt Barbara, and their four kids. Our adventures were so memorable that many of my favorite childhood memories include Uncle Jay’s family. The first time I remember eating these burritos was at a dinner in their home in San Jose. I still drool a little every time I think about it! This recipe is a variation of Uncle Jay’s, specifically designed around cooking the pork in an Instant Pot. Also, in his the meat is not marinated and he uses red Los Palmas sauce. I’ve added the marinade, along with the Instant Pot preparation to make this recipe faster and easier to prepare for a larger group. The marinade is completely optional—and highly recommended!


    Ingredients

    • 3–4 lbs pork shoulder (½ of a boneless shoulder)
    • 1 tbsp lard plus 2 tbsp avocado oil, divided
    • 2 lg onions, chopped
    • 1 recipe Refried Beans
    • 1 can (7 oz) Ortega diced green chiles, undrained
    • 1–2 cups homemade green enchilada sauce (or Los Palmas), to taste
    • jack cheese, grated
    • flour tortillas
    • Brazing Liquid

    • 1½ cups chicken broth
    • ½ cup cilantro
    • ⅓ cup avocado oil
    • ¼ cup soy sauce
    • ¼ cup orange juice
    • 2 tbsp lime juice
    • 2 tsp salt
    • 1 jalapeño, minced
    • 1 tsp cumin
    • 1 tsp chipotle chili powder
    • 1 tsp ancho chili powder
    • ½ tsp garlic powder
    • ½ tsp onion powder
    • ½ tsp mexican oregano
    • ¼ tsp cinnamon

    Directions

    Braze

    Slice pork shoulder into chunks (about 1 lb each). In an Instant Pot, combine all brazing liquid ingredients.

    In a skillet, heat 1 tbsp avocado oil and 1 tbsp lard; brown pork chunks on all sides and place in brazing liquid.

    Place lid on Instant Pot and close steam vent. Process on high pressure for 45 minutes.

    Allow pressure to release naturally for 30 minutes.

    Combine Ingredients

    Add an additional tbsp avocado oil to skillet and heat until shimmering. Add onion and sauté until softened and slightly browned.

    Place refried beans in a large mixing bowl; stir in sautéed onions, green chiles, and enchilada sauce.

    Remove meat from brazing liquid and cut into chunks or shred; stir into refried bean mixture.

    Serve

    Serve rolled in a warm tortilla with grated jack cheese, diced white onion, and chopped cilantro.

    Serve with Salsa Verde, a side of Mexican Rice, and a tomato-cucumber salad with Espiau’s Vinaigrette.

    For smothered burritos, heat 1 can (28 oz) Los Palmas green enchilada sauce. Add 1 tbsp sugar and ⅓ cup of the remaining brazing liquid; heat to boiling. Whisk in ¼–½ tsp xanthan gum to thicken slightly. Spoon some into the burrito, then smother with sauce and cheese; broil to melt.


    Notes

    Preparation

    • The marinade-style brazing liquid gives the pork deep flavor quickly, making this ideal for serving large groups.
    • For a milder filling, use only 1 cup enchilada sauce; for richer sauciness, use the full 2 cups.
    • Be sure to sauté the onions until lightly browned—this adds sweetness and depth to the bean mixture.
    • The original version of this family recipe can be found here: Original Chile Verde Burritos.

    Serving Suggestions

    • Great served with Mexican Rice, Salsa Verde, and plenty of fresh cilantro.
    • For a crowd, keep tortillas warm in a low oven and serve burrito fillings buffet-style.

    Variations

    • Substitute half the pork with chicken thighs for a lighter filling.
    • Use Hatch green chiles in place of Ortega for a smokier, more robust flavor.
    • To make it spicier, add an extra minced jalapeño to the bean mixture.

    Make-Ahead & Storage

    • Filling can be prepared 1–2 days in advance; flavor improves as it rests.
    • Store filling separately from tortillas to prevent sogginess.
    • Leftovers freeze well for up to 3 months—thaw and reheat gently before serving.
  • Babi Panggang — Indonesian Roasted Pork

    Babi Panggang — Indonesian Roasted Pork

    Working in the office in the city of Bussum in The Netherlands, we’d often order take-out from our favorite Chinese-Indonesian restaurant, Tong Fong, in the neighboring city of Hilversum. One stand-out item was their delicious Babi Panggang, which was always a part of our order. I later learned that Babi Panggang is the most ordered main dish at Indonesian restaurants throughout the Netherlands. This is my attempt to recreate the vibrant flavors and textures of this delicious dish.


    Ingredients

    • 2 lb pork shoulder or belly
    • Marinade

    • ¼ cup ketjap manis
    • 2 tbsp hoisin sauce
    • 2 tbsp rice cooking wine
    • 1 tbsp brown sugar
    • 1 tbsp fresh ginger, grated
    • 1 tbsp fish sauce
    • ½ tbsp sambal oelek
    • ½ tbsp sambal badjak
    • ½ tsp toasted sesame oil (optional)
    • ¼ tsp Chinese five spice (optional)
    • 2 cloves garlic, minced
    • Juice and zest of 1 lime
    • Sweet & Sour Red Sauce

    • 1 tbsp vegetable oil
    • 1 small onion, finely chopped
    • 2–3 cloves garlic, minced
    • 2 tsp grated ginger
    • ½ tsp sambal oelek
    • 3 tbsp tomato paste
    • ¼ tsp chicken powder
    • ¼ cup sweet chili sauce
    • 3 tbsp ketchup
    • 2 tbsp lime juice
    • 2 tbsp seasoned rice vinegar
    • 1 tbsp Tamarind Paste
    • 1 tbsp ketjap manis
    • 1 tsp fish sauce
    • ¾ cup chicken stock or water
    • ¼ cup brown sugar (adjust to taste)
    • 1 tbsp cornstarch mixed with 1 tbsp water

    Directions

    Marinate the Pork

    Combine all marinade ingredients, stirring until the sugar has completely dissolved. Pour into a resealable container or vacuum-seal bag. Add the pork, coating thoroughly. Seal and marinate in the refrigerator for 4–12 hours.

    Sweet & Sour Red Sauce

    Heat oil in a saucepan over medium heat. Sauté onion until lightly browned; add garlic, ginger, and sambal, and cook until fragrant. Add tomato paste and chicken powder; cook 1 minute to develop sweetness.

    Stir in sweet chili sauce, ketchup, lime juice, vinegar, tamarind, ketjap manis, fish sauce, stock or water, and brown sugar. Simmer 10 minutes to allow flavors to meld. Add the cornstarch slurry and simmer until glossy and thickened. Blend with an immersion blender and adjust thickness with additional stock, if needed.

    Preparation #1: Sous Vide

    Preheat sous vide bath to 170°F / 77°C for pork shoulder (130°F / 55°C for pork loin or tenderloin; 150°F / 65°C for pork belly). Submerge vacuum-sealed pork and marinade in the water bath and heat for 12–24 hours (2–8 hours for pork loin or tenderloin).

    Remove from the bag and pat dry. Brush with oil and finish under a broiler set to high for 4–5 minutes to crisp the top. Brush with red sauce during broiling and allow it to develop a few bits of char.

    Slice and serve over rice with a generous amount of sauce. Serve with acar ketimun (pickled vegetables), cucumber salad, fried cabbage, and/or blanched green beans tossed with garlic and sesame oil.

    Preparation #2: Oven

    Preheat oven to 350°F / 177°C. Place pork on a rack in a baking tray. Reserve marinade and boil in a saucepan for 5 minutes. Roast pork for 30–40 minutes per pound, or until internal temperature reaches 190°F / 88°C, basting with the boiled marinade halfway through.

    Rest pork for 20 minutes. Pat dry, brush with oil, and finish under a broiler set to high for 4–5 minutes to crisp the top. Optionally, baste with the red sauce while broiling and allow it to develop slight char.

    Slice and serve over rice with a generous amount of sauce. Serve with acar ketimun, cucumber salad, fried cabbage, and/or blanched green beans tossed with garlic and sesame oil.

    Preparation #3: Pellet Grill

    Preheat pellet grill to 250°F / 120°C. Smoke until internal temperature reaches 187°F / 86°C, basting halfway through. Rest pork for 30 minutes.

    Pat dry, brush with oil, and finish under a broiler set to high for 4–5 minutes to crisp the top. Optionally, baste with the red sauce while broiling and allow it to develop light char.

    Slice and serve over rice with a generous amount of sauce. Serve with acar ketimun, cucumber salad, fried cabbage, and/or blanched green beans tossed with garlic and sesame oil.


    Notes

    Preparation

    • Fattier cuts such as pork shoulder or belly are preferred, but pork loin or tenderloin (especially when using the sous vide method, with times and temperatures adjusted accordingly) can also be used. Take care not to overcook leaner cuts.
    • Preparation #1, Sous Vide, is the preferred method for the most tender and flavorful result.

    Serving Suggestions

    • Serve sliced Babi Panggang over rice with plenty of red sauce spooned on top.
    • Pair with acar ketimun, fried cabbage, cucumber salad, or blanched green beans with garlic and sesame oil.
  • Char Siu

    Char Siu

    With 60 first cousins on just the Huggins side, family parties are rarely small. It isn’t unusual to have 40 to 75 guests for dinner at our get-togethers. Cooking for that many people forces a bit of food-preparation creativity, and this char siu takes advantage of sous-vide precision to simplify the process. For a more traditional method, the pork can also be cooked and basted over a hot charcoal grill for deep, smoky flavor.


    Ingredients

    • 3–4 lbs pork shoulder, cut into 3–4 long strips, about 2 inches thick (see Notes for pork belly option)
    • Marinade:

    • ¾ cup soy sauce
    • ½ cup hoisin sauce
    • ½ cup Shaoxing wine (or dry sherry)
    • ½ cup rock sugar, crushed (or ¼ cup rock sugar + ¼ cup white sugar)
    • 2 tbsp oyster sauce (optional, adds depth)
    • 2 tbsp grated fresh ginger
    • 4 garlic cloves, minced
    • 1 tsp toasted sesame oil
    • 1 tsp Chinese five-spice powder
    • ½ tsp ground white pepper
    • ⅛ tsp pink curing salt #1 (optional, for rosy interior)
    • 3–5 drops red food coloring (optional, classic look)
    • Glaze:

    • 1 cup reserved marinade, strained
    • ¼–⅓ cup honey

    Directions

    Marinate the Pork

    Whisk together all marinade ingredients except the curing salt and honey. Reserve 1 cup of marinade, strain, and refrigerate for the glaze.

    Add curing salt to the remaining marinade. Place pork strips in vacuum-seal bags or heavy zipper bags and add the marinade. Seal and refrigerate at least 8–12 hours, up to 24 hours.

    For best flavor and color penetration, turn the bags occasionally during marinating.

    Sous-Vide Cook

    Preheat the sous-vide water bath to 65°C (149°F). Submerge the sealed pork and cook for 12–16 hours.

    When done, remove the pork and transfer to a rack set over a sheet pan. Pat dry gently.

    Prepare the Glaze

    In a small saucepan, combine the reserved marinade with honey. Simmer over medium heat until reduced by about half and syrupy. Keep warm.

    Dry and Broil

    Let the pork rest uncovered on the rack for 15–20 minutes so the surface becomes slightly tacky. This helps the glaze adhere during broiling.

    Preheat your broiler (or charcoal grill) to very hot. Brush the pork with glaze and broil 6–8 minutes total, turning and re-glazing every 1–2 minutes until lacquered with caramelized edges and light char.

    Keep pork about 6 inches from the broiler to prevent burning. Final internal temperature should be approximately 68–70°C (155–158°F), though the meat is already fully cooked from the sous-vide process.

    Rest and Serve

    Let pork rest 5 minutes, then slice into thick pieces. Drizzle with warm glaze before serving.


    Notes

    Preparation

    • Crushing rock sugar before measuring ensures accurate sweetness and easier dissolving.
    • Optional curing salt deepens the rosy color but does not affect flavor.
    • Turning the pork during marinating promotes even seasoning and color.

    Serving Suggestions

    • Serve over steamed jasmine rice or noodles.
    • Pair with pickled cucumbers or a crisp slaw to balance richness.
    • Excellent in bao buns or sliced thinly for Fried Rice with Shrimp & Char Siu.

    Variations

    • Pork Belly Version: Remove skin, cut into 1½–2-inch strips, reduce sugar to ⅓ cup total, sous-vide at 70°C (158°F) for 10–12 hours, broil from 8 inches away, glazing every minute.
    • Grill Instead of Broil: Cook over hot charcoal, glazing and turning every 1–2 minutes until lacquered.
    • Extra Caramelization: Increase honey in the glaze up to ½ cup for a deeper lacquer.

    Make-Ahead & Storage

    • Pork can be marinated up to 24 hours in advance.
    • Sous-vide cooked pork can be chilled in the sealed bags up to 48 hours before finishing.
    • Leftovers keep 3–4 days refrigerated; broil briefly to refresh the glaze.