Bags of Spices

Favorite Recipes

Baked, Roasted, & Broiled

Oven-based dishes that deliver caramelization, browning, and deep savory flavor — from casseroles to roasted meats.

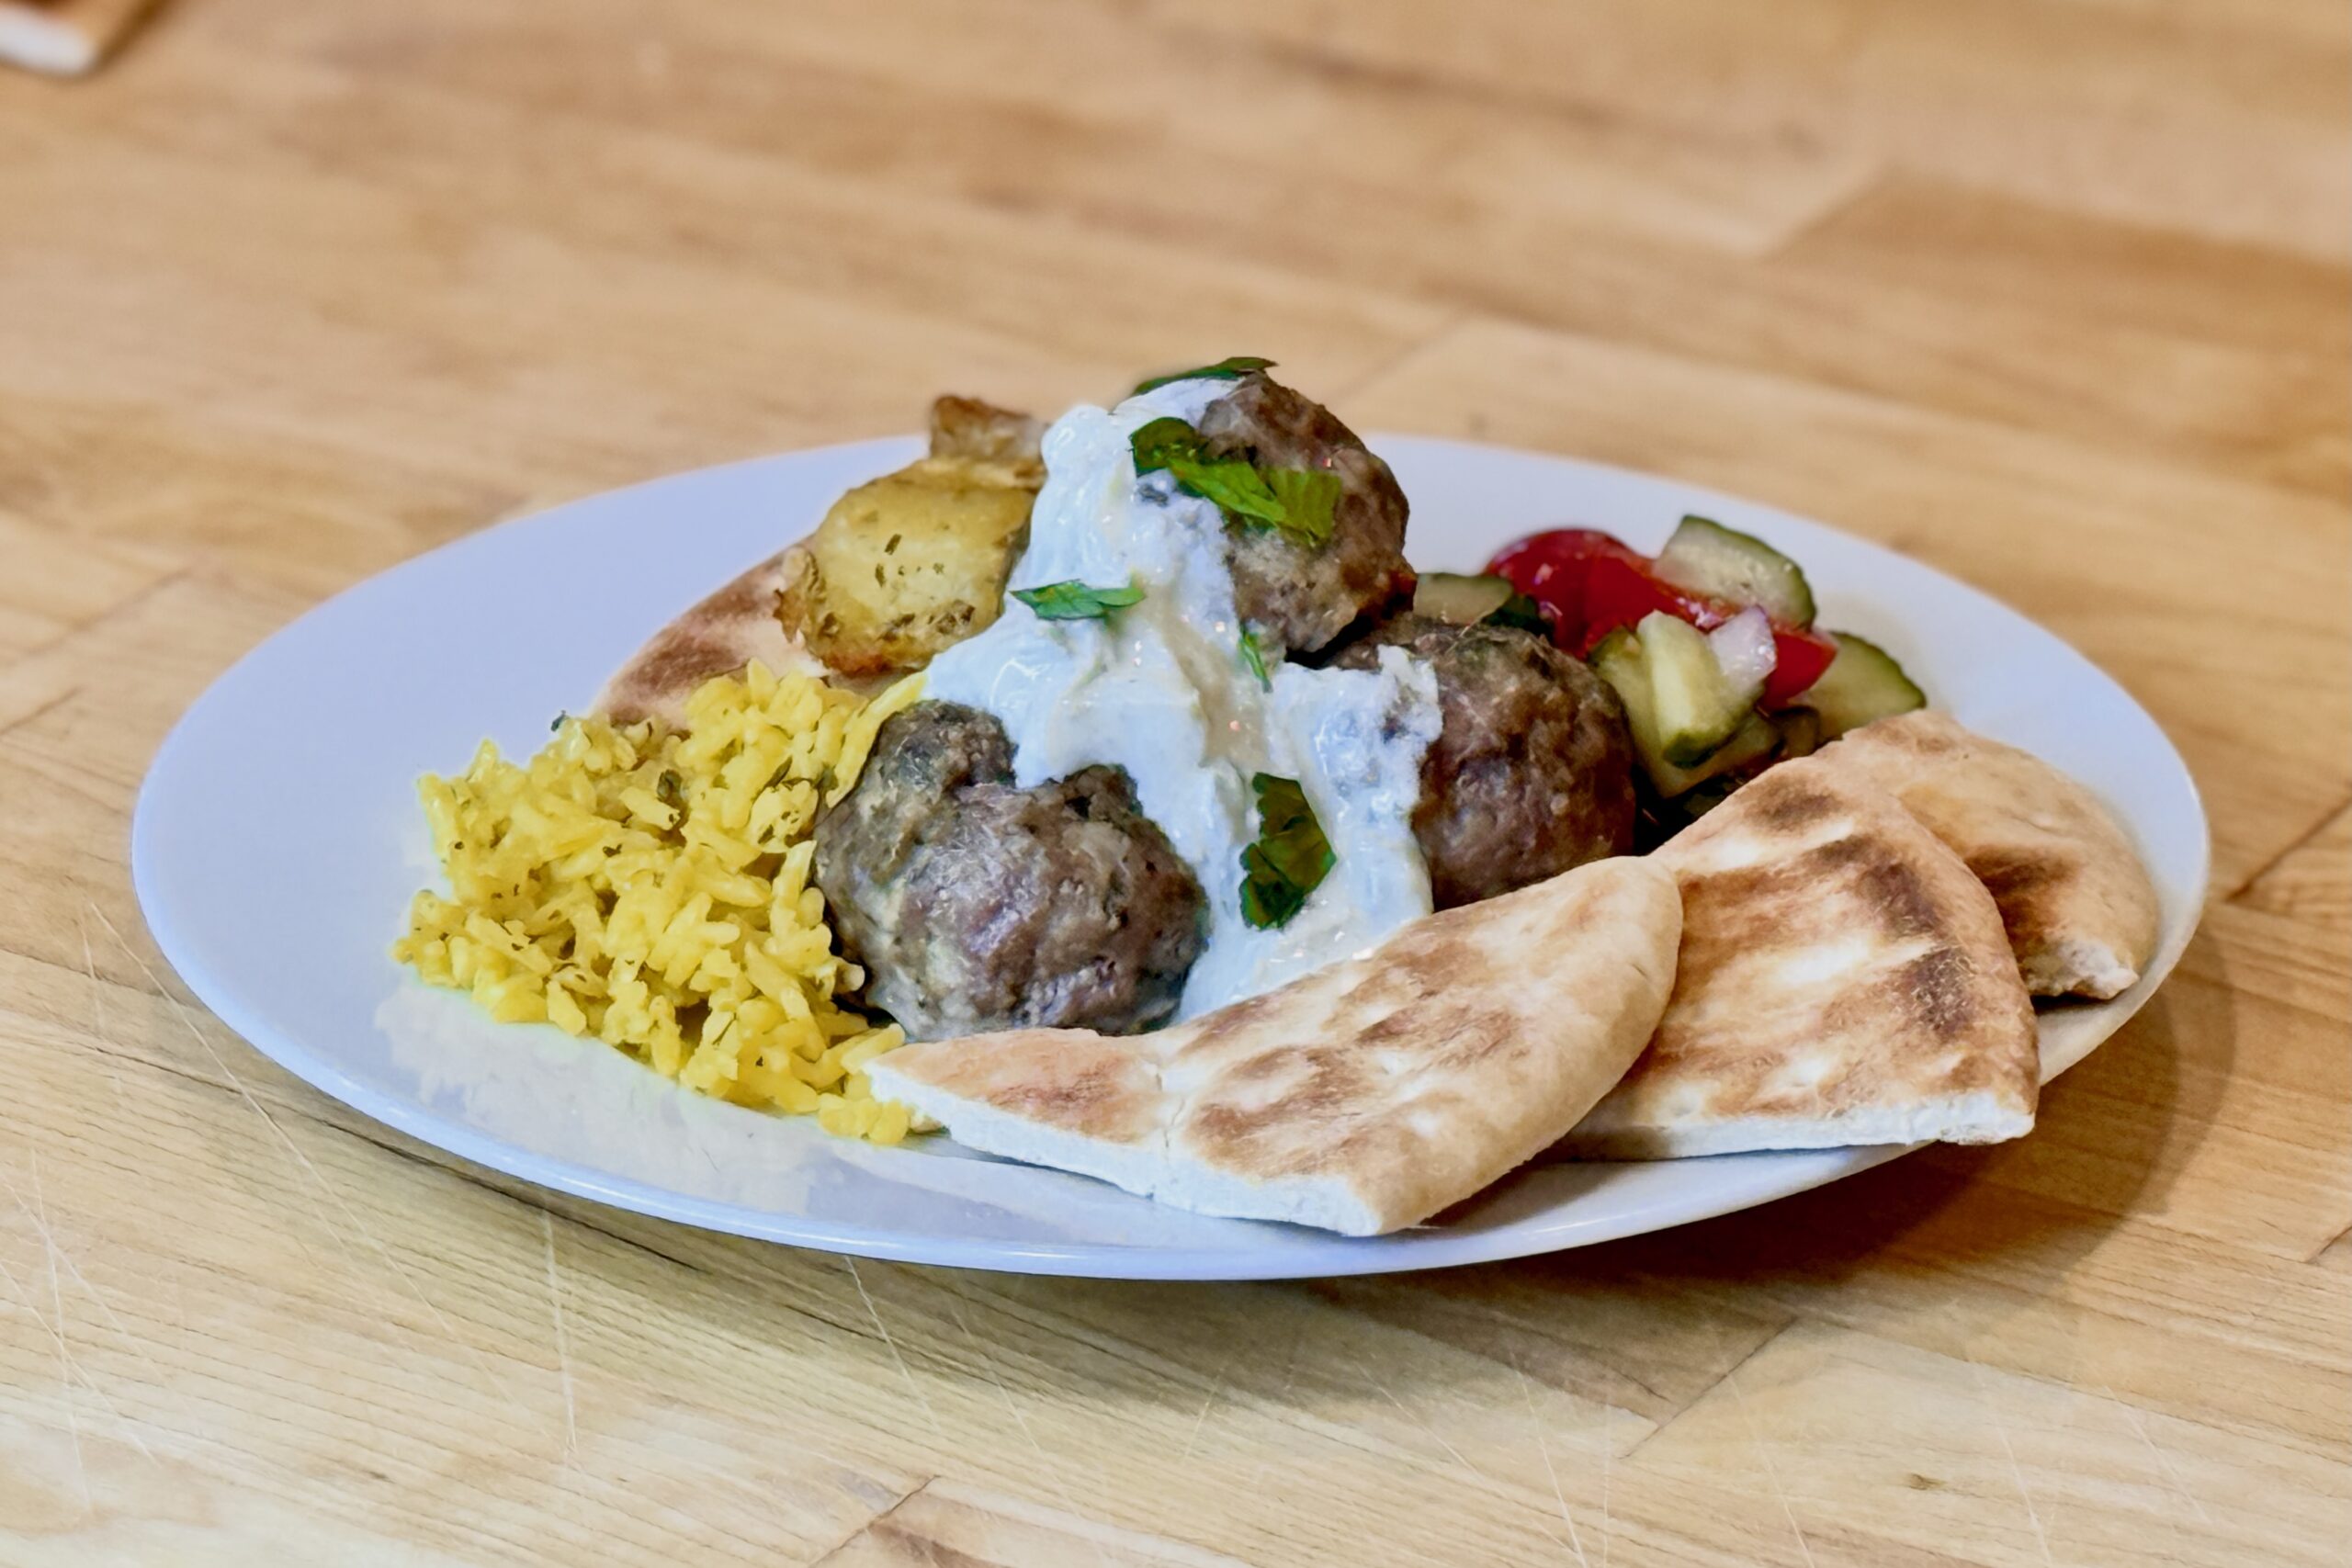
  • Keftedes (Κεφτέδες) — Greek Meatballs with Tzatziki

    Keftedes (Κεφτέδες) — Greek Meatballs with Tzatziki

    Our family loves Greek food, especially when there’s a generous bowl of tzatziki on the table. These baked Greek meatballs, known as keftedes (κεφτέδες), combine beef and pork with just enough lamb to add savory depth without taking over. Baked until browned and served with warm flatbread triangles and plenty of cool tzatziki, they’re tender, herbaceous, and made for sharing.


    Ingredients

    Tzatziki

    • 1 English cucumber, diced or grated
    • 1½ cups (about 360 g) plain Greek yogurt
    • 2 tbsp (30 ml) lemon juice
    • 2 tbsp (30 ml) extra virgin olive oil
    • 1 tsp garlic, minced
    • ½ tsp table salt
    • Freshly ground black pepper, to taste

    Meatballs

    • 1½ lb (680 g) ground beef, preferably 85% lean
    • ¼ lb (113 g) ground pork
    • ¼ lb (113 g) ground lamb
    • ⅓ cup (about 40 g) plain breadcrumbs
    • ⅓ cup (80 g) whole milk
    • 1 tbsp dried parsley
    • 1 large egg
    • ½ medium yellow onion (about 100 g), finely grated
    • 1 tbsp (about 10 g) garlic, minced
    • 1 tbsp fresh mint, finely chopped
    • Zest of 1 lemon
    • 1 tbsp dried oregano, rubbed between your palms before adding
    • ½ tsp ground cumin
    • 2 tsp table salt
    • ½ tsp freshly ground black pepper
    • 1 tbsp (15 ml) extra virgin olive oil

    For Serving

    • Flatbread, warmed and cut into triangles
    • Lemon wedges

    Directions

    Make the Tzatziki

    If the cucumber seems especially juicy, squeeze it lightly in a clean kitchen towel to remove excess moisture.

    Stir together the cucumber, Greek yogurt, lemon juice, olive oil, garlic, salt, and black pepper.

    Cover and refrigerate for at least 30 minutes before serving to allow the flavors to meld.

    Prepare the Meatball Mixture

    Preheat the oven to 425°F (218°C). Lightly oil a rimmed baking sheet.

    Combine the breadcrumbs, milk, and dried parsley in a large mixing bowl. Let stand for 5 minutes, until the milk is absorbed and the parsley has softened.

    Add the egg, grated onion, garlic, mint, lemon zest, oregano, cumin, salt, black pepper, and olive oil. Mix until evenly combined.

    Add the ground beef, pork, and lamb. Mix gently but thoroughly, stopping as soon as the meats and seasonings are evenly distributed.

    Shape and Bake

    Cook a small test patty in a skillet and adjust the seasoning if needed.

    Divide the mixture into approximately 24 portions of about 1¾ oz (50 g) each. Gently roll into meatballs and arrange on the prepared baking sheet with a little space between them.

    Bake for 16 to 20 minutes, until browned and the centers reach 160°F (71°C).

    For deeper browning, broil for 1 to 2 minutes at the end, watching closely. Rest for 5 minutes before serving.

    Warm the Flatbread and Serve

    Warm the flatbread on a hot skillet, grill, or griddle until soft and lightly toasted, then cut into triangles.

    Serve the meatballs on a platter with warm flatbread triangles, lemon wedges, and plenty of tzatziki.

    Yield: Approximately 24 meatballs (8 servings).


    Notes

    Preparation

    • The ¼ lb (113 g) of lamb accounts for about 12½% of the meat blend. It adds background richness without making the meatballs taste strongly of lamb.
    • Mix gently and avoid tightly compressing the meatballs so they remain tender.

    Variations

    • Adjust the ½ lb (about 227 g) combined pork and lamb to taste, using all pork, all lamb, or any blend in between. The equal amounts of ¼ lb (113 g) each keep the lamb flavor relatively mild.
    • Replace the dried parsley with ¼ cup finely chopped fresh parsley for a brighter herb flavor.
    • Panko breadcrumbs may be substituted for the plain breadcrumbs; use 1½ oz (45 g).
    • For traditionally fried keftedes, heat about ¼ inch (6 mm) olive oil in a heavy skillet over medium heat. Fry the meatballs in batches, turning occasionally, until deeply browned and the centers reach 160°F (71°C), about 8 to 10 minutes. Drain briefly on paper towels before serving.
    • For a more traditional herb note in the tzatziki, add 1 to 2 tsp finely chopped fresh dill or mint.

    Serving Suggestions

    Make-Ahead & Storage

    • The tzatziki can be made 1 day ahead and refrigerated in a covered container.
    • The meatballs can be mixed, shaped, covered, and refrigerated up to 24 hours before baking.
    • Cooked meatballs can be refrigerated in an airtight container for up to 3 days. Reheat covered at 325°F (163°C), then uncover briefly to restore the browned exterior.
    • For longer storage, freeze the shaped uncooked meatballs on a tray, then transfer them to a freezer-safe container once solid. Freeze for up to 3 months and thaw overnight in the refrigerator before baking.
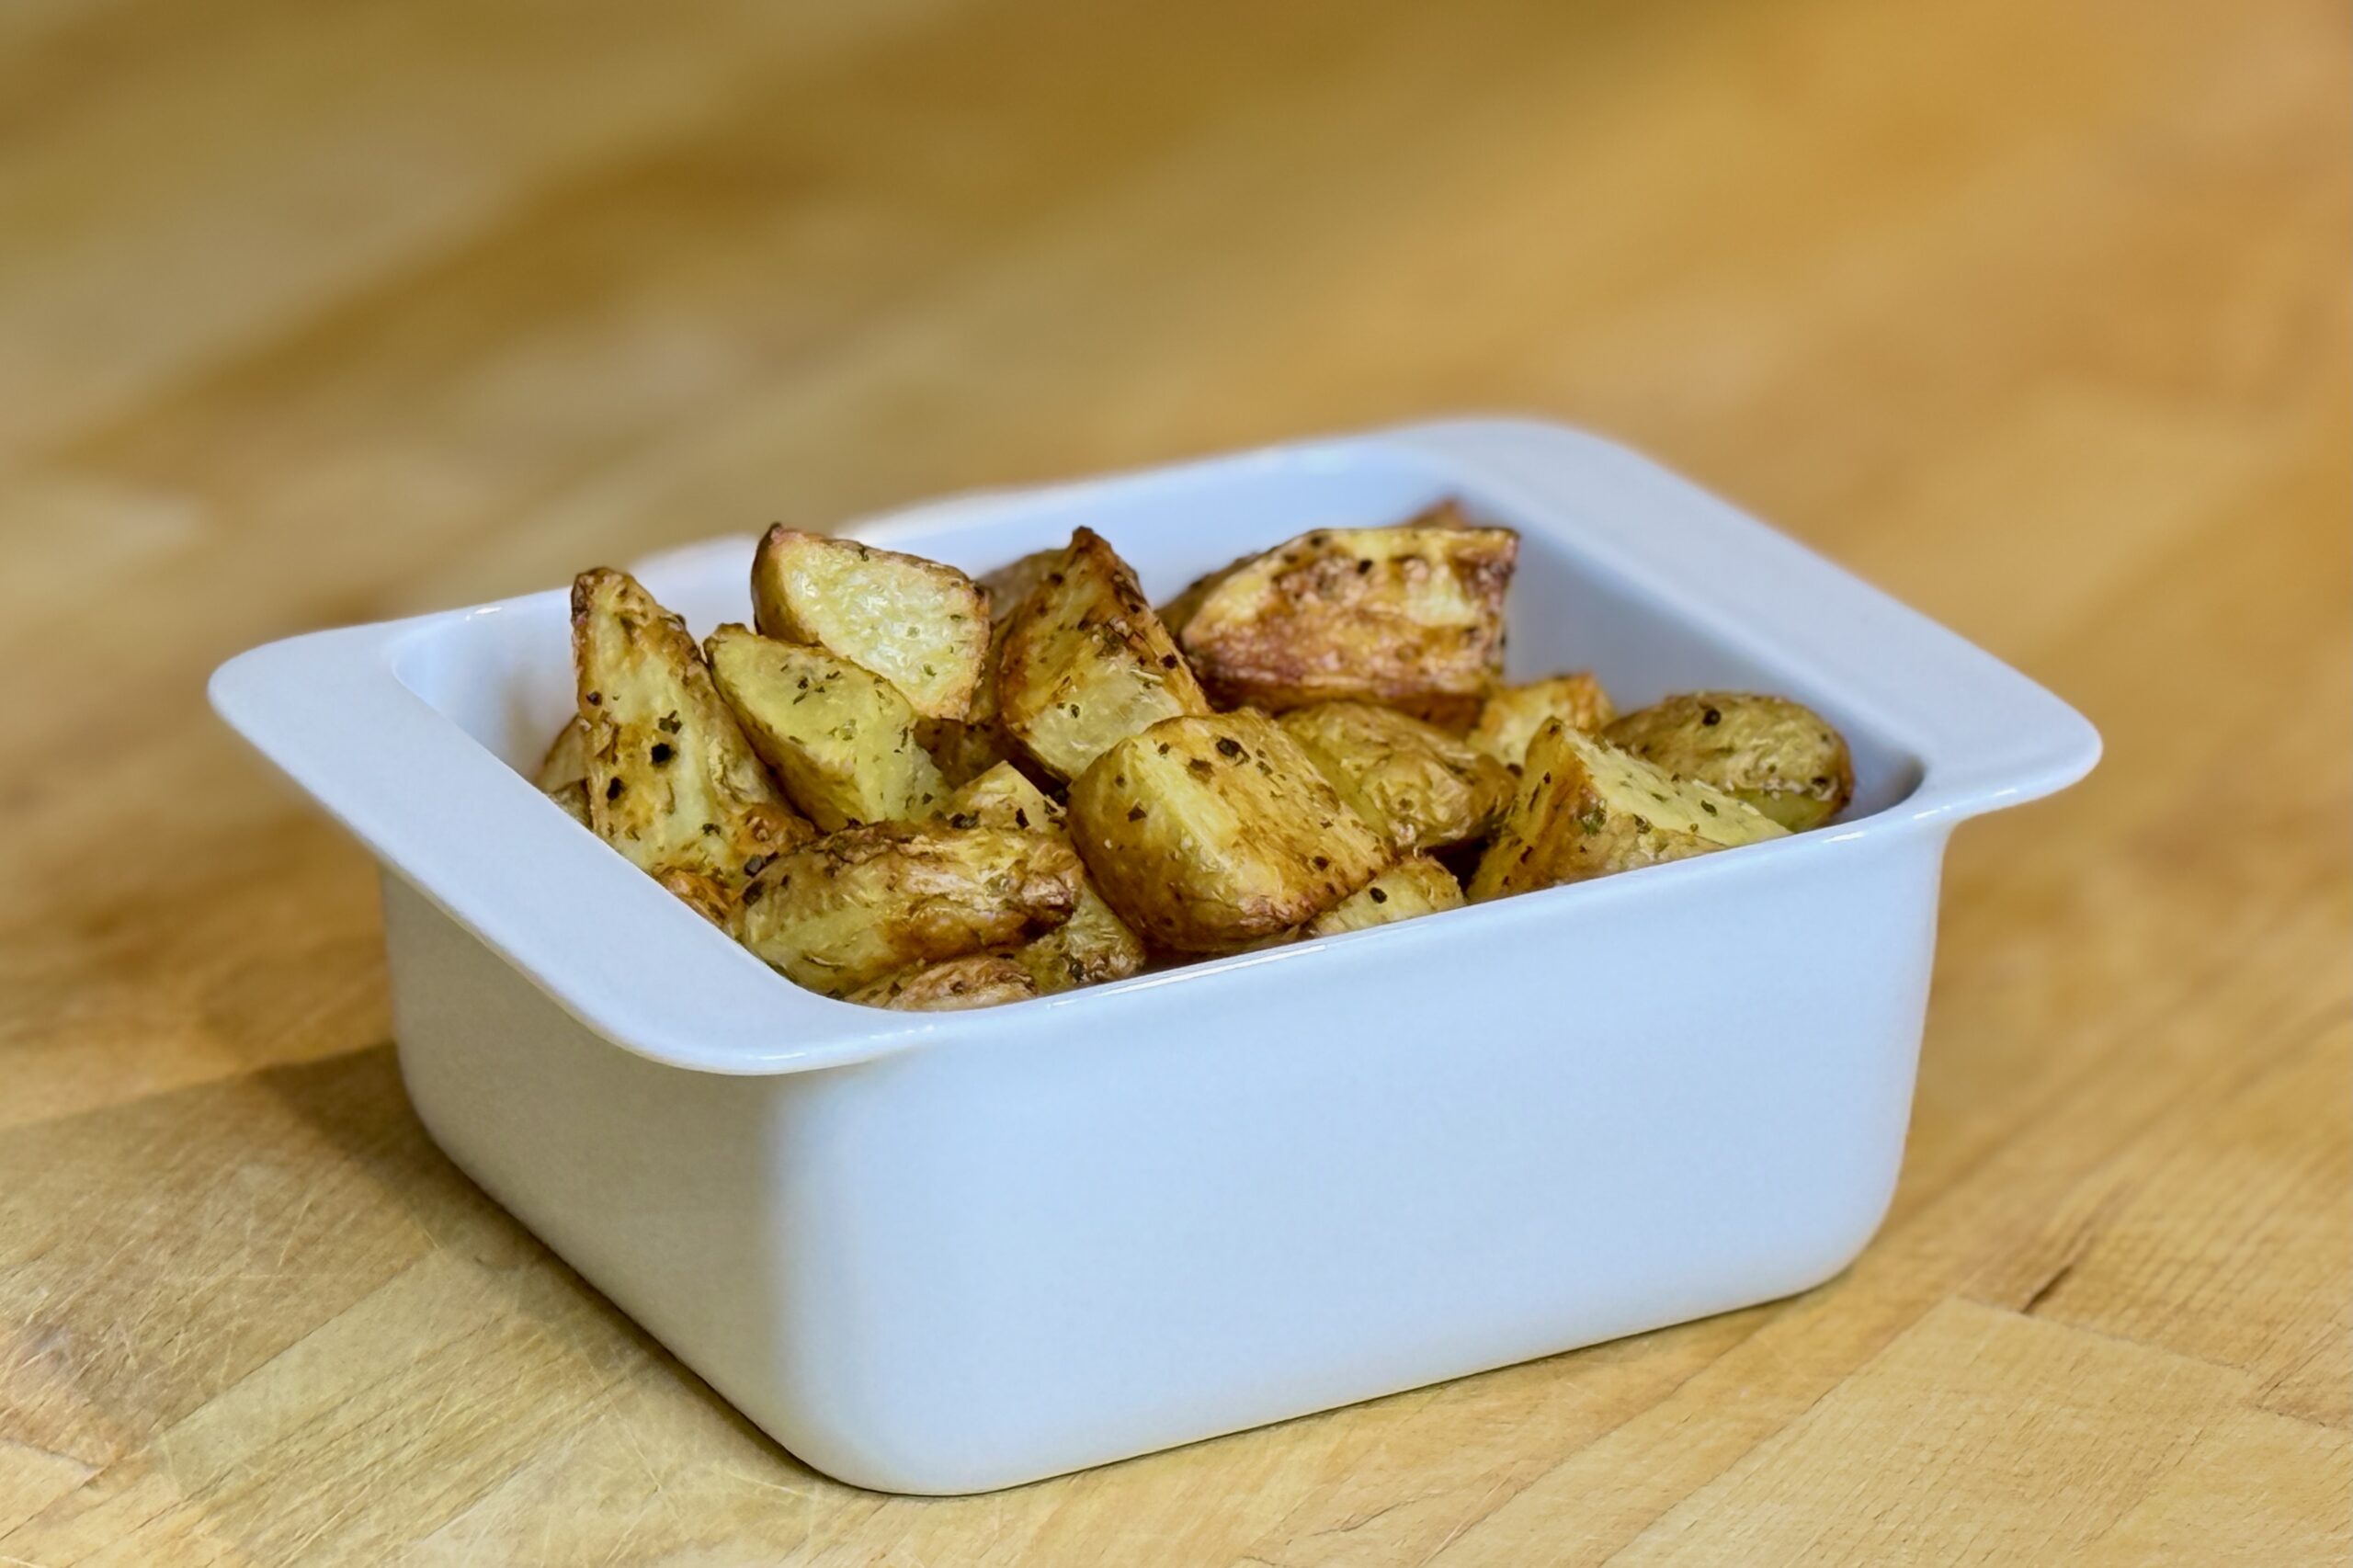
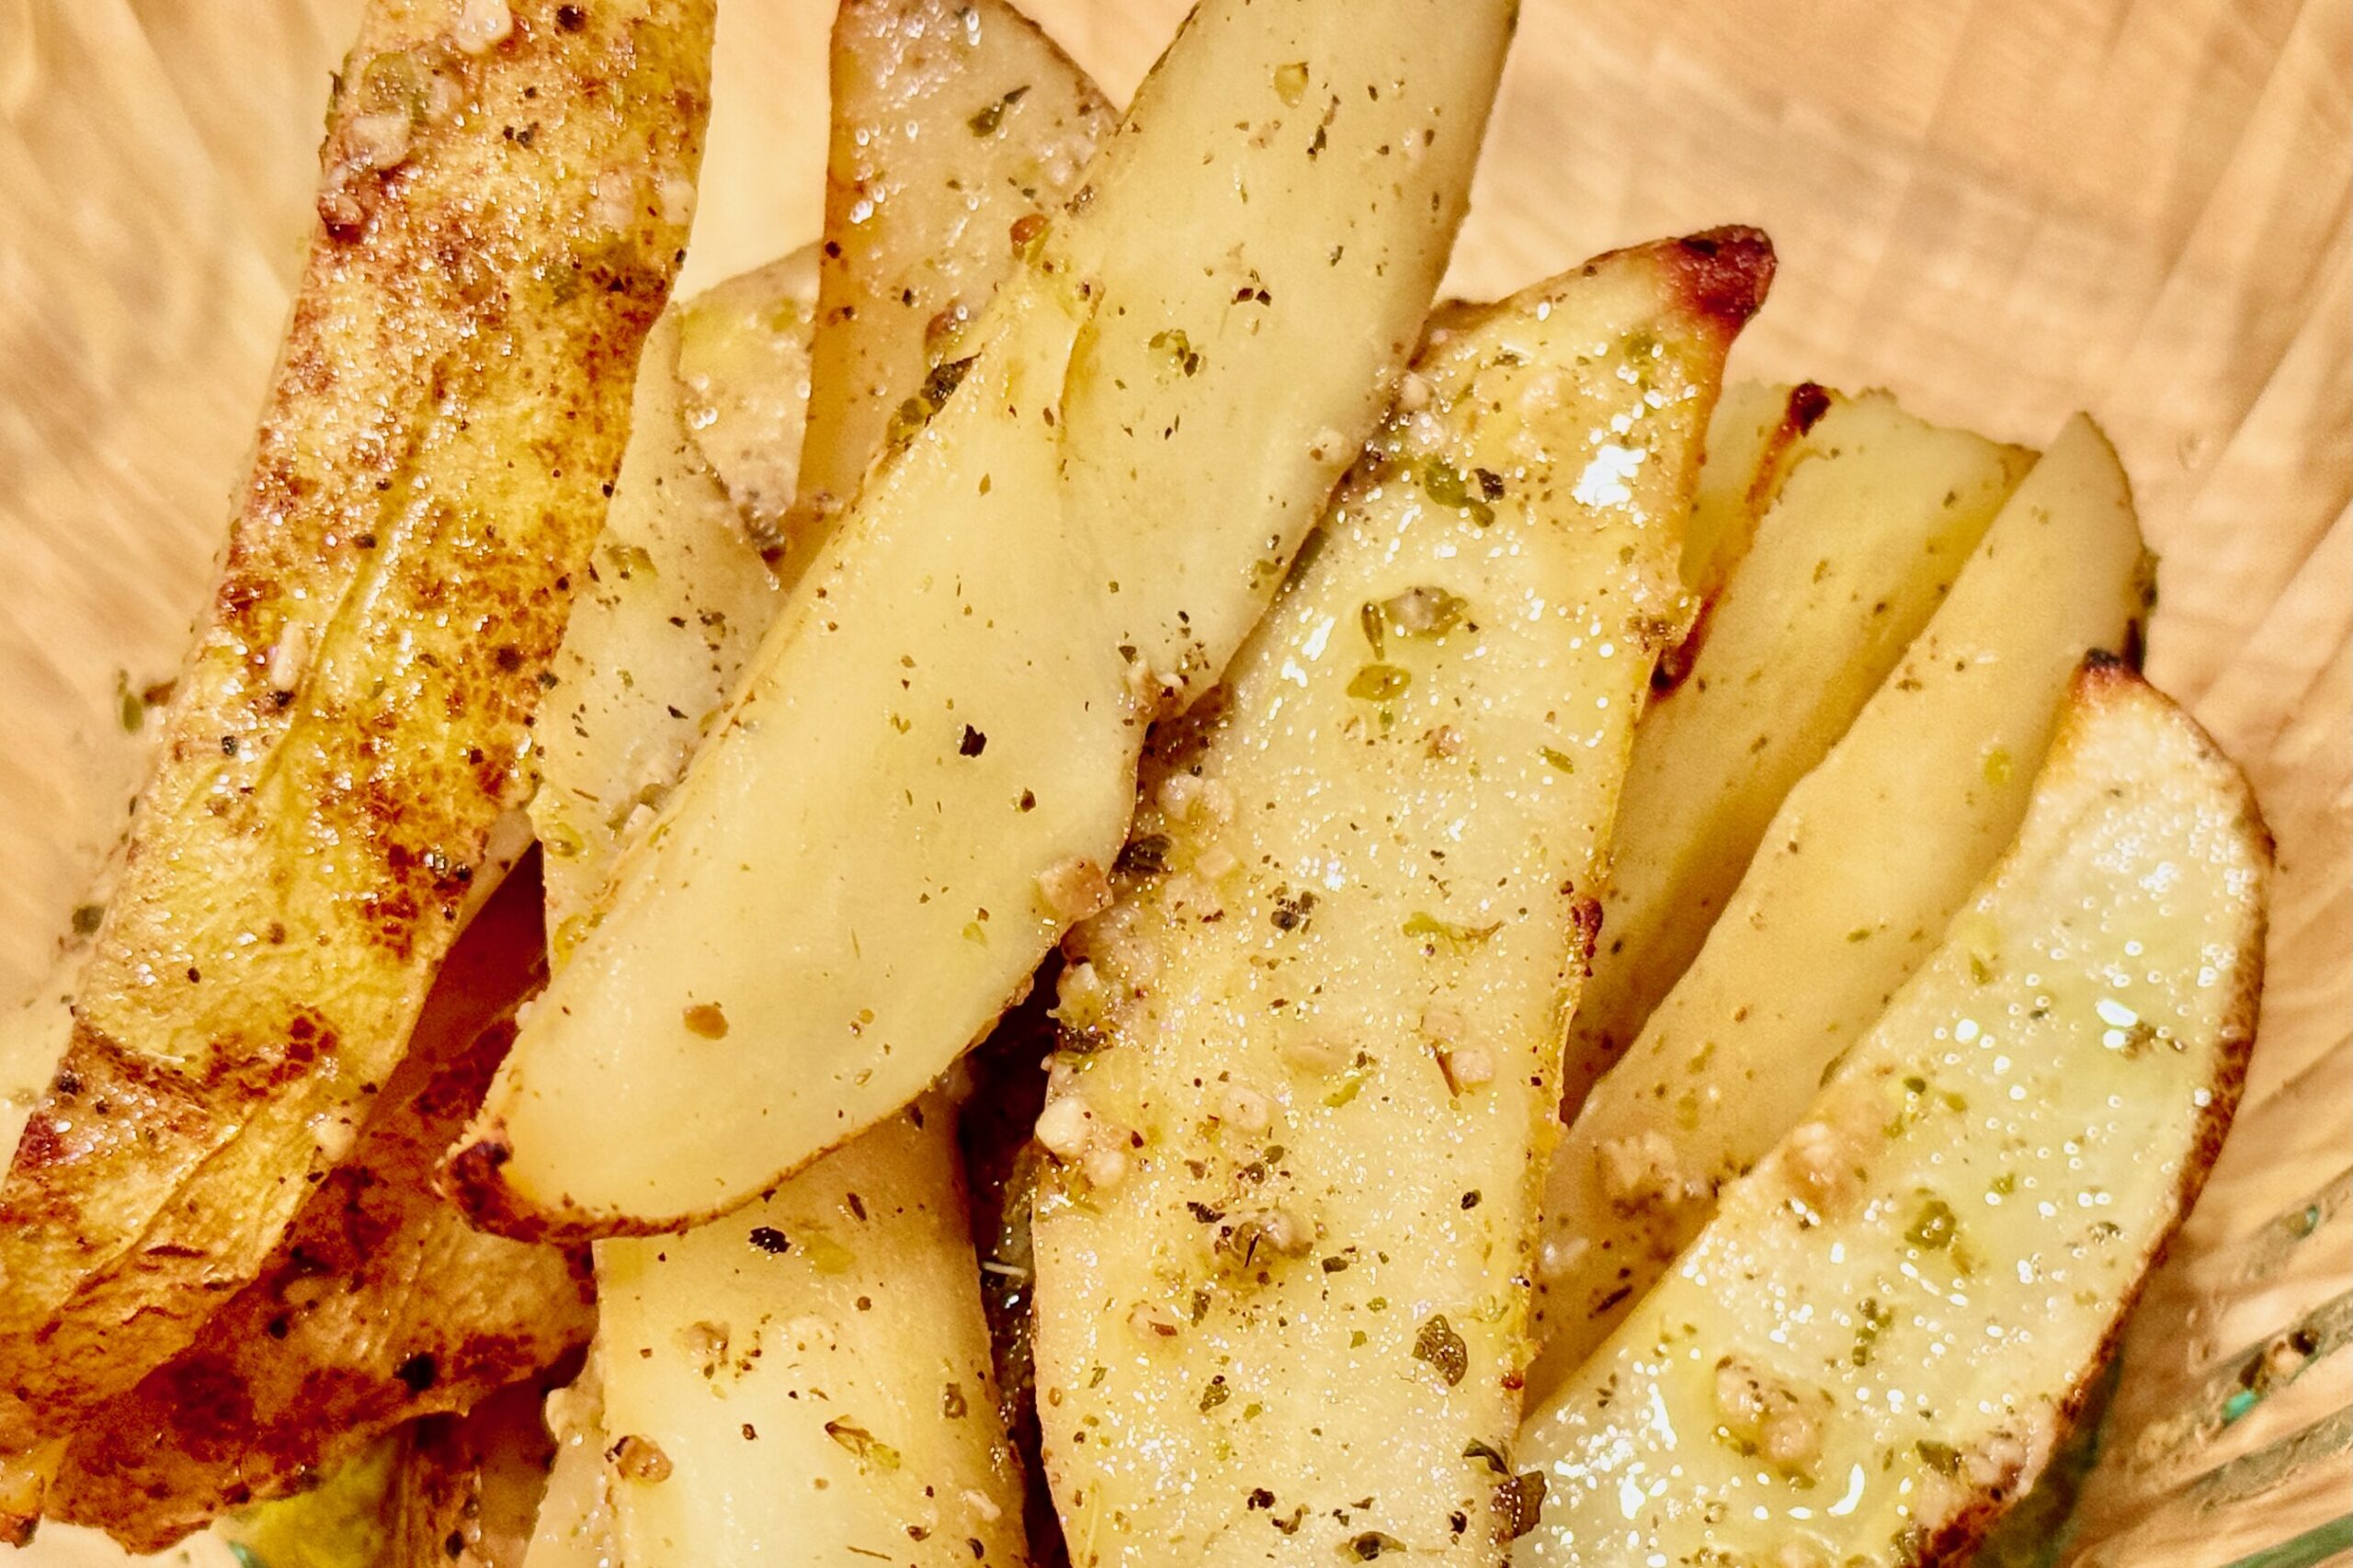
  • Rosemary & Oregano Oven-Roasted Potatoes

    Rosemary & Oregano Oven-Roasted Potatoes

    These rosemary and oregano potatoes are a simple side that works with almost anything on the dinner table. A preheated baking sheet gives them crisp, deeply golden edges while the centers stay creamy, and garlic and olive oil round out the savory Mediterranean flavor. They are especially good alongside roasted or grilled meats and vegetables.


    Ingredients

    • 3 lb (1.36 kg) Yukon Gold potatoes, cut into 1½-inch (4 cm) pieces
    • ¼ cup (55 g) extra-virgin olive oil
    • 1 tbsp finely chopped fresh rosemary
    • 2 tsp dried oregano
    • 1½ tsp table salt
    • ½ tsp freshly ground black pepper
    • 1 tbsp (15 g) minced garlic

    Directions

    Season the Potatoes

    Heat the oven to 425°F (218°C). Place a large rimmed baking sheet in the oven while it heats.

    Combine the potatoes with the olive oil, rosemary, oregano, salt, and black pepper. Toss until evenly coated.

    Roast

    Carefully spread the potatoes on the hot baking sheet in a single layer, placing as many cut sides against the pan as possible. Roast for 25 minutes without disturbing them.

    Turn the potatoes, add the minced garlic, and toss briefly to distribute it. Continue roasting for 15–20 minutes, until the potatoes are deeply golden, crisp on the edges, and tender in the center.

    Taste and adjust the salt before serving hot.

    Yield: Approximately 8 servings.


    Notes

    Preparation

    • Adding the garlic after the first 25 minutes keeps it from burning during the long roast.
    • Do not crowd the pan. Divide the potatoes between two preheated baking sheets if needed.

    Variations

    • Substitute 1 tsp dried rosemary, crushed between your fingers, for the fresh rosemary.

    Serving Suggestions

    • Serve with roasted or grilled chicken, beef, lamb, fish, or vegetables.
    • These potatoes pair especially well with our Keftedes (Greek Meatballs) with Tzatziki when another part of the meal already provides plenty of lemon.

    Make-Ahead & Storage

    • The potatoes are best served immediately while the edges are crisp.
    • Refrigerate leftovers in an airtight container for up to 3 days. Reheat at 425°F (218°C) for 10–15 minutes, until hot and crisp.
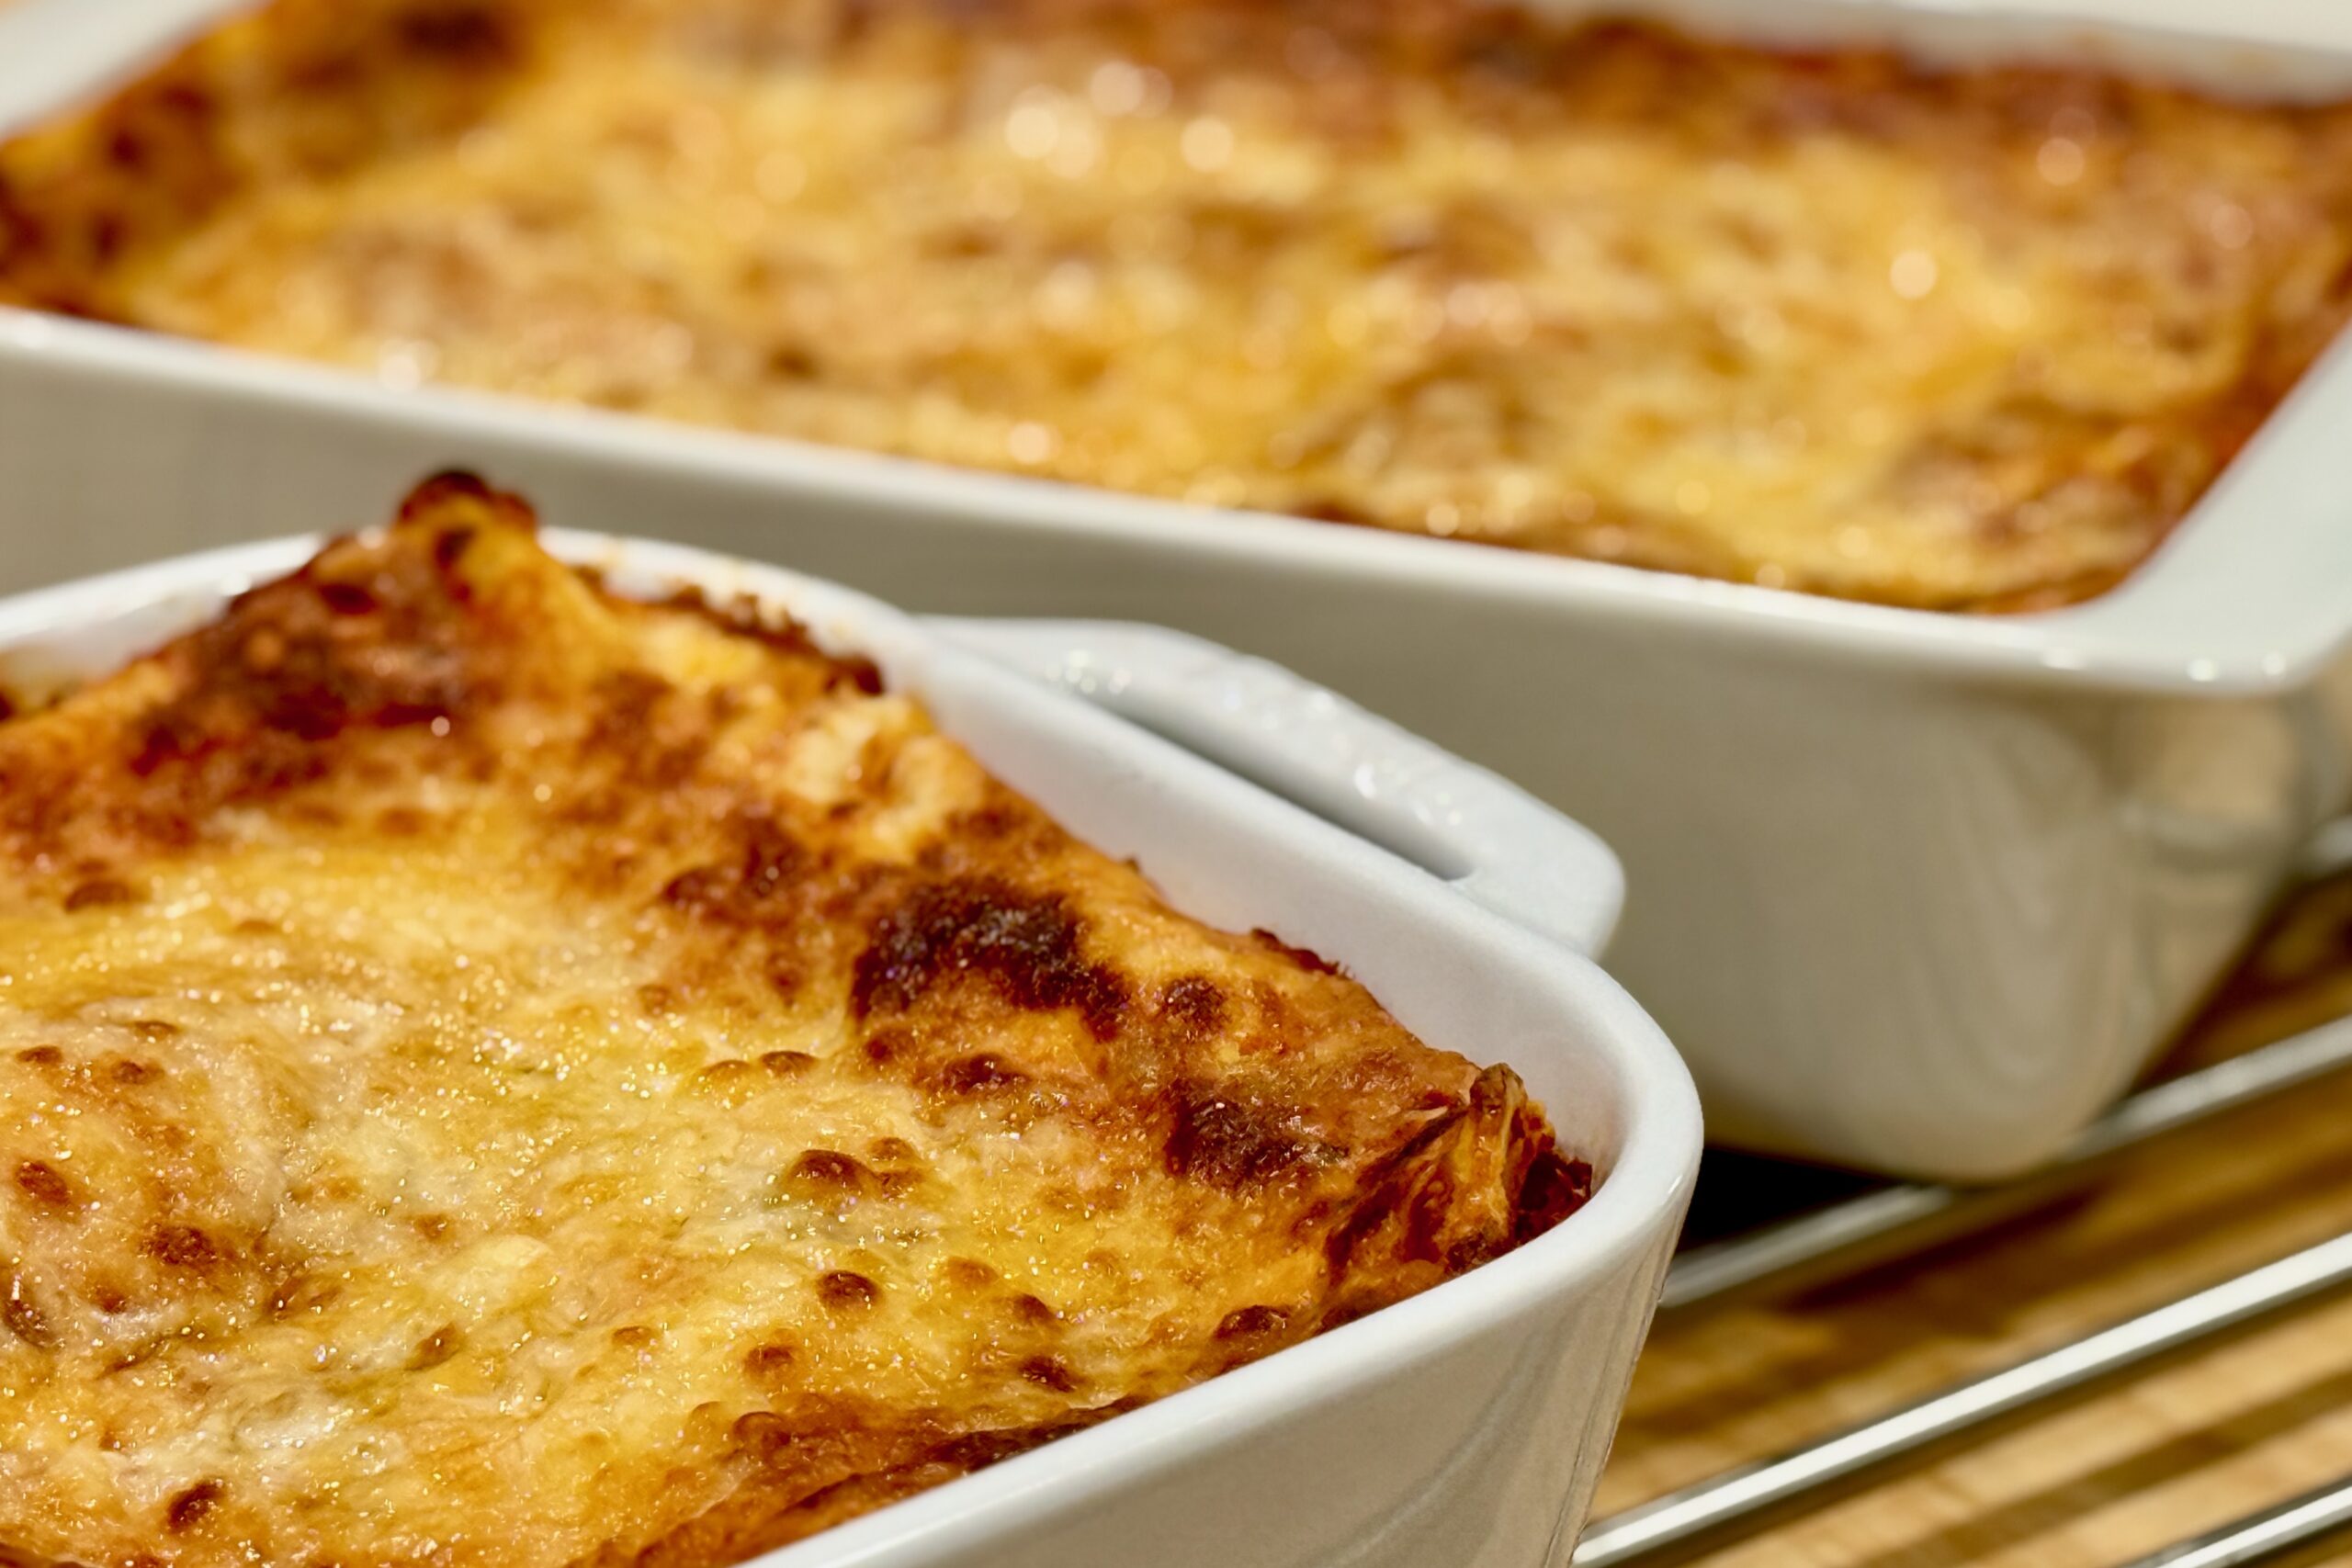
  • Grandma’s Lasagna

    Grandma’s Lasagna

    In the 1960s and 70s, most of our family parties included the Berg family—Tom, Evie, and their daughter Donna were always there, and they’ve long felt like part of our family. Grandma’s Lasagna recipe actually came from Donna Berg sometime in the 1970s after she served it at a birthday party. It was such a hit that our family has used this lasagna recipe ever since. Over the years, I’ve made a few careful updates: I added besciamella after living in Delft, The Netherlands, in the home of Bep Lupker—her lasagna included a silky, delicious besciamella that I never forgot. I’ve also refined the meat sauce for deeper flavor and better balance, while keeping the heart of the original recipe intact.


    Ingredients

    Meat Sauce

    • 2 tbsp (28 g) olive oil
    • 1 cup (140 g) chopped onion
    • 5 cloves (15 g) garlic, minced
    • 1 lb (454 g) ground chuck beef (or ½ lb (227 g) ground beef and ½ lb (227 g) Italian sausage)
    • 1 can, 28 oz (794 g), crushed tomatoes
    • 1 can, 15 oz (425 g), tomato sauce
    • 1 can, 6 oz (170 g), tomato paste
    • 1 cup (240 g) chicken broth
    • ½ cup (120 g) dry white wine or dry red wine (optional)
    • 2 tsp (10 g) fish sauce (optional)
    • 2 tsp dried basil
    • 2 tsp dried parsley
    • 1 tsp dried oregano
    • ¾ tsp dried ground fennel
    • ¼ tsp dried thyme leaves
    • 3 whole cloves
    • 2 bay leaves
    • ½ tsp freshly ground black pepper (to taste)
    • 1 tsp table salt

    Cheese & Pasta

    • 2 cups (454 g) ricotta or cottage cheese (or 1 cup (227 g) of each)
    • ½ cup (50 g) Parmesan cheese, shredded
    • 8 oz (227 g) mozzarella cheese, sliced
    • 8 oz (227 g) lasagna noodles, prepared (or our homemade Fresh Lasagna Pasta Sheets)

    Besciamella

    • ¼ cup (57 g) butter
    • ¼ cup (30 g) flour
    • 2 cups (480 g) milk
    • ¼ tsp onion powder
    • ¼ tsp table salt
    • ¼ tsp freshly ground black pepper
    • small pinch nutmeg

    Directions

    Make the Meat Sauce

    In a Dutch oven over medium heat, heat olive oil until shimmering. Add onion and sauté until translucent and tender. Add garlic and cook for 30–45 seconds, just until fragrant. Add meat and cook until no longer pink, breaking it up as it browns.

    Clear a small space in the pot and add tomato paste directly to the pan. Cook for 1–2 minutes, stirring, until the paste darkens slightly and smells sweeter. Stir the paste into the meat mixture.

    Stir in crushed tomatoes, tomato sauce, chicken broth, wine (optional), and fish sauce (optional). Add dried basil, dried parsley, oregano, fennel, thyme, cloves, bay leaves, pepper, and salt.

    Simmer covered on low heat for 30 minutes and uncovered for 15 minutes. Remove bay leaves and whole cloves before assembling. (Sauce is best when made a day or more in advance and reheated.)

    Prepare the Cheese

    Reserve a little Parmesan for the topping, then combine the remaining Parmesan with the ricotta and/or cottage cheese in a bowl. Reserve mozzarella for layering and topping.

    Assemble

    Place enough meat sauce in the bottom of a 9×13-inch (23×33 cm) lasagna pan to thinly coat. Add ⅓ of the cooked lasagna noodles. Spread ⅓ of the ricotta mixture over the noodles, add a layer of mozzarella slices, then cover with ⅓ of the remaining meat sauce.

    Repeat for two additional layers. Top with remaining mozzarella and the reserved Parmesan.

    Bake

    Preheat the oven to 325°F (163°C). Bake covered for 40 minutes and uncovered for 10 minutes, or until warmed through and cheese is slightly browned. Rest 10–15 minutes before slicing for cleaner layers.

    Make the Besciamella

    While the lasagna bakes, melt the butter in a saucepan over medium heat. Whisk in the flour and cook briefly, stirring, until smooth and bubbling. Gradually whisk in the milk, then add the onion powder, salt, pepper, and nutmeg. Cook, stirring, until the sauce thickens. Keep warm over low heat until serving.

    Serve

    Slice and serve lasagna topped with besciamella.

    Yield: 1 lasagna in a 9×13-inch (23×33 cm) pan.


    Notes

    Preparation

    • Why cloves? Whole cloves add subtle warmth and sweetness to the sauce and are removed before assembly so their flavor stays in the background.
    • Besciamella tip (optional): For an extra-silky texture, warm the milk separately and whisk it in gradually.
    • Make-ahead sauce: This meat sauce tastes even better after a night in the fridge; rewarm gently before assembling.

    Variations

    • Wine: Dry white or dry red both work well; omit if preferred.
    • Fish sauce: Optional, but it adds savory depth without tasting “fishy” at this amount. In its place, mash 2 anchovy fillets into the sauce with the tomato paste.
    • Meat: Replace half the beef with ½ lb (227 g) Italian sausage, using ½ lb (227 g) beef and ½ lb (227 g) sausage in total, for a slightly richer, more seasoned profile.

    Serving Suggestions

    • Let the lasagna rest 10–15 minutes before cutting for cleaner slices.
    • Serve with a simple green salad and warm bread to round out the meal.

    Make-Ahead & Storage

    • Make-ahead: Assemble the lasagna, cover, and refrigerate up to 24 hours. Bake as directed, adding 10–15 minutes to the covered bake time if it’s going in cold.
    • Refrigerate: Store leftovers covered for up to 4 days.
    • Freeze: Freeze tightly wrapped portions for up to 3 months. Thaw overnight in the fridge before reheating for best texture.

    Original Berg Family Lasagna Recipe (circa 1970s)
    This is the original version of the recipe as it was shared with our family by Donna Berg in the 1970s. It’s simpler than the updated version above, but it’s the foundation everything else grew from.

    Ingredients

    • ⅓ cup (53 g) chopped onion
    • 1 clove (3 g) garlic, minced
    • 2 tbsp (28 g) olive oil
    • 1 lb (454 g) ground chuck beef
    • 1 can (8 oz / 227 g) tomato sauce
    • 1 can (6 oz / 170 g) tomato paste
    • 1 cup (240 g) water
    • ½ tsp oregano
    • freshly ground black pepper (to taste)
    • 1 tsp table salt
    • ½ tsp basil
    • 1 whole clove, crushed
    • 2 cups (454 g) ricotta or cottage cheese (or 1 cup of each / 227 g each)
    • ½ cup (50 g) Parmesan cheese, shredded
    • 8 oz (227 g) mozzarella cheese, sliced
    • 8 oz (227 g) lasagna noodles, prepared

    Directions

    Sauté onion and garlic in oil until tender; add meat and brown. Add tomato sauce, tomato paste, water, and seasonings and simmer covered for 30 minutes.

    Place ½ of the cooked lasagna noodles in the bottom of a buttered 9×13 pan. Spread ½ of the ricotta (and/or cottage cheese), Parmesan, and mozzarella cheese over lasagna. Cover with ½ of the meat sauce. Repeat layers.

    Bake at 350°F for 45 minutes.

  • Jane’s Top Secret Carrot Cake

    Jane’s Top Secret Carrot Cake

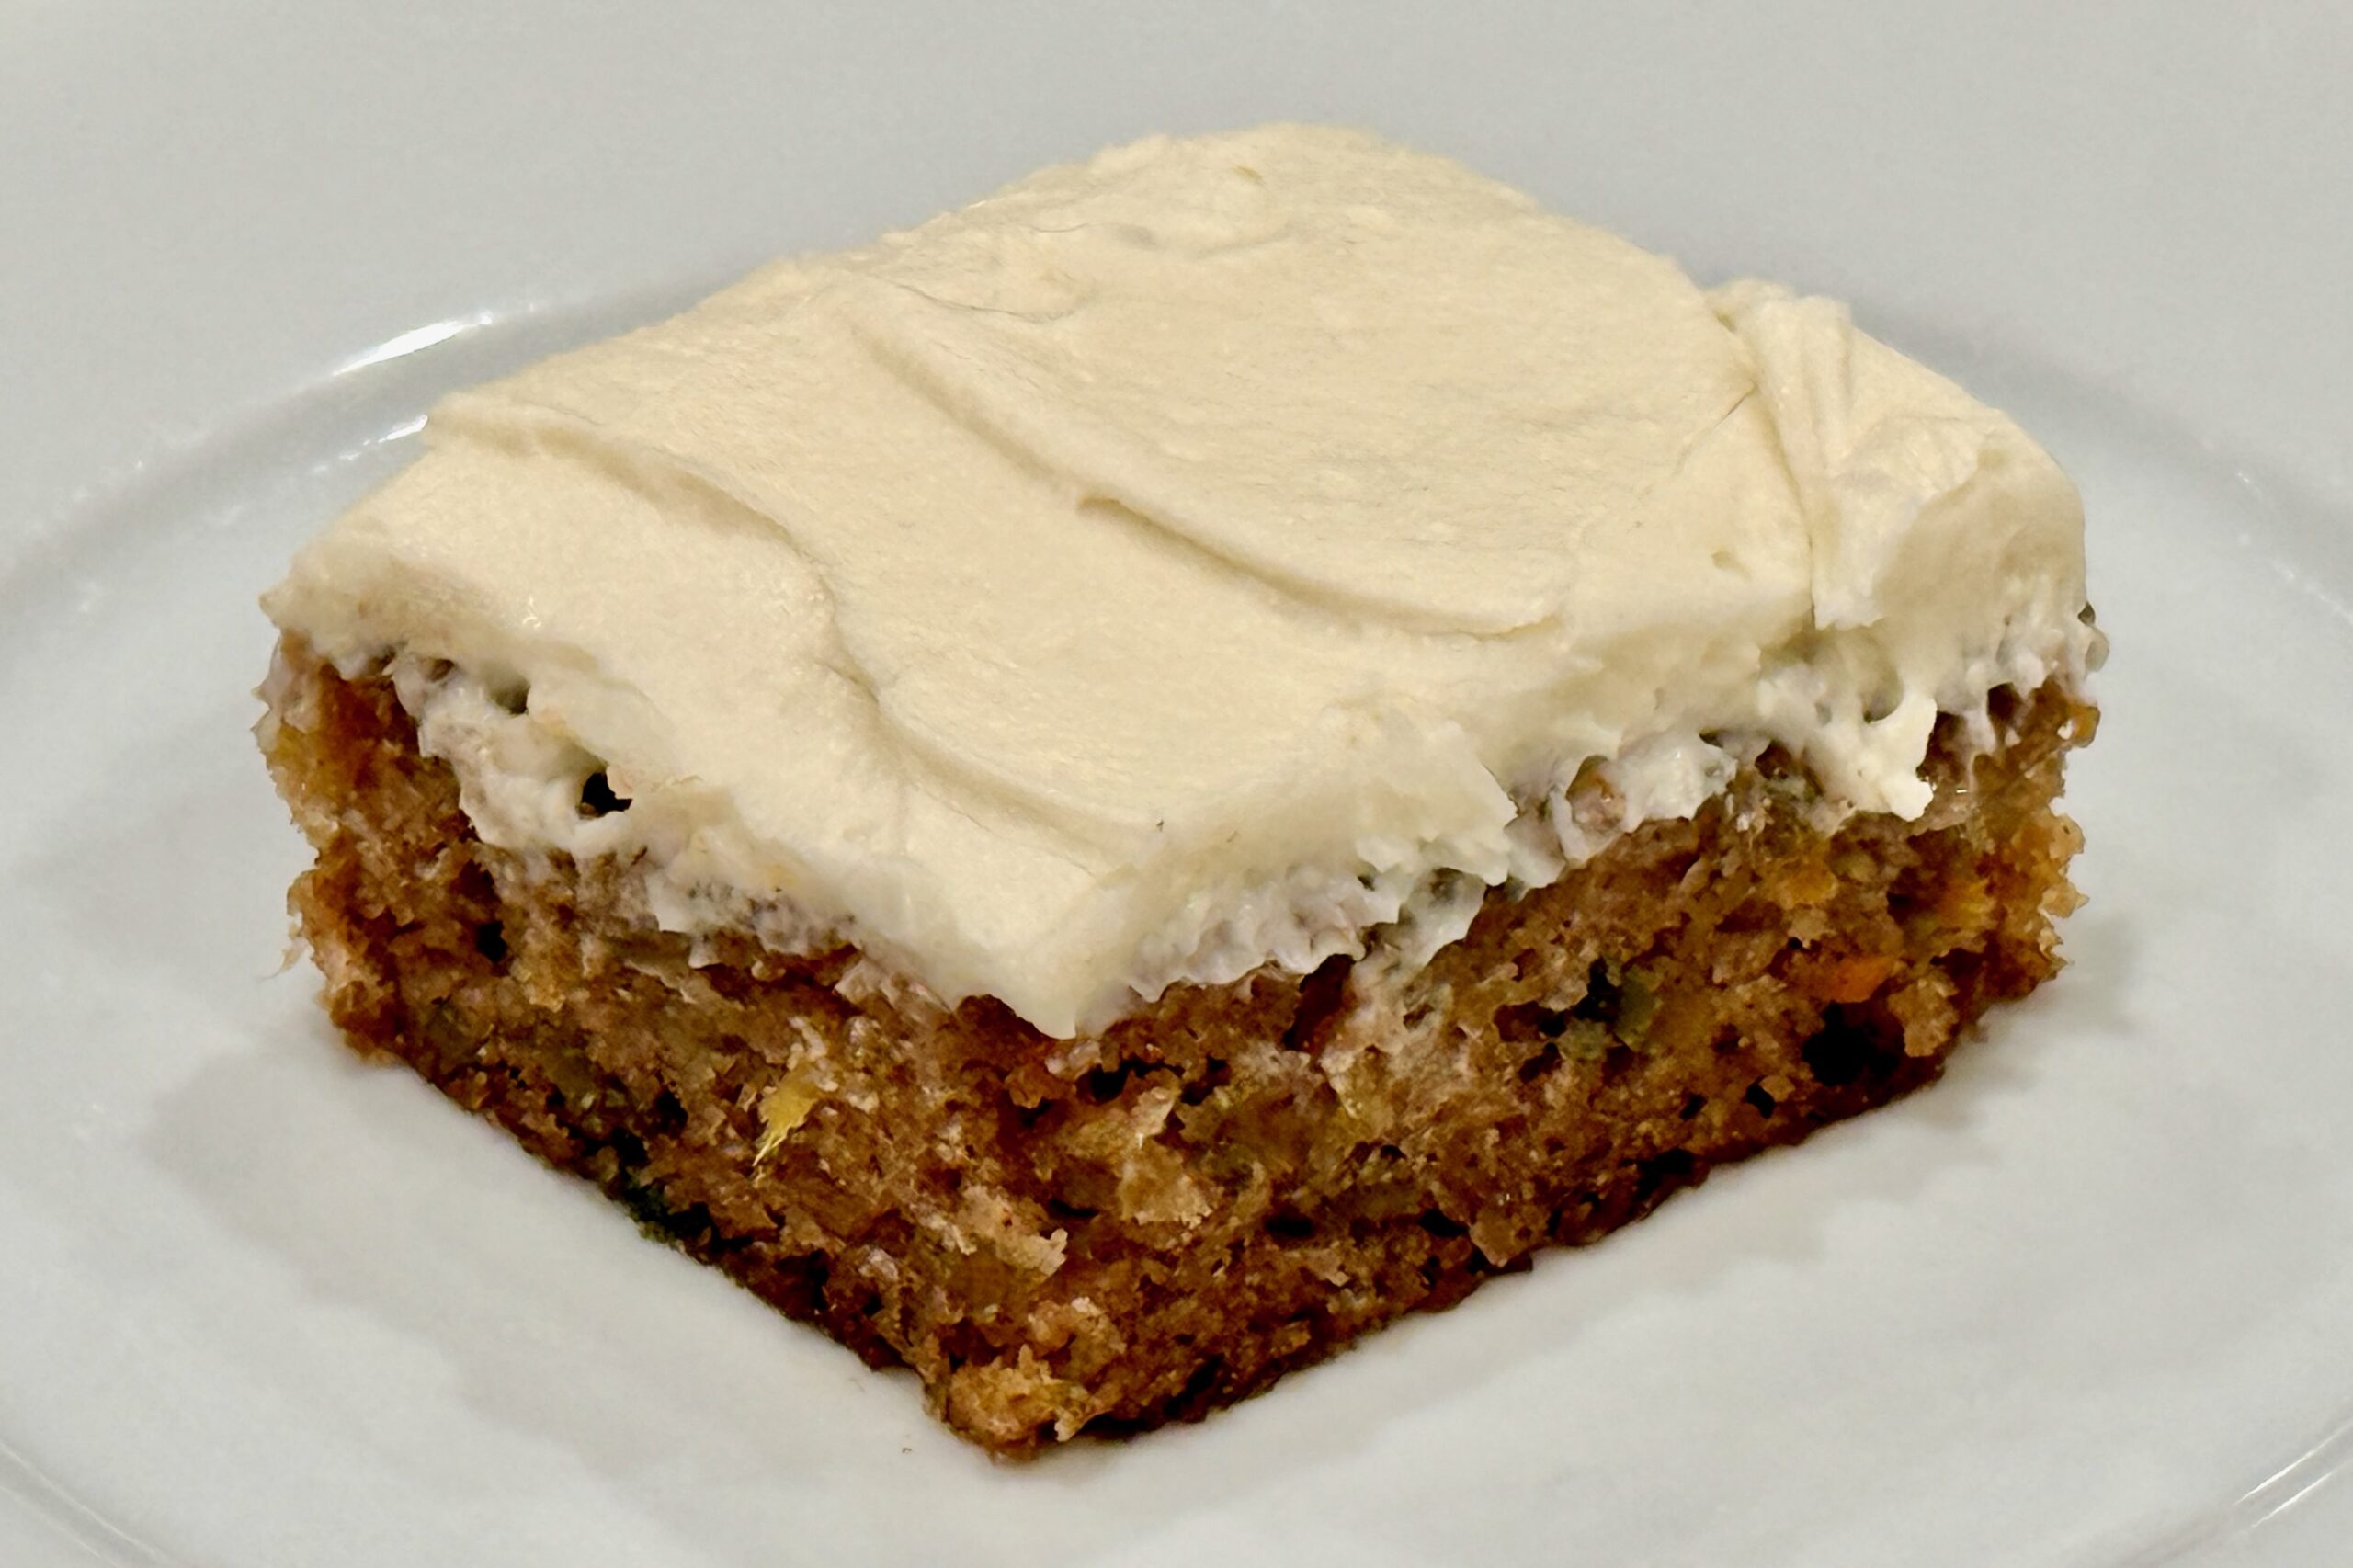
    This carrot cake has been a longtime family favorite—simple, reliable, and always a hit. Built on a classic combination of carrots, pineapple, and warm spice, it bakes up incredibly moist with a tender crumb and just the right amount of richness. Finished with a smooth, sweet cream cheese frosting, it’s the kind of cake that shows up at gatherings and quietly becomes everyone’s favorite slice.


    Ingredients

    Cake

    • 4 eggs, beaten
    • 1 cup (240 ml) vegetable oil
    • 1 (8 oz / 227 g) can crushed pineapple, undrained
    • 2 cups (400 g) sugar
    • 3 cups (about 330 g) carrots, shredded
    • 2 cups (240 g) flour
    • 1 tsp table salt
    • 2 tsp baking soda
    • 2 tsp cinnamon
    • ¼ tsp nutmeg (optional)
    • ¼ tsp ground ginger (optional)
    • 1 cup (about 110 g) pecans, chopped and toasted

    Icing

    • 1 cube (½ cup / 113 g) butter, softened
    • 1 pkg (8 oz / 227 g) cream cheese, softened
    • 4 cups (480 g) confectioners’ sugar
    • 1 tsp vanilla
    • ¼ tsp table salt

    Directions

    Prepare the Pan

    Grease and flour a bundt pan.

    Mix the Batter

    In a large bowl, whisk together the eggs, sugar, and vegetable oil until smooth and well combined.

    Stir in the crushed pineapple (with juice) and shredded carrots.

    In a separate bowl, combine the flour, salt, baking soda, cinnamon, and optional nutmeg and ground ginger (if using).

    Fold the dry ingredients into the wet mixture until just combined.

    Fold in the toasted pecans.

    Bake

    Pour the batter into the prepared bundt pan and bake at 350°F (177°C) for about 1 hour, or until a toothpick inserted into the center comes out clean.

    Let the cake cool in the pan for 15–20 minutes, then turn out onto a rack to cool completely.

    Alternative Pan Option

    Pour the batter into a greased stoneware bar pan, then bake at 350°F (177°C) for 25–30 minutes, or until a toothpick comes out clean.

    Make the Icing

    In a mixing bowl, beat the butter and cream cheese together until smooth and creamy.

    Gradually add the confectioners’ sugar, mixing until fully incorporated and smooth.

    Add the vanilla and salt, and mix until well combined.

    Finish

    Spread the icing over the completely cooled cake.

    Yield: 1 bundt cake.


    Notes

    Preparation

    • To toast nuts, spread on a baking sheet and bake at 350°F (177°C) for 6–8 minutes, until fragrant.
    • Shred carrots finely for the best texture and even distribution.

    Variations

    • Walnuts: Walnuts can be used in place of pecans if preferred.
    • Warmer Spice: Add the optional nutmeg and ginger for a slightly deeper, warmer spice profile.

    Serving Suggestions

    • Serve at room temperature for the best flavor and texture.
    • Great for gatherings, holidays, and family-style desserts.

    Make-Ahead & Storage

    • Store covered in the refrigerator for up to 4 days.
    • Bring to room temperature before serving for best texture.
    • Unfrosted cake can be wrapped and frozen for up to 2 months.

    High Altitude

    • High Altitude (about 4,750 ft / 1,400 m): Increase the flour by 2 tbsp plus 2 tsp, reduce the baking soda to 1¾ tsp, and increase the baking time slightly as needed.
    • Sea Level: Use 2 cups (240 g) flour and the full 2 tsp baking soda as written.
  • Chicken Parmesan

    Chicken Parmesan

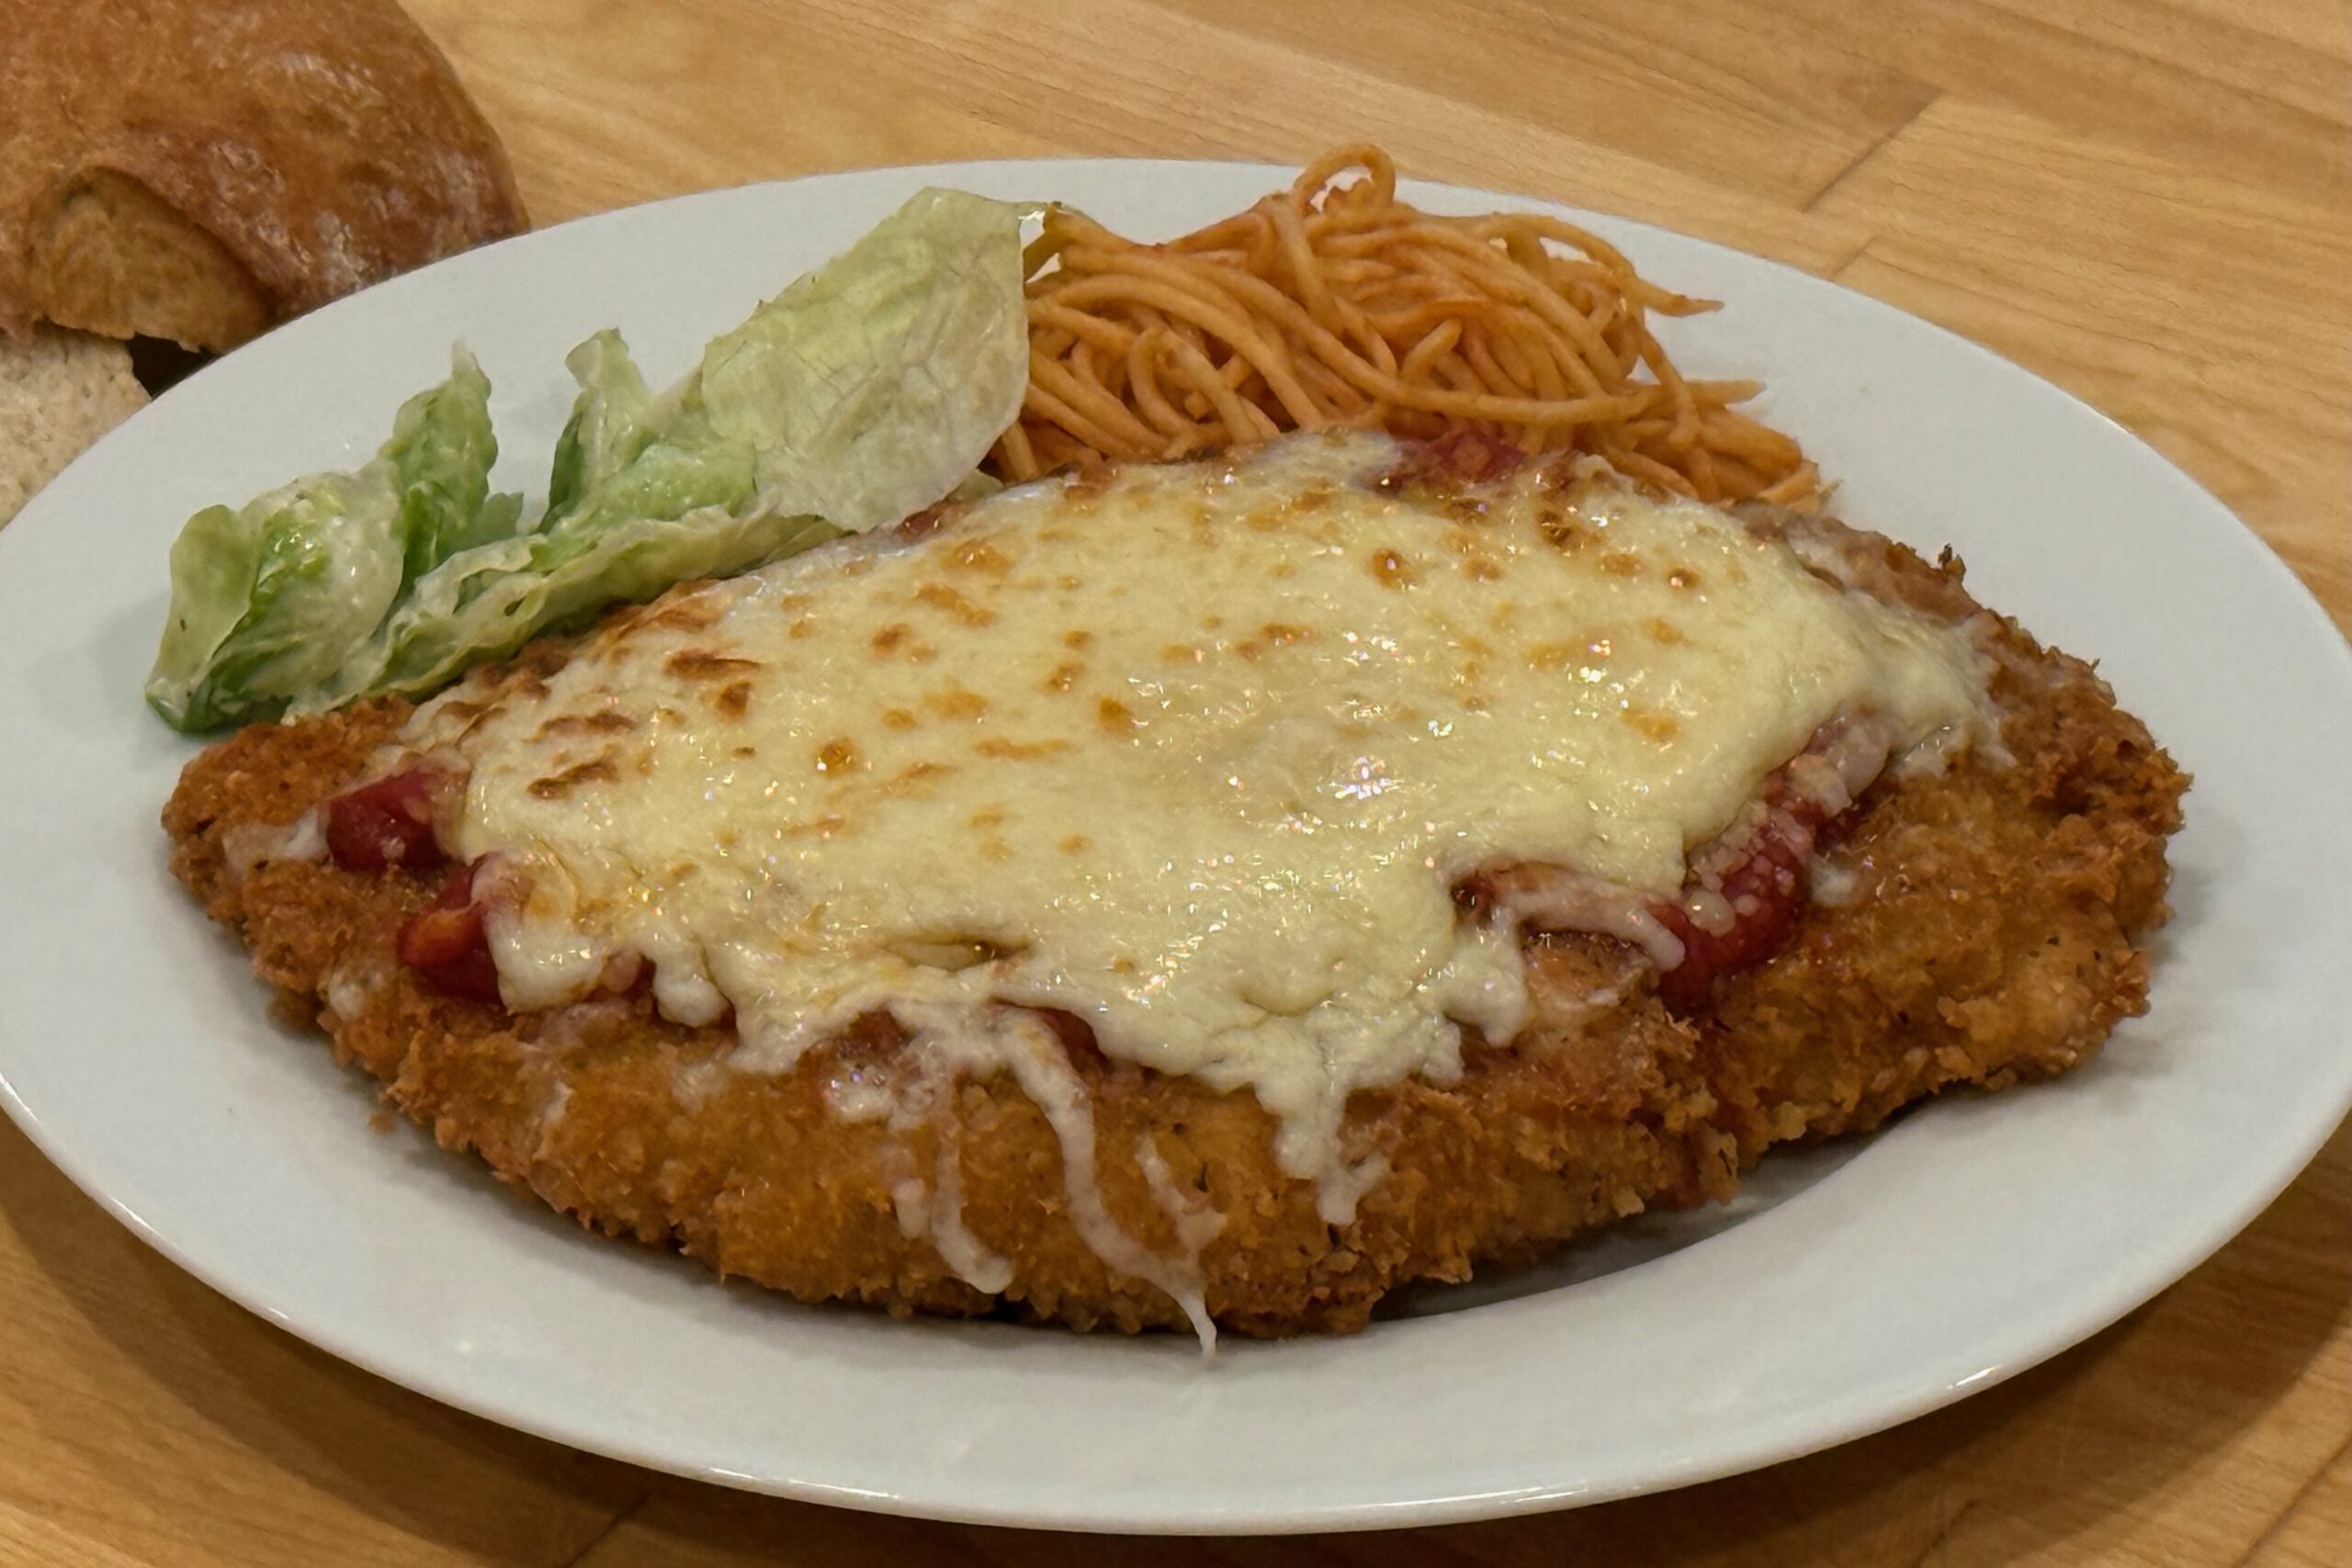
    A great Chicken Parmesan starts with the sauce—and this version pushes that balance a little further. It keeps the bright, clean tomato character that belongs in Chicken Parm, but builds in more savory depth with extra bloomed tomato paste, a broader basil profile, a slightly larger shallot base, and a restrained touch of heat. Paired with thin, well-seasoned chicken, a crisp Parmesan-forward crust, and just enough cheese to bring it all together, this version leans into both texture and flavor—clean, balanced, and deeply satisfying.


    Ingredients

    Sauce

    • 2 tbsp (30 ml) extra-virgin olive oil
    • 3 tbsp (45 g) finely grated shallot, or about 1½ small shallots, very finely minced
    • 2 cloves garlic (about 6 g), minced
    • 1 tbsp (15 g) tomato paste
    • ¼ tsp dried oregano
    • ¼ tsp dried basil
    • ¼ tsp red pepper flakes
    • 1 (28 oz / 794 g) can crushed tomatoes
    • ¾ tsp (4–5 g) table salt, plus more to taste
    • ¼ tsp MSG (recommended), or 1–2 tsp finely grated Parmesan rind
    • ¼ tsp sugar (optional), only if needed for balance
    • 2 tbsp (8 g) finely chopped fresh basil
    • 1 tbsp (15 ml) good-quality extra-virgin olive oil, for finishing

    Chicken

    • 4 large boneless, skinless chicken breasts (about 3 lb / 1.36 kg total), halved horizontally
    • 1½ tsp (8–9 g) table salt
    • ½ tsp black pepper
    • ½ tsp garlic powder

    Breading

    • 2 large eggs
    • 2 tbsp (16 g) all-purpose flour
    • 1½ cups (150 g) finely grated Parmesan cheese
    • 1 cup (60 g) panko bread crumbs
    • 1 tsp garlic powder
    • ½ tsp dried oregano
    • ½ tsp black pepper

    For Frying & Assembly

    • ⅔ cup (160 ml) olive oil or olive oil + neutral oil blend
    • 8 oz (225 g) whole-milk mozzarella, shredded
    • 4 oz (115 g) provolone, shredded
    • Fresh basil, torn
    • Extra freshly grated Parmesan, for finishing

    Directions

    Prepare the Sauce

    Heat 2 tbsp (30 ml) olive oil in a medium saucepan over medium heat. Add the shallot with a small pinch of salt and cook, stirring occasionally, until fully softened and lightly sweet, about 4–6 minutes.

    Stir in the tomato paste and cook, stirring constantly, until darkened slightly and concentrated, about 2 minutes.

    Add the garlic, oregano, dried basil, and red pepper flakes and cook for about 30 seconds, just until fragrant.

    Add the crushed tomatoes, ¾ tsp (4–5 g) table salt, and MSG or Parmesan rind. Bring to a simmer, then reduce heat to medium-low and cook for 25–30 minutes, stirring occasionally, until slightly thickened. As it simmers, lightly crush the tomatoes with a spoon or potato masher for a more natural texture. If needed, simmer a few minutes longer until the sauce lightly coats a spoon.

    Remove from heat and stir in the fresh basil and 1 tbsp (15 ml) good-quality olive oil. Taste and adjust with additional salt as needed. Add the sugar only if needed to balance acidity. Keep warm.

    Prepare the Chicken

    Place the chicken between sheets of plastic wrap and pound to an even ½-inch (1.25 cm) thickness.

    Season both sides with salt, pepper, and garlic powder. Let rest at room temperature for 15–20 minutes.

    Set Up the Breading Station

    In one shallow dish, whisk together the eggs and flour until smooth.

    In a second dish, combine the Parmesan, panko, garlic powder, oregano, and pepper.

    Bread the Chicken

    Pat the chicken dry. Dip each cutlet into the egg mixture, allowing excess to drip off, then coat thoroughly in the Parmesan-panko mixture, pressing gently so the coating adheres.

    Fry the Chicken

    Heat the oil in a large skillet over medium-high heat until shimmering.

    Working in batches, add the chicken and cook without moving until deep golden brown, about 1½–2 minutes per side.

    Transfer to a wire rack set over a sheet pan, or to a paper towel–lined plate if serving immediately.

    Broil and Assemble

    Preheat the broiler and position the rack about 4 inches (10 cm) from the heat.

    Place the chicken on a baking sheet. Spoon a light layer of sauce over each cutlet, then top with the mozzarella and provolone.

    Broil until the cheese is melted and lightly browned, 2–4 minutes.

    n

    Check every cutlet with an instant-read thermometer inserted from the side into its thickest part; the chicken should reach 165°F (74°C) before serving.

    Finish and Serve

    Transfer to a serving platter. Spoon a small amount of additional sauce around or lightly over the chicken, then finish with fresh basil, a light dusting of freshly grated Parmesan, and a drizzle of olive oil.

    Yield: 4 servings.


    Notes

    Preparation

    • For a slightly fresher texture, you can substitute whole peeled tomatoes and crush them by hand instead of using crushed tomatoes.
    • Blooming the full tablespoon of tomato paste gives the sauce more depth without pushing it into a heavy, long-cooked style.
    • Adding the red pepper flakes with the garlic keeps the heat clean and bright without risking bitterness.
    • Hold back some of the final salt adjustment until after the sauce has reduced and the MSG or Parmesan rind has been added, since both affect perceived savoriness.
    • Do not oversauce—too much sauce will soften the crust.
    • Letting the chicken rest after seasoning improves flavor and texture.

    Variations

    • With Fontina: Substitute fontina for provolone for a softer, more melt-focused variation.
    • Parmesan Rind: Use finely grated Parmesan rind instead of MSG for a more traditional source of added savory depth.
    • Mozzarella Only: Use mozzarella only for a simpler, more classic approach.

    Serving Suggestions

    • Serve with spaghetti, garlic bread, or a simple green salad.
    • Also works well sliced over pasta or tucked into a toasted sandwich roll.

    Make-Ahead & Storage

    • The sauce can be made up to 3 days ahead and refrigerated.
    • The fried chicken can be held briefly on a wire rack in a 200–225°F (95–110°C) oven before broiling.
    • Leftovers reheat best in a 375°F (190°C) oven to help preserve the crust.
  • Double Chocolate Bundt Cake

    Double Chocolate Bundt Cake

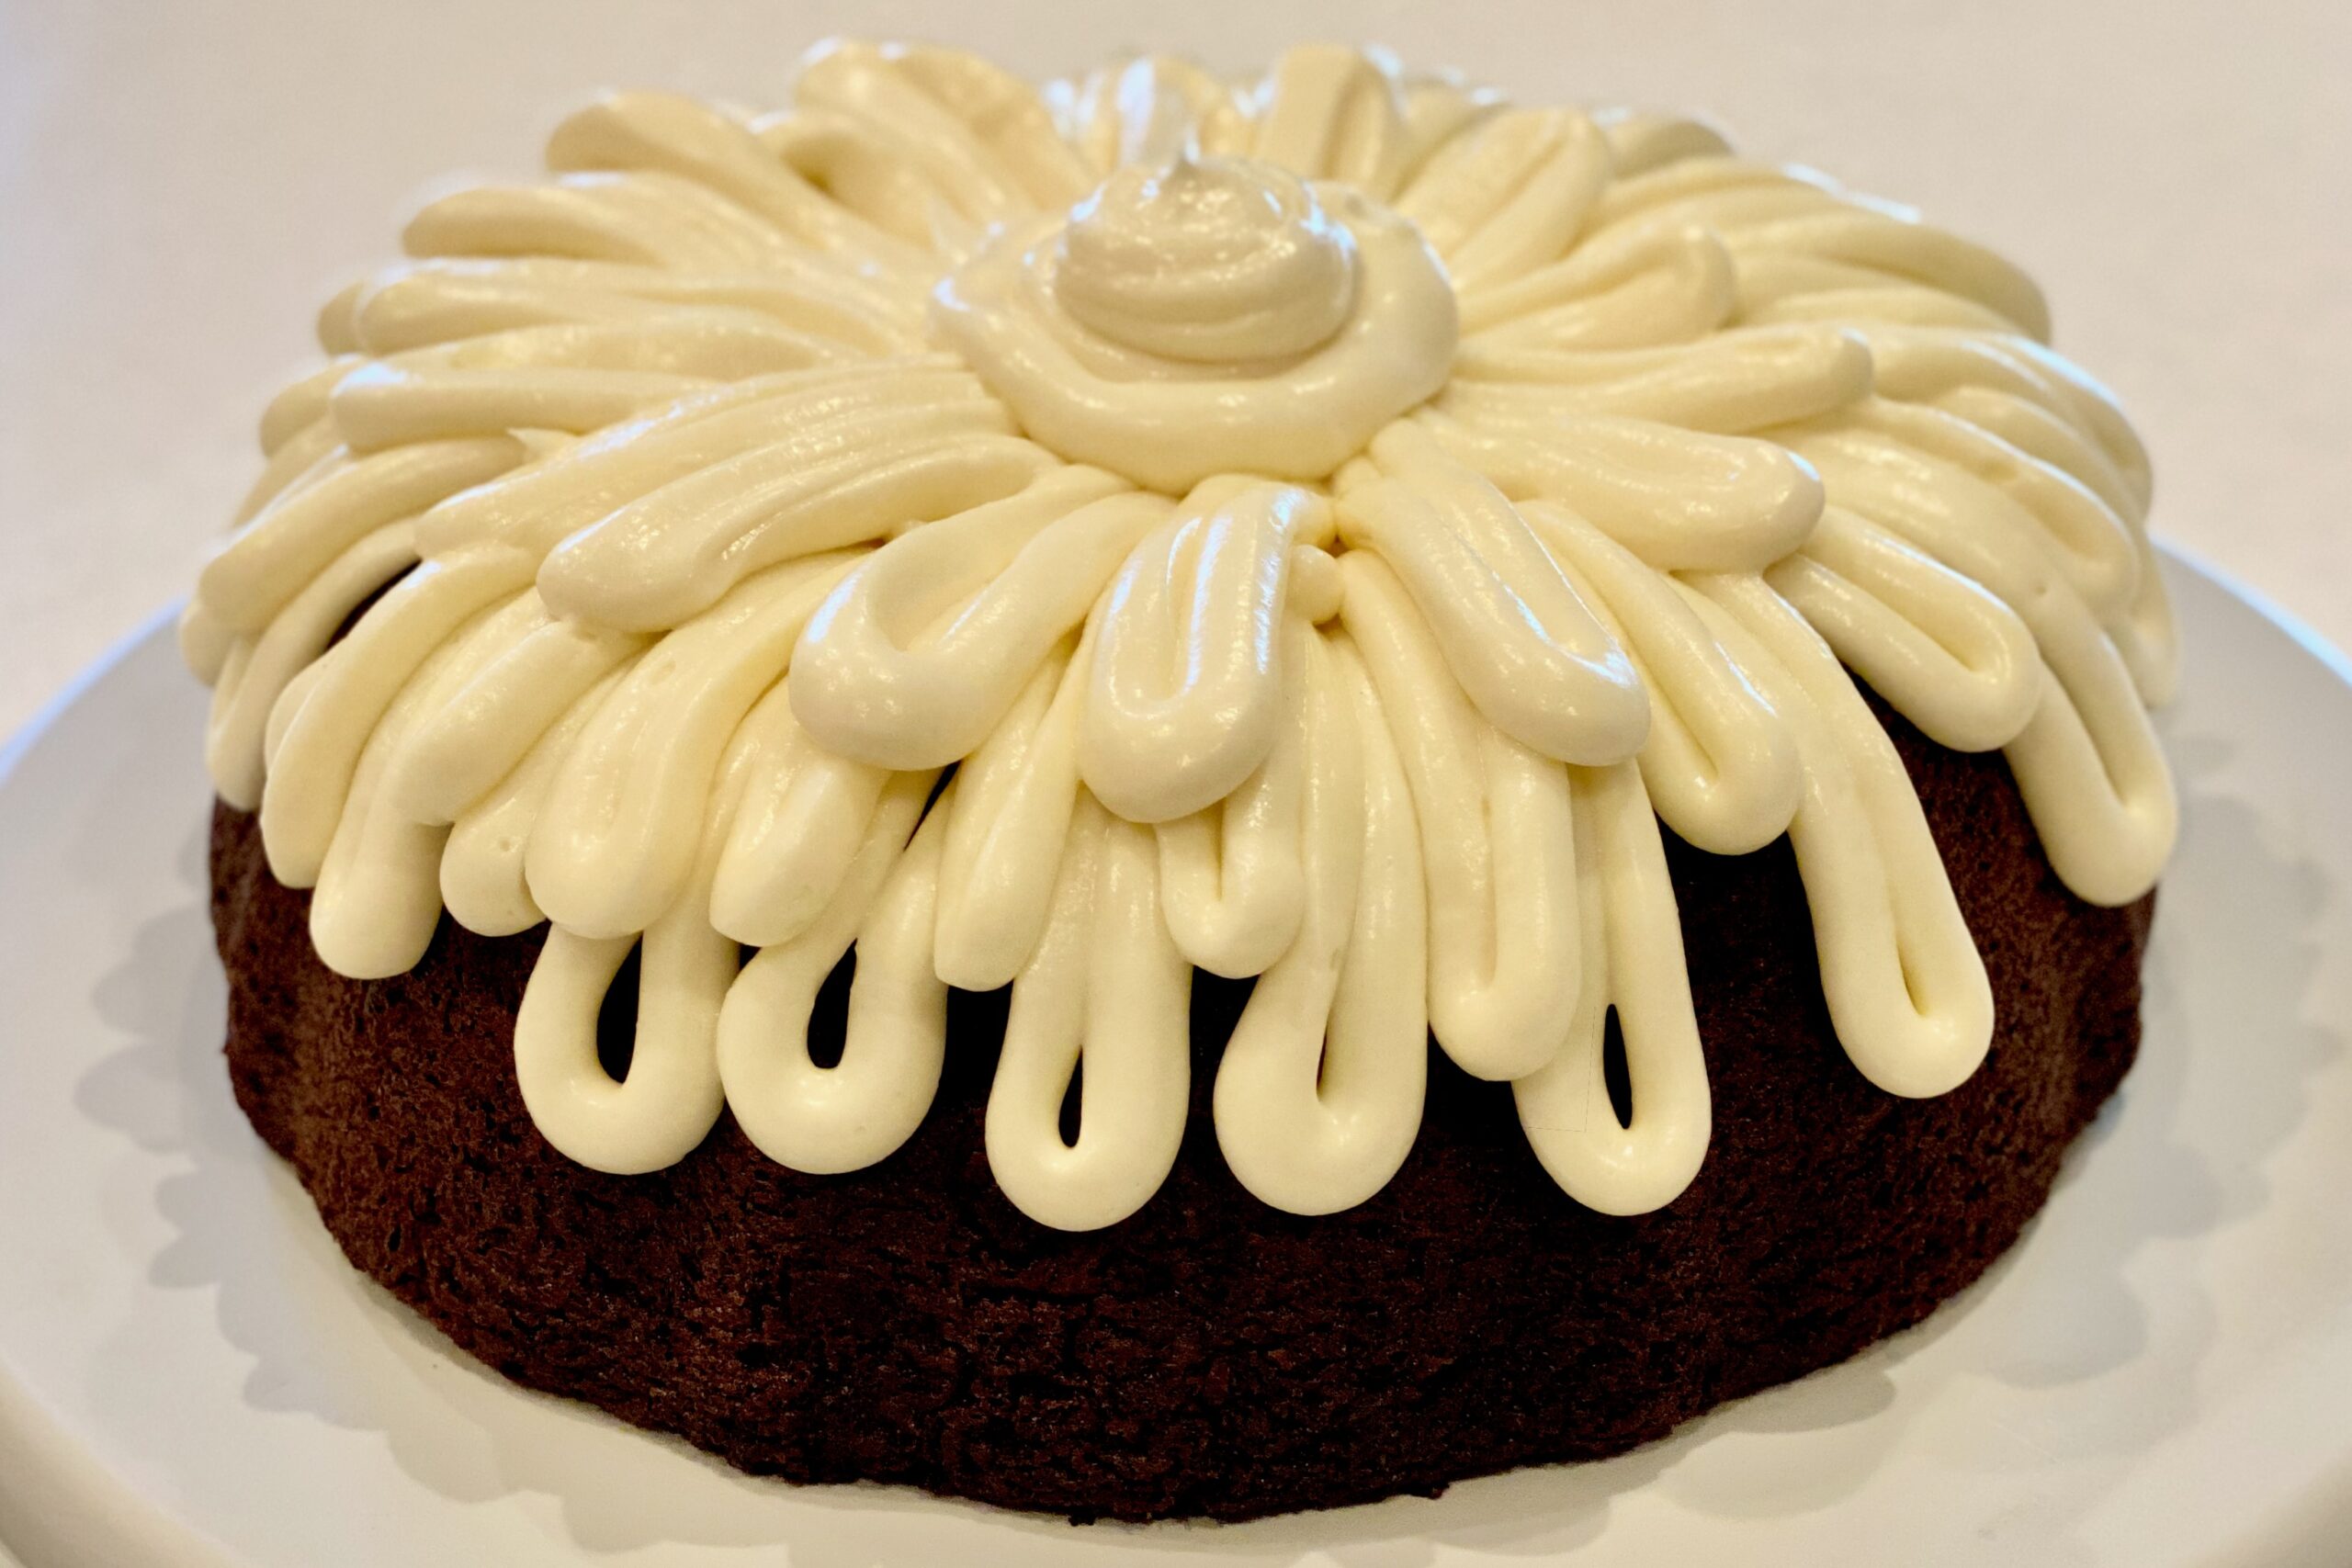
    This elevated box cake recipe transforms a simple chocolate mix into a deeply rich, ultra-moist Double Chocolate Bundt Cake with the help of sour cream, pudding, vanilla, and a touch of salt for balance. Chocolate chips melt into the tender crumb, while optional espresso powder intensifies the cocoa for bold, bakery-style flavor and a luxuriously soft texture.


    Ingredients

    • 1 pkg (13–16 oz / 369–454 g) chocolate cake mix
    • 1 pkg (3.9 oz / 110 g) instant chocolate pudding mix
    • ½ tsp table salt
    • 4 eggs
    • 1 cup (240 g) sour cream
    • ½ cup (120 ml) water
    • ½ cup (120 ml) oil
    • 1 tsp vanilla extract
    • 1 tsp espresso powder (optional)
    • 1½ cups (255 g) chocolate chips
    • 1 tbsp (8 g) flour (for tossing chips)

    White Cream Cheese Frosting

    • 1 pkg (8 oz / 227 g) cream cheese, softened
    • ¼ cup (57 g) butter, softened
    • 1½ cups (180 g) powdered sugar
    • 1–2 tsp vanilla extract
    • Pinch table salt

    Chocolate Frosting Option

    • 2–3 tbsp (10–15 g) unsweetened cocoa powder

    Directions

    Prepare the Batter

    Preheat oven to 350°F (177°C). Grease the Bundt pan using your usual method.

    In a large bowl, whisk together the cake mix, pudding mix, table salt, and espresso powder (if using).

    In a separate bowl, whisk the eggs, sour cream, water, oil, and vanilla until smooth.

    Add the wet ingredients to the dry ingredients and mix just until smooth and fully combined. Do not overmix.

    Toss the chocolate chips with 1 tbsp (8 g) flour, then fold them into the batter.

    Bake and Cool

    Pour batter into the prepared Bundt pan and smooth the top.

    Bake for 45–50 minutes, or until a toothpick inserted in the center comes out with moist crumbs (not wet batter).

    If the top browns too quickly, tent loosely with foil for the last 10–15 minutes.

    Cool in the pan for 20 minutes, then invert onto a rack and cool completely before frosting.

    Make the Frosting

    Beat the cream cheese and butter until smooth and creamy.

    Add the powdered sugar, vanilla, and pinch of salt, then beat until smooth. For the chocolate option, beat in 2–3 tbsp (10–15 g) cocoa powder until fully incorporated.

    Finish

    Drizzle frosting over the cooled cake. Slice and serve.


    Notes

    Preparation

    Use room temperature eggs, sour cream, butter, and cream cheese for the smoothest batter and frosting.

    Small details make a big difference in a Bundt cake:

    • Mix just until combined to keep the crumb tender.
    • Tossing chips with flour helps them stay more evenly distributed in the Bundt.
    • Cool 20 minutes before inverting; too early can tear, too late can encourage sticking.

    Variations

    Keep the frosting white for dramatic contrast, or turn it into a chocolate version with cocoa powder.

    • Chocolate Frosting: Beat in 2–3 tbsp (10–15 g) unsweetened cocoa powder; add 1 tbsp powdered sugar if needed for sweetness.
    • Mini Chocolate Chips: Use mini chocolate chips for more even distribution throughout the cake.
    • Toasted Nuts: Add ½ cup (about 55 g) chopped toasted pecans or walnuts for crunch.
    • Cinnamon: Add ¼ tsp cinnamon for subtle warmth.

    Serving Suggestions

    For clean slices, chill the cake briefly after frosting, then let slices come back toward room temperature before serving.

    • Serve with fresh raspberries or strawberries for bright contrast.
    • A light dusting of powdered sugar over the frosting adds a classic Bundt finish.

    Make-Ahead & Storage

    This cake keeps well and slices nicely after a short chill.

    • Because of the cream cheese frosting, refrigerate the frosted cake; do not leave it at room temperature for more than 2 hours.
    • Store covered in the refrigerator for up to 5 days; let slices sit 15–30 minutes before serving for the best texture.
    • Wrap the unfrosted cake tightly and freeze for up to 2 months; thaw overnight in the refrigerator, then frost.
    • Make the frosting up to 1 day ahead, refrigerate, then rewhip before using.
  • Italian-American Meatball Subs

    Italian-American Meatball Subs

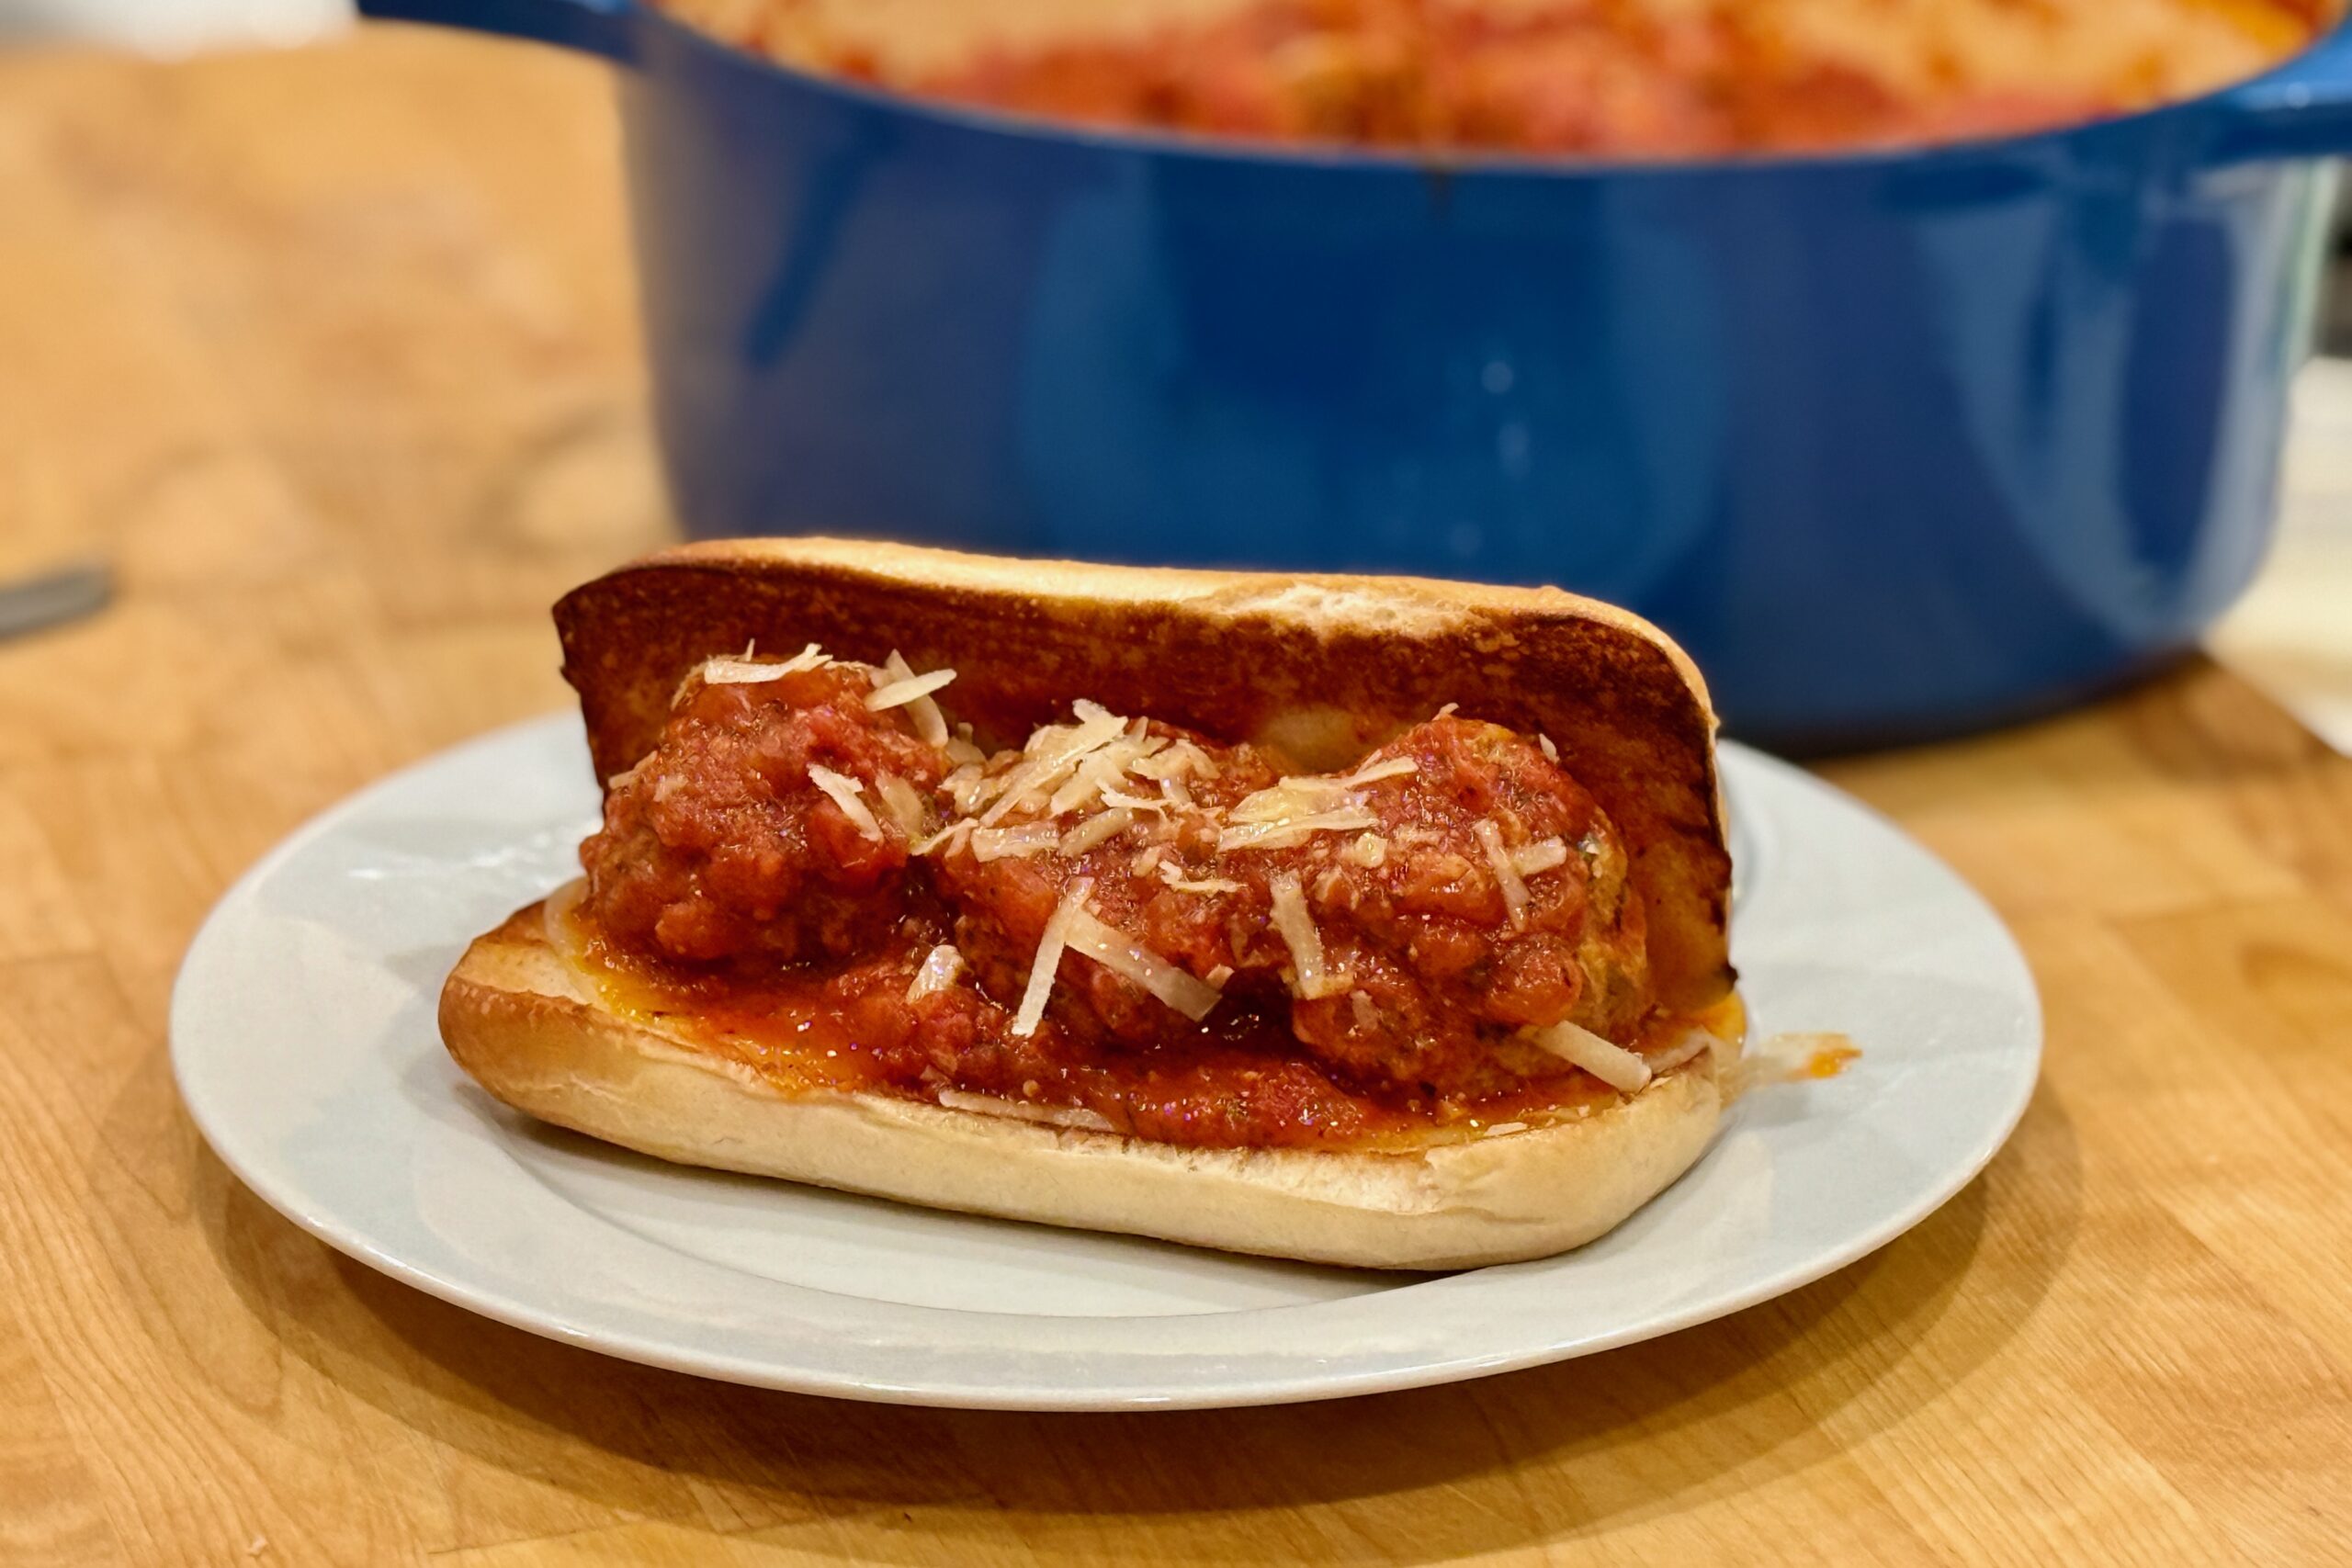
    Italian-American meatball subs built the classic way: tender, juicy roasted meatballs finished in a deeply savory red sauce, tucked into toasted rolls, and blanketed with melted provolone — comfort-food perfection with just enough structure to hold together.


    Ingredients

    Meatballs

    • 6 oz (170 g) bread crumbs
    • 1½ cups (360 ml) buttermilk
    • 1 pkg powdered gelatin (about ½ tbsp), bloomed in ¼ cup (60 ml) cold water
    • 3 eggs, slightly beaten
    • 1+ tbsp garlic, minced
    • ⅓ cup (packed) fresh parsley leaves, finely chopped
    • ½ tbsp table salt
    • ½ tsp black pepper
    • 3 oz (85 g) Parmesan cheese, grated
    • 6 oz (170 g) prosciutto, finely chopped
    • 2 lb (900 g) ground beef
    • 1 lb (455 g) ground pork

    Sauce

    • 2 tbsp (30 ml) olive oil
    • 1 cup (8 oz/225 g) onion, chopped
    • 5 cloves garlic, minced
    • 1 can (28 oz/795 g) crushed tomatoes
    • 1 can (15 oz/425 g) tomato sauce
    • 1 can (6 oz/170 g) tomato paste
    • 1½ cups (360 ml) chicken broth
    • ½ cup (120 ml) dry white wine (optional)
    • 1 tbsp fish sauce
    • 2 tsp dried basil
    • 2 tsp dried parsley
    • 1 tsp dried oregano
    • ½ tsp ground fennel
    • ¼ tsp dried thyme leaves
    • 2 whole cloves, crushed
    • 2 bay leaves
    • ½ tsp freshly ground black pepper
    • 1 tsp table salt

    For Serving

    • 10–12 Italian sub rolls or hoagie rolls
    • 10–12 oz (285–340 g) provolone, sliced (about 1 oz per sub)
    • Optional: garlic oil or olive oil, for brushing rolls
    • Optional: dried oregano, for finishing the rolls
    • Optional: grated Parmesan, for finishing
    • Optional: chopped parsley and/or a light basil chiffonade, for finishing

    Directions

    Prepare the Oven and Pans

    Preheat oven to 450°F (232°C) with racks positioned mid-top and mid-bottom.

    Line 2 half sheet pans with foil. Set wire racks in the pans and spray racks with cooking spray.

    Make the Meatballs

    Combine bread crumbs and buttermilk. Soak 10 minutes, then mash into a paste.

    Bloom gelatin in ¼ cup (60 ml) cold water for 8–10 minutes.

    In a mixing bowl, combine the bread crumb mixture and bloomed gelatin. Mix in eggs, garlic, parsley, salt, pepper, Parmesan, and prosciutto until well combined.

    Place ground beef and pork in a large bowl. Pour the egg/bread crumb mixture over the meat and mix gently by hand until thoroughly combined.

    Portion and form into 3 oz (85 g) meatballs (about 29–30 meatballs). If needed, refrigerate briefly to firm.

    Arrange meatballs on prepared racks and bake about 30 minutes, rotating trays and rack positions after 20 minutes.

    Make the Sauce

    In a Dutch oven over medium heat, heat olive oil until shimmering. Add onion and garlic and sauté until onion is translucent and tender.

    Stir in crushed tomatoes, tomato sauce, tomato paste, chicken broth, wine (optional), and fish sauce. Add remaining herbs, spices, and seasonings.

    Bring to a simmer, then reduce heat to low and simmer covered for 15 minutes.

    Braise the Meatballs in the Sauce

    After removing the cooked meatballs from the oven, lower oven temperature to 300°F (149°C).

    Add meatballs to the sauce. Cover and place in the oven for 1 hour.

    Remove and discard bay leaves before serving.

    Assemble and Bake the Subs

    Heat oven to 425°F (218°C). Split rolls lengthwise, leaving a hinge.

    Optional: brush cut sides lightly with garlic oil or olive oil. Toast rolls cut-side up on a sheet pan for 3–5 minutes, just until lightly crisp. If desired, finish with a very light dusting of dried oregano.

    Place a slice of provolone in each roll and return to the oven for 1–2 minutes to melt.

    Add 2–3 meatballs per sub. For easier bites and cleaner eating, slice meatballs in half before loading.

    Spoon sauce over the meatballs (go light under the meatballs to avoid soggy bread). Top with another small piece of provolone if desired.

    Bake 5–8 minutes, until the cheese is fully melted and bubbling at the edges.

    Yield: 10–12 subs.


    Notes

    Preparation

    • Fish sauce can be replaced with 4–6 anchovy filets, finely minced.
    • For meatball subs, sauce texture matters. If the sauce is still runny after braising, remove the meatballs and simmer the sauce uncovered until it reaches your desired thickness, then return the meatballs to the pot to rewarm.
    • Before serving, taste the sauce and adjust if needed. A splash (1–2 tsp) of red wine vinegar or a small squeeze of lemon can help brighten and balance the richness.
    • For extra color on the cheese, finish the assembled subs under the broiler for 30–90 seconds, watching closely.

    Variations

    • Parmesan and Romano: Parmesan can be swapped for a mixture of Parmesan and Romano cheeses.
    • Mozzarella: Swap provolone for mozzarella if you want a milder, stretchier melt.

    Serving Suggestions

    • Serve with extra warm sauce on the side for dipping rather than over-saucing the roll.
    • Classic sub-shop add-ons include hot cherry pepper relish, pickled pepperoncini, or sautéed onions and green peppers.
    • Optional finish: garnish with a light basil chiffonade and/or a sprinkle of chopped parsley for extra brightness.

    Make-Ahead & Storage

    • Meatballs and sauce taste even better the next day and reheat beautifully.
    • To reheat a chilled batch, add ¾ cup (180 ml) water to the pot and reheat covered at 325°F (163°C) until hot.
    • For best texture, store rolls separately and assemble subs just before baking.
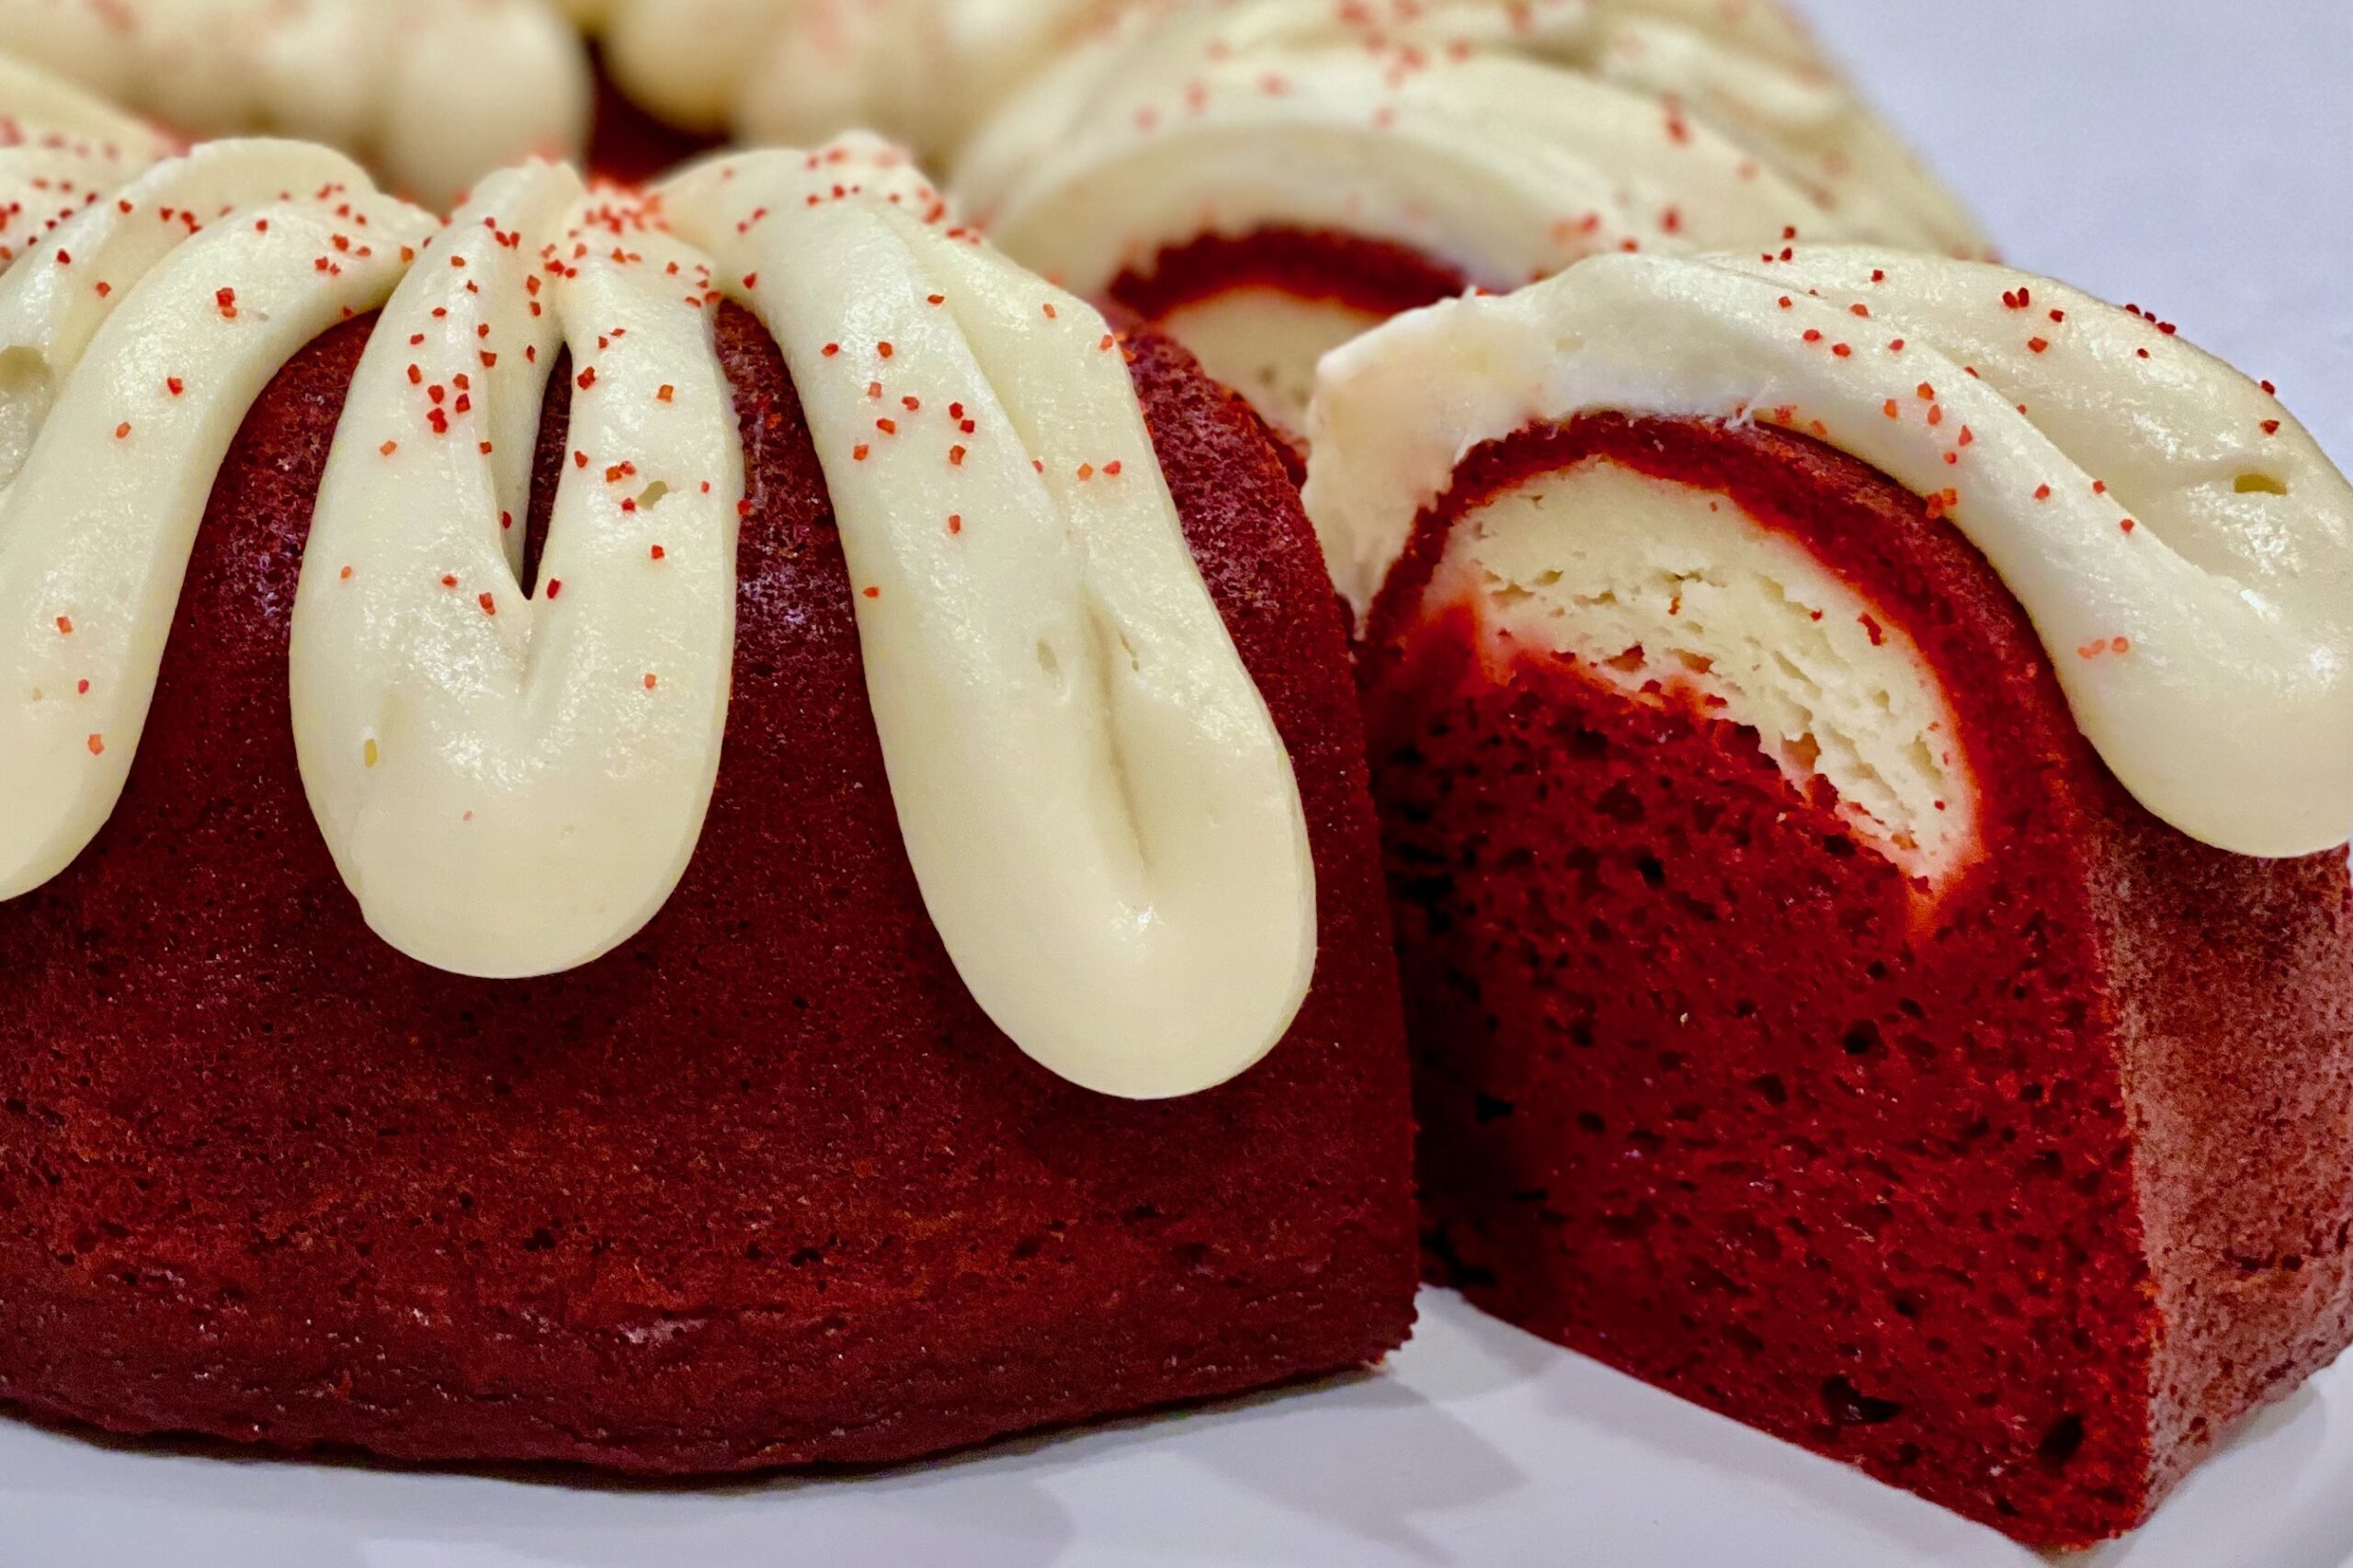
  • Red Velvet Cream Cheese Bundt Cake

    Red Velvet Cream Cheese Bundt Cake

    This Red Velvet Cream Cheese Bundt Cake is a classic “improved box cake” done right — exceptionally moist, tender, and familiar, with a rich cream cheese ribbon baked through the center and a simple cream cheese drizzle on top. The method here preserves everything that makes the original so good, while preventing the filling from sinking before the cake has time to set.


    Ingredients

    Cream Cheese Filling

    • 1 pkg (8 oz / 227 g) cream cheese, softened
    • 4 tbsp (57 g) butter, softened
    • ½ cup (100 g) sugar
    • 1 large egg
    • 2 tbsp (16 g) flour
    • 2 tsp vanilla extract

    Cake

    • 1 pkg (13–16 oz / 369–454 g) red velvet cake mix
    • 1 pkg (3.9 oz / 110 g) instant vanilla pudding mix
    • 1 cup (240 g) sour cream
    • 4 eggs
    • ⅓ cup (80 ml) water
    • ½ cup (120 ml) oil
    • ½ tsp table salt

    Cream Cheese Frosting

    • 1 pkg (8 oz / 227 g) cream cheese, softened
    • ¼ cup (57 g) butter, softened
    • 1½ cups (180 g) powdered sugar
    • 1–2 tsp vanilla extract
    • ⅛ tsp table salt

    Directions

    Make the Cream Cheese Filling

    In a stand mixer or with a hand mixer, beat the cream cheese, butter, and sugar until smooth and creamy, about 1–2 minutes.

    Beat in the egg, flour, and vanilla just until fully incorporated.

    Refrigerate the filling for 20–30 minutes, until thickened but still spoonable.

    Prepare the Cake Batter

    Heat the oven to 325°F (163°C). Generously grease a Bundt pan.

    In a large bowl, whisk together the sour cream, eggs, water, oil, and table salt until smooth.

    Add the cake mix and pudding mix and beat just until combined, scraping down the bowl as needed. Do not overmix.

    Assemble

    Pour about half of the cake batter into the prepared Bundt pan.

    Spoon the chilled cream cheese filling evenly over the batter, keeping about a ¾-inch (2 cm) border from the edges.

    Pour the remaining cake batter over the filling and gently smooth the top.

    Bake

    Bake at 325°F (163°C) for 60–70 minutes, until a toothpick inserted into the cake portion rather than the filling comes out clean.

    Cool in the pan for 20 minutes, then invert onto a rack and cool completely.

    Finish

    Beat the cream cheese and butter until smooth. Beat in the powdered sugar, vanilla, and table salt until creamy.

    Drizzle the frosting over the cooled cake.

    Yield: 12 servings.


    Notes

    Preparation

    • Chilling the filling before assembly helps prevent it from sinking before the cake structure sets, without changing its flavor or texture.

    Variations

    • Espresso Powder: Add 1 tsp espresso powder to the cake batter to deepen the cocoa notes without making the cake taste like coffee.

    Serving Suggestions

    • For the cleanest slices, chill the cake for several hours after cooling, then slice with a long knife wiped clean between cuts.

    Make-Ahead & Storage

    • Because of the cream cheese filling and frosting, keep the cake refrigerated. Store covered for up to 5 days.
    • Freeze the unfrosted cake for up to 2 months; thaw overnight in the refrigerator and frost before serving.
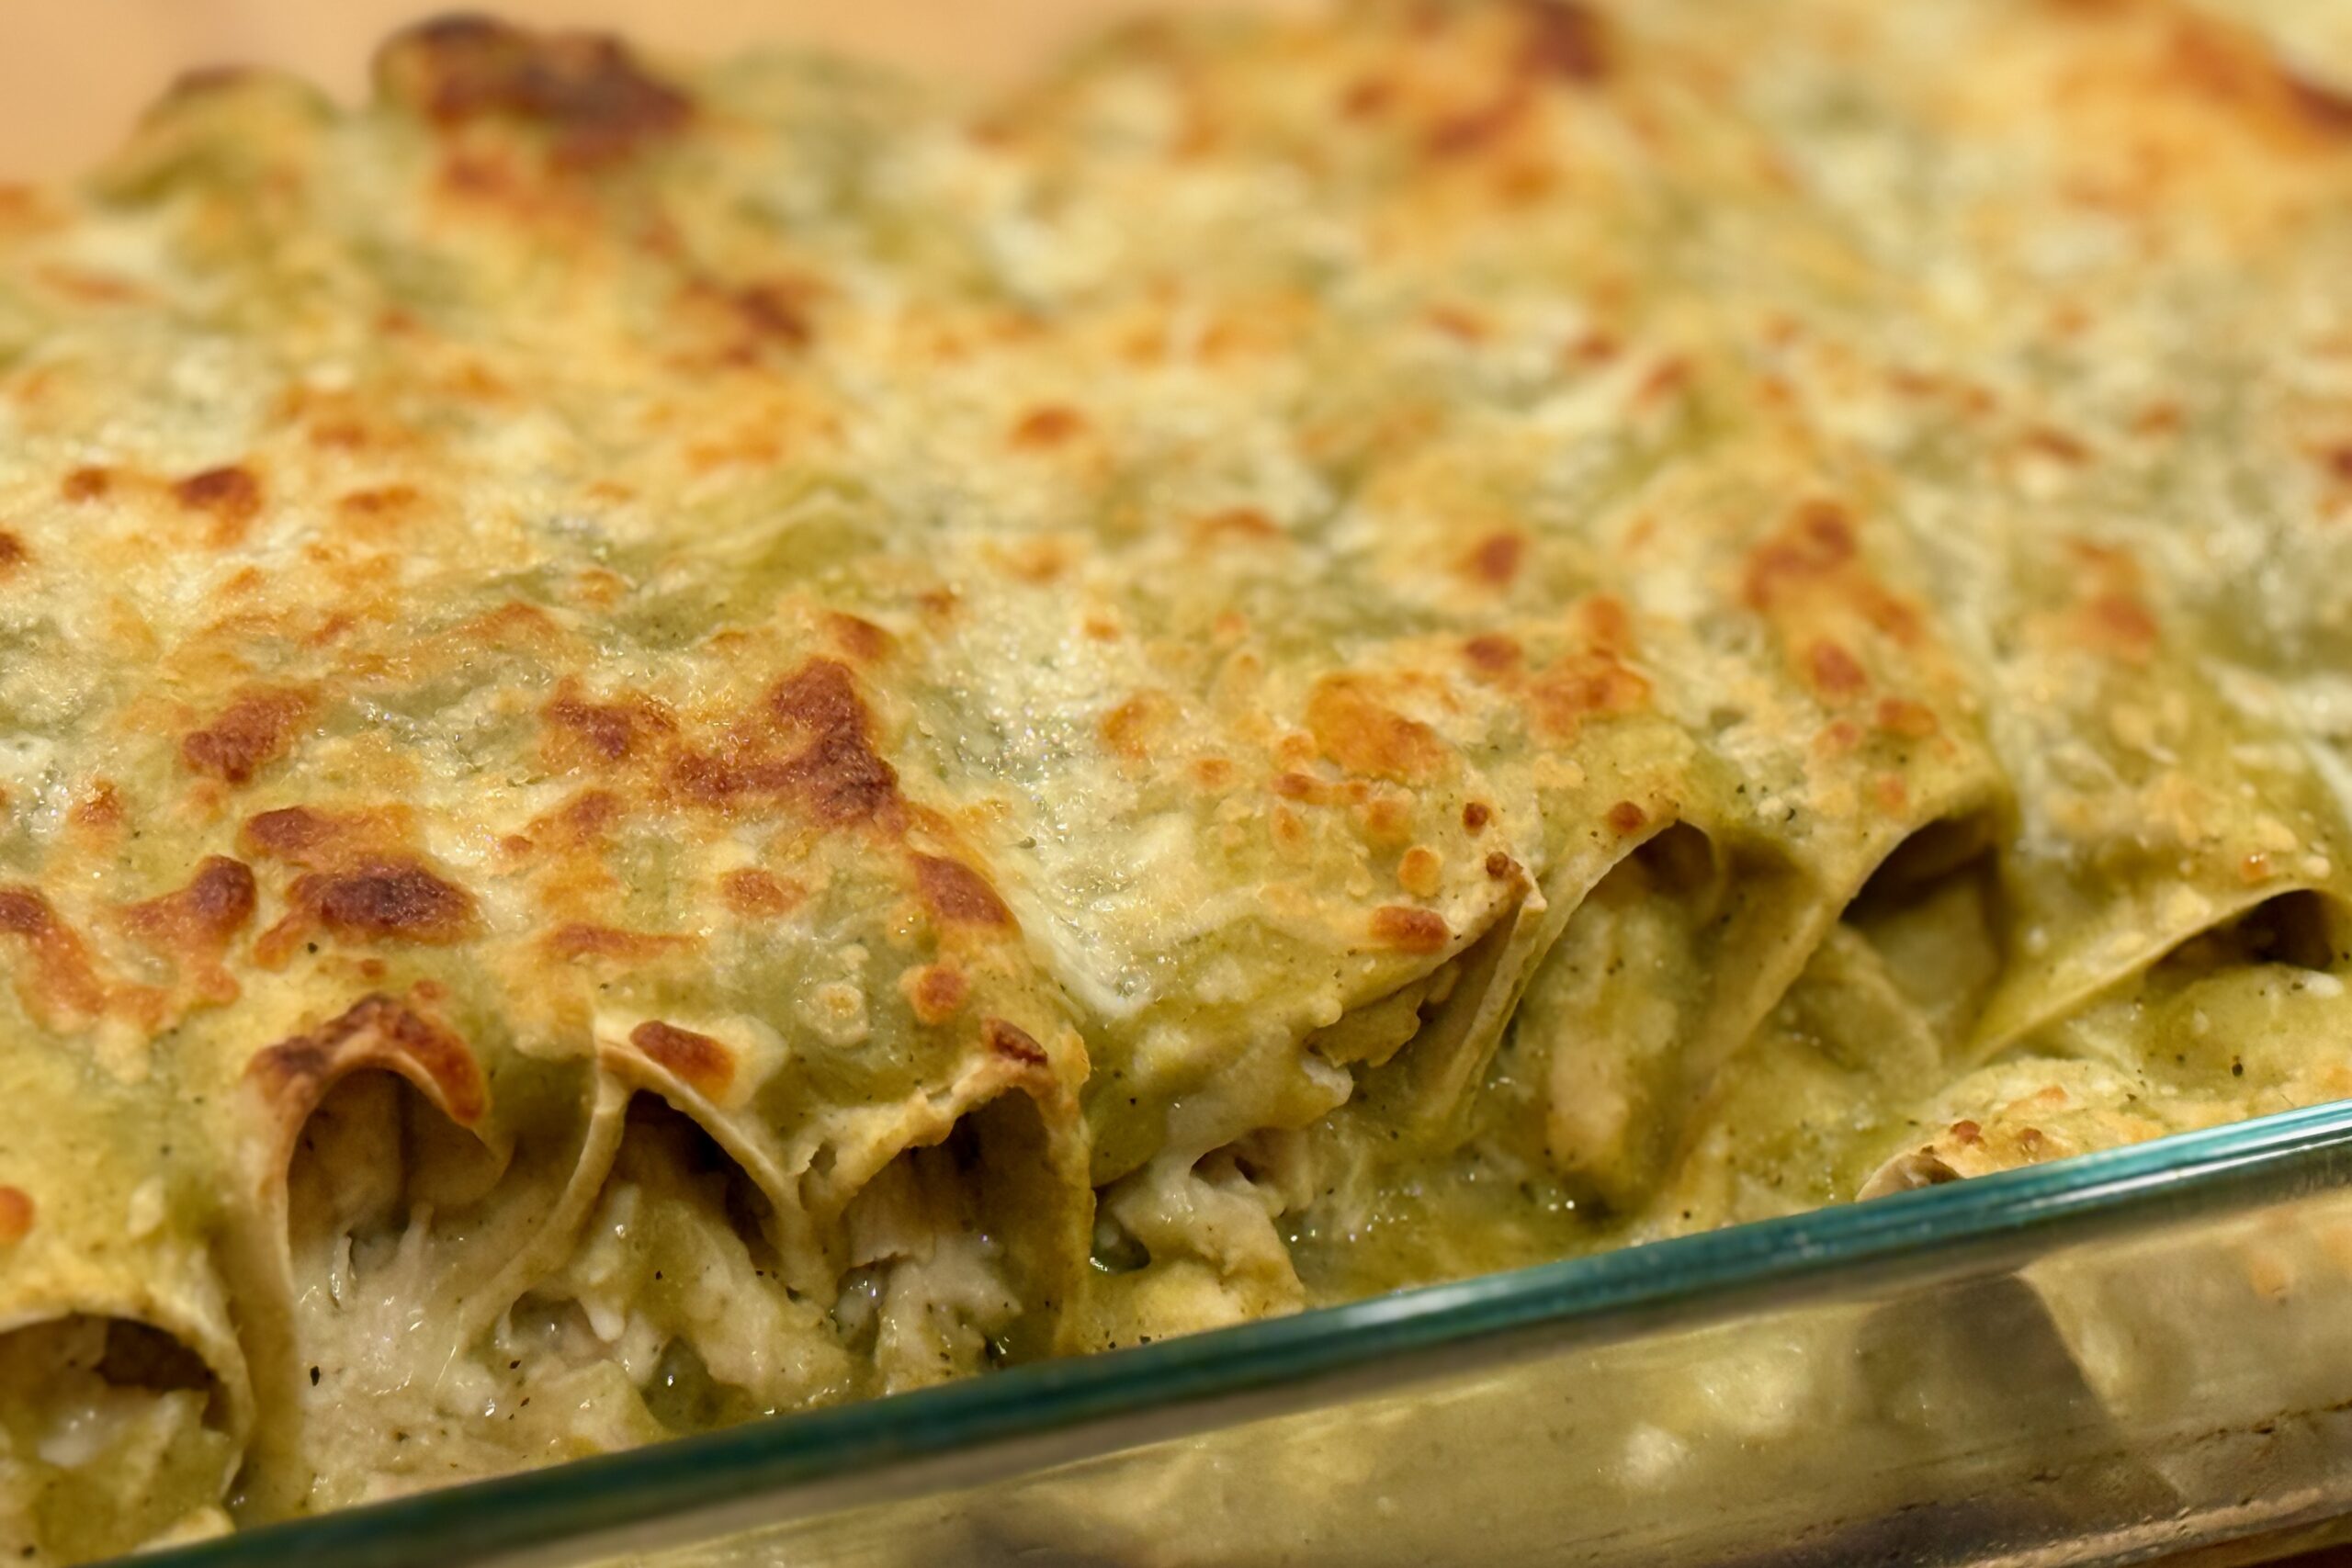
  • Enchiladas Verdes de Pollo

    Enchiladas Verdes de Pollo

    Green Chicken Enchiladas: Bright, tangy tomatillo sauce, tender chicken, and melty jack cheese wrapped in soft corn tortillas—these restaurant-style enchiladas verdes de pollo get their signature flavor from our homemade Green Enchilada Sauce, finished with cilantro-lime crema and crisp garnishes.


    Ingredients

    For the Enchiladas

    • 1 recipe Green Enchilada Sauce, warmed
    • 12 corn tortillas
    • neutral oil, for soft-frying tortillas
    • 1 cup (240 ml) chicken broth (for loosening sauce and moistening filling, as needed)

    For the Filling

    • 3 cups (about 420 g) cooked shredded chicken (recommended: rotisserie; see optional poached method)
    • 1½ cups (170 g) shredded monterey jack cheese (plus ½ cup / 57 g for topping)
    • ¼ cup (60 ml) crema (or sour cream)
    • ½ tsp table salt, or to taste
    • freshly ground black pepper, to taste
    • 1–2 tbsp (15–30 ml) warm Green Enchilada Sauce (to season chicken before mixing)
    • 2 tsp (10 ml) fresh lime juice (optional, brightens the filling)

    For Assembly & Garnish

    • reserved warm Green Enchilada Sauce (for coating tortillas and topping)
    • Cilantro-Lime Crema, for drizzling
    • Lime Pickled Onions
    • pickled jalapeños
    • fresh cilantro, chopped
    • 1 small white onion, finely diced
    • avocado, sliced (optional)
    • queso fresco or cotija, crumbled (optional)

    Directions

    Prepare the Chicken

    In a bowl, combine the shredded chicken with 1–2 tbsp (15–30 ml) warm Green Enchilada Sauce, ¼ cup (60 ml) crema, 1½ cups (170 g) monterey jack, salt, pepper, and the lime juice, if using. Reserve the remaining ½ cup (57 g) monterey jack for topping. If the mixture seems dry, moisten it with 1–2 tbsp (15–30 ml) warm chicken broth. Taste and adjust the seasoning.

    Optional Poached & Shredded Method

    In a saucepan, add chicken breasts, chicken broth to cover by ½ inch (1 cm), 1 smashed garlic clove, and 1 bay leaf. Bring just to a bare simmer; poach gently until the thickest part of each breast registers 165°F (74°C), about 12–15 minutes depending on thickness. Rest 5 minutes, shred, then proceed as above.

    Warm the Tortillas

    Heat a thin film of oil in a skillet over medium heat. Briefly pan-fry each tortilla for 5–10 seconds per side to soften; stack on a plate and keep covered. Warm the Green Enchilada Sauce separately until just simmering.

    Assemble

    Heat the oven to 350–375°F (177–191°C). Lightly oil a 9 × 13-inch (23 × 33 cm) baking dish; spoon ½ cup (120 ml) warm sauce over the bottom. Working one at a time, dip a warm tortilla into the sauce to lightly coat, add about ¼–⅓ cup (60–80 ml) chicken filling, roll, and place seam-side down in the dish. Repeat with the remaining tortillas. Pour the remaining sauce evenly over the enchiladas; sprinkle with the reserved ½ cup (57 g) monterey jack.

    Bake

    Bake for 20–25 minutes, until heated through and bubbling. Broil for 1–2 minutes at the end for light browning, if desired. Rest for 5 minutes.

    Garnish & Serve

    Drizzle with Cilantro-Lime Crema. Top with chopped cilantro, diced onion, pickled jalapeños, and Lime Pickled Onions. Add avocado slices and crumbled queso fresco or cotija, if using.

    Yield: 6 servings.


    Notes

    Preparation

    • Bloom the Sauce: Simmer the Green Enchilada Sauce for 1–2 minutes with 1 tsp of the neutral oil before assembly for deeper flavor.
    • Corn Tortilla Integrity: A quick soft-fry in oil prevents tearing and keeps the texture soft yet structured.
    • Layered Sauce Effect: Spoon a thin layer over the tortillas before baking, then drizzle a little fresh warm sauce over them after baking for a vibrant finish.

    Variations

    • Suizas Style: Stir ¼–½ cup (60–120 ml) crema into part of the warm sauce for a creamier finish.
    • Cheese Blend: Swap in part Oaxaca or asadero with monterey jack for extra melt and stretch.
    • Vegetable Add-Ins: Fold in a handful of sautéed spinach, roasted corn, or diced roasted poblanos with the chicken.
    • Spicier: Keep the chile seeds or add a diced serrano to the sauce.

    Serving Suggestions

    Make-Ahead & Storage

    • Assemble Ahead: Assemble up to 24 hours in advance; cover and chill. Reserve ½ cup (120 ml) sauce to pour on just before baking.
    • Leftovers: Refrigerate for up to 3 days; reheat covered at 325°F (163°C) until warmed through, adding a splash of broth if needed.
    • Freeze: Assemble without the garnishes, wrap well, and freeze for up to 2 months. Thaw overnight in the refrigerator before baking.
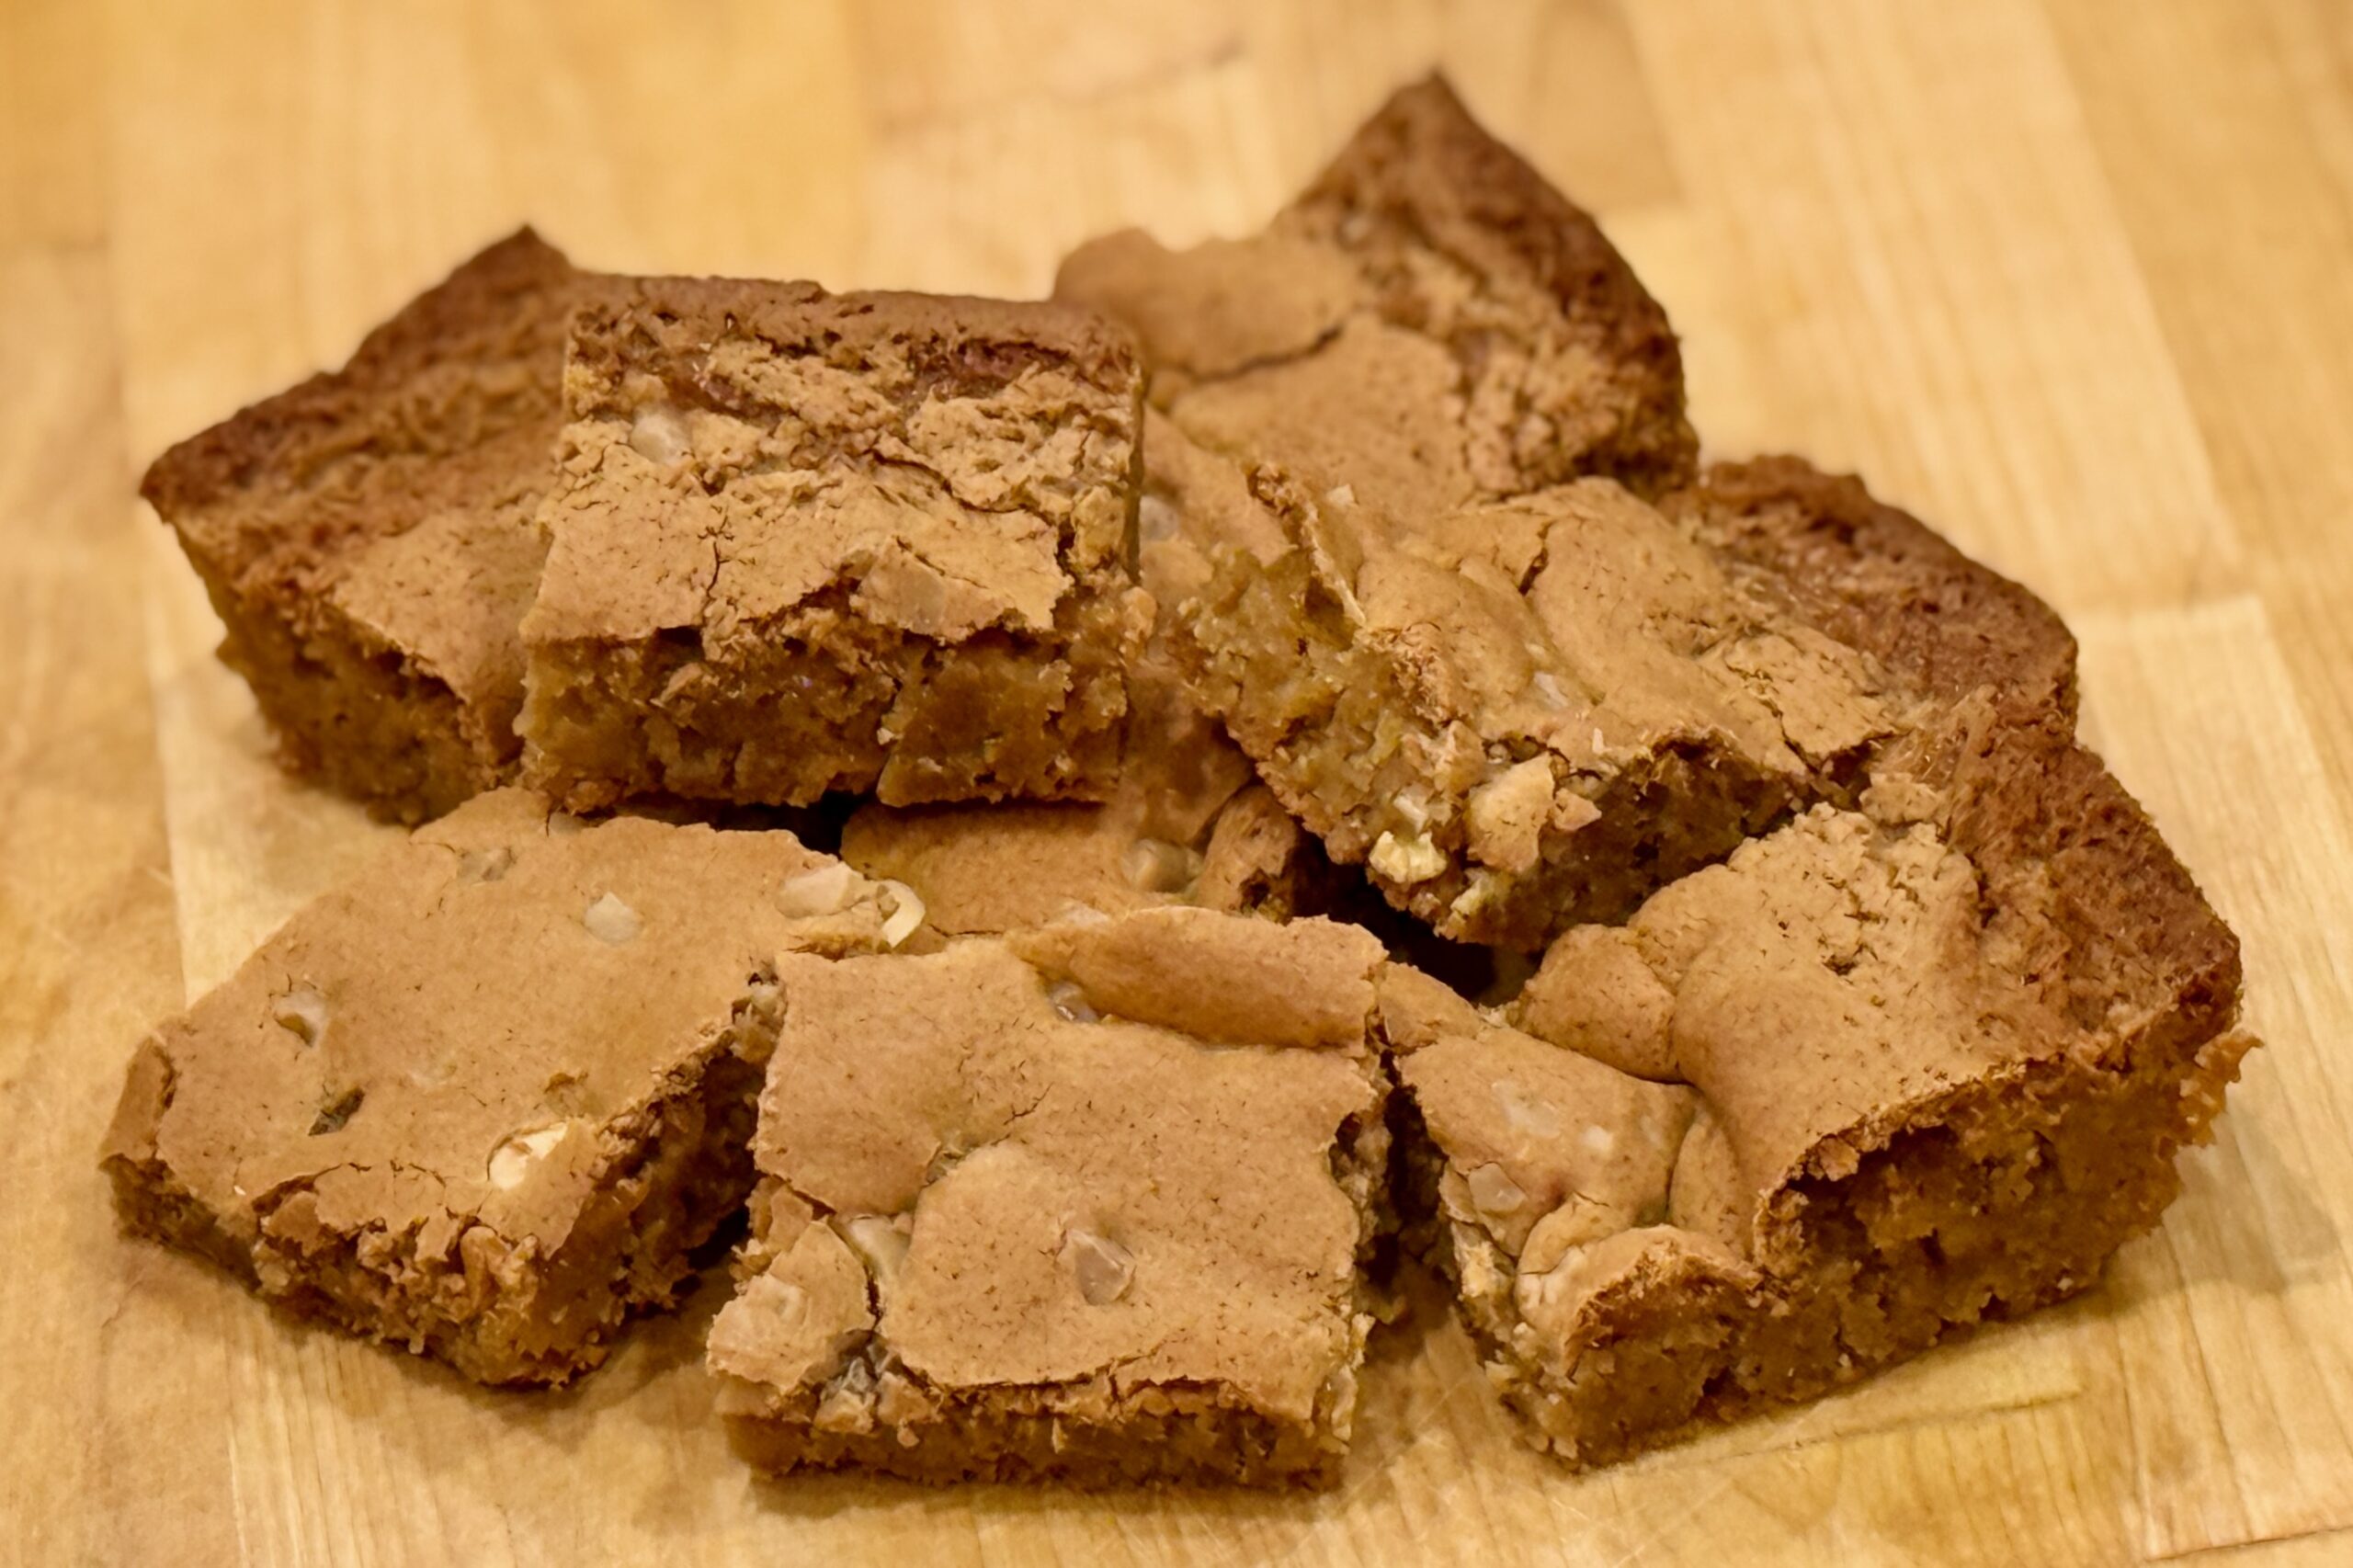
  • Brown Sugar Blondies

    Brown Sugar Blondies

    These brown sugar blondies are a simple, old-school bar cookie—rich with caramel notes, soft in the center, and the kind of dessert that disappears fast at family get-togethers. The base recipe is intentionally straightforward (one bowl, one pan), and it’s a perfect canvas for mix-ins like ginger + cranberry, chocolate chips, toasted nuts, or a cinnamon-sugar swirl.


    Ingredients

    • 2 cups brown sugar
    • 1⅔ cups all-purpose flour
    • ½ cup butter, melted
    • 3 eggs
    • 2 tsp baking powder
    • 2 tsp vanilla extract
    • ½ tsp table salt

    Directions

    Prepare the Batter

    Preheat oven to 350º. Grease a 9×13 baking dish.

    In a large bowl, combine all ingredients and mix until evenly incorporated. Spread batter evenly into the prepared pan.

    Bake and Cool

    Bake until the top is dry and the edges begin to pull away from the sides, about 25 minutes.

    Remove from the oven and cool completely before slicing.


    Notes

    Preparation

    These blondies are soft and lightly cake-like as written. For a chewier, denser blondie, make this one change:

    • Chewier Texture Option: Use 2 eggs (instead of 3) and 1 tsp baking powder (instead of 2 tsp). (All other ingredients stay the same.)

    Doneness is best judged by texture, not time:

    • A toothpick should show moist crumbs, not wet batter.
    • Overbaking will dry the bars quickly, so start checking a few minutes early if your oven runs hot.
    • For clean slices, cool completely and use a sharp knife, wiping between cuts.

    Altitude can affect baking results (especially dryness and rise):

    • High Altitude (~4,750 ft / 1400 m): Start checking 2–4 minutes early. If your blondies tend to bake up dry at altitude, add 1–2 tbsp extra melted butter to the batter.
    • Sea Level: Bake time is typically closer to the full time; keep the base butter amount as written.

    Serving Suggestions

    • Serve at room temperature for the cleanest texture and easiest slicing.
    • For a dessert-style presentation, warm individual squares briefly and serve with vanilla ice cream.

    Variations

    Stir the variation ingredients below into the batter unless otherwise noted.

    White Chocolate Toffee Blondies:

    • ¼ cup white chocolate chips (sprinkled evenly on top before baking)
    • 1 tbsp toffee bits (sprinkled evenly on top before baking)

    Ginger Cranberry Bars:

    • ½ tsp ground ginger
    • ¼ cup crystallized ginger, finely chopped
    • ½–⅔ cup dried cranberries, chopped
    • 8 oz white chocolate chips
    • Optional: ½ tsp orange zest

    Classic Walnut Blondies:

    • 1–1¼ cups walnuts, toasted and chopped
    • Optional: ½ tsp cinnamon

    Chocolate Chip Blondies:

    • 1½–2 cups semisweet or dark chocolate chips
    • Optional: a light sprinkle of flaky salt on top before baking

    Maple Pecan Blondies:

    • 1 cup pecans, toasted and chopped
    • ½ tsp cinnamon
    • Optional: add 1 tbsp maple syrup

    Espresso Toffee Blondies:

    • 1 tsp instant espresso powder
    • ¾ cup toffee bits

    Cinnamon Roll Blondies:

    Gently marble this swirl into the batter just before baking:

    • ¼ cup brown sugar
    • 1½ tsp cinnamon
    • 1 tbsp melted butter

    Apple Spice Blondies:

    • 1½ cups finely diced apple, tossed with 1 tsp flour
    • ¾ tsp cinnamon
    • ¼ tsp nutmeg

    Variation baking note:

    • Fruit-heavy or topped variations may need 1–3 additional minutes of bake time.
    • Toasting nuts before adding improves flavor and keeps them tasting fresh in the finished bars.

    Make-Ahead & Storage

    • Store tightly covered at room temperature for up to 3 days.
    • Freeze fully cooled bars (well wrapped) for up to 2 months; thaw at room temperature.
  • Greek Lemon Potatoes

    Greek Lemon Potatoes

    These Greek Lemon Potatoes are built around the classic taverna method: potatoes gently braised in lemony broth until creamy inside, then roasted uncovered so the liquid reduces and the edges turn deeply golden and crisp. Yukon Golds hold their shape while soaking up bright lemon, oregano, and garlic, and a small finish of butter rounds the acidity without dulling it. The result is a side dish that’s bold, savory, and unmistakably Greek—equally at home next to roast chicken, lamb, or a simple grilled protein.


    Ingredients

    • 2½ lbs Yukon Gold potatoes
    • ⅓ cup olive oil
    • ¼ cup fresh lemon juice
    • Zest of 1 lemon
    • 2 tsp dried oregano
    • Pinch dried thyme
    • 1 tbsp garlic, minced (see note for whole garlic option)
    • ½ tbsp table salt, divided
    • ½ tsp black pepper
    • 1¼ cups chicken broth
    • 1–2 tbsp unsalted butter
    • 1–2 tsp fresh parsley, finely chopped

    Directions

    Prepare the Potatoes

    Wash the potatoes and slice into thick wedges (skin on or peeled). Place in a large bowl of cold water and soak for at least 30 minutes to remove excess surface starch. Drain well and pat thoroughly dry.

    Prepare the Seasoned Oil

    In a small saucepan, gently warm the olive oil over low heat. Add the oregano, thyme, and garlic and cook just until fragrant, 30–60 seconds, taking care not to brown the garlic. Remove from heat.

    Stir in the lemon juice, ¾ of the salt, and the black pepper.

    Roast – Phase One (Braise & Steam)

    Preheat the oven to 400°F (200°C).

    Arrange the potatoes in a single layer in a 9×13-inch baking dish. Pour the seasoned oil mixture evenly over the potatoes and toss gently to coat.

    Carefully pour the chicken broth into the sides of the baking dish, avoiding pouring directly over the potatoes. The potatoes should be partially submerged, with their tops exposed.

    Cover loosely with foil and roast for 30 minutes.

    Roast – Phase Two (Reduce & Crisp)

    Remove the foil. Dot the butter between the potatoes, allowing it to melt into the broth as it reduces.

    Continue roasting uncovered until most of the liquid has reduced and the bottoms of the potatoes are deeply golden, about 30–35 minutes. Toss once only after the potatoes release cleanly from the pan.

    Return to the oven and roast an additional 20–30 minutes, until the potatoes are golden, crisp-edged, and fork-tender. Broil briefly if desired for extra color.

    Finish

    Transfer the potatoes to a serving dish and spoon over any remaining pan juices. Sprinkle with lemon zest and parsley. Taste and adjust with the remaining salt if needed. Serve immediately.


    Notes

    Preparation

    • Soaking the potatoes removes excess surface starch, helping the wedges roast with crisper edges instead of turning gummy.
    • Blooming the oregano and garlic in warm oil softens oregano’s bitterness and prevents raw garlic harshness, resulting in a rounder, more integrated flavor.
    • Avoid pouring broth directly over the potatoes. Keeping the tops dry allows them to roast while the bottoms gently braise.
    • Salt is added in stages: most goes in early to season the interior, with a final adjustment once the liquid has reduced and flavors have concentrated.

    Serving Suggestions

    • Serve alongside roast chicken, lamb, or grilled meats.
    • Pairs well with a simple cucumber–tomato salad or tzatziki to balance the richness and lemony depth.
    • Best served hot from the oven, when the edges are crisp and the centers are creamy.

    Variations

    • Whole Garlic Option: Whole garlic cloves (lightly smashed) may be used in place of minced garlic. As they roast, the cloves soften and sweeten, lending a gentler, more rounded garlic flavor without the sharper bite of minced garlic.

    Make-Ahead & Storage

    • These potatoes are best served fresh, but leftovers keep well.
    • Refrigerate in an airtight container for up to 3 days.
    • Reheat uncovered in a hot oven (400°F / 200°C) to restore crisp edges. Avoid microwaving, which softens the exterior.
  • Spanakopita Triangles

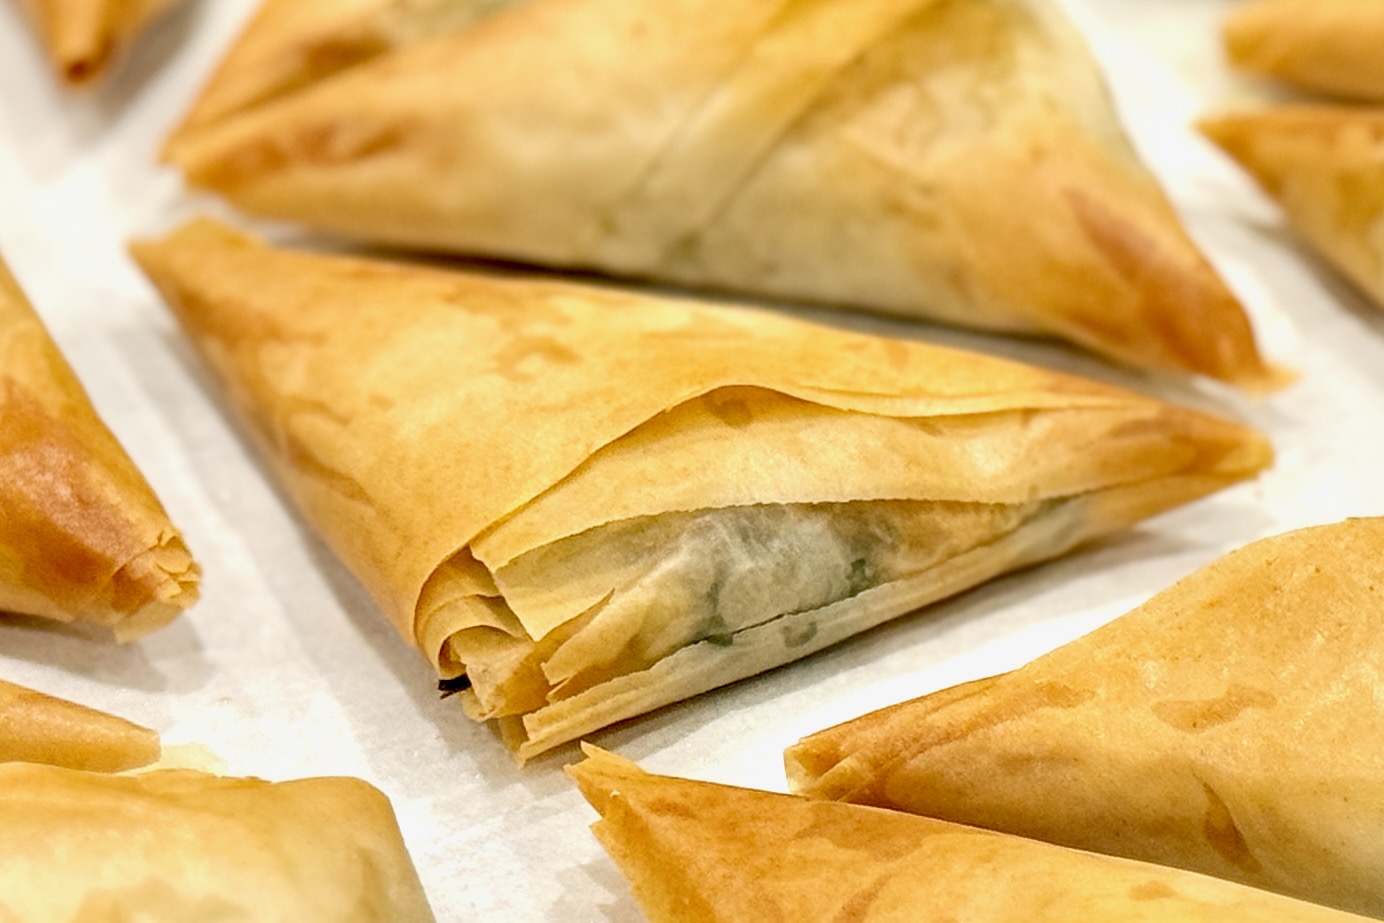
    Spanakopita Triangles

    These spanakopita triangles are crisp, buttery, and filled with a savory blend of spinach, feta, and fresh herbs. Dill leads the flavor, supported by parsley and a subtle hint of mint, creating a filling that’s bright, aromatic, and unmistakably Mediterranean. Baked until golden and shatteringly crisp, they’re perfect as an appetizer, mezze platter addition, or make-ahead snack.


    Ingredients

    • 1 tbsp olive oil (or butter)
    • ½ onion, finely diced
    • 1 tsp garlic, finely chopped
    • 2 tbsp fresh dill, finely chopped (or 2 tsp dried dill)
    • 1 tbsp fresh parsley, finely chopped (or 1 tsp dried parsley)
    • ¼ tsp dried mint
    • ¾–1 tsp shoarma spice mix (optional)
    • 1 package (12–16 oz) frozen spinach, thawed and very well squeezed dry, or equivalent fresh spinach, cooked down and drained
    • 1 egg, lightly beaten
    • ½ cup crumbled feta
    • salt & freshly ground black pepper, to taste
    • frozen phyllo dough, thawed
    • butter, melted

    Directions

    Prepare the Filling

    Preheat oven to 375ºF. Line two half-sheet pans with parchment. Heat a skillet over medium heat and add olive oil (or butter). Add onion and cook until softened but not browned.

    Stir in garlic, dill, parsley, mint, and shoarma spice mix (if using) and cook just until fragrant.

    Use a clean tea towel to squeeze as much liquid as possible from the spinach; coarsely chop if needed. Add spinach to the skillet and heat through. Remove from heat and let cool slightly, then stir in egg and feta. Season with salt and pepper to taste.

    Assemble the Triangles

    While the phyllo is still wrapped, use a sharp knife to cut it into 3 equal sections (about 3″ wide strips). Work with one section at a time, keeping the remaining dough covered with plastic or a lightly damp towel to prevent drying.

    Place one strip of phyllo on the work surface and brush lightly with melted butter. Top with a second strip and brush again. Place about ½ tbsp of filling near the bottom corner. Fold the corner over the filling to form a triangle, then continue folding in a flag pattern up the strip, maintaining the triangle shape. Transfer to the prepared baking sheet.

    Bake

    Repeat with remaining phyllo and filling, spacing triangles slightly apart. Bake for 18–22 minutes, until crisp and golden brown.


    Notes

    Preparation

    • Spinach must be squeezed very dry to prevent soggy filling and torn phyllo.

    Variations

    • Shoarma Spice Mix: This is a non-traditional addition. Classic Greek spanakopita relies on fresh herbs rather than warm spice blends. Used sparingly here, it adds subtle warmth and depth; omit it for a fully traditional Greek flavor.

    Make-Ahead & Storage

    • Unbaked triangles may be frozen solid and baked from frozen, adding 3–5 minutes to the bake time.
  • Spaghetti & Meatballs

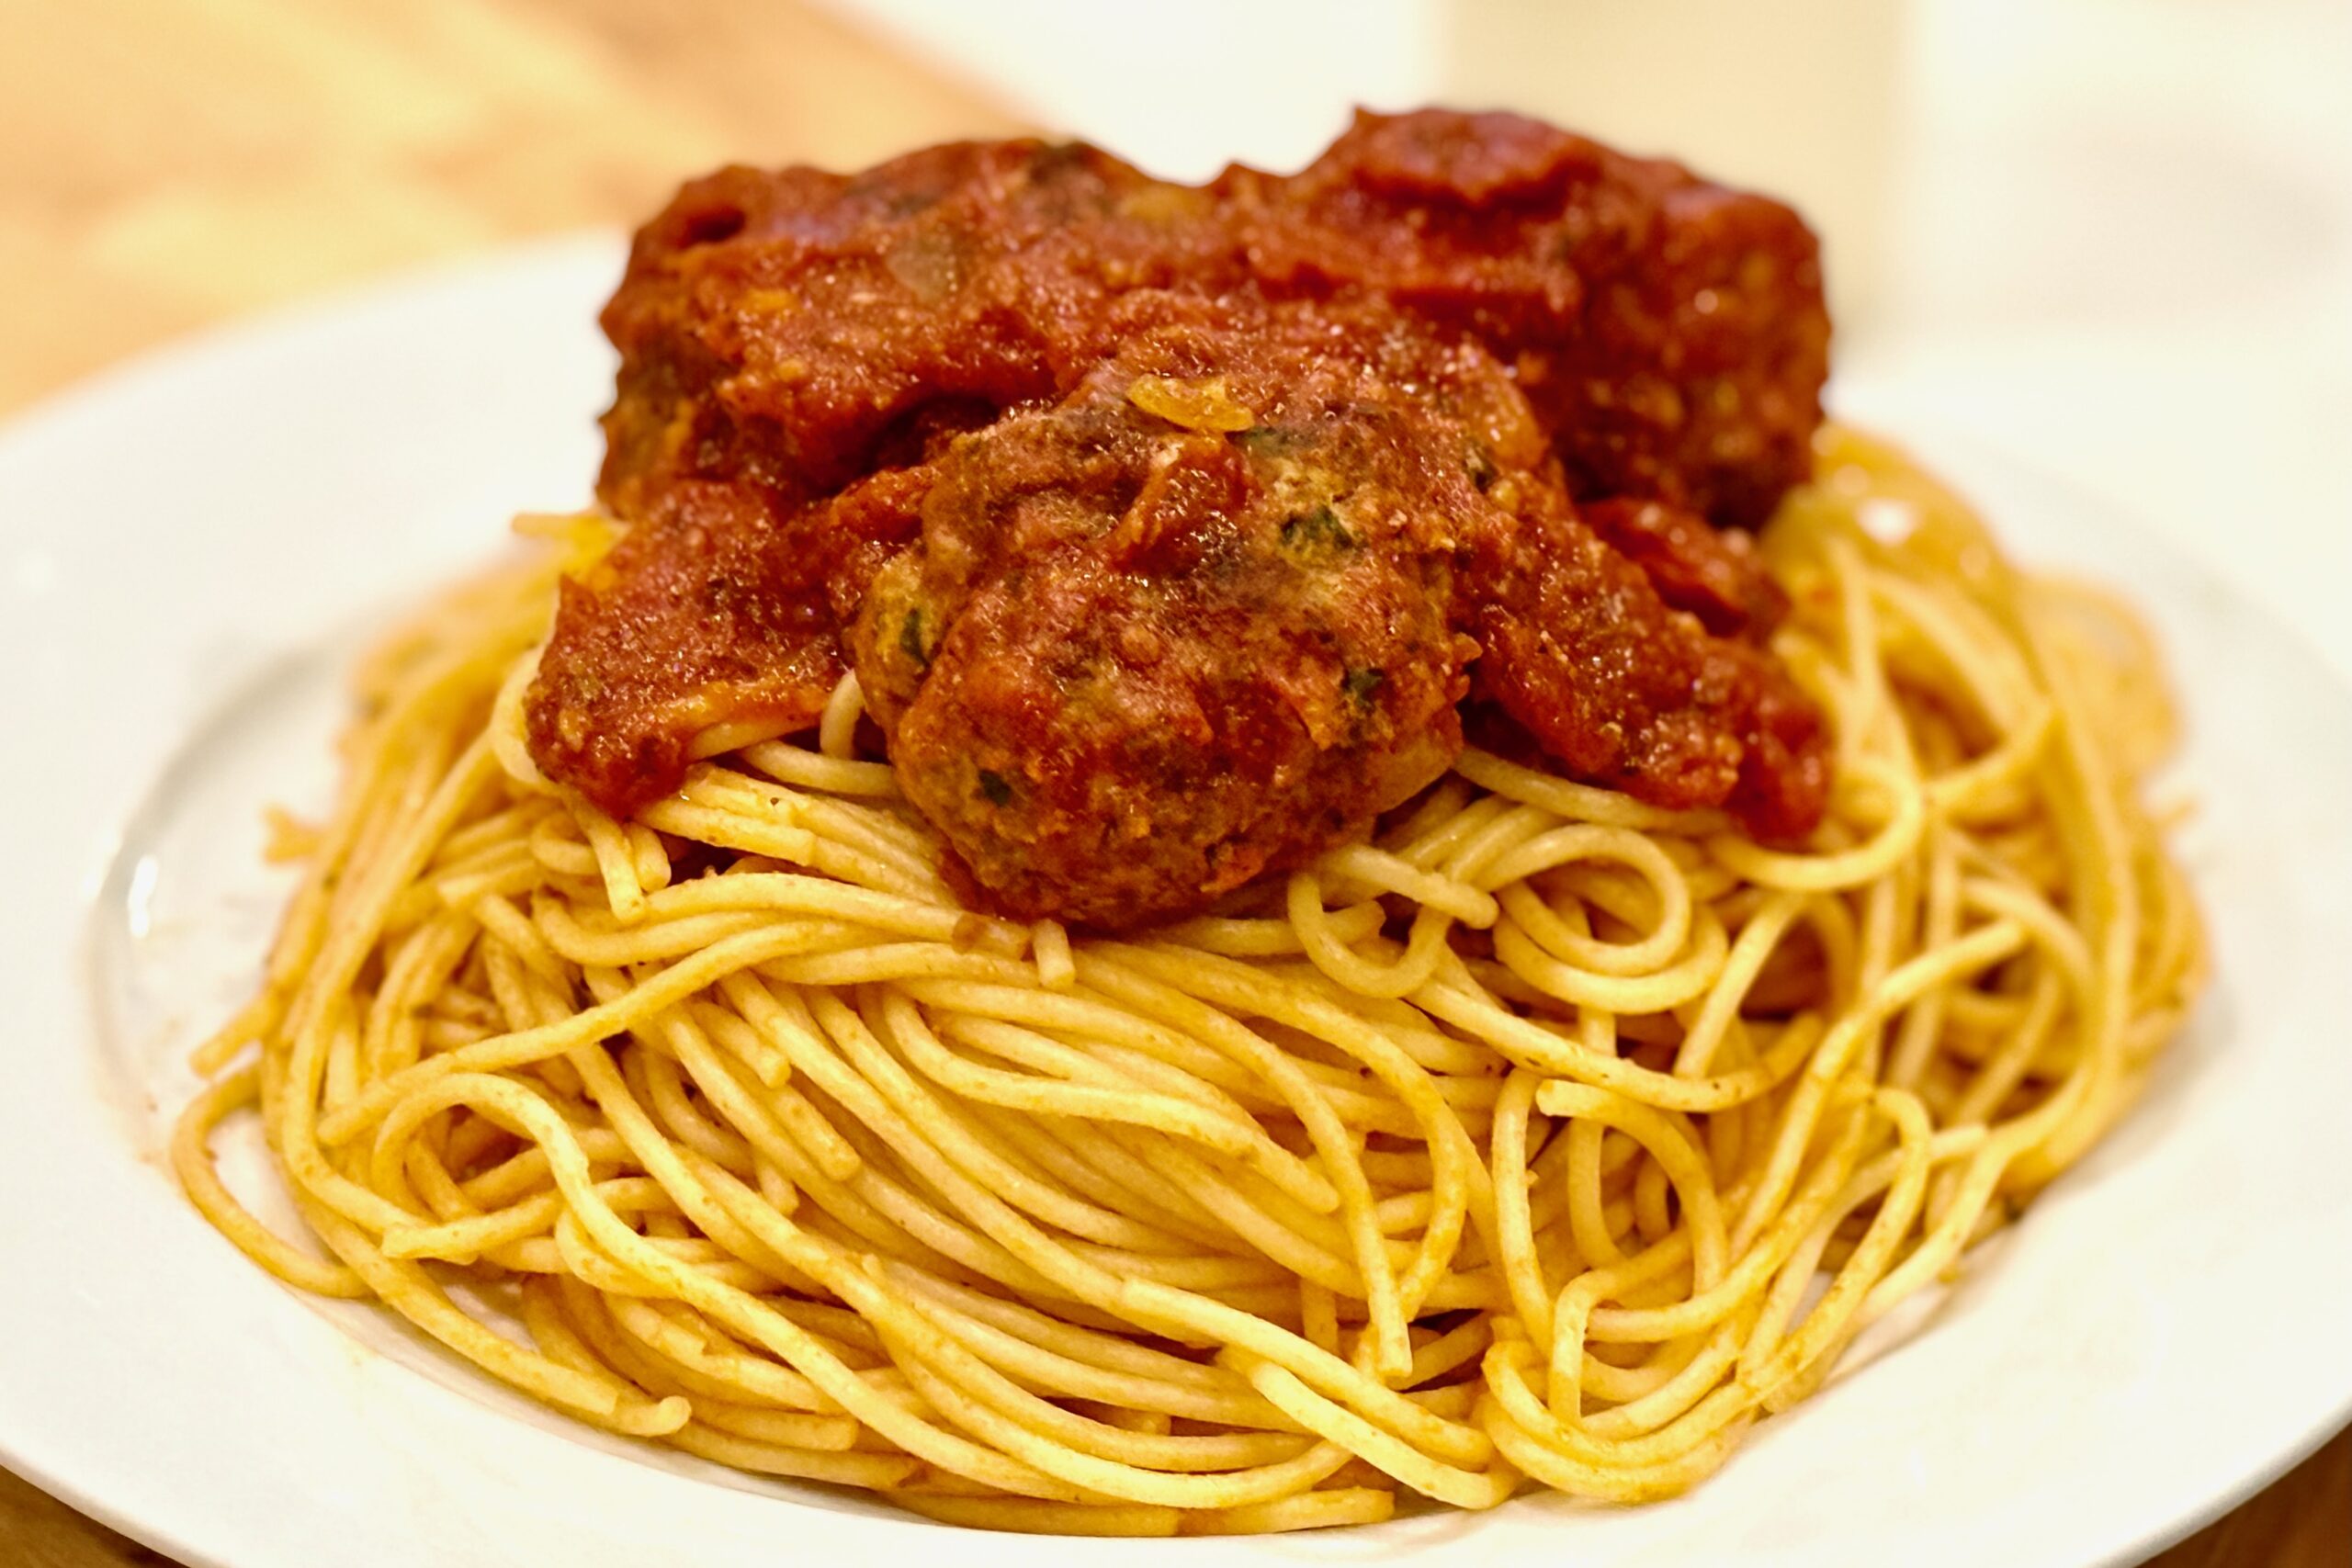
    Spaghetti & Meatballs

    This Spaghetti & Meatballs is built the way a great red-sauce Sunday dinner should be: deeply savory, richly tomatoey, and unapologetically comforting. The meatballs are intentionally tender and juicy—thanks to a buttermilk panade and a little gelatin—then roasted for browning before finishing in the sauce so everything tastes like it belongs together. It’s a big-batch, make-ahead-friendly classic that feels special on a weeknight and even better the next day.


    Ingredients

    Meatballs

    • 6 oz bread crumbs
    • 1½ cups buttermilk
    • 1 pkg (+/- ½ tbsp) powdered gelatin, bloomed in ¼ cup water
    • 3 eggs, slightly beaten
    • 1+ tbsp garlic, minced
    • ⅓ cup (packed) fresh parsley leaves, finely chopped
    • ½ tbsp table salt
    • ½ tsp pepper
    • 3 oz Parmesan cheese, grated
    • 6 oz prosciutto, finely chopped
    • 2 lbs ground beef
    • 1 lb ground pork

    Sauce

    • 2 tbsp olive oil
    • 1 cup (8-oz) onion, chopped
    • 5 cloves garlic, minced
    • 1 can (28-oz) crushed tomatoes
    • 1 can (15-oz) tomato sauce
    • 1 can (6-oz) tomato paste
    • 1½ cups chicken broth
    • ½ cup dry white wine (optional)
    • 1 tbsp fish sauce
    • 2 tsp dried basil
    • 2 tsp dried parsley
    • 1 tsp dried oregano
    • ½ tsp dried ground fennel
    • ¼ tsp dried thyme leaves
    • 2 whole cloves, crushed
    • 2 bay leaves
    • ½ tsp fresh ground pepper
    • 1 tsp table salt
    • 1–2 lbs dry spaghetti

    Directions

    Prepare the Oven and Pans

    Preheat oven to 450ºF with cooking racks mid-top and mid-bottom of oven.

    Place foil and wire racks in 2 half sheet pans; spray racks with cooking spray.

    Make the Meatballs

    Combine bread crumbs and buttermilk and stir to completely combine. Soak bread crumbs to fully hydrate, about 10 minutes, then mash into a paste.

    Bloom gelatin in ¼ cup cold water for 8–10 minutes.

    Place bread crumb mixture into a mixing bowl. Mix in bloomed gelatin, followed by all remaining ingredients except beef and pork; mix well to combine.

    Place meats in a large mixing bowl; pour egg/bread crumb mixture over meat and mix gently by hand until thoroughly combined.

    Portion and form into individual balls, about 3-oz each (29–30 meatballs). If necessary, refrigerate to firm.

    Place meatballs on the greased racks and bake for about 30 minutes, rotating trays and tray locations after 20 minutes.

    Make the Sauce

    In a Dutch oven over medium heat, heat olive oil until shimmering; add onion and garlic and sauté until onion is translucent and tender.

    Stir in crushed tomatoes, tomato sauce, tomato paste, chicken broth, wine (optional), and fish sauce; add remaining herbs, spices, and seasonings.

    Bring to a simmer, then reduce heat to low and simmer covered for 15 minutes.

    Braise the Meatballs in the Sauce

    After removing cooked meatballs from oven, lower oven temperature to 300ºF.

    Add meatballs to sauce; cover with lid and place in oven for 1 hour.

    Remove and discard bay leaves before serving.

    Cook the Pasta and Serve

    Prepare spaghetti as directed; drain, retaining some of the pasta water in a separate bowl.

    Add pasta back to the cooking pot along with a small amount of pasta water and about ¼ cup sauce; toss until pasta is coated.

    Serve pasta topped with meatballs, additional sauce, and grated Parmesan.


    Notes

    Preparation

    • Fish sauce can be replaced by 4–6 anchovy filets, finely minced.

    Serving Suggestions

    • Optional finish: garnish bowls with a light chiffonade of fresh basil and/or a sprinkle of fresh parsley for extra brightness.

    Variations

    • Parmesan can be swapped for a mixture of Parmesan and Romano cheeses.

    Make-Ahead & Storage

    • Can be made a day in advance and reheated.
    • Add ¾ cup water over mixture and reheat covered at 325ºF.
  • North Woods Garlic Cheese Bread

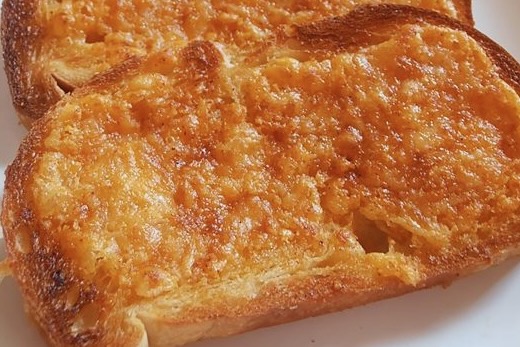
    North Woods Garlic Cheese Bread

    This garlic cheese bread captures the rich, gooey, paprika-tinted flavor of the beloved North Woods Inn classic—warm, buttery, deeply savory, and loaded with cheddar. This version adds the option for an ultra-smooth melt while keeping the rustic cheese bits that make the original so iconic.


    Ingredients

    • ¾ lb cheddar cheese, grated (reserve ½ cup for pulsing in at the end)
    • 2 oz Romano cheese, grated
    • 8 oz butter, room temperature
    • 1 small clove garlic, grated (or ¾ tsp garlic powder)
    • 1 tsp Hungarian sweet paprika
    • ½ tsp Tabasco sauce
    • 2 tsp Worcestershire sauce
    • Optional: 1–2 tsp sodium citrate (for an extra-smooth, gooey melt)
    • salt, to taste
    • 2 loaves French or sourdough bread, sliced
    • Hungarian sweet paprika, for sprinkling after broiling

    Directions

    Prepare the Cheese Spread

    Combine all ingredients except ½ cup of the cheddar in a food processor. Blend until smooth, cohesive, and richly colored.

    Taste and adjust salt if needed—the mixture should be boldly savory.

    Add the reserved cheddar and pulse 2–3 times to leave small, visible cheese pieces suspended in the spread.

    Assemble & Broil

    Spread the cheese mixture generously onto sliced French or sourdough bread.

    Place under the broiler until the top is melted with darkened, blistered spots—this light caramelization is essential for authentic North Woods flavor.

    Remove from the broiler and lightly dust with Hungarian sweet paprika. Wrap in foil to keep warm until serving.


    Notes

    Preparation

    • French bread gives the most classic soft, gooey texture; sourdough creates a firmer, tangier base.
    • Sodium citrate is optional but helps the cheese melt into an ultra-smooth, cohesive layer without separating.
    • Taste the spread before adding salt—Romano and cheddar vary in saltiness.

    Serving Suggestions

    • Serve alongside steaks, ribs, or salad for a full North Woods–style meal.
    • Excellent as an appetizer when cut into strips or squares.

    Variations

    • Add a pinch of cayenne or smoked paprika for a spicy or smoky accent.
    • Use sharp white cheddar for a milder color and deeper tang.

    Make-Ahead & Storage

    • The cheese spread can be made up to 3 days ahead and refrigerated in an airtight container.
    • Bring to room temperature before spreading for smoothest application.
    • Bread is best enjoyed immediately after broiling.
  • Soft Gingerbread Men

    Soft Gingerbread Men

    Cookies are serious business around our house. Baking dozens of cookies in all varieties is part of our holiday tradition. The box of cookies in the photo held just a sampling of treats baked for our annual Christmas Eve party—and these soft gingerbread men are always a crowd pleaser.


    Ingredients

    • 1 cup packed brown sugar
    • ½ cup butter + ¼ cup shortening (or ¾ cup shortening for a more traditional texture)
    • ¼ cup molasses
    • 1 tbsp honey or dark corn syrup (optional, for extra softness)
    • 1 large egg
    • 2 tsp baking soda
    • 1 tsp ground cinnamon
    • 1 tsp ground ginger
    • 1½ tsp ground cloves
    • ¼ tsp table salt
    • 2¼ cups all-purpose flour

    Directions

    Make the Dough

    In a large bowl, beat together brown sugar, butter, shortening, molasses, honey (if using), and egg until smooth and creamy. Stir in baking soda, cinnamon, ginger, cloves, and salt. Gradually mix in flour until fully incorporated.

    Cover dough and chill for at least 3 hours or overnight, until firm enough to roll.

    Roll and Cut

    Preheat oven to 375°F (190°C). Roll chilled dough between sheets of parchment paper dusted with confectioners’ sugar (instead of flour) to about ¼-inch thickness. Cut into desired shapes using cookie cutters.

    Transfer cookies to a baking sheet lined with parchment paper or release foil.

    Bake

    Bake for 10–12 minutes, or until cookies are fragrant and edges are just set—they’ll continue to bake on the sheet after removal. Avoid overbaking to keep them soft.

    Cool cookies on the baking sheet for several minutes before transferring to a wire rack to cool completely.

    Optional Glaze

    For a glossy finish, whisk together 1 cup confectioners’ sugar, 1–2 tbsp milk, and ½ tsp vanilla or lemon juice. Brush lightly over warm cookies and allow to set.


    Notes

    Preparation

    • Rolling between parchment prevents sticking and eliminates the need for added flour, keeping cookies tender.
    • Adding honey or corn syrup creates a slightly chewier texture.
    • For an even softer cookie, slightly underbake and store while still a bit warm.

    Serving Suggestions

    • Decorate with royal icing, sanding sugar, or a drizzle of glaze.
    • Serve alongside hot cocoa, Anijsmelk, or Aunt Laurie’s Pumpkin Spice Steamer for a cozy holiday pairing.

    Make-Ahead & Storage

    • Dough can be chilled up to 3 days or frozen up to 1 month; thaw in the refrigerator before rolling.
    • Baked cookies keep for about 1 week in an airtight container at room temperature.
    • To retain softness, store with a slice of bread or a piece of apple in the container.
  • Pão de Queijo — Brazilian Cheese Rolls

    Pão de Queijo — Brazilian Cheese Rolls

    Crisp on the outside and chewy within, these Brazilian cheese rolls—known as Pão de Queijo—are irresistibly airy and full of cheesy flavor. Made from tapioca flour, they’re naturally gluten-free and come together quickly in a blender for an easy, crowd-pleasing treat.


    Ingredients

    • 1 egg
    • 1 cup milk
    • ½ cup vegetable oil
    • 1¾ cups tapioca flour
    • ½ cup parmesan, grated
    • ½ cup mozzarella, cheddar, or jack cheese, grated
    • ½ tsp table salt

    Directions

    Prepare the Batter

    Preheat oven to 350°F (175°C). Spray a 24-cup mini muffin tin with nonstick cooking spray.

    In a blender, combine egg, milk, and oil. Blend for 30 seconds, then add the remaining ingredients and blend for another 30 seconds until smooth.

    Bake

    Pour batter into the prepared muffin cups, filling each about ¾ full. Bake for 20–25 minutes, or until the cheese rolls are puffed and golden.

    Serve warm for the best texture. Makes about 35–40 cheese rolls.

    Store

    Allow cheese rolls to cool completely before storing. Place in an airtight container and refrigerate up to 3 days or freeze up to 1 month. Reheat in a 350°F oven for 5–10 minutes until warmed through.


    Notes

    Preparation

    • Avocado oil is preferred, but olive oil or any neutral vegetable oil works well.
    • Tapioca flour gives Pão de Queijo its signature chewy texture—do not substitute with wheat flour.

    Serving Suggestions

    • Serve as a snack, breakfast bread, or alongside soups and stews.
    • Enjoy warm with butter, cream cheese, or fruit preserves for a sweet-savory contrast.

    Variations

    • Add ½ tsp garlic powder or minced herbs for extra flavor.
    • Swap in pepper jack for a spicy version or gouda for a milder flavor.

    Make-Ahead & Storage

    • Refrigerate baked rolls up to 3 days in an airtight container.
    • Freeze baked or unbaked batter portions up to 1 month.
    • Reheat frozen rolls directly in a 350°F oven for 10–12 minutes until hot and crisp.
  • German Chocolate Cake — Bakery Structure with Box Convenience

    German Chocolate Cake — Bakery Structure with Box Convenience

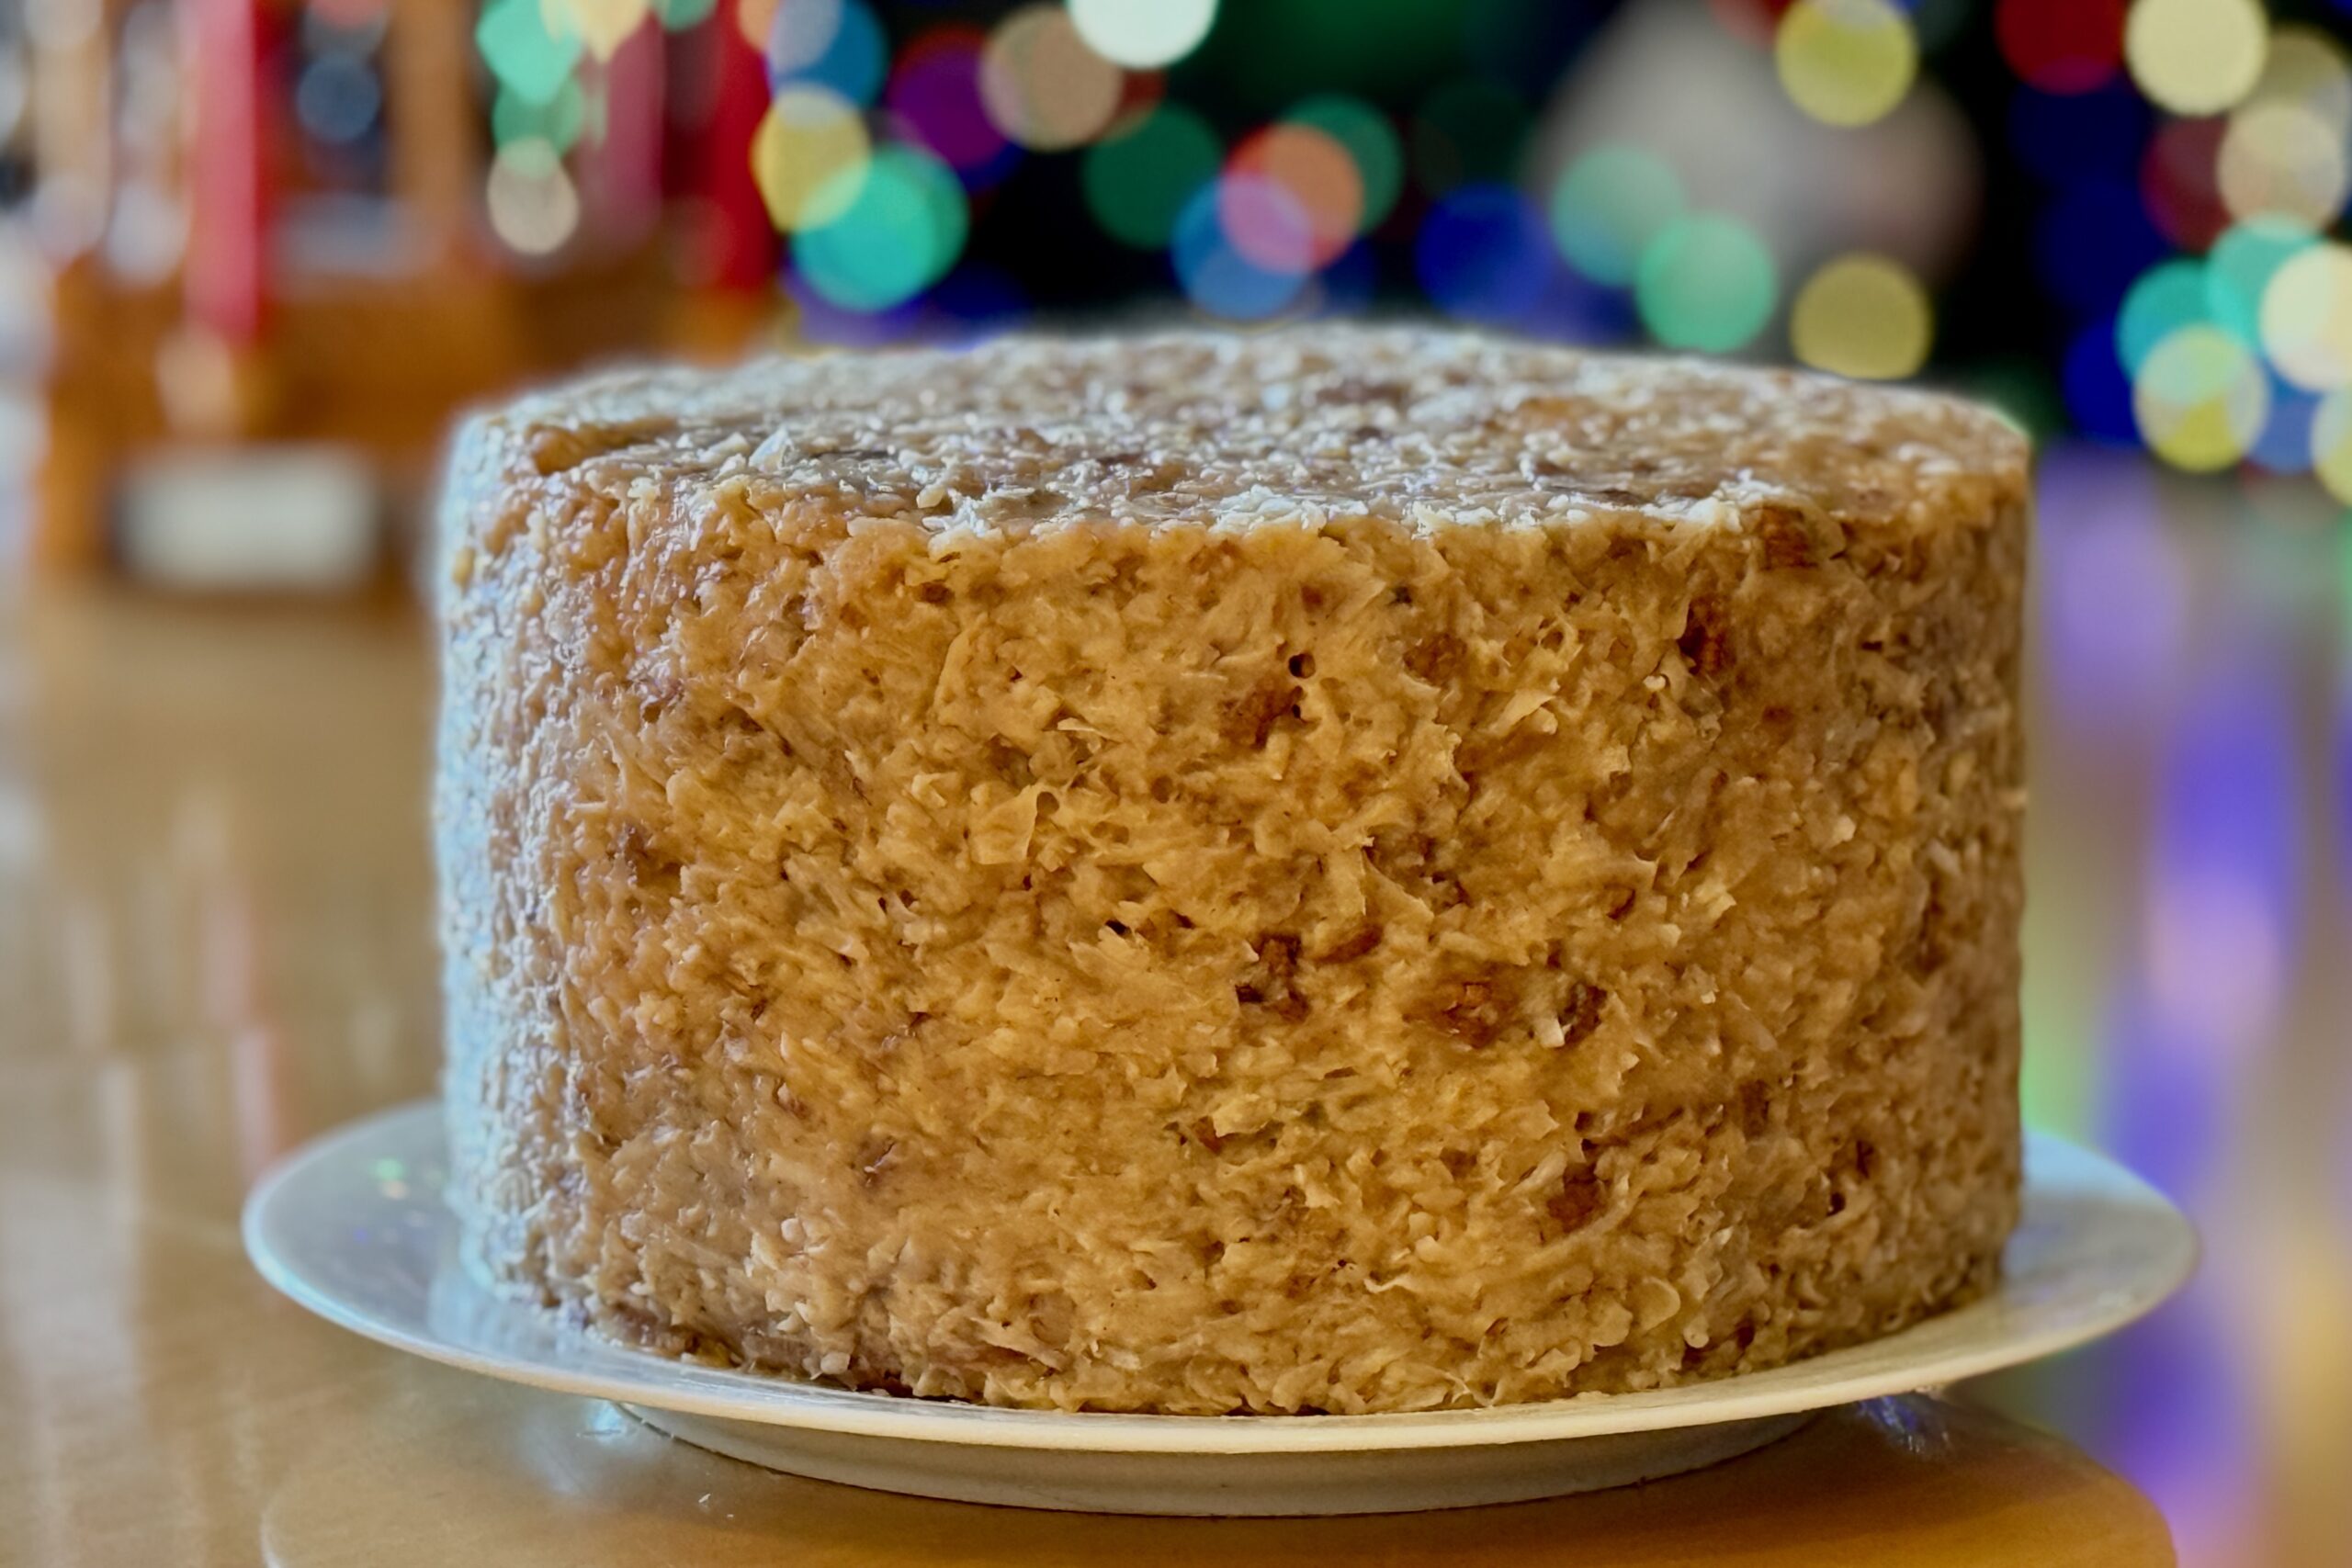
    Every year on my wife’s birthday, there’s only one request — German chocolate cake. It’s become one of our family traditions, the kind of ritual you never change because it carries as much sentiment as flavor. But over time I also realized that while boxed mixes make the process easy, they often fall short of the tall layers, defined slices, and deep chocolate-and-coconut flavor we’ve come to expect. So this version became the answer: a handful of smart upgrades that turn a simple mix into something closer scratch-made, with richer flavor, a sturdier crumb, and bakery-worthy presentation. The layers bake up taller and slice beautifully, the frosting wraps the cake without slipping, and the whole thing feels celebratory without adding hours of prep. It’s the shortcut I make every year for my wife, and the version that finally gives us the flavor we love with the structure a three-layer cake needs.


    Ingredients

    Cake Layers

    • 1 boxed German chocolate cake mix (prefer one that calls for milk; if not, substitute whole milk for the water)
    • 1 cup (240 ml) whole milk (use 2–3 tbsp less than the package amount if milk is listed)
    • 1 cup (225 g) melted butter plus 2 tbsp (28 g) extra
    • 4–5 large eggs (two more than the box calls for; 4 for softer crumb, 5 for maximum stability)
    • ½ cup (60 g) all-purpose flour
    • 1 tbsp (8 g) cornstarch
    • ½ tsp baking powder
    • 1 tbsp Dutch-process cocoa powder
    • ½ tsp instant espresso powder (enhances chocolate depth without adding coffee flavor)
    • 1 tsp powdered gelatin, bloomed in 1 tbsp warm water
    • 2 tbsp (30 g) sour cream or Greek yogurt

    Coconut–Pecan Frosting

    • 8 egg yolks
    • 2 cans (each 12 oz / 354 ml) evaporated milk
    • 3 cups (600 g) sugar
    • 1½ cups (340 g / 3 sticks) butter
    • 5⅓ cups (about 400 g) unsweetened shredded coconut (sweetened coconut also works with no measurement changes; frosting will simply be sweeter)
    • 3 cups (300 g) chopped pecans
    • 2 tbsp finely ground pecans
    • ½ tsp table salt
    • 1 tbsp (15 ml) vanilla extract

    Directions

    Prepare the Cake Layers

    Bloom the gelatin by sprinkling it over 1 tbsp warm water in a small bowl. Let stand 5 minutes to fully hydrate. If the gelatin has set very firmly, gently warm it in the microwave for a few seconds until fluid before adding to the batter.

    Preheat the oven to 320°F (160°C). Grease three 8-inch round cake pans lightly and dust with flour, then line the bottoms with parchment rounds for best release and to help prevent overbrowning on the base.

    In a medium bowl, whisk together the cake mix, all-purpose flour, cornstarch, baking powder, Dutch-process cocoa powder, and instant espresso powder until evenly combined.

    In a separate large bowl, whisk together the melted butter, eggs, milk, bloomed (and fluid) gelatin, and sour cream or Greek yogurt until smooth.

    Add the dry ingredients to the wet ingredients and mix just until incorporated. Avoid overbeating to keep the crumb tender.

    Divide the batter evenly among the three prepared pans, smoothing the tops.

    Bake for about 24–30 minutes, or until the tops spring back lightly when touched, a toothpick inserted in the center comes out with moist crumbs (not wet batter), and the internal temperature in the center of each layer registers around 195°F (90°C) for the best balance of structure and moisture.

    Cool the cakes in the pans for 10 minutes, then turn out onto wire racks to cool completely. For the cleanest slices, wrap and chill the cooled layers before assembly.

    Make the Frosting

    In a large saucepan, whisk together the egg yolks and evaporated milk until smooth and well combined.

    Add the sugar and butter to the pan.

    Cook over medium heat, stirring constantly, until the mixture reaches a gentle simmer. Once simmering, continue to cook for about 12 minutes, stirring frequently to prevent scorching and to develop a thicker, more stable frosting.

    Remove the pan from the heat and stir in the salt first, making sure it dissolves fully in the warm mixture.

    Add the vanilla extract and stir until fully incorporated.

    Stir in the chopped pecans, finely ground pecans, and shredded coconut until evenly distributed.

    Allow the frosting to cool completely; it will thicken significantly as it cools and will be much easier to spread on the cake.

    Assemble the Cake

    If needed, level the chilled cake layers using a serrated knife so they stack evenly.

    Place the first layer on a serving plate. Spread a very thin “seal coat” of frosting over the top to trap crumbs, then chill briefly. Follow with a more generous layer of frosting for the filling.

    Repeat with the second layer: add the layer, apply a thin seal coat, chill briefly, then spread on a full layer of frosting.

    Place the third layer on top and apply a thin coat of frosting over the top and sides to lock in crumbs. Chill briefly again, then finish with a final, even layer of frosting over the top and sides. The extended cook time and finely ground pecans help the frosting cling well to the sides.

    Chill the assembled cake for at least 2 hours (or overnight) before slicing for the cleanest, bakery-style cuts.


    Notes

    Preparation

    • Choose a German chocolate cake mix that calls for milk when possible. If your mix uses water, substitute whole milk and reduce the amount slightly (about 2–3 tbsp less than the listed water volume).
    • The added Dutch-process cocoa and espresso powder deepen the chocolate flavor without making the cake taste like coffee, helping the chocolate stand up to the rich coconut–pecan frosting.
    • Using 4 eggs will give a slightly softer crumb, while using 5 eggs increases structure and height, which is ideal for very clean slices and tall layers.
    • Fully blooming the gelatin and incorporating it with the wet ingredients strengthens the slice without making the cake dense or rubbery. If the gelatin sets too firmly, gently warm it until fluid before whisking it into the wet mixture.
    • This cake was tested at a higher altitude using dark metal pans and a baking temperature of 320°F (160°C), with doneness judged by the spring of the cake, a clean toothpick with moist crumbs, and an internal temperature around 195°F (90°C) in the center of each layer.
    • Frosting distribution: For evenly layered, bakery-style assembly, divide the frosting into four equal portions. Use about 25% between the first and second layers, 25% between the second and third layers, 25% on top of the cake, and the remaining 25% for the sides.

    Serving Suggestions

    • For the cleanest, restaurant-style slices, cut the cake while it is well chilled using a thin, sharp knife dipped in hot water and wiped dry between cuts.
    • Let individual slices rest at room temperature for 10–15 minutes before serving so the crumb and frosting soften slightly and the flavors bloom.
    • This cake pairs nicely with lightly sweetened vanilla or coconut ice cream, or with a dollop of softly whipped cream to balance the richness.

    Make-Ahead & Storage

    • Cake layers can be baked, cooled, wrapped tightly, and refrigerated for up to 2 days or frozen for up to 1 month before assembly.
    • The coconut–pecan frosting can be made up to 2–3 days in advance and stored in an airtight container in the refrigerator. Bring it to a cool room temperature and stir until spreadable before using.
    • The fully assembled cake should be stored covered in the refrigerator and is best enjoyed within 3–4 days.
    • Extra frosting can be refrigerated for up to 1 week or frozen for longer storage; it works well as a topping for brownies, cupcakes, or ice cream.
  • Boterkoek

    Boterkoek

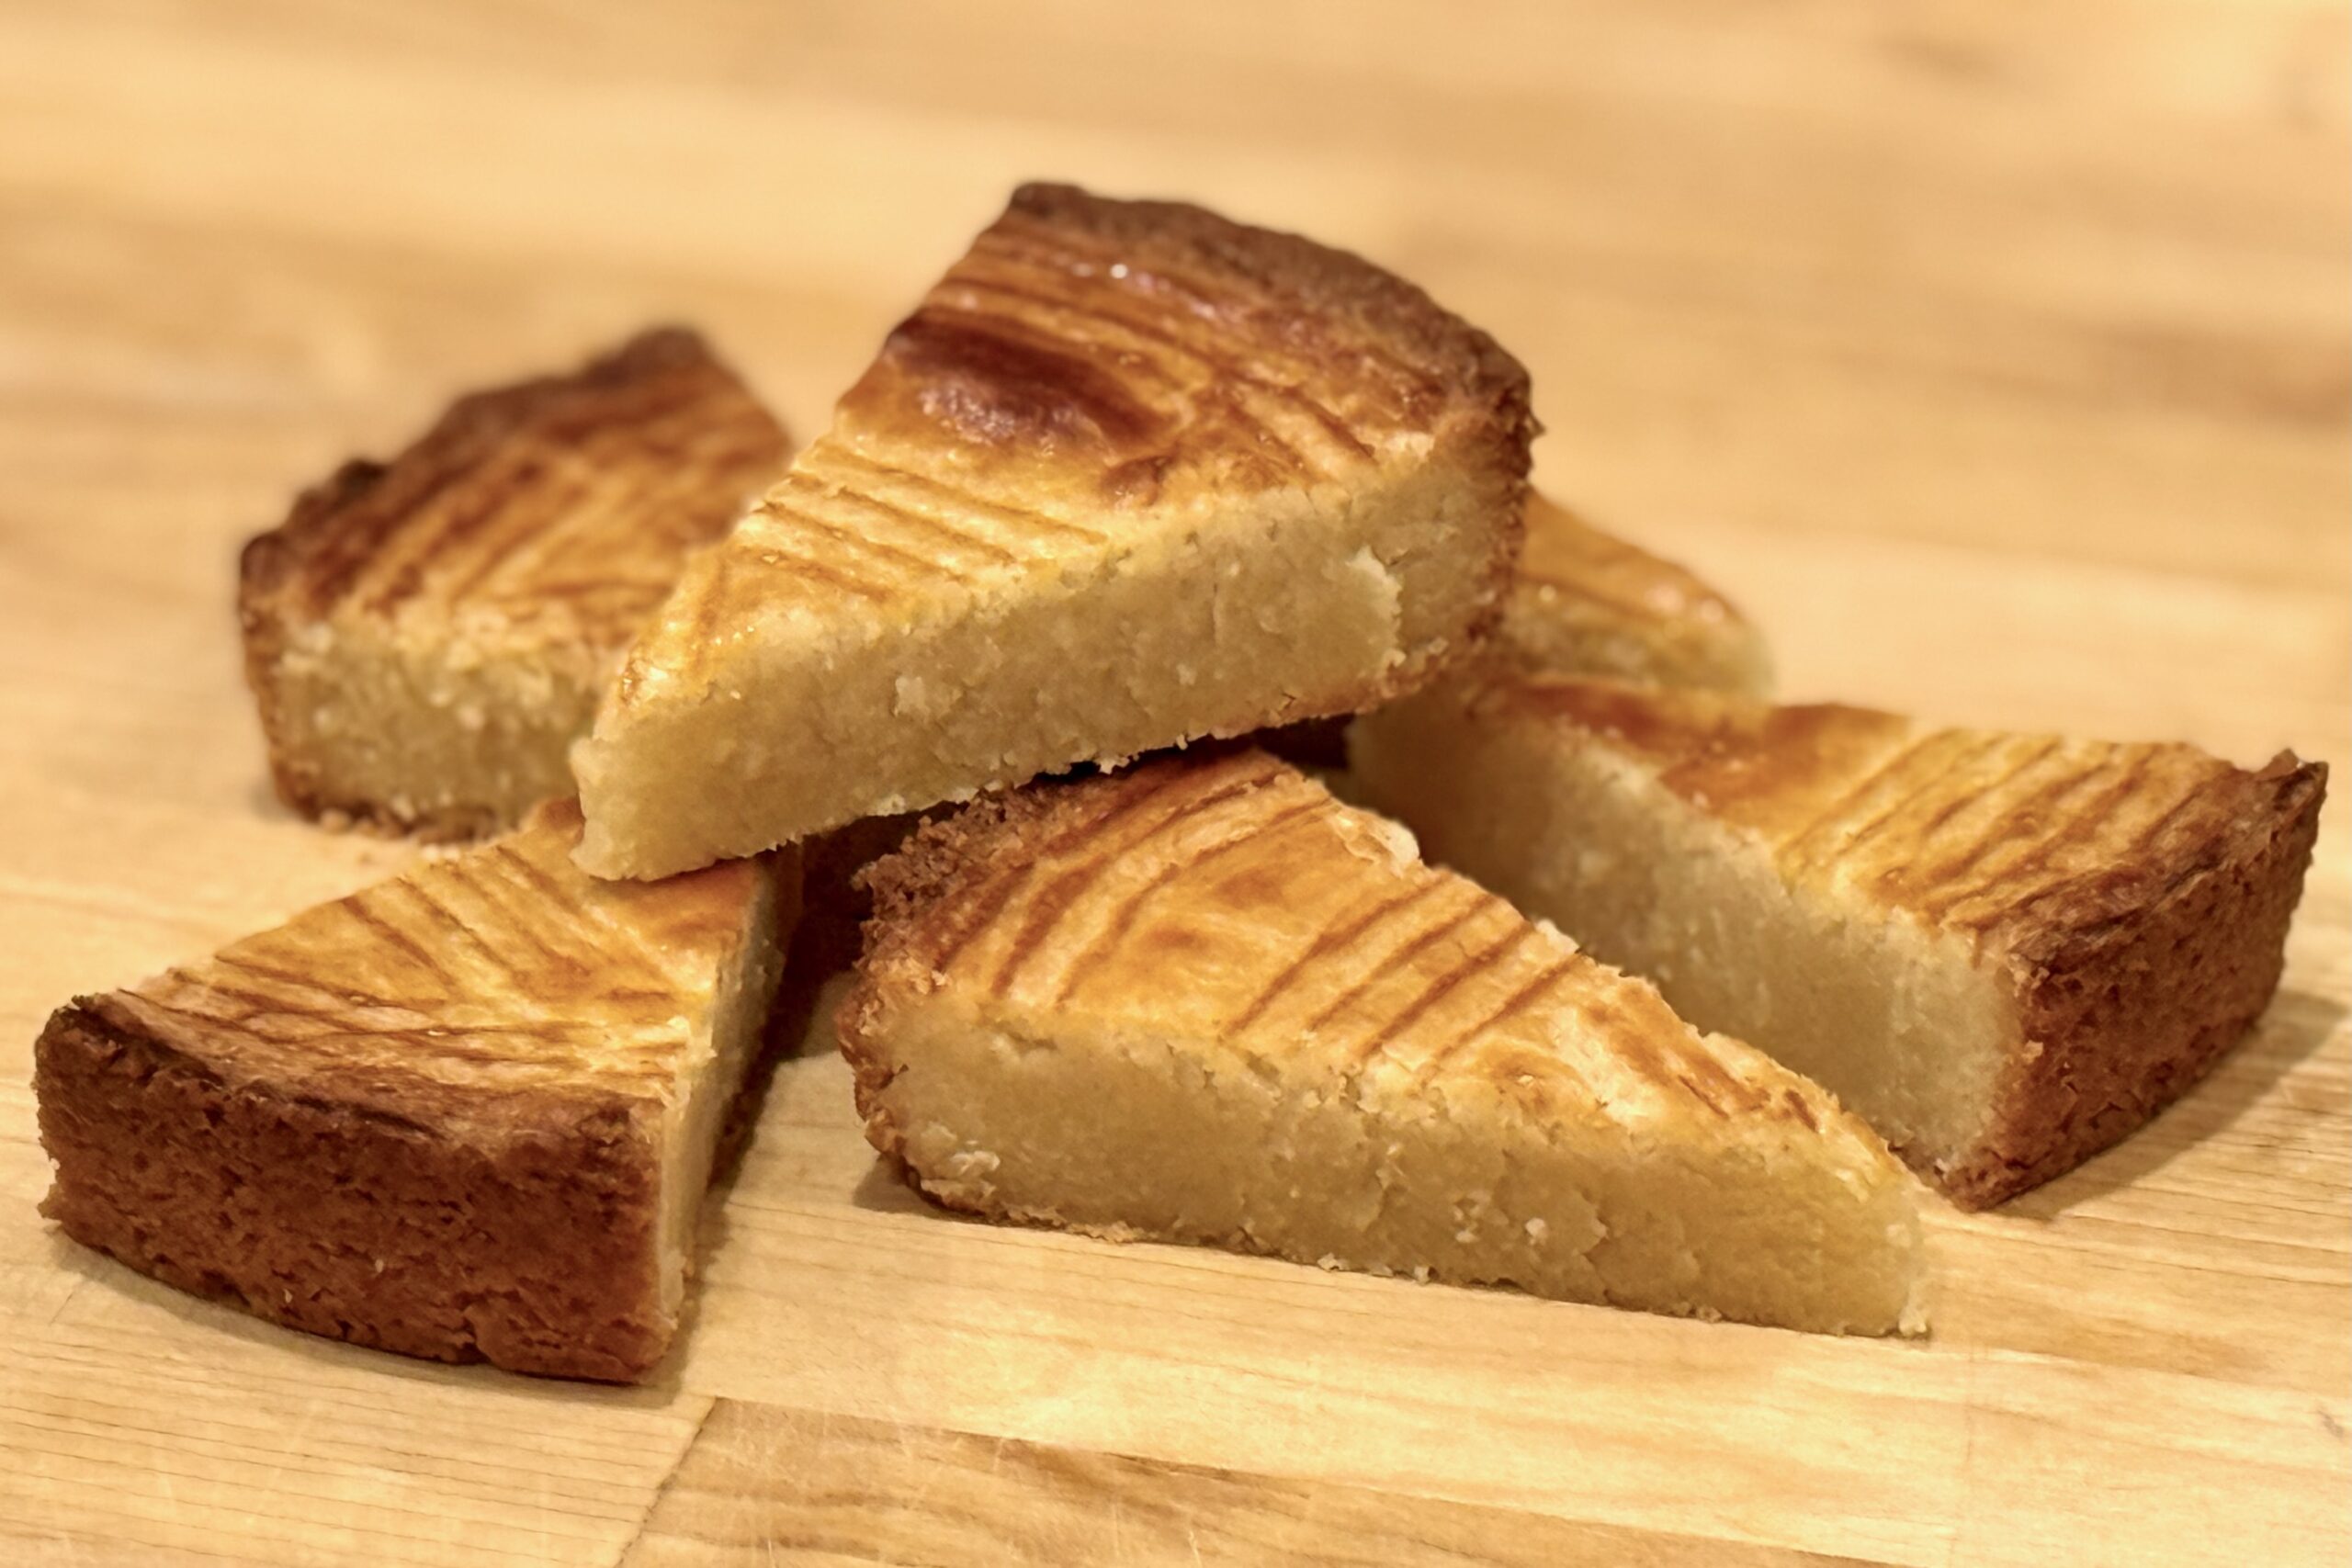
    Oma Rasch was a spunky little lady, full of equal parts sugar and spice. I fondly remember the fun we had while I lived in her second-story row house on Krugerstraat in Den Helder, at the northernmost point of North Holland. Even in her 80s, she climbed the steep, treacherous staircase each day and set off on her bicycle to run errands. She was always willing to help as I worked to learn Dutch, once telling me, after I repeated a particularly colorful word, “There are no bad words, just words you shouldn’t use around nette mensen (respectable people).” A common treat in her home was homemade boterkoek—rich, golden, and fragrant. Whenever we walked in and smelled that buttery aroma, we knew we were in for ‘een lekker toetje’, a truly ‘heerlijk’ dessert.


    Ingredients

    • 1 cup (2 sticks) unsalted butter, at room temperature
    • 1 cup sugar
    • 2 cups all-purpose flour
    • ¼ tsp table salt
    • 1 large egg, lightly beaten, divided
    • ½ tbsp milk or buttermilk (for egg wash)
    • Optional Flavor Variations:

      • Citrus: Zest of ½ a lemon, lime, or orange, plus a small splash of juice
      • Almond: ½–1 tsp almond extract, topped with almond halves before baking
      • Speculaas: 1–1½ tsp speculaaskruiden (Dutch speculaas spice blend)
      • Ginger: 1–2 tbsp finely chopped crystallized ginger folded into the dough
      • Vanilla Sugar: 1–2 tbsp vanilla sugar mixed into the dough or sprinkled lightly on top

    Directions

    Prepare the Pan and Oven:

    Preheat the oven to 350°F (175°C). Butter an 8- or 9-inch round cake pan, then line the bottom with a circle of parchment paper. Lightly dust the sides with flour and tap out any excess. A springform or removable-bottom pan makes unmolding and slicing easier, but a standard pan works as well.

    Mix the Dough:

    In a small bowl, lightly beat the egg with a fork. Transfer about 1 tbsp of the beaten egg to a separate small bowl, add the milk or buttermilk, and whisk to combine for the egg wash. Set aside.

    In a medium mixing bowl, combine the butter and sugar. Beat just until smooth, creamy, and well combined (do not whip until light and fluffy—you want a dense boterkoek, not a cake). Add the remaining beaten egg (from the larger portion) and mix only until incorporated. If using any flavorings (citrus zest, almond extract, speculaaskruiden, crystallized ginger, or vanilla sugar), mix them in at this stage.

    Add the flour and salt. Using a spatula or wooden spoon, fold and stir just until no dry flour remains and the dough comes together. The dough will be stiff but cohesive; avoid overmixing.

    Chill the Dough:

    Scrape the dough onto a sheet of plastic wrap and pat it into a thick disk. Wrap tightly and refrigerate for 20–30 minutes, until firm but still pliable. Overchilling will make the dough harder to press evenly into the pan.

    Press, Crosshatch, and Glaze:

    Transfer the chilled dough to the prepared pan. Using your fingertips or the back of a spoon, press it evenly into the pan, smoothing the surface and making sure it reaches all the way to the edges.

    Using the tines of a fork, lightly score a crosshatch pattern across the top of the dough. For the cleanest lines, wipe the fork between strokes as needed.

    Gently brush the surface with a thin, even layer of the egg wash. Avoid pooling, especially around the edges, which can create hard spots as it bakes.

    Bake:

    Bake at 350°F (175°C) for 25–35 minutes, until the edges are deep golden brown and the center is just set and a lighter golden color. The top should not puff dramatically. Begin checking around 25 minutes, rotating the pan if needed for even browning. The boterkoek will continue to firm as it cools.

    Cool, Rest, and Serve:

    Remove the pan from the oven and place it on a wire rack. Let the boterkoek cool completely in the pan. Once cool, run a thin knife around the edge to loosen, then invert or release from the pan and remove the parchment.

    For the best flavor and texture, allow the boterkoek to rest for several hours or overnight before slicing. Cut into small wedges (it is rich) and serve at room temperature.


    Notes

    Preparation

    • Use unsalted butter for the cleanest flavor and better control over salt. The butter should be cool room temperature—soft enough to press a finger into, but not greasy or melting.
    • Be careful not to over-aerate the butter and sugar; mixing just until smooth (rather than light and fluffy) keeps the boterkoek dense and tender, as it should be.
    • For easy release and clean slices, butter the pan and line the bottom with parchment. A springform or removable-bottom pan is especially handy if you plan to unmold it for serving on a platter.
    • Approximately equal amounts of butter, sugar, and flour by weight are used in this recipe, which is traditional for Dutch boterkoek and gives it its rich, close-crumb texture.
    • Altitude adjustments (high altitude ~4,750 ft / 1,450 m): Because this is a dense, non-leavened cake, ingredient changes are usually unnecessary. Begin checking for doneness a few minutes early and remove from the oven once the edges are deep golden and the center is just set. At sea level, follow the base recipe and bake until the center is just set and no longer looks wet.

    Serving Suggestions

    • Cut into small wedges or narrow bars—boterkoek is rich and meant to be enjoyed in modest slices.
    • Serve alongside afternoon coffee, as is common in Dutch homes.
    • For a simple dessert, pair with lightly sweetened whipped cream and fresh berries or stone fruit.
    • Include on a cookie or dessert tray with other Dutch favorites such as speculaas or stroopwafels.

    Variations

    • Citrus Boterkoek: Add the finely grated zest of ½ a lemon, lime, or orange, plus a small splash of juice, to the dough along with the egg. This adds a bright, fragrant edge that balances the richness.
    • Almond Boterkoek: Add ½–1 tsp almond extract to the dough, then press blanched or sliced almonds gently into the top before baking. Almond is a very traditional flavor; start with the smaller amount of extract and increase to taste.
    • Speculaas Boterkoek: Add 1–1½ tsp speculaaskruiden (Dutch speculaas spice blend) with the flour for a warm, spiced version that’s especially nice around the holidays.
    • Ginger Boterkoek: Fold 1–2 tbsp finely chopped crystallized ginger into the dough before pressing it into the pan for pockets of sweet, spicy heat.
    • Vanilla Sugar Boterkoek: Replace 1–2 tbsp of the sugar with vanilla sugar, or sprinkle a light dusting of vanilla sugar over the top right after baking for extra aroma.

    Make-Ahead & Storage

    • Boterkoek is an excellent make-ahead dessert. The flavor and texture actually improve after resting for several hours or overnight.
    • Once completely cool, wrap tightly or store in an airtight container at room temperature for up to 3–4 days.
    • For longer storage, wrap wedges or the whole boterkoek well and freeze for up to 2 months. Thaw at room temperature in the wrapping to preserve moisture.
    • If the surface softens slightly after storage, a brief rest uncovered at room temperature will help the top regain a gentle firmness.
  • Buttermilk Biscuits

    Buttermilk Biscuits

    Tall, flaky, and tender, these buttermilk biscuits are our elevated take on a classic Southern staple. Grated butter, gentle folds, and a blast of high heat create dramatic layers, while buttermilk adds subtle tang and softness. Perfect for Sunday breakfast, sausage gravy, or warm from the oven with a generous swipe of butter.


    Ingredients

      Biscuits

    • 4 cups self-rising flour
    • 1–2 tbsp sugar (optional)
    • ¾ cup unsalted butter, grated and frozen 10–15 minutes
    • ¼ cup shortening (optional, adds tenderness)
    • 1 large egg (or omit for fluffier, more delicate biscuits)
    • 1½ cups buttermilk, plus more as needed
    • ½ tsp table salt (recommended for flavor balance)
    • Glaze

    • 1 egg, beaten
    • 1 tbsp buttermilk

    Directions

    Prepare the Dough

    Preheat oven to 475ºF (245ºC). Line a baking sheet with parchment paper.

    Whisk together self-rising flour, sugar (if using), and salt. Add grated frozen butter and shortening; toss lightly to distribute.

    Stir in the egg (if using), then add buttermilk. Mix gently with a wooden spoon until just combined; add an extra tablespoon of buttermilk at a time only if the dough seems dry.

    Fold & Shape

    Turn dough onto a lightly floured surface. Pat into a rough rectangle about ¾″ thick. Fold the right third over the center, then the left third (like an envelope). Pat back to ¾″, then repeat the fold 2–3 more times.

    Pat to a final thickness of about 1″. Cut biscuits with a sharp cutter, pressing straight down without twisting. Gather scraps, pat gently, and re-cut.

    Arrange biscuits on the prepared baking sheet with sides touching for higher rise.

    Glaze & Bake

    Whisk together egg and buttermilk; brush lightly over the tops.

    Bake at 475ºF for 5 minutes, then reduce heat to 450ºF (no need to open the oven) and bake 6–8 minutes more, or until deeply golden.

    Brush hot biscuits with melted butter. Let rest 5 minutes before serving.


    Notes

    Preparation

    • Freezing the grated butter helps create dramatic layers and prevents premature melting.
    • Using both butter and shortening gives restaurant-quality flakiness and tenderness.
    • For the tallest biscuits, keep dough cold and handle it as little as possible.
    • Patting dough to 1″ thickness produces higher, fluffier biscuits.
    • If substituting all-purpose flour for self-rising flour: use 1 cup all-purpose flour + 1½ tsp baking powder + ¼ tsp salt per cup. For this recipe: 4 cups all-purpose flour + 6 tsp (2 tbsp) baking powder + 1 tsp salt.

    Serving Suggestions

    • Serve with Sausage Gravy and fried eggs for a classic Southern breakfast.
    • Pair with honey butter, jam, or sorghum molasses.
    • Split and toast leftovers for sandwiches.

    Variations

    • Cheddar & chive biscuits: fold in 1 cup shredded cheddar and ¼ cup chopped chives.
    • Sweet cream biscuits: omit egg and substitute sweet cream for buttermilk.
    • Cinnamon–brown sugar biscuits: add 1 tsp cinnamon and increase sugar to 3 tbsp.

    Make-Ahead & Storage

    • Refrigerate cut, unbaked biscuits up to 1 day; bake straight from fridge.
    • Freeze unbaked biscuits up to 1 month; bake from frozen, adding 2–3 minutes.
    • Baked biscuits keep 2–3 days at room temperature; reheat at 350ºF for 5–7 minutes.
  • Oven-Fried Fries

    Oven-Fried Fries

    Crisp on the outside and tender inside, these simple oven-fried fries are a quick family favorite. They deliver the satisfying crunch of classic fries without deep-frying—perfect for weeknight burgers, sandwiches, or snacking straight from the pan.


    Ingredients

    • potatoes, peeled and sliced
    • vegetable oil
    • salt, to taste

    Directions

    Prep the Oven

    Preheat oven to 450ºF. Lightly oil a baking sheet.

    Coat the Potatoes

    Place sliced potatoes on the baking sheet and drizzle with vegetable oil. Rub the potatoes together with your hands to evenly coat them.

    Bake

    Spread potatoes into a single even layer. Bake for 25–35 minutes, flipping after about 15 minutes, until golden and browned.


    Notes

    Preparation

    • For extra-crisp fries, soak sliced potatoes in cold water for 20–30 minutes, then dry thoroughly before oiling.
    • Be sure the potatoes are in a single layer to ensure even browning.
    • Season immediately after baking so the salt adheres well.

    Serving Suggestions

    • Serve with burgers, sandwiches, grilled meats, or alongside homemade chicken tenders.
    • Pair with fry sauce, ketchup, chipotle mayo, ranch, or garlic aioli.
    • Finish with chopped herbs such as parsley, chives, or rosemary for added aroma.

    Variations

    • Toss with garlic powder, smoked paprika, or black pepper before baking.
    • Make “steak fries” by cutting potatoes thicker and baking slightly longer.
    • Use Yukon Golds for a creamy interior or Russets for maximum crispness.

    Make-Ahead & Storage

    • Best served immediately for maximum crispness.
    • To reheat, bake at 425ºF for 8–10 minutes to refresh texture.
    • Leftovers can be stored in an airtight container in the refrigerator for up to 3 days.