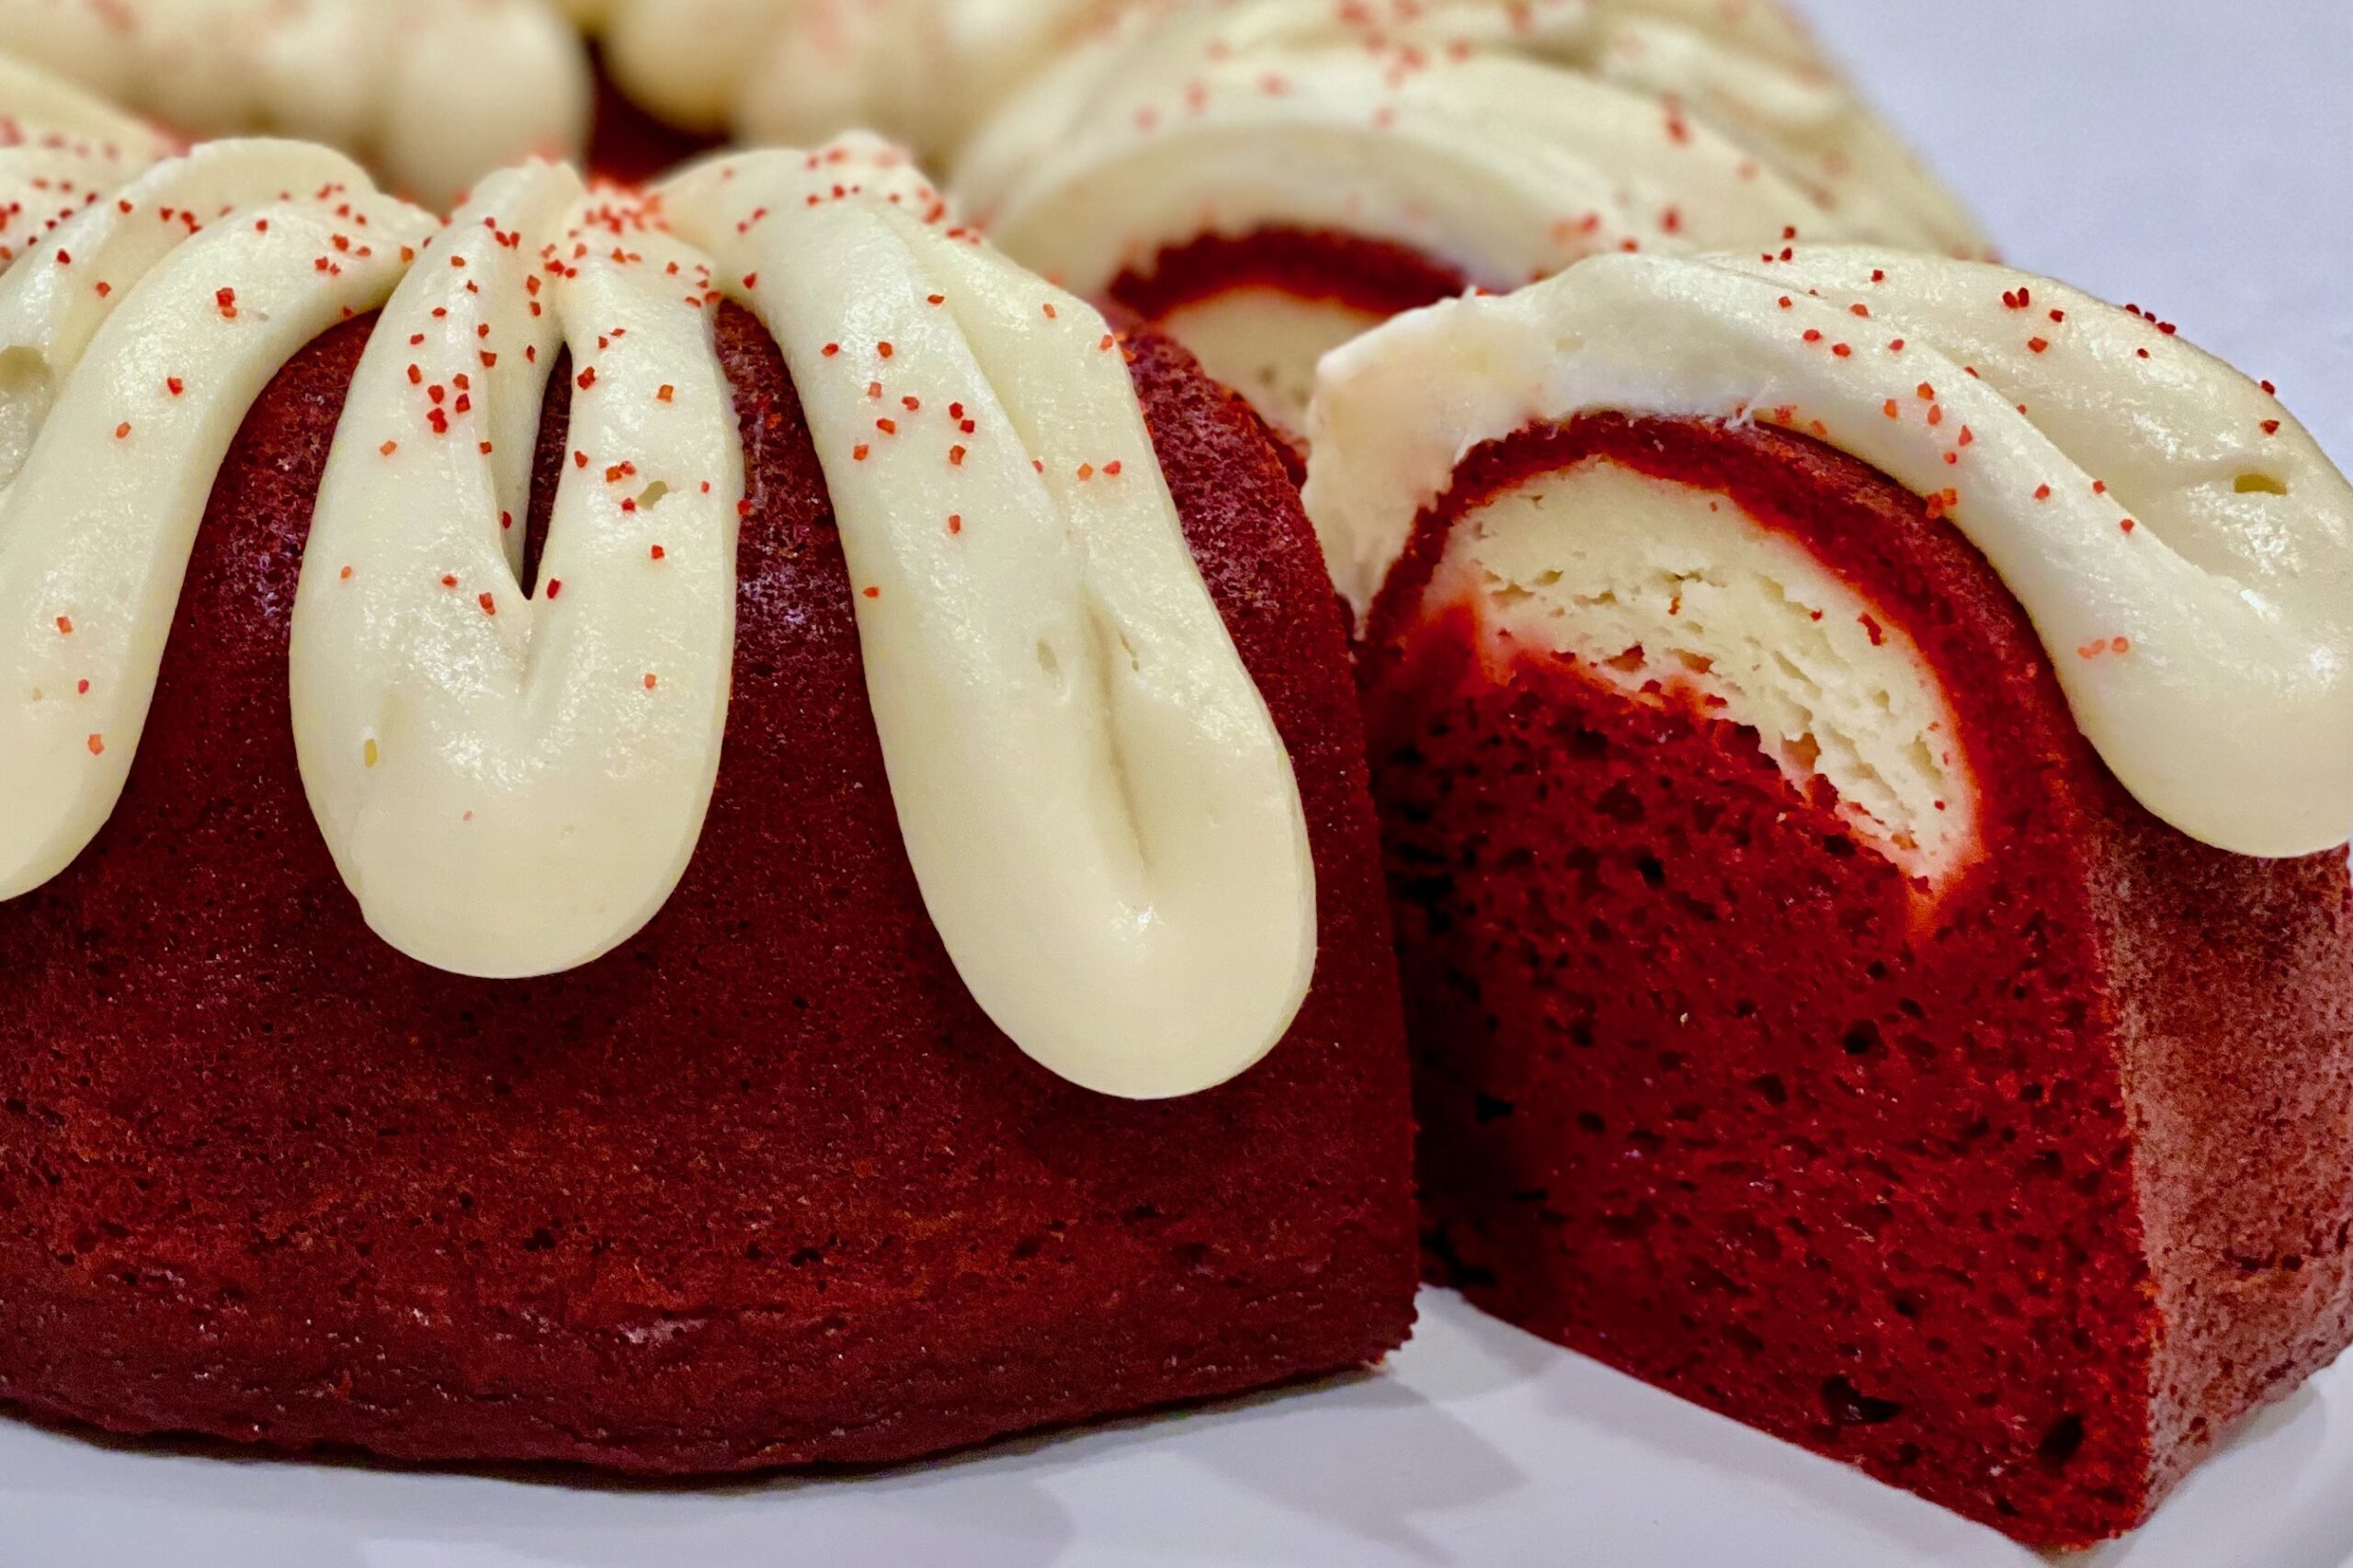
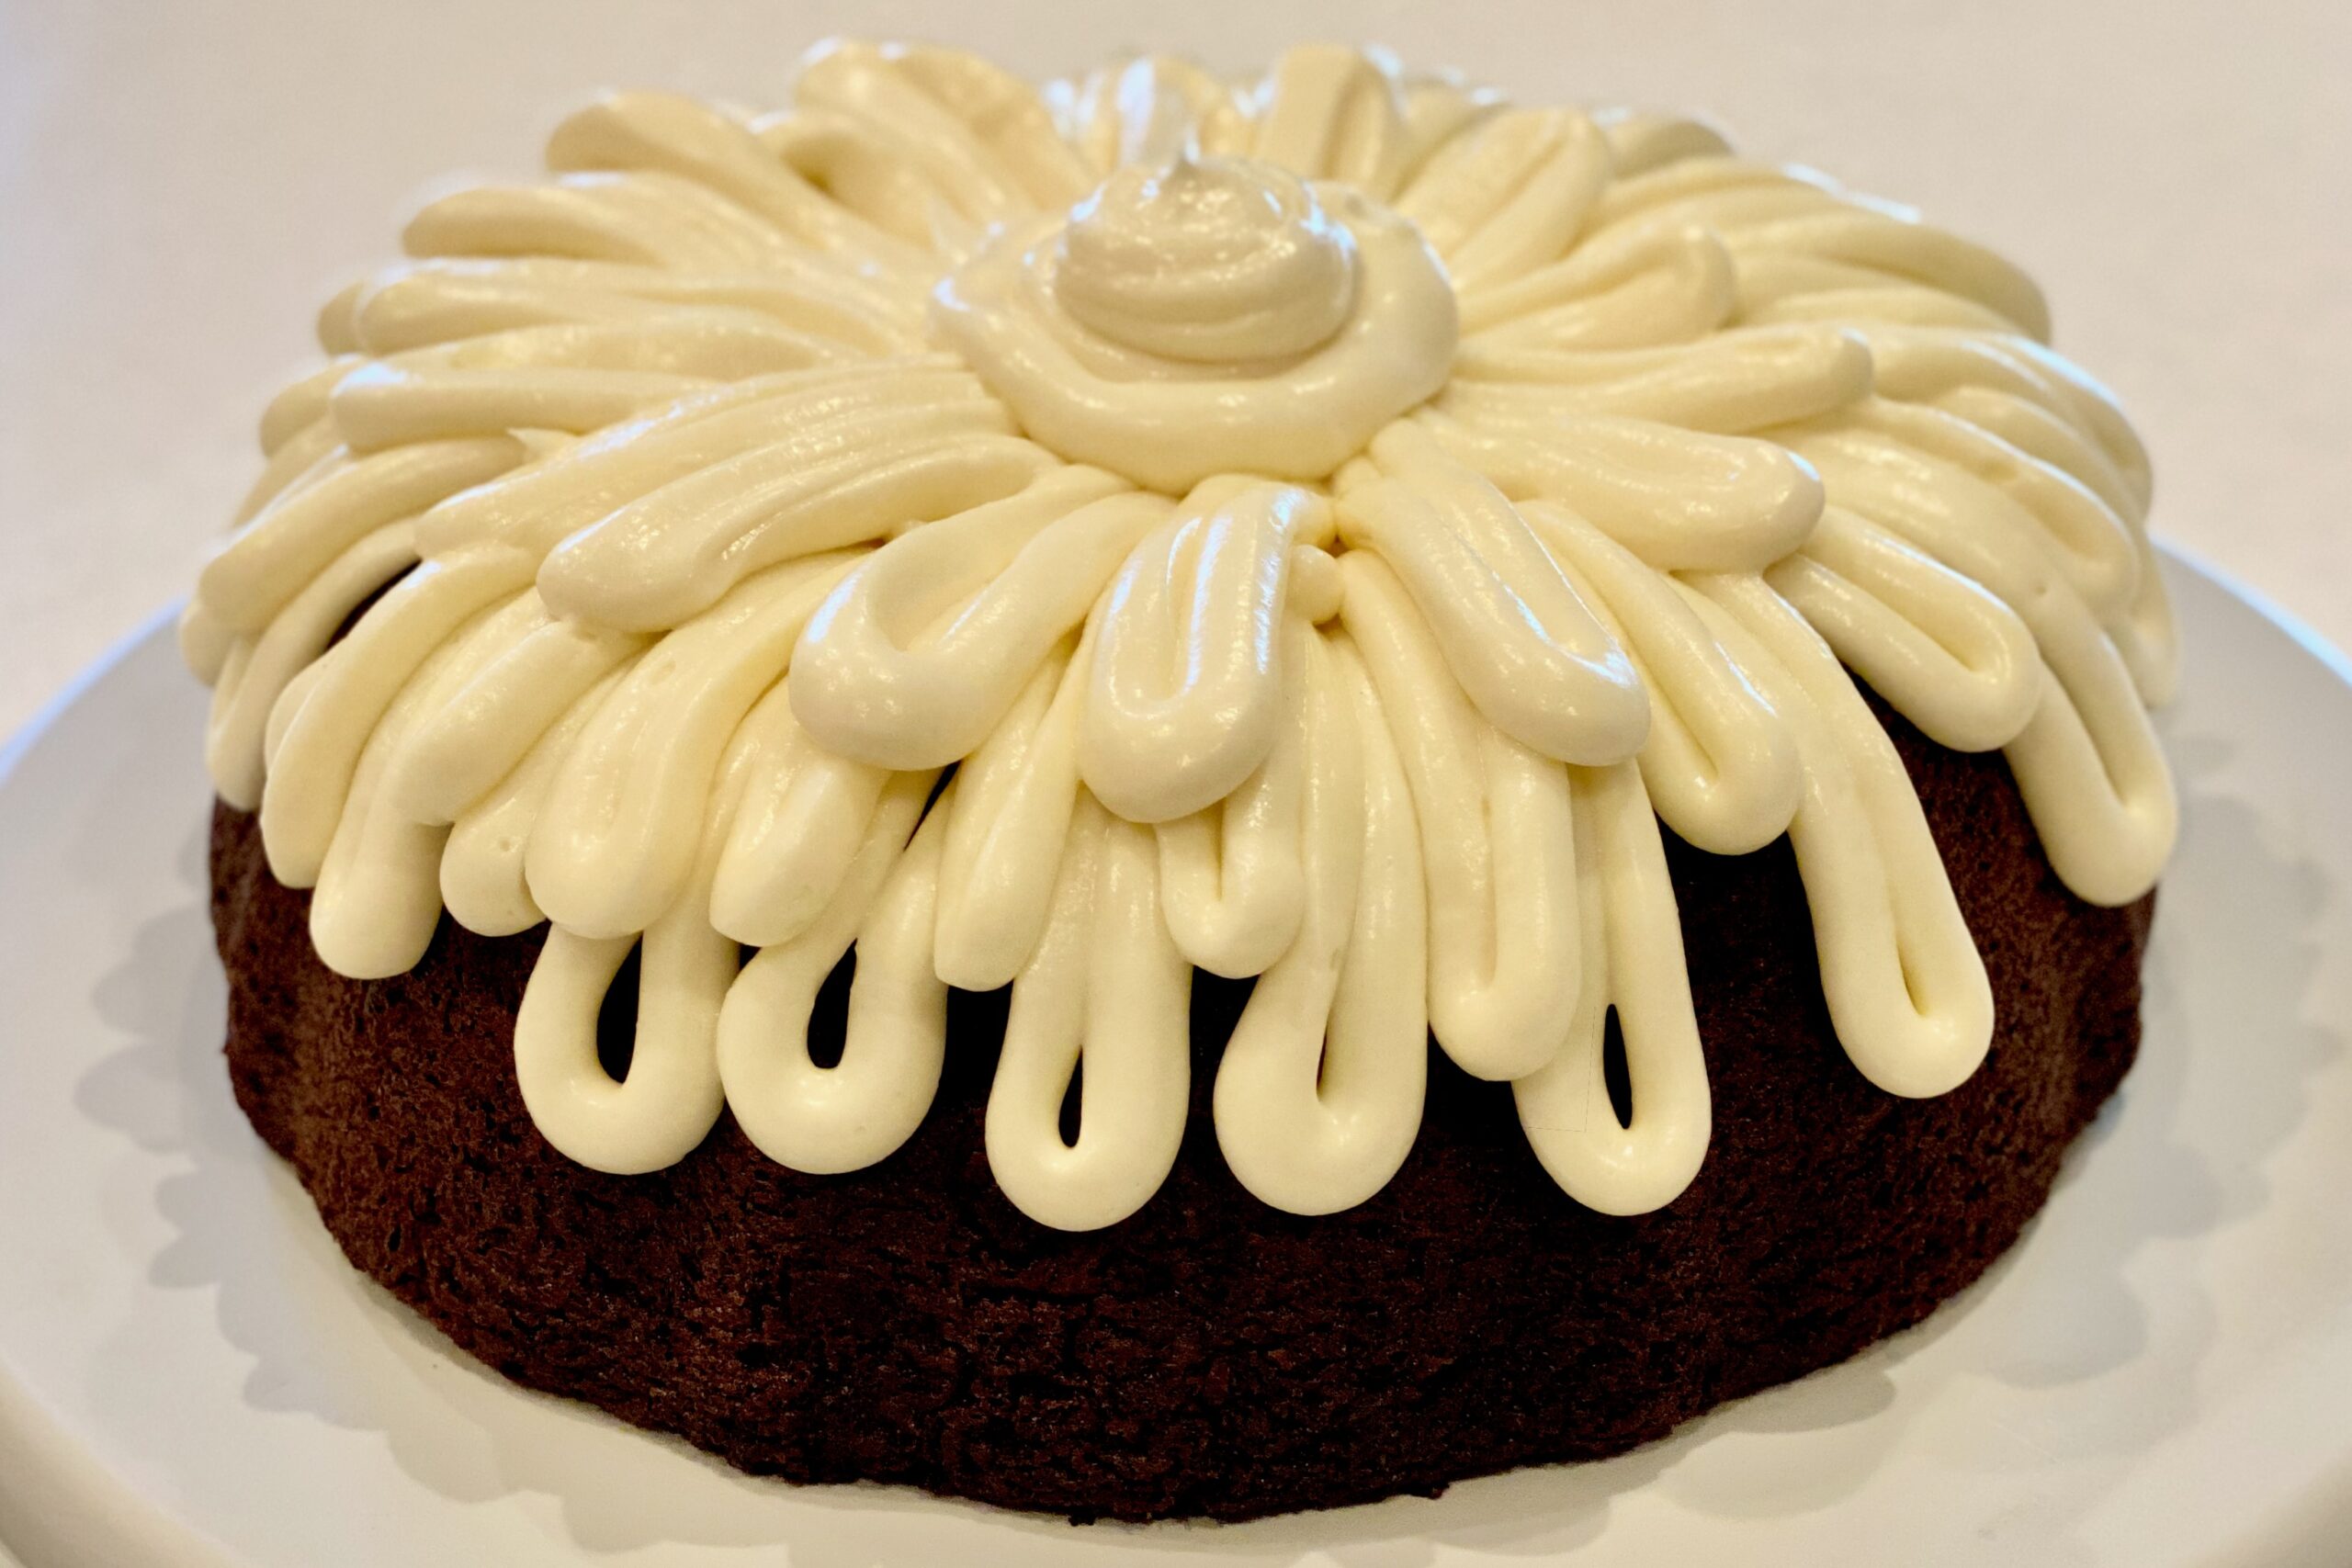
Bags of Spices

Favorite Recipes

American

Home-cooking classics, holiday staples, and recipes that feel like home.

  • Italian-American Meat Sauce

    Italian-American Meat Sauce

    This Meat Sauce is a classic Italian-American style simmered sauce built for depth and balance: well-browned meat, layered tomato flavor, dried herbs, and just enough savory backbone to make it craveable without tipping into heaviness. Blooming the tomato paste adds richness and sweetness, while a short covered simmer softens acidity before finishing uncovered to concentrate flavor. It’s a sauce that’s excellent fresh, but even better the next day—exactly what a great red sauce should be.


    Ingredients

    • 2 tbsp olive oil
    • 1 cup (8 oz) onion, chopped
    • 5 cloves garlic, minced
    • 1 lb ground chuck beef (or ½ lb ground chuck and ½ lb uncased Italian sausage)
    • 1 can (28 oz) crushed tomatoes
    • 1 can (15 oz) tomato sauce
    • 1 can (6 oz) tomato paste
    • 1 cup chicken broth
    • ¼–½ cup dry white or dry red wine (optional)
    • 1 tbsp fish sauce
    • 2 tsp dried basil
    • 2 tsp dried parsley
    • 1 tsp dried oregano
    • ½ tsp dried ground fennel
    • ¼ tsp dried thyme leaves
    • 2 whole cloves, crushed
    • 2 bay leaves
    • ½ tsp freshly ground black pepper (to taste)
    • 1 tsp table salt

    Directions

    Build the Sauce

    In a Dutch oven over medium heat, heat the olive oil until shimmering. Add the onion and sauté until translucent and tender, about 5–7 minutes. Add the garlic and cook for 1–2 minutes more, just until fragrant.

    Add the ground meat and cook, breaking it up with a spoon, until well browned and any excess moisture has cooked off.

    Stir in the tomato paste and cook for 1–2 minutes, allowing it to bloom and darken slightly to deepen sweetness and round acidity.

    Stir in the crushed tomatoes, tomato sauce, chicken broth, wine (if using), and fish sauce. Add the dried herbs, fennel, thyme, crushed cloves, bay leaves, pepper, and salt. Bring the sauce to a gentle simmer.

    Simmer

    Reduce heat to low and simmer covered for 30 minutes to soften acidity and allow the flavors to meld.

    Uncover and continue simmering for 15 minutes, allowing excess moisture to evaporate and the sauce to thicken. Remove and discard the bay leaves and crushed cloves before serving.

    Finish the Pasta

    Boil pasta as directed until al dente. Drain, reserving some of the pasta cooking water.

    Place enough warmed meat sauce in a serving bowl to lightly coat the pasta. Stir in a small splash of the reserved pasta water to loosen the sauce, then add the pasta and toss gently to coat. Serve topped with additional meat sauce and freshly grated Romano and/or Parmesan cheese.


    Notes

    Preparation

    • Anchovy Option: The fish sauce may be replaced with 4–6 anchovy fillets, finely minced. Add them with the garlic so they dissolve into the oil and meat as the sauce cooks.

    Make-Ahead & Storage

    This sauce improves with time and is best when made a day ahead and reheated.

    • Refrigerate in airtight containers for up to 3 days.
    • Freeze for up to 3 months.
    • Reheat gently on the stovetop over low heat, adding a splash of water or broth as needed to loosen the sauce.
  • Spaghetti & Meat Balls

    Spaghetti & Meat Balls

    This Spaghetti & Meatballs is built the way a great red-sauce Sunday dinner should be: deeply savory, richly tomatoey, and unapologetically comforting. The meatballs are intentionally tender and juicy—thanks to a buttermilk panade and a little gelatin—then roasted for browning before finishing in the sauce so everything tastes like it belongs together. It’s a big-batch, make-ahead-friendly classic that feels special on a weeknight and even better the next day.


    Ingredients

    Meatballs

    • 6 oz bread crumbs
    • 1½ cups buttermilk
    • 1 pkg (+/- ½ tbsp) powdered gelatin, bloomed in ¼ cup water
    • 3 eggs, slightly beaten
    • 1+ tbsp garlic, minced
    • ⅓ cup (packed) fresh parsley leaves, finely chopped
    • ½ tbsp table salt
    • ½ tsp pepper
    • 3 oz Parmesan cheese, grated
    • 6 oz prosciutto, finely chopped
    • 2 lbs ground beef
    • 1 lb ground pork

    Sauce

    • 2 tbsp olive oil
    • 1 cup (8-oz) onion, chopped
    • 5 cloves garlic, minced
    • 1 can (28-oz) crushed tomatoes
    • 1 can (15-oz) tomato sauce
    • 1 can (6-oz) tomato paste
    • 1½ cups chicken broth
    • ½ cup dry white wine (optional)
    • 1 tbsp fish sauce
    • 2 tsp dried basil
    • 2 tsp dried parsley
    • 1 tsp dried oregano
    • ½ tsp dried ground fennel
    • ¼ tsp dried thyme leaves
    • 2 whole cloves, crushed
    • 2 bay leaves
    • ½ tsp fresh ground pepper
    • 1 tsp table salt
    • 1–2 lbs dry spaghetti

    Directions

    Prepare the Oven and Pans

    Preheat oven to 450ºF with cooking racks mid-top and mid-bottom of oven.

    Place foil and wire racks in 2 half sheet pans; spray racks with cooking spray.

    Make the Meatballs

    Combine bread crumbs and buttermilk and stir to completely combine. Soak bread crumbs to fully hydrate, about 10 minutes, then mash into a paste.

    Bloom gelatin in ¼ cup cold water for 8–10 minutes.

    Place bread crumb mixture into a mixing bowl. Mix in bloomed gelatin, followed by all remaining ingredients except beef and pork; mix well to combine.

    Place meats in a large mixing bowl; pour egg/bread crumb mixture over meat and mix gently by hand until thoroughly combined.

    Portion and form into individual balls, about 3-oz each (29–30 meatballs). If necessary, refrigerate to firm.

    Place meatballs on the greased racks and bake for about 30 minutes, rotating trays and tray locations after 20 minutes.

    Make the Sauce

    In a Dutch oven over medium heat, heat olive oil until shimmering; add onion and garlic and sauté until onion is translucent and tender.

    Stir in crushed tomatoes, tomato sauce, tomato paste, chicken broth, wine (optional), and fish sauce; add remaining herbs, spices, and seasonings.

    Bring to a simmer, then reduce heat to low and simmer covered for 15 minutes.

    Braise the Meatballs in the Sauce

    After removing cooked meatballs from oven, lower oven temperature to 300ºF.

    Add meatballs to sauce; cover with lid and place in oven for 1 hour.

    Remove and discard bay leaves before serving.

    Cook the Pasta and Serve

    Prepare spaghetti as directed; drain, retaining some of the pasta water in a separate bowl.

    Add pasta back to the cooking pot along with a small amount of pasta water and about ¼ cup sauce; toss until pasta is coated.

    Serve pasta topped with meatballs, additional sauce, and grated Parmesan.


    Notes

    Preparation

    • Fish sauce can be replaced by 4–6 anchovy filets, finely minced.

    Serving Suggestions

    • Optional finish: garnish bowls with a light chiffonade of fresh basil and/or a sprinkle of fresh parsley for extra brightness.

    Variations

    • Parmesan can be swapped for a mixture of Parmesan and Romano cheeses.

    Make-Ahead & Storage

    • Can be made a day in advance and reheated.
    • Add ¾ cup water over mixture and reheat covered at 325ºF.
  • Grandma’s Taco Sauce

    Grandma’s Taco Sauce

    This simple, flavorful taco sauce is Grandma Honey’s creation. She is famous for her unique tostadas—requested at nearly every family birthday party and gathering—and this vibrant, tangy sauce is the one she always spooned over the top. Made from pantry-friendly ingredients, it delivers a bright balance of heat, acidity, and savory depth that brings her tostadas to life.


    Ingredients

    • 1 can peeled tomatoes
    • 2 or 3 hot yellow peppers
    • 2 tbsp juice from yellow peppers
    • 1 can Ortega green diced chilies
    • 3 tbsp vegetable oil
    • 1 tsp table salt
    • ½ tsp pepper
    • 3 or 4 tbsp white vinegar

    Directions

    Make the Sauce

    Drain the juice from the tomatoes and reserve.

    Place the tomatoes in a blender and blend for 2 seconds; add to the reserved tomato juice.

    Place the hot peppers and pepper juice in the blender with the vinegar and blend for 2 seconds; add to the tomato mixture.

    Add the chilies, salt, pepper, vegetable oil, and remaining vinegar, one at a time, stirring to combine.

    Best when served at room temperature.


    Notes

    Preparation

    • The hot yellow peppers provide most of the sauce’s signature heat and tang. Using 2 peppers keeps it mild; using 3 adds a noticeable kick.
    • The combination of canned tomatoes and green chilies gives the sauce a smooth but slightly rustic texture—exactly like Grandma’s.
    • The vegetable oil adds body and helps the flavors meld as the sauce rests.
    • Best served at room temperature, just as Grandma always prepared it for her tostadas.

    Serving Suggestions

    • Perfect on Grandma’s tostadas, tacos, enchiladas, or as a tangy topping for rice bowls.
    • Also works well as a base sauce for Mexican-style soups or stews.
  • Southern-Style Sausage Gravy

    Southern-Style Sausage Gravy

    Sausage gravy, a Southern staple, has been a Huggins family favorite for generations. No true Southern breakfast is complete without buttery biscuits smothered in creamy sausage gravy. The sage sausage pays homage to my grandma Lena — a true Southern lady who loved using sage in her cooking. I learned to make this gravy watching my mom prepare it time and time again in our family kitchen in Southern California. I may just be superstitious, but I swear the gravy tastes best when it’s made in my favorite cast iron pan!


    Ingredients

    • 1 lb sage breakfast sausage
    • ½ cup (1 stick) butter
    • ½ cup flour, lightly mounded
    • 4–6 cups whole milk, divided (start with 4 cups and add more to adjust thickness)
    • salt, to taste
    • freshly ground black pepper or white pepper, to taste

    Directions

    Cook the Sausage:

    In a large skillet or cast iron pan over medium heat, cook the sausage until browned and crumbled, breaking it into small pieces as it cooks. When fully cooked, push the sausage to one side of the pan, leaving the drippings in the skillet.

    Make the Roux:

    Add the butter to the sausage drippings and let it melt completely. Sprinkle the flour over the melted butter and drippings, stirring constantly to form a smooth paste. Cook the roux for 2–4 minutes, stirring continuously, until it turns a pale blond color and smells lightly nutty. Do not let it brown.

    Add the Milk:

    Reduce the heat to medium-low. Slowly pour in about 6 cups of the milk while whisking or stirring constantly, scraping along the bottom of the pan to prevent scorching (especially when using cast iron). Continue to cook and stir until the gravy thickens and begins to gently bubble.

    Finish and Season:

    Stir the cooked sausage back into the thickened gravy. If the gravy is thicker than you prefer, add additional milk ½ cup at a time, stirring well heating after each addition, until it reaches your desired consistency—smooth, creamy, and thick enough to coat the back of a spoon while still pouring easily.

    Season with salt to taste and a generous amount of freshly ground black pepper or white pepper. Traditional Southern-style gravy is fairly pepper-forward, so don’t be shy unless you prefer it milder.

    Serve:

    Serve hot over warm buttermilk biscuits. This gravy is also excellent with fried eggs, soft-scrambled eggs, or grated boiled eggs alongside your biscuits.


    Notes

    Preparation

    • Milk scorches easily, especially in cast iron. Once the milk is added, keep the heat at medium-low and stir frequently, scraping along the bottom of the pan.
    • A pale blond roux (2–4 minutes of cooking) helps remove any raw flour taste while keeping the gravy light in color and flavor.
    • The gravy will continue to thicken as it sits off heat. If it becomes too thick, gently rewarm and whisk in a little extra milk until it loosens to your preferred consistency.

    Serving Suggestions

    • Serve over hot buttermilk biscuits for a classic Southern breakfast.
    • Pair with fried eggs, soft-scrambled eggs, or grated boiled eggs for added protein and richness.
    • Try serving with hash browns, breakfast potatoes, or over toasted bread when biscuits aren’t available.

    Variations

    • Add a few drops of Worcestershire sauce to the gravy for deeper savoriness.
    • Stir in a dash of your favorite hot sauce (such as Crystal or Tabasco) for gentle heat that complements the sage and sausage.
    • If your sausage is not very sage-forward, add a tiny pinch of rubbed sage toward the end of cooking, tasting as you go to avoid overpowering the gravy.
    • Use white pepper instead of black pepper if you prefer a smoother look while keeping a robust, peppery flavor.

    Make-Ahead & Storage

    • Sausage gravy can be made up to 2 days in advance and cooled completely before refrigerating in an airtight container.
    • Reheat gently over low heat, adding a splash of milk as needed to loosen the gravy back to a smooth, creamy consistency.
    • For food safety, avoid leaving the gravy at room temperature for extended periods; promptly refrigerate leftovers.
  • North Woods Garlic Cheese Bread

    North Woods Garlic Cheese Bread

    This garlic cheese bread captures the rich, gooey, paprika-tinted flavor of the beloved North Woods Inn classic—warm, buttery, deeply savory, and loaded with cheddar. This version adds the option for an ultra-smooth melt while keeping the rustic cheese bits that make the original so iconic.


    Ingredients

    • ¾ lb cheddar cheese, grated (reserve ½ cup for pulsing in at the end)
    • 2 oz Romano cheese, grated
    • 8 oz butter, room temperature
    • 1 small clove garlic, grated (or ¾ tsp garlic powder)
    • 1 tsp Hungarian sweet paprika
    • ½ tsp Tabasco sauce
    • 2 tsp Worcestershire sauce
    • Optional: 1–2 tsp sodium citrate (for an extra-smooth, gooey melt)
    • salt, to taste
    • 2 loaves French or sourdough bread, sliced
    • Hungarian sweet paprika, for sprinkling after broiling

    Directions

    Prepare the Cheese Spread

    Combine all ingredients except ½ cup of the cheddar in a food processor. Blend until smooth, cohesive, and richly colored.

    Taste and adjust salt if needed—the mixture should be boldly savory.

    Add the reserved cheddar and pulse 2–3 times to leave small, visible cheese pieces suspended in the spread.

    Assemble & Broil

    Spread the cheese mixture generously onto sliced French or sourdough bread.

    Place under the broiler until the top is melted with darkened, blistered spots—this light caramelization is essential for authentic North Woods flavor.

    Remove from the broiler and lightly dust with Hungarian sweet paprika. Wrap in foil to keep warm until serving.


    Notes

    Preparation

    • French bread gives the most classic soft, gooey texture; sourdough creates a firmer, tangier base.
    • Sodium citrate is optional but helps the cheese melt into an ultra-smooth, cohesive layer without separating.
    • Taste the spread before adding salt—Romano and cheddar vary in saltiness.

    Serving Suggestions

    • Serve alongside steaks, ribs, or salad for a full North Woods–style meal.
    • Excellent as an appetizer when cut into strips or squares.

    Variations

    • Add a pinch of cayenne or smoked paprika for a spicy or smoky accent.
    • Use sharp white cheddar for a milder color and deeper tang.

    Make-Ahead & Storage

    • The cheese spread can be made up to 3 days ahead and refrigerated in an airtight container.
    • Bring to room temperature before spreading for smoothest application.
    • Bread is best enjoyed immediately after broiling.
  • Vanilla Bean Ice Cream

    Vanilla Bean Ice Cream

    This lighter-style vanilla bean ice cream puts the spotlight squarely on the ingredients—fresh cream, whole milk, and a full Madagascar vanilla bean. Cooking the custard to a slightly higher temperature strengthens the structure without adding heaviness, allowing the vanilla to shine with clean, bright aroma and a naturally silky texture.


    Ingredients

      Ice Cream Base

    • 2 cups whole milk
    • 1 cup heavy cream
    • ⅔ cup granulated sugar, divided
    • 4 large egg yolks
    • 1 Madagascar vanilla bean, split and scraped
    • 1 tbsp vanilla extract
    • ⅛ tsp xanthan gum
    • ¼ tsp fine salt
    • Optional

    • 1–2 tsp vanilla bean paste (for extra speckles and enhanced aroma)

    Directions

    Prepare the Vanilla Base

    In a medium saucepan, combine the whole milk, half of the sugar, salt, vanilla bean seeds, and the scraped pod. Heat over medium until steaming but not boiling.

    In a separate bowl, whisk the egg yolks with the remaining sugar until well combined and slightly lightened.

    Slowly ladle some of the warm milk into the yolks while whisking, then return the tempered yolk mixture to the saucepan.

    Cook the Custard

    Cook over medium heat, stirring constantly with a rubber spatula, until the custard thickens enough to coat the spatula and reaches 174–176°F.

    Remove from heat and whisk in the heavy cream.

    Add Xanthan Gum

    Sprinkle the xanthan gum over the warm custard and blend with an immersion blender (or whisk vigorously) to fully disperse.

    Let the mixture steep for 20–30 minutes for maximum vanilla extraction.

    Chill the Base

    Strain the custard through a fine-mesh sieve into a bowl, removing the vanilla pod.

    Stir in the vanilla extract (and vanilla bean paste, if using).

    Cover and refrigerate for at least 6 hours or overnight.

    Churn

    Churn the chilled base in your ice cream maker until soft-serve consistency.

    Transfer to a container, press parchment against the surface, and freeze until firm.


    Notes

    Preparation

    • Vanilla bean paste enhances the speckled appearance and boosts aroma without overwhelming the base.
    • Cook the custard slowly to avoid scrambling the yolks; constant stirring ensures even thickening.

    Serving Suggestions

    • Serve alongside pies, crisps, or berry desserts—its lighter profile pairs beautifully with richer sweets.
    • For extra aroma, add a light drizzle of warm caramel or a spoonful of fresh berries.

    Variations

    • Vanilla Bean–Tahitian: Replace Madagascar extract with homemade Tahitian for a floral, fruity aroma.
    • French Vanilla: Add an additional yolk and increase sugar to ¾ cup for a richer, custard-forward style.
    • Extra Speckles: Increase vanilla bean paste to 2–3 tsp for a visual “vanilla bean explosion” effect.

    Make-Ahead & Storage

    • Ice cream keeps best for 1–2 weeks when stored in an airtight container.
    • To prevent ice crystals, press parchment paper directly against the surface before freezing.
  • Nacho Cheese Sauce

    Nacho Cheese Sauce

    This smooth and flavorful nacho cheese sauce blends cheddar, colby jack, green chiles, warm spices, and a touch of cream cheese for richness—perfect for dipping, drizzling, or spooning over anything that needs a bold, melty kick.


    Ingredients

    • 2 tbsp butter
    • ¼ tsp powdered annatto (optional)
    • ¼ tsp garlic powder
    • ¼ tsp onion powder
    • ¼ tsp ground cumin
    • ¼ tsp chipotle chile powder
    • 2 tbsp flour
    • 1½ cups milk
    • 1½ tsp sodium citrate (optional)
    • 4 oz cream cheese, cut into small chunks
    • 4 oz cheddar cheese, grated
    • 4 oz colby jack cheese, grated
    • ½ tsp table salt
    • ¼ tsp fish sauce (optional)
    • 2–4 oz diced green chiles

    Directions

    Make the Sauce

    Heat butter in a skillet over medium heat. When melted and bubbling, add annatto (if using) and bloom for 15 seconds.

    Add garlic powder, onion powder, cumin, and chipotle chile powder; whisk briefly to bloom the spices. Add flour to form a roux and cook until the mixture is bubbling and the raw flour scent dissipates.

    Dissolve sodium citrate in the milk, then whisk the milk mixture into the roux. Continue whisking until the mixture thickens and reaches a gentle boil.

    Whisk in the cream cheese until fully incorporated. Remove the skillet from heat.

    Add the cheddar and colby jack a handful at a time, whisking thoroughly between additions until smooth. Stir in salt, fish sauce (if using), and green chiles.


    Notes

    Preparation

    Powdered annatto gives a warm reddish color and mimics classic cheddar coloring. It is a natural antioxidant with additional health benefits.

    Sodium citrate enhances smooth meltability, adds gentle tanginess, and helps prevent the sauce from separating. Increasing to 1½ tsp improves stability, especially during reheating.

    Fish sauce adds subtle umami depth and rounds out the flavors but remains undetectable as a distinct ingredient.

    Serving Suggestions

    For extra heat, stir in a splash of your favorite hot sauce just before serving.

    Pickled jalapeños or 1–2 tsp jalapeño brine may be added for brightness and acidity.

    Variations

    Optional Add-Ins:

    • Diced pickled jalapeños
    • Jalapeño brine for acidity
    • Extra green chiles for mild heat

    These additions adjust heat and acidity without changing the core sauce flavor.

    Make-Ahead & Storage

    Store cooled sauce in an airtight container for up to 4 days.

    Reheat gently over low heat on the stovetop or in the microwave in 20–30 second bursts, stirring between intervals.

    If the sauce thickens during storage or reheating, whisk in 1–3 tbsp milk as needed to adjust consistency.

  • Soft Gingerbread Men

    Soft Gingerbread Men

    Cookies are serious business around our house. Baking dozens of cookies in all varieties is part of our holiday tradition. The box of cookies in the photo held just a sampling of treats baked for our annual Christmas Eve party—and these soft gingerbread men are always a crowd pleaser.


    Ingredients

    • 1 cup packed brown sugar
    • ½ cup butter + ¼ cup shortening (or ¾ cup shortening for a more traditional texture)
    • ¼ cup molasses
    • 1 tbsp honey or dark corn syrup (optional, for extra softness)
    • 1 large egg
    • 2 tsp baking soda
    • 1 tsp ground cinnamon
    • 1 tsp ground ginger
    • 1½ tsp ground cloves
    • ¼ tsp table salt
    • 2¼ cups all-purpose flour

    Directions

    Make the Dough

    In a large bowl, beat together brown sugar, butter, shortening, molasses, honey (if using), and egg until smooth and creamy. Stir in baking soda, cinnamon, ginger, cloves, and salt. Gradually mix in flour until fully incorporated.

    Cover dough and chill for at least 3 hours or overnight, until firm enough to roll.

    Roll and Cut

    Preheat oven to 375°F (190°C). Roll chilled dough between sheets of parchment paper dusted with confectioners’ sugar (instead of flour) to about ¼-inch thickness. Cut into desired shapes using cookie cutters.

    Transfer cookies to a baking sheet lined with parchment paper or release foil.

    Bake

    Bake for 10–12 minutes, or until cookies are fragrant and edges are just set—they’ll continue to bake on the sheet after removal. Avoid overbaking to keep them soft.

    Cool cookies on the baking sheet for several minutes before transferring to a wire rack to cool completely.

    Optional Glaze

    For a glossy finish, whisk together 1 cup confectioners’ sugar, 1–2 tbsp milk, and ½ tsp vanilla or lemon juice. Brush lightly over warm cookies and allow to set.


    Notes

    Preparation

    • Rolling between parchment prevents sticking and eliminates the need for added flour, keeping cookies tender.
    • Adding honey or corn syrup creates a slightly chewier texture.
    • For an even softer cookie, slightly underbake and store while still a bit warm.

    Serving Suggestions

    • Decorate with royal icing, sanding sugar, or a drizzle of glaze.
    • Serve alongside hot cocoa, Anijsmelk, or Aunt Laurie’s Pumpkin Spice Steamer for a cozy holiday pairing.

    Make-Ahead & Storage

    • Dough can be chilled up to 3 days or frozen up to 1 month; thaw in the refrigerator before rolling.
    • Baked cookies keep for about 1 week in an airtight container at room temperature.
    • To retain softness, store with a slice of bread or a piece of apple in the container.
  • Pralines & Cream Buttermilk Ice Cream

    Pralines & Cream Buttermilk Ice Cream

    The Huggins Family traces its roots to some of the earliest settlers in the American South, and although several generations have since made their homes in the West, many of the foods we love still reflect that Southern heritage. Pralines—those sweet, buttery pecan confections tied to countless Southern kitchens—capture that legacy perfectly. This ice cream honors that connection with a silky buttermilk custard base swirled with ribbons of praline cream and studded with crisp pecan pralines for a nostalgic, balanced, unmistakably Southern flavor.


    Ingredients

    • Custard Base:

    • 2 cups heavy cream
    • ½ cup whole milk
    • ½ cup buttermilk (added after cooking)
    • ½ cup sugar, divided
    • 5 egg yolks
    • ½ tsp vanilla extract
    • ¼ tsp table salt
    • Praline-Cream Swirl:

    • ¼ cup butter
    • 6 tbsp brown sugar
    • 2 tbsp heavy cream
    • ½ tsp table salt
    • 1 tsp vanilla extract
    • Mix-Ins:

    • 1 cup chopped pecan pralines, frozen before use

    Directions

    Cook the Custard

    In a medium saucepan, whisk together the cream, whole milk, ¼ cup sugar, and salt. Warm over medium heat until mixture begins to steam and the sugar dissolves.

    Temper the Yolks

    In a separate bowl, whisk the egg yolks with the remaining ¼ cup sugar until thick and pale. Slowly temper with ½ cup of the warm cream mixture, then return everything to the saucepan.

    Finish the Base

    Cook gently over low heat, stirring constantly, until the custard coats the back of a spoon (170–175°F / 77–80°C). Do not boil. Strain through a fine mesh sieve, stir in vanilla, and let cool slightly. Add the buttermilk, then chill thoroughly—preferably overnight.

    Make the Praline-Cream Swirl

    In a small saucepan, melt butter with brown sugar and cream. Simmer 1–2 minutes until lightly thickened. Remove from heat, stir in salt and vanilla, and cool completely before layering.

    Churn & Assemble

    Churn the chilled custard in an ice cream maker according to manufacturer instructions. When nearly finished, fold in the frozen chopped pralines. As you transfer to a container, alternate layers of ice cream and thin ribbons of praline-cream swirl. Gently marble with a butter knife and freeze until firm.


    Notes

    Preparation

    • Freeze pralines before folding them in to preserve their crisp texture.
    • Buttermilk provides a gentle tang that balances caramel sweetness; replace with whole milk for a richer, sweeter version.
    • Ensure the praline swirl is fully cooled before layering to avoid melting the churned base.

    Serving Suggestions

    • Top with extra chopped pecan pralines for added crunch.
    • Serve alongside warm apple or pecan pie.
    • Add a drizzle of warm caramel sauce for an extra-sweet presentation.

    Variations

    • Add ¼ tsp cinnamon to the swirl for a deeper Southern praline flavor.
    • Swap half the pralines for toasted pecans for a nuttier variation.

    Make-Ahead & Storage

    • Refrigerate the unchurned custard up to 2 days before freezing.
    • Store praline-cream swirl refrigerated up to 1 week.
    • Finished ice cream keeps 1 week for best texture.
  • Red Cabbage Salad

    Red Cabbage Salad

    This bright, sweet-tangy red cabbage salad is inspired by the legendary version served at North Woods Inn in Southern California. Its deep purple color, crunchy texture, and bold seasoning come from long marination and a perfectly balanced vinegar-sugar brine—just like the classic steakhouse favorite.


    Ingredients

    • 1 head red cabbage, shredded
    • ¾ cup seasoned rice vinegar
    • ½ cup sugar
    • 1½ tsp onion powder
    • 1 tsp Lawry’s seasoned salt
    • ½ tsp black pepper
    • ⅛ tsp garlic powder
    • ⅛ tsp celery seed (optional)
    • 1–1½ tsp table salt (for dry brine; not part of marinade)
    • ½ cup avocado oil (or canola or vegetable oil)

    Directions

    Dry Brine the Cabbage

    Toss the shredded cabbage with 1–1½ tsp table salt and let rest for 30–45 minutes. This softens the leaves slightly and helps them absorb the marinade more evenly.

    Rinse lightly under cold water, then drain thoroughly and pat or spin dry.

    Marinate

    In a large resealable container, combine the seasoned rice vinegar, sugar, onion powder, Lawry’s seasoned salt, black pepper, garlic powder, and celery seed (if using).

    Add the cabbage to the container, press out excess air, seal, and refrigerate for at least 8 hours and up to 4 days, turning occasionally to ensure even marination.

    The cabbage will deepen in color and develop the signature sweet-tangy North Woods flavor as it rests.

    Finish

    Add the avocado oil (or canola or vegetable oil) about 1 hour before serving and toss well to coat.


    Notes

    Preparation

    Dry brining is key for achieving the slightly softened yet crisp texture typical of the North Woods Inn salad. Don’t skip the rinse—it prevents the final salad from becoming too salty.

    For best flavor, allow at least 8 hours of marination, though the salad reaches peak texture and flavor on days 2–3.

    Optional celery seed adds a classic steakhouse-style background note but is not essential.

    Serving Suggestions

    Serve chilled alongside grilled or roasted meats, steakhouse entrées, or hearty sandwiches.

    Pairs especially well with rich dishes that benefit from sweet-tart contrast.

    Variations

    For a slightly lighter flavor, replace 2–3 tbsp of the seasoned rice vinegar with plain rice vinegar.

    For a richer mouthfeel, add the oil earlier (4–6 hours before serving), though the cabbage will soften more quickly.

    Make-Ahead & Storage

    This salad improves with time and can be prepared up to 4 days in advance.

    Once the oil is added, it is best enjoyed within 24 hours for peak texture.

    Store refrigerated in an airtight container.