Bags of Spices

Favorite Recipes

Rick

Signature dishes, experiments, global inspirations, and family staples from Rick’s kitchen.

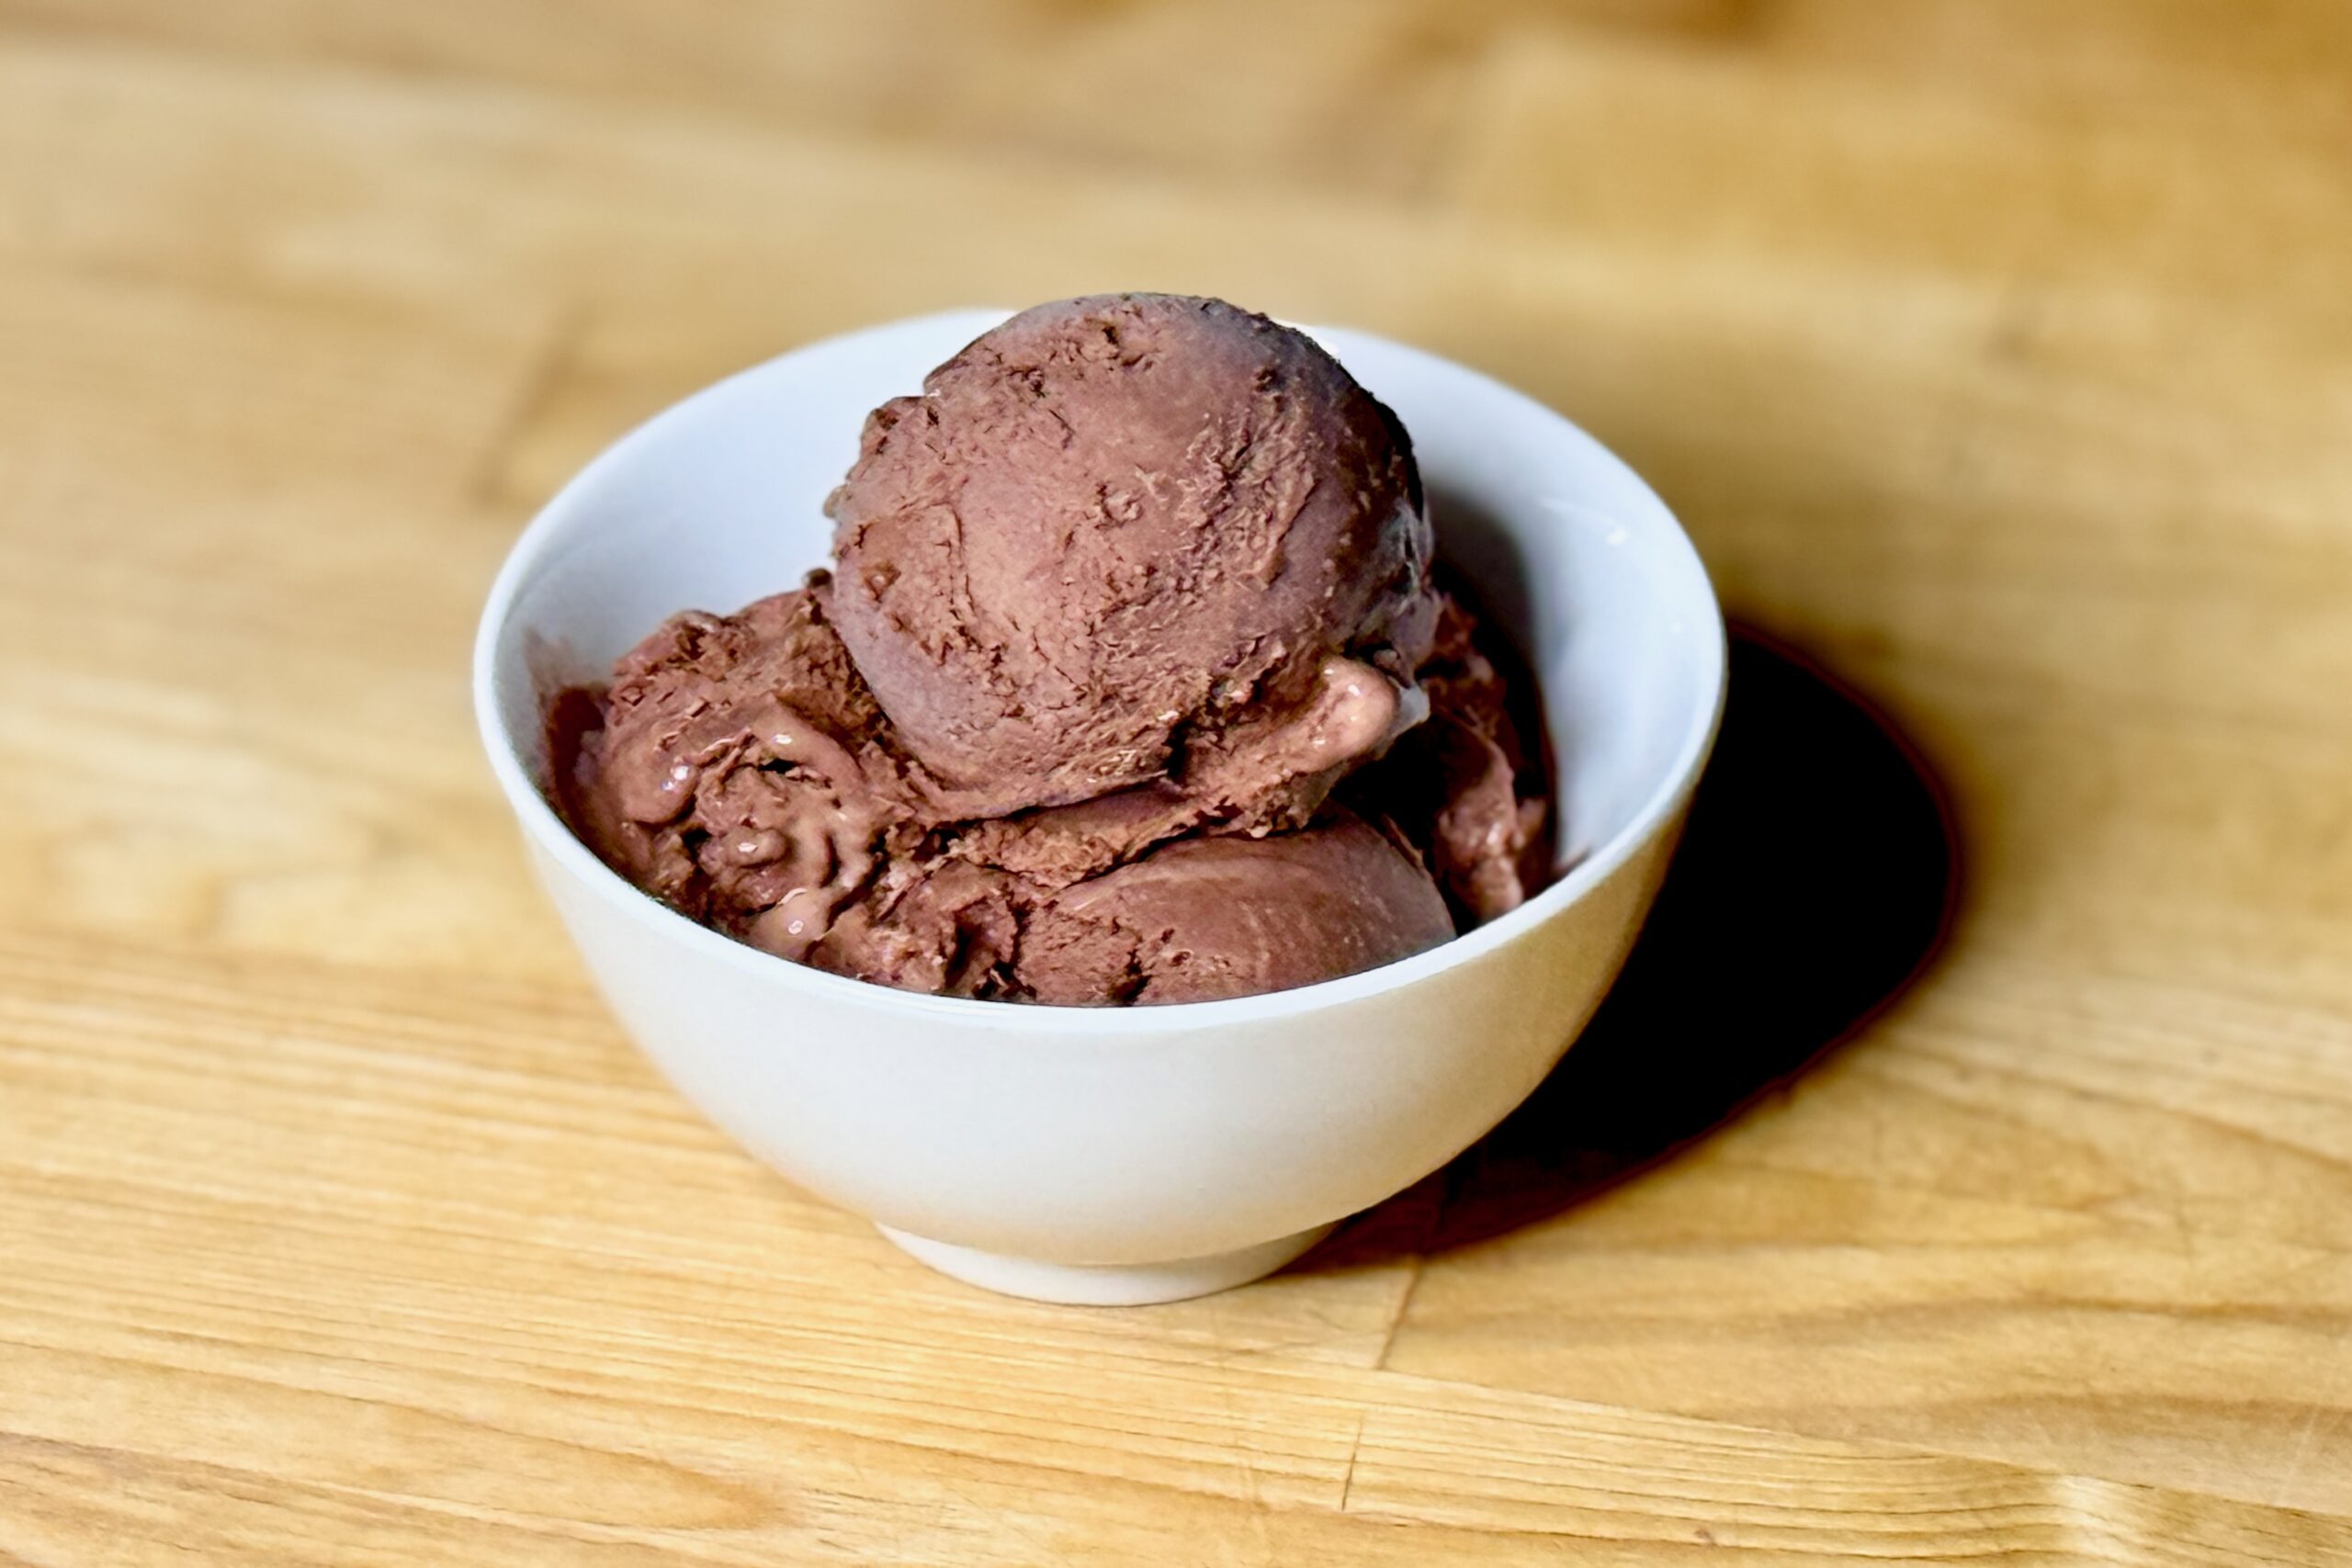
  • Cinnamon Chocolate-Coconut Ice Cream

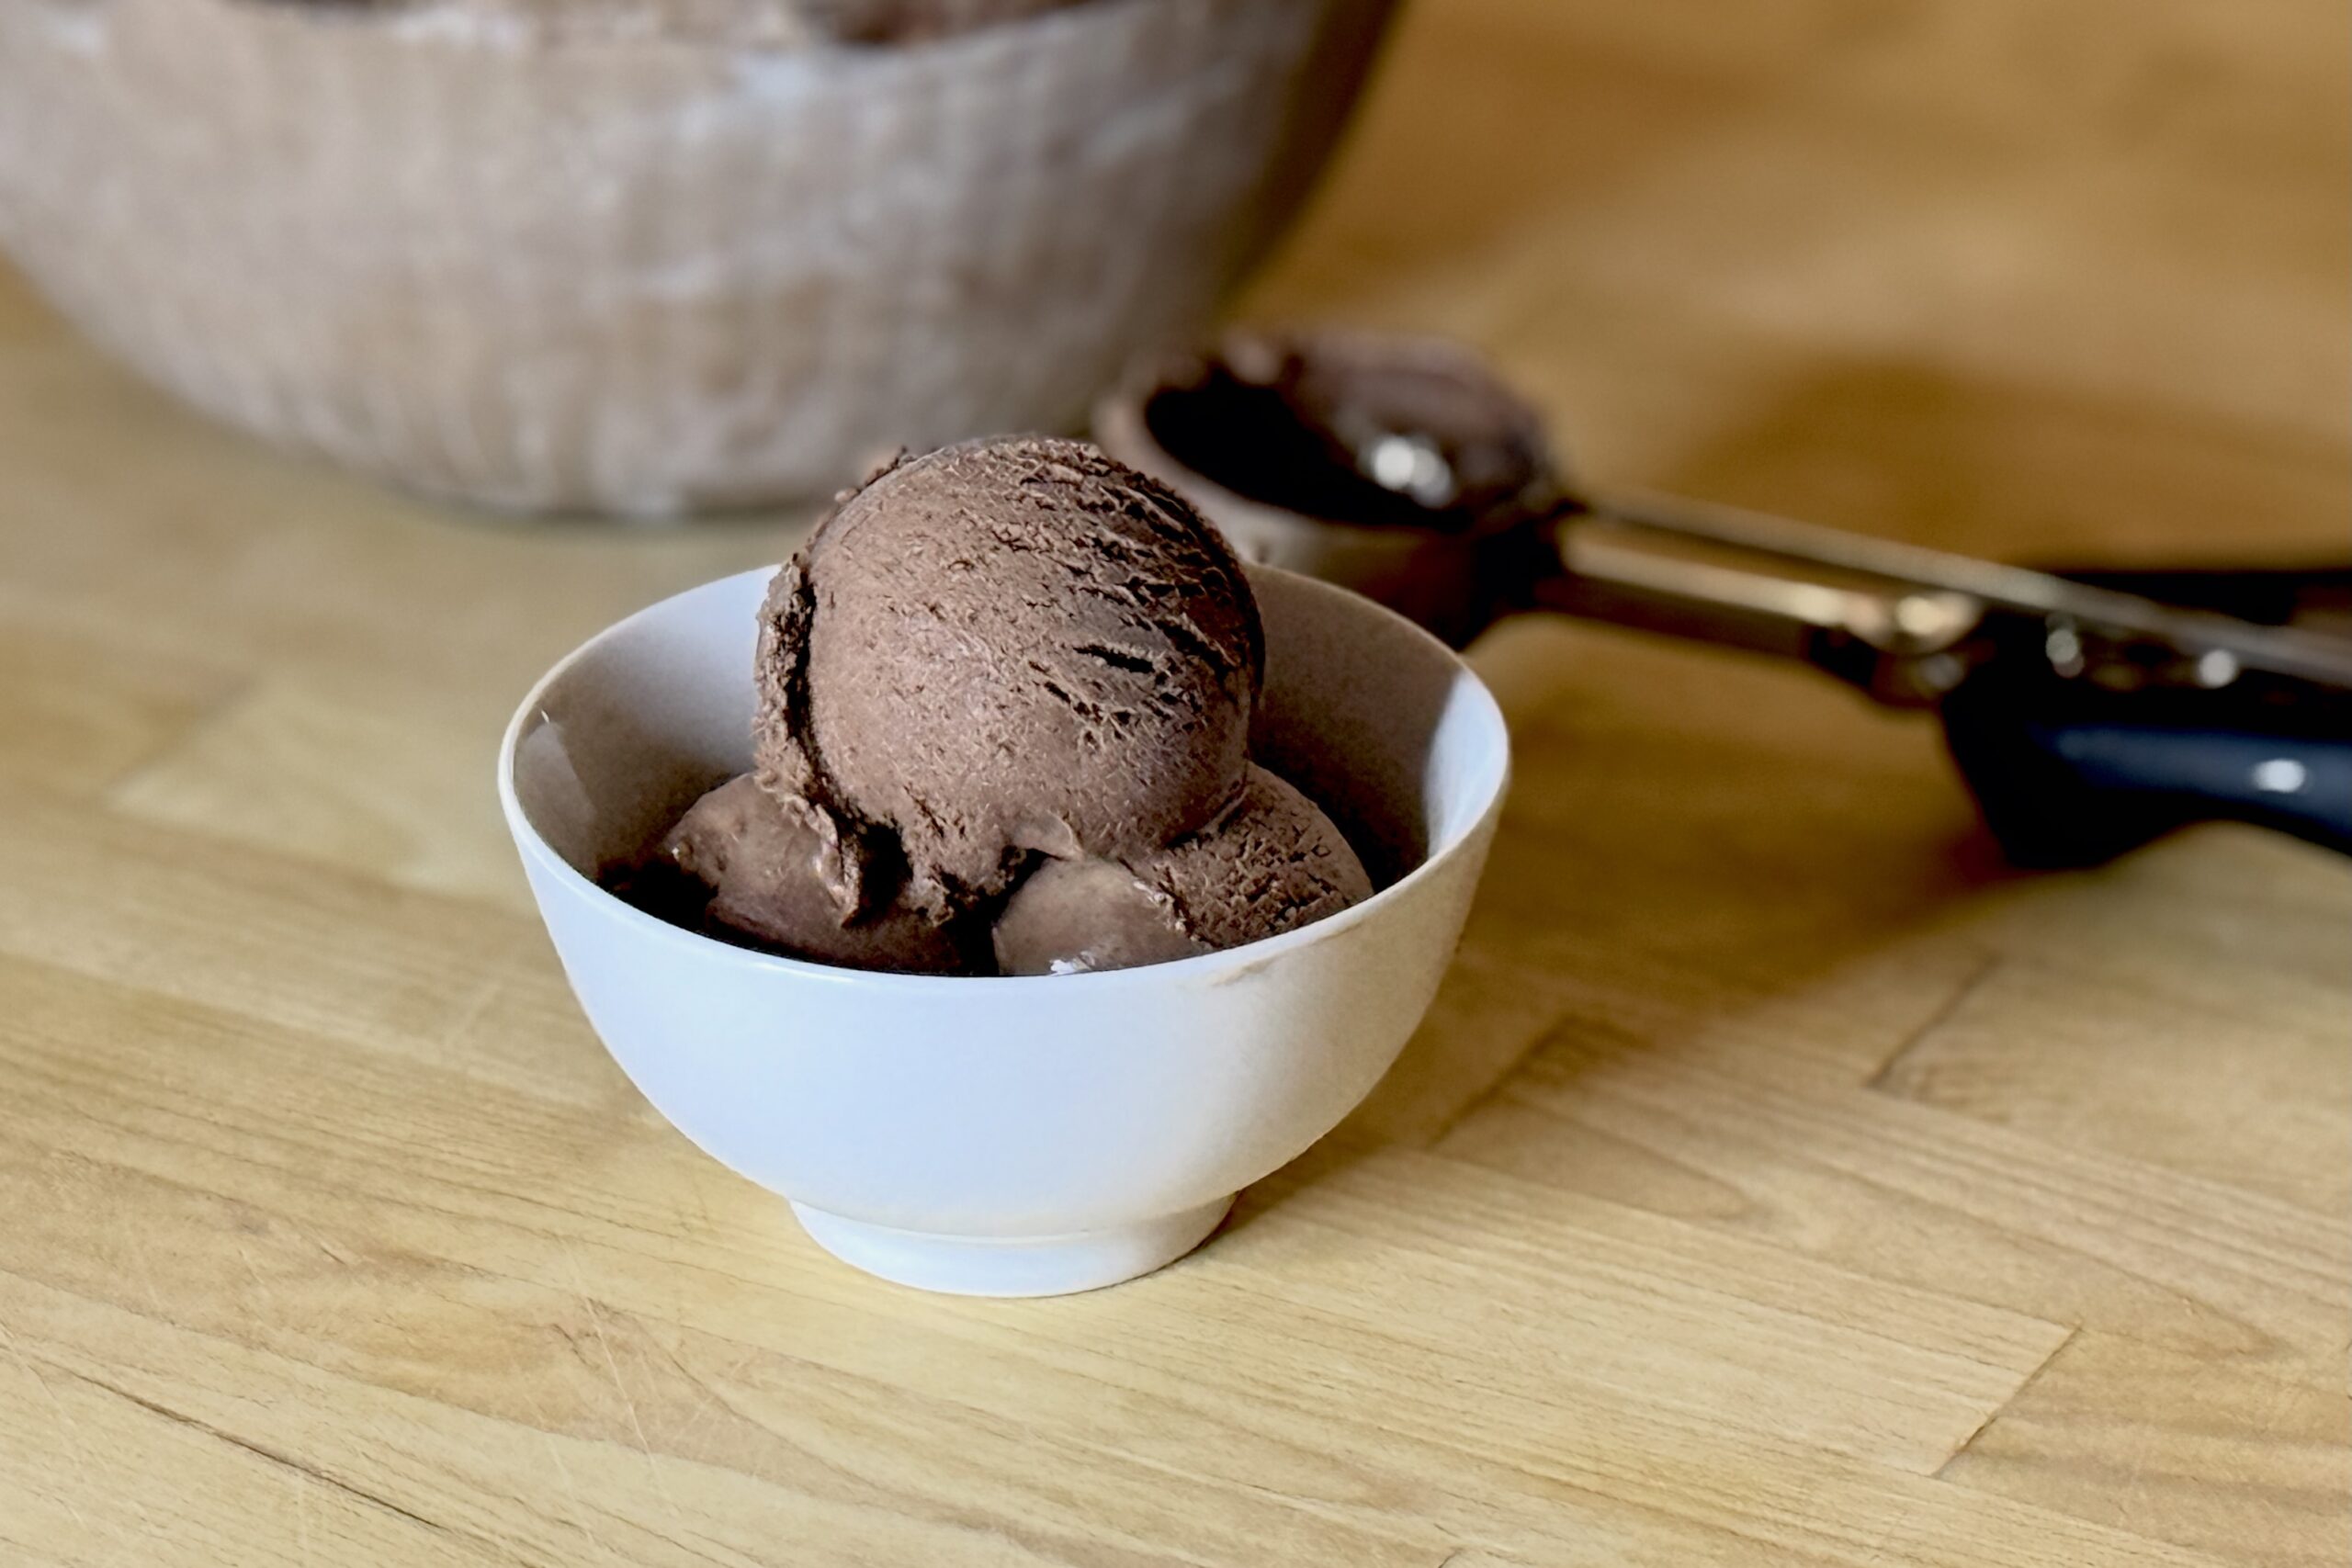
    Cinnamon Chocolate-Coconut Ice Cream

    After a Mexican meal, there’s something comforting about settling in with a cool scoop of ice cream. Chocolate and coconut make this one rich and creamy, while cinnamon adds a gentle warmth to the finish. The cinnamon gives the chocolate a little of the familiar character of Mexican hot chocolate. For a bolder dessert, the optional ghost pepper or habanero variation brings a gradual, fruity heat.


    Ingredients

    • 1 (13.66 oz / 403 ml) can full-fat coconut milk
    • 1 cup (240 g) whole milk
    • ⅔ cup (135 g) granulated sugar, divided
    • ¼ cup (22 g) unsweetened Dutch-process cocoa powder
    • 1 tsp ground cinnamon (about 2.5 g)
    • about ⅞ oz (25 g) dark chocolate, finely shaved or chopped
    • 4 large egg yolks
    • ¼ tsp table salt
    • ½ tsp vanilla bean paste

    Directions

    Prepare the Chocolate Base

    In a medium saucepan, whisk together the cocoa powder, cinnamon, and ⅓ cup (about 67 g) of the sugar. Whisk in about ½ cup (120 ml) of the coconut milk until smooth. Heat over medium-low heat, whisking occasionally, until the mixture reaches about 150°F (66°C). Add the dark chocolate and stir until completely melted. Stir in the remaining coconut milk, whole milk, and salt.

    Prepare the Custard

    In a separate bowl, whisk the egg yolks with the remaining sugar until smooth. Slowly whisk some of the warm chocolate mixture into the yolks to temper them. Gradually whisk the tempered yolks back into the saucepan. Cook over medium-low heat, stirring constantly, until the custard reaches 175°F (79°C). Do not let it boil. Remove from the heat and stir in the vanilla bean paste.

    Chill and Churn

    Cool the custard, then cover and refrigerate until thoroughly chilled, preferably at least 6 hours or overnight. Churn according to your ice cream maker’s instructions. Transfer to a freezer-safe container and freeze until firm enough to scoop.

    Yield: About 1 quart (950 ml).


    Notes

    Variations

    • Ghost Pepper or Habanero: For a spicy version, add 1 g fresh ghost pepper or 2 g fresh habanero to the chocolate base when it reaches about 150°F (66°C). Continue with the recipe. After tempering the yolks and returning them to the saucepan, heat gently until the pepper’s flavor and heat are noticeable. Strain out the pepper, return the custard to the saucepan, and cook to 175°F (79°C). The original chocolate-coconut recipe uses 1 g ghost pepper; 1.5 g gives a hotter result. Pepper heat varies, so remove it sooner for a milder flavor. Wear gloves when handling peppers.

    Serving Suggestions

    • Serve in small scoops after a Mexican meal.
    • Lightly dust each serving with ground cinnamon for extra aroma.

    Make-Ahead & Storage

    • The custard can be prepared up to 24 hours ahead and refrigerated before churning.
    • Store the finished ice cream in a tightly covered container in the freezer. Let it stand at room temperature for 5–10 minutes before scooping, if needed.
  • Patatje Verde — Mexican-Inspired Dutch Frites

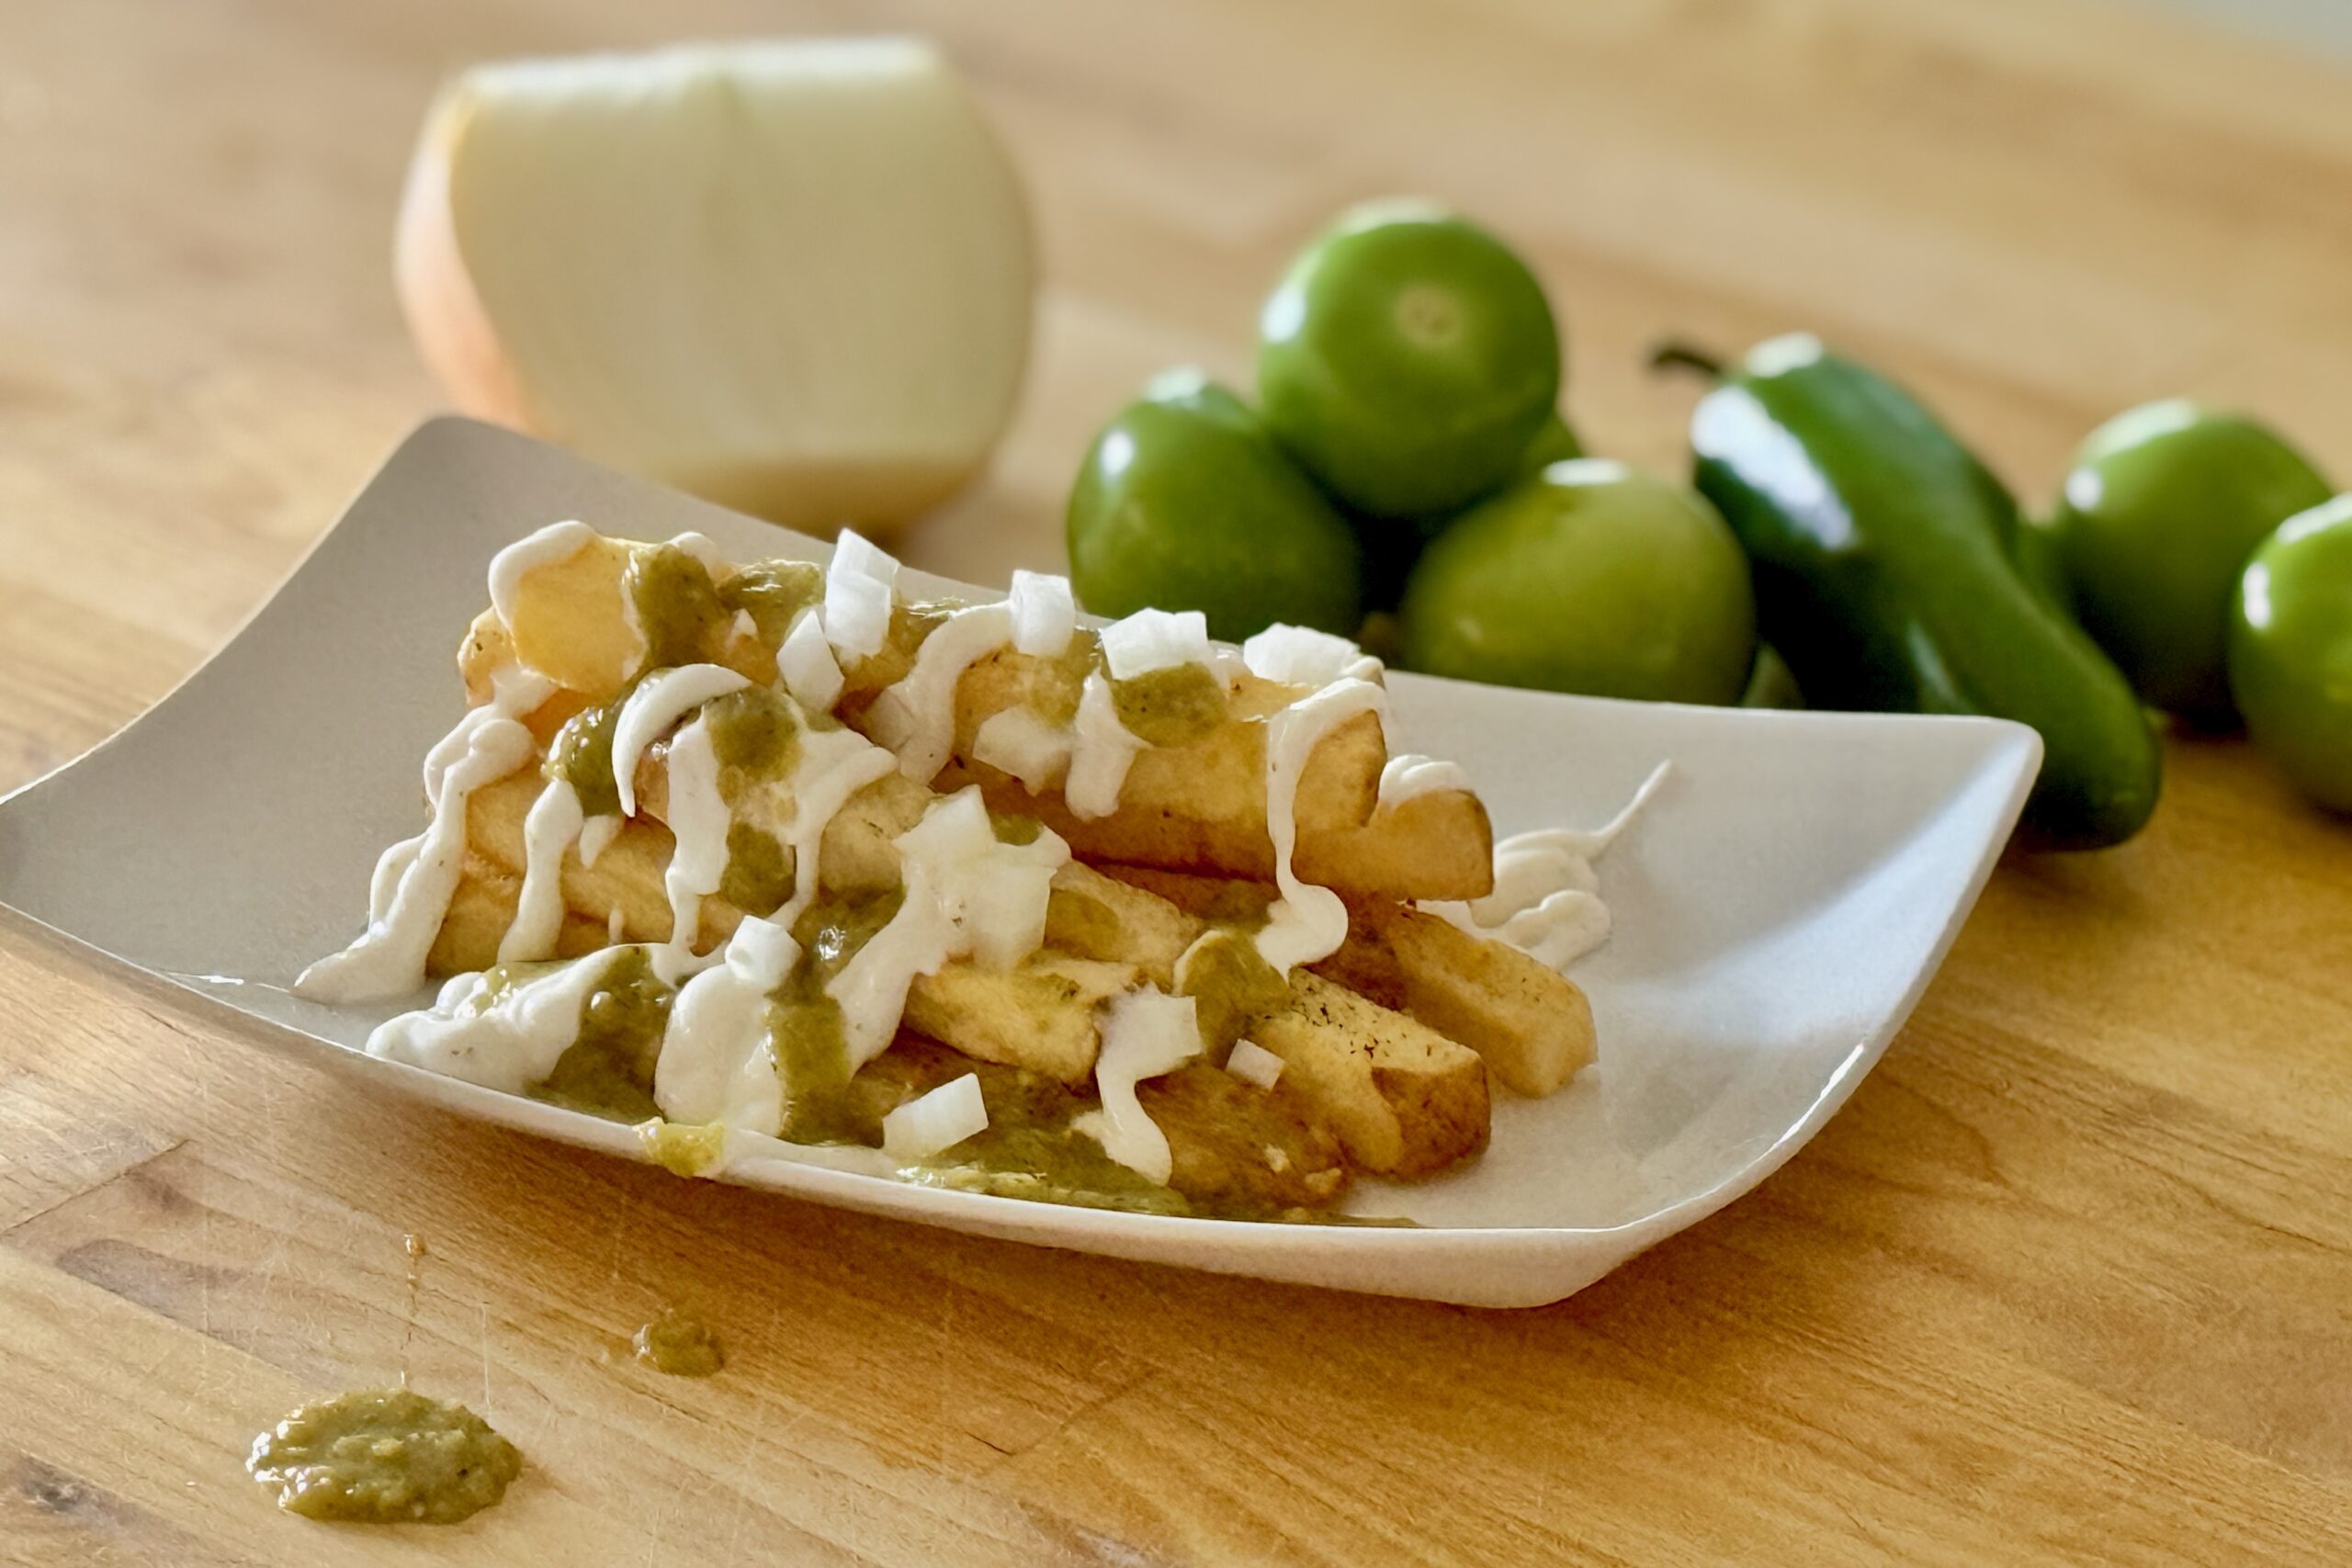
    Patatje Verde — Mexican-Inspired Dutch Frites

    Inspired by Dutch snackbar favorites patat speciaal and patatje oorlog, Patatje Verde gives golden, crisp frites a Mexican-inspired finish. Roasted Anaheim chiles and tomatillos make a bright, gently sweet and tangy green sauce, drizzled separately with cool, creamy frietssaus in equal amounts and finished with finely diced white onions. Enjoy these frites on their own or alongside Chile Verde Burritos.


    Ingredients

    Frites

    • 4 lb (1.8 kg) russet potatoes
    • Neutral frying oil, as needed
    • Table salt, to taste

    Roasted Green Chile Sauce

    • About 7 medium tomatillos (300 g), husked and rinsed
    • Roasted Anaheim chiles (240 g after peeling, stemming, and seeding)
    • 1 large jalapeño (60 g), stem removed, seeds and membranes intact
    • 4 cloves garlic, peeled
    • About ⅓ cup (50 g) white onion, cut into large wedges
    • 2 tbsp (30 ml) avocado oil
    • 2 tsp sugar
    • 1 tsp apple cider vinegar
    • 1 tsp ground cumin
    • ½ tsp Mexican oregano
    • ½ tsp table salt, plus more to taste
    • 4 tsp (20 ml) fresh lime juice
    • Water or chicken broth, only if needed

    Frietssaus and Toppings

    • Prepared House Mayonnaise, using the frietssaus variation, for drizzling
    • 1 cup (about 150 g) finely diced white onion
    • Finely chopped cilantro, optional

    Directions

    Roast the Anaheim Chiles

    Preheat the broiler to high. Broil the Anaheim chiles, turning as needed, until their skins blister and char. Place in a covered bowl for about 10 minutes, then peel, remove stems and seeds, and measure 240 g of prepared chiles.

    Prepare the Green Chile Sauce

    Arrange the tomatillos, jalapeño, and large onion wedges on a baking sheet. Tuck the garlic cloves beneath the onion wedges so the onion protects them from direct heat. Broil for 6–10 minutes, turning the tomatillos and jalapeño as needed, until softened with lightly charred spots. Check that the garlic is tender but not burned.

    Blend the roasted vegetables and garlic with the Anaheim chiles, sugar, apple cider vinegar, cumin, oregano, and salt until smooth. Add only enough water or chicken broth to help the blender turn, if necessary.

    Heat the avocado oil in a saucepan over medium heat. Carefully add the blended sauce, reduce heat to medium-low, and simmer, stirring occasionally, for about 8–12 minutes or until thick enough to cling to frites. Remove from heat and stir in the full 4 tsp (20 ml) lime juice. Taste and adjust salt if needed. Keep warm or let cool to room temperature.

    Prepare the Frites

    Cut the potatoes into frites about ⅜–½ inch (1 cm) thick. Soak in cold water for at least 20 minutes, then drain and dry thoroughly.

    Heat the frying oil to 275–300°F (135–150°C). Fry in batches for 4–6 minutes until tender but not browned. Remove and cool for 20–30 minutes.

    Increase the oil temperature to 375°F (190°C). Fry the potatoes again in batches for 3–5 minutes until golden and crisp. Drain briefly and season immediately with salt.

    Assemble the Patatje Verde

    Divide the hot frites among serving dishes. Drizzle the cool frietssaus and green chile sauce separately, in equal amounts, creating contrasting ribbons over the fries; do not blend the sauces together. Finish with finely diced raw white onion and optional cilantro. Serve immediately.

    Yield: Approximately 8–12 side servings.


    Notes

    Preparation

    • Anaheim chile weight: Measure 240 g after roasting, peeling, and removing stems and seeds. Buy extra fresh chiles to account for trimming losses.
    • Jalapeño: Use 60 g with the seeds and membranes intact for the tested-style heat level. Pepper heat varies.
    • Two distinct sauces: Use equal amounts of frietssaus and green chile sauce, drizzled individually over the frites rather than mixed ahead.
    • Texture: Reduce the green sauce until smooth and spoonable so it coats rather than soaks the crisp potatoes.

    Variations

    • Canned Green Chiles: Replace the 240 g roasted Anaheim chiles with two 4 oz (113 g each) cans of diced green chiles, lightly drained. Add directly to the blender; their flavor will be milder and less roasted.
    • More Heat: Substitute serrano chiles for some or all of the jalapeño, starting with less than 60 g and adjusting to taste because serranos are typically hotter.

    Serving Suggestions

    • Serve on their own as a Dutch-Mexican snackbar-style dish or alongside Chile Verde Burritos.
    • For burritos with frites inside, add a modest handful of freshly fried potatoes and use only a small amount of sauce to avoid a soggy filling.

    Make-Ahead & Storage

    • Refrigerate the green chile sauce in an airtight container for up to 3–4 days; reheat gently before serving if desired.
    • Keep frietssaus chilled according to the House Mayonnaise recipe.
    • Par-fry the potatoes earlier in the day, cool and refrigerate, then complete the second frying just before serving. Assemble only when ready to eat.
  • House Mayonnaise

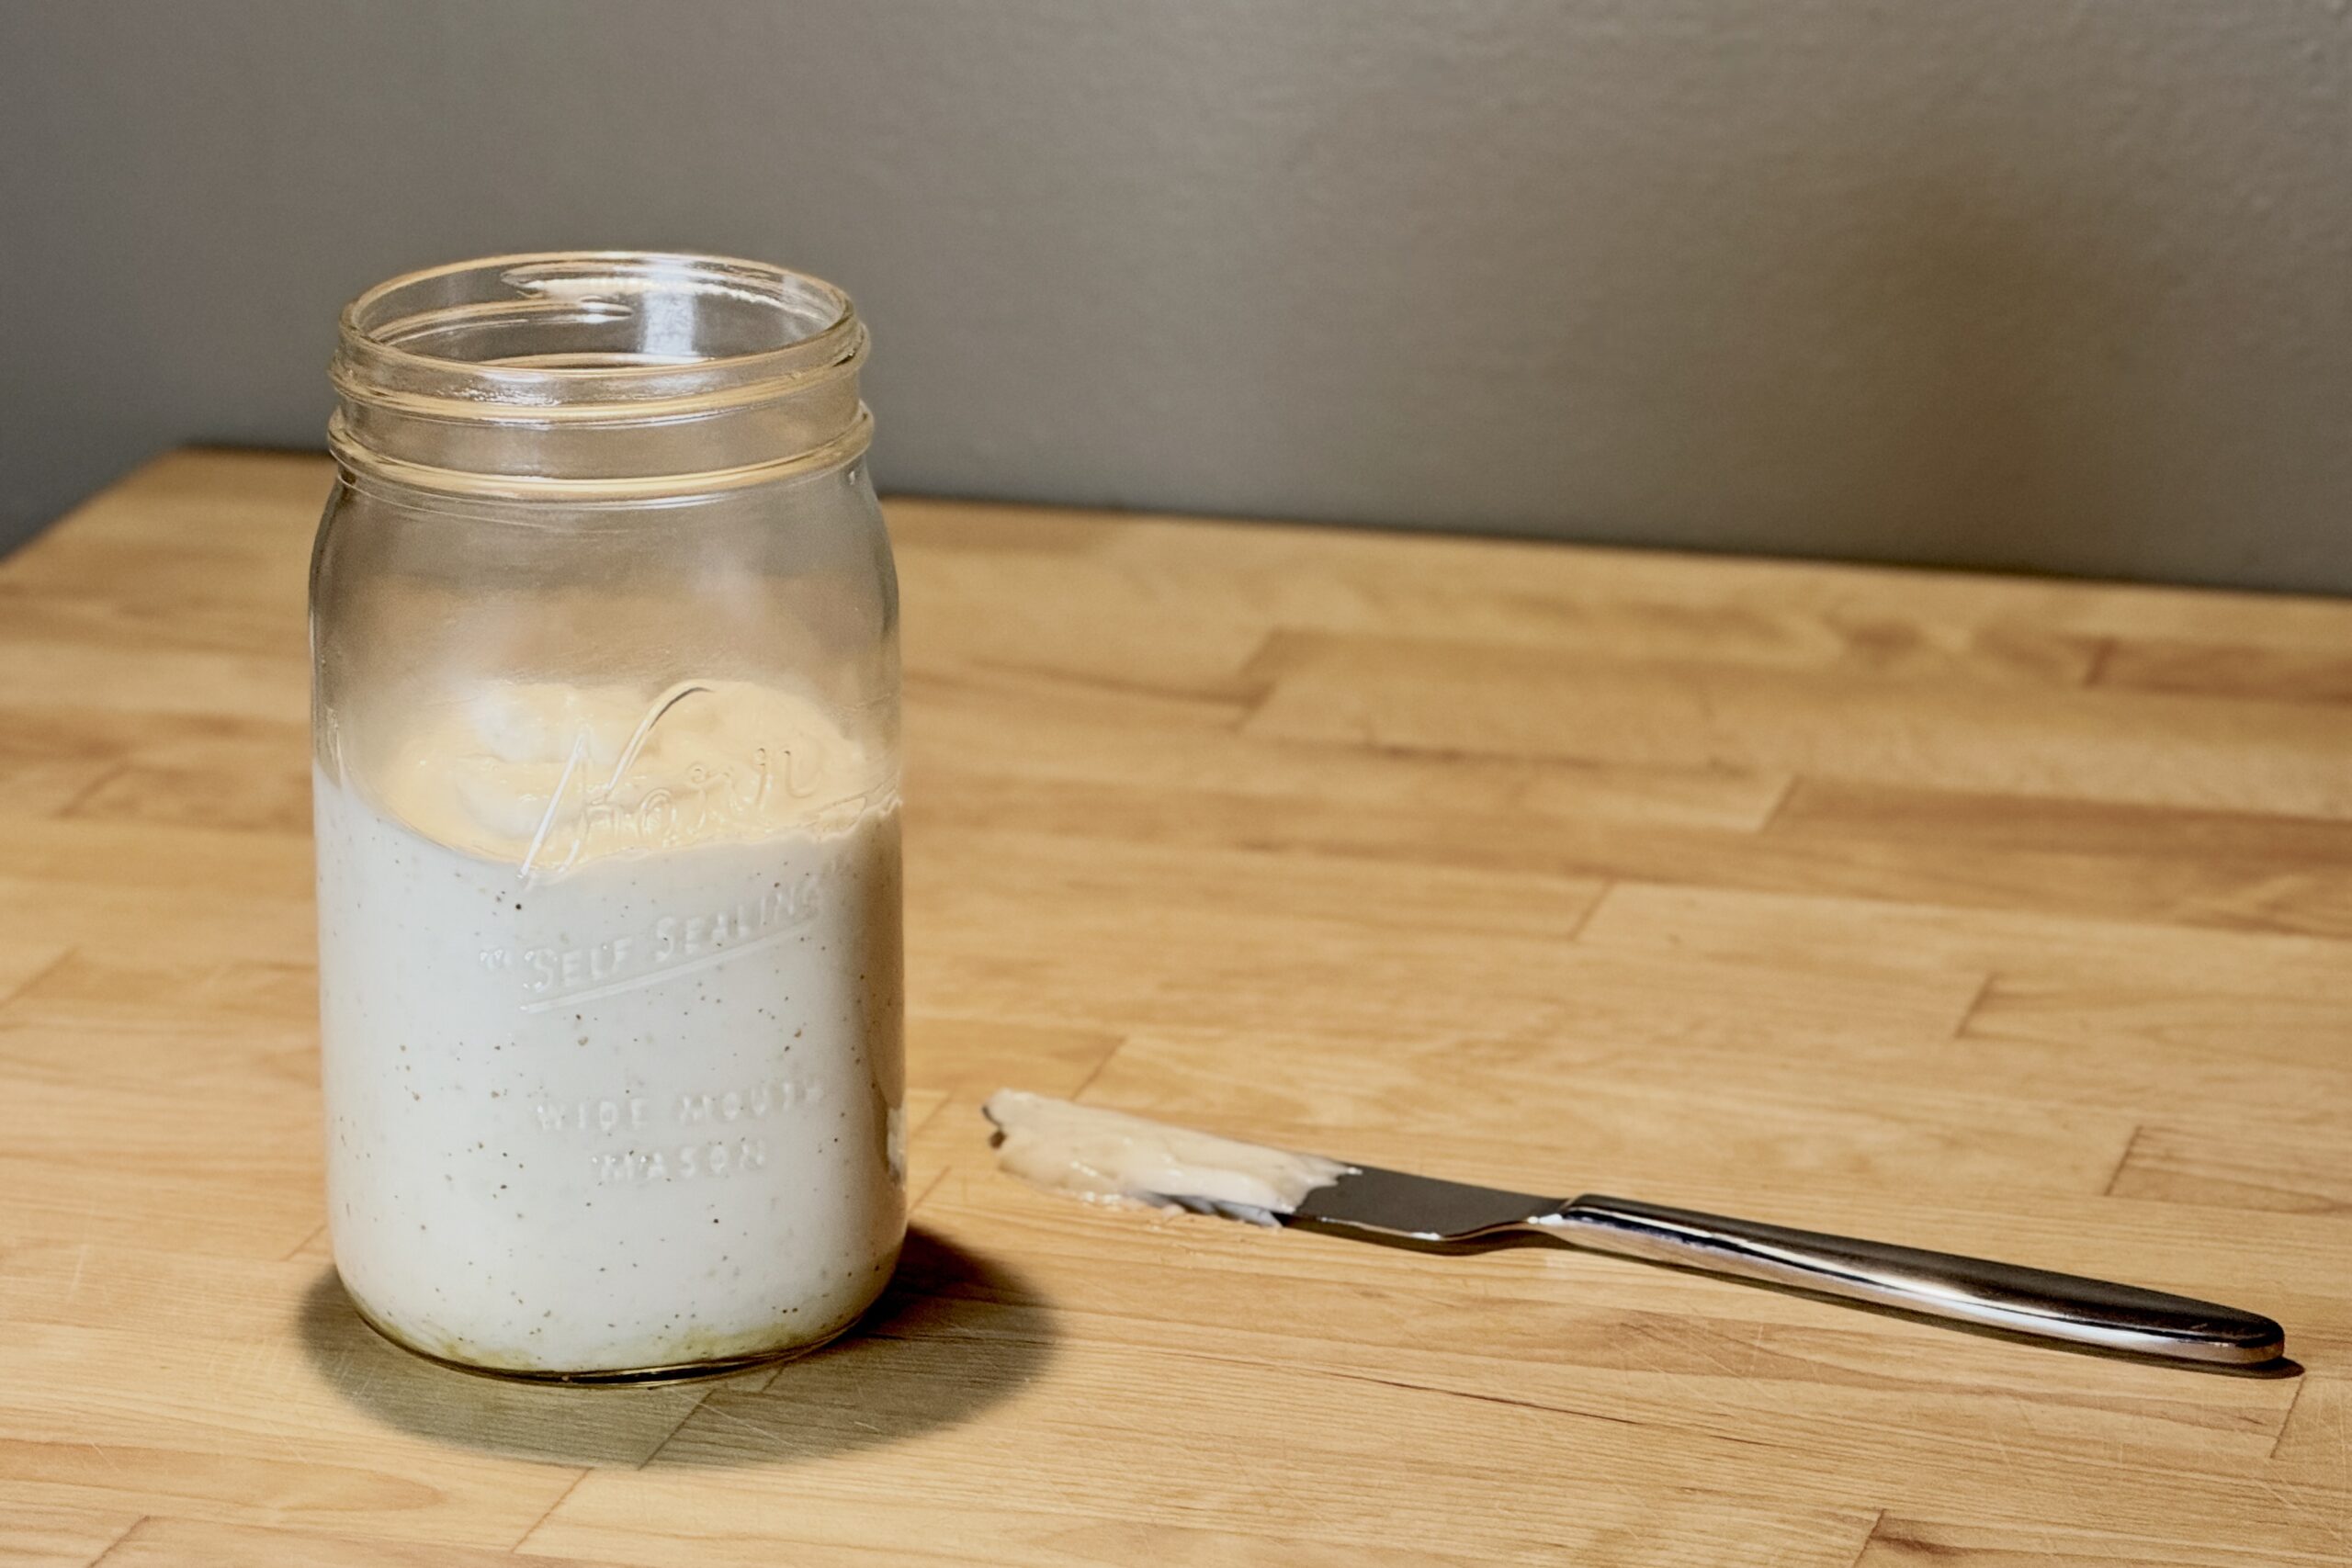
    House Mayonnaise

    This house mayonnaise brings together two styles we especially enjoy: the clean, tangy character of Southern-style mayonnaise and the smoother, slightly sweeter balance of Dutch mayonnaise. Made with a neutral oil and just enough mustard and vinegar to keep it lively, it works equally well with sandwiches, deviled eggs, salads, and hot, salty frites, with a few simple variations that take it in entirely different directions.


    Ingredients

    • 8 oz (225 g) soybean oil
    • 1 large egg yolk
    • 2 tsp white vinegar
    • 1 tsp apple cider vinegar
    • 2 tsp water
    • 1½ tsp Dijon mustard
    • 3 g sugar
    • 2 g table salt

    Directions

    Prepare the Mayonnaise

    Let the ingredients stand at room temperature for about 15 minutes so they are close to the same temperature.

    Add the egg yolk, white vinegar, apple cider vinegar, water, Dijon mustard, sugar, and salt to a wide-mouth pint mason jar. Pour the soybean oil over the top and allow the mixture to settle for a minute.

    Place the head of an immersion blender flat against the bottom of the jar so it covers the yolk. Blend without moving the blender until a thick, pale emulsion forms around the blade. Slowly lift and tilt the blender through the remaining oil until the mayonnaise is completely emulsified and smooth.

    Let the mayonnaise rest for a few minutes, then taste and adjust as needed. If it is thicker than desired, blend in cold water ½ tsp at a time until it reaches the preferred consistency.

    Yield: About 1 cup (240 ml).


    Notes

    Preparation

    • Eggs: Commercially pasteurized egg yolks are the simplest choice when raw-egg safety is a concern.
    • Sous Vide Egg Treatment: To reduce the risk associated with raw egg, place refrigerated eggs in a 135°F (57°C) sous vide bath for 75 minutes, then transfer immediately to an ice bath for 10 minutes. Refrigerate until needed. This home heat treatment reduces the risk of Salmonella but is not equivalent to commercially pasteurized eggs; commercially pasteurized eggs or yolks remain the safest choice.
    • Oil: Soybean oil keeps the flavor especially neutral. Refined canola oil can be substituted if preferred, although it may contribute a little more seed-like flavor.
    • Immersion blender: A container only slightly wider than the blender head helps the emulsion form quickly and reliably.

    Variations

    • Frietssaus: For a lighter, slightly sweeter sauce for frites, blend 1–2 tsp additional cold water and 1–2 g additional sugar into the finished mayonnaise. Adjust gradually so the sauce remains creamy rather than thin.
    • Southern-Style Mayonnaise: For a sharper, Duke’s-inspired mayonnaise, use 1 tbsp white vinegar, 2 tsp apple cider vinegar, and 1 tsp water in place of the base recipe’s vinegars and water. Omit the sugar and Dijon mustard, and add ⅛ tsp sweet paprika. Prepare as directed.
    • Garlic Mayonnaise: Blend 1 small garlic clove, finely grated or pressed, into 1 cup (240 ml) finished House Mayonnaise. Refrigerate for at least 30 minutes before serving to allow the garlic flavor to mellow and develop.
    • Curry Mayonnaise: Stir 1½ tsp mild curry powder into 1 cup (240 ml) finished House Mayonnaise. Refrigerate for at least 30 minutes before serving so the curry can hydrate and the flavors can meld. Add up to ½ tsp additional curry powder to taste for a more pronounced flavor.

    Serving Suggestions

    • Use as an all-purpose mayonnaise for sandwiches, burgers, deviled eggs, egg salad, potato salad, or as a base for other sauces.
    • Serve the Frietssaus variation with hot, well-salted frites.

    Make-Ahead & Storage

    • Refrigerate promptly in a clean, covered container and keep cold. Use within 3 days, and discard it sooner if there is any question about freshness.
  • Baklava Ice Cream

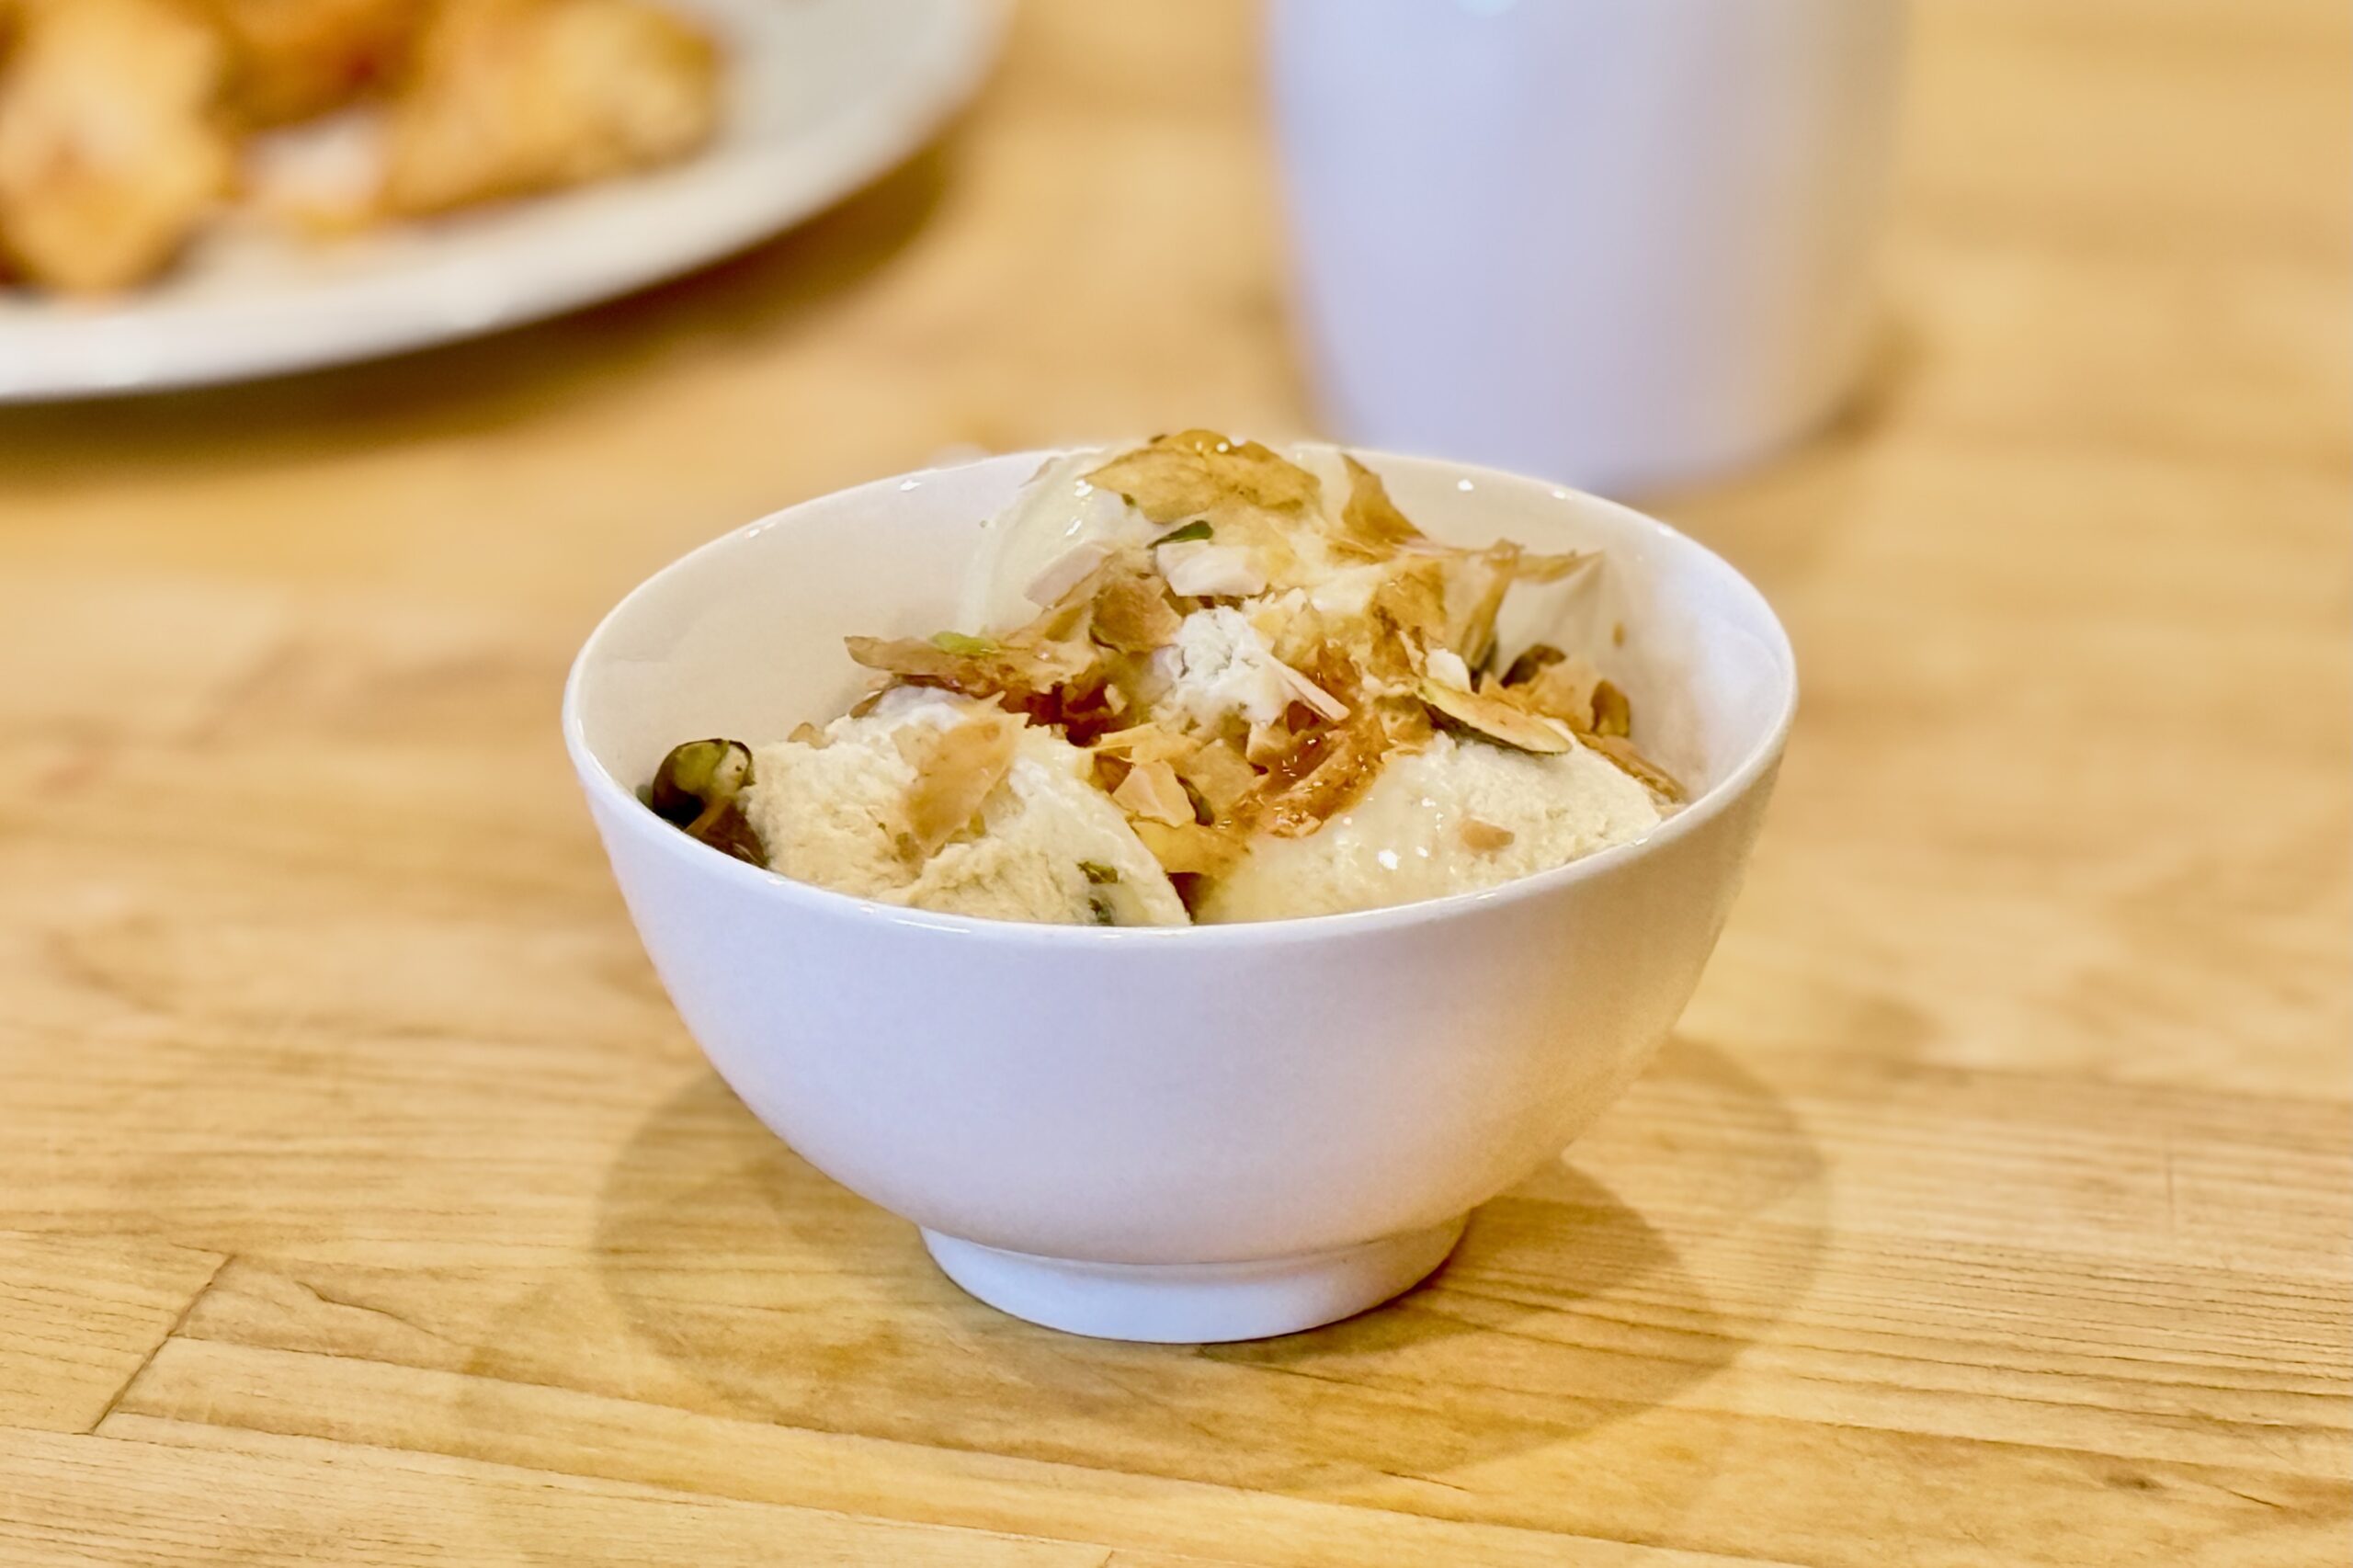
    Baklava Ice Cream

    This Greek-inspired ice cream brings together the flavors and textures we love in baklava: honey, cinnamon, toasted pistachios and almonds, and crisp buttered phyllo. Keeping the phyllo and warm honey-lemon sauce separate from the frozen ice cream preserves their texture and lets everyone finish a scoop to taste.


    Ingredients

    Ice Cream Base

    • 2 cups (480 g) whole milk
    • 1 cup (240 g) heavy cream
    • 6 tbsp (75 g) granulated sugar, divided
    • 1½ tbsp (32 g) honey
    • 5 large egg yolks
    • ¼ tsp (about 0.6 g) ground cinnamon
    • ⅛ tsp table salt

    Toasted Nuts

    • ⅓ cup (45 g) shelled pistachios
    • ⅓ cup (30 g) sliced or slivered almonds

    Crisp Phyllo Clusters

    • 4 sheets phyllo dough, thawed
    • 2½ tbsp (35 g) unsalted butter, melted
    • 1 tbsp (13 g) granulated sugar
    • ¼ tsp ground cinnamon
    • pinch of table salt

    Warm Honey-Lemon Sauce

    • 2 tbsp (42 g) honey
    • 1½ tbsp (19 g) granulated sugar
    • 2 tbsp (30 g) water
    • 1 tsp (5 g) fresh lemon juice
    • 1 wide strip lemon zest
    • pinch of table salt

    Directions

    Prepare the Ice Cream Base

    Combine the milk, cream, honey, cinnamon, salt, and 3 tbsp (about 38 g) of the sugar in a saucepan. Heat until steaming but not boiling.

    Whisk the egg yolks with the remaining 3 tbsp (about 38 g) sugar. Gradually whisk some of the hot dairy mixture into the yolks, then return everything to the saucepan.

    Cook over medium-low heat, stirring constantly, until the custard reaches 170–175°F (77–79°C) and lightly coats a spatula. Strain into a clean container, chill over an ice bath, cover, and refrigerate for at least 6 hours or preferably overnight.

    Prepare the Nuts

    Heat the oven to 325°F (163°C). Toast the pistachios and almonds for 7–9 minutes, until fragrant and lightly colored. Cool completely, then chop into small pieces. Reserve a little for garnishing and refrigerate or freeze the remainder until needed.

    Prepare the Phyllo Clusters

    Heat the oven to 350°F (177°C) and line a baking sheet with parchment paper. Combine the sugar, cinnamon, and salt.

    Brush the phyllo sheets lightly with melted butter, sprinkling each with a little cinnamon sugar. Tear or loosely crumple the sheets into bite-size clusters on the prepared pan.

    Bake for 9–13 minutes, until deeply golden and crisp. Cool completely and store airtight at room temperature.

    Churn and Finish

    Churn the cold custard according to your ice cream maker’s instructions, using a medium-firm ice cream setting if available. Add the chopped pistachios and almonds during the final minute of churning.

    Transfer to a freezer container and freeze for at least 6 hours, preferably overnight.

    Prepare the Honey-Lemon Sauce

    Combine the honey, sugar, water, lemon juice, zest, and salt in a small saucepan. Simmer gently for 2–3 minutes, then remove the lemon zest.

    Keep the sauce lightly warm, approximately 100–110°F (38–43°C).

    Serve

    Let the ice cream temper at room temperature for 8–10 minutes. Place a scoop in each serving dish and drizzle with 1–2 tsp of the warm honey-lemon sauce. Top with crisp phyllo clusters and the reserved toasted nuts, then serve immediately.

    Yield: About 1 quart (950 ml), 8 servings.


    Notes

    Preparation

    • Keep the phyllo clusters separate from the frozen ice cream and add them immediately before serving so they remain crisp.
    • The honey-lemon sauce should be lightly warm rather than hot so it does not melt the ice cream too quickly.

    Variations

    • Plain Honey: Omit the honey-lemon sauce and finish each scoop with a very light drizzle of plain honey.
    • Ghost Pepper Hot Honey: Drizzle ¼–½ tsp room-temperature Ghost Pepper Hot Honey over each scoop. The cold ice cream initially softens the heat, which builds as the ice cream melts.
    • No Sauce: Serve the ice cream with only the crisp phyllo and toasted nuts.

    Serving Suggestions

    • Drizzle each scoop with 1–2 tsp of warm honey-lemon sauce, then finish with crisp phyllo clusters and the reserved toasted nuts.

    Make-Ahead & Storage

    • The ice cream base can be prepared and refrigerated up to 24 hours before churning.
    • Store the finished ice cream in a tightly covered container in the freezer. Let it temper at room temperature for 8–10 minutes before scooping.
    • Store the cooled phyllo clusters in an airtight container at room temperature for up to 2 days.
    • Refrigerate the honey-lemon sauce in an airtight container for up to 1 week and rewarm it gently before serving.
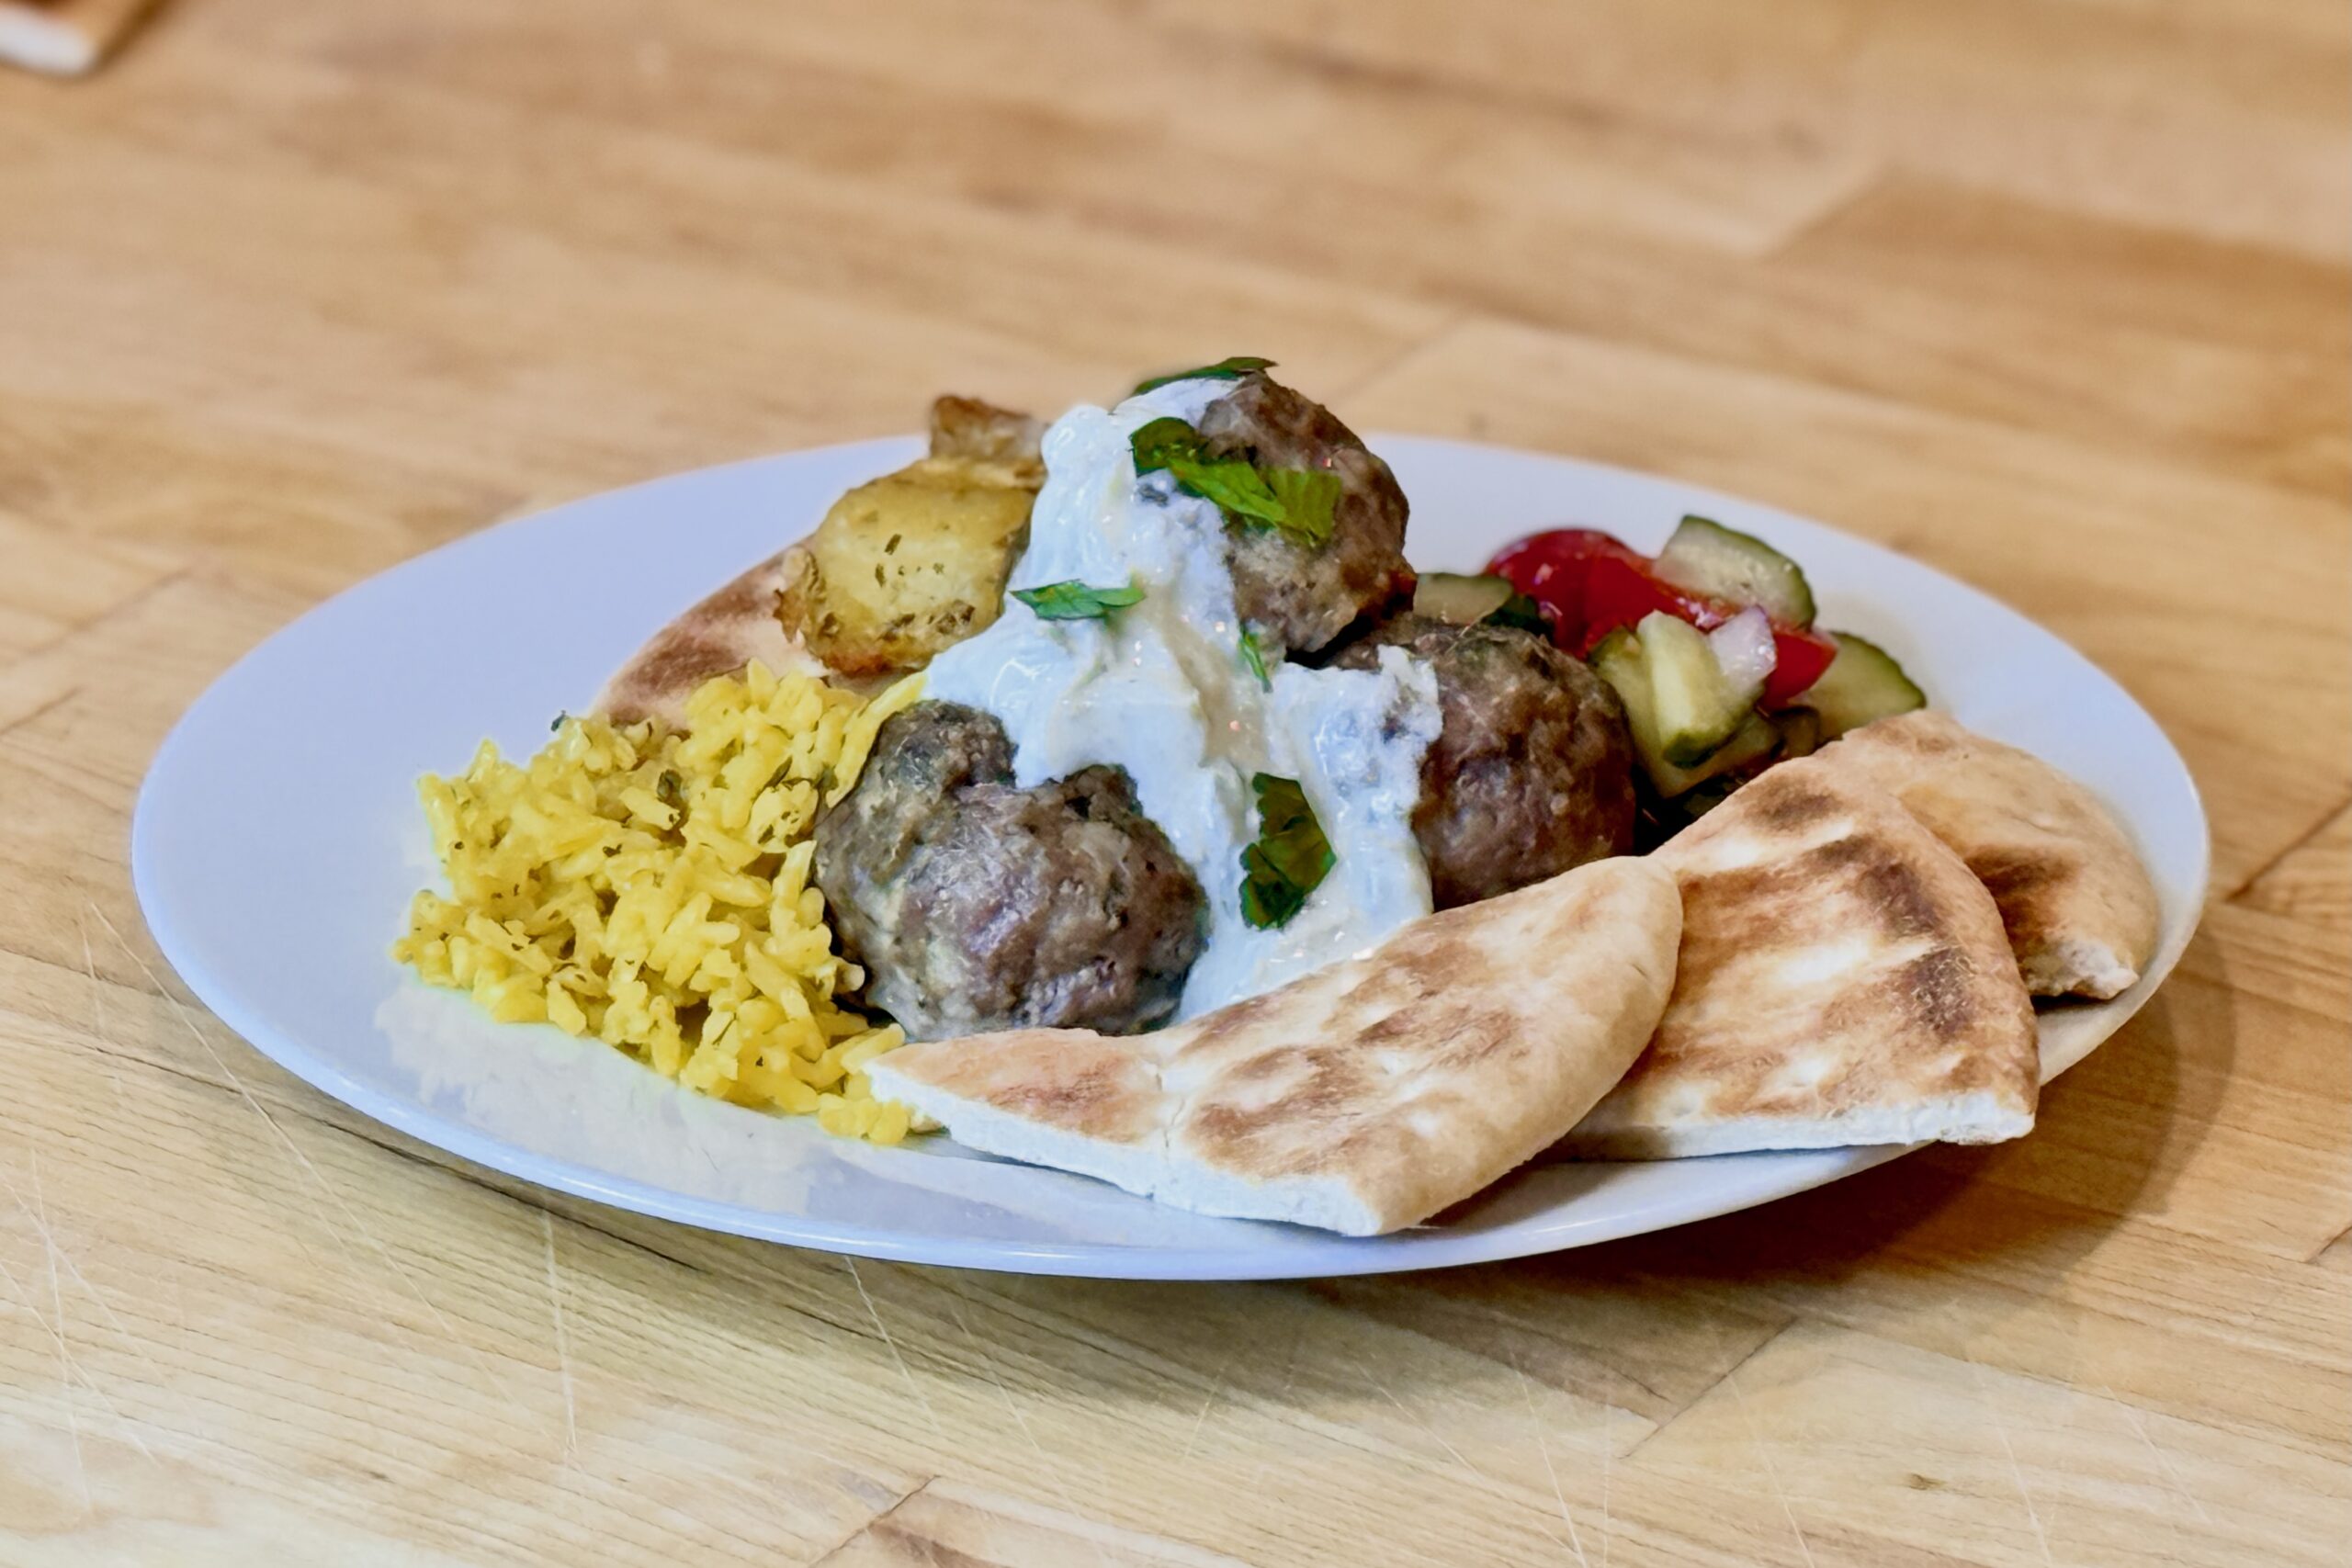
  • Keftedes (Κεφτέδες) — Greek Meatballs with Tzatziki

    Keftedes (Κεφτέδες) — Greek Meatballs with Tzatziki

    Our family loves Greek food, especially when there’s a generous bowl of tzatziki on the table. These baked Greek meatballs, known as keftedes (κεφτέδες), combine beef and pork with just enough lamb to add savory depth without taking over. Baked until browned and served with warm flatbread triangles and plenty of cool tzatziki, they’re tender, herbaceous, and made for sharing.


    Ingredients

    Tzatziki

    • 1 English cucumber, diced or grated
    • 1½ cups (about 360 g) plain Greek yogurt
    • 2 tbsp (30 ml) lemon juice
    • 2 tbsp (30 ml) extra virgin olive oil
    • 1 tsp garlic, minced
    • ½ tsp table salt
    • Freshly ground black pepper, to taste

    Meatballs

    • 1½ lb (680 g) ground beef, preferably 85% lean
    • ¼ lb (113 g) ground pork
    • ¼ lb (113 g) ground lamb
    • ⅓ cup (about 40 g) plain breadcrumbs
    • ⅓ cup (80 g) whole milk
    • 1 tbsp dried parsley
    • 1 large egg
    • ½ medium yellow onion (about 100 g), finely grated
    • 1 tbsp (about 10 g) garlic, minced
    • 1 tbsp fresh mint, finely chopped
    • Zest of 1 lemon
    • 1 tbsp dried oregano, rubbed between your palms before adding
    • ½ tsp ground cumin
    • 2 tsp table salt
    • ½ tsp freshly ground black pepper
    • 1 tbsp (15 ml) extra virgin olive oil

    For Serving

    • Flatbread, warmed and cut into triangles
    • Lemon wedges

    Directions

    Make the Tzatziki

    If the cucumber seems especially juicy, squeeze it lightly in a clean kitchen towel to remove excess moisture.

    Stir together the cucumber, Greek yogurt, lemon juice, olive oil, garlic, salt, and black pepper.

    Cover and refrigerate for at least 30 minutes before serving to allow the flavors to meld.

    Prepare the Meatball Mixture

    Preheat the oven to 425°F (218°C). Lightly oil a rimmed baking sheet.

    Combine the breadcrumbs, milk, and dried parsley in a large mixing bowl. Let stand for 5 minutes, until the milk is absorbed and the parsley has softened.

    Add the egg, grated onion, garlic, mint, lemon zest, oregano, cumin, salt, black pepper, and olive oil. Mix until evenly combined.

    Add the ground beef, pork, and lamb. Mix gently but thoroughly, stopping as soon as the meats and seasonings are evenly distributed.

    Shape and Bake

    Cook a small test patty in a skillet and adjust the seasoning if needed.

    Divide the mixture into approximately 24 portions of about 1¾ oz (50 g) each. Gently roll into meatballs and arrange on the prepared baking sheet with a little space between them.

    Bake for 16 to 20 minutes, until browned and the centers reach 160°F (71°C).

    For deeper browning, broil for 1 to 2 minutes at the end, watching closely. Rest for 5 minutes before serving.

    Warm the Flatbread and Serve

    Warm the flatbread on a hot skillet, grill, or griddle until soft and lightly toasted, then cut into triangles.

    Serve the meatballs on a platter with warm flatbread triangles, lemon wedges, and plenty of tzatziki.

    Yield: Approximately 24 meatballs (8 servings).


    Notes

    Preparation

    • The ¼ lb (113 g) of lamb accounts for about 12½% of the meat blend. It adds background richness without making the meatballs taste strongly of lamb.
    • Mix gently and avoid tightly compressing the meatballs so they remain tender.

    Variations

    • Adjust the ½ lb (about 227 g) combined pork and lamb to taste, using all pork, all lamb, or any blend in between. The equal amounts of ¼ lb (113 g) each keep the lamb flavor relatively mild.
    • Replace the dried parsley with ¼ cup finely chopped fresh parsley for a brighter herb flavor.
    • Panko breadcrumbs may be substituted for the plain breadcrumbs; use 1½ oz (45 g).
    • For traditionally fried keftedes, heat about ¼ inch (6 mm) olive oil in a heavy skillet over medium heat. Fry the meatballs in batches, turning occasionally, until deeply browned and the centers reach 160°F (71°C), about 8 to 10 minutes. Drain briefly on paper towels before serving.
    • For a more traditional herb note in the tzatziki, add 1 to 2 tsp finely chopped fresh dill or mint.

    Serving Suggestions

    Make-Ahead & Storage

    • The tzatziki can be made 1 day ahead and refrigerated in a covered container.
    • The meatballs can be mixed, shaped, covered, and refrigerated up to 24 hours before baking.
    • Cooked meatballs can be refrigerated in an airtight container for up to 3 days. Reheat covered at 325°F (163°C), then uncover briefly to restore the browned exterior.
    • For longer storage, freeze the shaped uncooked meatballs on a tray, then transfer them to a freezer-safe container once solid. Freeze for up to 3 months and thaw overnight in the refrigerator before baking.
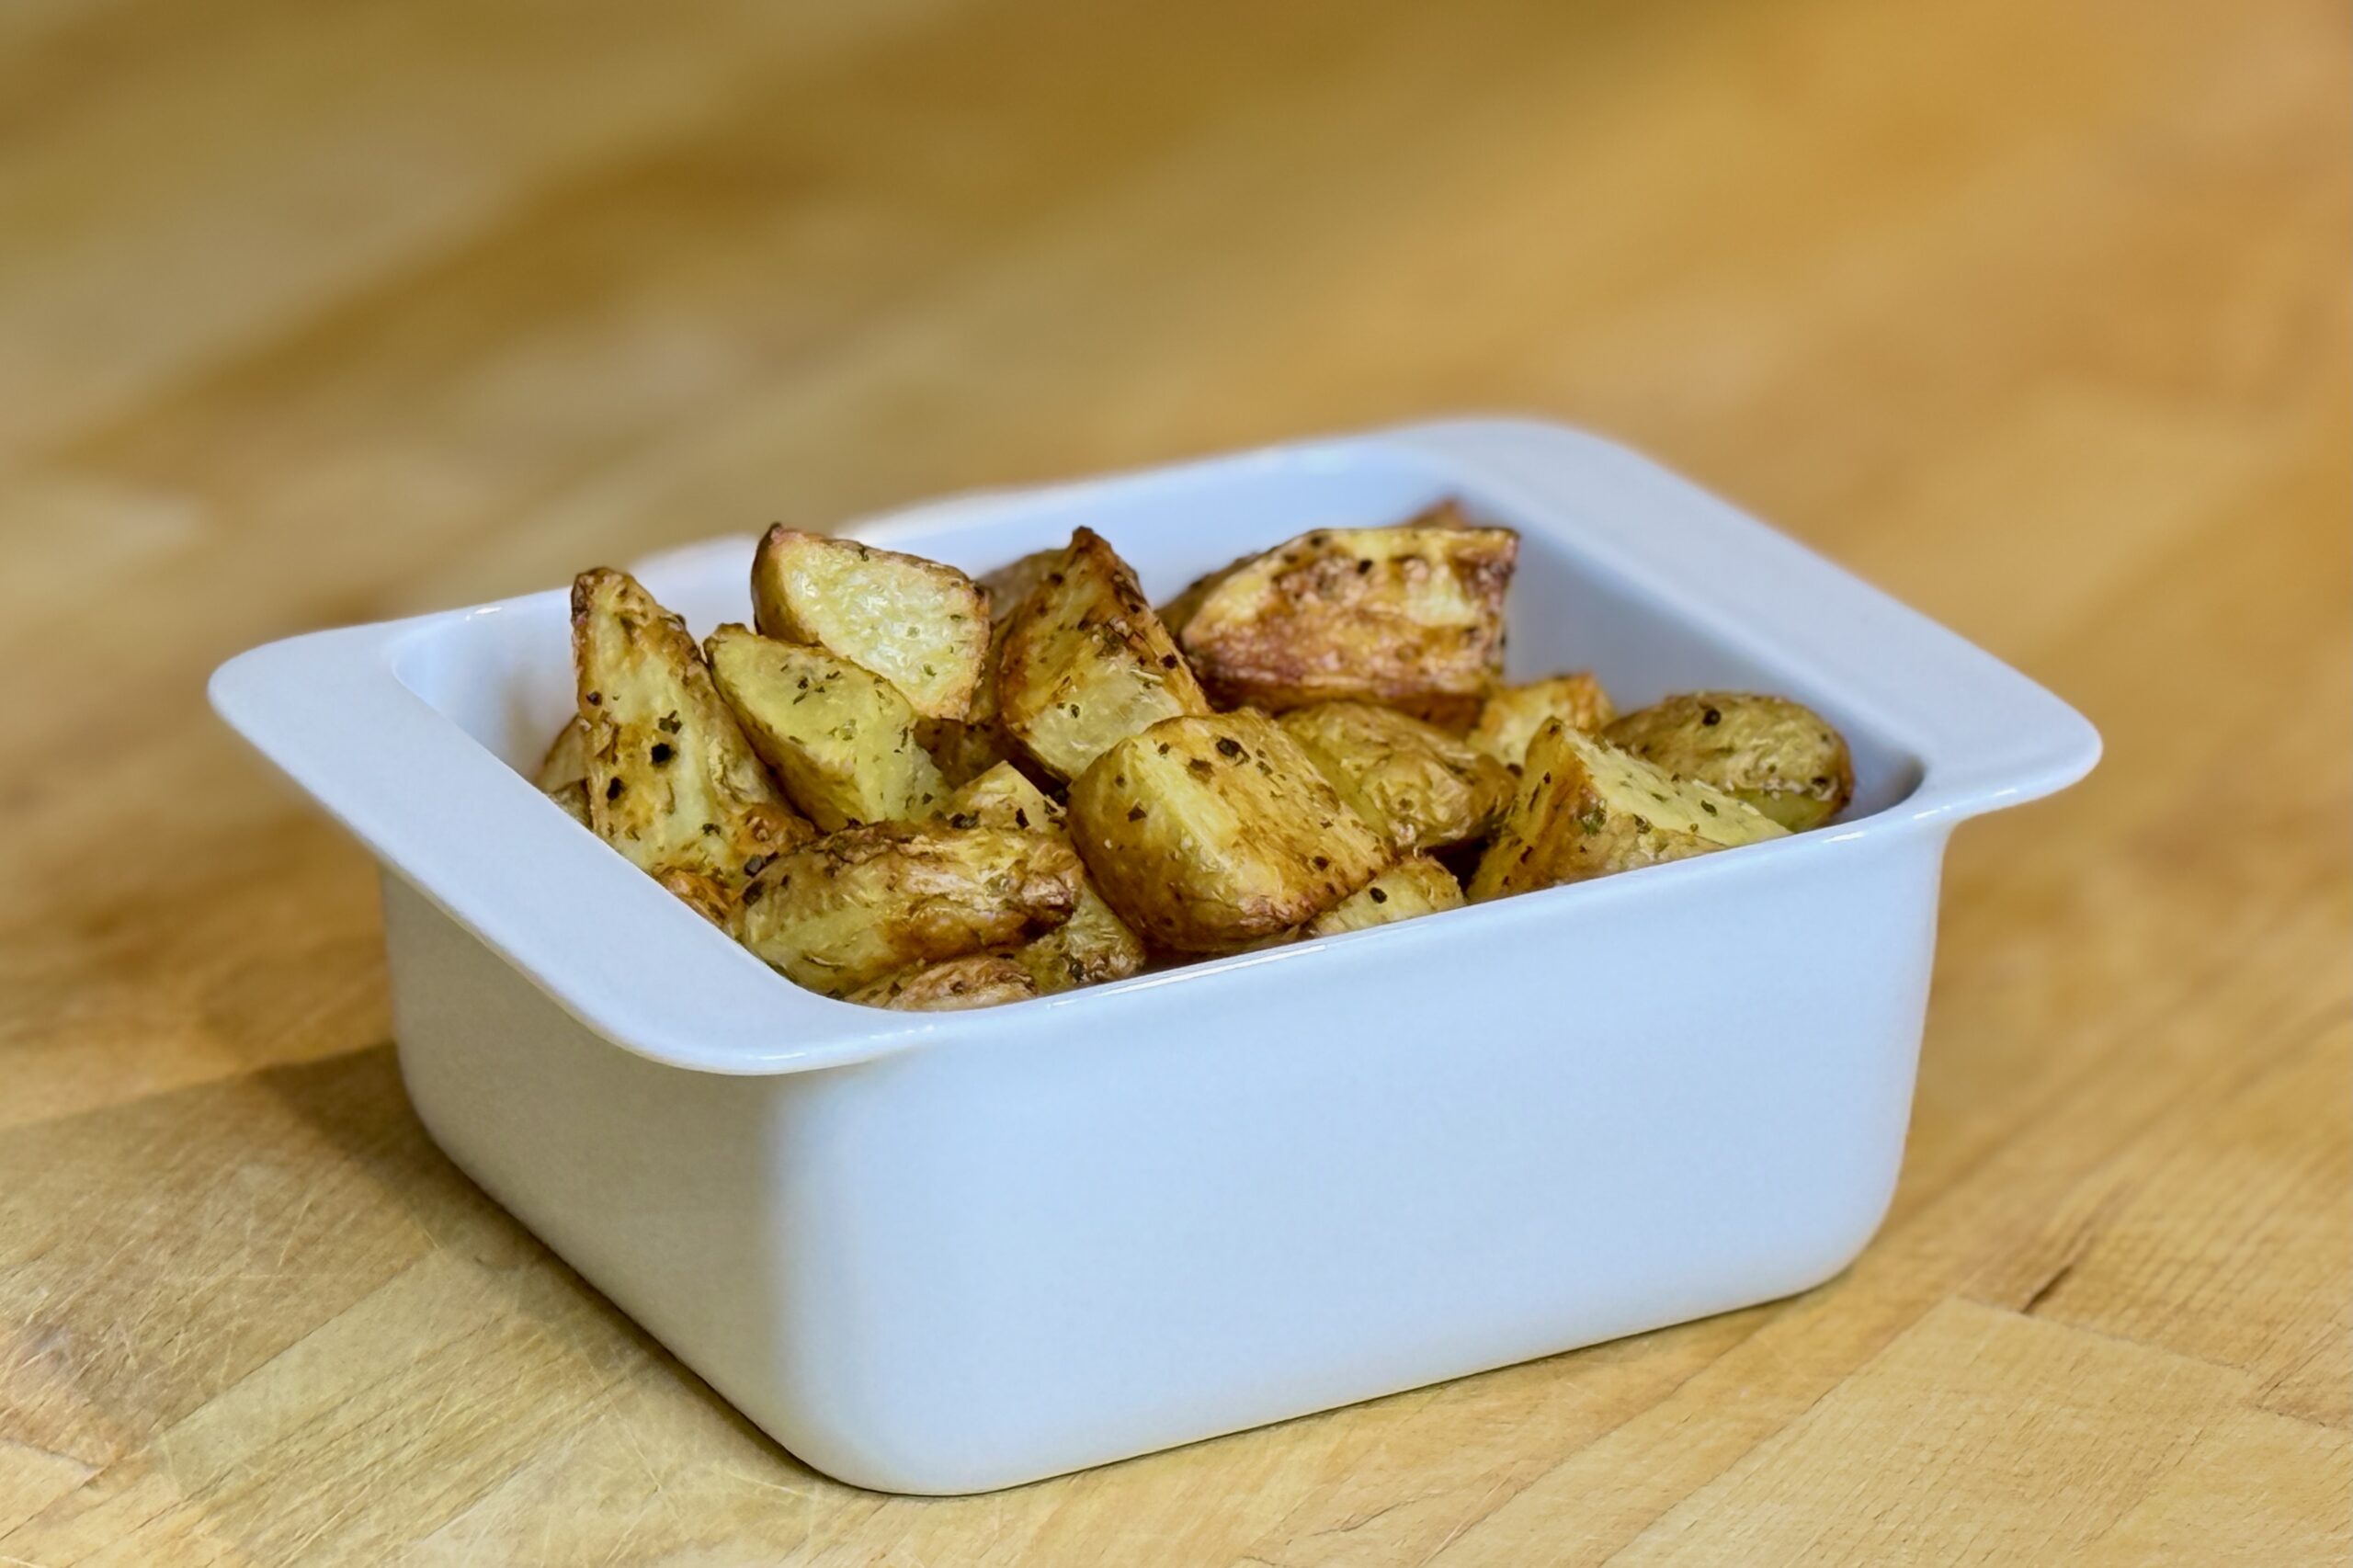
  • Rosemary & Oregano Oven-Roasted Potatoes

    Rosemary & Oregano Oven-Roasted Potatoes

    These rosemary and oregano potatoes are a simple side that works with almost anything on the dinner table. A preheated baking sheet gives them crisp, deeply golden edges while the centers stay creamy, and garlic and olive oil round out the savory Mediterranean flavor. They are especially good alongside roasted or grilled meats and vegetables.


    Ingredients

    • 3 lb (1.36 kg) Yukon Gold potatoes, cut into 1½-inch (4 cm) pieces
    • ¼ cup (55 g) extra-virgin olive oil
    • 1 tbsp finely chopped fresh rosemary
    • 2 tsp dried oregano
    • 1½ tsp table salt
    • ½ tsp freshly ground black pepper
    • 1 tbsp (15 g) minced garlic

    Directions

    Season the Potatoes

    Heat the oven to 425°F (218°C). Place a large rimmed baking sheet in the oven while it heats.

    Combine the potatoes with the olive oil, rosemary, oregano, salt, and black pepper. Toss until evenly coated.

    Roast

    Carefully spread the potatoes on the hot baking sheet in a single layer, placing as many cut sides against the pan as possible. Roast for 25 minutes without disturbing them.

    Turn the potatoes, add the minced garlic, and toss briefly to distribute it. Continue roasting for 15–20 minutes, until the potatoes are deeply golden, crisp on the edges, and tender in the center.

    Taste and adjust the salt before serving hot.

    Yield: Approximately 8 servings.


    Notes

    Preparation

    • Adding the garlic after the first 25 minutes keeps it from burning during the long roast.
    • Do not crowd the pan. Divide the potatoes between two preheated baking sheets if needed.

    Variations

    • Substitute 1 tsp dried rosemary, crushed between your fingers, for the fresh rosemary.

    Serving Suggestions

    • Serve with roasted or grilled chicken, beef, lamb, fish, or vegetables.
    • These potatoes pair especially well with our Keftedes (Greek Meatballs) with Tzatziki when another part of the meal already provides plenty of lemon.

    Make-Ahead & Storage

    • The potatoes are best served immediately while the edges are crisp.
    • Refrigerate leftovers in an airtight container for up to 3 days. Reheat at 425°F (218°C) for 10–15 minutes, until hot and crisp.
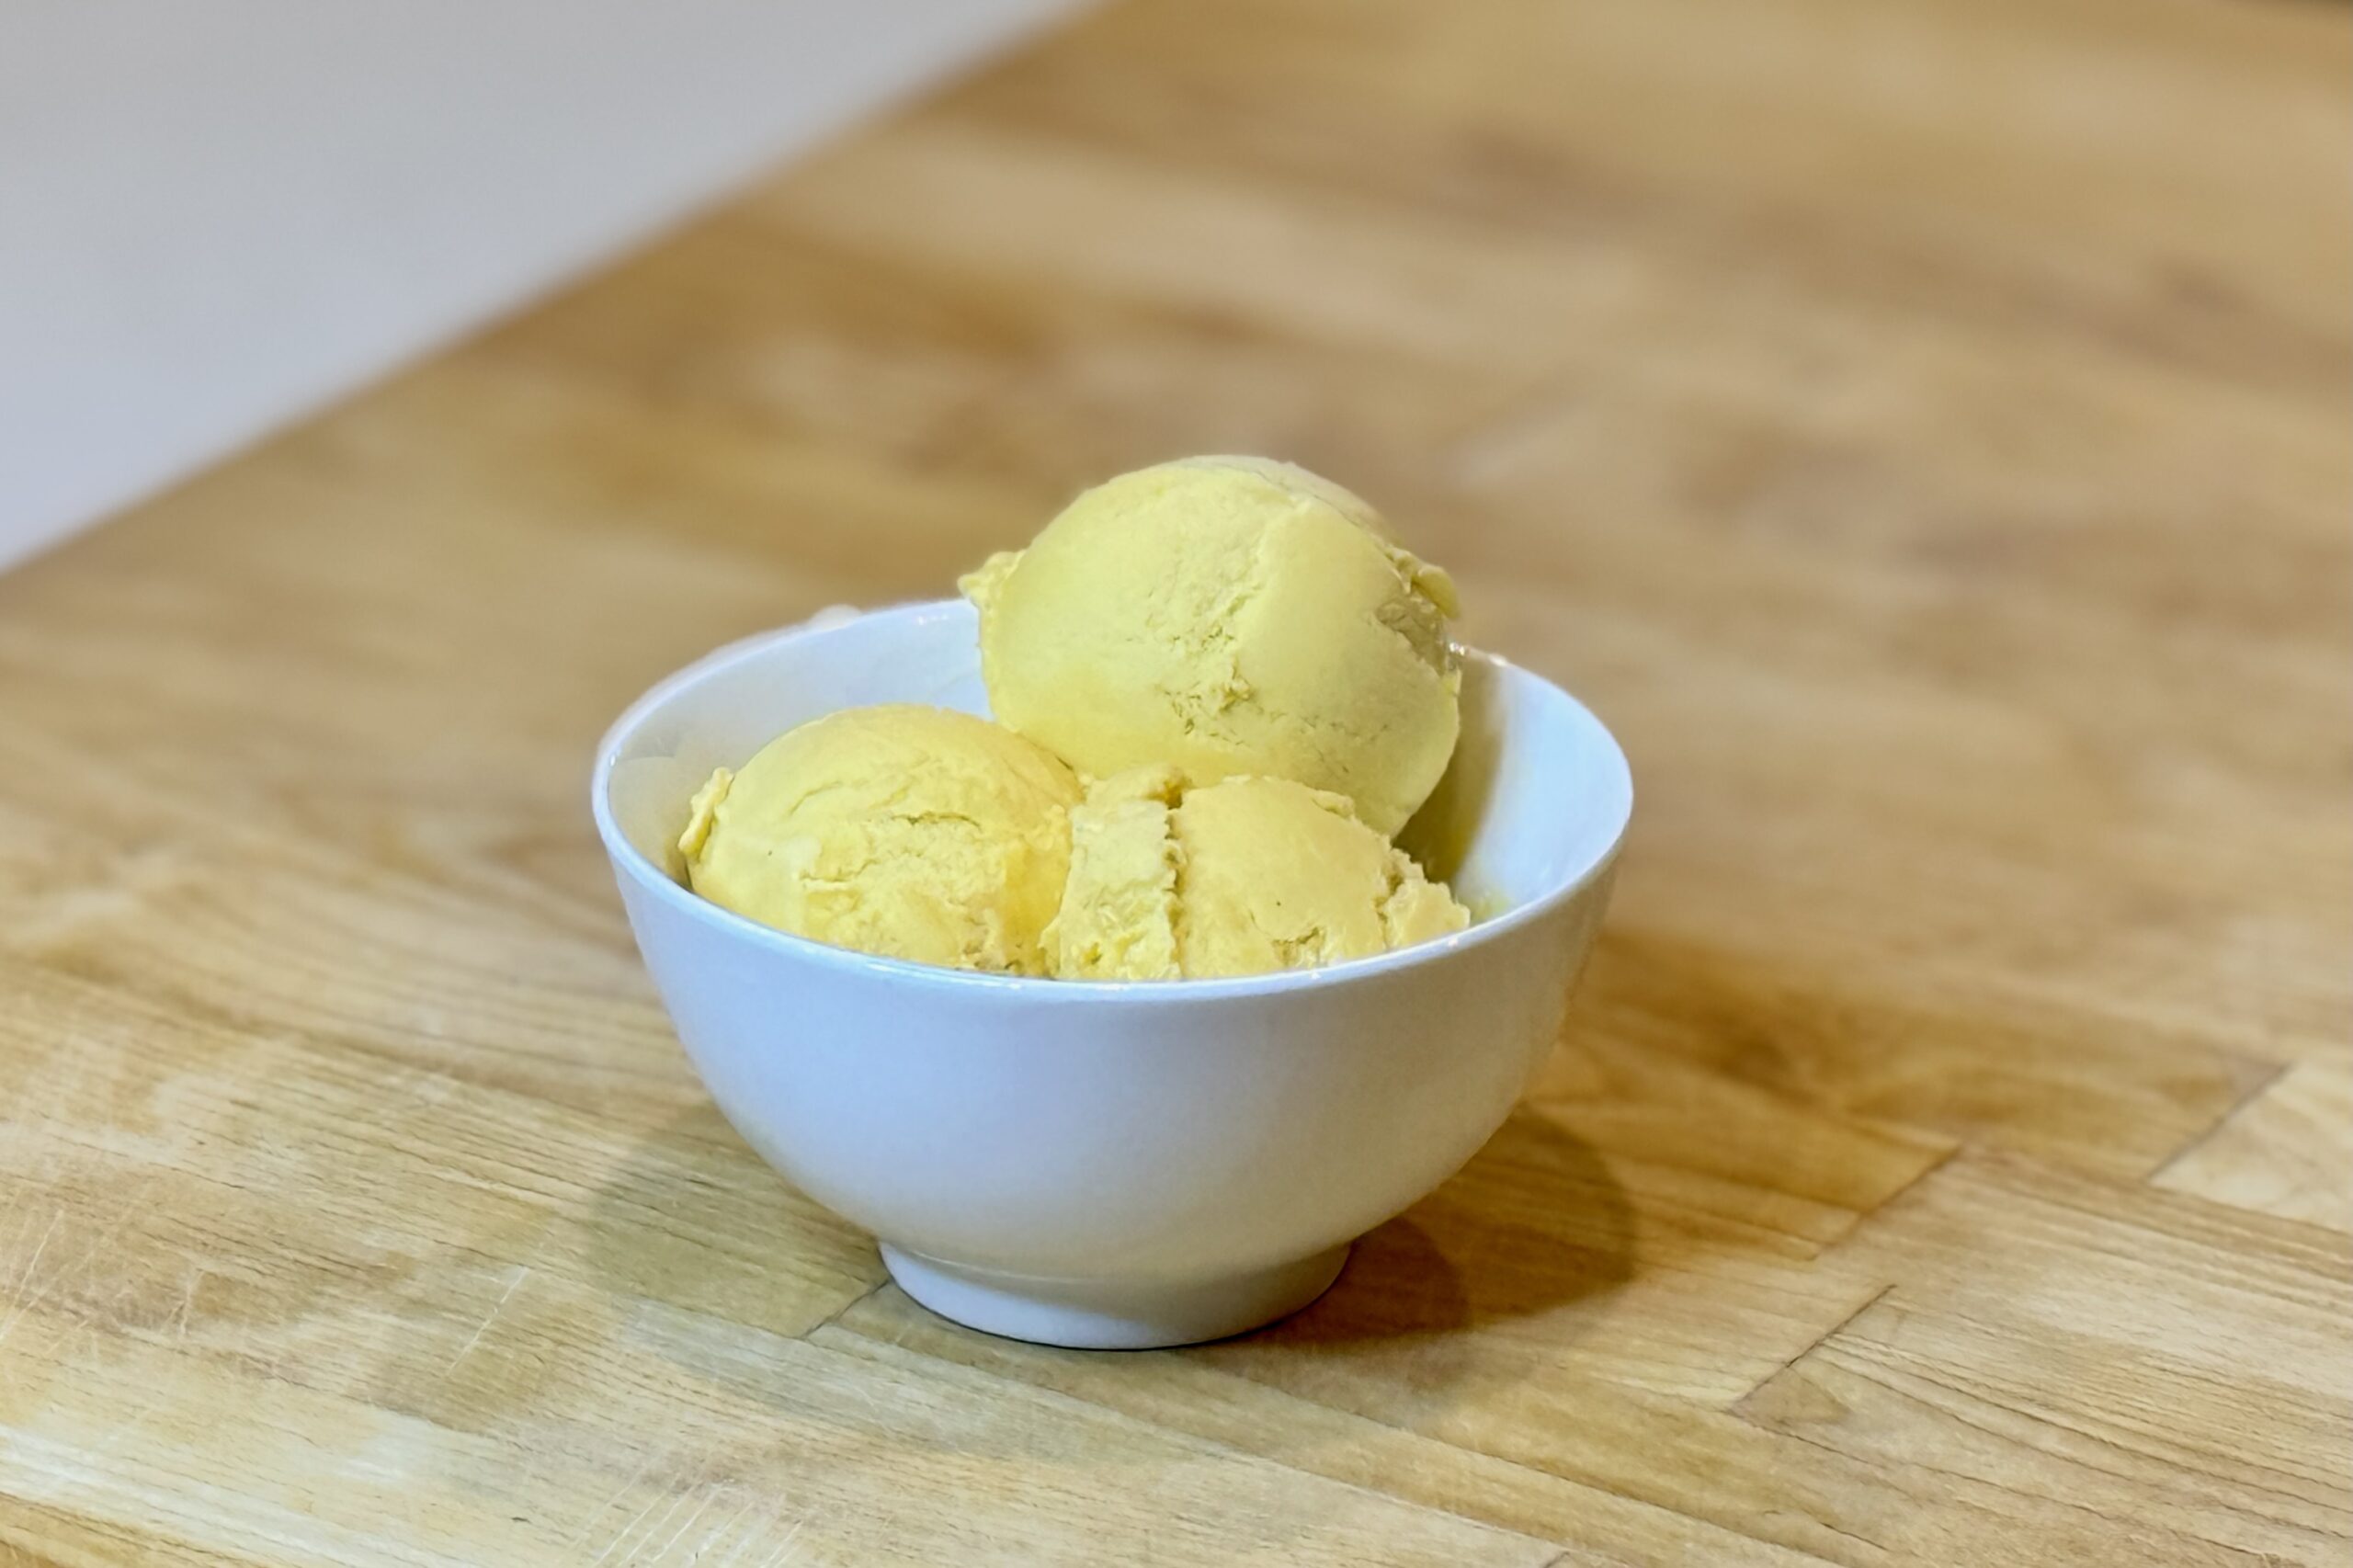
  • Mango Ghost Pepper Ice Cream

    Mango Ghost Pepper Ice Cream

    This Mango Ghost Pepper Ice Cream brings together the lush sweetness of Alphonso mango, the rich coconut flavor of coconut milk, and the surprising fruitiness of fresh ghost pepper. The first spoonful is cool, creamy, and tropical; then the pepper’s warmth gradually builds in the background. Using just ½ g of ghost pepper keeps those fruit flavors at the center while giving the finished ice cream a distinct but balanced heat.


    Ingredients

    • 1 can (13.66 oz / 403 ml) full-fat coconut milk
    • 1 cup (240 g) Alphonso mango pulp
    • ½ cup (120 g) whole milk
    • ½ cup plus 2 tbsp (125 g) granulated sugar, divided
    • 4 large egg yolks
    • ¼ tsp table salt
    • ½ g fresh ghost pepper
    • ½ tsp vanilla bean paste
    • 1 tbsp (15 g) fresh lime juice

    Directions

    Prepare the Custard

    Combine the coconut milk, whole milk, ½ cup (100 g) of the sugar, and salt in a medium saucepan. Warm over medium-low heat, stirring frequently. When the mixture reaches about 150°F (66°C), add the ghost pepper.

    In a medium bowl, whisk the egg yolks with the remaining 2 tbsp (25 g) sugar until smooth. Slowly whisk about 1 cup (240 ml) of the hot milk mixture into the yolks. Pour the tempered yolk mixture back into the saucepan, whisking constantly.

    Remove and discard the ghost pepper. Cook the custard over medium-low heat, stirring constantly, until it reaches 175°F (79°C). Do not let it boil.

    Finish the Base

    Remove the custard from the heat and let it cool. Blend in the mango pulp and vanilla bean paste until smooth.

    Chill and Churn

    Cover and chill until completely cold, at least 4 hours or overnight. Stir in the lime juice, then churn according to your ice cream maker’s instructions. Transfer to a freezer-safe container and freeze until firm, about 4 hours.

    Yield: About 1 quart (950 ml).


    Notes

    Preparation

    • Wear gloves when handling ghost peppers and avoid touching your face or eyes. Pepper heat can vary considerably, even at the same weight.

    Variations

    • Mango Ice Cream: Omit the ghost pepper and prepare the custard as directed, skipping the steps to add and remove the pepper.
    • Spicier Mango Ghost Pepper Ice Cream: Increase the fresh ghost pepper to 1 g. This tested version delivers a noticeably stronger, more persistent heat.

    Make-Ahead & Storage

    • The ice cream base can be prepared and refrigerated up to 24 hours before churning.
    • Store the finished ice cream in a tightly covered container in the freezer. Let it stand at room temperature for 5–10 minutes before scooping, if needed.
  • Chocolate-Coconut Ghost Pepper Ice Cream

    Chocolate-Coconut Ghost Pepper Ice Cream

    Chocolate and chile are a natural combination, but ghost pepper brings something especially interesting to this ice cream. Its surprisingly fruity flavor works beautifully with dark chocolate and coconut, while the heat builds slowly after each bite. Keeping the chocolate restrained allows all three flavors to come through, creating a rich chocolate ice cream with noticeable coconut and a warm ghost pepper finish.


    Ingredients

    • 1 (13.66 oz / 403 ml) can full-fat coconut milk
    • 1 cup (240 g) whole milk
    • ⅔ cup (135 g) granulated sugar, divided
    • ¼ cup (22 g) Guittard Cocoa Rouge cocoa powder
    • about ⅞ oz (25 g) dark Belgian chocolate, finely shaved or chopped
    • 4 large egg yolks
    • ¼ tsp table salt
    • ½ tsp vanilla bean paste
    • 1 g fresh ghost pepper

    Directions

    Prepare the Chocolate Base

    In a medium saucepan, whisk together the cocoa powder and ⅓ cup (about 67 g) of the sugar. Whisk in about ½ cup (120 ml) of the coconut milk until smooth. Heat over medium-low heat, whisking occasionally, until the mixture reaches about 150°F (66°C). Add the ghost pepper and dark chocolate, stirring until the chocolate is completely melted. Stir in the remaining coconut milk, whole milk, and salt.

    Prepare the Custard

    In a separate bowl, whisk the egg yolks with the remaining sugar until smooth. Slowly whisk some of the warm chocolate mixture into the yolks to temper them. Gradually whisk the tempered yolks back into the saucepan. Continue heating gently, stirring frequently. Once the ghost pepper flavor and heat are noticeable, strain the mixture to remove the pepper and return the custard to the saucepan. Continue cooking, stirring constantly, until the custard reaches 175°F (79°C). Remove from the heat and stir in the vanilla bean paste.

    Chill and Churn

    Cool the custard, then cover and refrigerate until thoroughly chilled, preferably at least 6 hours or overnight. Churn according to your ice cream maker’s instructions. Transfer to a freezer-safe container and freeze until firm enough to scoop.

    Yield: About 1 quart (950 ml).


    Notes

    Preparation

    • Ghost peppers are extremely hot. Wear gloves while handling them and avoid touching your face or eyes.
    • The ghost pepper is infused in the warm custard and then removed before the custard reaches its final temperature. This gives you more control over the finished heat than leaving pieces of pepper in the ice cream.
    • The chocolate arrives first, while the ghost pepper heat remains almost hidden by the cold. As the ice cream melts and the cold sensation fades, the heat begins to emerge and builds into a warm, lingering finish.
    • Using only 25 g dark chocolate is intentional. The cocoa powder provides most of the chocolate flavor while the small amount of dark chocolate adds richness without overwhelming the coconut or fruity character of the ghost pepper.

    Variations

    • Hotter Ghost Pepper: Increase the ghost pepper to 1.5 g for a more assertive, lingering heat. This is the amount used in the original test batch.
    • Milder: Remove the ghost pepper earlier during the custard preparation once the desired level of heat is reached.
    • Cinnamon: Lightly sprinkle the ice cream with ground cinnamon just before serving. The cinnamon complements the chocolate and ghost pepper while adding a warm aromatic note.

    Serving Suggestions

    • Serve on its own to appreciate the progression from chocolate and coconut to the slowly building ghost pepper heat.
    • Pair with a warm brownie for a richer chocolate dessert.
    • A small pinch of flaky salt over the finished ice cream can provide contrast to the chocolate and subtle sweetness.

    Make-Ahead & Storage

    • The custard can be prepared a day ahead and refrigerated overnight before churning.
    • Store the finished ice cream tightly covered in the freezer. For the best texture, allow very firm ice cream to soften briefly at room temperature before scooping.
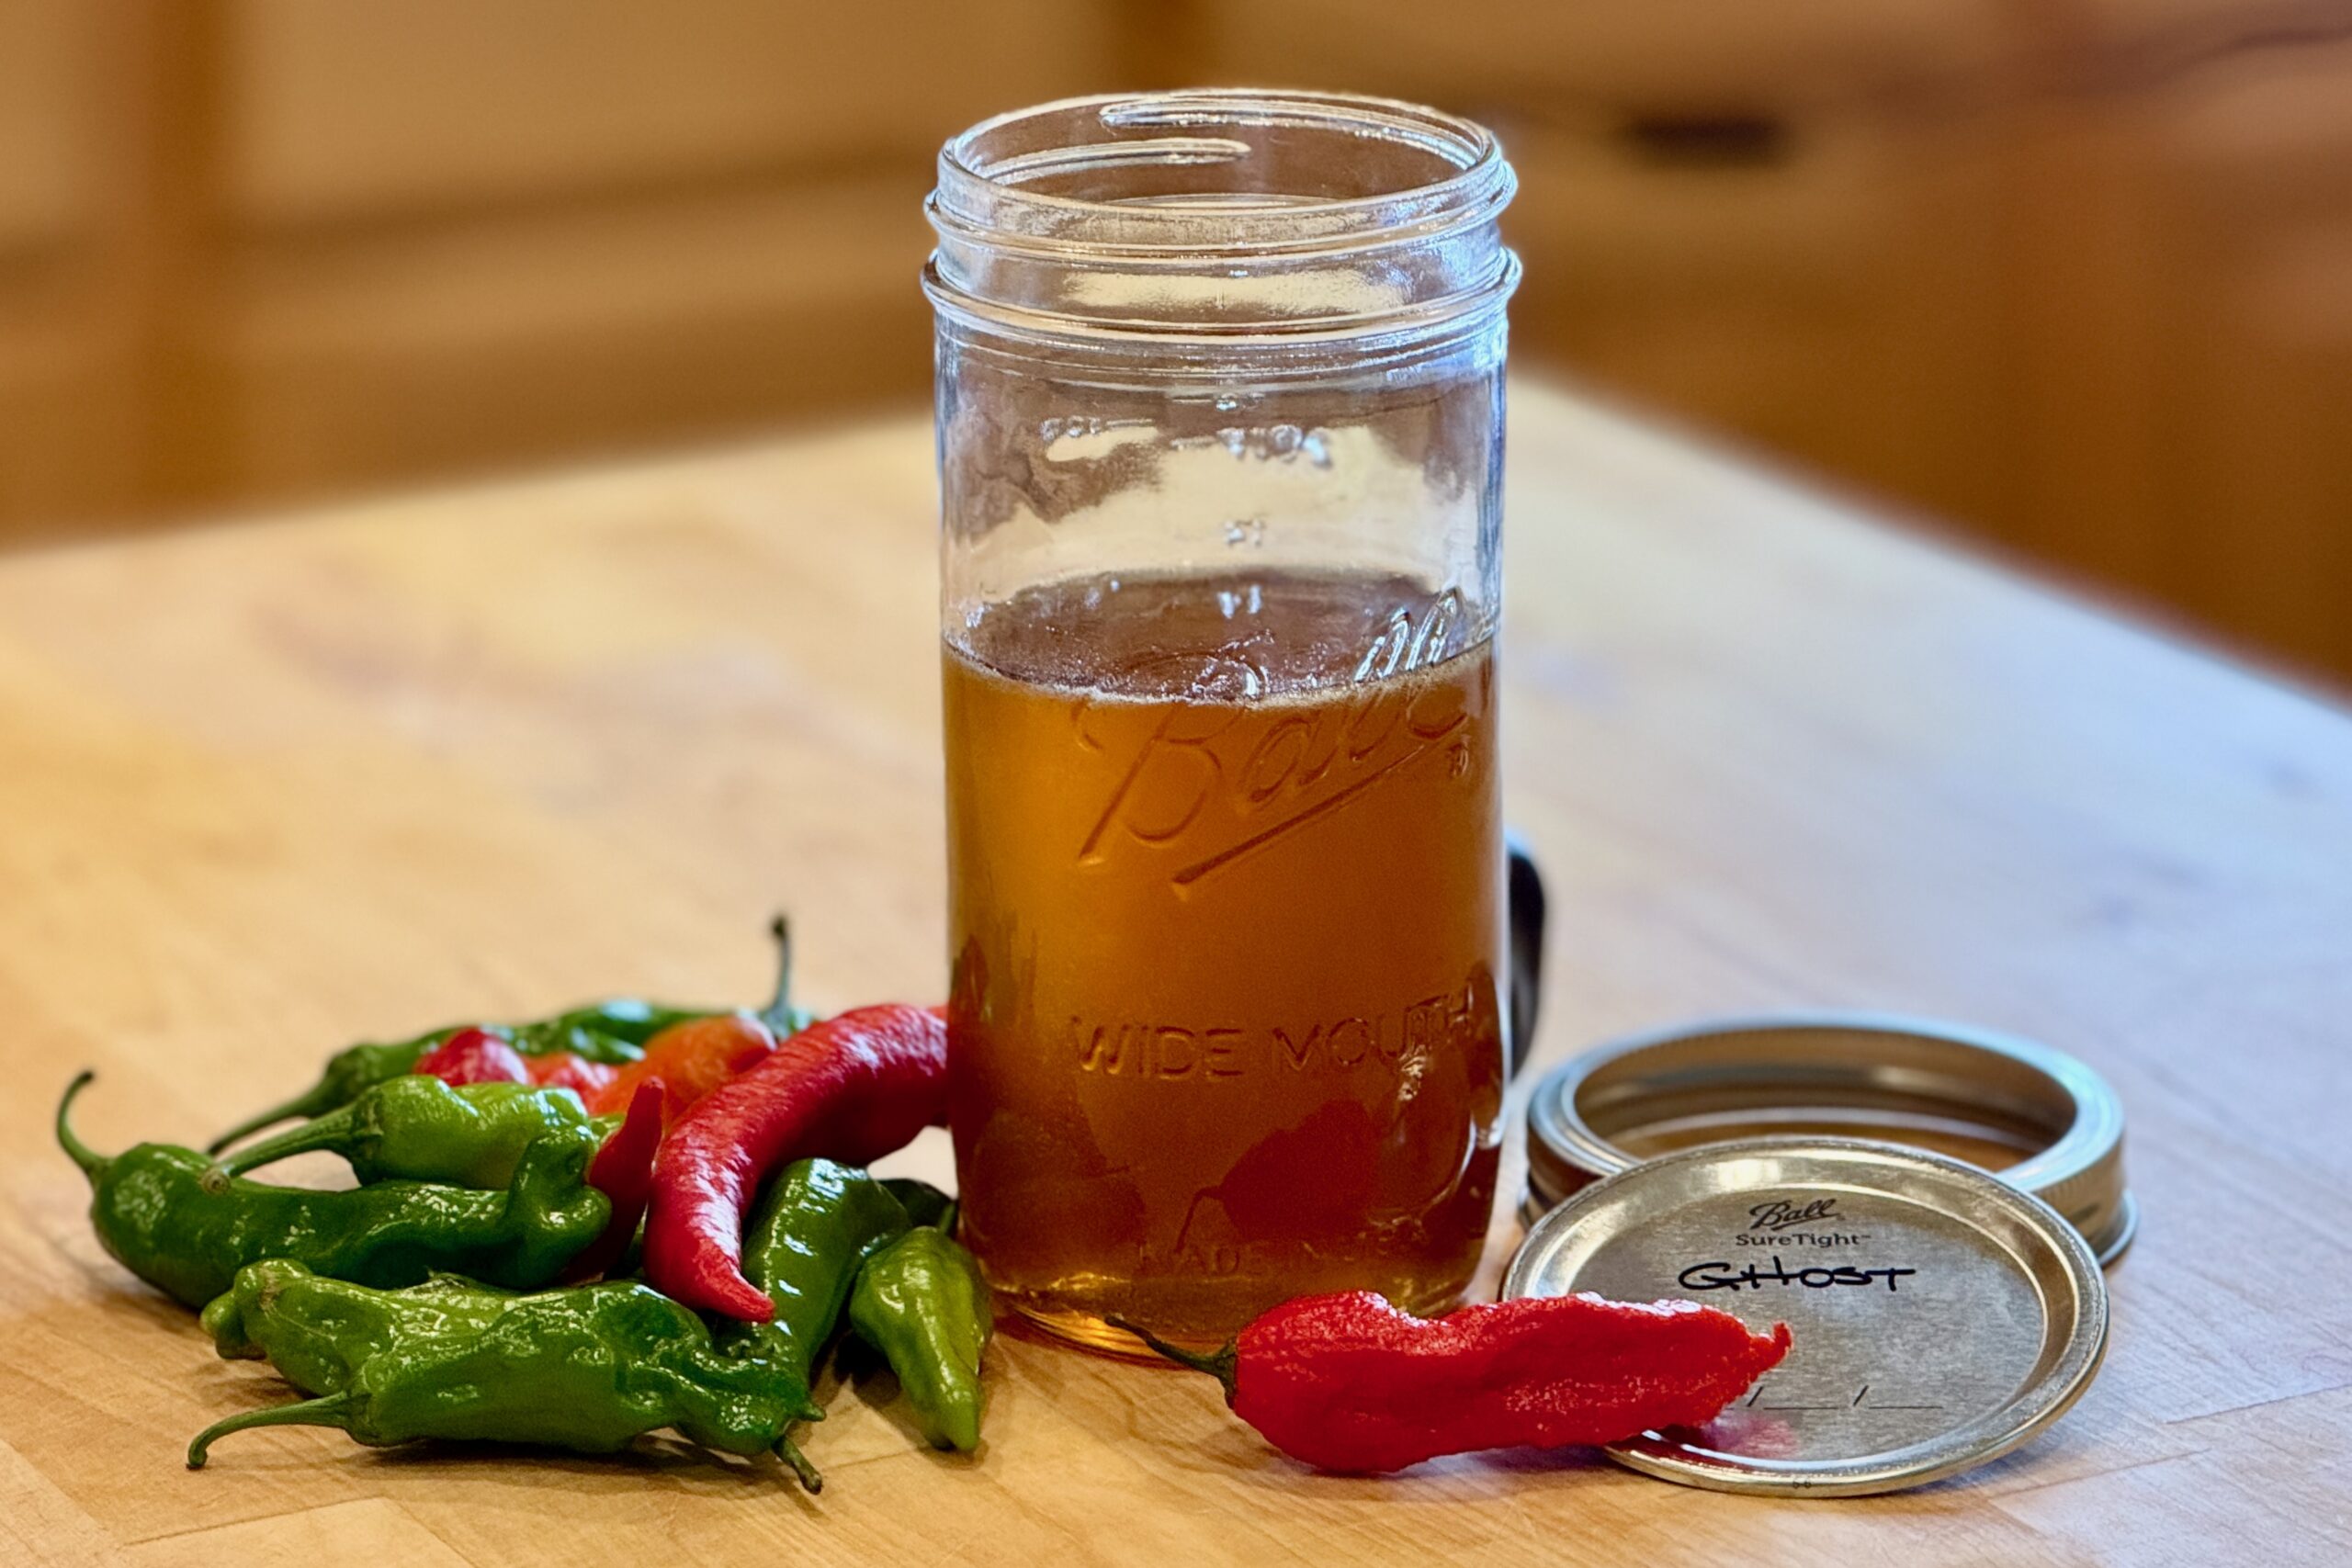
  • Ghost Pepper Hot Honey

    Ghost Pepper Hot Honey

    This ghost pepper hot honey has become my favorite version because ghost peppers bring more than intense heat—they have a surprisingly fruity character that comes through beautifully in the honey. The first taste begins sweet and fragrant, then the heat gradually builds and lingers. Holding the sous vide bath at a gentle 130°F (54°C) infuses the pepper while helping preserve more of the raw honey’s natural flavor, enzymes, and antioxidant compounds than a higher-temperature infusion. The result is especially good on pizza, fried chicken, biscuits, barbecue, and anywhere a little sweetness and serious heat belong together.


    Ingredients

    • 16 oz (455 g) unfiltered raw honey
    • 1 fresh ghost pepper
    • Pinch of table salt (optional)

    Directions

    Prepare the Jar

    Lightly bruise the ghost pepper with the side of a knife without cutting it open. Add the honey, ghost pepper, and optional salt to a small mason jar. Seal the jar finger-tight so pressure can equalize during the infusion.

    Infuse Sous Vide

    Set a sous vide bath to 130°F (54°C). Submerge the jar and infuse for 2 hours.

    Strain and Store

    Remove the jar from the water bath and let it cool just enough to handle comfortably. Remove the ghost pepper and strain the honey through a fine-mesh strainer.

    For a cleaner finish and better consistency, strain again through cheesecloth or a coffee filter before transferring to a clean jar for storage.

    Yield: 16 oz (455 g).


    Notes

    Preparation

    • Bruising the pepper allows its fruity flavor and heat to infuse the honey without releasing as much capsaicin as cutting it open.
    • If your honey is very thick or lightly crystallized, it may loosen naturally during the infusion.
    • Wear gloves when handling ghost peppers, and avoid touching your face or eyes afterward.
    • The heat may seem moderate at first but builds noticeably after tasting.

    Variations

    • For less heat, shorten the infusion time.
    • For considerably more heat, cut the ghost pepper open before infusing.

    Serving Suggestions

    • Drizzle over fried chicken, pizza, roasted vegetables, cornbread, or biscuits.
    • Use as a finishing touch for pulled pork, brisket, grilled chicken, or ribs.
    • Stir a small amount into barbecue sauce, vinaigrettes, marinades, or a mango lassi for balanced sweetness and heat.

    Make-Ahead & Storage

    • Store in a clean jar in the refrigerator for the best shelf life.
    • If the honey crystallizes in storage, warm the jar gently in hot water until fluid again.
    • Because this recipe uses fresh pepper, thorough straining is important for stability and consistency.
  • Umbricelli — Traditional Umbrian Hand-Rolled Pasta

    Umbricelli — Traditional Umbrian Hand-Rolled Pasta

    Umbricelli is one of those pastas that feels like it came straight from a farmhouse kitchen—simple ingredients, rolled by hand, and built for sauces that cling and coat every strand. Originating in the heart of Italy, this thick, rustic pasta delivers a firm, satisfying bite that’s closer to traditional semolina pasta than soft egg noodles. Around our table, it’s become a favorite for nights when we want something hearty and hands-on—rolled together, cooked quickly, and finished in a bold sauce that brings everything to life.


    Ingredients

    • 250 g (about 2 cups) all-purpose flour, plus more for dusting
    • ½ tsp table salt
    • 180 ml (¾ cup) warm water, as needed

    Directions

    Make the Dough

    Add the flour and salt to the bowl of a KitchenAid stand mixer fitted with the dough hook. With the mixer on low speed (1–2), slowly drizzle in about 160 ml (⅔ cup) of the warm water until a shaggy dough begins to form.

    Continue mixing on low for 5–7 minutes until the dough becomes smooth, cohesive, and firm with slight resistance when pressed. Add additional water only as needed, 5 ml (1 tsp) at a time, until the dough comes together. It should not be soft or sticky.

    If your mixer struggles with the stiff dough, stop and finish kneading by hand for 1–2 minutes.

    Rest the Dough

    Wrap the dough tightly or cover with an inverted bowl and let rest at room temperature for at least 30 minutes. This relaxes the gluten and makes shaping easier.

    Shape the Umbricelli

    Divide the dough into 4 portions, keeping unused portions covered to prevent drying.

    Roll one portion into a rope about ½ inch thick, then cut into small pieces about the size of a marble.

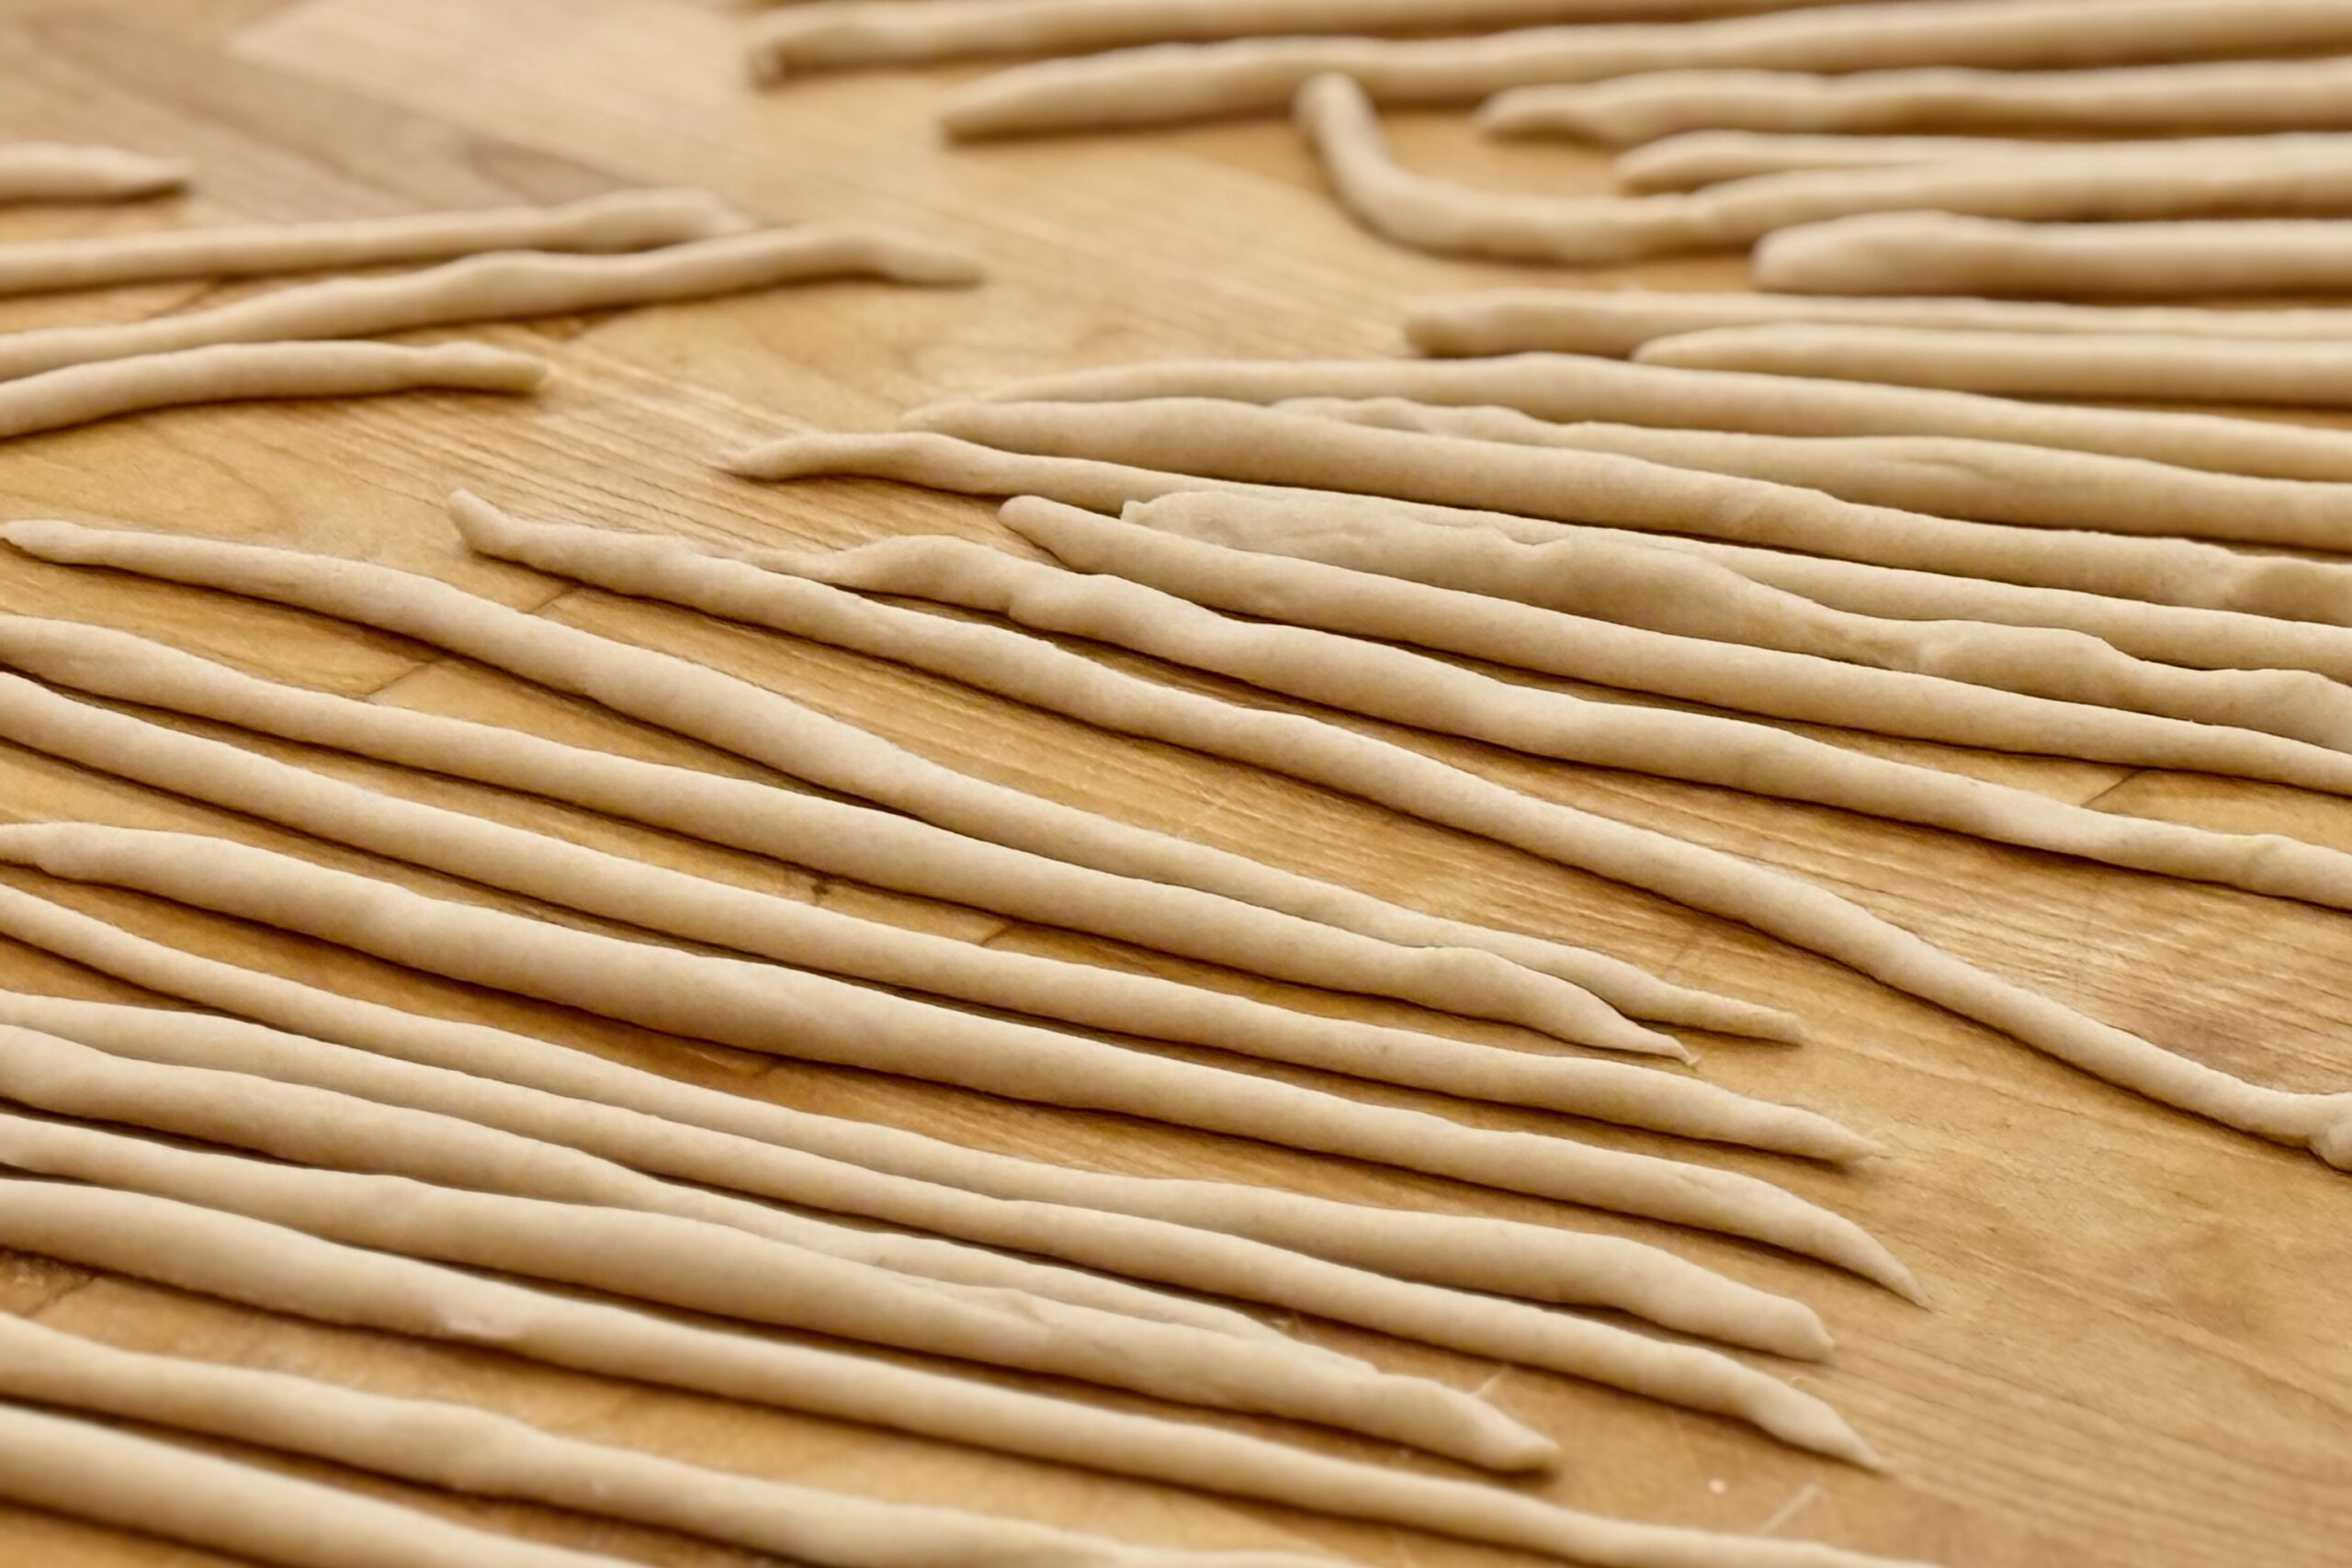
    Using your palms, roll each piece on a clean work surface into long strands, generally about ⅛–¼ inch (3–6 mm) thick. Apply light, even pressure, letting friction stretch the dough naturally. Umbricelli is intentionally rustic—perfect uniformity is neither necessary nor desirable.

    Place finished strands on a lightly floured towel or work surface, keeping them separated so they do not stick together.

    Cook

    Bring a large pot of well-salted water to a rolling boil. Add the umbricelli and cook for 3–5 minutes, or until tender but still pleasantly firm to the bite.

    Transfer directly to your prepared sauce and finish cooking for 1–2 minutes, allowing the pasta to absorb flavor while the sauce clings to the strands.

    Yield: 4 servings.


    Notes

    Preparation

    • For the most consistent dough, weigh the flour and water with a kitchen scale.
    • The dough should feel firm but workable—too soft and the strands will stretch unevenly; too dry and they may crack while rolling.
    • If the dough resists rolling or shrinks back, let it rest an additional 10–15 minutes.
    • Light flour on the work surface helps prevent sticking, but too much flour reduces the friction needed for rolling.
    • Rustic variation in thickness is expected and part of the character of traditional umbricelli.

    Variations

    • Traditional Hand Method: Mix the flour and salt in a bowl, gradually add the warm water, then knead by hand for 8–10 minutes until smooth and firm.
    • More Semolina: Substitute 50 g (about ⅓ cup) semolina for an equal weight of the all-purpose flour, using 200 g (about 1⅔ cups) all-purpose flour and 50 g semolina total. The dough may hydrate more slowly, so let it rest briefly before adding extra water.
    • Adjust the Thickness: Roll slightly thicker for a heartier chew or slightly thinner for a more refined presentation.

    Serving Suggestions

    • Finish simply with butter, cracked black pepper, and freshly grated parmesan.
    • Pair with sausage-based sauces like Umbrian-style alla Norcina.
    • Serve with our Fresh San Marzano Tomato Basil Sauce.
    • Excellent with garlic-chili oil, truffle butter sauces, or other robust tomato sauces.

    Make-Ahead & Storage

    • Fresh umbricelli can rest at room temperature for up to 2 hours before cooking.
    • Refrigerate, lightly floured and covered, for up to 24 hours.
    • Freeze in loose nests on a tray, then transfer to a freezer bag; cook directly from frozen, adding 1–2 minutes.

    High Altitude

    • At about 4,750 ft (1,400 m), the dough may need an additional 15–30 ml (1–2 tbsp) water because of drier conditions.
  • Pagotó Kaïmáki (παγωτό καϊμάκι) — Greek Mastic Ice Cream

    Pagotó Kaïmáki (παγωτό καϊμάκι) — Greek Mastic Ice Cream

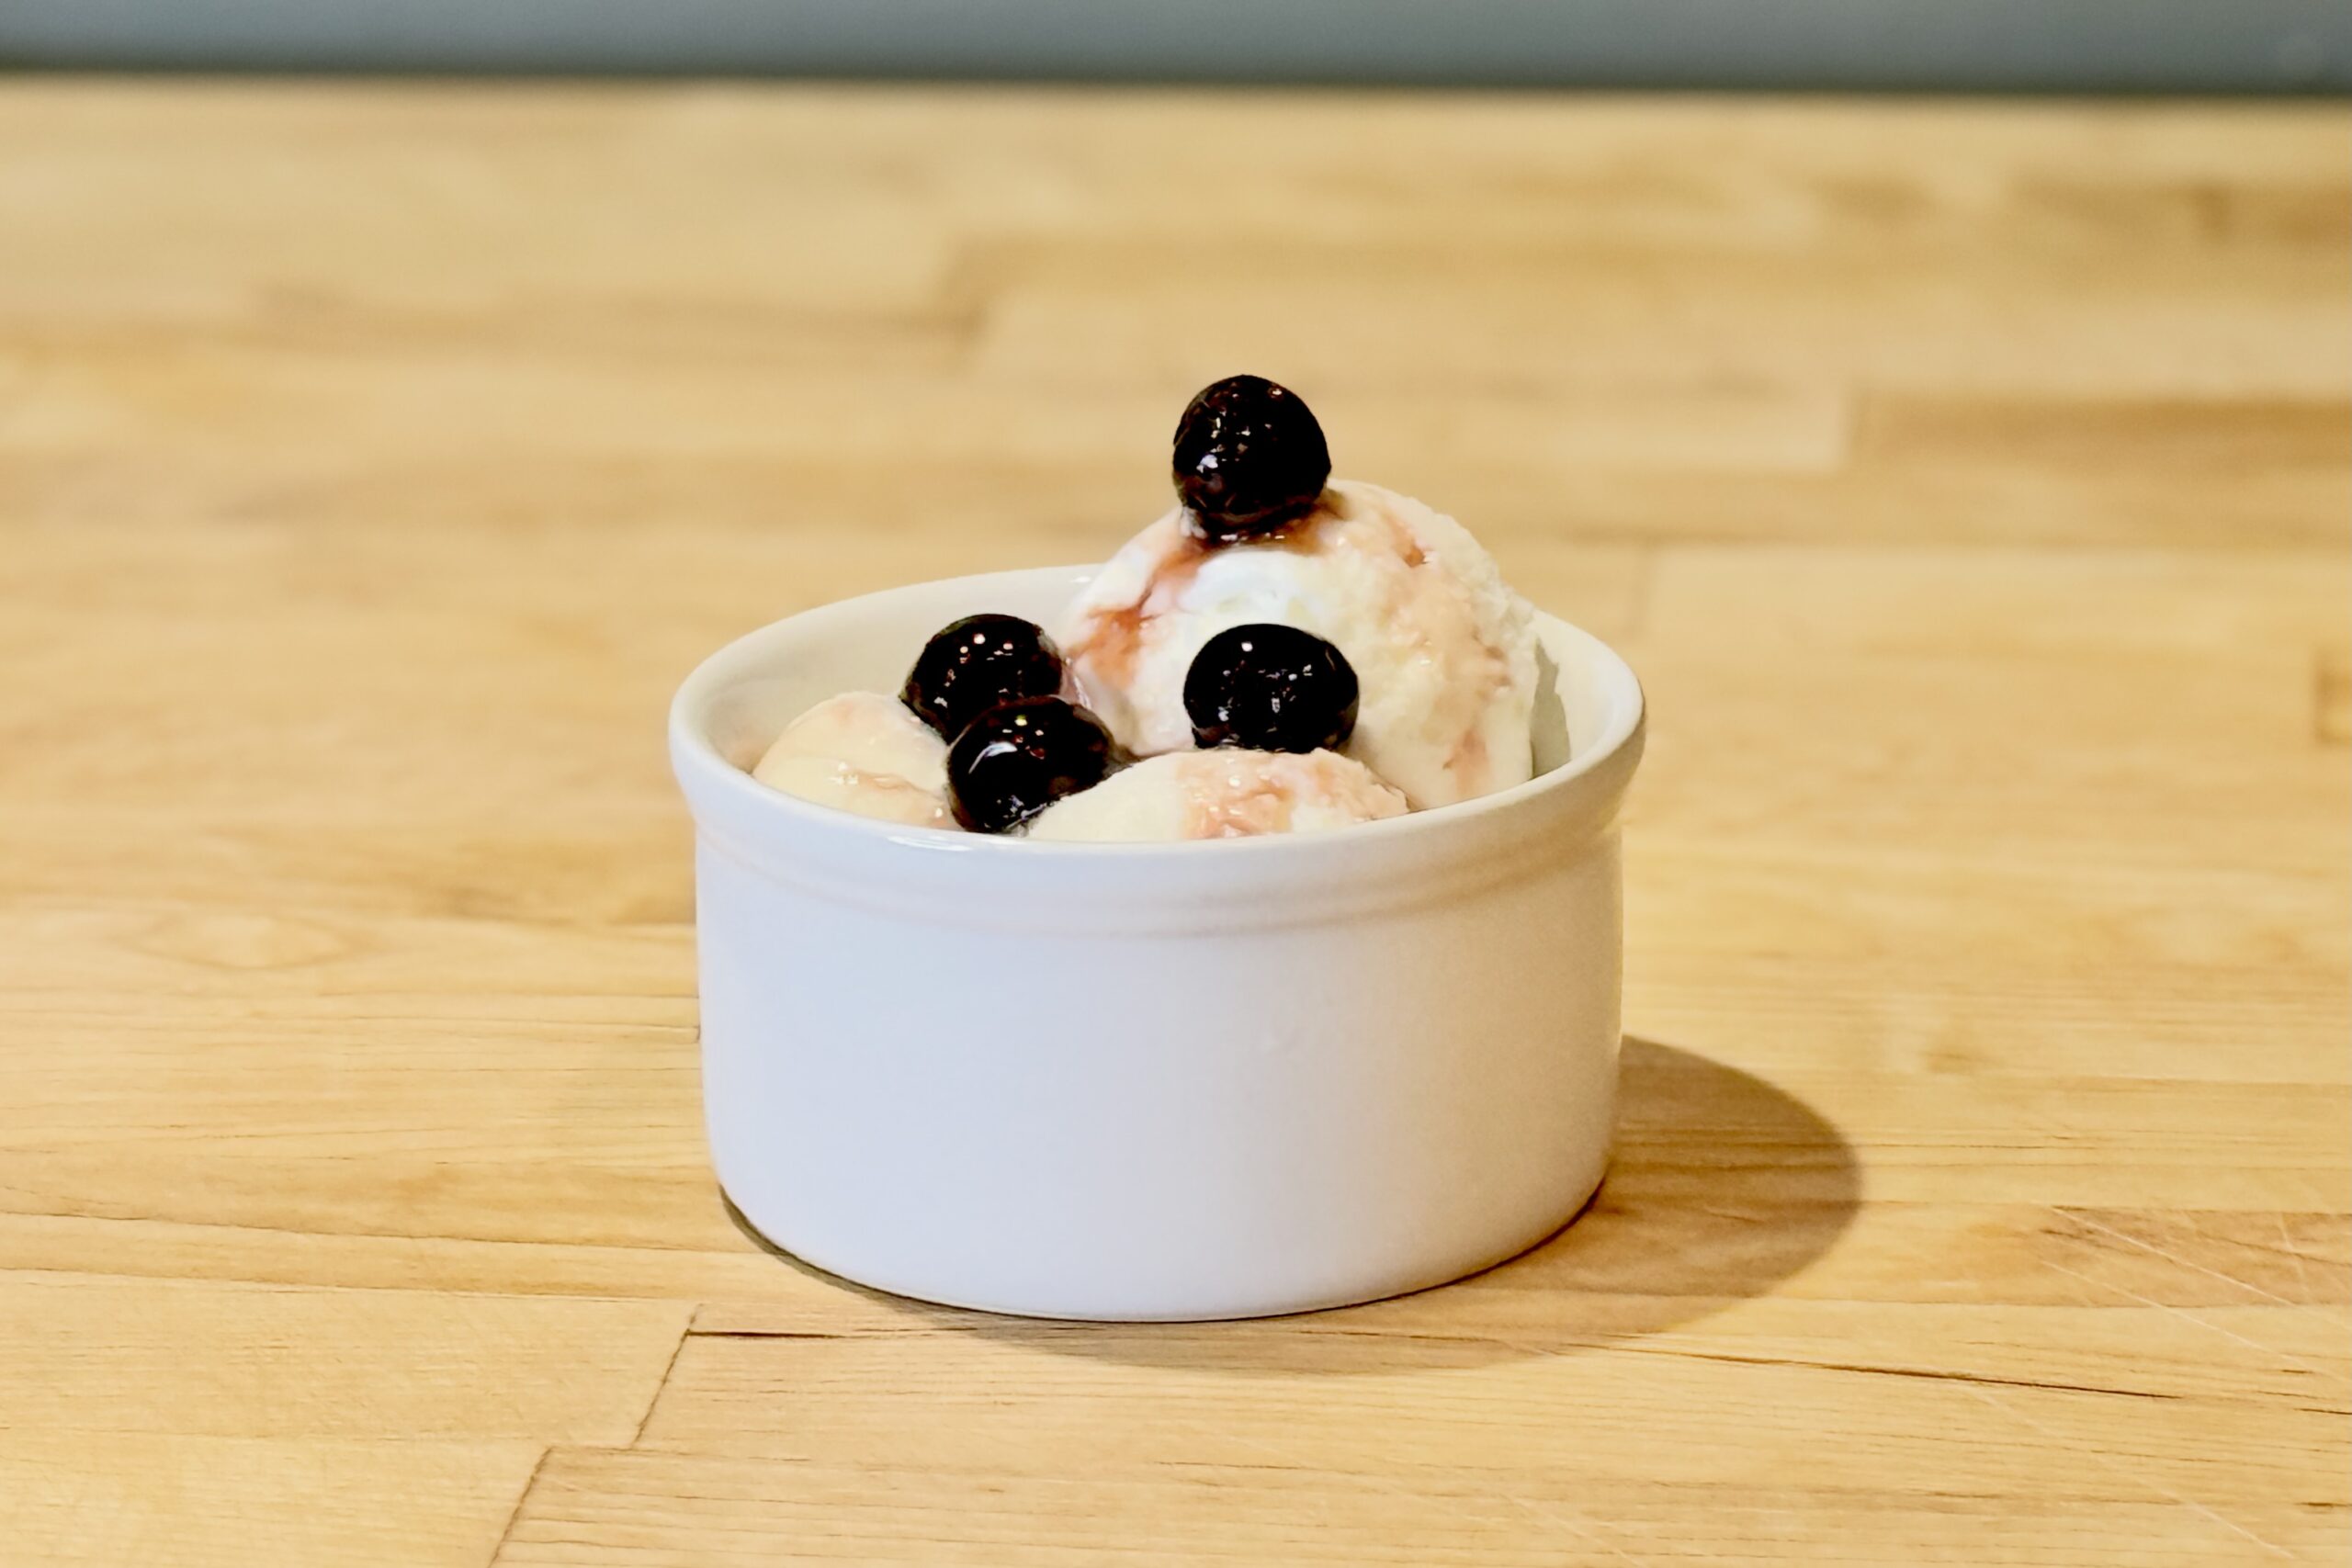
    Pagotó kaïmáki (παγωτό καϊμάκι) is a traditional Greek ice cream known for the distinctive aromatic flavor of Chios mastiha and its unusually creamy, slightly elastic texture. Mastiha gives the ice cream a fresh, gently piney fragrance that becomes fuller as the base rests overnight. This eggless version keeps that unusual flavor at the center, while Fabbri Amarena cherries and a spoonful of their syrup add a sweet-tart finish.


    Ingredients

    • 500 g (about 2 cups + 1 tbsp) whole milk
    • 200 g (about ¾ cup + 1½ tbsp) heavy cream
    • 150 g (about ¾ cup) granulated sugar, divided
    • 10 g (about 1½ tbsp) tapioca flour
    • 0.4 g xanthan gum
    • 0.5 g Chios mastiha tears
    • 1 g table salt

    For Serving

    • Fabbri Amarena cherries, 2–3 per serving
    • Amarena cherry syrup, 1–2 tsp per serving

    Directions

    Prepare the Mastiha

    Place the mastiha tears in the freezer for 30 minutes. Grind the cold mastiha with 10 g (about 2½ tsp) of the sugar until very fine, then set aside.

    Cook the Base

    Whisk together the remaining 140 g (about ¾ cup minus 2½ tsp) sugar, tapioca flour, xanthan gum, and salt in a saucepan. Gradually whisk in the milk, followed by the cream.

    Cook over medium heat, whisking frequently, until the mixture reaches 180–185°F (82–85°C). Hold it in that range for approximately 1 minute while whisking.

    Remove from the heat and immediately add the ground mastiha mixture. Blend with an immersion blender for 15–20 seconds, then strain into a clean container.

    Chill and Churn

    Chill the base over an ice bath, cover, and refrigerate for at least 6–8 hours, preferably overnight.

    Churn the chilled base according to your ice cream maker’s instructions, using a firm gelato setting if available. Transfer to a freezer container and freeze for at least 6 hours, preferably overnight.

    Serve

    Let the ice cream temper at room temperature for 8–10 minutes. Top each serving with 2–3 Amarena cherries and 1–2 tsp of their syrup.

    Yield: Approximately 950 ml (1 quart), 8 modest servings.


    Notes

    Preparation

    • The mastiha flavor becomes fuller as the base rests. Do not skip the 6–8 hour refrigeration before churning; overnight is preferable.
    • Weigh the mastiha carefully; even small changes noticeably affect its aromatic, resinous flavor.
    • Use the gram weights as the primary measurements to preserve the tested formula; the US volume equivalents are approximate. Weigh the base ingredients and the salep if using. Use a precision scale that reads to 0.01 g for the xanthan gum and mastiha; do not estimate these tiny amounts with measuring spoons.

    Variations

    • Traditional Salep: Replace the 10 g (about 1½ tbsp) tapioca flour and 0.4 g xanthan gum with 4 g pure salep powder. After reserving 10 g (about 2½ tsp) of the sugar for grinding the mastiha, whisk the salep thoroughly into the remaining 140 g (about ¾ cup minus 2½ tsp) sugar before adding the milk and cream; this helps prevent clumping. Heat the base to 180–185°F (82–85°C) and hold it in that range for 2–3 minutes, whisking continuously, until lightly thickened. Finish, chill, and churn as directed. Salep varies in strength; do not substitute a sweetened salep or sahlab beverage mix measure-for-measure.

    Serving Suggestions

    • Serve plain to emphasize the mastiha, or top each portion with 2–3 Amarena cherries and 1–2 tsp of their syrup. Keep the cherries and syrup out of the churn so the kaïmáki’s texture and flavor remain the focus.

    Make-Ahead & Storage

    • The base can be prepared and refrigerated in a covered container up to 1 day before churning.
    • For the best texture, store the finished ice cream airtight with parchment pressed against the surface and enjoy within 2 weeks.
  • Fresh San Marzano Tomato Basil Sauce

    Fresh San Marzano Tomato Basil Sauce

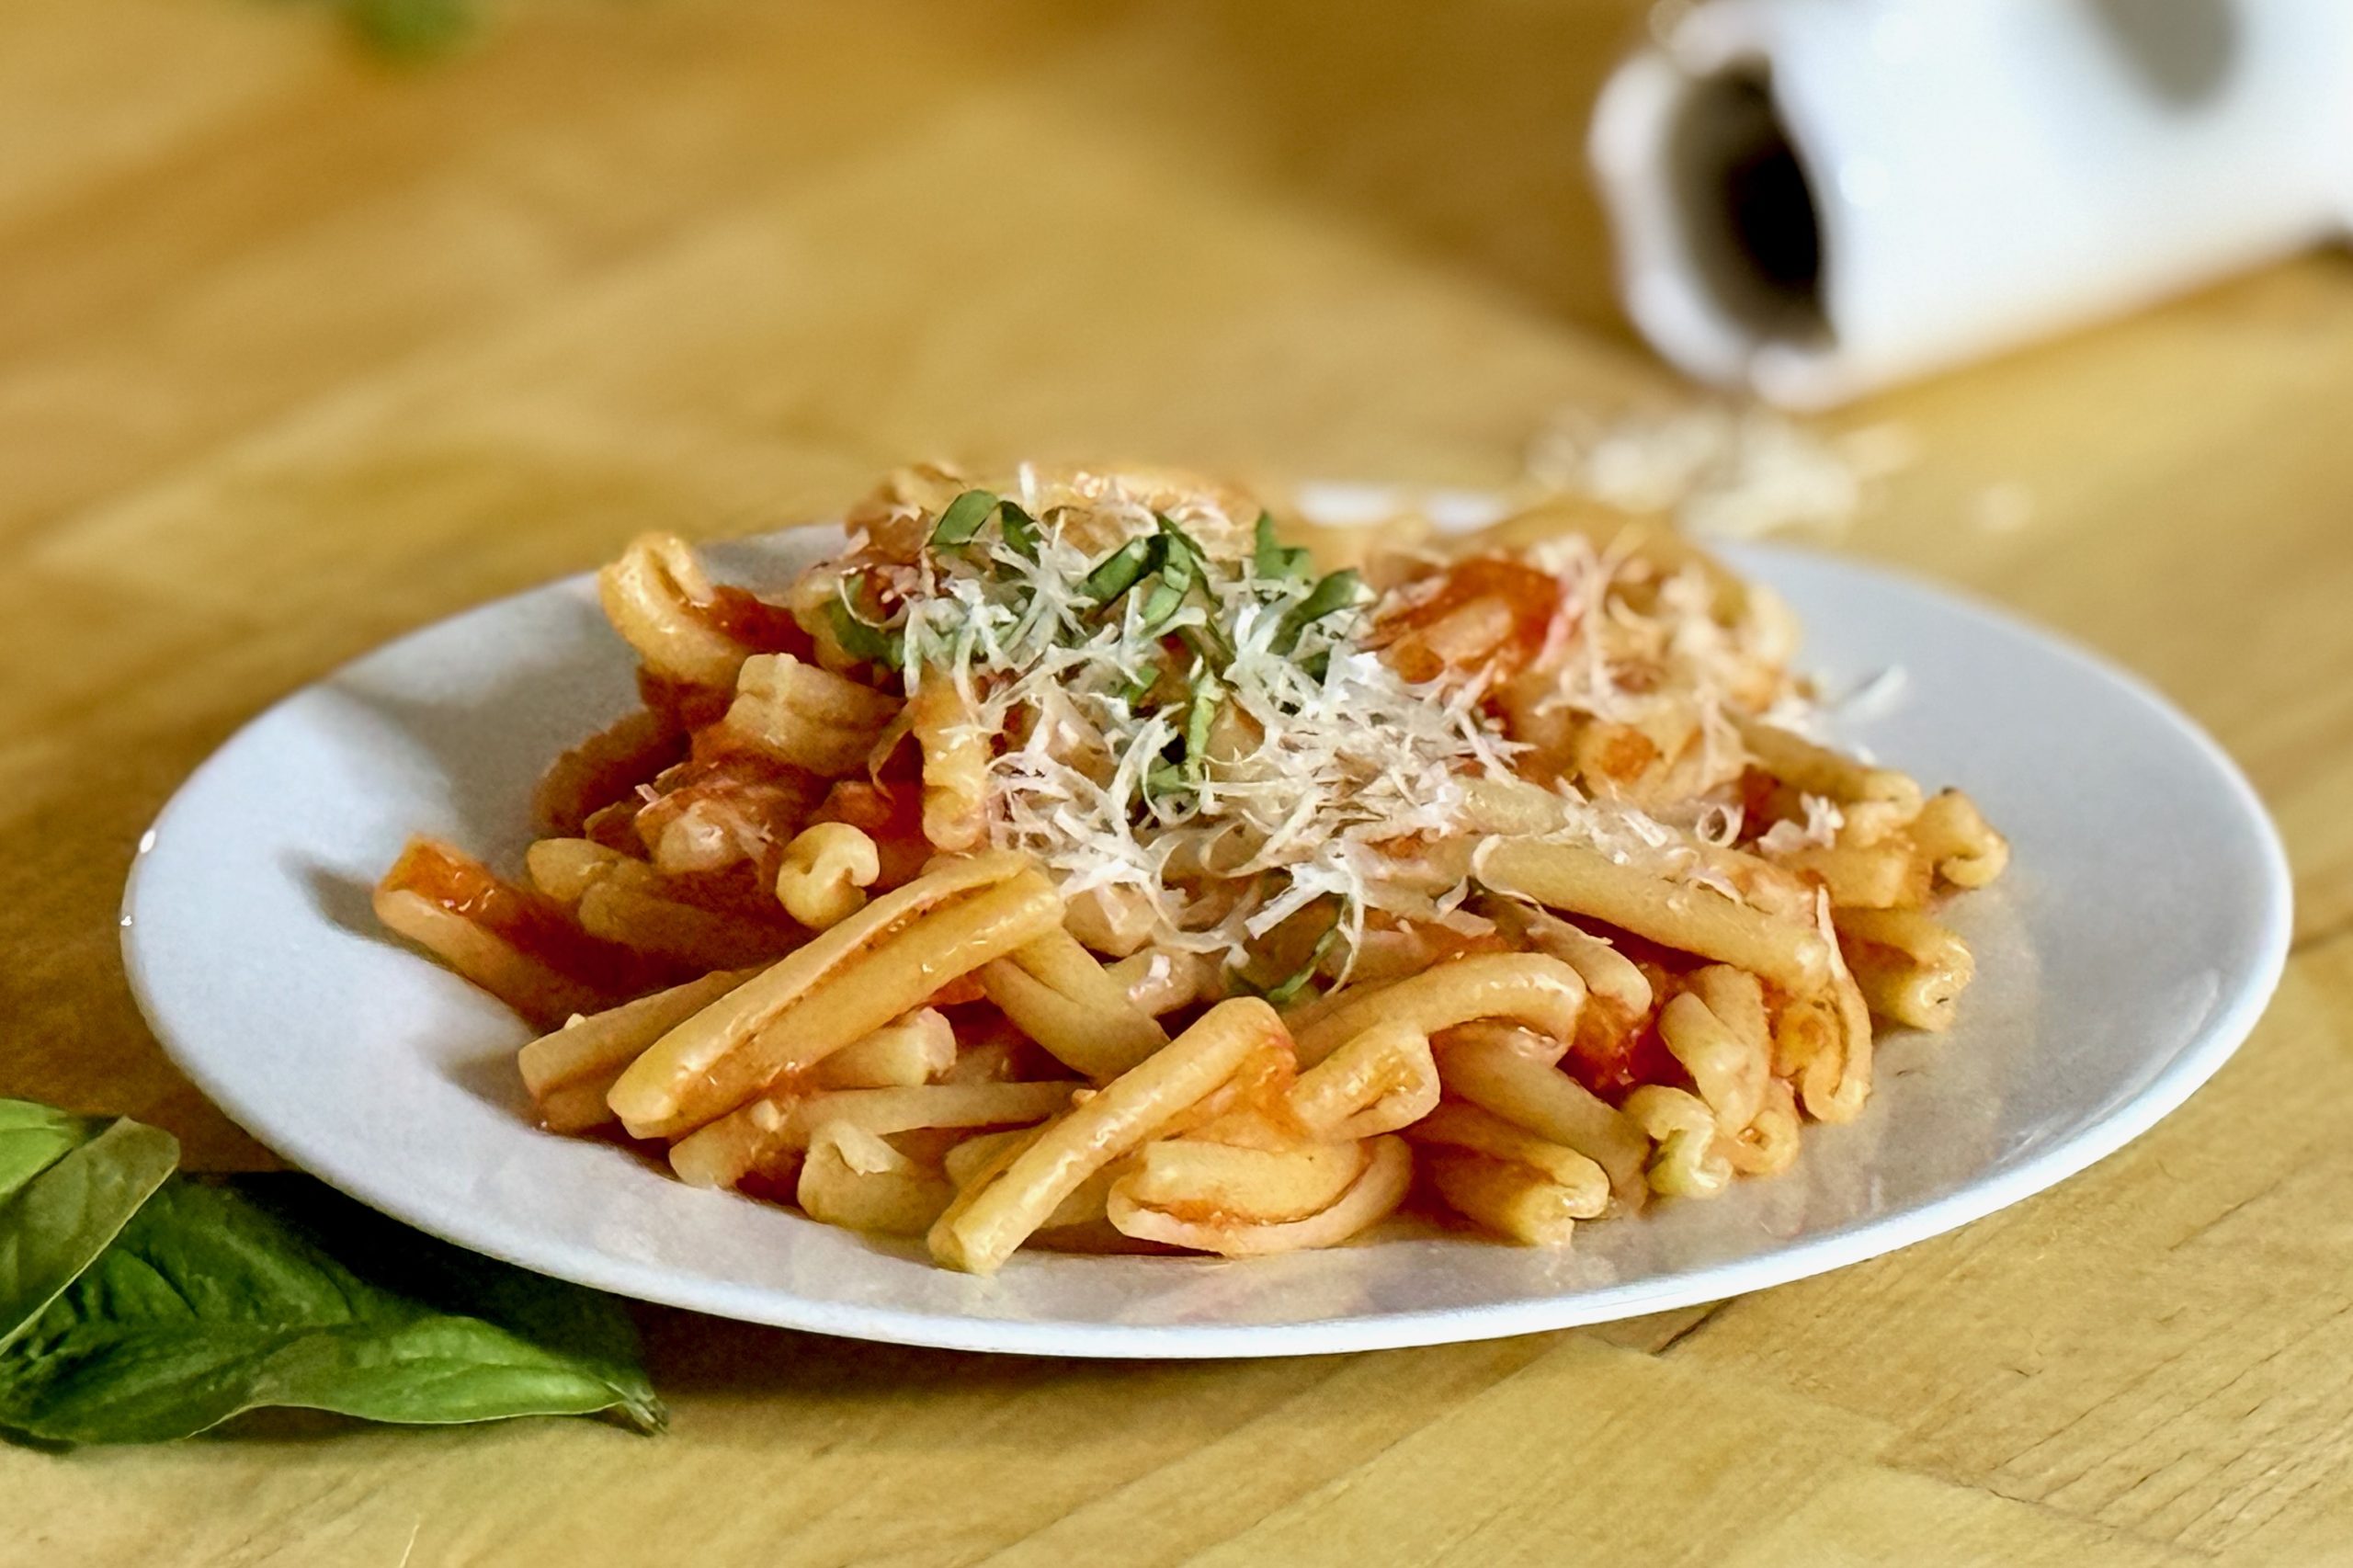
    Each year, our backyard garden gives us a bumper crop of San Marzano tomatoes along with plenty of freshly harvested basil, and this sauce is one of our favorite ways to bring the two together. The tomatoes are grated and briefly simmered with gently cooked garlic, fresh basil, and olive oil, creating a sauce that is bright, fragrant, and full of fresh tomato flavor. Finishing the pasta directly in the sauce allows the tomato juices, olive oil, and pasta starch to come together into a light, silky coating that clings beautifully to every strand.


    Ingredients

    • 2 lb (900 g) fresh San Marzano tomatoes
    • 3 tbsp (45 ml) extra-virgin olive oil, divided
    • 2–3 cloves garlic, thinly sliced
    • ½ tsp table salt, plus more to taste
    • Freshly ground black pepper, to taste, optional
    • 10–15 fresh basil leaves, divided
    • Reserved pasta cooking water, only if needed

    Directions

    Prepare the Tomatoes

    Cut the tomatoes in half. Holding each tomato by the skin, grate the cut side against the large holes of a box grater until only the skin remains. Discard the skins, retaining all of the tomato pulp, juice, seeds, and surrounding gel.

    Make the Sauce

    Heat 2 tbsp (30 ml) olive oil in a wide skillet or sauté pan over medium-low heat. Add the sliced garlic and cook gently for 30–60 seconds, just until fragrant. Do not allow the garlic to brown.

    Add the grated tomatoes and ½ tsp salt. Add 3–4 whole basil leaves or a few tender basil stems.

    Bring to a gentle simmer and cook uncovered for about 15–20 minutes, stirring occasionally, until the raw tomato flavor has softened and the tomatoes have reduced slightly. The sauce should still be relatively loose; do not continue cooking simply to achieve the consistency of a finished pasta sauce.

    Remove and discard the cooked basil leaves or stems. Taste and adjust the salt and black pepper as needed.

    Finish the Pasta in the Sauce

    Cook the pasta in well-salted boiling water until about 2 minutes shy of your preferred doneness.

    Transfer the pasta directly into the simmering tomato sauce. Toss continuously over medium to medium-high heat for about 2 minutes, or until the pasta is properly cooked and the tomato juices, starch, and olive oil have come together into a light sauce that clings to the pasta.

    Add reserved pasta cooking water only if the sauce becomes too tight.

    Remove from the heat. Tear the remaining fresh basil leaves into the pasta and drizzle with the remaining 1 tbsp (15 ml) olive oil. Toss well and serve immediately.

    Yield: 4 servings.


    Notes

    Preparation

    • Use fully ripe tomatoes with good natural sweetness and acidity. Because the sauce contains so few ingredients, the quality and ripeness of the tomatoes make a significant difference.
    • Do not seed the tomatoes. The pulp and gel surrounding the seeds contribute flavor and moisture to the finished sauce.
    • Grating the tomatoes removes the skins while retaining more pulp than processing them through a fruit and vegetable strainer.
    • Keep the garlic pale and aromatic. Browning it produces a deeper flavor that can compete with the fresh tomatoes.
    • Cooking time will vary somewhat with the moisture content of the tomatoes. Judge the sauce primarily by flavor rather than trying to reduce away all of the tomato liquid.
    • The sauce is intentionally loose before the pasta is added. Finishing the pasta directly in the sauce allows the pasta to absorb some of the tomato liquid while released starch helps bind the tomato juices and olive oil.
    • Avoid substantially extending the tomato cooking time simply to thicken the sauce. The short simmer helps preserve its fresh tomato character.
    • Sugar should not normally be necessary with ripe tomatoes. If a particular batch is unusually acidic, make any adjustment only after tasting the cooked sauce.

    Variations

    • Spicy Tomato & Basil: Add a small pinch of crushed red pepper flakes with the garlic.
    • Chunkier Sauce: Peel the tomatoes by blanching rather than grating, then hand-crush or roughly chop them before cooking.
    • Fresh Pomodoro Variation: Add a small amount of finely grated onion and extend the simmer for a slightly richer, sweeter, and more developed sauce.

    Serving Suggestions

    • Especially good with fresh, rustic pastas such as umbricelli, where the irregular surface and substantial texture give the sauce plenty to cling to.
    • Use with other fresh or dried pasta shapes, finishing the pasta directly in the sauce using the same method.
    • Finish individual servings with additional fresh basil or a drizzle of extra-virgin olive oil.
    • Parmigiano-Reggiano or Pecorino Romano can be served at the table, although the sauce is flavorful enough to serve without cheese.
    • For a bruschetta-style serving, chill leftover sauce and spoon it over toasted or grilled bread. Finish with fresh basil and a drizzle of extra-virgin olive oil.

    Make-Ahead & Storage

    • The tomato sauce can be prepared several hours ahead and gently reheated before finishing the pasta in it. Reserve the finishing basil and final tablespoon of olive oil until serving.
    • Refrigerate leftover sauce in an airtight container for up to 4 days.
    • Leftover sauce is excellent served cold or at room temperature as a bruschetta-style topping.
    • The sauce can be frozen, although its fresh basil aroma and especially fresh character are best when served shortly after preparation.
  • Crispy Gnocchi Chaat with Spiced Chickpeas

    Crispy Gnocchi Chaat with Spiced Chickpeas

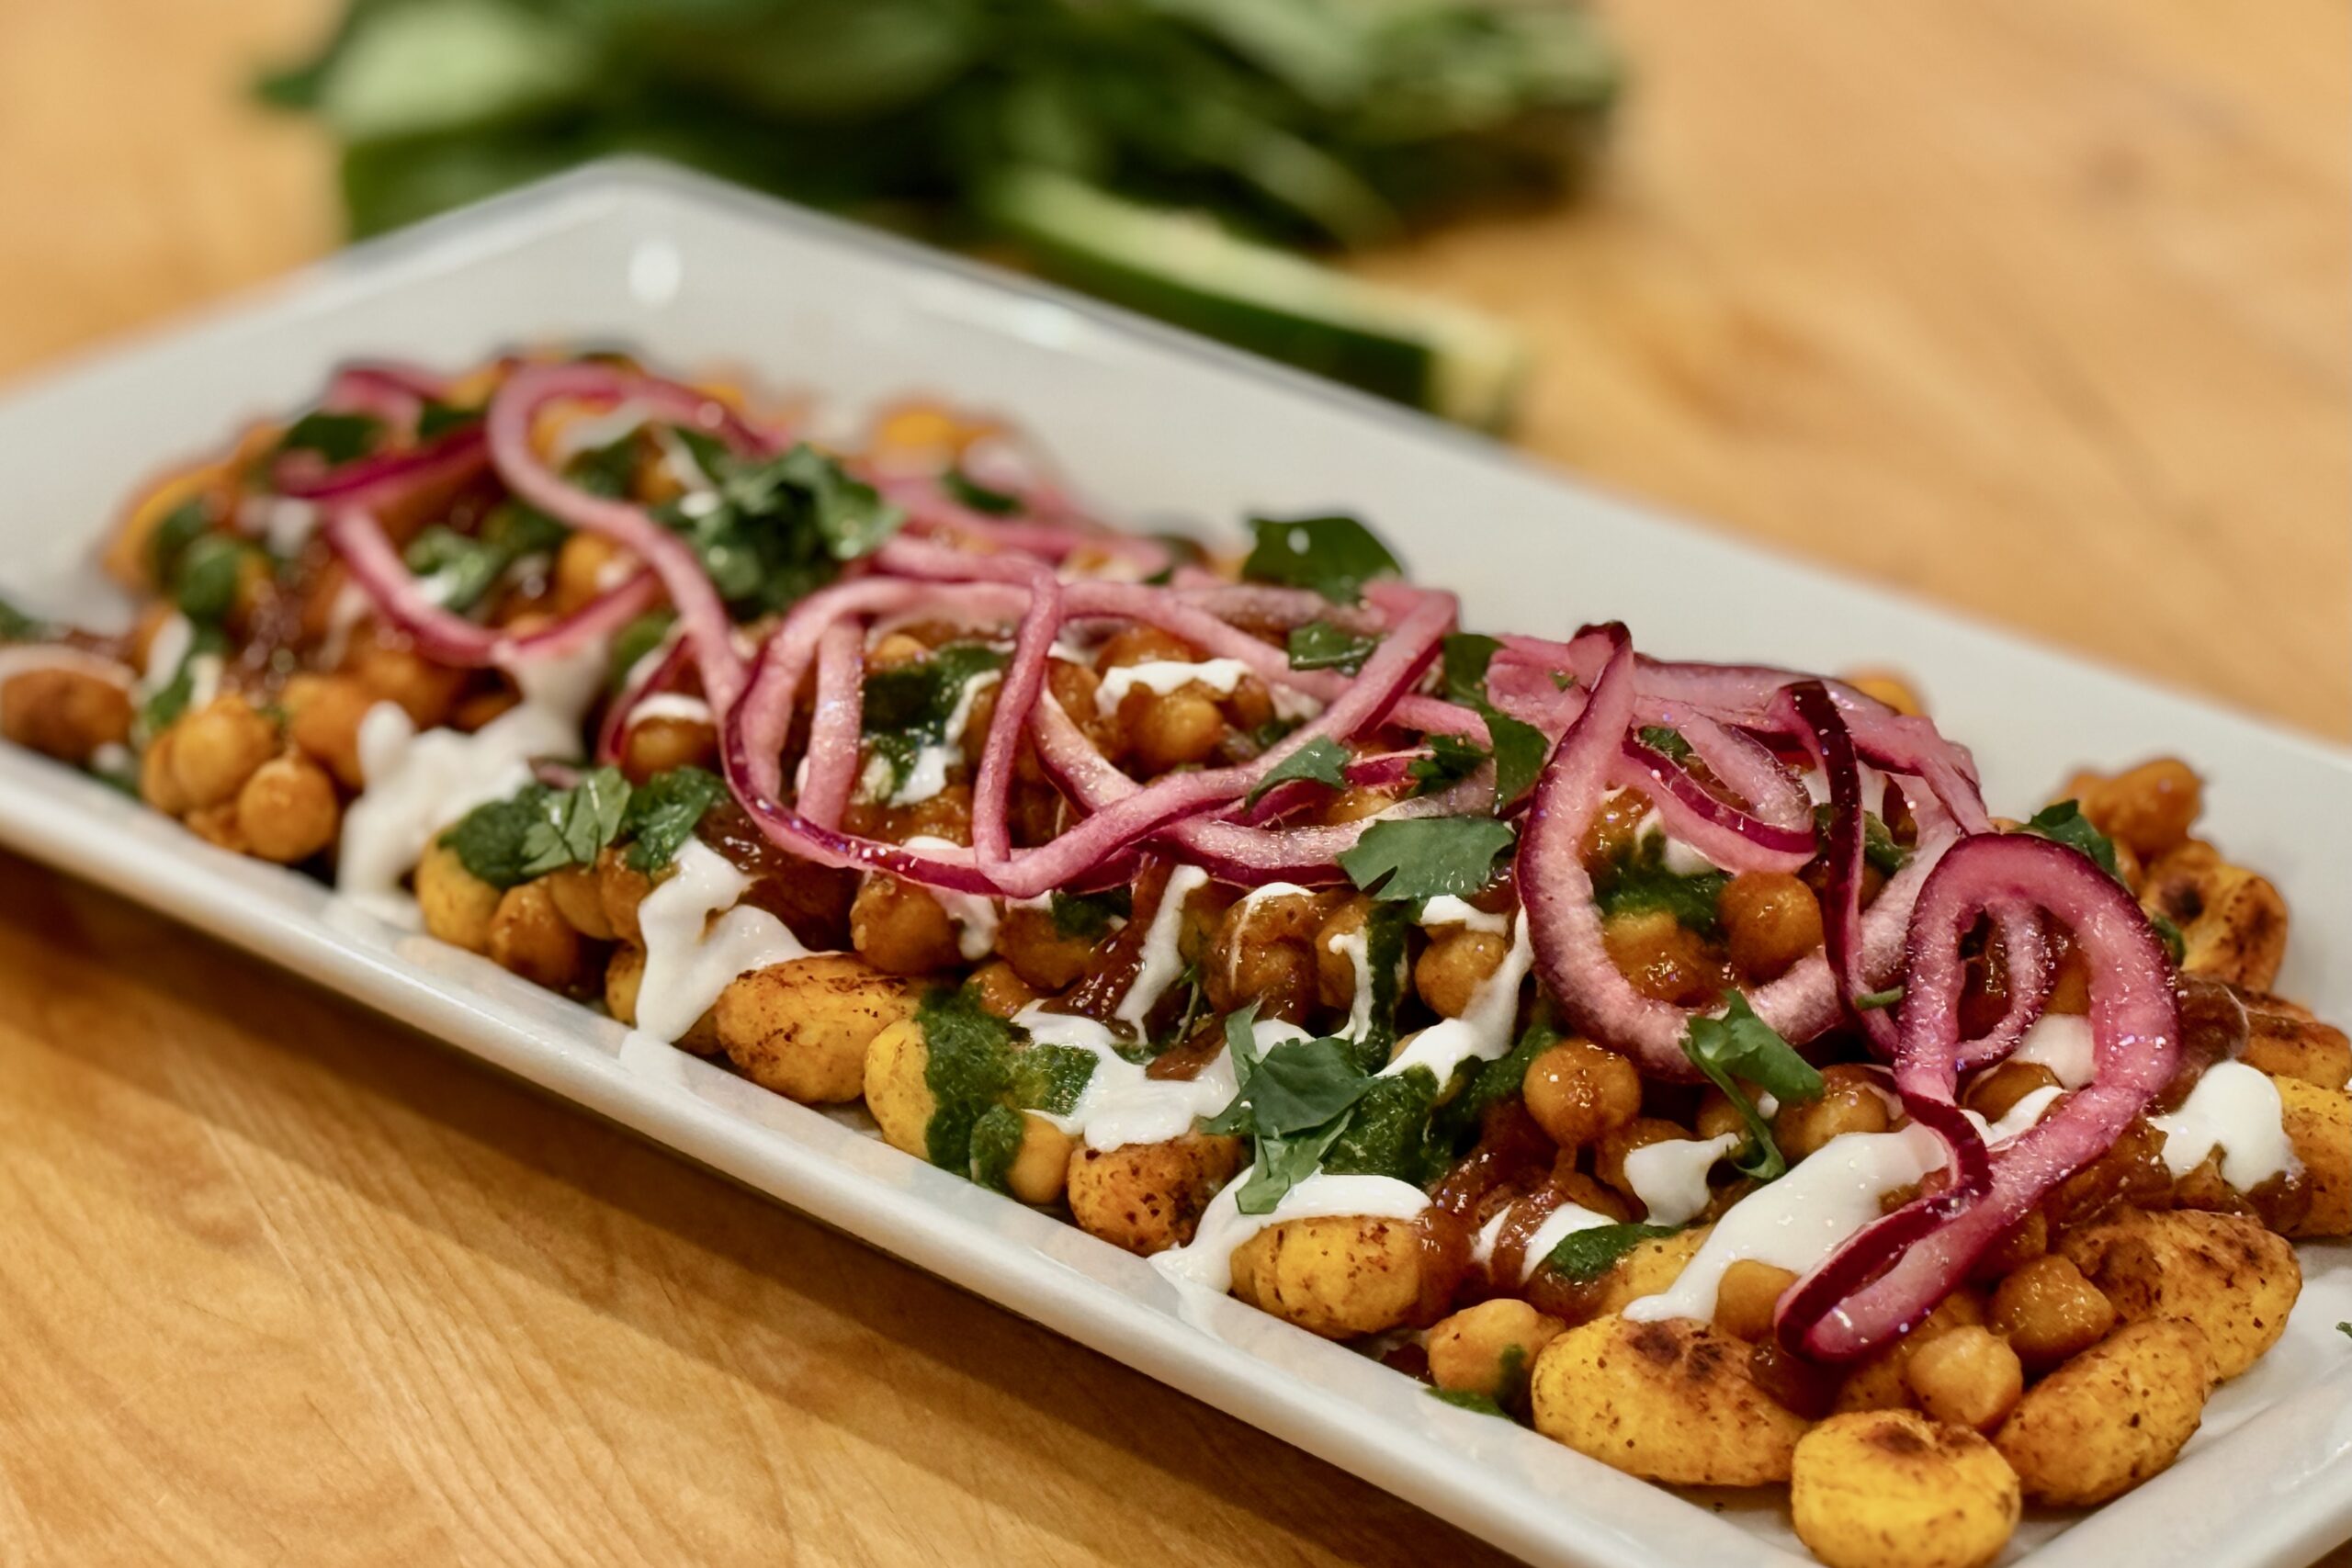
    This crispy gnocchi chaat delivers everything we love about samosa chaat—warm spiced chickpeas, cool salted yogurt, bright green chutney, and that sweet-tangy tamarind hit—without the folding and frying. Roasted gnocchi turns golden and blistered, while quick-pickled red onions and a glossy date–tamarind reduction give the platter a modern, restaurant-worthy edge. Mildly spicy for the family, with simple ways to dial up the heat at the table.


    Ingredients

    Quick-Pickled Red Onions

    • 1 medium red onion, very thinly sliced
    • 3 tbsp (45 ml) rice vinegar (or white vinegar)
    • 2 tbsp (30 ml) warm water
    • 1 tsp sugar
    • ¾ tsp table salt

    Date–Tamarind Reduction

    • ½ cup (about 120 g) tamarind paste (store-bought; or use our homemade Tamarind Paste from Whole Pods)
    • ¾ cup (180 ml) water
    • 3 Medjool dates, pitted and finely chopped
    • ⅓–½ cup (65–100 g) sugar (start with ⅓ cup; adjust to taste)
    • ½ tsp table salt
    • ¼ tsp roasted ground cumin

    Yogurt

    • 1½ cups (about 365 g) plain whole milk yogurt
    • ¼ tsp table salt
    • ½ tsp sugar
    • 1–2 tbsp (15–30 ml) milk, to thin slightly

    Mint-Cilantro Chutney

    • 1½ cups (about 30 g) cilantro leaves and tender stems, packed
    • ¼ cup (about 5 g) mint leaves, lightly packed (leaves only; remove thick stems)
    • ½ small green chili (serrano or jalapeño), seeded (mild)
    • 1 tbsp (15 ml) fresh lime juice
    • ½ tsp sugar
    • ½ tsp table salt, plus more to taste
    • 1–3 tbsp (15–45 ml) water, as needed to blend smooth

    Crispy Gnocchi

    • 2½ lb (1.13 kg) shelf-stable potato gnocchi
    • 3 tbsp (45 ml) neutral oil
    • 1 tsp table salt
    • 1 tsp Kashmiri red chili powder (mild; mostly for color)
    • ¾ tsp chaat masala
    • ⅛ tsp garam masala
    • optional: ⅛ tsp sugar

    Spiced Chickpeas

    • 2 tbsp (30 ml) neutral oil
    • 1 tsp cumin seeds
    • ½ small yellow onion, very finely minced
    • 1 tsp grated ginger
    • 1 tsp grated garlic
    • 1 tbsp (about 15 g) tomato paste
    • 1 tsp ground coriander
    • ½ tsp ground cumin
    • ¼ tsp turmeric
    • ½ tsp Kashmiri red chili powder
    • ¼ tsp garam masala
    • ¼ tsp kasoori methi, crushed finely between palms
    • ½ tsp table salt, plus more to taste
    • 2 cans (15.5 oz / 439 g each) chickpeas, drained
    • 2–3 tbsp (30–45 ml) water
    • 1–2 tsp fresh lime juice

    To Finish

    • ¼ cup (about 15 g) nylon sev (thin sev is best)
    • extra sev, on the side
    • 2–3 tbsp (about 5 g) chopped cilantro
    • chaat masala, for a light dusting
    • optional: pomegranate arils

    Directions

    Quick-Pickle the Onions

    In a bowl, whisk together vinegar, warm water, sugar, and table salt until dissolved.

    Add sliced red onion and toss. Let sit 30–60 minutes, then drain well before plating.

    Make the Date–Tamarind Reduction

    In a small saucepan, combine tamarind paste, water, chopped dates, ⅓ cup (65 g) sugar, table salt, and roasted ground cumin.

    Bring to a gentle simmer and cook 10–12 minutes, stirring occasionally, until the dates are very soft and the mixture has darkened slightly and reduced to a loose, glossy syrup. Taste and add additional sugar as needed to balance the tartness of the tamarind.

    Blend until completely smooth. For an especially refined sauce, strain through a fine-mesh sieve. Cool completely before using; the reduction will thicken noticeably as it cools.

    Prepare the Yogurt and Chutney

    For the yogurt: whisk yogurt, table salt, sugar, and milk until smooth and lightly drizzleable. Taste and adjust salt if needed.

    For the mint-cilantro chutney: blend cilantro, mint leaves (no thick stems), seeded green chili, lime juice, sugar, table salt, and a splash of water until smooth and bright. Add water only as needed to blend; taste and adjust salt, lime, and sugar for balance.

    Crisp the Gnocchi

    Preheat oven to 450°F (232°C) using conventional bake (no convection). Place the rack on the bottom or lower-middle position.

    Toss gnocchi with neutral oil, table salt, Kashmiri chili powder, chaat masala, garam masala, and optional sugar until evenly coated.

    Spread on a bare aluminum sheet pan in a single layer (do not crowd). Roast 25–35 minutes, flipping once around 15–18 minutes, until deep golden, lightly blistered, and crisp on the edges.

    Keep warm while you finish the chickpeas.

    Cook the Spiced Chickpeas

    Heat neutral oil in a skillet over medium heat. Add cumin seeds and cook until they crackle and smell fragrant (about 20–30 seconds).

    Add minced onion and cook until softened but not browned, 3–5 minutes. Add ginger and garlic and cook 30 seconds.

    Stir in tomato paste and cook 1 minute. Add coriander, ground cumin, turmeric, and Kashmiri chili powder and cook 20–30 seconds to bloom.

    Add chickpeas, table salt, and 2–3 tbsp (30–45 ml) water. Simmer 5–6 minutes, stirring, until the chickpeas are glossy and lightly coated (not wet).

    Turn off heat and stir in garam masala, crushed kasoori methi, and lime juice. Taste and adjust salt and lime for a gently warm, savory, slightly tangy finish.

    Assemble the Platter

    Use a large shallow platter (white looks especially sharp). Scatter hot crispy gnocchi evenly across the platter.

    Spoon chickpeas lightly over the gnocchi (don’t blanket the whole surface—leave golden gnocchi exposed).

    Drizzle yogurt in ribbons, then drizzle date–tamarind reduction sparingly in thin lines. Add small streaks or spoonfuls of mint-cilantro chutney.

    Scatter drained pickled onions. Sprinkle with nylon sev, chopped cilantro, and a light dusting of chaat masala. Add optional pomegranate arils.

    Serve immediately while the gnocchi is still crisp, with extra sev on the side for topping.

    Yield: 8 servings.


    Notes

    Preparation

    • Crispness is the make-or-break detail. Roast the gnocchi on a bare aluminum sheet pan, use conventional bake (no convection), and flip once to encourage browning before the centers dry out.
    • The slight reduction in chaat masala paired with a touch of garam masala rounds the flavor and softens any overly sulfury notes from black salt.
    • For the date–tamarind reduction, start with ⅓ cup (65 g) sugar and adjust only after the mixture has simmered. Tamarind varies considerably in tartness, so the final amount of sugar may vary from batch to batch.
    • To make roasted ground cumin, toast cumin seeds in a dry skillet until fragrant and a shade darker, then cool and grind finely.

    Variations

    Boost heat (without changing the family-friendly base):

    • Drizzle chili oil over one quadrant of the platter, or over individual servings.
    • Sprinkle individual servings with a pinch of cayenne before serving.
    • Make a “hot” green chutney bowl by blending in an extra green chili; serve on the side.
    • Scatter thinly sliced fresh green chili over one edge of the platter.

    For a more traditional chaat feel, add a handful of boiled diced potatoes or a spoonful of chana masala-style gravy to the chickpea layer.

    If mint is especially strong, use only 2 tbsp (about 3 g), lightly packed, and rely on cilantro + lime for the bright green profile.

    For another take on chaat, try our Chickpea Chaat.

    Serving Suggestions

    • Serve as a shareable appetizer platter. Keep extra yogurt, chutney, and sev on the side so guests can customize and you can refresh crunch as needed.

    Make-Ahead & Storage

    Make ahead (best):

    • Quick-pickled onions: 2–3 days refrigerated (drain before serving).
    • Date–tamarind reduction: 5–7 days refrigerated. It will thicken as it chills; loosen with warm water, 1 tsp at a time, until easily drizzleable.
    • Mint-cilantro chutney: 2–3 days refrigerated; press plastic wrap directly onto the surface to slow browning.
    • Chickpeas: 3–4 days refrigerated; reheat gently with a splash of water.
    • Yogurt sauce: 2–3 days refrigerated; whisk before using.
    • Day-of only: roast the gnocchi and assemble right before serving for maximum crispness. If needed, you can re-crisp gnocchi on a sheet pan at 450°F (232°C) for 5–7 minutes.

  • Smokehouse Cole Slaw

    Smokehouse Cole Slaw

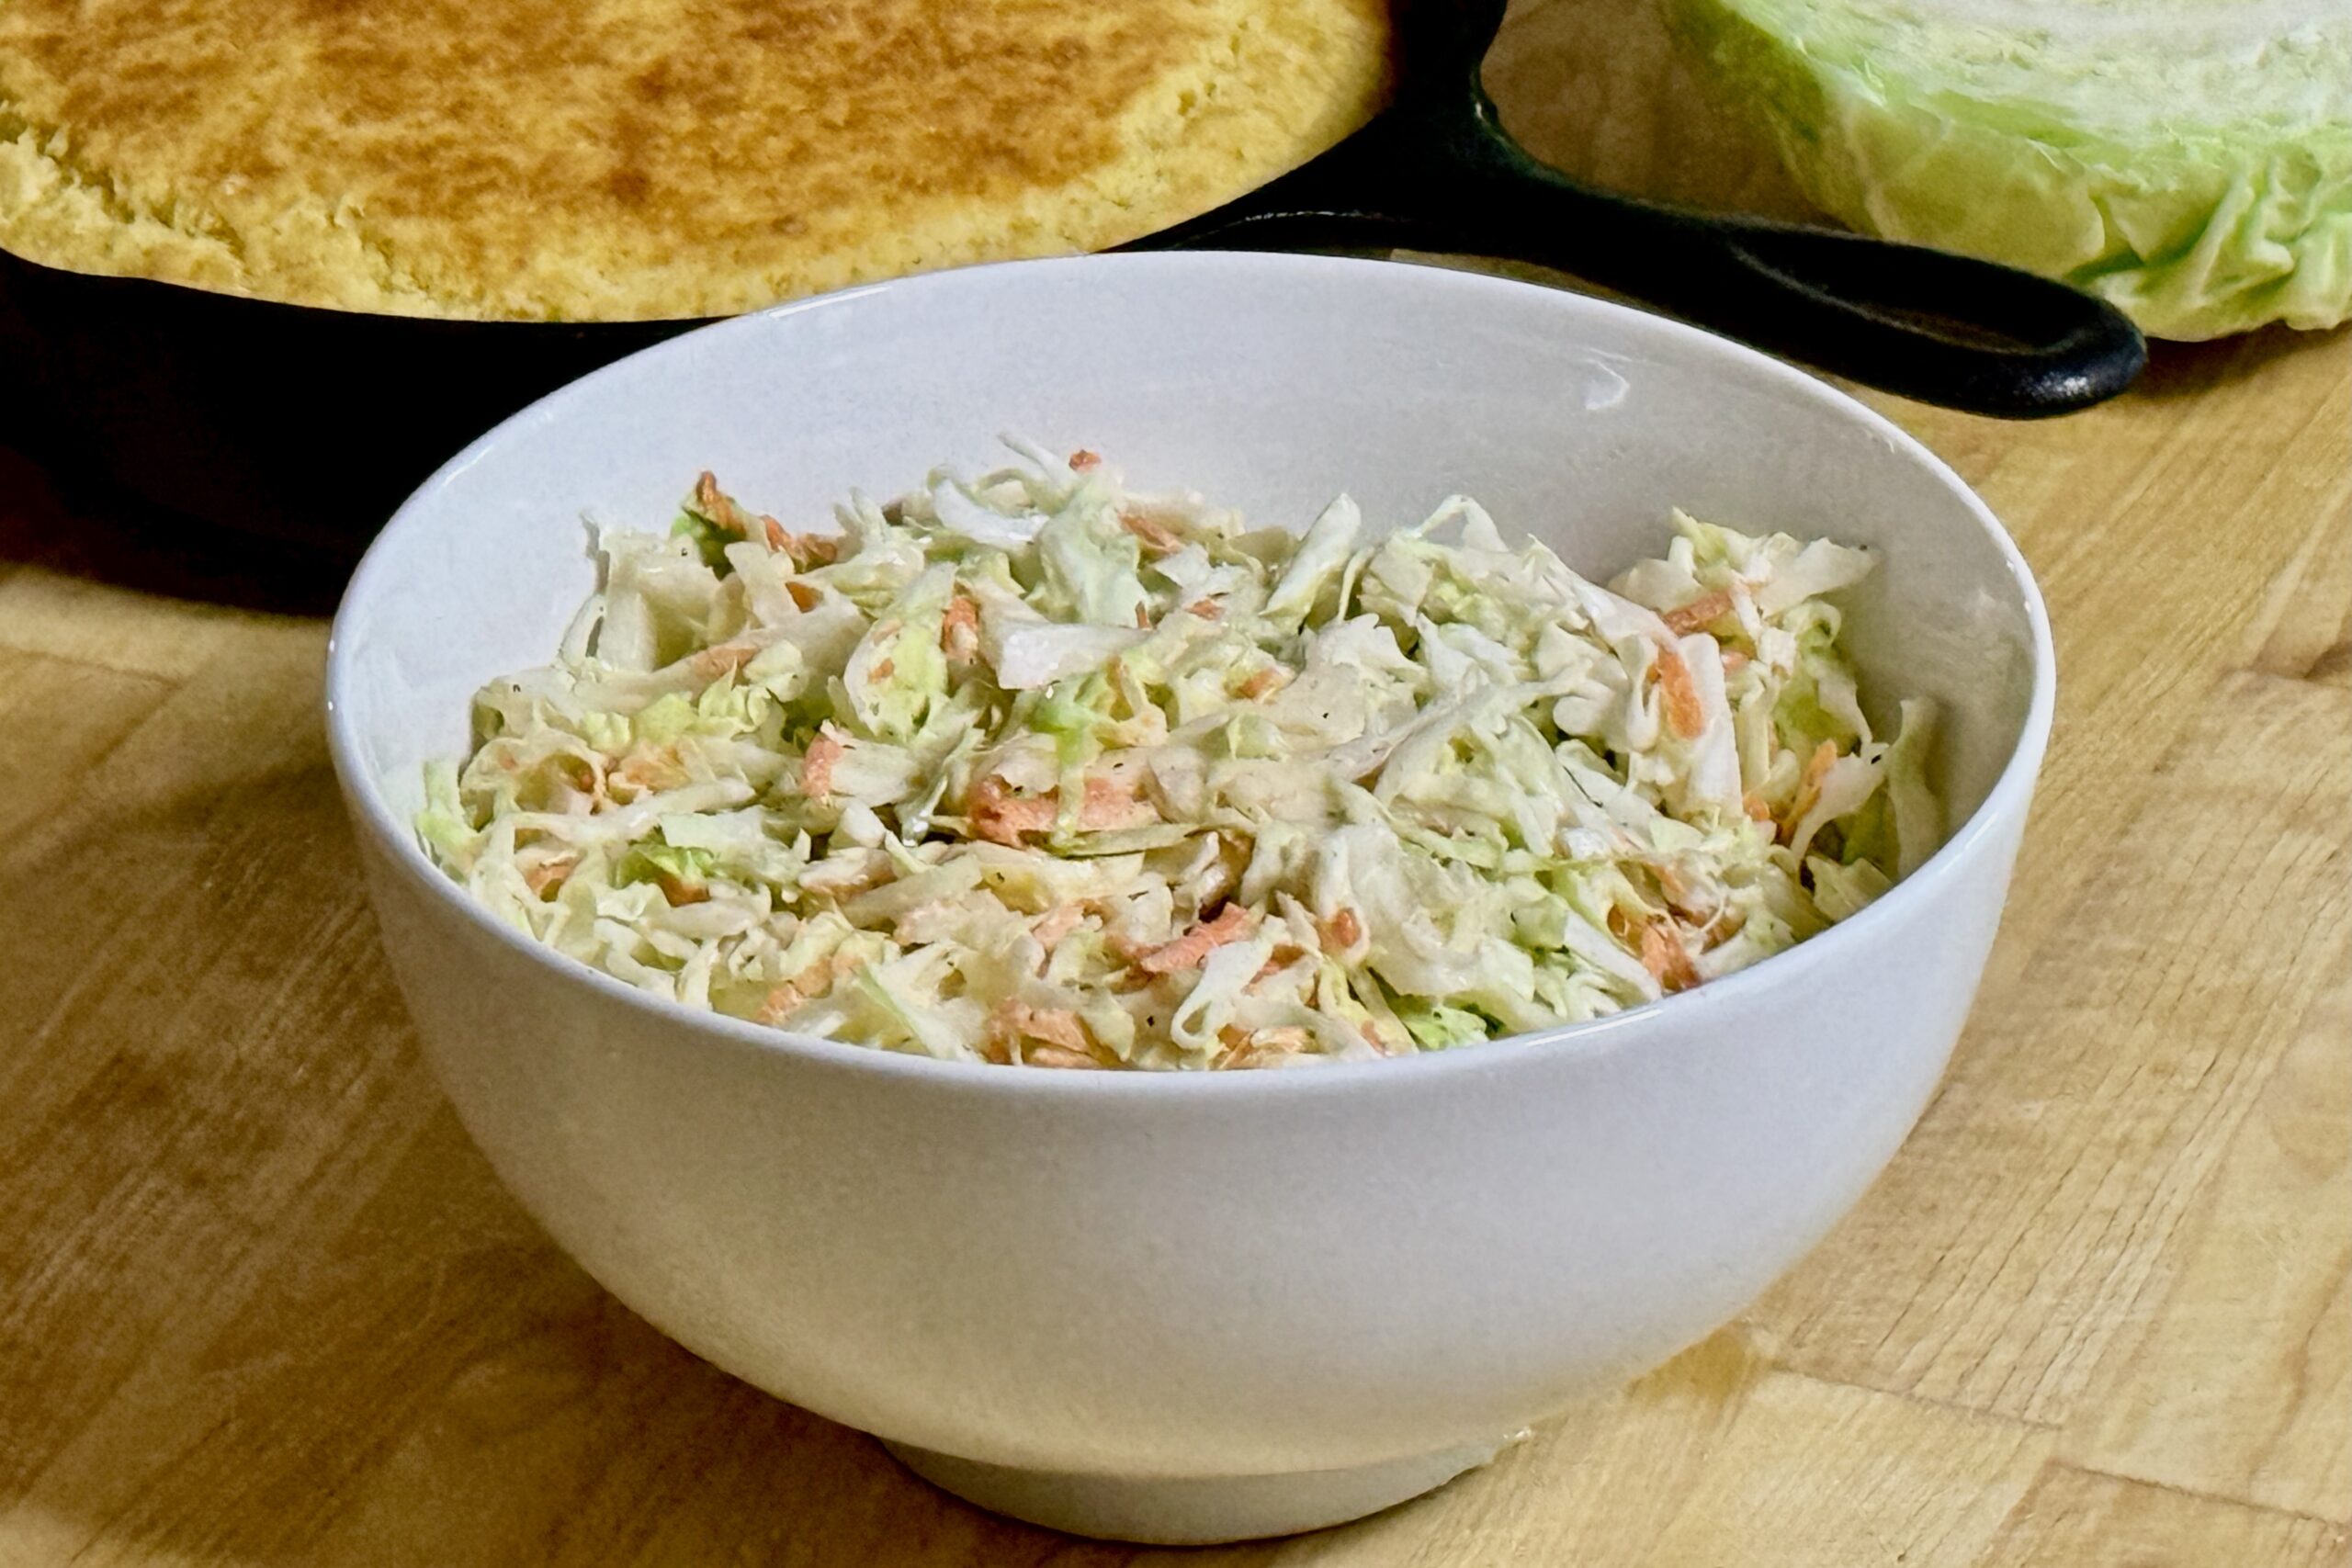
    Our creamy smokehouse cole slaw is simple, classic, and exactly the kind of side dish that belongs next to a tray of barbecue. The dressing is sweet, tangy, and familiar, with enough apple cider vinegar, mustard, lemon, and black pepper to give it a bright, lively finish that perfectly balances rich smoked meats. A small amount of MSG adds extra savoriness without changing its classic character, while the cabbage and carrots stay crisp and refreshing after a good rest in the refrigerator.


    Ingredients

    • ¼ tsp dry mustard
    • ¼ tsp table salt
    • ¼ cup (50 g) sugar
    • 2 tbsp (30 ml) apple cider vinegar
    • 1 tsp (5 ml) lemon juice
    • 1 cup (230 g) mayonnaise
    • ¼ tsp celery seed (optional)
    • ¼ tsp MSG
    • ½ tsp black pepper
    • 1–2 tbsp (10–20 g) very finely grated shallot or ¼ tsp onion powder (optional)
    • 24 oz (680 g) cabbage, finely shredded
    • ¼ cup (about 25 g) carrots, grated

    Directions

    Make the Dressing

    Whisk together the dry mustard, table salt, sugar, apple cider vinegar, and lemon juice until the sugar is mostly dissolved.

    Add the mayonnaise, celery seed (if using), MSG, black pepper, and the grated shallot or onion powder (if using). Whisk until smooth, then let the dressing rest for 15–20 minutes before using to allow the flavors to meld.

    Dress the Slaw

    Place the shredded cabbage and grated carrots in a large bowl.

    Add the dressing and toss until the vegetables are evenly coated.

    Chill

    Cover and refrigerate for at least 2 hours before serving, stirring once before serving if needed.

    Yield: Approximately 8 servings.


    Notes

    Preparation

    • Use the full 2 tbsp (30 ml) apple cider vinegar for a bright, barbecue-friendly slaw. For a slightly milder, sweeter version, reduce the vinegar to 1½ tbsp (22 ml).
    • The optional shallot adds a subtle savory depth. If you don’t have one on hand, ¼ tsp onion powder is an excellent substitute.
    • For the best texture, shred the cabbage fairly fine so the dressing coats evenly without feeling heavy.
    • Freshly ground black pepper gives the dressing the brightest flavor, though pre-ground pepper also works well.

    Variations

    • Deli-Style: Add the optional celery seed for a more old-fashioned slaw flavor.
    • Extra-Peppery: Increase the black pepper to ¾ tsp.
    • Vinegar-Based: Toss the cabbage and carrots with Espiau’s Vinaigrette instead of the mayonnaise dressing.

    Serving Suggestions

    • Serve alongside pulled pork, smoked chicken, ribs, brisket, or burgers with our Dr Pepper Barbecue Sauce.
    • This slaw also makes an excellent topping for pulled pork or smoked chicken sandwiches, adding cool crunch and bright acidity.

    Make-Ahead & Storage

    • This slaw is best after resting for at least 2 hours and is at its crispest the day it is made.
    • Store covered in the refrigerator for up to 2 days. Stir before serving, as the cabbage will naturally release a small amount of liquid.
    • For the freshest texture, prepare the dressing and vegetables separately, then combine them 2–4 hours before serving.
  • Smokehouse Street Corn

    Smokehouse Street Corn

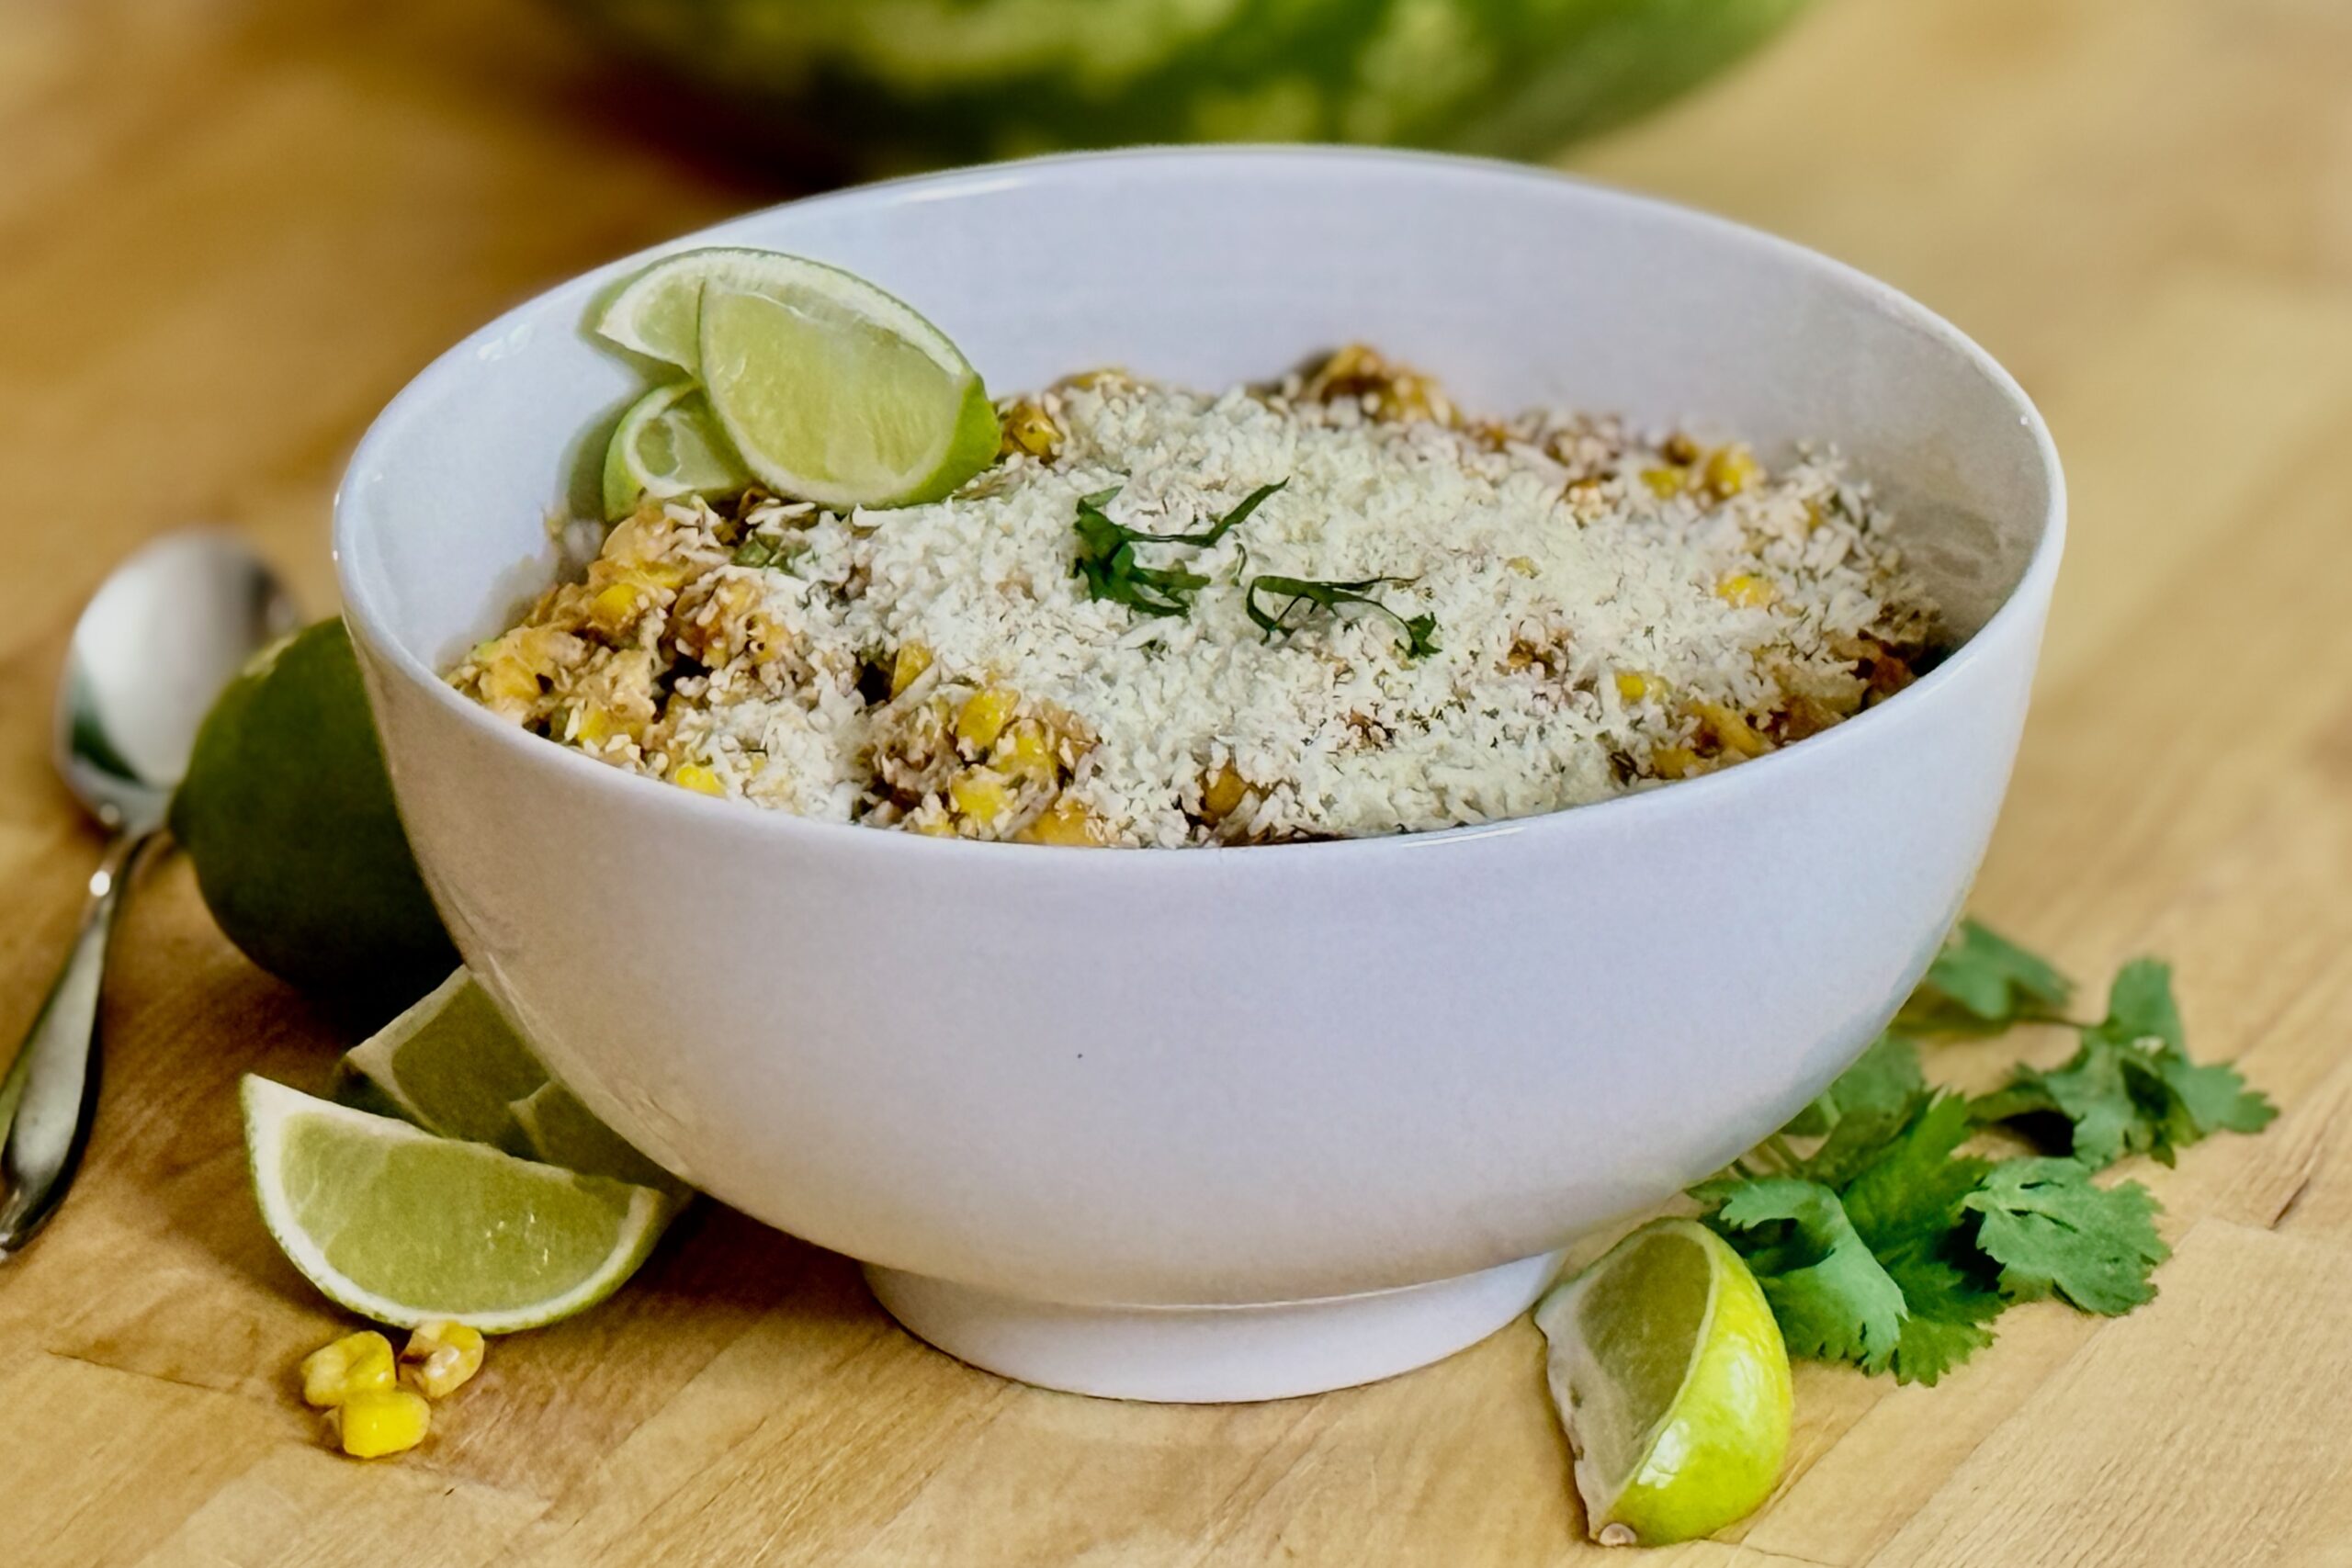
    Inspired by Mexican street corn but crafted for the barbecue table, this Smokehouse Street Corn has quickly become one of our family’s favorite side dishes. Sweet corn is charred until deeply caramelized, then tossed with browned butter, smoky chipotle, Better Than Bouillon Roasted Chicken Base, fresh jalapeño, lime, Cotija, and just enough creamy dressing to tie everything together without hiding the corn itself. The result is rich, savory, smoky, bright, and just a little spicy—the perfect companion for ribs, brisket, pulled pork, or grilled chicken.


    Ingredients

    Corn

    • 2 lb (910 g) frozen sweet corn (do not thaw)
    • 2 tbsp (30 ml) avocado oil
    • 1 medium jalapeño, finely diced

    Dressing

    • ¼ cup (55 g) mayonnaise
    • ¼ cup (60 g) sour cream
    • 1 tsp Dijon mustard
    • 2 cloves garlic, finely grated
    • 1 tsp Worcestershire sauce
    • 1 tsp lime zest
    • 1½ tbsp (22 ml) fresh lime juice
    • ¼ tsp freshly ground black pepper
    • ¼ tsp MSG (optional, but recommended)

    Browned Butter Seasoning

    • 3 tbsp (42 g) unsalted butter
    • ½ tsp Better Than Bouillon Roasted Chicken Base
    • ½ tsp chipotle chile powder
    • ½ tsp smoked paprika
    • ¼ tsp ground cumin

    Finish

    • ¾ cup (about 85 g) crumbled Cotija cheese, divided
    • 2 green onions, thinly sliced
    • ¼ cup (about 4 g) chopped fresh cilantro
    • Table salt, to taste
    • Lime wedges, for serving

    Directions

    Prepare the Dressing

    In a medium bowl, whisk together the mayonnaise, sour cream, Dijon mustard, garlic, Worcestershire sauce, lime zest, lime juice, black pepper, and MSG (if using). Refrigerate while preparing the corn.

    Char the Corn

    Heat a large cast-iron skillet over high heat until very hot. Add the avocado oil, then immediately add the frozen corn in an even layer. Leave the corn undisturbed for 3–4 minutes. Continue cooking another 6–8 minutes, stirring only every couple of minutes, until roughly one-third of the kernels have developed deep brown spots.

    Cook the Jalapeño

    Stir in the diced jalapeño and continue cooking for 3–4 minutes until softened and beginning to char. Transfer the corn mixture to a large serving bowl.

    Brown the Butter

    Reduce the heat to medium. Add the butter to the empty skillet and cook until the milk solids become deep golden brown and smell nutty, about 2–3 minutes.

    Bloom the Spices

    Stir the Better Than Bouillon Roasted Chicken Base, chipotle chile powder, smoked paprika, and cumin into the browned butter. Cook for 20–30 seconds, stirring constantly. Immediately pour the seasoned browned butter over the warm corn and toss well to coat.

    Finish the Corn

    Let the corn cool for about one minute. Fold in the prepared dressing, half of the Cotija cheese, the green onions, and cilantro until everything is lightly coated.

    Serve

    Transfer to a serving bowl if needed. Sprinkle with the remaining Cotija cheese and serve with fresh lime wedges. Taste before serving and season with table salt as needed.

    Yield: Approximately 8 servings.


    Notes

    Preparation

    • Do not thaw the corn. Cooking it directly from frozen allows the moisture to evaporate before the kernels begin to caramelize.
    • Resist stirring too often. Letting the corn sit against the hot skillet creates the smoky, charred flavor that defines this dish.
    • Watch the butter carefully while browning. It should smell nutty and become deep golden, but not burnt.
    • Blooming the Better Than Bouillon Roasted Chicken Base with the spices in the browned butter gives the corn a rich, savory depth that blends beautifully with the smoky chipotle.
    • This recipe was tested with ½ teaspoon Better Than Bouillon Roasted Chicken Base and required just a small pinch of table salt at the end for perfect balance.

    Variations

    • More Heat: Use two jalapeños or leave more of the seeds intact.
    • Queso Fresco: Substitute queso fresco if Cotija isn’t available, though Cotija provides the best salty finish.
    • Spicier Smokehouse Corn: Add a pinch of cayenne.

    Serving Suggestions

    Make-Ahead & Storage

    • The dressing can be prepared up to 2 days ahead.
    • The finished corn can be made several hours in advance and gently rewarmed before serving. Add a fresh squeeze of lime and a little extra Cotija just before serving for the brightest flavor.
    • Store leftovers refrigerated for up to 3 days.
  • Garlic Oil Pizza Base

    Garlic Oil Pizza Base

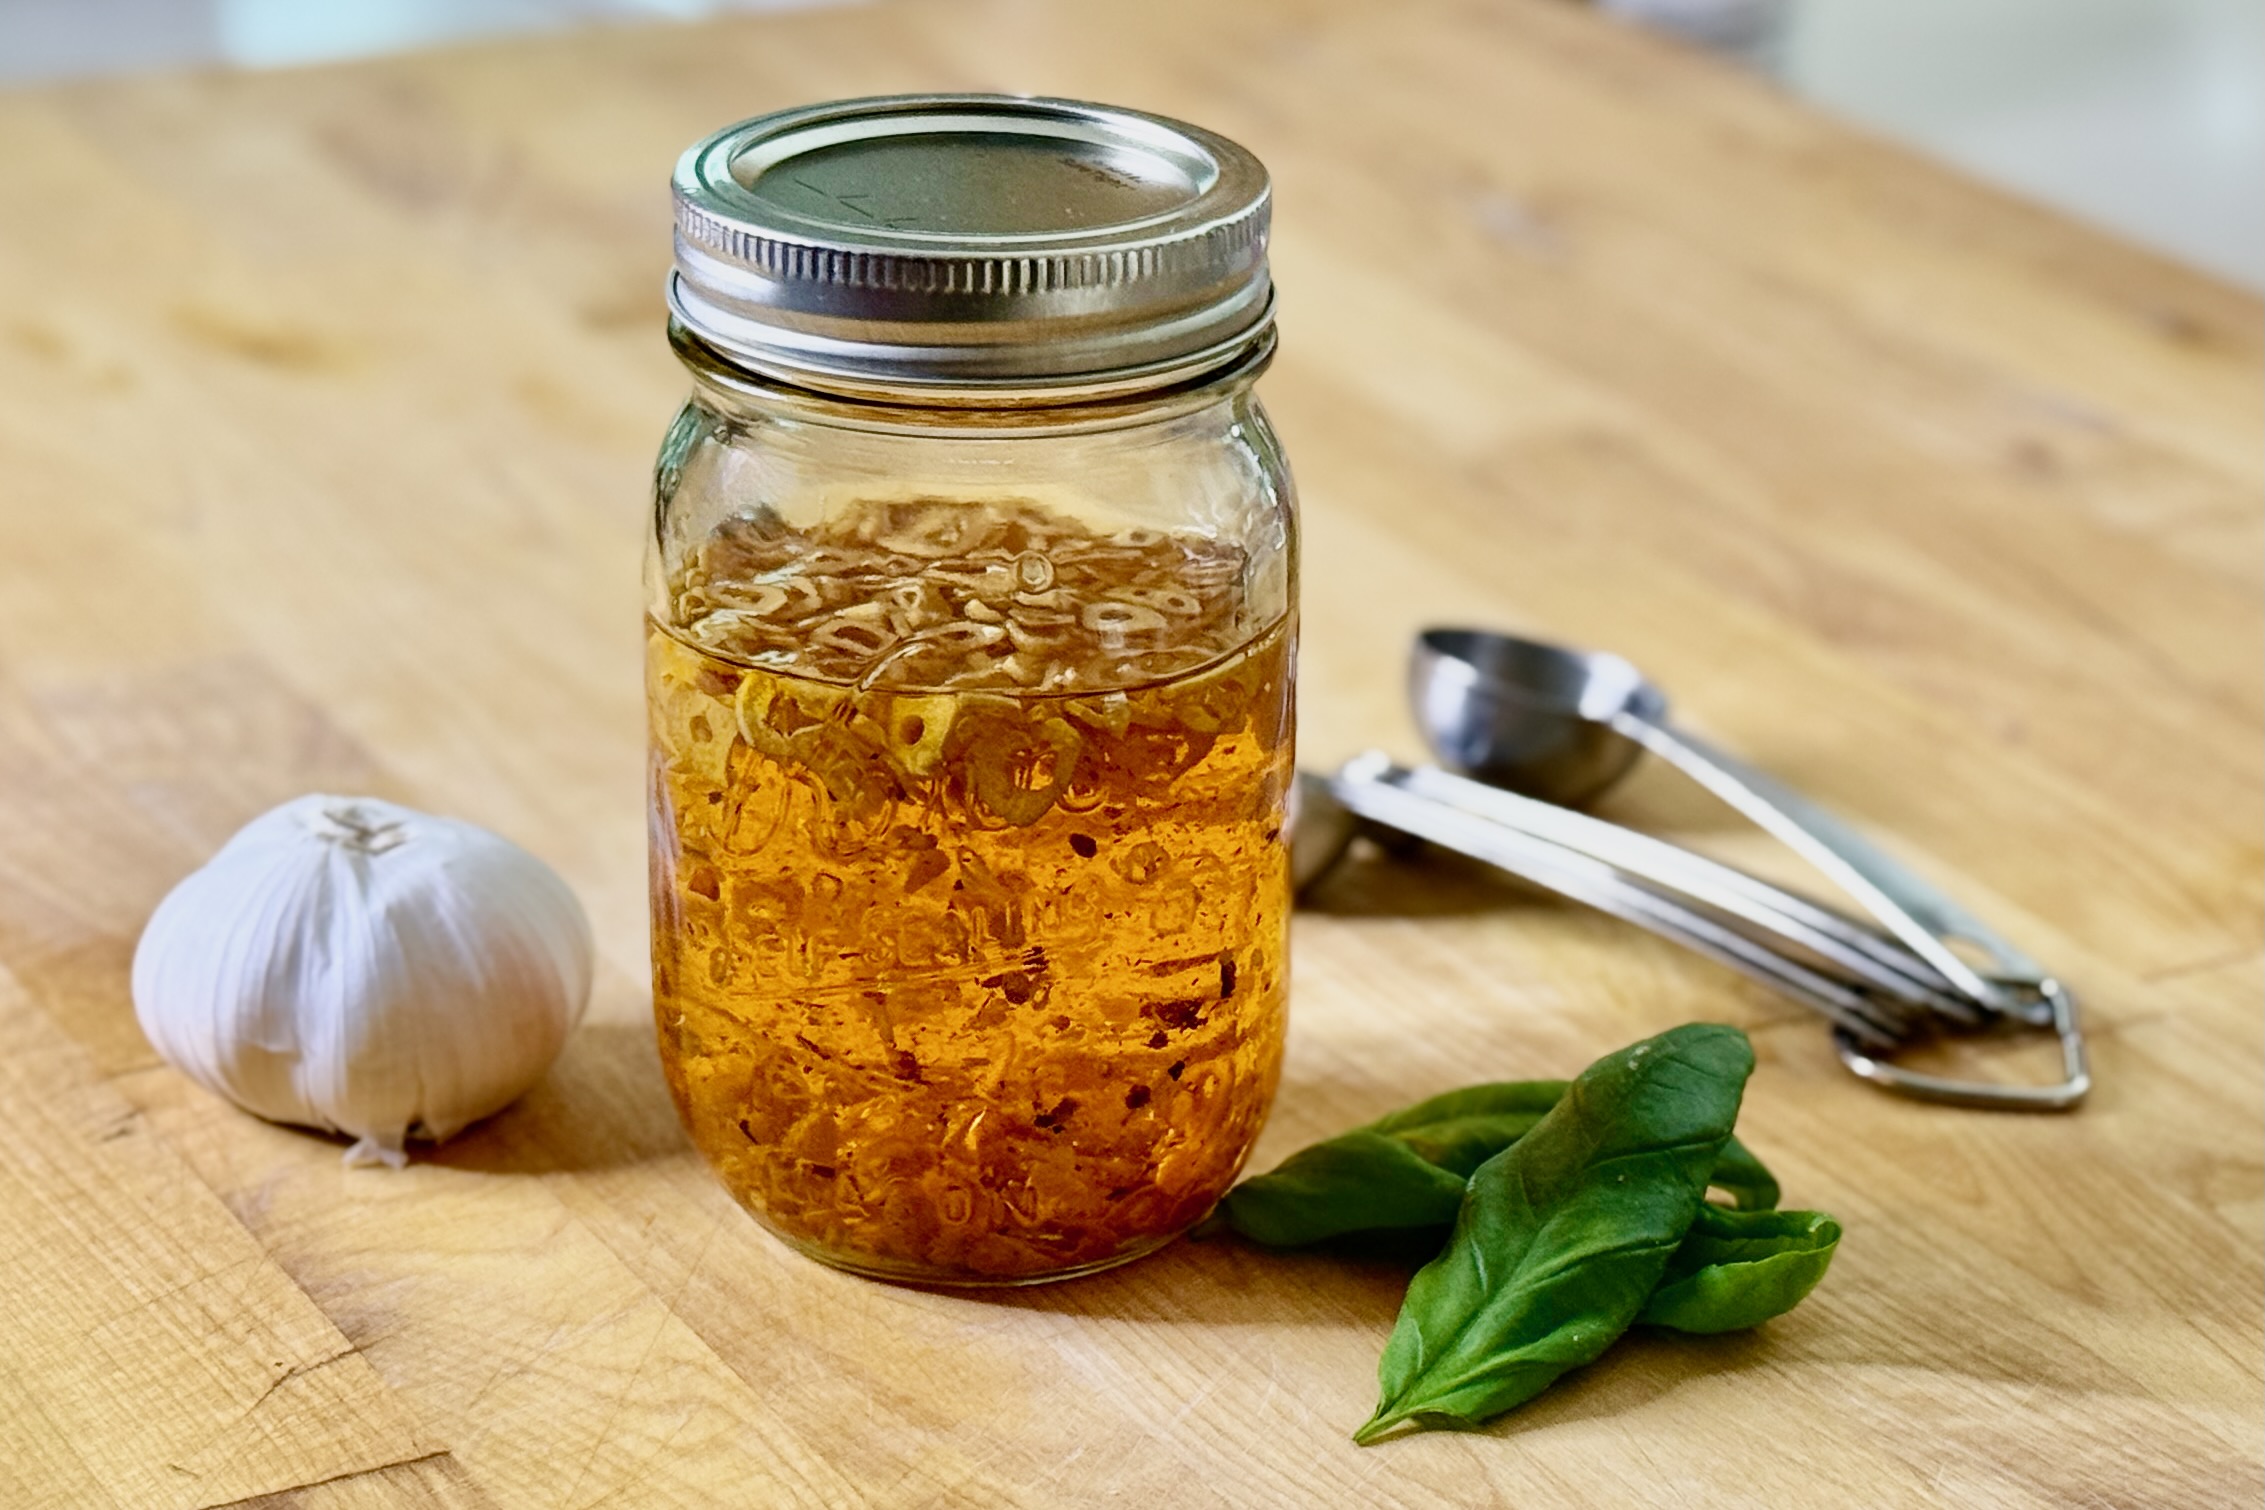
    This garlic oil base transforms your Neapolitan pizza into a light, aromatic pizza bianca. It’s perfect when you want the dough’s flavor and texture to shine without the acidity of tomato sauce. It pairs beautifully with fresh mozzarella, ricotta, mushrooms, or prosciutto for a delicate, savory balance. The aglio e olio variation adds a gentle chili warmth layered into the oil itself.


    Ingredients

    • 1–2 tsp Garlic Oil, per pizza
    • Thin slices of cooked garlic from the infused oil, optional

    Optional Toppings

    • Fresh mozzarella or burrata
    • Ricotta cheese
    • Mushrooms, caramelized onions, or roasted peppers
    • Prosciutto, arugula, or fresh basil

    Directions

    Prepare the Dough

    Stretch or shape one portion of prepared Neapolitan pizza dough to your desired size, leaving a slightly raised edge for the crust.

    Apply the Garlic Oil Base

    Brush or spoon the garlic oil evenly over the dough. Use about 1 tsp for subtle flavor or up to 2 tsp for stronger flavor, scattering a few cooked garlic slices over the surface if desired.

    Add Toppings

    Top lightly with cheese and desired ingredients. Avoid adding too much oil or moisture, which can soften the crust during baking.

    Bake

    Bake according to your Neapolitan dough instructions—typically at 475–500°F (245–260°C) until the crust is blistered and golden, about 1½–2 minutes in a high-heat pizza oven or 6–8 minutes in a home oven on a preheated baking steel.

    Finish

    Drizzle with a touch more garlic oil after baking, if desired. Slice and serve immediately.

    Yield: 1 pizza.


    Notes

    Preparation

    • Use Homemade Garlic Oil for best flavor and consistency. For the aglio e olio version, use the Chili Garlic Oil variation from that same recipe.
    • For a lighter pizza, use less oil and keep toppings minimal—Neapolitan-style pizza cooks best when lightly topped.
    • Apply oil lightly; too much can prevent proper blistering and lead to a softer crust.

    Variations

    • Aglio e Olio: Blend ½–1 tsp of the Chili Garlic Oil variation from our Garlic Oil recipe into the garlic oil before brushing the dough. Use ½ tsp for gentle heat or 1 tsp for bolder heat.
    • Truffle Oil: Drizzle a few drops over the pizza just before serving.
    • Subtle Chili-Garlic: Combine equal parts garlic oil and the Chili Garlic Oil variation for a gentle, smoky spice.
    • Herb-Infused: Use rosemary- or thyme-infused olive oil for a Mediterranean variation.

    Serving Suggestions

    • Top with mozzarella, ricotta, or burrata for a rich pizza bianca.
    • Add roasted vegetables, mushrooms, or caramelized onions for earthy depth.
    • Finish with prosciutto, arugula, or basil after baking for a fresh touch.

    Make-Ahead & Storage

    • Garlic oil can be made ahead and stored in the refrigerator according to the storage guidance in the Garlic Oil recipe.
    • Bring refrigerated garlic oil to room temperature before using for easier spreading.
    • Do not leave garlic-infused oil at room temperature for extended periods due to food safety concerns.
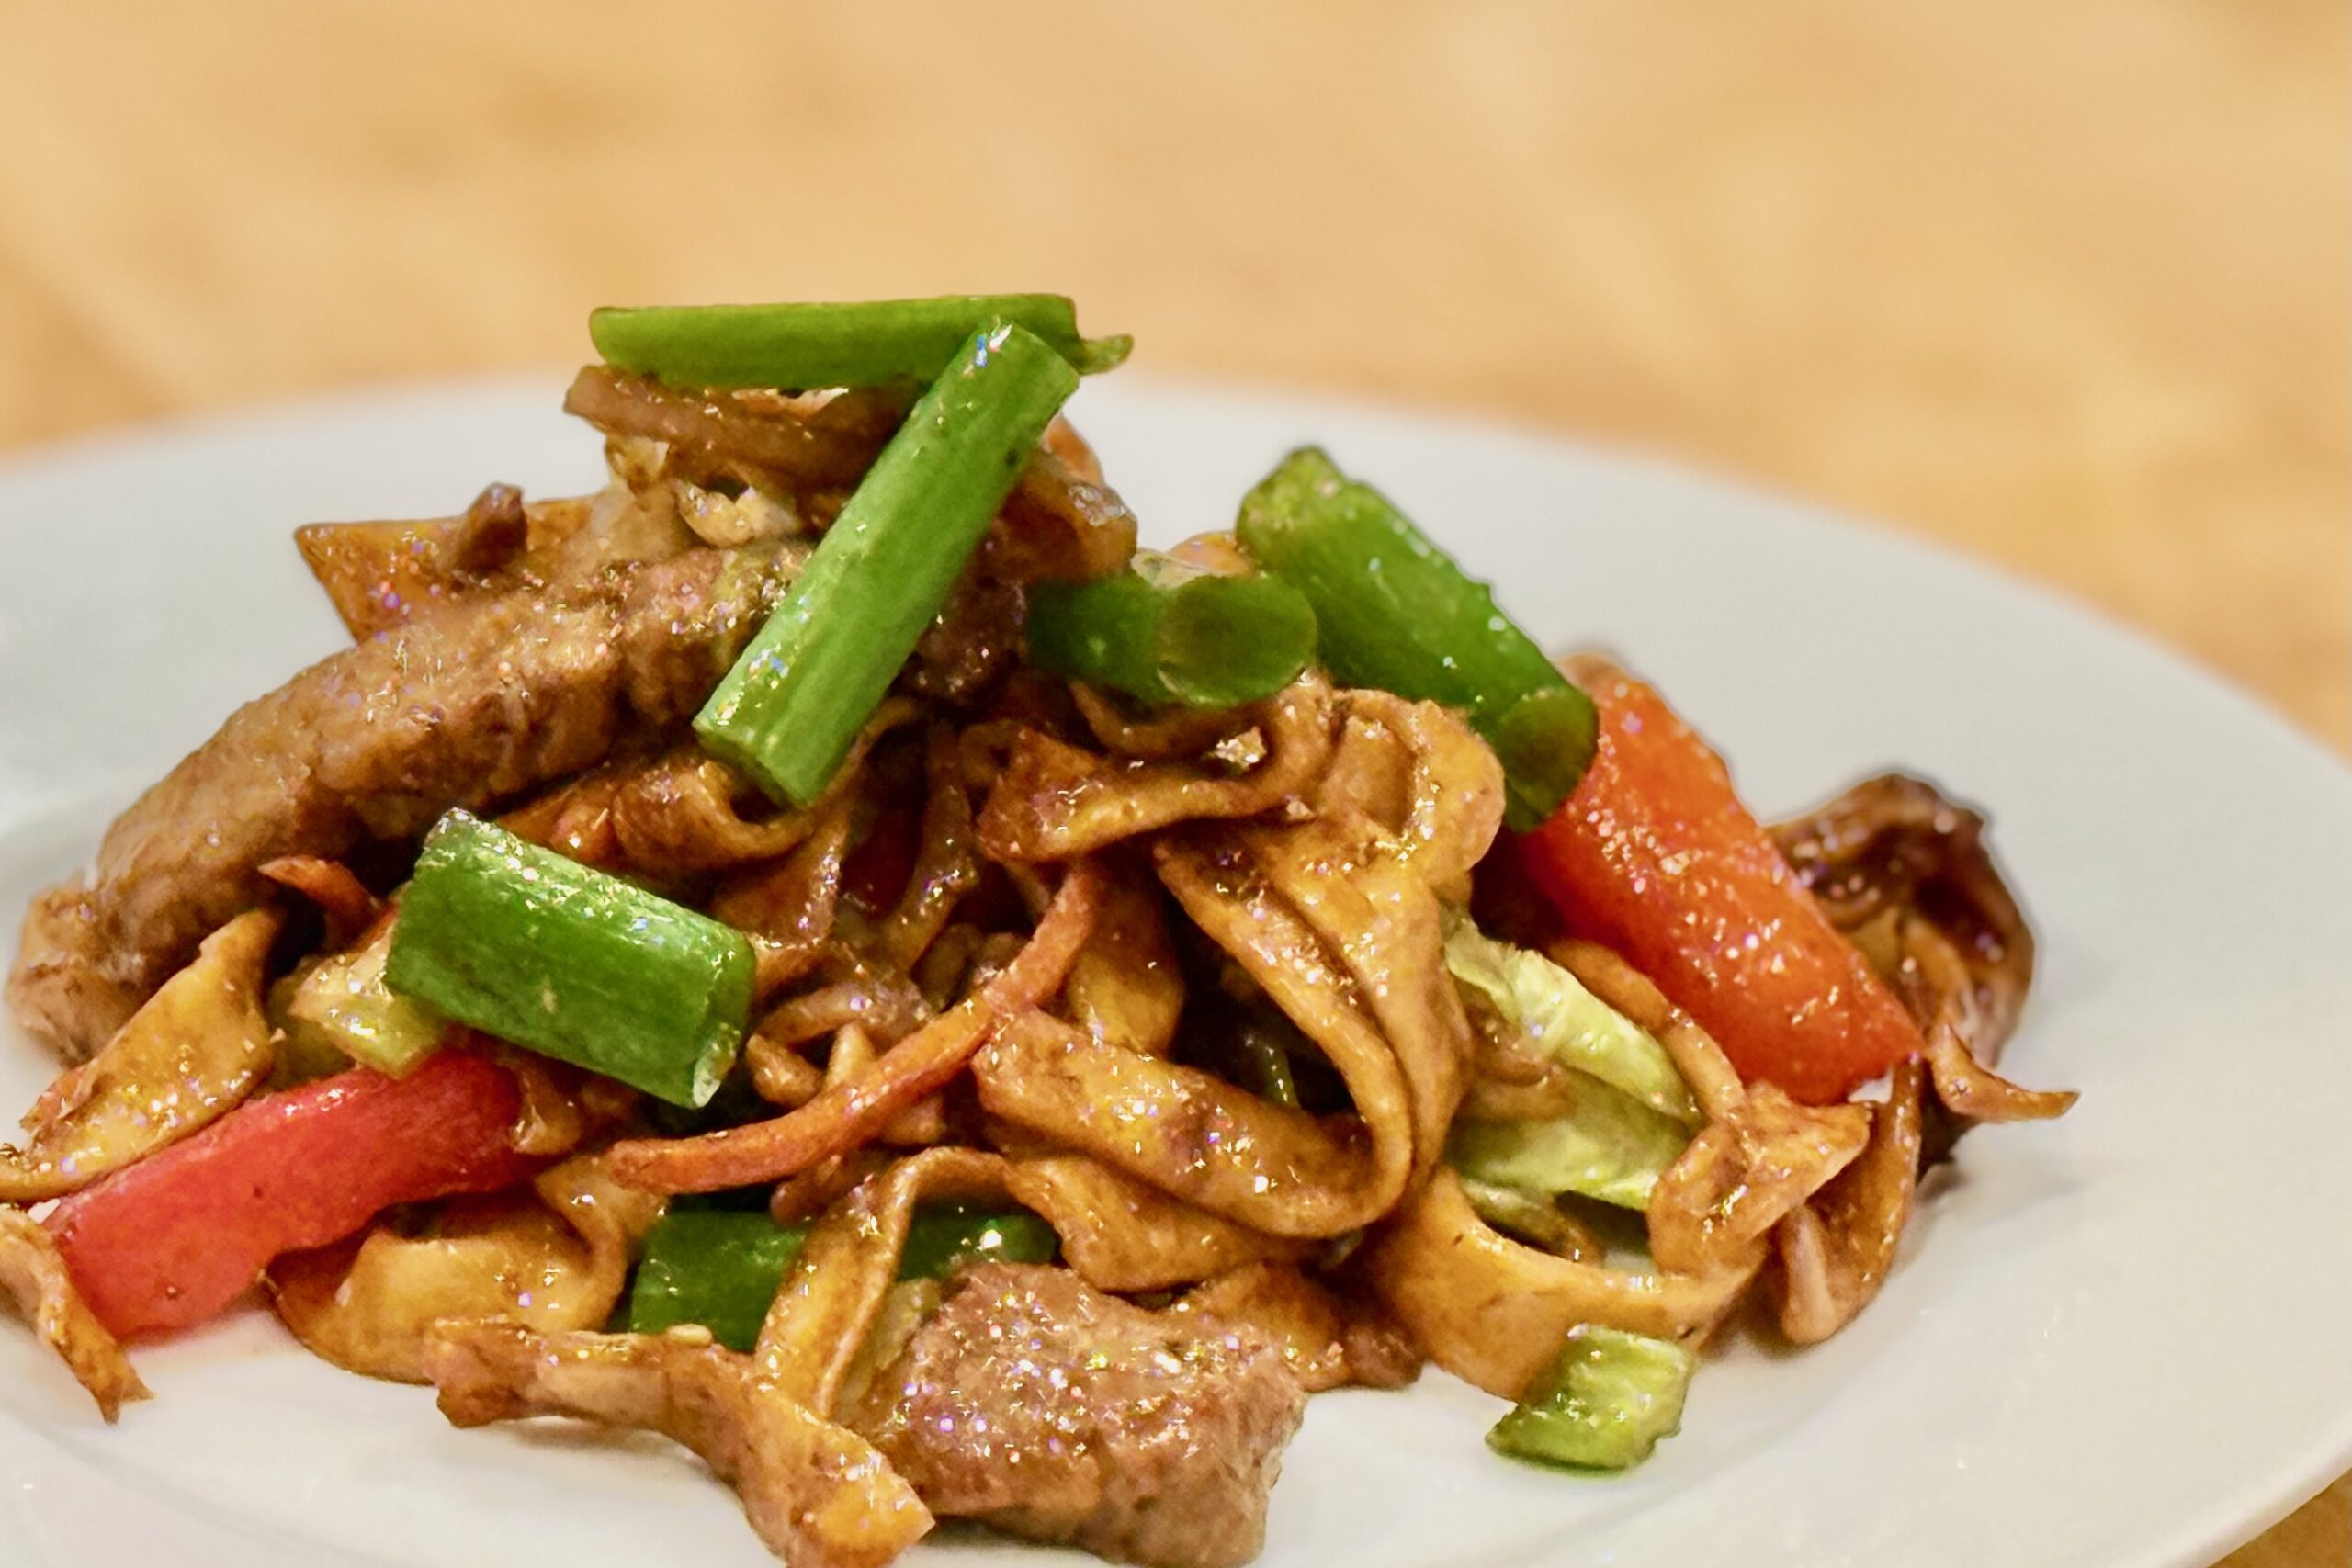
  • Beef Bahmi Goreng

    Beef Bahmi Goreng

    Beef Bahmi Goreng is a savory, wok-fried noodle dish built around tender velveted beef, springy homemade bahmi noodles, crisp green cabbage, bean sprouts, shallot, garlic, ginger, and a restrained ketjap-soy glaze. This version keeps the sweetness in check so the noodles stay smoky, aromatic, and savory, while fried shallots, green onion, cilantro, and lime bring brightness and crunch at the table.


    Ingredients

    Beef

    • 1½ lb (680 g) flank steak, sirloin flap, flat iron steak, or tender steak, sliced thin against the grain

    Velveting Marinade

    • 1 cup (240 ml) water
    • ½ tsp baking soda
    • 3 tbsp (45 ml) soy sauce
    • 1 egg white
    • ¼ tsp white pepper
    • 1 tbsp (8 g) cornstarch
    • 1 tsp neutral oil

    Noodles

    Sauce

    • 2 tbsp (30 ml) ketjap manis
    • 2 tbsp (30 ml) soy sauce
    • 1 tbsp (15 ml) mushroom soy sauce
    • 1 tbsp (15 ml) oyster sauce
    • 1 tbsp (15 ml) Shaoxing wine or michiu
    • ½ tsp white pepper
    • ¼ tsp MSG, optional

    Vegetables & Aromatics

    • 3–4 tbsp (45–60 ml) neutral oil, divided
    • 4–5 cups (about 280–350 g) shredded green cabbage
    • 1 medium carrot, julienned
    • 2 shallots, thinly sliced
    • 4 green onions, whites thinly sliced and greens reserved for garnish
    • 2 tbsp (about 18 g) minced garlic
    • 1 tsp minced fresh ginger
    • 2 cups (about 200 g) bean sprouts

    Garnishes

    • Fried shallots
    • Reserved green onion greens
    • Fresh cilantro leaves
    • Lime wedges
    • Chopped dry roasted peanuts, optional
    • Sambal oelek or sambal badjak, optional

    Directions

    Velvet the Beef

    In a large bowl, whisk together the water, baking soda, and soy sauce. Add the sliced beef, separate the pieces, and toss until evenly coated. Cover and refrigerate for 30–90 minutes.

    Drain the beef very well and pat dry with paper towels. Return to a clean bowl and add the egg white, white pepper, cornstarch, and neutral oil. Mix thoroughly until the beef is evenly coated. Let rest for 15–30 minutes while preparing the remaining ingredients.

    Prepare the Noodles

    Cook the homemade bahmi noodles until just shy of fully tender. They should still have a firm bite since they will finish cooking in the wok.

    Drain very well, toss lightly with 1 tsp neutral oil, and spread on a tray or wide bowl so excess steam can escape before stir-frying.

    Mix the Sauce

    In a small bowl, stir together the ketjap manis, soy sauce, mushroom soy sauce, oyster sauce, Shaoxing wine, white pepper, and MSG, if using. Set near the stove.

    Cook the Beef

    Heat a wok over high heat until very hot. Add 1–2 tbsp (15–30 ml) neutral oil and cook the beef in batches, spreading it out so it sears instead of steaming.

    Stir-fry just until the beef is lightly browned at the edges and nearly cooked through. Transfer to a plate and set aside.

    Char the Cabbage and Carrot

    Return the wok to high heat. Add 1 tbsp (15 ml) neutral oil, then add the cabbage and carrot. Stir-fry until the cabbage picks up light browning and blistered edges while still retaining some crispness. Transfer to a plate and set aside.

    Stir-Fry the Aromatics

    Add another 1 tbsp (15 ml) neutral oil to the wok if needed. Add the shallots and green onion whites and stir-fry briefly until fragrant and beginning to soften. Add the garlic and ginger and cook for 10–15 seconds more, being careful not to brown the garlic.

    Fry the Noodles

    Add the noodles to the wok and toss over high heat until they begin to pick up light wok color in spots.

    Pour the sauce around the edges of the wok and toss rapidly until the noodles are evenly coated. The noodles should be lightly glazed, not swimming in sauce.

    Finish

    Return the beef, cabbage, and carrot to the wok and toss until everything is hot and evenly combined.

    Add the bean sprouts and toss for 15–30 seconds, just until barely softened but still fresh and crisp. Remove from heat.

    Serve

    Transfer to a serving platter and top with green onion greens, fried shallots, cilantro, and lime wedges. Add chopped dry roasted peanuts and sambal, if desired.

    Yield: 6 servings.


    Notes

    Preparation

    • For the best texture, slice the beef thinly against the grain. Partially freezing the meat for 20–30 minutes makes slicing easier.
    • Cook the cabbage separately over very high heat so it can brown slightly without softening too much.
    • Do not overcook the bean sprouts. They should stay fresh and lightly crisp.
    • This recipe is designed as a relatively dry wok-fried noodle dish. Avoid adding extra liquid unless the noodles are sticking badly.
    • The homemade bahmi noodles should be slightly undercooked before stir-frying so they keep their springy texture in the finished dish.

    Variations

    • Dutch-Chinese-Indonesian Restaurant Style: Increase the ketjap manis to 3–4 tbsp (45–60 ml), add 1–2 tsp sugar or palm sugar, use a slightly heavier hand with dark soy or mushroom soy, cook the vegetables a little softer, and use a touch more oil for a glossier takeaway-style finish.
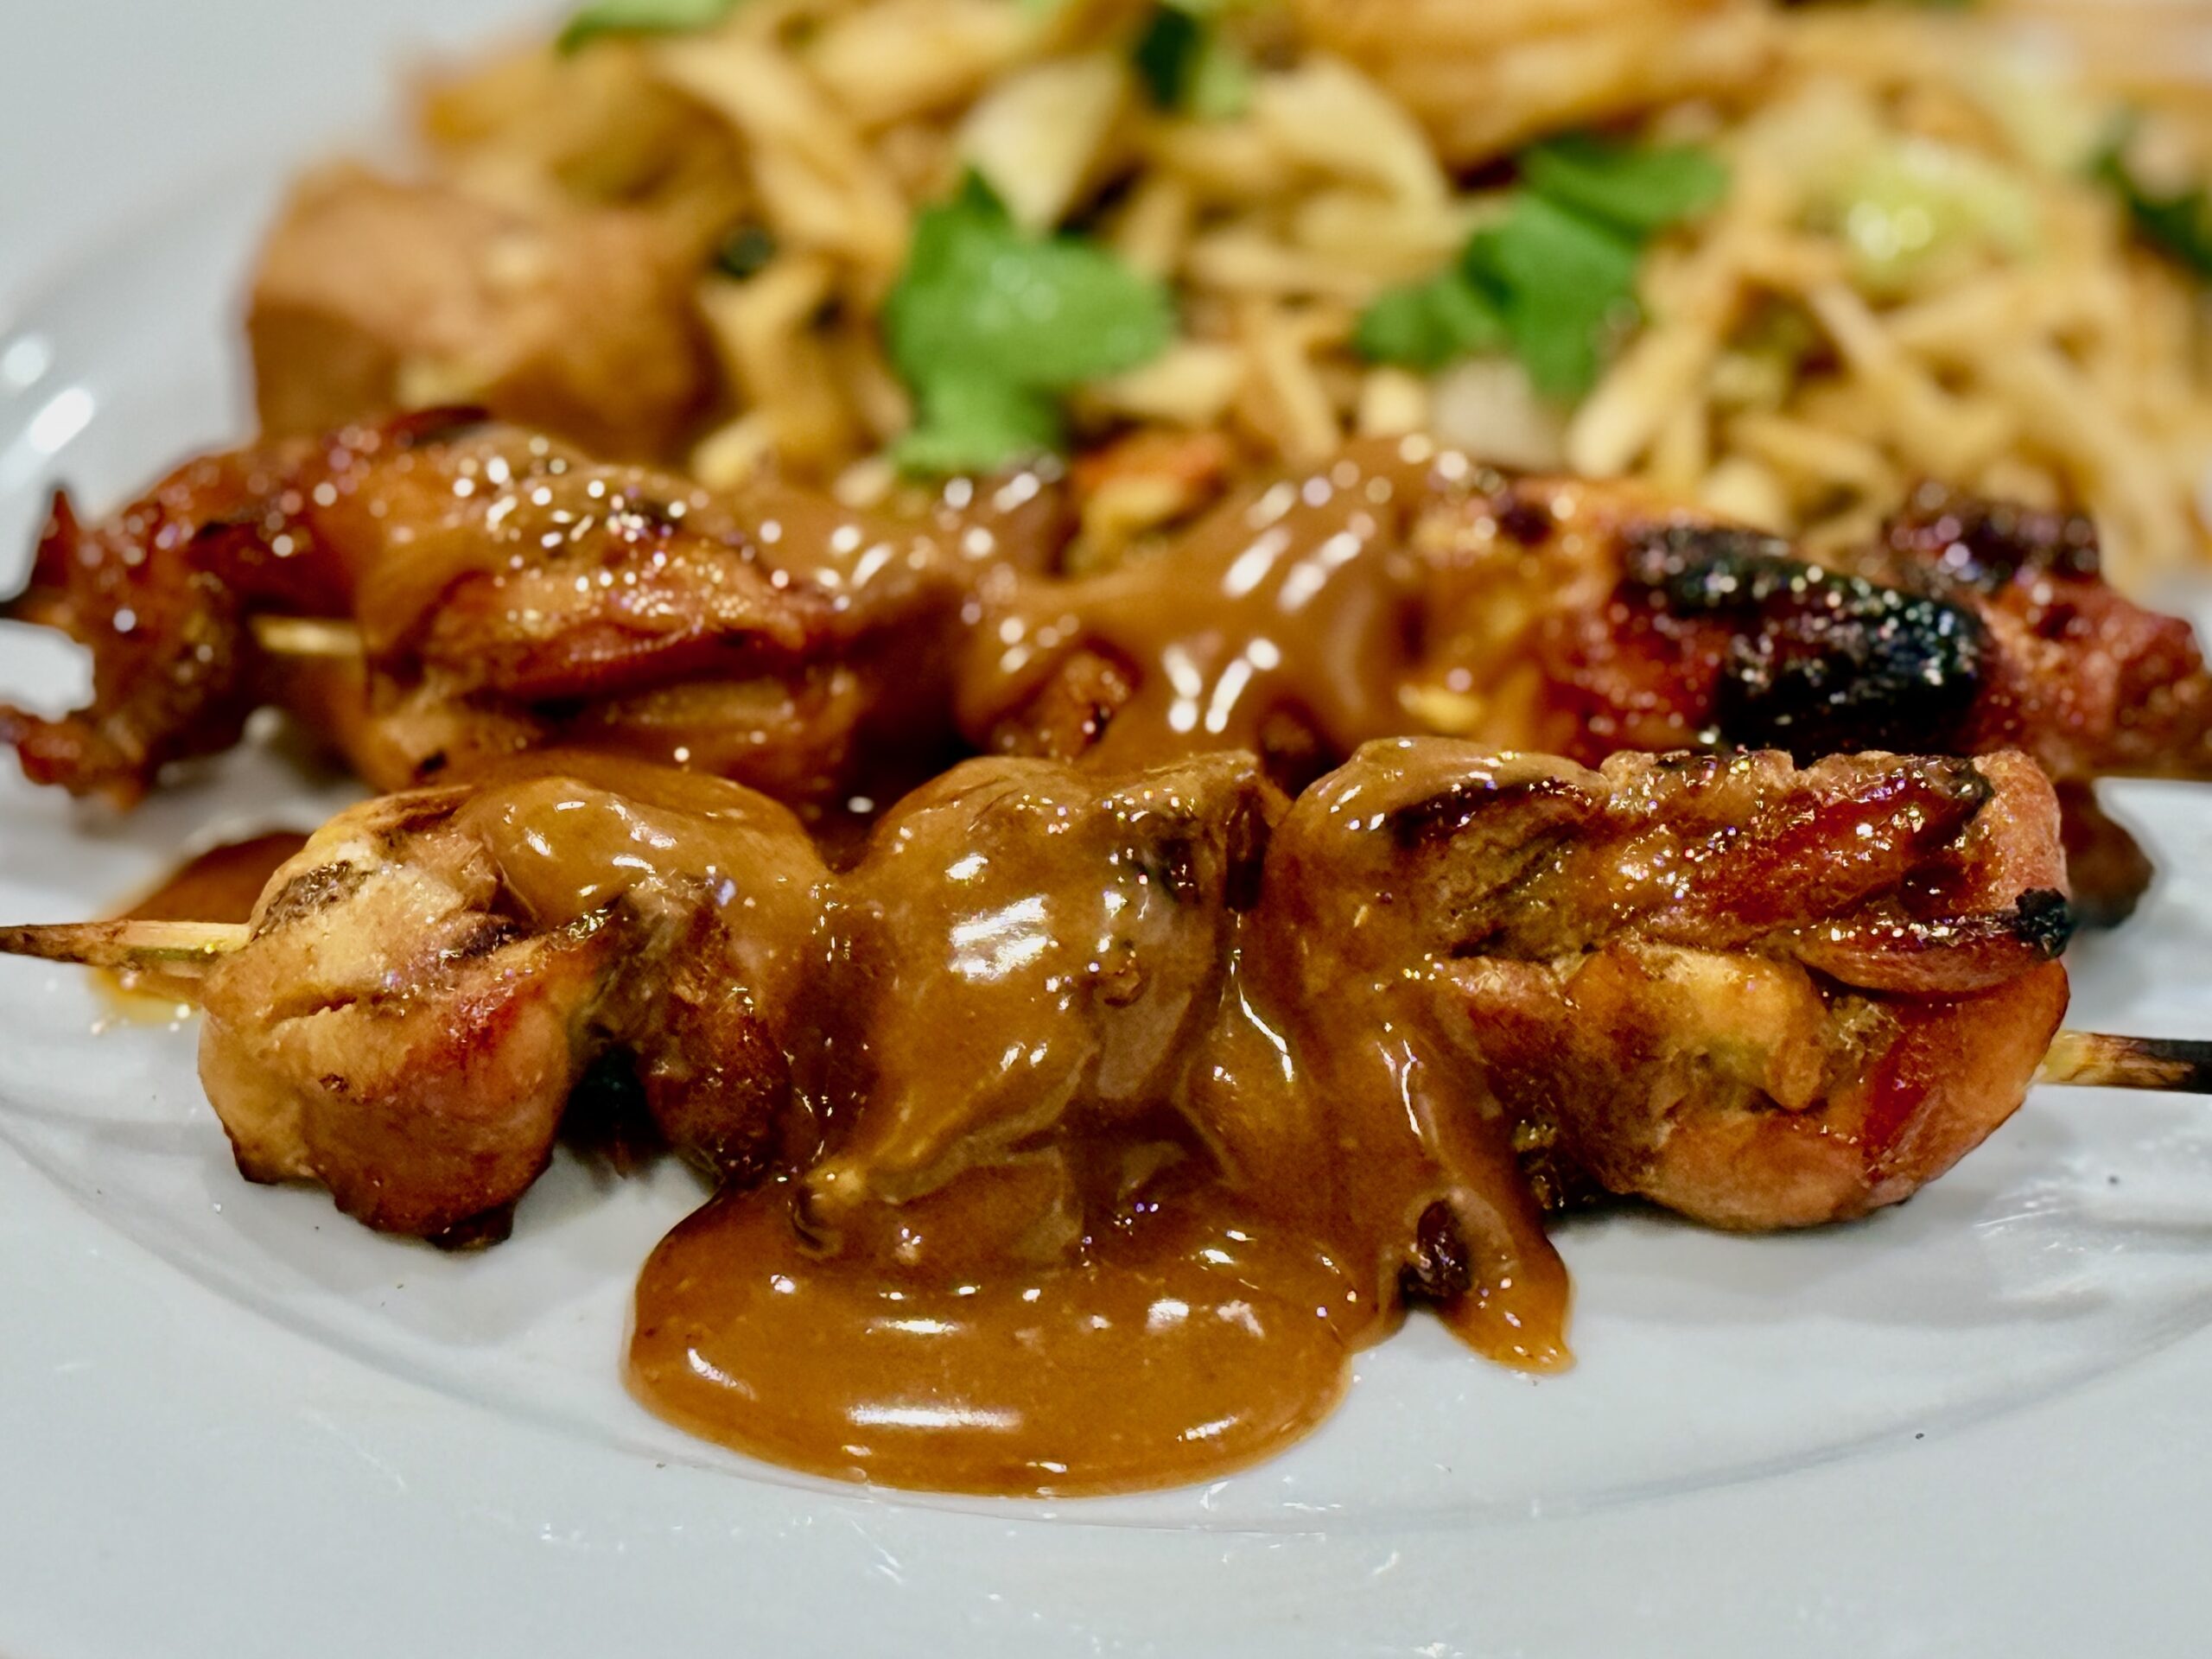
    • Peanut Garnish: Chopped dry roasted peanuts work well when serving the noodles with saté ayam, pindasaus, or other peanut-based sides. For a cleaner noodle-forward version, omit them.
    • Spicier Version: Add sambal oelek, sambal badjak, or sliced fresh chilies to the side rather than cooking them into the noodles.
    • Chicken or Pork Version: Replace the beef with thinly sliced chicken thigh, chicken breast, pork shoulder, or pork loin and use the same velveting method.

    Serving Suggestions

    • Serve with acar ketimun for a bright, pickled contrast.
    • Pair with saté ayam and pindasaus for a fuller Indonesian-inspired meal.
    • Lime wedges are best served on the side so each person can brighten their own portion.
    • Serve with sambal on the side for heat without changing the base flavor of the noodles.

    Make-Ahead & Storage

    • The beef can be velveted several hours ahead and refrigerated until ready to cook.
    • The sauce can be mixed up to 2 days ahead and refrigerated.
    • The vegetables can be sliced earlier in the day and refrigerated separately.
    • Leftovers keep in an airtight container in the refrigerator for up to 3 days. Reheat gently in a wok or skillet with a small splash of water if needed.
    • This dish is best served fresh, while the noodles still have wok-fried texture and the vegetables retain some crispness.
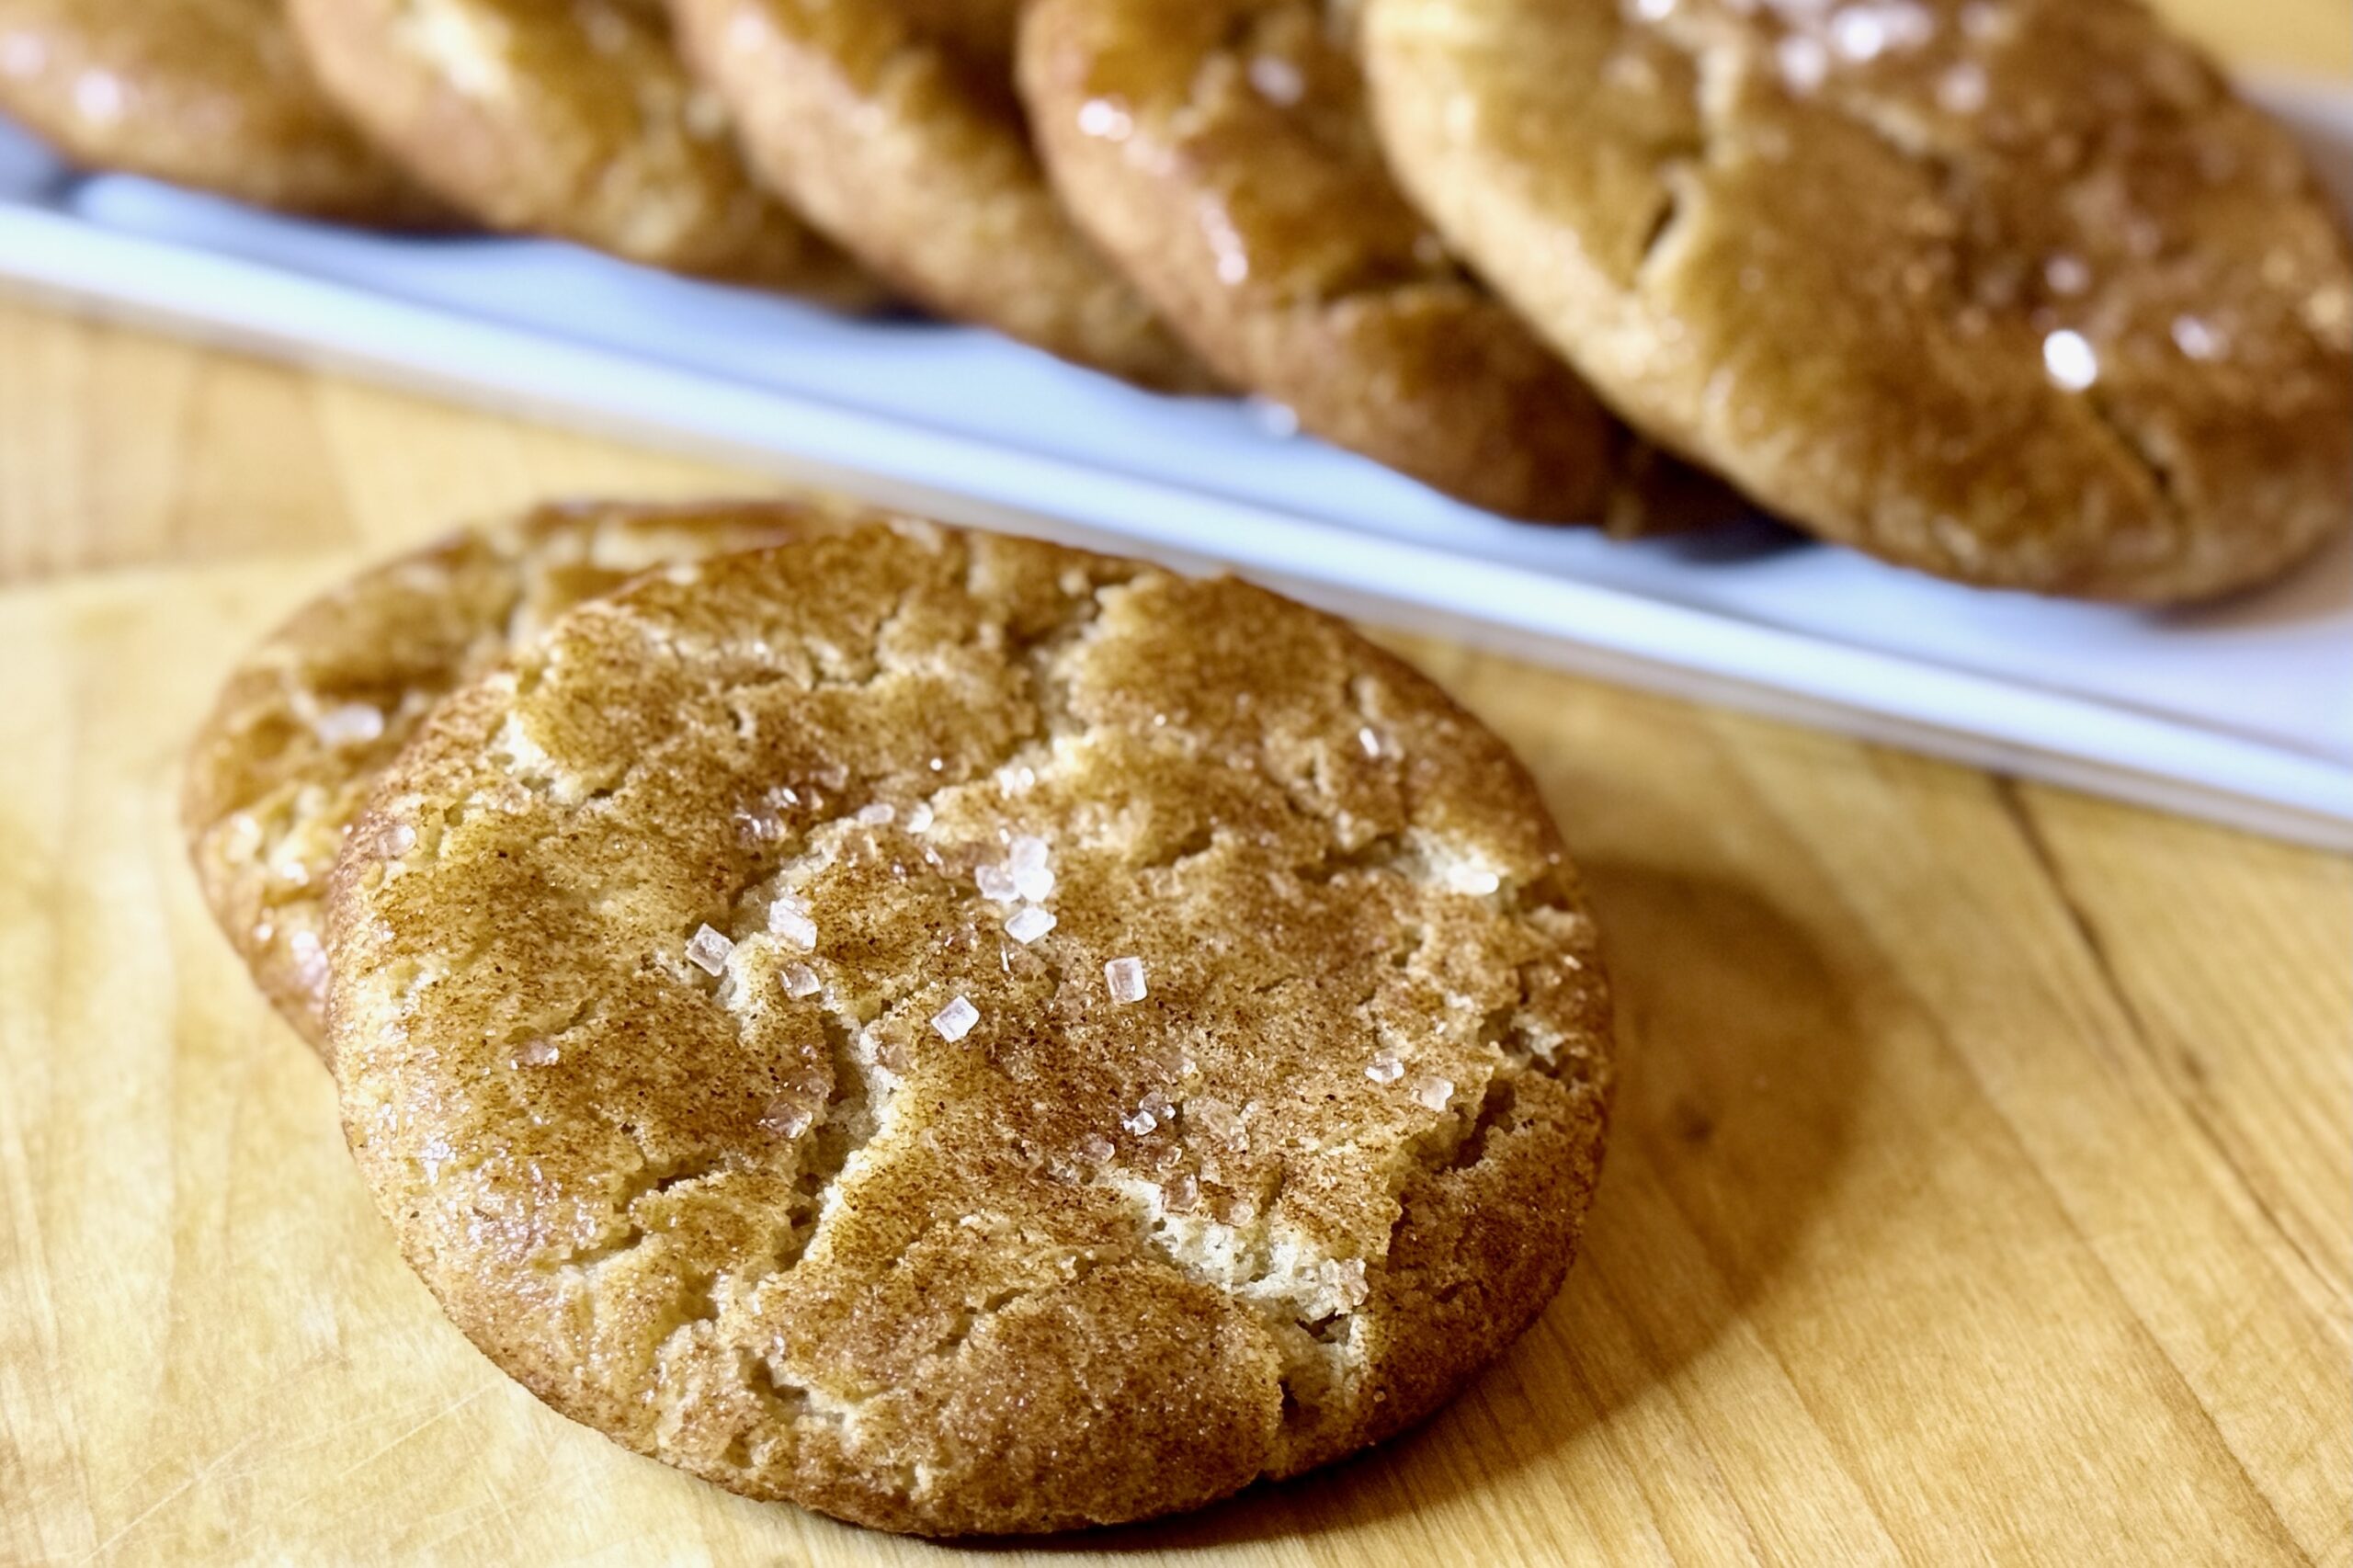
  • Snickerdoodles (Bakery Style, Soft & Chewy)

    Snickerdoodles (Bakery Style, Soft & Chewy)

    These Snickerdoodles build on our “Fat Daddo’s” Master Bakery-Style Cookies, adapted into a classic cinnamon-sugar cookie with a soft, chewy center and lightly crisp edges. Cream of tartar gives them their signature tang and crackled surface, while a balanced sugar ratio keeps them light without losing that bakery-style richness. This version is adjusted for high-altitude baking at about 4,500 ft for consistent structure and controlled spread. For sea-level baking, see the Notes section for adjustments.


    Ingredients

    Dough

    • 1 cup (227 g) unsalted butter, softened
    • ½ cup (110 g) packed brown sugar
    • ¾ cup (150 g) granulated sugar
    • 1 large egg (50 g)
    • 1 large egg yolk (18 g)
    • 1½ tsp (7 g) vanilla extract
    • 1–2 tbsp (15–30 g) milk
    • 3 cups + 2 tbsp (375 g) all-purpose flour
    • 2 tsp (6 g) cream of tartar
    • 1 tsp (5 g) baking soda
    • 1 tsp (6 g) table salt
    • ½ tsp ground cinnamon (optional)

    Cinnamon Sugar Coating

    • ¼ cup (50 g) granulated sugar
    • 1½ tbsp ground cinnamon

    Directions

    Make the Dough

    In the bowl of a stand mixer or in a large mixing bowl, cream together the softened butter, brown sugar, and granulated sugar until light and fluffy, about 1–2 minutes.

    Add the egg, egg yolk, vanilla extract, and 1 tbsp (15 g) milk. Mix until smooth and slightly thickened, about 1 minute.

    In a separate bowl, whisk together the flour, cream of tartar, baking soda, salt, and optional cinnamon.

    Finish the Dough

    Add the dry ingredients to the wet mixture and mix just until combined. Do not overmix.

    The dough should be soft and slightly tacky, but not sticky. If the dough seems stiff after adding the flour, mix in the remaining 1 tbsp (15 g) milk.

    Prepare Coating

    In a small bowl, mix the granulated sugar and cinnamon.

    Portion, Coat, and Chill

    Portion the dough into 8 large cookies or up to 24 regular cookies.

    Roll each dough ball in the cinnamon sugar mixture until fully coated.

    Gently flatten each to about ¾–1 inch (2–2.5 cm) thick.

    Place on a parchment-lined baking sheet and refrigerate for at least 1 hour and up to 48 hours.

    For slightly more spread, let the dough sit at room temperature for 10–15 minutes before baking.

    Bake

    Preheat the oven to 400°F (204°C). Line a baking sheet with parchment paper or a silicone baking mat.

    Arrange cookies 2–3 inches (5–8 cm) apart.

    Bake large cookies for 11–14 minutes or regular cookies for 7–9 minutes, until edges are set and tops are crackled.

    Cool on the baking sheet for 10–15 minutes before transferring to a rack.

    Freeze for Later

    Portioned dough can be frozen before or after coating.

    Freeze on a tray until firm, then transfer to a freezer bag.

    Bake from frozen, adding 2–3 minutes to the baking time.

    Yield: 8 large cookies or up to 24 regular cookies.


    Notes

    Preparation

    • Cream of tartar is essential for the signature tang and texture—do not substitute.
    • Flattening before baking ensures even spread and classic snickerdoodle shape.
    • Chilling improves flavor and prevents excessive spreading.

    Variations

    • Warm Spice: Add ½ tsp nutmeg or cardamom.
    • Thicker Coating: Roll the dough in cinnamon sugar twice.
    • Browned Butter: Use browned butter with its lost water replaced for a deeper, nutty flavor.

    Serving Suggestions

    • Serve slightly warm for the softest centers.
    • Perfect with cold milk.
    • They pair especially well with our homemade Vanilla Bean Ice Cream.
    • Excellent for holiday baking and gifting.

    Make-Ahead & Storage

    • Dough can be refrigerated up to 48 hours.
    • Freeze dough up to 2 months.
    • Store baked cookies in an airtight container for 3–4 days.

    High Altitude

    • About 4,500 ft (1,370 m): Use the recipe as written.
    • Sea Level: Reduce the flour to 3 cups (360 g) and use only 1 tbsp (15 g) milk unless additional moisture is needed.
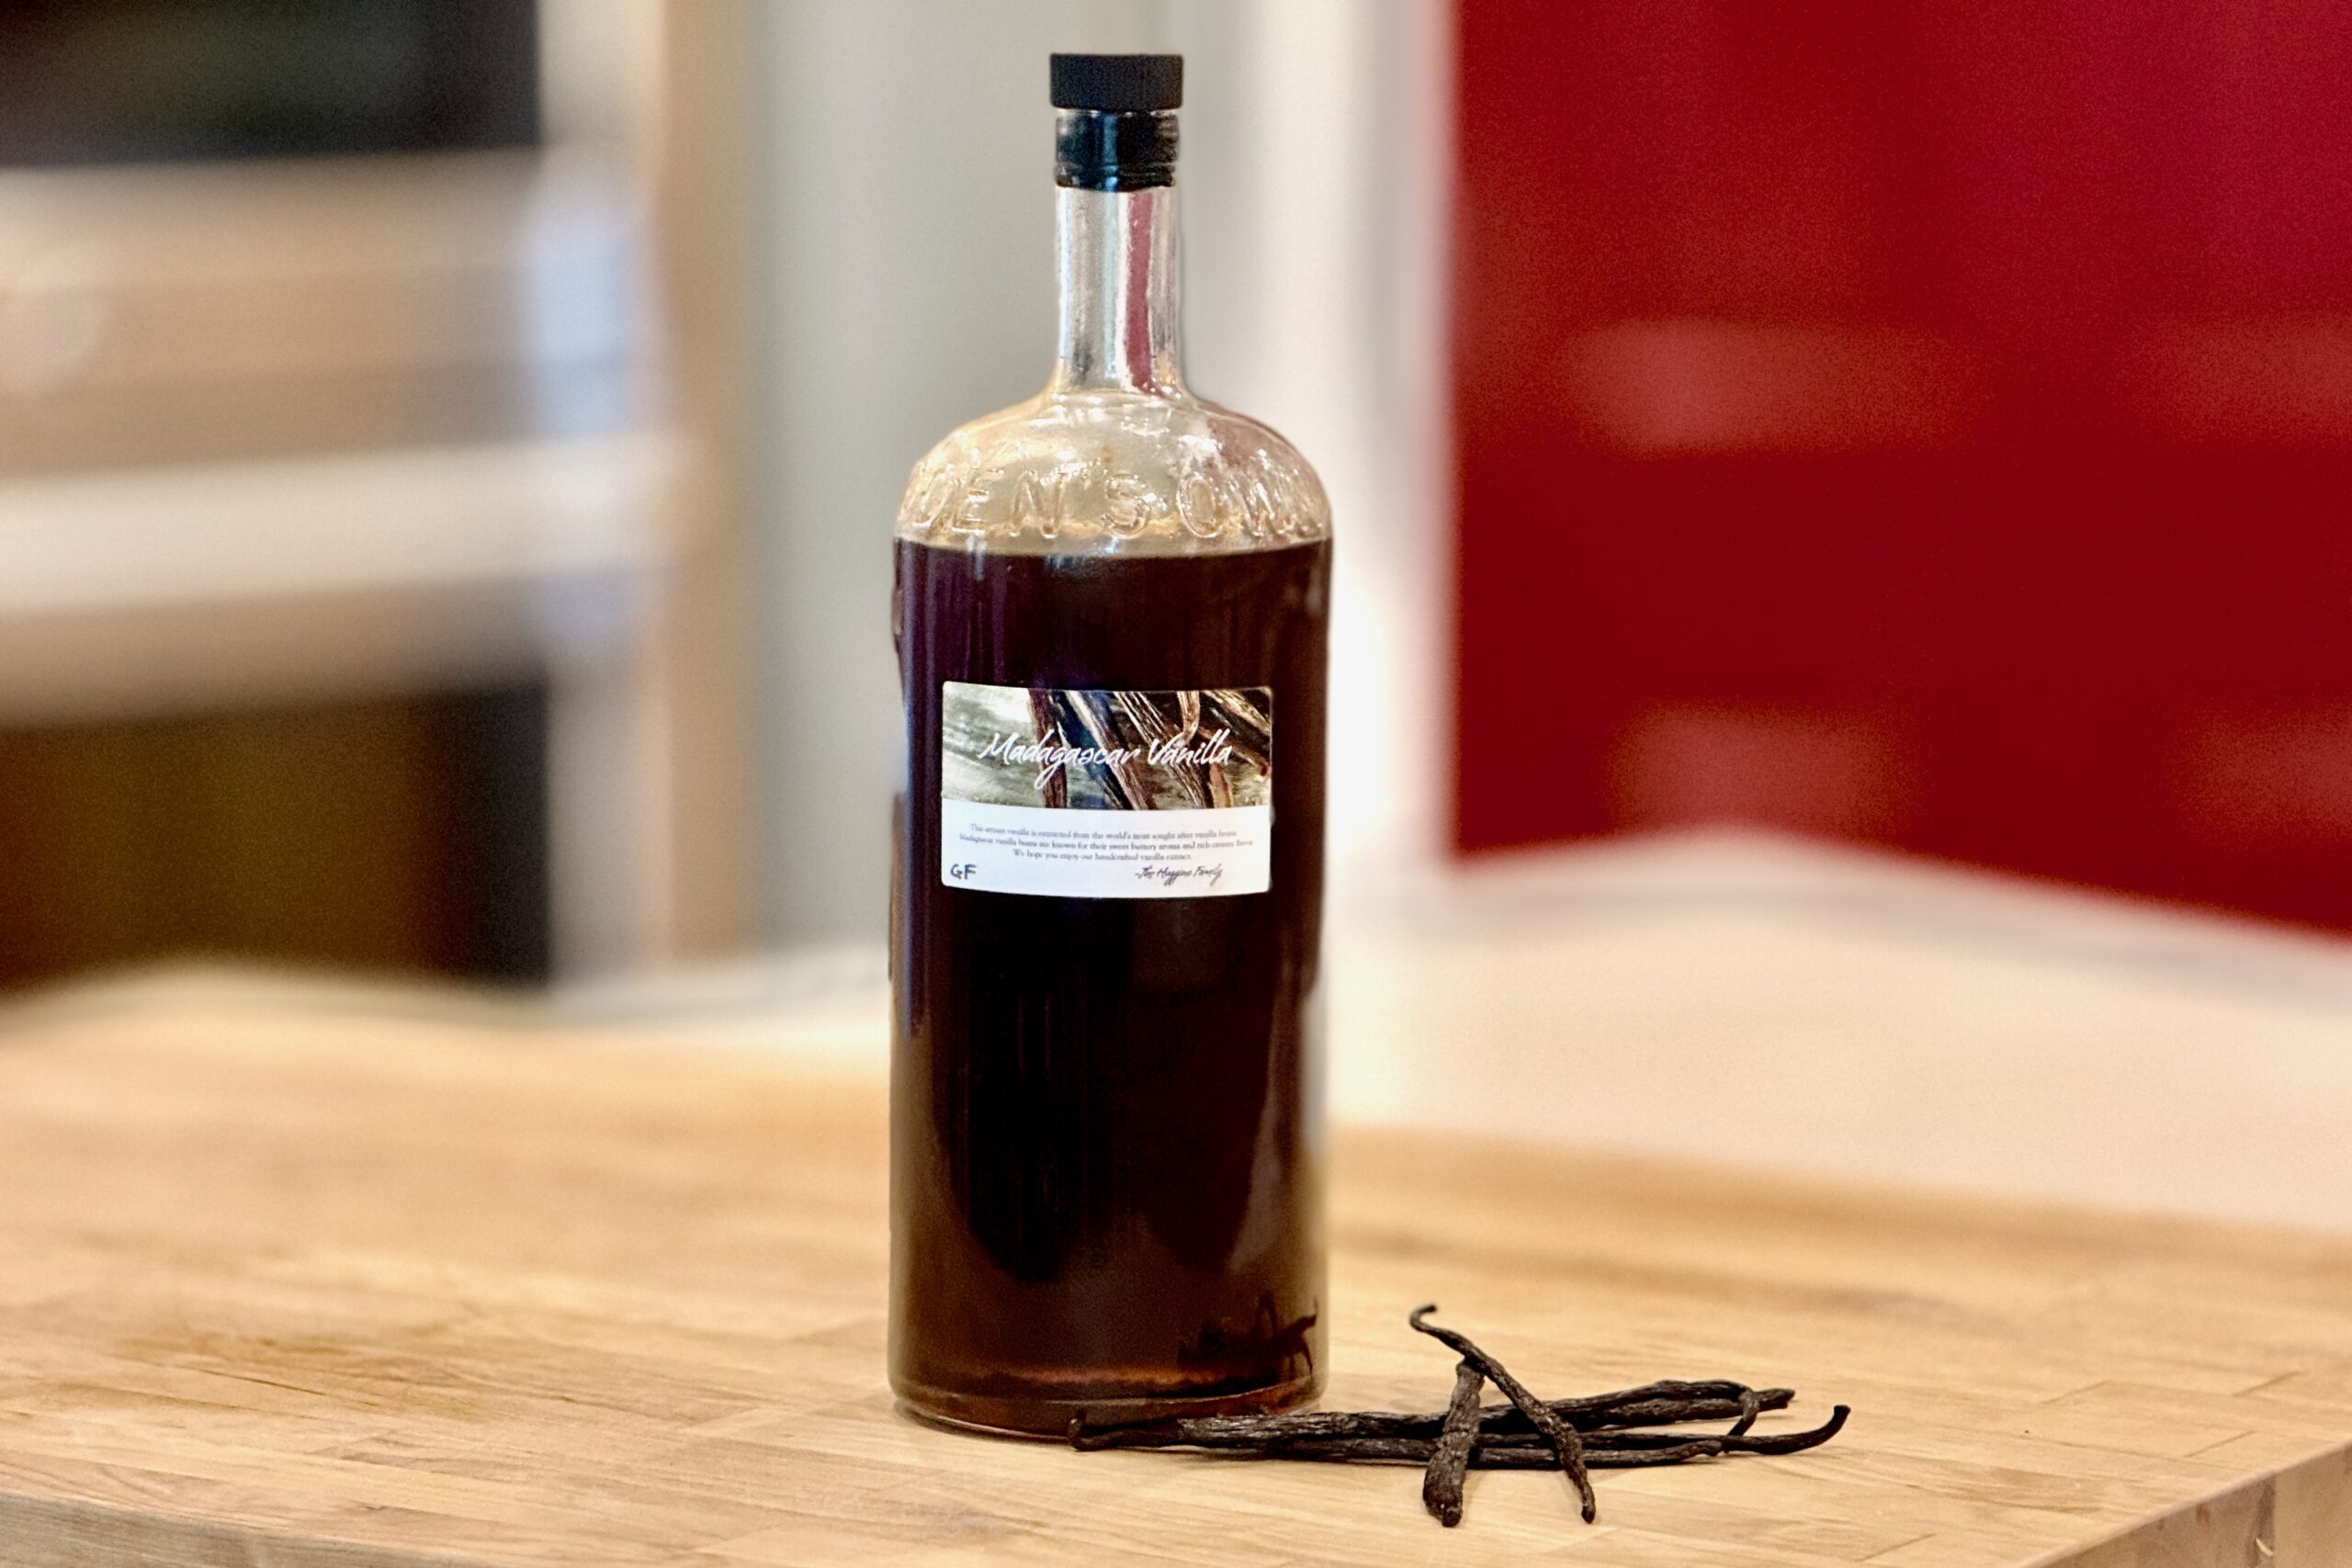
  • Vanilla Extract

    Vanilla Extract

    Homemade vanilla extract is one of those quiet staples that rewards patience. Made with just two ingredients—vanilla beans and liquor—it develops a deep, rounded flavor over time that far surpasses most store-bought versions. Our method uses a practical single-fold-style ratio of vanilla beans to liquor, giving a reliable starting point whether you’re making a small bottle or scaling up for gifts or long-term use.


    Ingredients

    • 12.7 fl oz (375 ml) vodka (or light rum or bourbon)
    • 1⅓ oz (37.5 g) vanilla beans

    Directions

    Prepare the Beans

    Beginning just below the curved end of each vanilla bean, split the pod lengthwise, leaving the top intact.

    The split beans can also be cut into 1–2 inch (2.5–5 cm) segments to increase surface area and improve extraction.

    Combine

    Place the prepared vanilla beans into the liquor.

    Seal the bottle and shake well.

    Extract

    Store in a cool, dark place.

    Shake daily for the first 2 weeks to help initiate extraction.

    After that, shake every few days for an additional 6 weeks.

    Finish

    Begin tasting the extract after about 8 weeks. For a fuller, more rounded flavor, allow it to mature for several additional months.

    Yield: About 12.7 fl oz (375 ml) vanilla extract.


    Notes

    Preparation

    • Use liquor that is at least 70 proof (35% alcohol) for proper extraction.
    • Vodka produces a clean, neutral extract; bourbon and rum add subtle background flavor. Madagascar Bourbon-type beans tend toward a rich, classic flavor, while Tahitian beans often have more floral notes; origins and individual batches vary.
    • For best results, use a glass bottle with a tight-fitting lid.
    • For home batches, use 0.1 g vanilla beans per 1 ml liquor—for example, 37.5 g beans for 375 ml liquor. The commercial single-fold standard is based on beans at a specified moisture content and the volume of finished extract; wetter beans require a higher bean weight.

    Variations

    • Double-Fold Extract: double the vanilla bean weight for a more concentrated extract.
    • Blended Spirits: Blend different spirits, such as vodka and bourbon, for a layered flavor profile.
    • Bean Origins: Use beans from different origins to explore flavor differences, from deeper cocoa-like notes to brighter floral tones.

    Serving Suggestions

    • Use in baking, custards, ice cream, and sauces.
    • Add a splash to whipped cream or oatmeal for extra depth.

    Make-Ahead & Storage

    • Keep the bottle tightly sealed in a cool, dark place, away from heat and sunlight. Keep the beans submerged in the liquor while extracting.
    • Adding liquor dilutes the extract. For a new full-strength batch, add fresh beans in the same bean-to-liquor ratio and allow time for extraction.
    • Beans can be reused for a second batch, though the flavor will be lighter.
    • For scaling, use 0.35 oz (10 g) beans per 3.4 fl oz (100 ml) liquor, 0.88 oz (25 g) per 8.5 fl oz (250 ml), 1.76 oz (50 g) per 16.9 fl oz (500 ml), 2.65 oz (75 g) per 25.4 fl oz (750 ml), or 3.53 oz (100 g) per 33.8 fl oz (1 liter).
  • Saté Ajam — Indonesian Chicken Satay

    Saté Ajam — Indonesian Chicken Satay

    When I was living in the Netherlands, I had the good fortune of learning a few Indonesian dishes from a kind little Indonesian grandmother in the beautiful city of Delft. Zuster Volder was from Java, and in her small kitchen she showed me how simple ingredients—ketjap manis, shallots, garlic, and warm spices—could transform humble skewers of meat into something unforgettable. This saté ajam, the Indonesian dish most people know as chicken satay or sate ayam, draws inspiration from those lessons: chicken marinated in sweet soy, coconut milk, and fragrant spices, then grilled over hot coals until caramelized and served with rich Dutch-Indonesian peanut sauce (Pindasaus).


    Ingredients

    Chicken

    • 2 lb (907 g) boneless skinless chicken thighs
    • Bamboo skewers, soaked in water for at least 30 minutes before threading

    Marinade

    • ¼ cup (60 ml) ketjap manis
    • 1 tbsp (15 ml) vegetable oil
    • 1½ tbsp shallot, finely grated
    • ½ tsp fresh ginger, finely grated
    • ½ tsp fresh galangal, finely grated
    • 1 tbsp brown sugar
    • ¼ tsp ground coriander
    • ¼ tsp ground turmeric
    • ¼ tsp ground cumin
    • 1 clove garlic, minced, or ¼ tsp garlic powder
    • 1 tsp lime juice
    • 2 tbsp (30 ml) coconut milk
    • ⅛ tsp white pepper
    • ¼ tsp baking soda

    Pre-Grill Seasoning

    • 1 tsp ketjap manis
    • 1 tsp vegetable oil
    • Pinch of table salt

    Coconut Milk Baste

    • 2 tbsp (30 ml) coconut milk
    • Pinch of table salt

    For Serving

    • Warm Dutch-Indonesian peanut sauce (Pindasaus)
    • Lime wedges
    • Cucumber slices or Acar Ketimun
    • Fried shallots (optional)
    • Steamed rice or lontong

    Directions

    Prepare the Chicken

    Trim any large excess pieces of fat from the chicken thighs. Cut the meat into long strips about ½–¾ inch (1.3–1.9 cm) thick rather than cubes. This traditional shape lets the chicken fold onto the skewers and gives you more caramelized surface area over the coals.

    Make the Marinade

    In a medium bowl, combine the ketjap manis, vegetable oil, grated shallot, ginger, galangal, brown sugar, coriander, turmeric, cumin, garlic, lime juice, coconut milk, white pepper, and baking soda. Stir until the sugar is dissolved and the marinade is well blended.

    Marinate the Chicken

    Add the chicken to the marinade and toss well to coat evenly. Cover and refrigerate for 4–5 hours, or up to 8 hours. This timing gives the flavors time to penetrate while the small amount of baking soda helps the chicken stay especially tender over high charcoal heat.

    Thread the Chicken

    Soak bamboo skewers in water for at least 30 minutes. Thread the marinated chicken onto the skewers, weaving and folding the strips back and forth so the meat lies fairly flat.

    Prepare the Grill

    Light a charcoal grill and let the coals burn down until they are very hot and covered with a light layer of ash. You want strong direct heat for fast caramelization, but not roaring flames.

    In a small bowl, stir together the coconut milk and a pinch of salt for the baste. In a second small bowl, combine the ketjap manis, oil, and pinch of salt for the pre-grill seasoning.

    Season and Grill the Satay

    Remove the threaded chicken from the refrigerator. Lightly brush or toss the skewered chicken with the pre-grill seasoning. Leave a light coating of marinade on the meat rather than wiping it clean; that helps create the classic lacquered satay crust.

    Place the skewers over direct heat and grill for about 2–3 minutes on each broad side, turning as needed so the sugars caramelize without scorching. During the last minute or two of cooking, brush lightly with the coconut milk baste.

    Cook until the chicken is lightly charred in spots and reaches 165°F (74°C).

    Serve

    Arrange the saté ajam on a platter and serve immediately with warm Pindasaus, lime wedges, cucumber or Acar Ketimun, and steamed rice or lontong. A squeeze of lime over the top just before eating brightens the sweet ketjap glaze and balances the peanut sauce beautifully.

    Yield: 4 servings.


    Notes

    Preparation

    • Chicken thighs are preferred here because they stay juicy and tender over high direct heat and hold up better than breast meat in a sweet ketjap marinade.
    • Cutting the chicken into long folded strips instead of cubes gives more surface area for browning and produces a more traditional satay texture.
    • The small amount of baking soda helps the chicken retain moisture and stay tender during quick charcoal grilling. Do not increase the amount, or the flavor can become slightly alkaline.
    • Fresh galangal adds a more traditionally Indonesian, Javanese-leaning aroma to the marinade. If galangal is not available, using 1 tsp finely grated ginger in place of the ginger and galangal combination is still very good.
    • If using larger bamboo skewers, you can double-skewer the chicken to make turning easier over the grill.

    Variations

    • Yellow Javanese Satay: For a more classic yellow Javanese profile, increase the turmeric slightly to ⅜ tsp.
    • Without Cumin: If you prefer a cleaner, more straightforward satay flavor, omit the cumin; with it included, the marinade leans a bit more Javanese.
    • Chicken Breast: Chicken breast can be used; watch it closely and cook until the thickest pieces reach 165°F (74°C). Avoid cooking longer than necessary so the lean meat stays tender.

    Serving Suggestions

    • Serve with our Pindasaus, lime wedges, and a crisp cucumber pickle such as Acar Ketimun.
    • This pairs especially well with steamed rice, lontong, or as part of a larger rijsttafel-style meal.
    • Fried shallots scattered over the platter add a wonderful savory finish.

    Make-Ahead & Storage

    • The chicken can be marinated earlier in the day and held refrigerated for up to 8 hours before grilling.
    • Leftover cooked satay can be refrigerated in an airtight container for up to 3 days.
    • Reheat gently in a covered skillet, low oven, or microwave until just warmed through. Serve with freshly warmed Dutch-Indonesian peanut sauce (Pindasaus) for the best texture.