Bags of Spices

Favorite Recipes

Treats

Desserts and sweet indulgences — cakes, ice cream, cookies, and holiday favorites shared across generations.

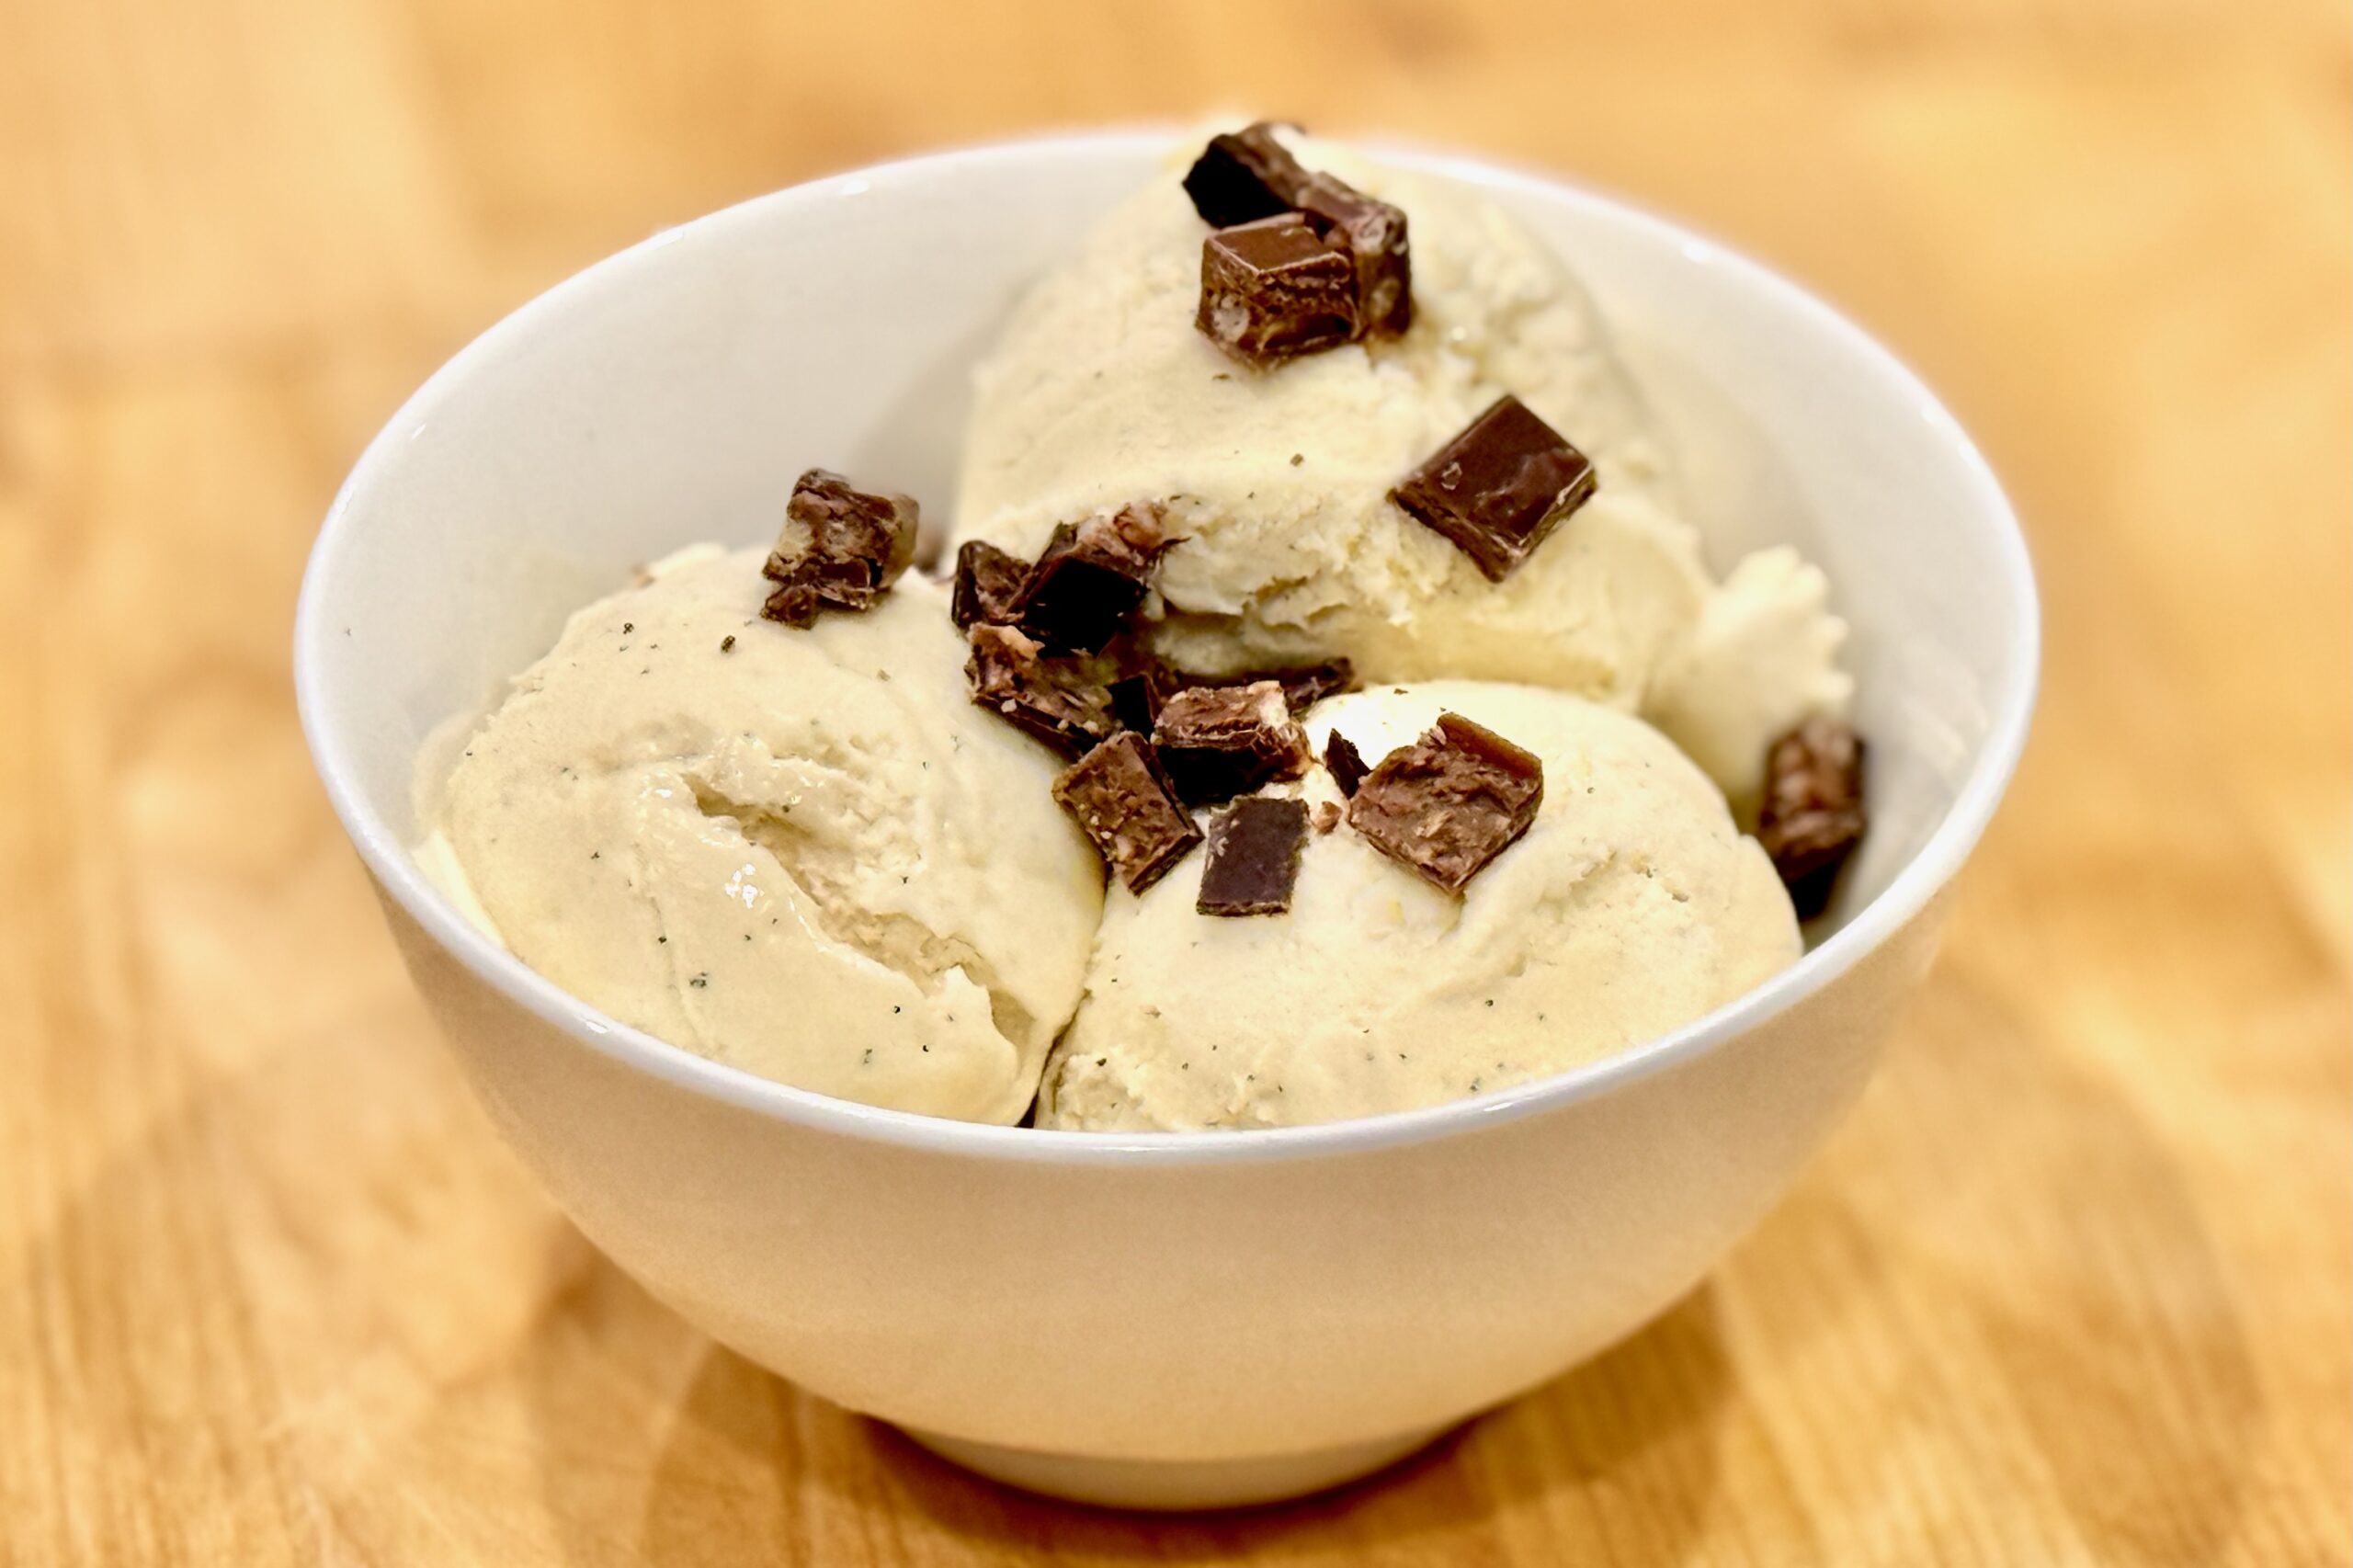
  • Cinnamon Chocolate-Coconut Ice Cream

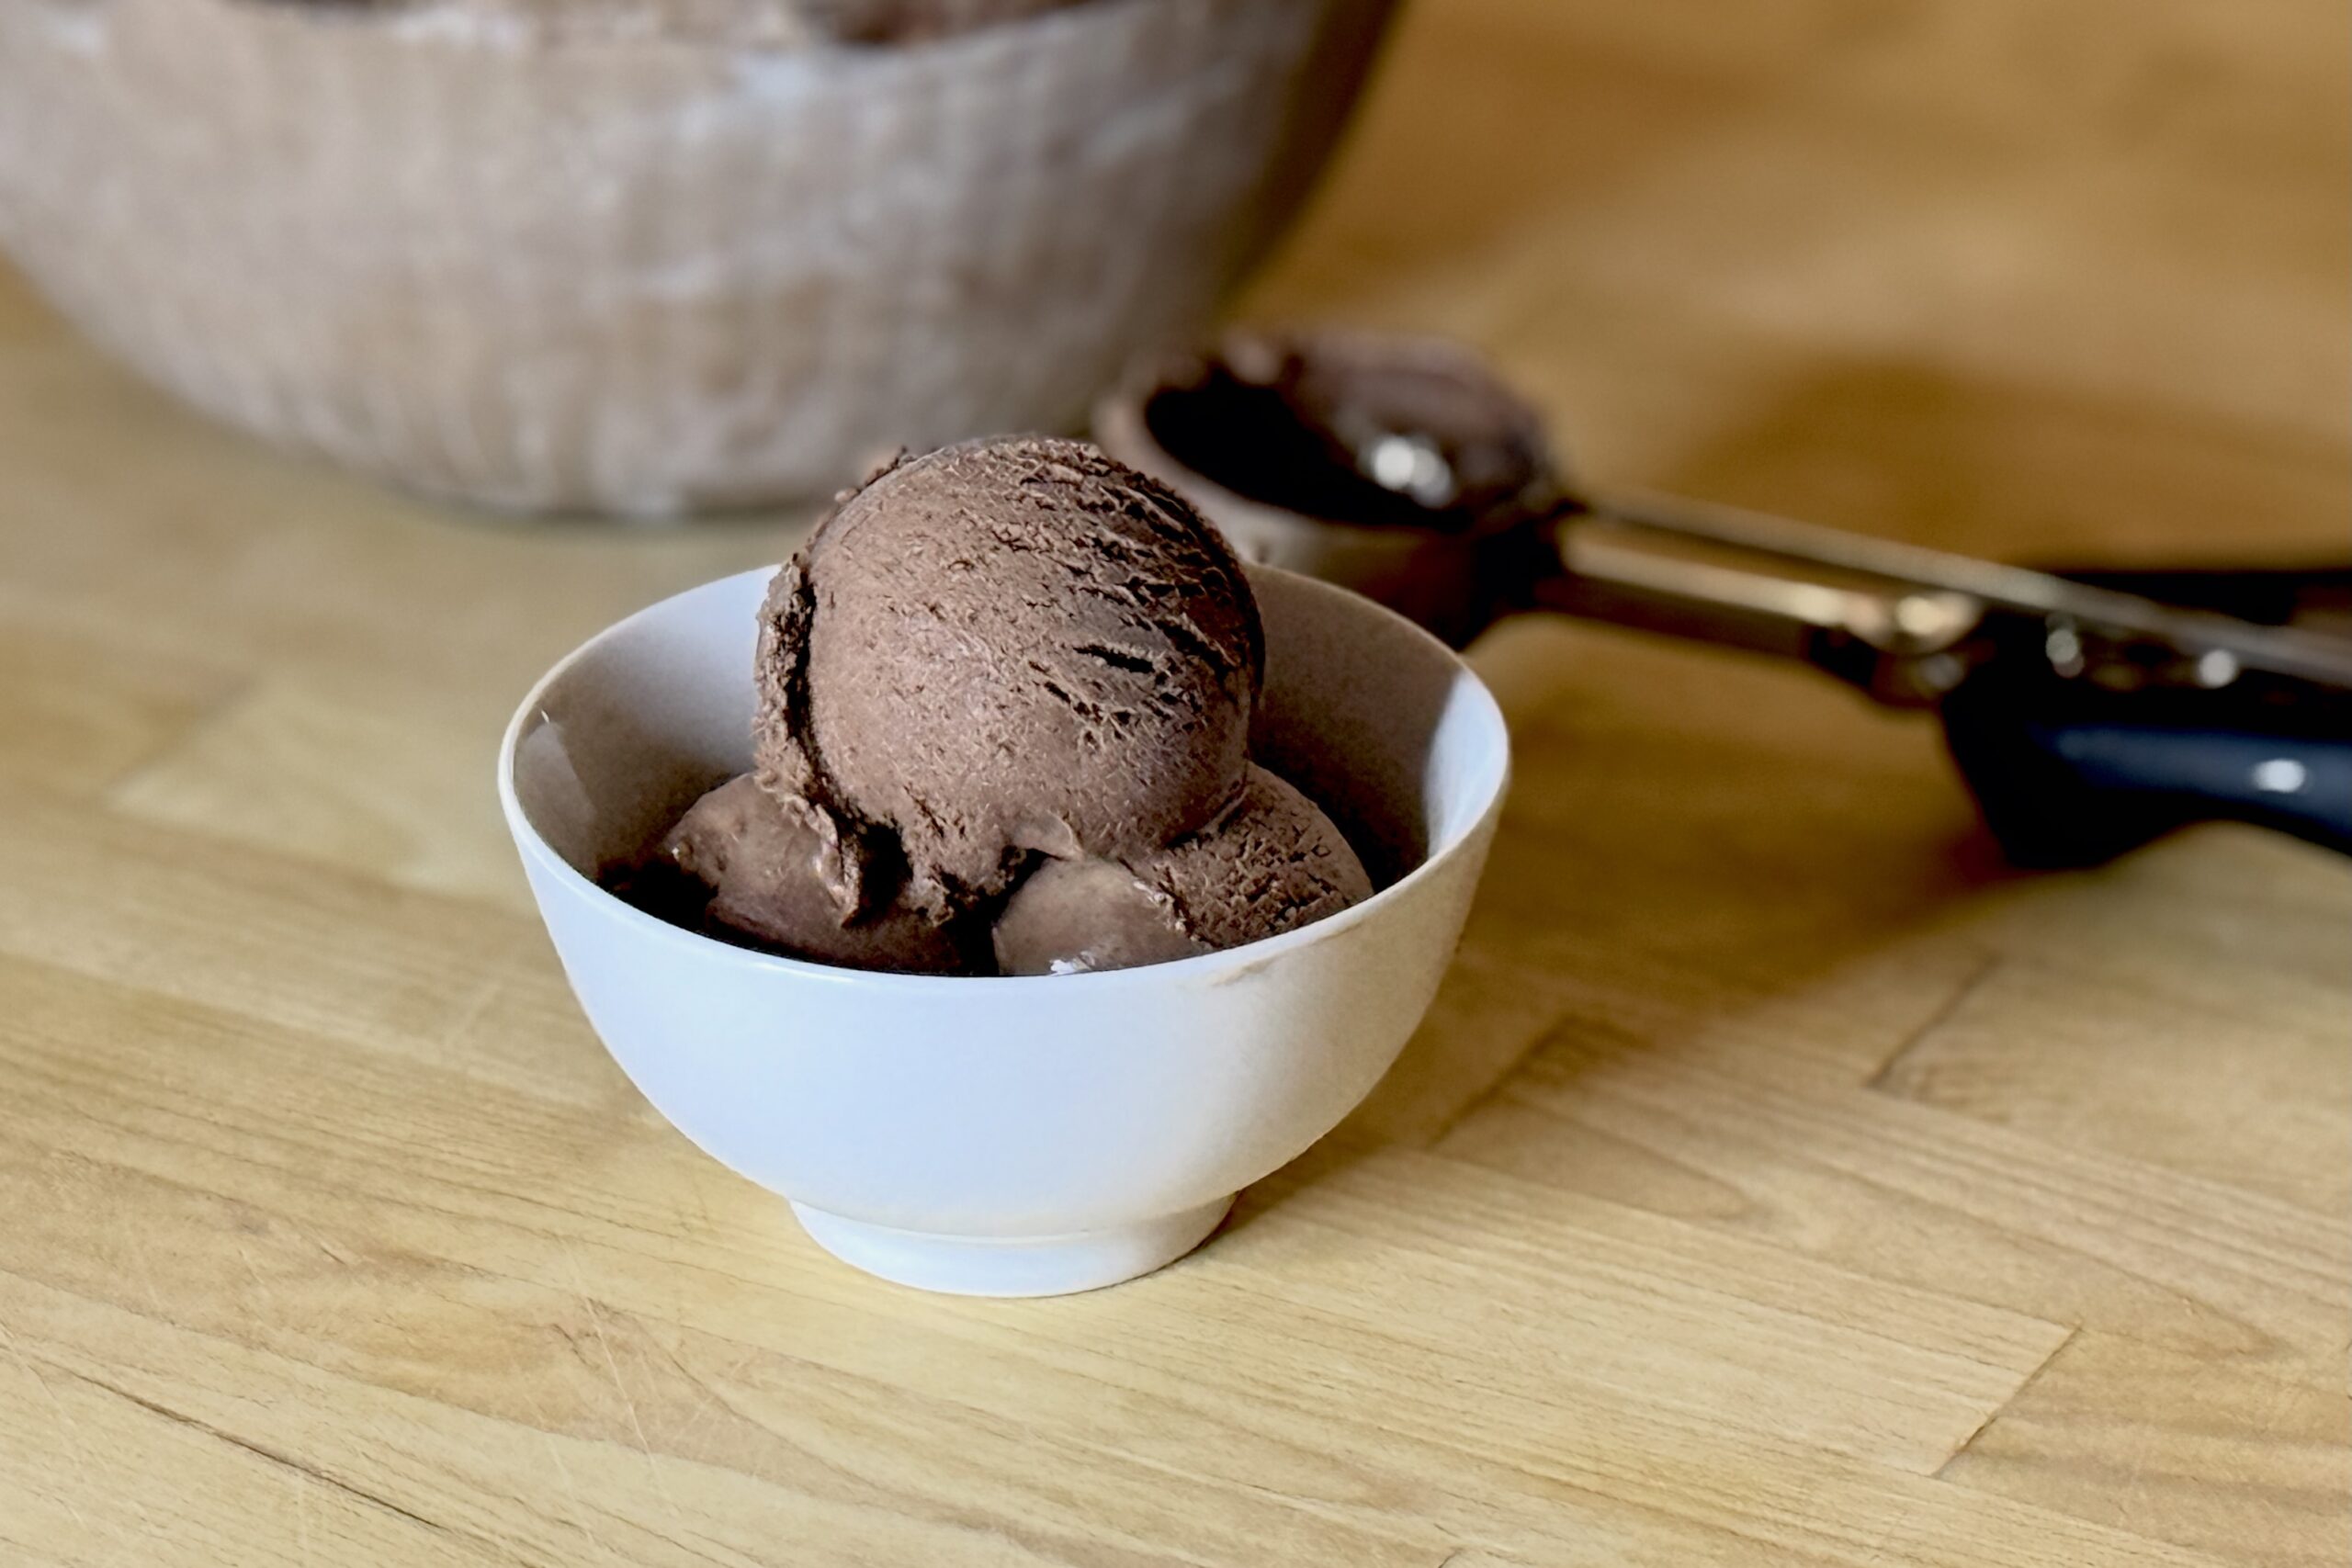
    Cinnamon Chocolate-Coconut Ice Cream

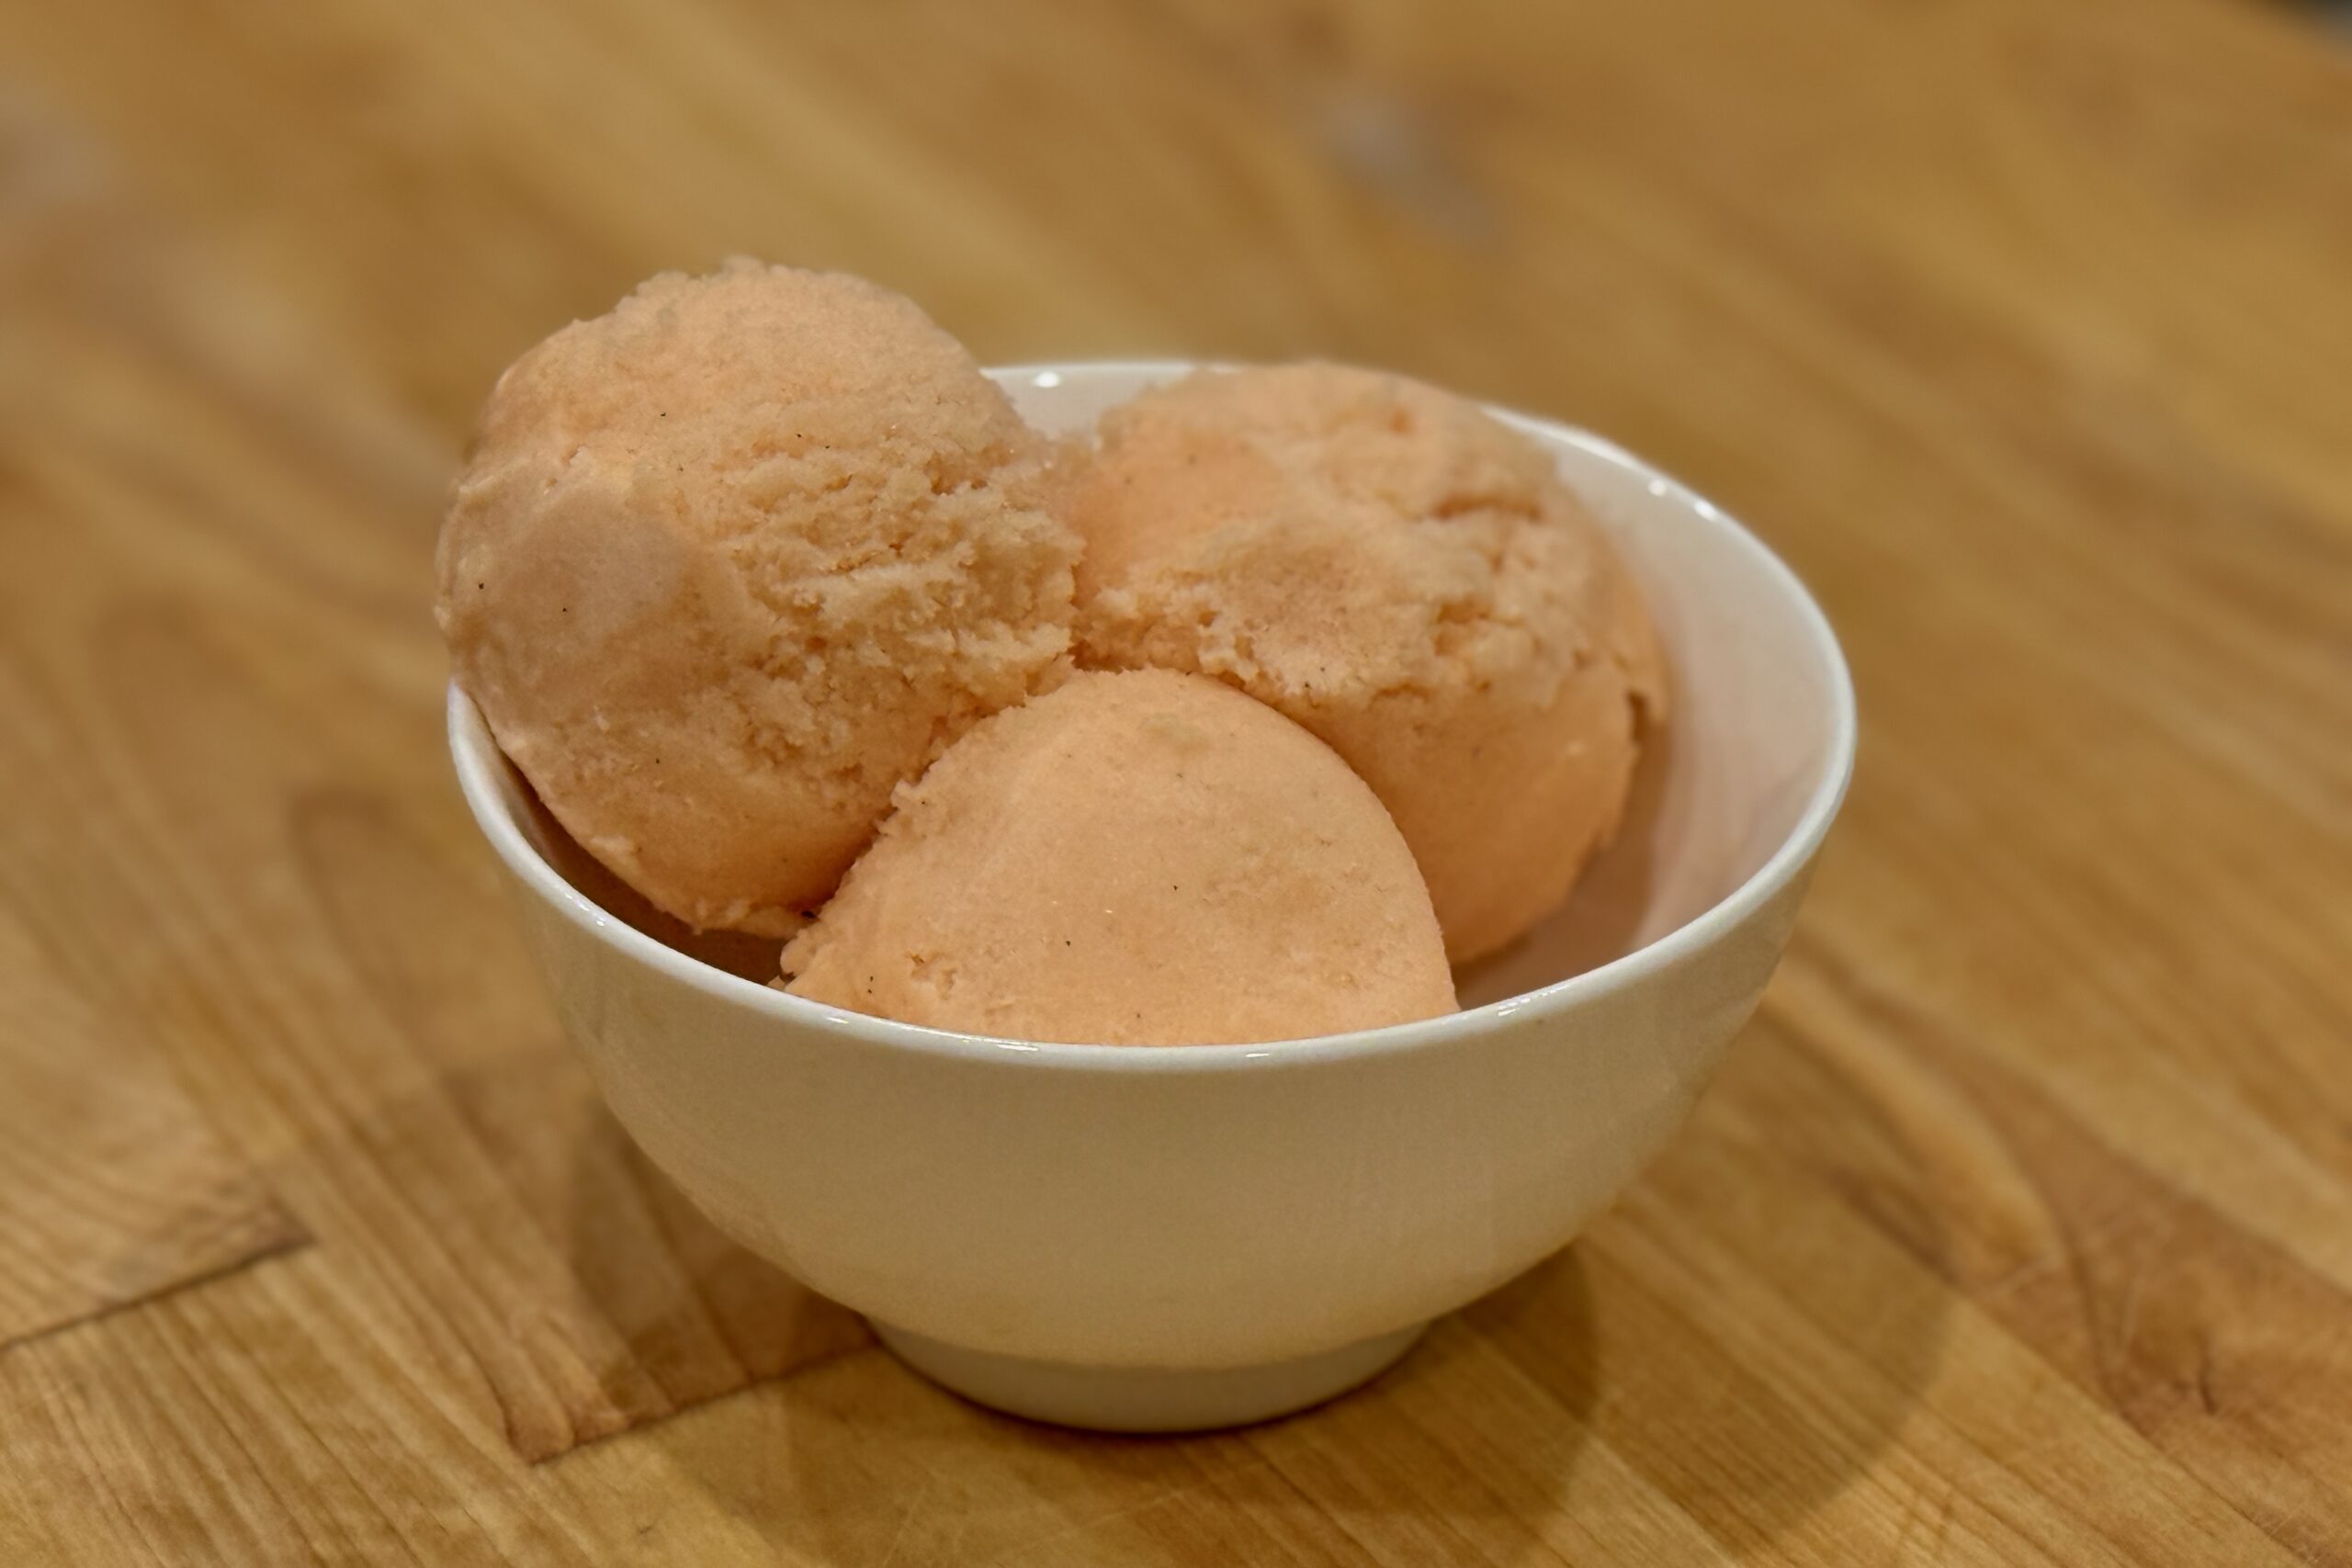
    After a Mexican meal, there’s something comforting about settling in with a cool scoop of ice cream. Chocolate and coconut make this one rich and creamy, while cinnamon adds a gentle warmth to the finish. The cinnamon gives the chocolate a little of the familiar character of Mexican hot chocolate. For a bolder dessert, the optional ghost pepper or habanero variation brings a gradual, fruity heat.


    Ingredients

    • 1 (13.66 oz / 403 ml) can full-fat coconut milk
    • 1 cup (240 g) whole milk
    • ⅔ cup (135 g) granulated sugar, divided
    • ¼ cup (22 g) unsweetened Dutch-process cocoa powder
    • 1 tsp ground cinnamon (about 2.5 g)
    • about ⅞ oz (25 g) dark chocolate, finely shaved or chopped
    • 4 large egg yolks
    • ¼ tsp table salt
    • ½ tsp vanilla bean paste

    Directions

    Prepare the Chocolate Base

    In a medium saucepan, whisk together the cocoa powder, cinnamon, and ⅓ cup (about 67 g) of the sugar. Whisk in about ½ cup (120 ml) of the coconut milk until smooth. Heat over medium-low heat, whisking occasionally, until the mixture reaches about 150°F (66°C). Add the dark chocolate and stir until completely melted. Stir in the remaining coconut milk, whole milk, and salt.

    Prepare the Custard

    In a separate bowl, whisk the egg yolks with the remaining sugar until smooth. Slowly whisk some of the warm chocolate mixture into the yolks to temper them. Gradually whisk the tempered yolks back into the saucepan. Cook over medium-low heat, stirring constantly, until the custard reaches 175°F (79°C). Do not let it boil. Remove from the heat and stir in the vanilla bean paste.

    Chill and Churn

    Cool the custard, then cover and refrigerate until thoroughly chilled, preferably at least 6 hours or overnight. Churn according to your ice cream maker’s instructions. Transfer to a freezer-safe container and freeze until firm enough to scoop.

    Yield: About 1 quart (950 ml).


    Notes

    Variations

    • Ghost Pepper or Habanero: For a spicy version, add 1 g fresh ghost pepper or 2 g fresh habanero to the chocolate base when it reaches about 150°F (66°C). Continue with the recipe. After tempering the yolks and returning them to the saucepan, heat gently until the pepper’s flavor and heat are noticeable. Strain out the pepper, return the custard to the saucepan, and cook to 175°F (79°C). The original chocolate-coconut recipe uses 1 g ghost pepper; 1.5 g gives a hotter result. Pepper heat varies, so remove it sooner for a milder flavor. Wear gloves when handling peppers.

    Serving Suggestions

    • Serve in small scoops after a Mexican meal.
    • Lightly dust each serving with ground cinnamon for extra aroma.

    Make-Ahead & Storage

    • The custard can be prepared up to 24 hours ahead and refrigerated before churning.
    • Store the finished ice cream in a tightly covered container in the freezer. Let it stand at room temperature for 5–10 minutes before scooping, if needed.
  • Baklava Ice Cream

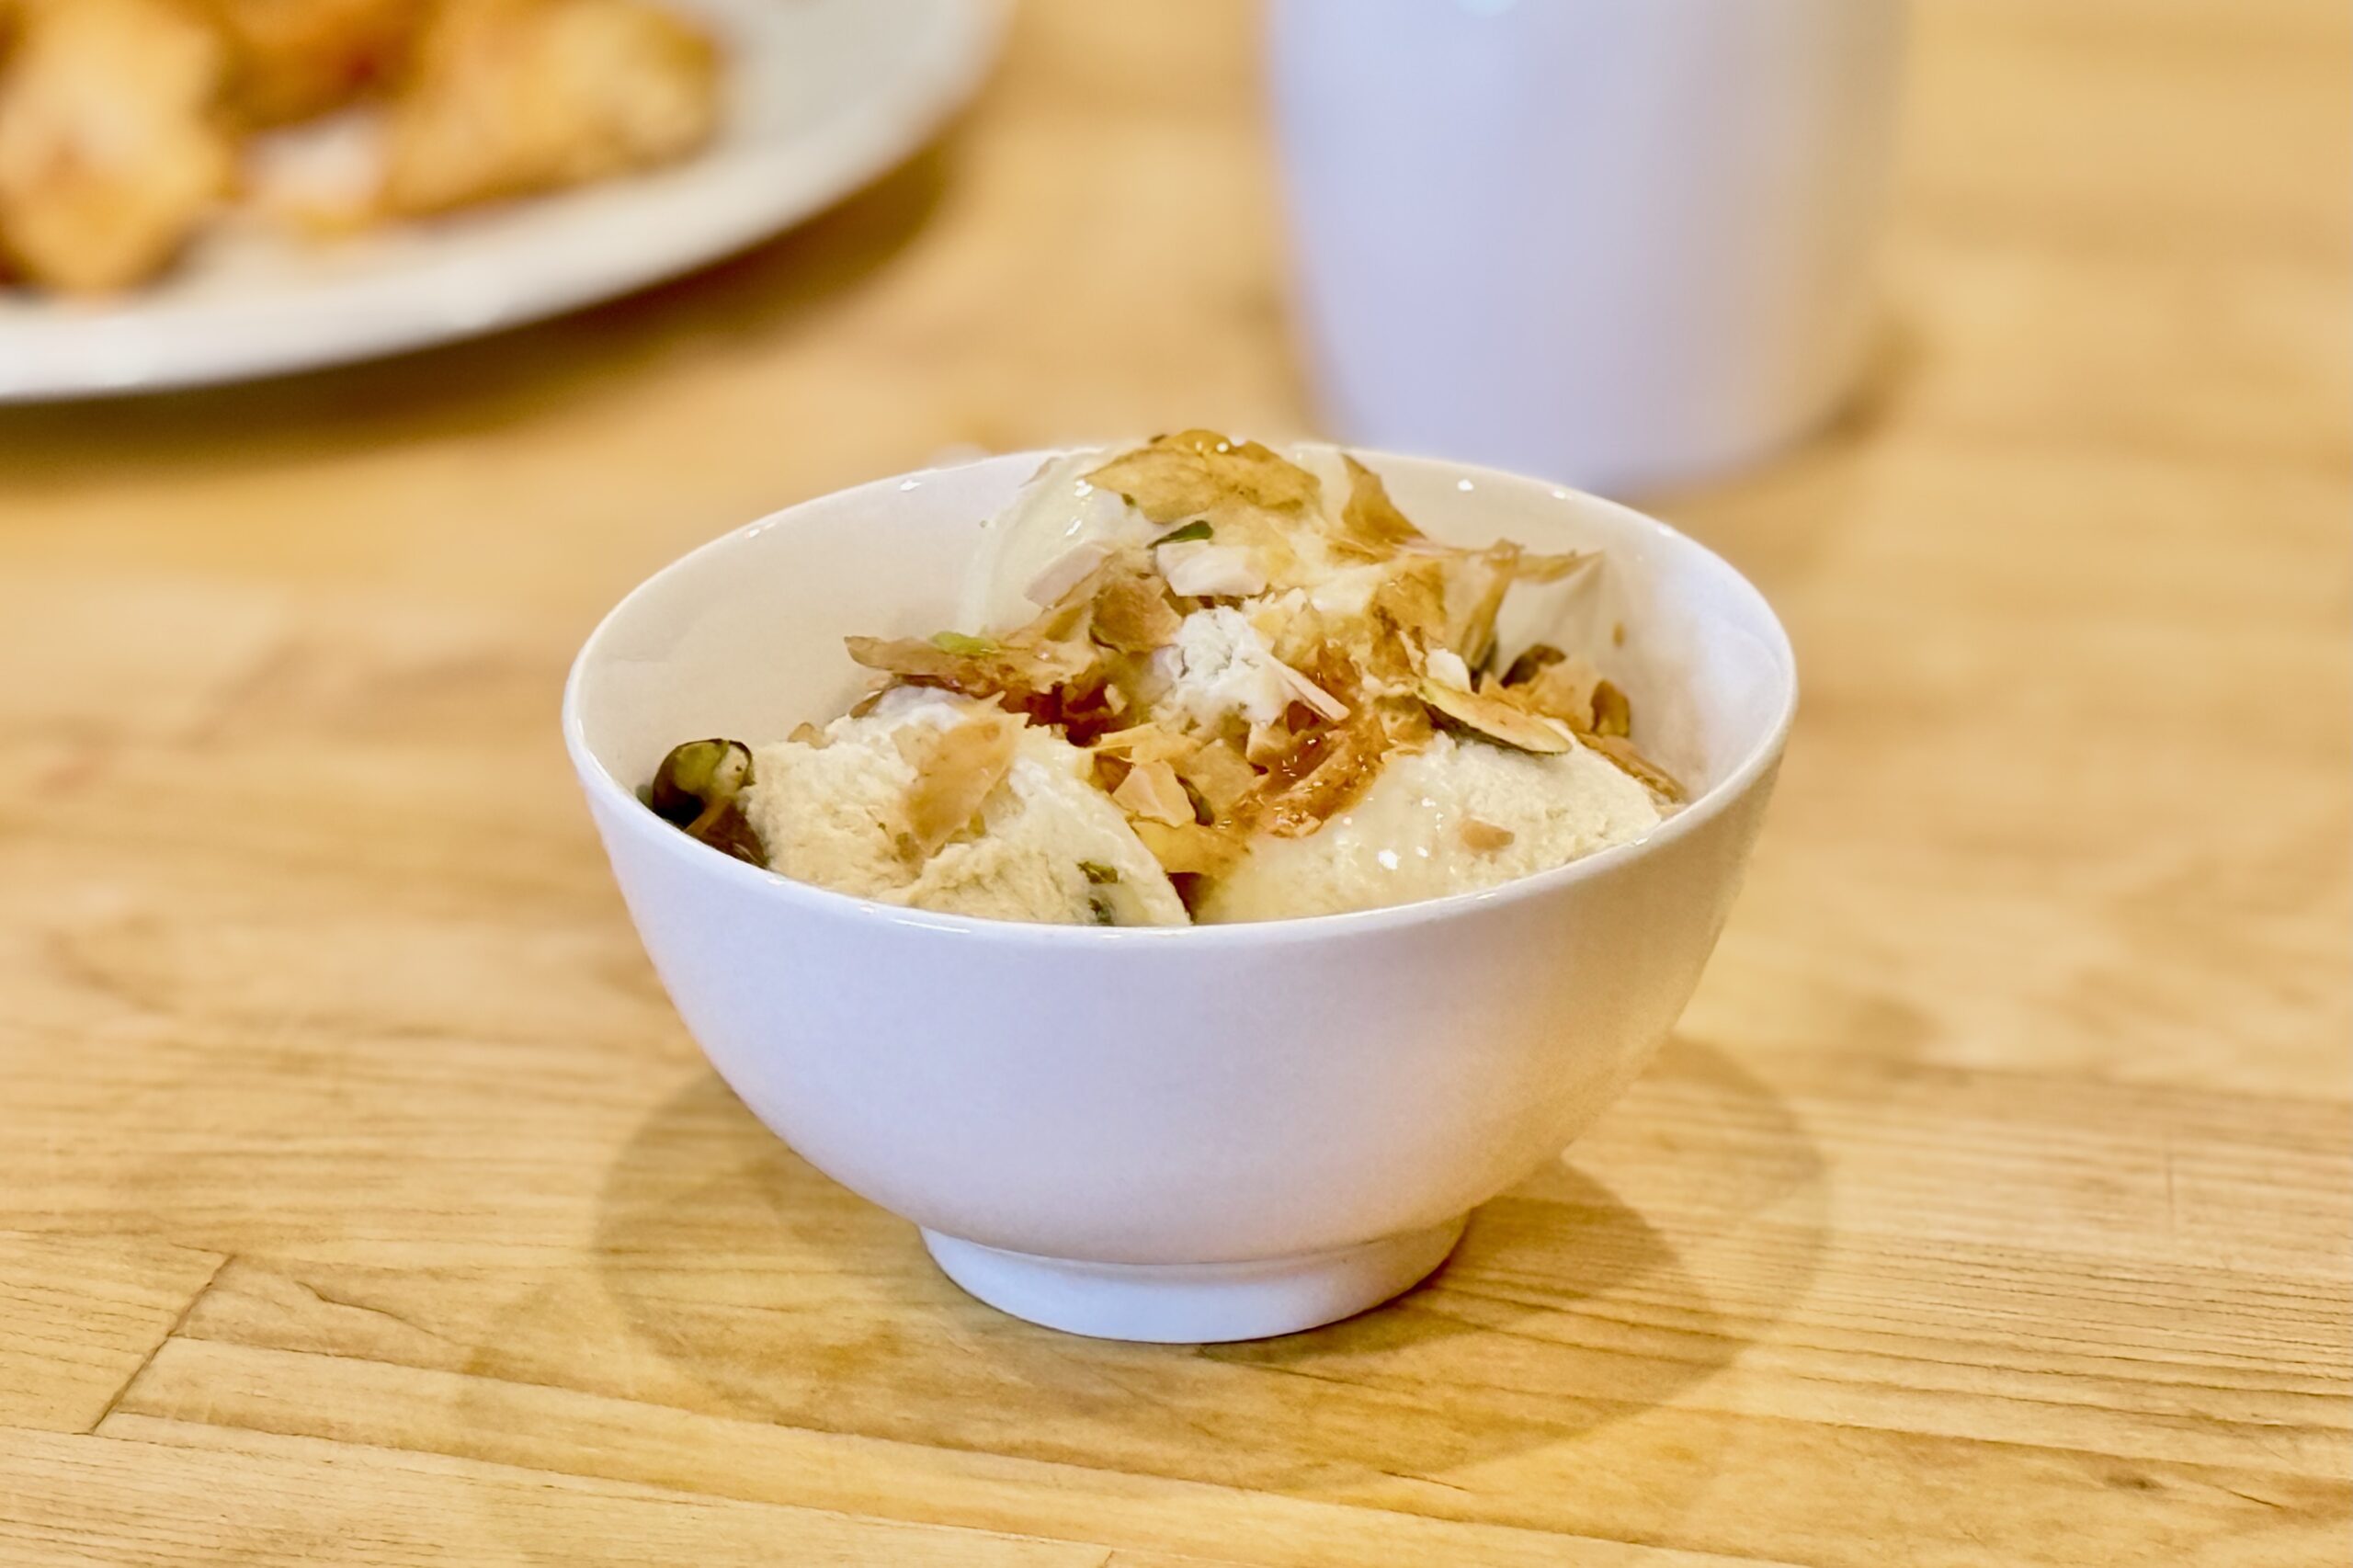
    Baklava Ice Cream

    This Greek-inspired ice cream brings together the flavors and textures we love in baklava: honey, cinnamon, toasted pistachios and almonds, and crisp buttered phyllo. Keeping the phyllo and warm honey-lemon sauce separate from the frozen ice cream preserves their texture and lets everyone finish a scoop to taste.


    Ingredients

    Ice Cream Base

    • 2 cups (480 g) whole milk
    • 1 cup (240 g) heavy cream
    • 6 tbsp (75 g) granulated sugar, divided
    • 1½ tbsp (32 g) honey
    • 5 large egg yolks
    • ¼ tsp (about 0.6 g) ground cinnamon
    • ⅛ tsp table salt

    Toasted Nuts

    • ⅓ cup (45 g) shelled pistachios
    • ⅓ cup (30 g) sliced or slivered almonds

    Crisp Phyllo Clusters

    • 4 sheets phyllo dough, thawed
    • 2½ tbsp (35 g) unsalted butter, melted
    • 1 tbsp (13 g) granulated sugar
    • ¼ tsp ground cinnamon
    • pinch of table salt

    Warm Honey-Lemon Sauce

    • 2 tbsp (42 g) honey
    • 1½ tbsp (19 g) granulated sugar
    • 2 tbsp (30 g) water
    • 1 tsp (5 g) fresh lemon juice
    • 1 wide strip lemon zest
    • pinch of table salt

    Directions

    Prepare the Ice Cream Base

    Combine the milk, cream, honey, cinnamon, salt, and 3 tbsp (about 38 g) of the sugar in a saucepan. Heat until steaming but not boiling.

    Whisk the egg yolks with the remaining 3 tbsp (about 38 g) sugar. Gradually whisk some of the hot dairy mixture into the yolks, then return everything to the saucepan.

    Cook over medium-low heat, stirring constantly, until the custard reaches 170–175°F (77–79°C) and lightly coats a spatula. Strain into a clean container, chill over an ice bath, cover, and refrigerate for at least 6 hours or preferably overnight.

    Prepare the Nuts

    Heat the oven to 325°F (163°C). Toast the pistachios and almonds for 7–9 minutes, until fragrant and lightly colored. Cool completely, then chop into small pieces. Reserve a little for garnishing and refrigerate or freeze the remainder until needed.

    Prepare the Phyllo Clusters

    Heat the oven to 350°F (177°C) and line a baking sheet with parchment paper. Combine the sugar, cinnamon, and salt.

    Brush the phyllo sheets lightly with melted butter, sprinkling each with a little cinnamon sugar. Tear or loosely crumple the sheets into bite-size clusters on the prepared pan.

    Bake for 9–13 minutes, until deeply golden and crisp. Cool completely and store airtight at room temperature.

    Churn and Finish

    Churn the cold custard according to your ice cream maker’s instructions, using a medium-firm ice cream setting if available. Add the chopped pistachios and almonds during the final minute of churning.

    Transfer to a freezer container and freeze for at least 6 hours, preferably overnight.

    Prepare the Honey-Lemon Sauce

    Combine the honey, sugar, water, lemon juice, zest, and salt in a small saucepan. Simmer gently for 2–3 minutes, then remove the lemon zest.

    Keep the sauce lightly warm, approximately 100–110°F (38–43°C).

    Serve

    Let the ice cream temper at room temperature for 8–10 minutes. Place a scoop in each serving dish and drizzle with 1–2 tsp of the warm honey-lemon sauce. Top with crisp phyllo clusters and the reserved toasted nuts, then serve immediately.

    Yield: About 1 quart (950 ml), 8 servings.


    Notes

    Preparation

    • Keep the phyllo clusters separate from the frozen ice cream and add them immediately before serving so they remain crisp.
    • The honey-lemon sauce should be lightly warm rather than hot so it does not melt the ice cream too quickly.

    Variations

    • Plain Honey: Omit the honey-lemon sauce and finish each scoop with a very light drizzle of plain honey.
    • Ghost Pepper Hot Honey: Drizzle ¼–½ tsp room-temperature Ghost Pepper Hot Honey over each scoop. The cold ice cream initially softens the heat, which builds as the ice cream melts.
    • No Sauce: Serve the ice cream with only the crisp phyllo and toasted nuts.

    Serving Suggestions

    • Drizzle each scoop with 1–2 tsp of warm honey-lemon sauce, then finish with crisp phyllo clusters and the reserved toasted nuts.

    Make-Ahead & Storage

    • The ice cream base can be prepared and refrigerated up to 24 hours before churning.
    • Store the finished ice cream in a tightly covered container in the freezer. Let it temper at room temperature for 8–10 minutes before scooping.
    • Store the cooled phyllo clusters in an airtight container at room temperature for up to 2 days.
    • Refrigerate the honey-lemon sauce in an airtight container for up to 1 week and rewarm it gently before serving.
  • Mango Ghost Pepper Ice Cream

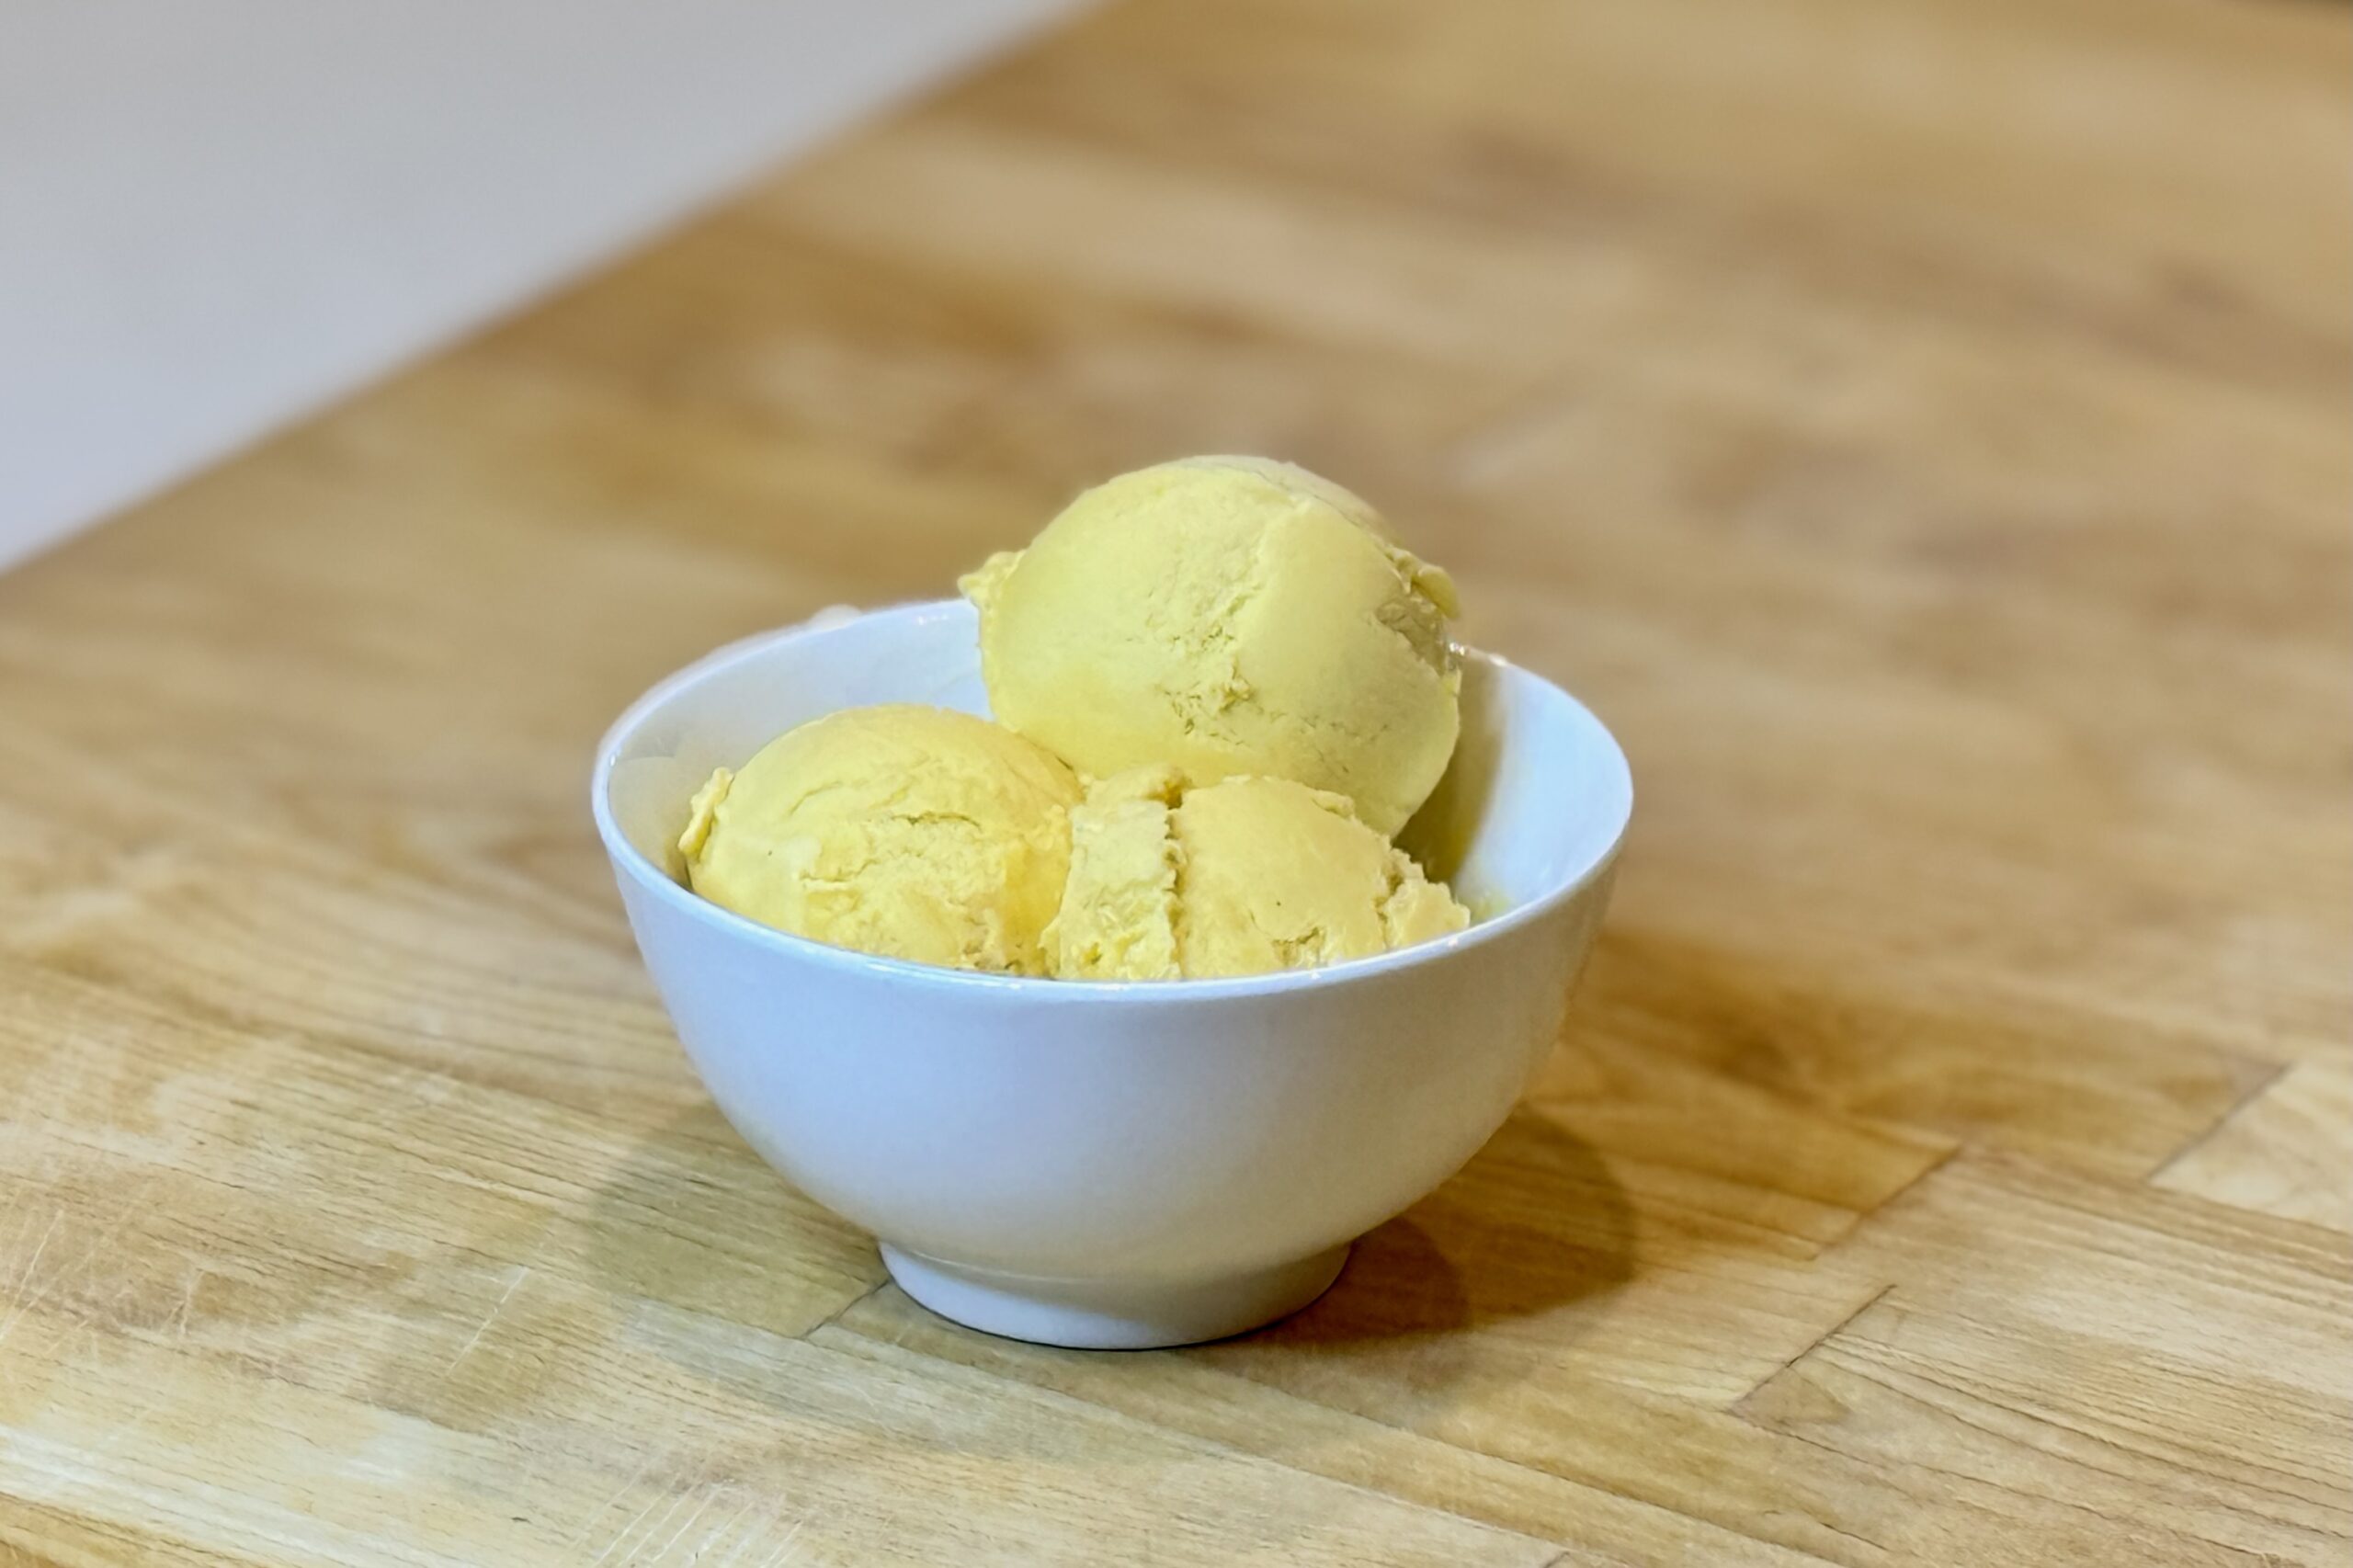
    Mango Ghost Pepper Ice Cream

    This Mango Ghost Pepper Ice Cream brings together the lush sweetness of Alphonso mango, the rich coconut flavor of coconut milk, and the surprising fruitiness of fresh ghost pepper. The first spoonful is cool, creamy, and tropical; then the pepper’s warmth gradually builds in the background. Using just ½ g of ghost pepper keeps those fruit flavors at the center while giving the finished ice cream a distinct but balanced heat.


    Ingredients

    • 1 can (13.66 oz / 403 ml) full-fat coconut milk
    • 1 cup (240 g) Alphonso mango pulp
    • ½ cup (120 g) whole milk
    • ½ cup plus 2 tbsp (125 g) granulated sugar, divided
    • 4 large egg yolks
    • ¼ tsp table salt
    • ½ g fresh ghost pepper
    • ½ tsp vanilla bean paste
    • 1 tbsp (15 g) fresh lime juice

    Directions

    Prepare the Custard

    Combine the coconut milk, whole milk, ½ cup (100 g) of the sugar, and salt in a medium saucepan. Warm over medium-low heat, stirring frequently. When the mixture reaches about 150°F (66°C), add the ghost pepper.

    In a medium bowl, whisk the egg yolks with the remaining 2 tbsp (25 g) sugar until smooth. Slowly whisk about 1 cup (240 ml) of the hot milk mixture into the yolks. Pour the tempered yolk mixture back into the saucepan, whisking constantly.

    Remove and discard the ghost pepper. Cook the custard over medium-low heat, stirring constantly, until it reaches 175°F (79°C). Do not let it boil.

    Finish the Base

    Remove the custard from the heat and let it cool. Blend in the mango pulp and vanilla bean paste until smooth.

    Chill and Churn

    Cover and chill until completely cold, at least 4 hours or overnight. Stir in the lime juice, then churn according to your ice cream maker’s instructions. Transfer to a freezer-safe container and freeze until firm, about 4 hours.

    Yield: About 1 quart (950 ml).


    Notes

    Preparation

    • Wear gloves when handling ghost peppers and avoid touching your face or eyes. Pepper heat can vary considerably, even at the same weight.

    Variations

    • Mango Ice Cream: Omit the ghost pepper and prepare the custard as directed, skipping the steps to add and remove the pepper.
    • Spicier Mango Ghost Pepper Ice Cream: Increase the fresh ghost pepper to 1 g. This tested version delivers a noticeably stronger, more persistent heat.

    Make-Ahead & Storage

    • The ice cream base can be prepared and refrigerated up to 24 hours before churning.
    • Store the finished ice cream in a tightly covered container in the freezer. Let it stand at room temperature for 5–10 minutes before scooping, if needed.
  • Chocolate-Coconut Ghost Pepper Ice Cream

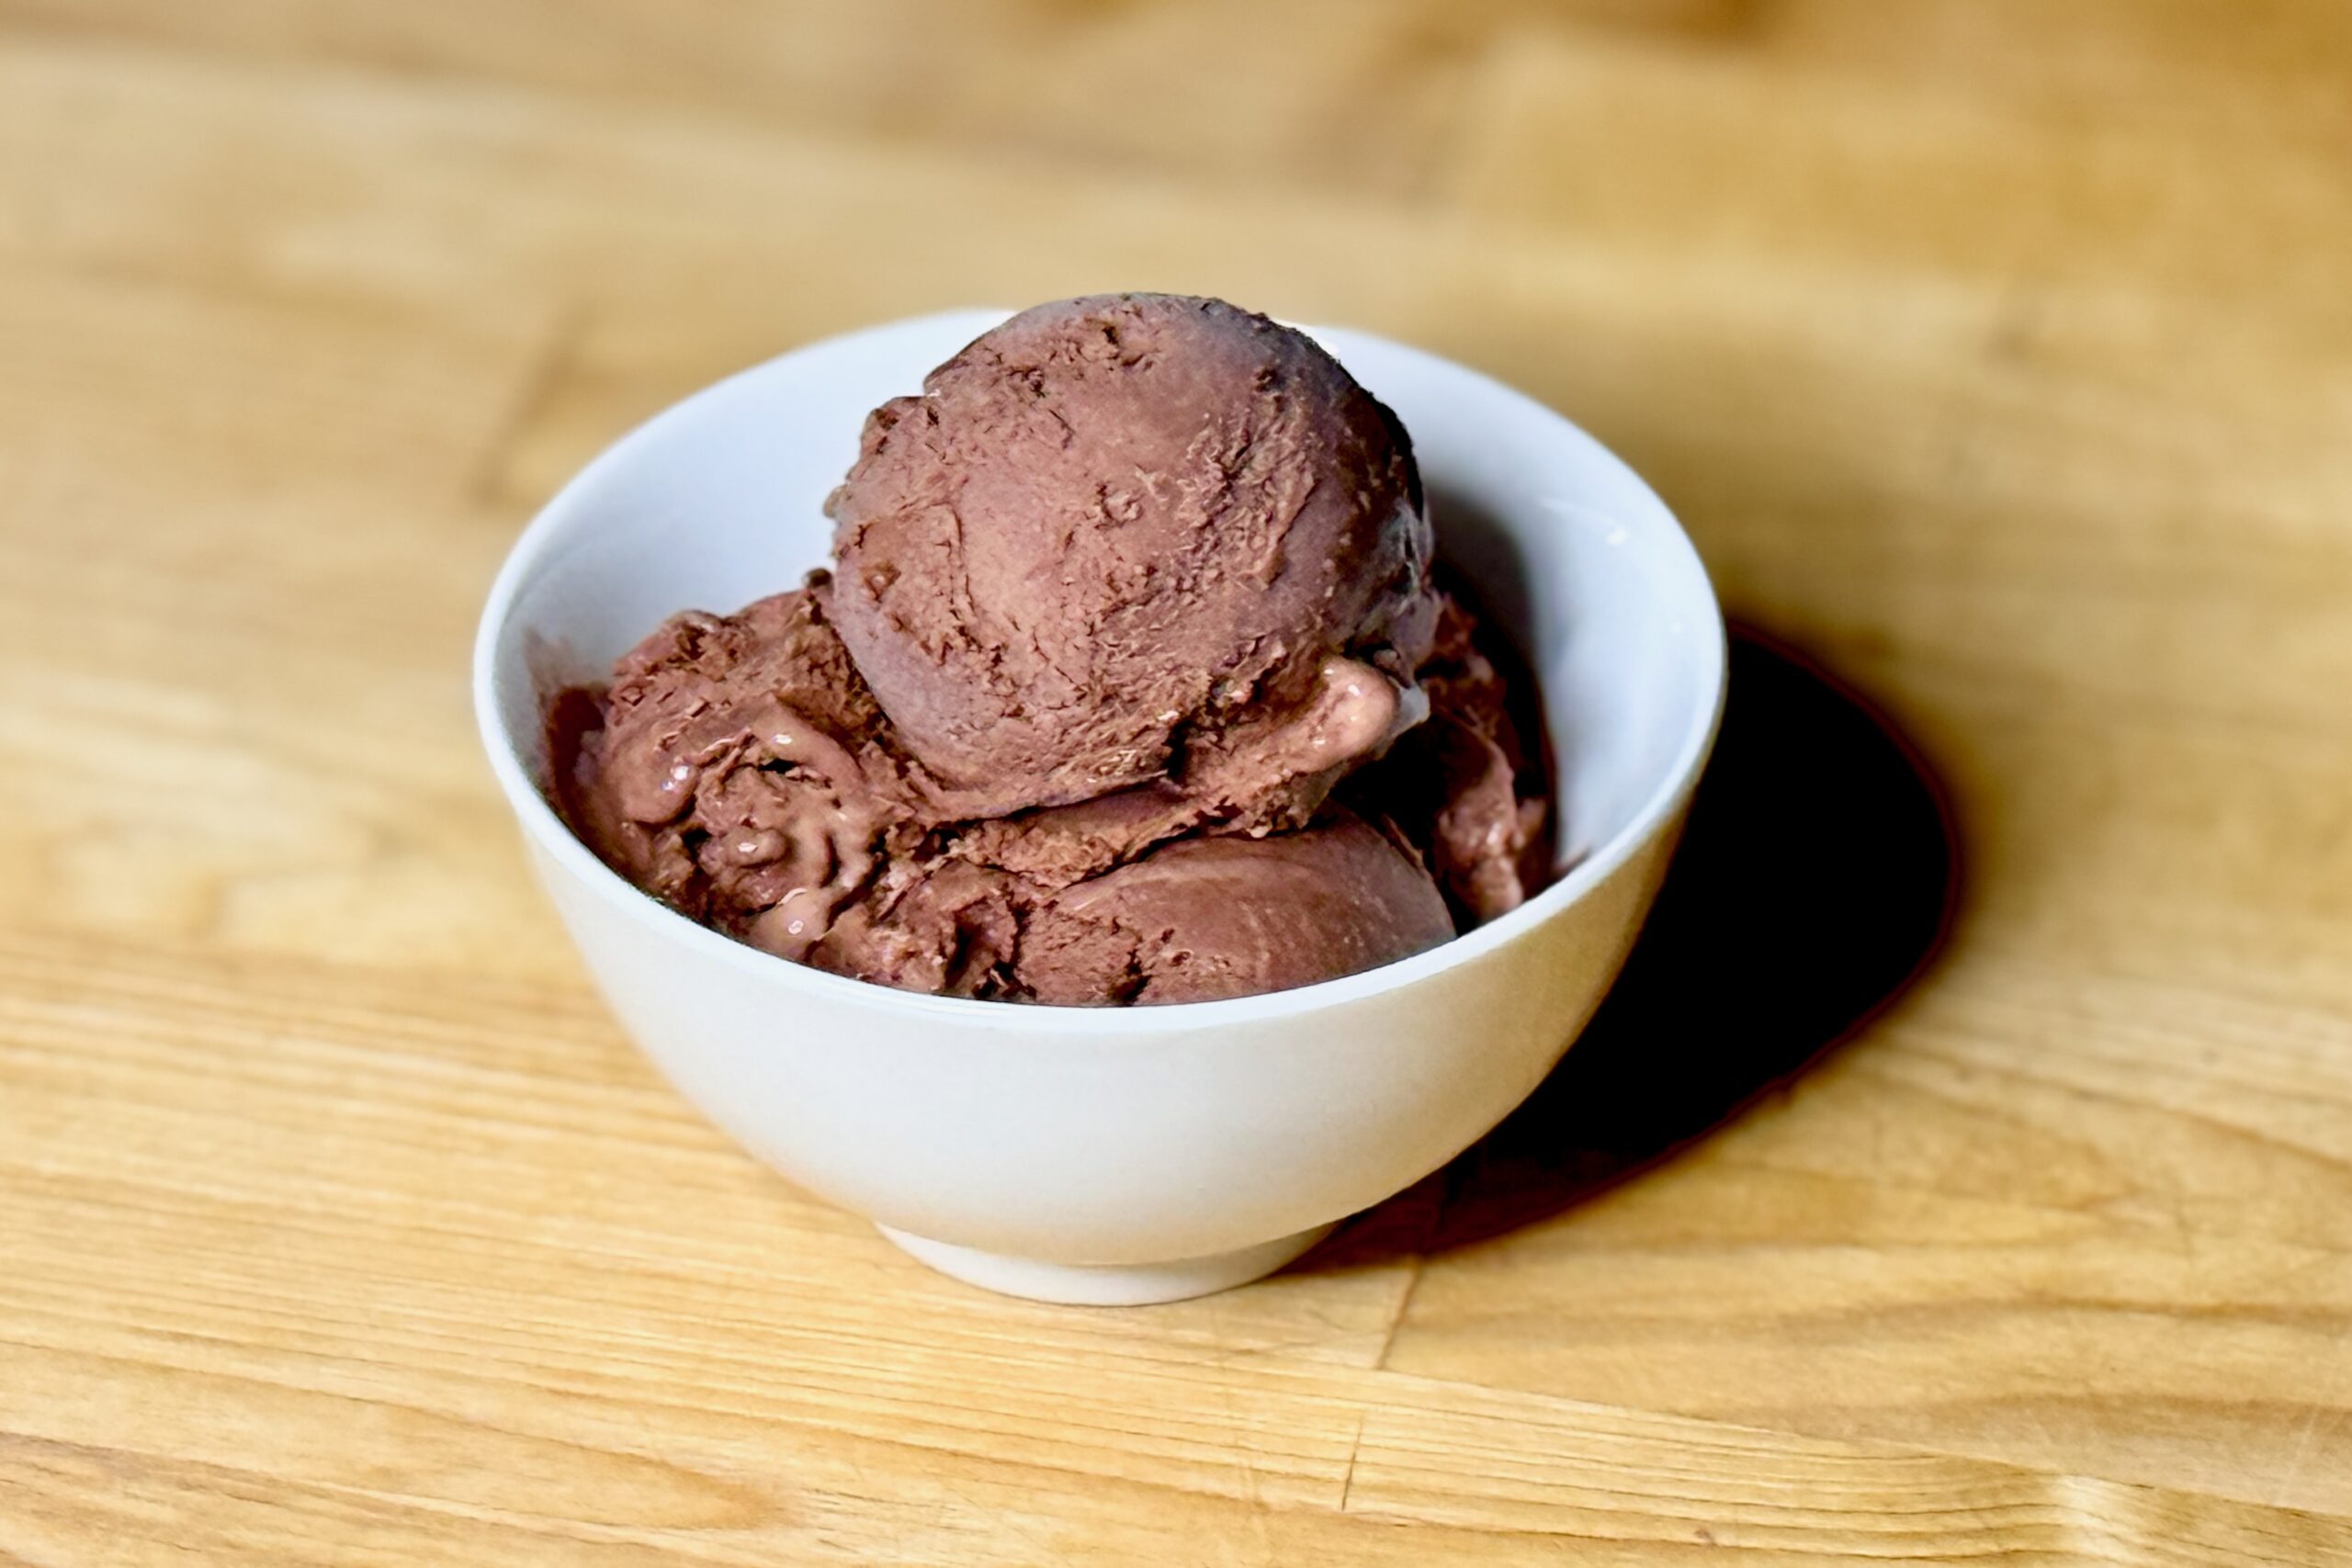
    Chocolate-Coconut Ghost Pepper Ice Cream

    Chocolate and chile are a natural combination, but ghost pepper brings something especially interesting to this ice cream. Its surprisingly fruity flavor works beautifully with dark chocolate and coconut, while the heat builds slowly after each bite. Keeping the chocolate restrained allows all three flavors to come through, creating a rich chocolate ice cream with noticeable coconut and a warm ghost pepper finish.


    Ingredients

    • 1 (13.66 oz / 403 ml) can full-fat coconut milk
    • 1 cup (240 g) whole milk
    • ⅔ cup (135 g) granulated sugar, divided
    • ¼ cup (22 g) Guittard Cocoa Rouge cocoa powder
    • about ⅞ oz (25 g) dark Belgian chocolate, finely shaved or chopped
    • 4 large egg yolks
    • ¼ tsp table salt
    • ½ tsp vanilla bean paste
    • 1 g fresh ghost pepper

    Directions

    Prepare the Chocolate Base

    In a medium saucepan, whisk together the cocoa powder and ⅓ cup (about 67 g) of the sugar. Whisk in about ½ cup (120 ml) of the coconut milk until smooth. Heat over medium-low heat, whisking occasionally, until the mixture reaches about 150°F (66°C). Add the ghost pepper and dark chocolate, stirring until the chocolate is completely melted. Stir in the remaining coconut milk, whole milk, and salt.

    Prepare the Custard

    In a separate bowl, whisk the egg yolks with the remaining sugar until smooth. Slowly whisk some of the warm chocolate mixture into the yolks to temper them. Gradually whisk the tempered yolks back into the saucepan. Continue heating gently, stirring frequently. Once the ghost pepper flavor and heat are noticeable, strain the mixture to remove the pepper and return the custard to the saucepan. Continue cooking, stirring constantly, until the custard reaches 175°F (79°C). Remove from the heat and stir in the vanilla bean paste.

    Chill and Churn

    Cool the custard, then cover and refrigerate until thoroughly chilled, preferably at least 6 hours or overnight. Churn according to your ice cream maker’s instructions. Transfer to a freezer-safe container and freeze until firm enough to scoop.

    Yield: About 1 quart (950 ml).


    Notes

    Preparation

    • Ghost peppers are extremely hot. Wear gloves while handling them and avoid touching your face or eyes.
    • The ghost pepper is infused in the warm custard and then removed before the custard reaches its final temperature. This gives you more control over the finished heat than leaving pieces of pepper in the ice cream.
    • The chocolate arrives first, while the ghost pepper heat remains almost hidden by the cold. As the ice cream melts and the cold sensation fades, the heat begins to emerge and builds into a warm, lingering finish.
    • Using only 25 g dark chocolate is intentional. The cocoa powder provides most of the chocolate flavor while the small amount of dark chocolate adds richness without overwhelming the coconut or fruity character of the ghost pepper.

    Variations

    • Hotter Ghost Pepper: Increase the ghost pepper to 1.5 g for a more assertive, lingering heat. This is the amount used in the original test batch.
    • Milder: Remove the ghost pepper earlier during the custard preparation once the desired level of heat is reached.
    • Cinnamon: Lightly sprinkle the ice cream with ground cinnamon just before serving. The cinnamon complements the chocolate and ghost pepper while adding a warm aromatic note.

    Serving Suggestions

    • Serve on its own to appreciate the progression from chocolate and coconut to the slowly building ghost pepper heat.
    • Pair with a warm brownie for a richer chocolate dessert.
    • A small pinch of flaky salt over the finished ice cream can provide contrast to the chocolate and subtle sweetness.

    Make-Ahead & Storage

    • The custard can be prepared a day ahead and refrigerated overnight before churning.
    • Store the finished ice cream tightly covered in the freezer. For the best texture, allow very firm ice cream to soften briefly at room temperature before scooping.
  • Pagotó Kaïmáki (παγωτό καϊμάκι) — Greek Mastic Ice Cream

    Pagotó Kaïmáki (παγωτό καϊμάκι) — Greek Mastic Ice Cream

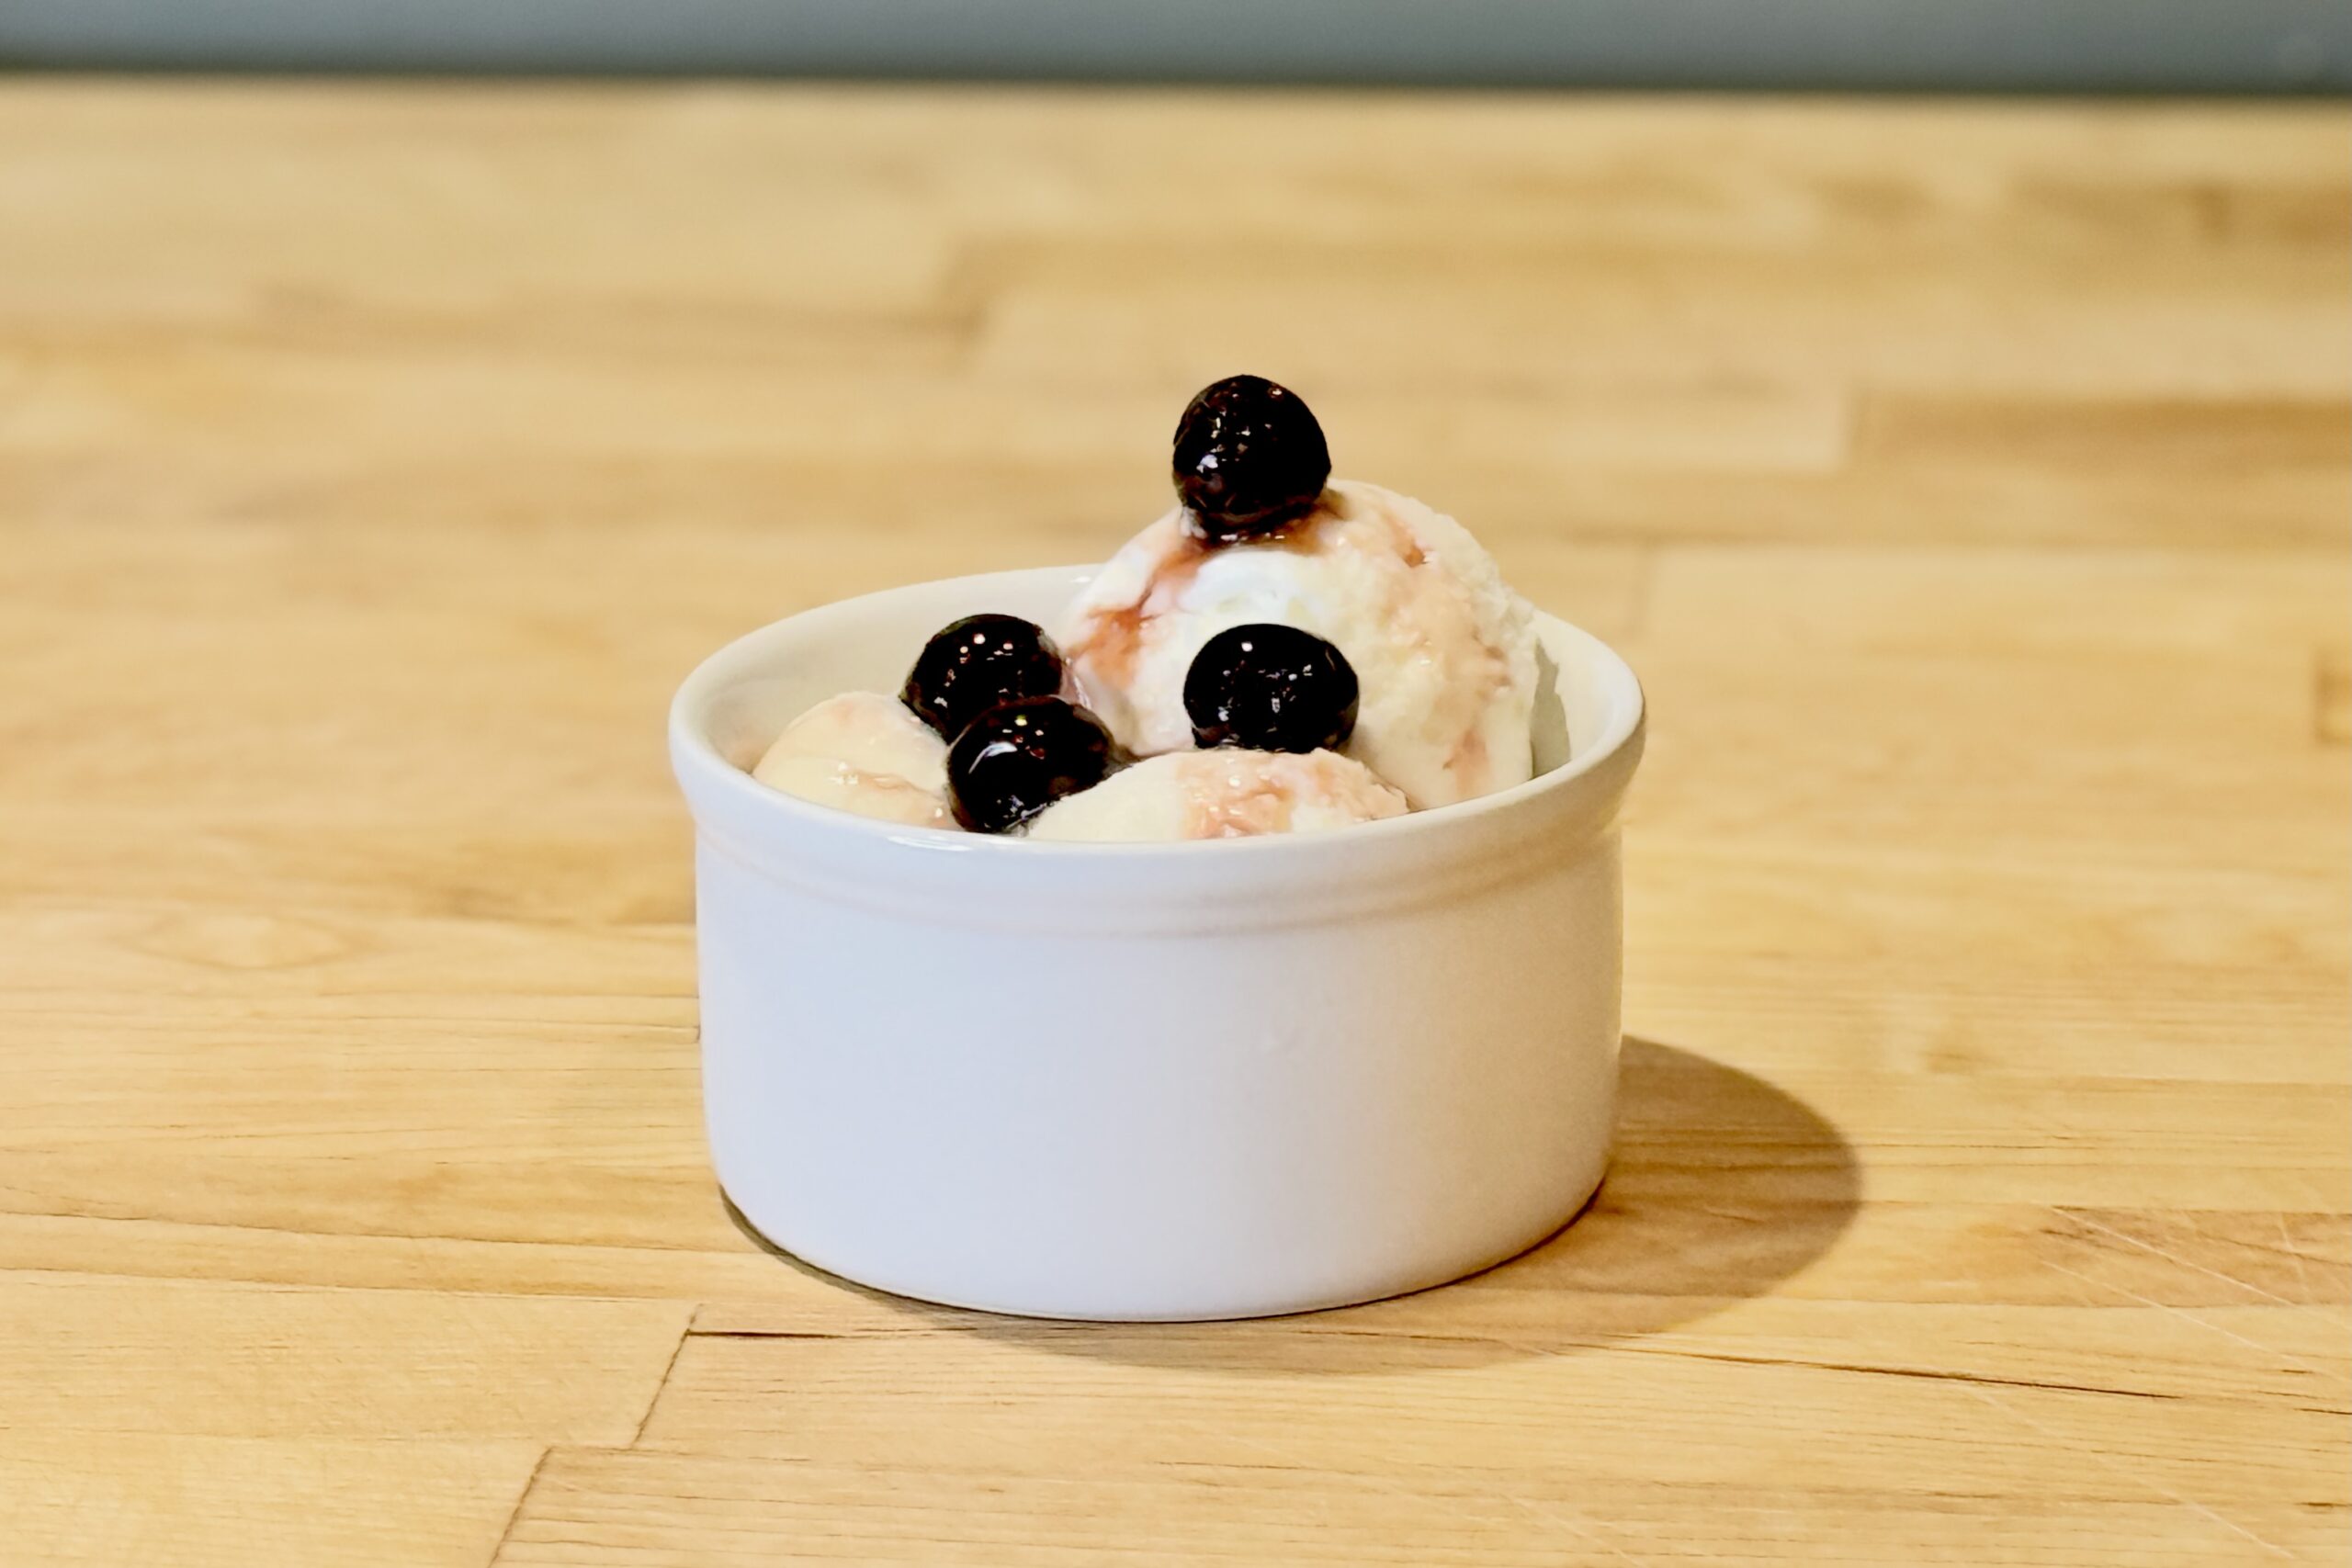
    Pagotó kaïmáki (παγωτό καϊμάκι) is a traditional Greek ice cream known for the distinctive aromatic flavor of Chios mastiha and its unusually creamy, slightly elastic texture. Mastiha gives the ice cream a fresh, gently piney fragrance that becomes fuller as the base rests overnight. This eggless version keeps that unusual flavor at the center, while Fabbri Amarena cherries and a spoonful of their syrup add a sweet-tart finish.


    Ingredients

    • 500 g (about 2 cups + 1 tbsp) whole milk
    • 200 g (about ¾ cup + 1½ tbsp) heavy cream
    • 150 g (about ¾ cup) granulated sugar, divided
    • 10 g (about 1½ tbsp) tapioca flour
    • 0.4 g xanthan gum
    • 0.5 g Chios mastiha tears
    • 1 g table salt

    For Serving

    • Fabbri Amarena cherries, 2–3 per serving
    • Amarena cherry syrup, 1–2 tsp per serving

    Directions

    Prepare the Mastiha

    Place the mastiha tears in the freezer for 30 minutes. Grind the cold mastiha with 10 g (about 2½ tsp) of the sugar until very fine, then set aside.

    Cook the Base

    Whisk together the remaining 140 g (about ¾ cup minus 2½ tsp) sugar, tapioca flour, xanthan gum, and salt in a saucepan. Gradually whisk in the milk, followed by the cream.

    Cook over medium heat, whisking frequently, until the mixture reaches 180–185°F (82–85°C). Hold it in that range for approximately 1 minute while whisking.

    Remove from the heat and immediately add the ground mastiha mixture. Blend with an immersion blender for 15–20 seconds, then strain into a clean container.

    Chill and Churn

    Chill the base over an ice bath, cover, and refrigerate for at least 6–8 hours, preferably overnight.

    Churn the chilled base according to your ice cream maker’s instructions, using a firm gelato setting if available. Transfer to a freezer container and freeze for at least 6 hours, preferably overnight.

    Serve

    Let the ice cream temper at room temperature for 8–10 minutes. Top each serving with 2–3 Amarena cherries and 1–2 tsp of their syrup.

    Yield: Approximately 950 ml (1 quart), 8 modest servings.


    Notes

    Preparation

    • The mastiha flavor becomes fuller as the base rests. Do not skip the 6–8 hour refrigeration before churning; overnight is preferable.
    • Weigh the mastiha carefully; even small changes noticeably affect its aromatic, resinous flavor.
    • Use the gram weights as the primary measurements to preserve the tested formula; the US volume equivalents are approximate. Weigh the base ingredients and the salep if using. Use a precision scale that reads to 0.01 g for the xanthan gum and mastiha; do not estimate these tiny amounts with measuring spoons.

    Variations

    • Traditional Salep: Replace the 10 g (about 1½ tbsp) tapioca flour and 0.4 g xanthan gum with 4 g pure salep powder. After reserving 10 g (about 2½ tsp) of the sugar for grinding the mastiha, whisk the salep thoroughly into the remaining 140 g (about ¾ cup minus 2½ tsp) sugar before adding the milk and cream; this helps prevent clumping. Heat the base to 180–185°F (82–85°C) and hold it in that range for 2–3 minutes, whisking continuously, until lightly thickened. Finish, chill, and churn as directed. Salep varies in strength; do not substitute a sweetened salep or sahlab beverage mix measure-for-measure.

    Serving Suggestions

    • Serve plain to emphasize the mastiha, or top each portion with 2–3 Amarena cherries and 1–2 tsp of their syrup. Keep the cherries and syrup out of the churn so the kaïmáki’s texture and flavor remain the focus.

    Make-Ahead & Storage

    • The base can be prepared and refrigerated in a covered container up to 1 day before churning.
    • For the best texture, store the finished ice cream airtight with parchment pressed against the surface and enjoy within 2 weeks.
  • Snickerdoodles (Bakery Style, Soft & Chewy)

    Snickerdoodles (Bakery Style, Soft & Chewy)

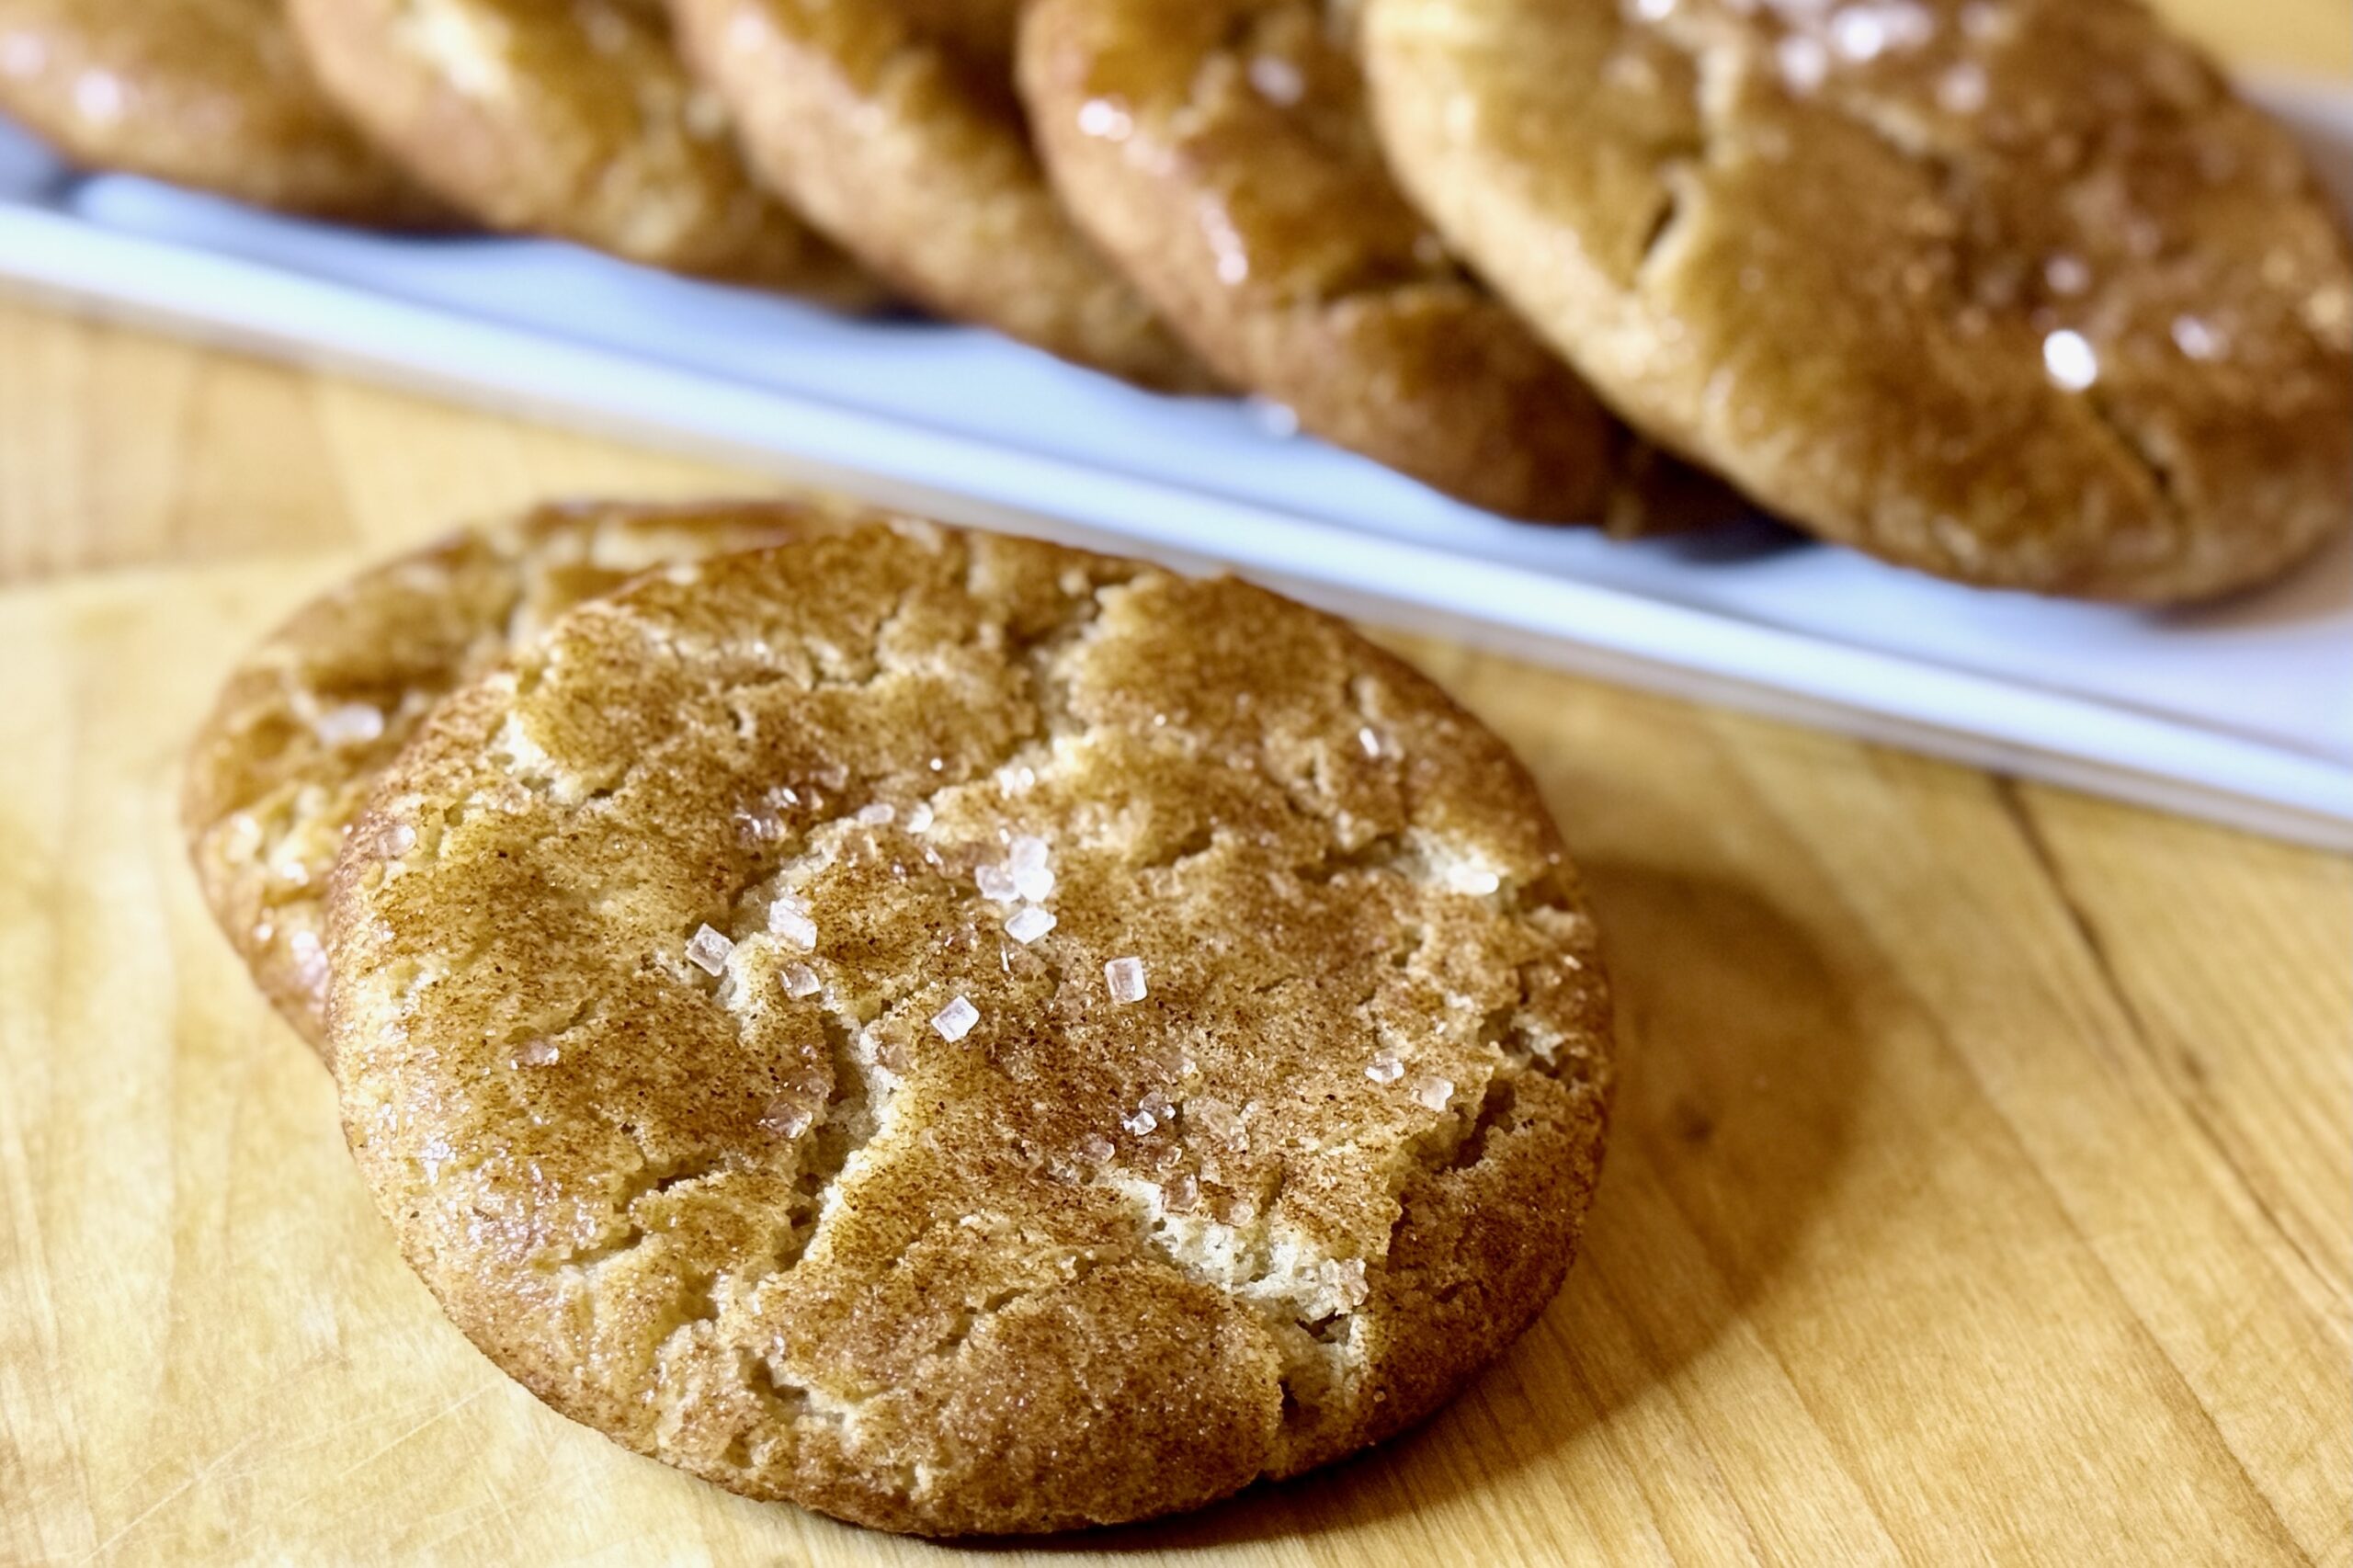
    These Snickerdoodles build on our “Fat Daddo’s” Master Bakery-Style Cookies, adapted into a classic cinnamon-sugar cookie with a soft, chewy center and lightly crisp edges. Cream of tartar gives them their signature tang and crackled surface, while a balanced sugar ratio keeps them light without losing that bakery-style richness. This version is adjusted for high-altitude baking at about 4,500 ft for consistent structure and controlled spread. For sea-level baking, see the Notes section for adjustments.


    Ingredients

    Dough

    • 1 cup (227 g) unsalted butter, softened
    • ½ cup (110 g) packed brown sugar
    • ¾ cup (150 g) granulated sugar
    • 1 large egg (50 g)
    • 1 large egg yolk (18 g)
    • 1½ tsp (7 g) vanilla extract
    • 1–2 tbsp (15–30 g) milk
    • 3 cups + 2 tbsp (375 g) all-purpose flour
    • 2 tsp (6 g) cream of tartar
    • 1 tsp (5 g) baking soda
    • 1 tsp (6 g) table salt
    • ½ tsp ground cinnamon (optional)

    Cinnamon Sugar Coating

    • ¼ cup (50 g) granulated sugar
    • 1½ tbsp ground cinnamon

    Directions

    Make the Dough

    In the bowl of a stand mixer or in a large mixing bowl, cream together the softened butter, brown sugar, and granulated sugar until light and fluffy, about 1–2 minutes.

    Add the egg, egg yolk, vanilla extract, and 1 tbsp (15 g) milk. Mix until smooth and slightly thickened, about 1 minute.

    In a separate bowl, whisk together the flour, cream of tartar, baking soda, salt, and optional cinnamon.

    Finish the Dough

    Add the dry ingredients to the wet mixture and mix just until combined. Do not overmix.

    The dough should be soft and slightly tacky, but not sticky. If the dough seems stiff after adding the flour, mix in the remaining 1 tbsp (15 g) milk.

    Prepare Coating

    In a small bowl, mix the granulated sugar and cinnamon.

    Portion, Coat, and Chill

    Portion the dough into 8 large cookies or up to 24 regular cookies.

    Roll each dough ball in the cinnamon sugar mixture until fully coated.

    Gently flatten each to about ¾–1 inch (2–2.5 cm) thick.

    Place on a parchment-lined baking sheet and refrigerate for at least 1 hour and up to 48 hours.

    For slightly more spread, let the dough sit at room temperature for 10–15 minutes before baking.

    Bake

    Preheat the oven to 400°F (204°C). Line a baking sheet with parchment paper or a silicone baking mat.

    Arrange cookies 2–3 inches (5–8 cm) apart.

    Bake large cookies for 11–14 minutes or regular cookies for 7–9 minutes, until edges are set and tops are crackled.

    Cool on the baking sheet for 10–15 minutes before transferring to a rack.

    Freeze for Later

    Portioned dough can be frozen before or after coating.

    Freeze on a tray until firm, then transfer to a freezer bag.

    Bake from frozen, adding 2–3 minutes to the baking time.

    Yield: 8 large cookies or up to 24 regular cookies.


    Notes

    Preparation

    • Cream of tartar is essential for the signature tang and texture—do not substitute.
    • Flattening before baking ensures even spread and classic snickerdoodle shape.
    • Chilling improves flavor and prevents excessive spreading.

    Variations

    • Warm Spice: Add ½ tsp nutmeg or cardamom.
    • Thicker Coating: Roll the dough in cinnamon sugar twice.
    • Browned Butter: Use browned butter with its lost water replaced for a deeper, nutty flavor.

    Serving Suggestions

    • Serve slightly warm for the softest centers.
    • Perfect with cold milk.
    • They pair especially well with our homemade Vanilla Bean Ice Cream.
    • Excellent for holiday baking and gifting.

    Make-Ahead & Storage

    • Dough can be refrigerated up to 48 hours.
    • Freeze dough up to 2 months.
    • Store baked cookies in an airtight container for 3–4 days.

    High Altitude

    • About 4,500 ft (1,370 m): Use the recipe as written.
    • Sea Level: Reduce the flour to 3 cups (360 g) and use only 1 tbsp (15 g) milk unless additional moisture is needed.
  • Pistachio Gelato

    Pistachio Gelato

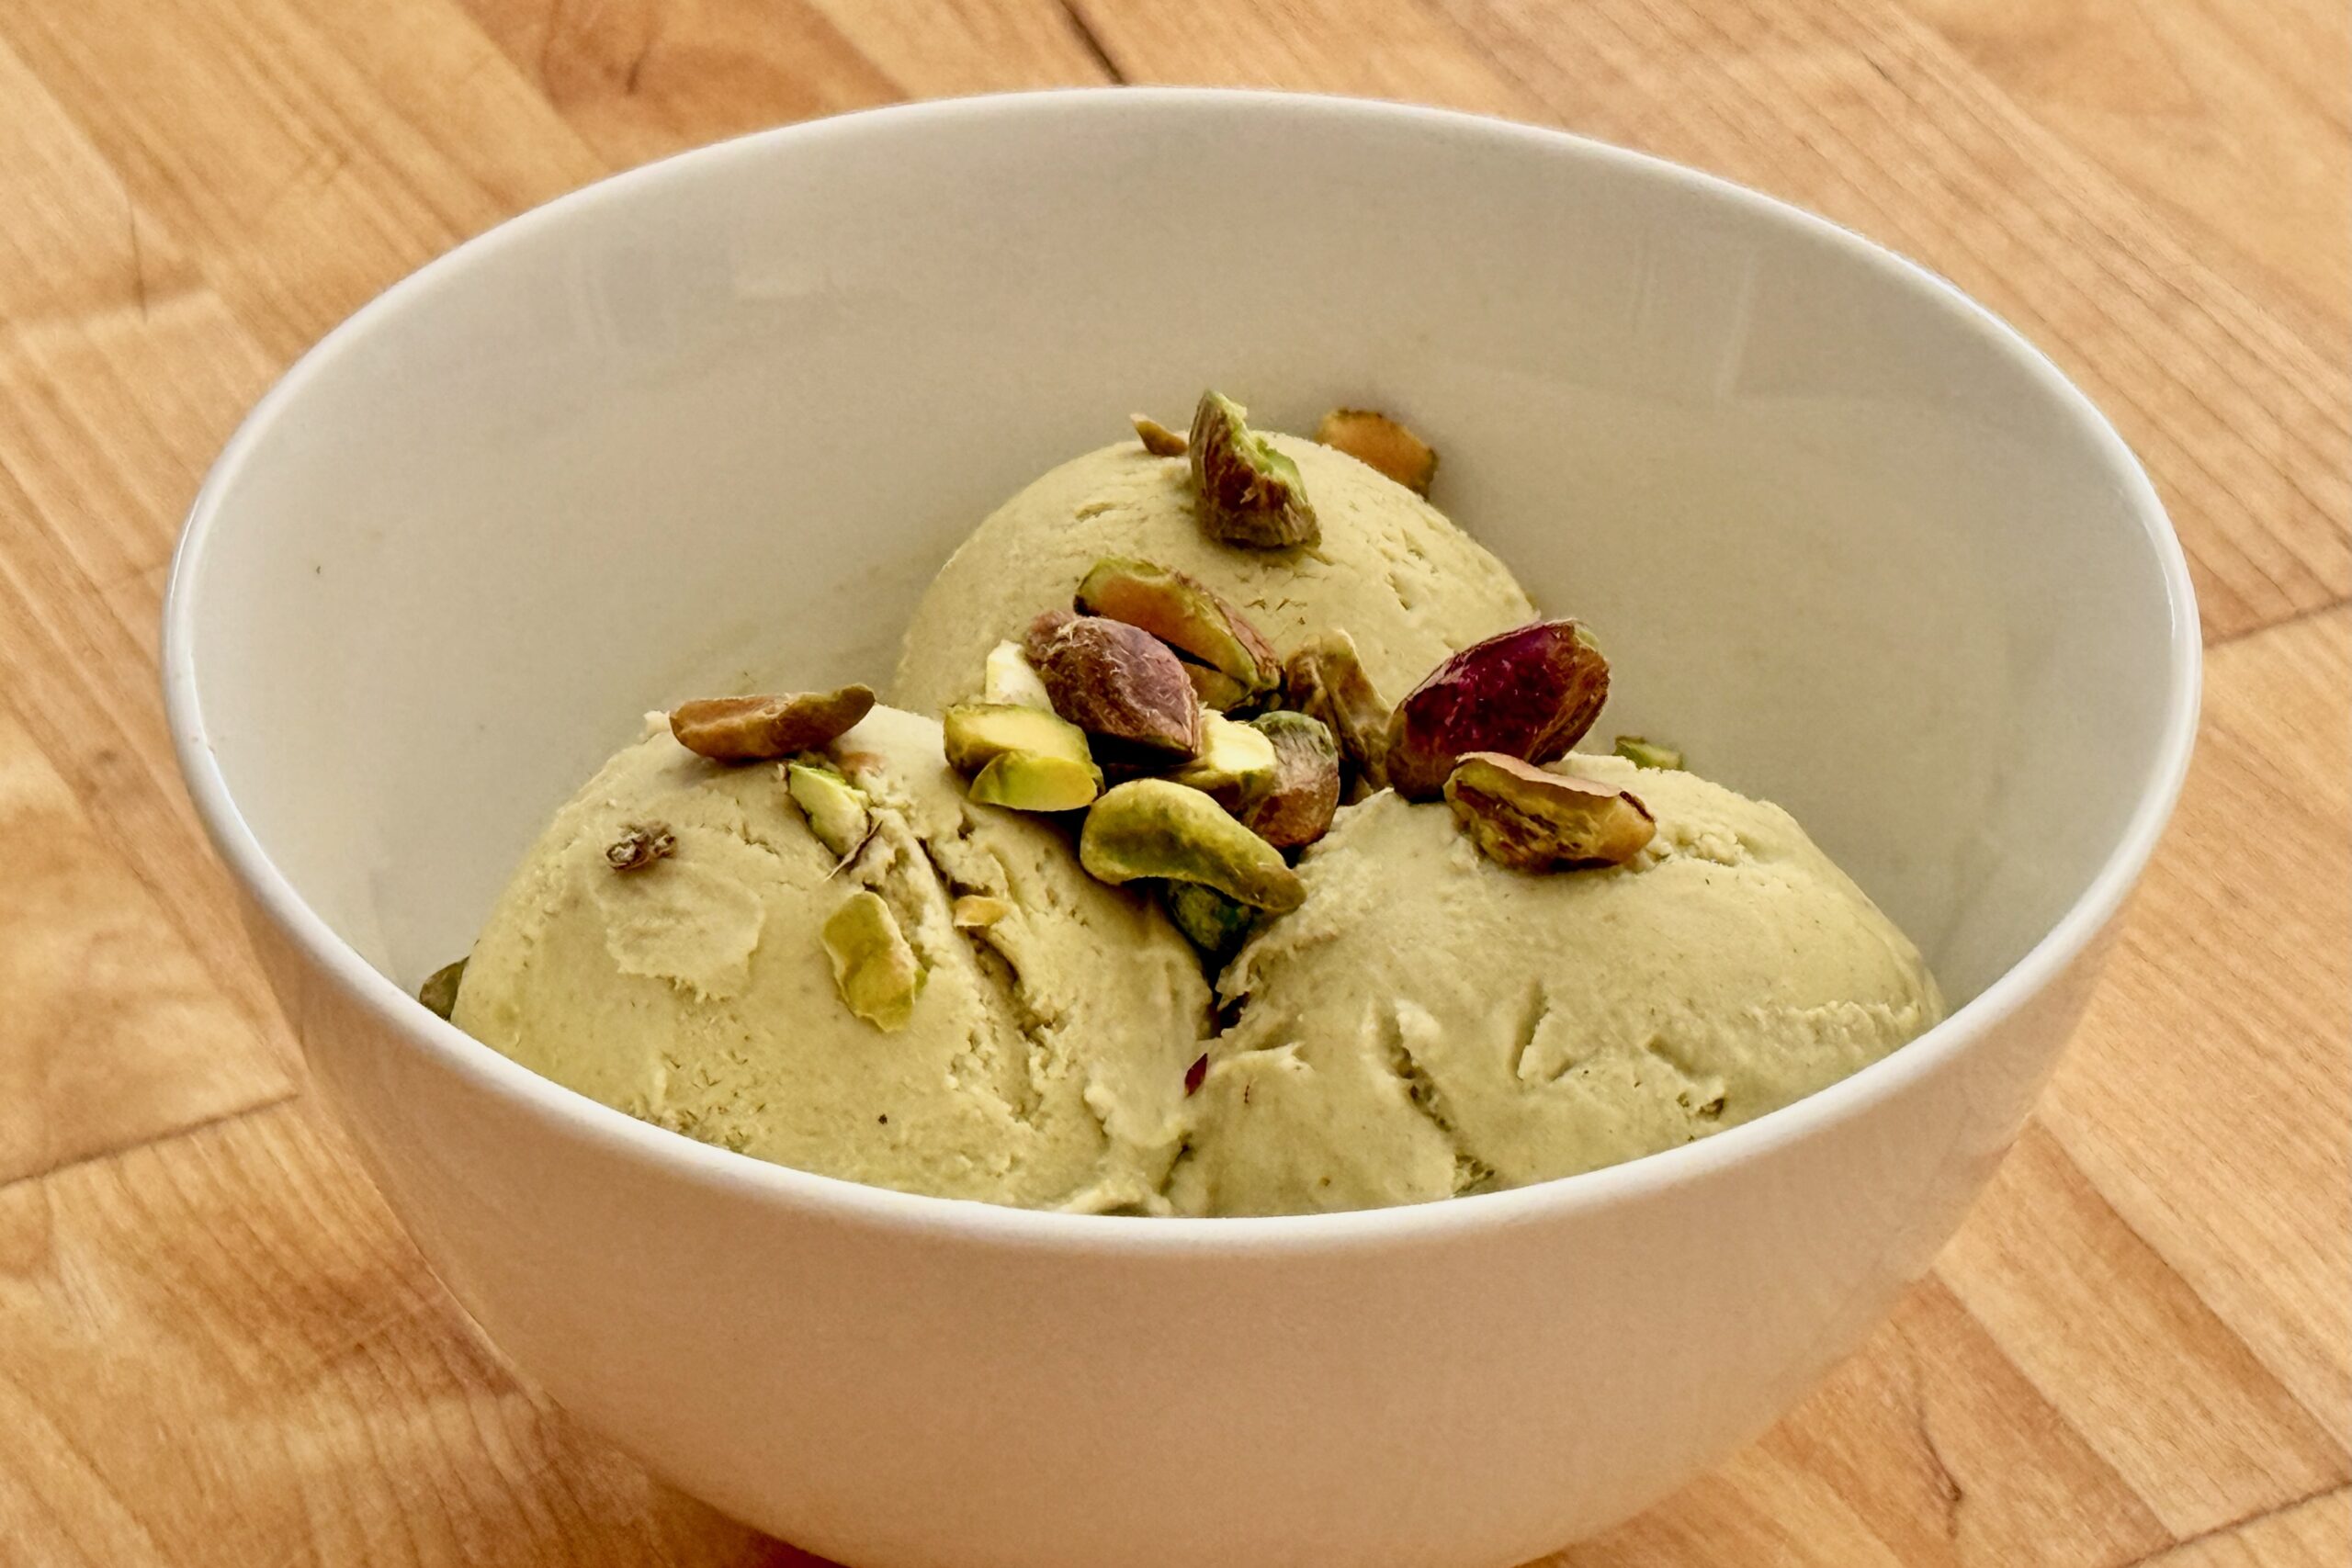
    Pistachio gelato has always held a special place in our family—especially for Grandma Honey, who never passes it up when it’s on the menu. It’s one of those flavors that feels both nostalgic and a little refined at the same time, simple on the surface but deeply satisfying when it’s done right. This pistachio gelato is designed to deliver true pistachio flavor first—deeply nutty, smooth, and satisfying, without drifting into a heavy custard or becoming overly sweet. Lightly toasted pistachios are blended directly into the base for full flavor and body, while a restrained amount of cream, a small number of yolks, and added milk solids create a texture that feels dense and luxurious rather than airy or thin. It churns into a gelato that stays clean on the palate and rich enough to keep you coming back for another spoonful.


    Ingredients

    • 1¼ cups (175 g) raw shelled pistachios
    • 2 tbsp (25 g) sugar (from the measured sugar below, for blending the pistachios)
    • 2¼ cups (540 g) whole milk, divided
    • ¾ cup (180 g) heavy cream
    • ⅔ cup (135 g) sugar
    • 1½ tbsp light corn syrup
    • 2 tbsp dry milk powder (optional, but recommended)
    • 3 large egg yolks
    • ¼ tsp table salt, plus more to taste
    • ¼ tsp vanilla extract (optional)
    • ⅛ tsp almond extract (optional; use sparingly)

    Directions

    Toast the Pistachios

    Heat the oven to 300°F (149°C). Spread the pistachios on a small sheet pan or oven-safe dish in an even layer.

    Toast for 8–10 minutes, just until fragrant. They should smell nutty and aromatic but should not brown. Let cool slightly.

    Blend the Pistachio Base

    Place the warm pistachios in a blender with 2 tbsp (25 g) of the measured sugar and ¾ cup (180 g) of the milk.

    Blend until very smooth. The mixture should move well in the blender and become thick, creamy, and fluid rather than forming a stiff paste.

    Leave the pistachio mixture in the blender jar.

    Heat the Dairy Base

    In a medium saucepan, combine the remaining 1½ cups (360 g) milk, cream, remaining sugar, corn syrup, dry milk powder if using, and ¼ tsp table salt.

    Heat over medium, whisking occasionally, until the mixture is steaming hot and the sugar is dissolved, but do not let it boil.

    Temper the Yolks

    In a separate bowl, whisk the egg yolks until smooth.

    Slowly pour in about 1 cup (240 ml) of the hot milk mixture while whisking constantly.

    Gradually whisk the tempered yolks back into the saucepan.

    Cook the Base

    Cook over medium-low heat, stirring constantly with a heatproof spatula or wooden spoon, until the base thickens slightly and reaches 170–175°F (77–79°C).

    It should lightly coat the back of a spoon. Do not let it boil.

    Combine and Blend Again

    Remove the pan from the heat. Carefully pour the hot custard into the blender with the pistachio mixture.

    Blend until fully smooth and uniform. Stir in the vanilla extract and almond extract, if using.

    For the smoothest final texture, keep this blending step even if the pistachios seemed to break down well the first time.

    Strain and Chill

    Strain the base through a fine-mesh sieve into a clean bowl to catch any remaining pistachio fiber and ensure a smooth, non-gritty texture.

    Cool over an ice bath, then cover and refrigerate until very cold, at least 6 hours and preferably overnight.

    Taste once chilled and add a tiny extra pinch of salt if you want the pistachio flavor to pop a bit more.

    Churn

    Pour the cold base into your ice cream maker and churn according to the manufacturer’s instructions until thick, smooth, and softly mounded.

    The finished texture should resemble soft gelato.

    Freeze to Set

    Transfer to a chilled container, press a piece of parchment or plastic wrap against the surface, cover, and freeze until firm enough to scoop, about 2–4 hours.

    Let stand at room temperature for a few minutes before serving if needed.

    Yield: About 1 quart (950 ml).


    Notes

    Preparation

    • Raw pistachios are ideal here because they give you fresher flavor and better natural color than pre-roasted nuts. Toast them lightly to wake up their flavor, but do not let them brown.
    • If using roasted pistachios, unsalted nuts can be used as-is (skip the toasting step or warm briefly to refresh their aroma). If using salted pistachios, rinse under cool water to remove surface salt, dry thoroughly, and warm briefly in a low oven before using. Adjust added salt in the recipe to taste.
    • This recipe uses fewer yolks than a classic custard ice cream so the pistachio flavor stays clear while still giving the gelato enough body to feel satisfying and rich.
    • The sugar level is intentionally restrained to keep the finish clean and nut-forward. Corn syrup helps preserve smooth texture and scoopability without making the gelato taste sweeter.
    • Dry milk powder is optional, but it noticeably improves body and density, especially in home machines. If you want the most gelato-like texture, it is worth using.
    • Almond extract can make the pistachio flavor seem stronger, but it should remain in the background. Use only a very small amount or leave it out entirely for a purer pistachio profile.
    • Straining the blended base is recommended even if only a small amount of fine pistachio fiber remains. That extra step helps keep the finished gelato smooth rather than faintly gritty.
    • Chill the base thoroughly before churning. A fully cold base churns faster and freezes more smoothly.

    Variations

    • Extra Pistachio: For a more intense pistachio version, increase the pistachios to 1½ cups (210 g).
    • Pistachio Crunch: For added texture, fold in ¼ cup (60 ml) finely chopped toasted pistachios after churning, just before transferring to the freezer container.
    • Pure Pistachio: For a purer pistachio profile, omit the vanilla and almond extracts completely.

    Serving Suggestions

    • Serve on its own to let the pistachio flavor shine, or top with a small spoonful of finely chopped pistachios for contrast.
    • This is excellent with fresh berries, a crisp butter cookie, or a light drizzle of dark chocolate for a more dessert-forward presentation.
    • For the most authentic gelato-style experience, serve slightly softened so the texture is dense, creamy, and supple rather than hard-frozen.

    Make-Ahead & Storage

    • The base can be made and refrigerated up to 24 hours before churning.
    • Store the finished gelato tightly covered in the freezer for up to 2 weeks for best texture and flavor.
    • Homemade gelato freezes firmer than what is served in most shops, so let it sit at room temperature for 5–10 minutes before scooping if needed.
  • Master Bakery-Style Cookies (Endless Variations)

    Master Bakery-Style Cookies (Endless Variations)

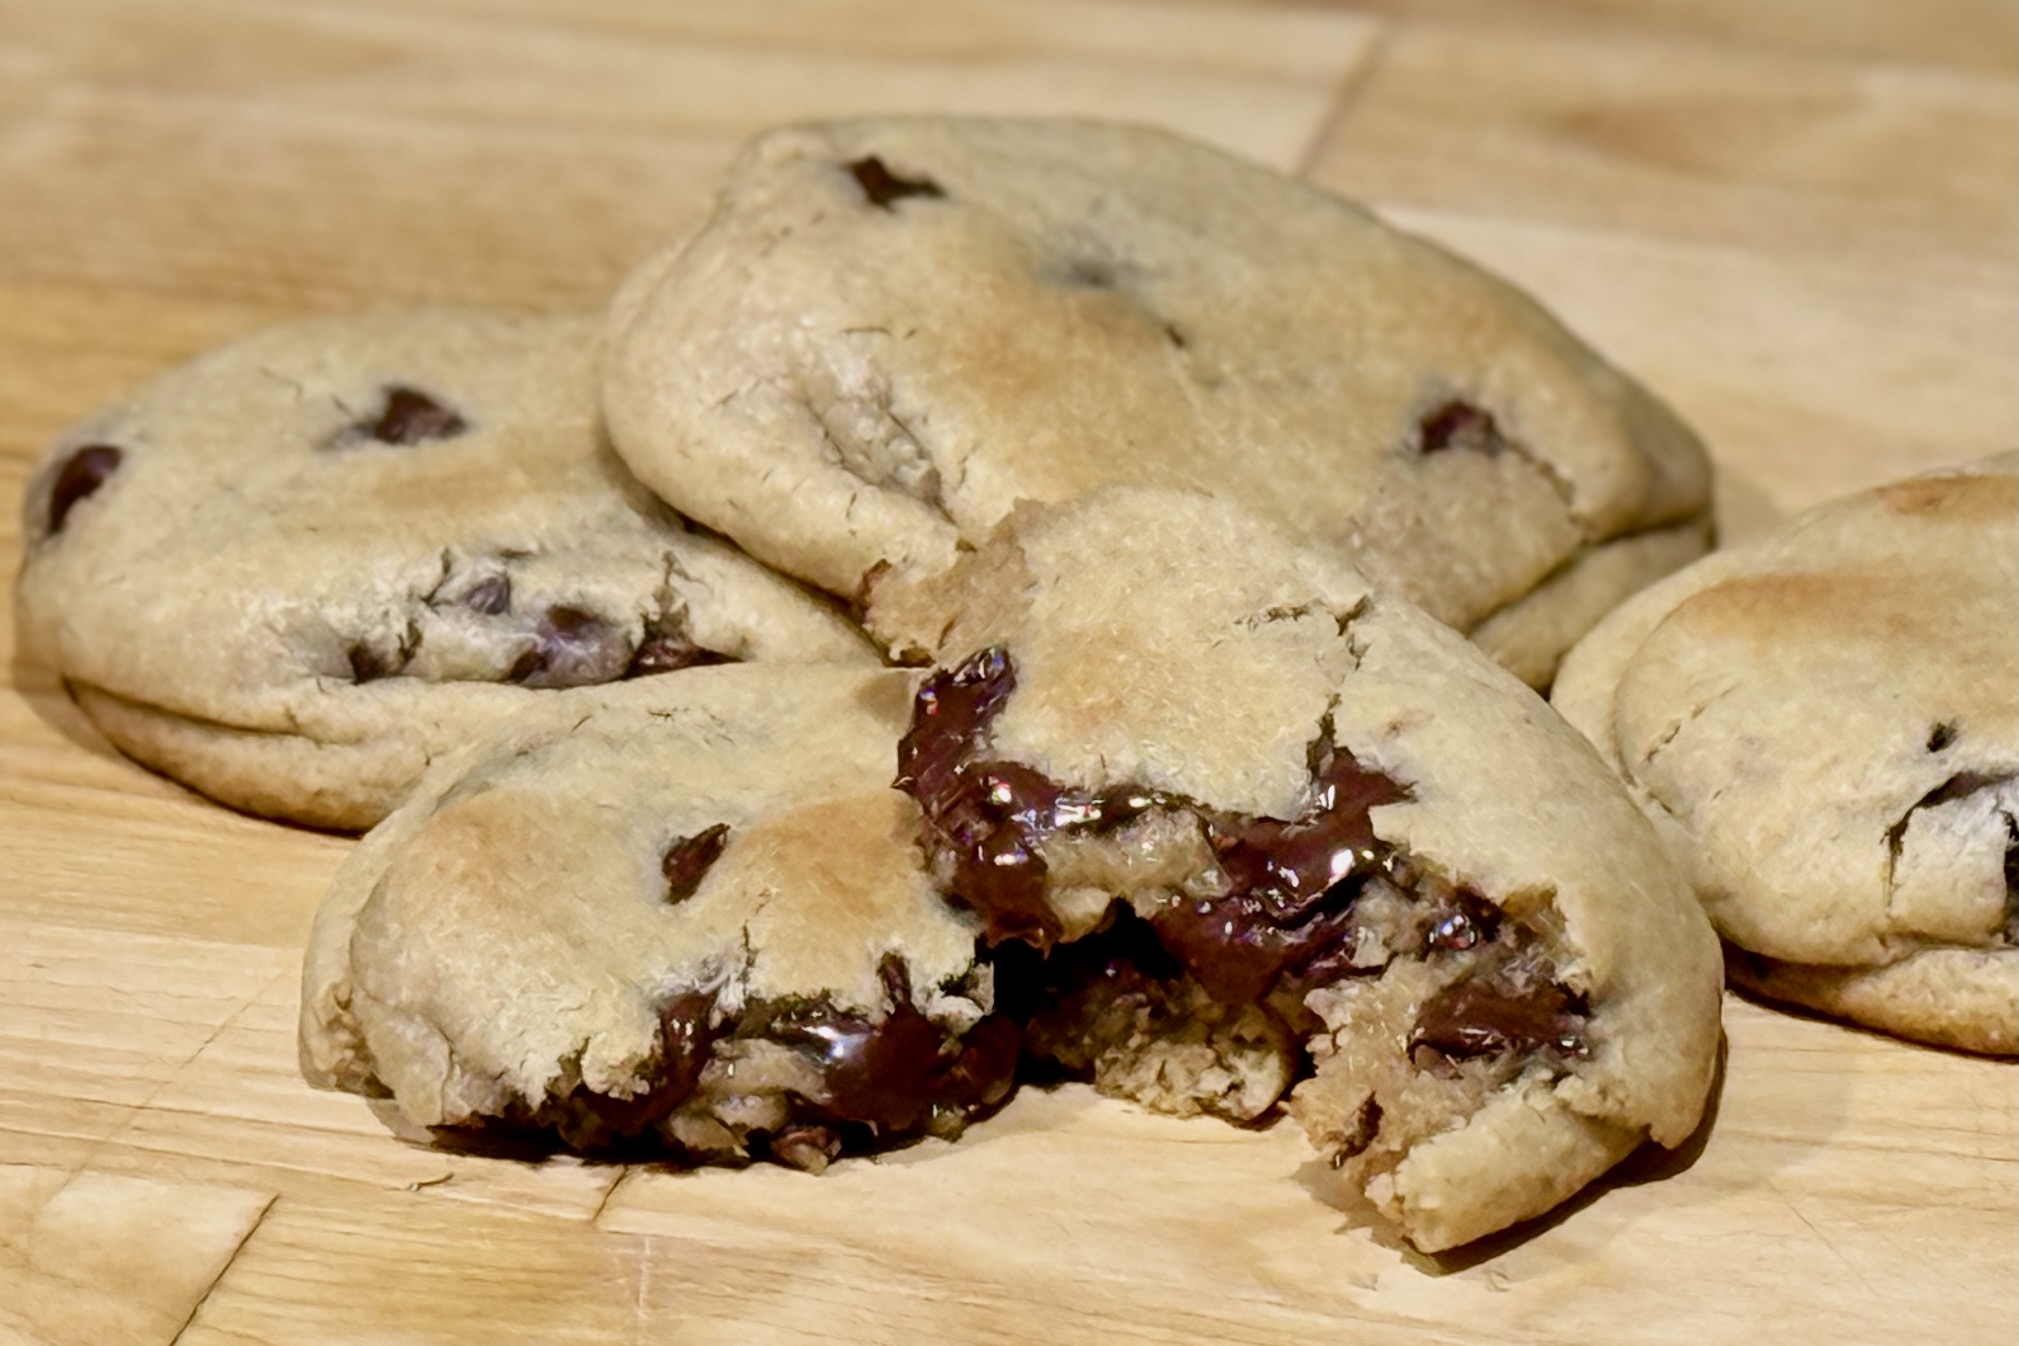
    This original Huggins Family recipe—affectionately known in our house as “Fat Daddo’s Cookies”—is our master dough for thick, chewy bakery-style cookies with crisp edges and soft centers. Built to handle everything from classic chocolate chip to brown butter pecan, chocolate orange, and more, it’s designed as a true “one dough, endless variations” system. This version is adjusted for high-altitude baking at about 4,500 ft (1,370 m), so the cookies keep their structure without sacrificing that soft, indulgent texture. For sea-level baking, see the Notes section for adjustments.


    Ingredients

    Base Dough

    • 1 cup (227 g) unsalted butter, softened
    • 1 cup (220 g) packed brown sugar
    • ¼ cup (50 g) granulated sugar
    • 1 large egg (50 g)
    • 1 large egg yolk (18 g)
    • 1½ tsp (7 g) vanilla extract
    • 1–2 tbsp (15–30 g) milk
    • 3 cups + 2 tbsp (375 g) all-purpose flour
    • 2 tbsp (16 g) cornstarch
    • ¾ tsp (4 g) baking soda
    • 1 tsp (6 g) table salt

    Directions

    Make the Dough

    In the bowl of a stand mixer or in a large mixing bowl, cream together the softened butter, brown sugar, and granulated sugar until light and fluffy, about 1–2 minutes.

    Add the egg, egg yolk, vanilla extract, and 1 tbsp (15 g) milk. Mix until smooth and slightly thickened, about 1 minute. If the dough seems especially stiff once the flour is added, mix in the remaining 1 tbsp (15 g) milk.

    In a separate bowl, whisk together the flour, cornstarch, baking soda, and salt.

    Finish the Dough

    Add the dry ingredients to the wet mixture and mix just until combined. Do not overmix.

    Fold in the optional mix-ins for your chosen variation just until evenly distributed.

    The dough should be soft and slightly tacky, but not sticky.

    Portion, Shape, and Chill

    Portion the dough into either 8 large cookies or approximately 18 regular cookies.

    Gently flatten each dough ball to about ¾–1 inch (2–2.5 cm) thick to encourage even spreading while baking.

    Place the dough on a parchment-lined or silicone mat-lined baking sheet and refrigerate for at least 1 hour and up to 48 hours. Chilling helps prevent excess spreading and improves flavor and texture.

    For slightly more spread, let the dough sit at room temperature for 10–15 minutes before baking.

    Bake

    Preheat the oven to 400°F (204°C). Line a baking sheet with parchment paper or a silicone baking mat.

    Arrange the chilled dough 2–3 inches (5–7.5 cm) apart.

    Bake large cookies for 12–15 minutes or regular cookies for 7–9 minutes, until the edges are set and the centers still look slightly underbaked.

    Let the cookies cool on the baking sheet for 15 minutes, then transfer to a wire rack to cool completely.

    Yield: 8 large cookies or approximately 18 regular cookies.


    Notes

    Preparation

    • For mix-ins that absorb moisture—such as oats, toasted coconut, or freeze-dried fruit—add an extra 1 tbsp (15 g) milk to the dough.
    • Metric equivalents for optional mix-ins are approximate; weights vary with the brand, cut size, and packing. Volume equivalents are used for mix-ins whose weights depend especially on how finely they are chopped or crushed.
    • Bulky mix-ins like chocolate chunks, nuts, and toffee usually need no additional adjustment.
    • Soft or sticky mix-ins like marshmallows and almond paste work best when frozen first or enclosed inside the dough.
    • For Gevulde Koek-style filled cookies, wrap the filling completely in dough and bake at 375°F (190°C) instead of 400°F (204°C) for more even baking.

    Variations

    Chocolate Dough:

    Replace ½ cup (60 g) of the flour with ½ cup (50 g) unsweetened Dutch-process cocoa powder.

    Increase the milk by 1–2 tbsp (15–30 g), using 2–4 tbsp (30–60 g) total, as needed to achieve a soft, slightly tacky dough.

    Browned Butter:

    Weigh the butter, then place it in a small saucepan and cook over medium heat until deeply golden and nutty.

    Weigh the browned butter after cooking and add only enough water to bring the combined weight of the browned butter and water back to the original butter weight.

    Let cool until thickened but still workable before mixing the dough.

    When using browned butter, begin with no added milk; add milk only if the finished dough is too stiff.

    Base Dough Optional Mix-Ins:

    • Chocolate Chip: 1½ cups (255 g) semisweet chocolate chips or 1½ cups (265 g) mini semisweet chocolate chips; add 1 cup (about 115 g) roasted chopped pecans if desired.
    • Dark Chocolate Chunk & Roasted Hazelnuts: 6–8 oz (170–227 g) dark chocolate chunks, ¾ cup (about 105 g) roasted chopped hazelnuts, and ¾ cup (about 45 g) toasted unsweetened coconut flakes if desired.
    • White Chocolate Macadamia: 1 cup (170 g) white chocolate chips, ¾ cup (about 112 g) macadamia nuts, and ¾ cup (about 45 g) toasted unsweetened coconut flakes if desired.
    • Oatmeal Raisin: 1¼–1½ cups (111–134 g) quick oats and 2 cups (about 300 g) raisins; add 1 tbsp (15 g) extra milk.
    • Toffee & Chocolate: 1 cup (156 g) Heath toffee bits and ¾ cup (128 g) semisweet chocolate chips.
    • S’mores: ½ cup (85 g) milk chocolate chips, ½ cup (85 g) semisweet chocolate chips, 1 cup (43 g) frozen mini marshmallows, and ½ cup (120 ml) slightly crushed Golden Grahams cereal.
    • White Chocolate Cranberry: ¾ cup (128 g) white chocolate chips, ¾ cup (85 g) dried cranberries, and ½ cup (120 ml) chopped crystallized ginger if desired.
    • White Chocolate Raspberry: 1 cup (170 g) white chocolate chunks and ½ cup (120 ml) crushed freeze-dried raspberries; add 1 tbsp (15 g) extra milk.
    • Pretzel Crunch: 1 cup (240 ml) chopped pretzels and ¾ cup (180 ml) peanut butter chips or semisweet chocolate chips.

    Chocolate Dough Optional Mix-Ins:

    • White Chocolate Chip: 1¼ cups (213 g) white chocolate chips.
    • Peanut Butter Chip: 1½–2 cups (360–475 ml) peanut butter chips.
    • Chocolate S’mores: 1 cup (43 g) frozen mini marshmallows and ¾ cup (180 ml) slightly crushed Golden Grahams cereal.
    • Chocolate Orange: zest of 1 orange and 1 cup (170 g) white chocolate chips.
    • Chocolate Raspberry: 1 cup (170 g) white chocolate chips and ½ cup (120 ml) crushed freeze-dried raspberries; add 1 tbsp (15 g) extra milk.
    • Tuxedo Cookies: 1 cup (170 g) white chocolate chunks, ¾ cup (128 g) chopped 70% dark chocolate, and ½ tsp espresso powder.
    • Mochanut: 1 cup (about 60 g) toasted unsweetened coconut flakes, ¾ cup (180 ml) semisweet or dark chocolate chips, and 1 tsp instant espresso powder; add 1 tbsp (15 g) extra milk.
    • Cherry Chocolate: ¾ cup (about 105 g) dried cherries, plumped with water and drained well, plus ¾ cup (128 g) chopped 70% dark chocolate.
    • Chocolate Gevulde Koek: 2 boxes almond paste, 8 oz (227 g) each, portioned into disks and enclosed in the chocolate dough; bake at 375°F (190°C).
    • Burnt Almond Fudge: 1½ cups (255 g) semisweet chocolate chips, ½ cup (about 57 g) roasted chopped slivered almonds, and replace ½ tsp vanilla extract with ½ tsp almond extract.

    Browned Butter Dough Optional Mix-Ins:

    • Ginger Chunk: ½ cup (120 ml) crystallized ginger, chopped.
    • Brown Butter Pecan: 1 cup (about 115 g) toasted chopped pecans, ¾ cup (117 g) toffee bits, replace ½ tsp vanilla extract with ½ tsp maple extract, and press a pecan half into the top before baking.
    • Golden Gevulde Koek: 2 boxes almond paste, 8 oz (227 g) each, portioned into disks and enclosed in the dough; bake at 375°F (190°C).

    Serving Suggestions

    • Serve slightly warm for the softest centers and best melted-chocolate texture.
    • Pair with cold milk or vanilla ice cream.
    • Large cookies are perfect for sharing or bakery-style presentation.

    Make-Ahead & Storage

    • Dough can be refrigerated for up to 48 hours.
    • Freeze portioned dough on a tray until firm, then transfer to a freezer bag or airtight container. Store for up to 2 months. Bake from frozen, adding 2–3 minutes to the normal baking time.
    • Baked cookies keep in an airtight container at room temperature for 3–4 days.
    • Warm briefly before serving for best texture.

    High Altitude

    • At About 4,500 ft (1,370 m): Use the ingredient amounts listed for thicker cookies with better structure and controlled spread.
    • Sea Level: Reduce the flour to 3 cups (360 g), increase the baking soda to 1 tsp, and use only enough milk to bring the dough together if needed.
  • Jane’s Top Secret Carrot Cake

    Jane’s Top Secret Carrot Cake

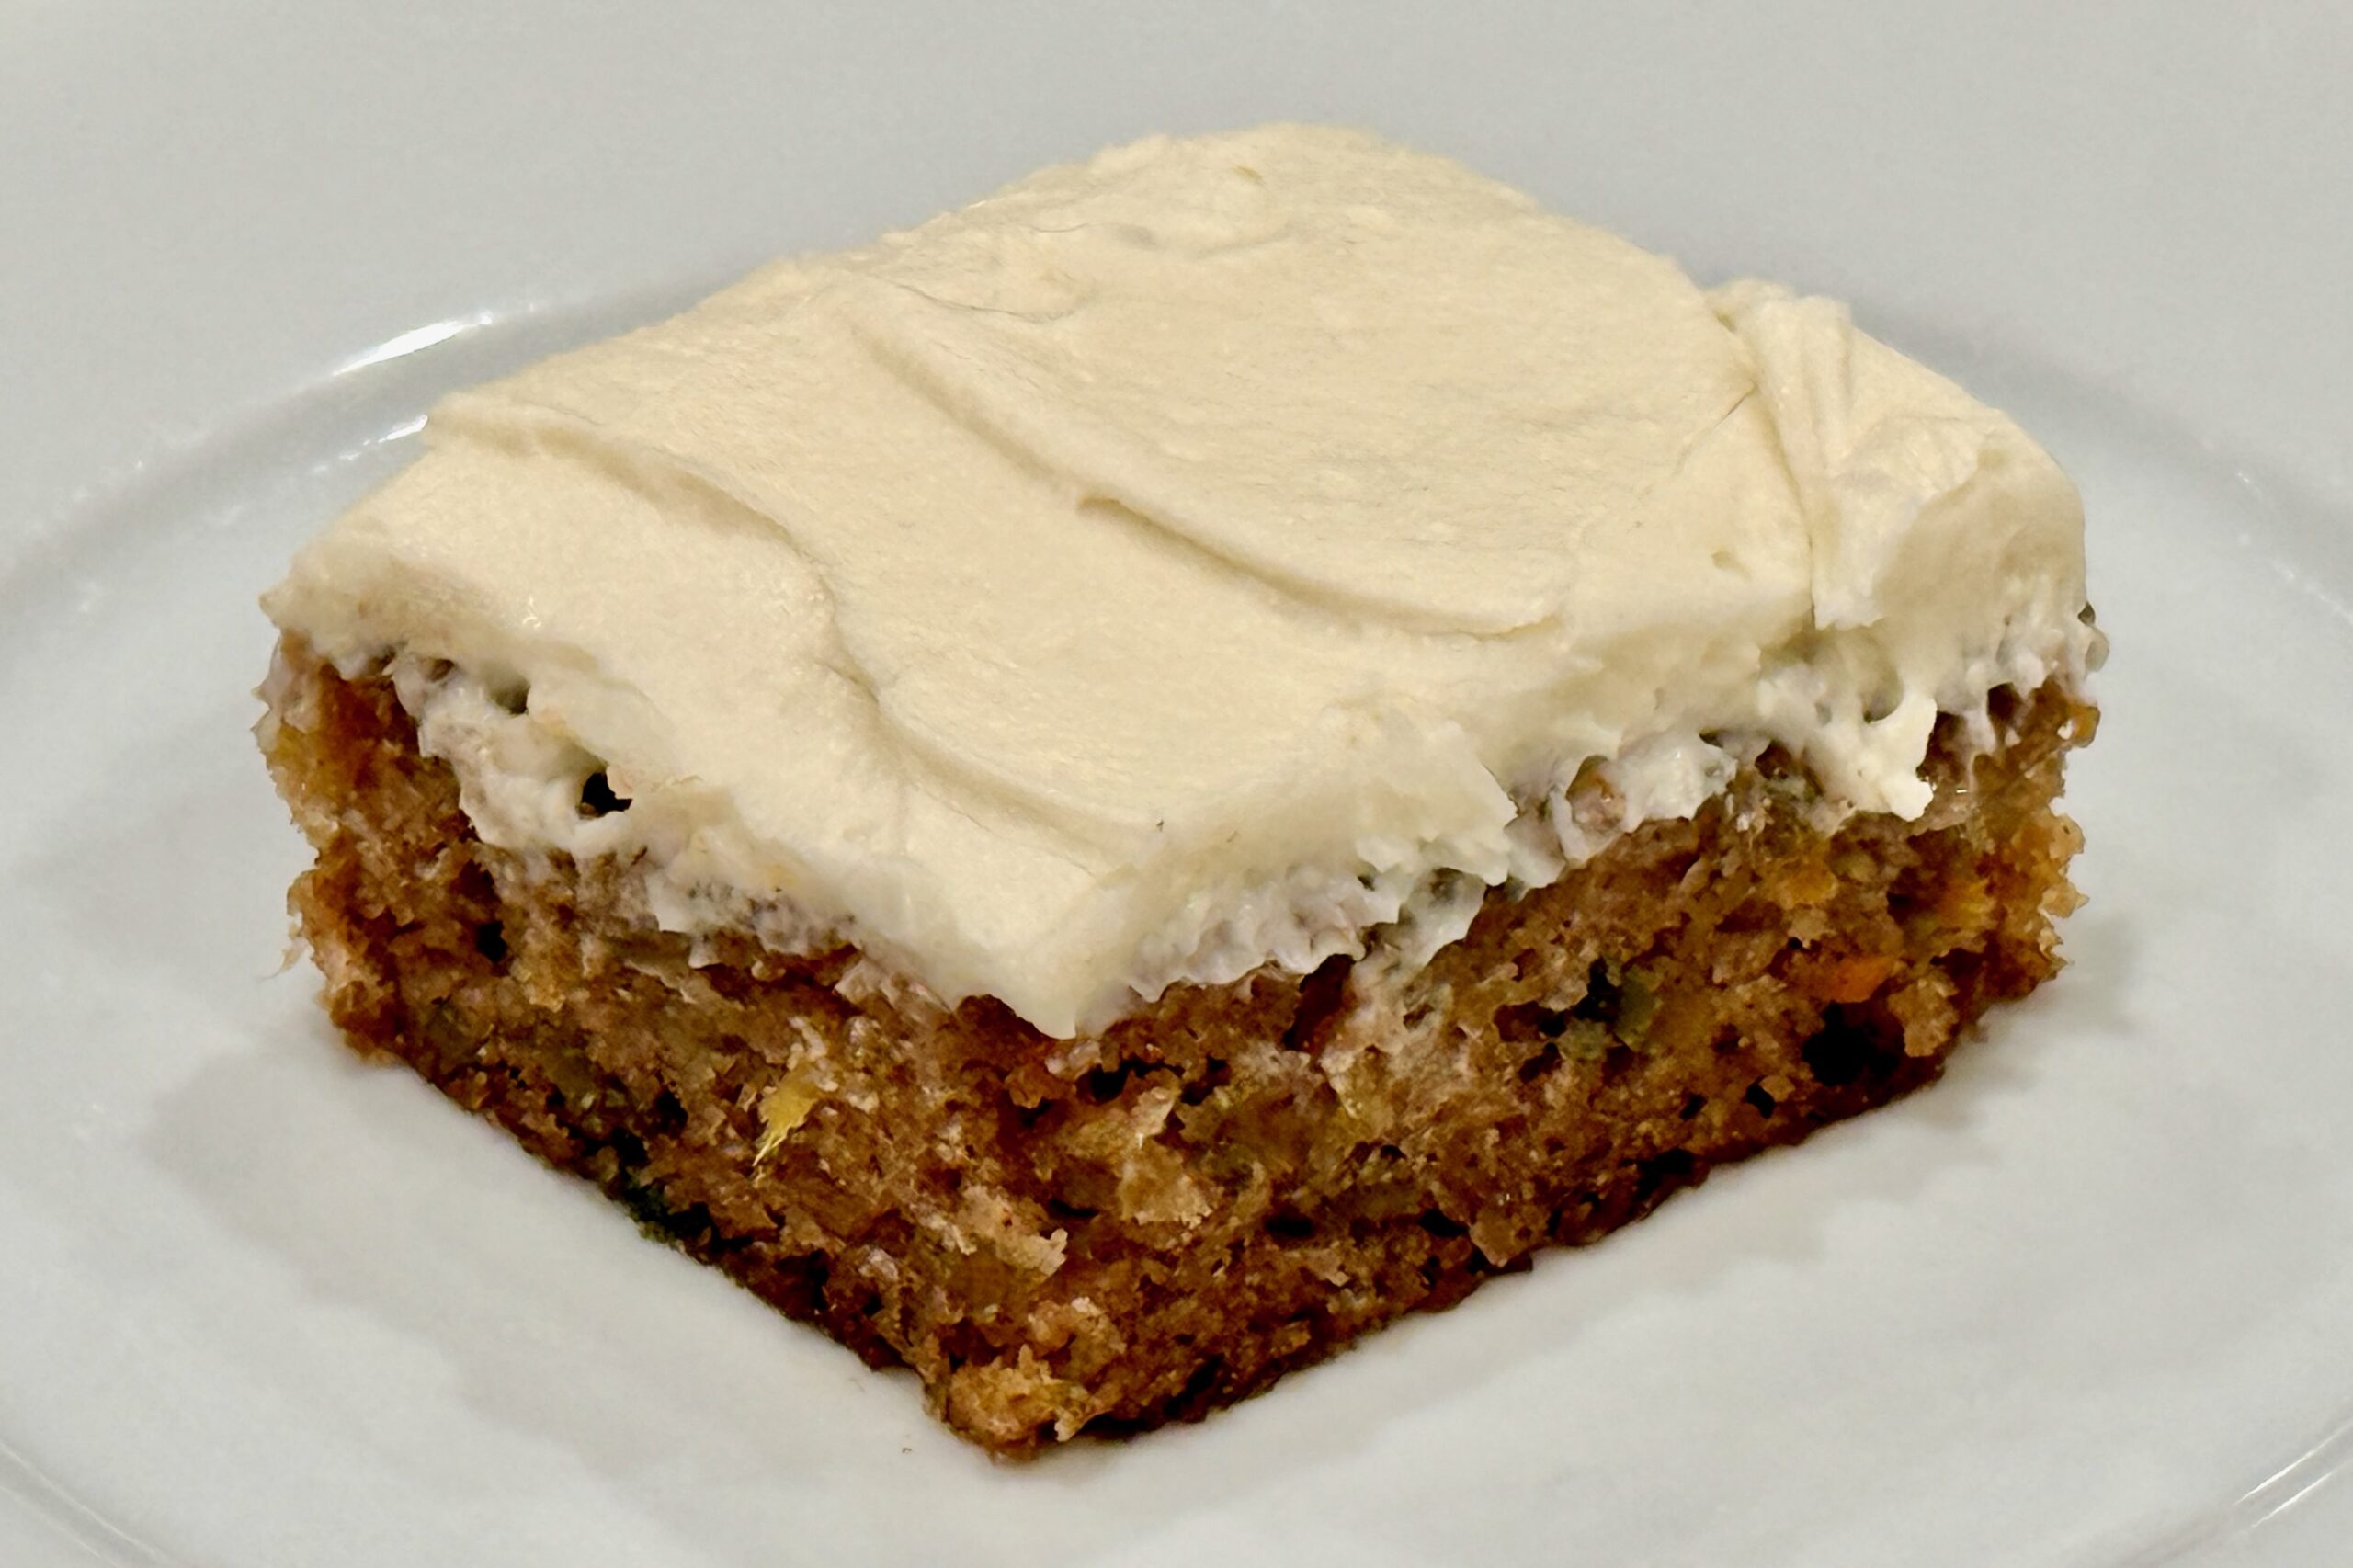
    This carrot cake has been a longtime family favorite—simple, reliable, and always a hit. Built on a classic combination of carrots, pineapple, and warm spice, it bakes up incredibly moist with a tender crumb and just the right amount of richness. Finished with a smooth, sweet cream cheese frosting, it’s the kind of cake that shows up at gatherings and quietly becomes everyone’s favorite slice.


    Ingredients

    Cake

    • 4 eggs, beaten
    • 1 cup (240 ml) vegetable oil
    • 1 (8 oz / 227 g) can crushed pineapple, undrained
    • 2 cups (400 g) sugar
    • 3 cups (about 330 g) carrots, shredded
    • 2 cups (240 g) flour
    • 1 tsp table salt
    • 2 tsp baking soda
    • 2 tsp cinnamon
    • ¼ tsp nutmeg (optional)
    • ¼ tsp ground ginger (optional)
    • 1 cup (about 110 g) pecans, chopped and toasted

    Icing

    • 1 cube (½ cup / 113 g) butter, softened
    • 1 pkg (8 oz / 227 g) cream cheese, softened
    • 4 cups (480 g) confectioners’ sugar
    • 1 tsp vanilla
    • ¼ tsp table salt

    Directions

    Prepare the Pan

    Grease and flour a bundt pan.

    Mix the Batter

    In a large bowl, whisk together the eggs, sugar, and vegetable oil until smooth and well combined.

    Stir in the crushed pineapple (with juice) and shredded carrots.

    In a separate bowl, combine the flour, salt, baking soda, cinnamon, and optional nutmeg and ground ginger (if using).

    Fold the dry ingredients into the wet mixture until just combined.

    Fold in the toasted pecans.

    Bake

    Pour the batter into the prepared bundt pan and bake at 350°F (177°C) for about 1 hour, or until a toothpick inserted into the center comes out clean.

    Let the cake cool in the pan for 15–20 minutes, then turn out onto a rack to cool completely.

    Alternative Pan Option

    Pour the batter into a greased stoneware bar pan, then bake at 350°F (177°C) for 25–30 minutes, or until a toothpick comes out clean.

    Make the Icing

    In a mixing bowl, beat the butter and cream cheese together until smooth and creamy.

    Gradually add the confectioners’ sugar, mixing until fully incorporated and smooth.

    Add the vanilla and salt, and mix until well combined.

    Finish

    Spread the icing over the completely cooled cake.

    Yield: 1 bundt cake.


    Notes

    Preparation

    • To toast nuts, spread on a baking sheet and bake at 350°F (177°C) for 6–8 minutes, until fragrant.
    • Shred carrots finely for the best texture and even distribution.

    Variations

    • Walnuts: Walnuts can be used in place of pecans if preferred.
    • Warmer Spice: Add the optional nutmeg and ginger for a slightly deeper, warmer spice profile.

    Serving Suggestions

    • Serve at room temperature for the best flavor and texture.
    • Great for gatherings, holidays, and family-style desserts.

    Make-Ahead & Storage

    • Store covered in the refrigerator for up to 4 days.
    • Bring to room temperature before serving for best texture.
    • Unfrosted cake can be wrapped and frozen for up to 2 months.

    High Altitude

    • High Altitude (about 4,750 ft / 1,400 m): Increase the flour by 2 tbsp plus 2 tsp, reduce the baking soda to 1¾ tsp, and increase the baking time slightly as needed.
    • Sea Level: Use 2 cups (240 g) flour and the full 2 tsp baking soda as written.
  • Double Chocolate Bundt Cake

    Double Chocolate Bundt Cake

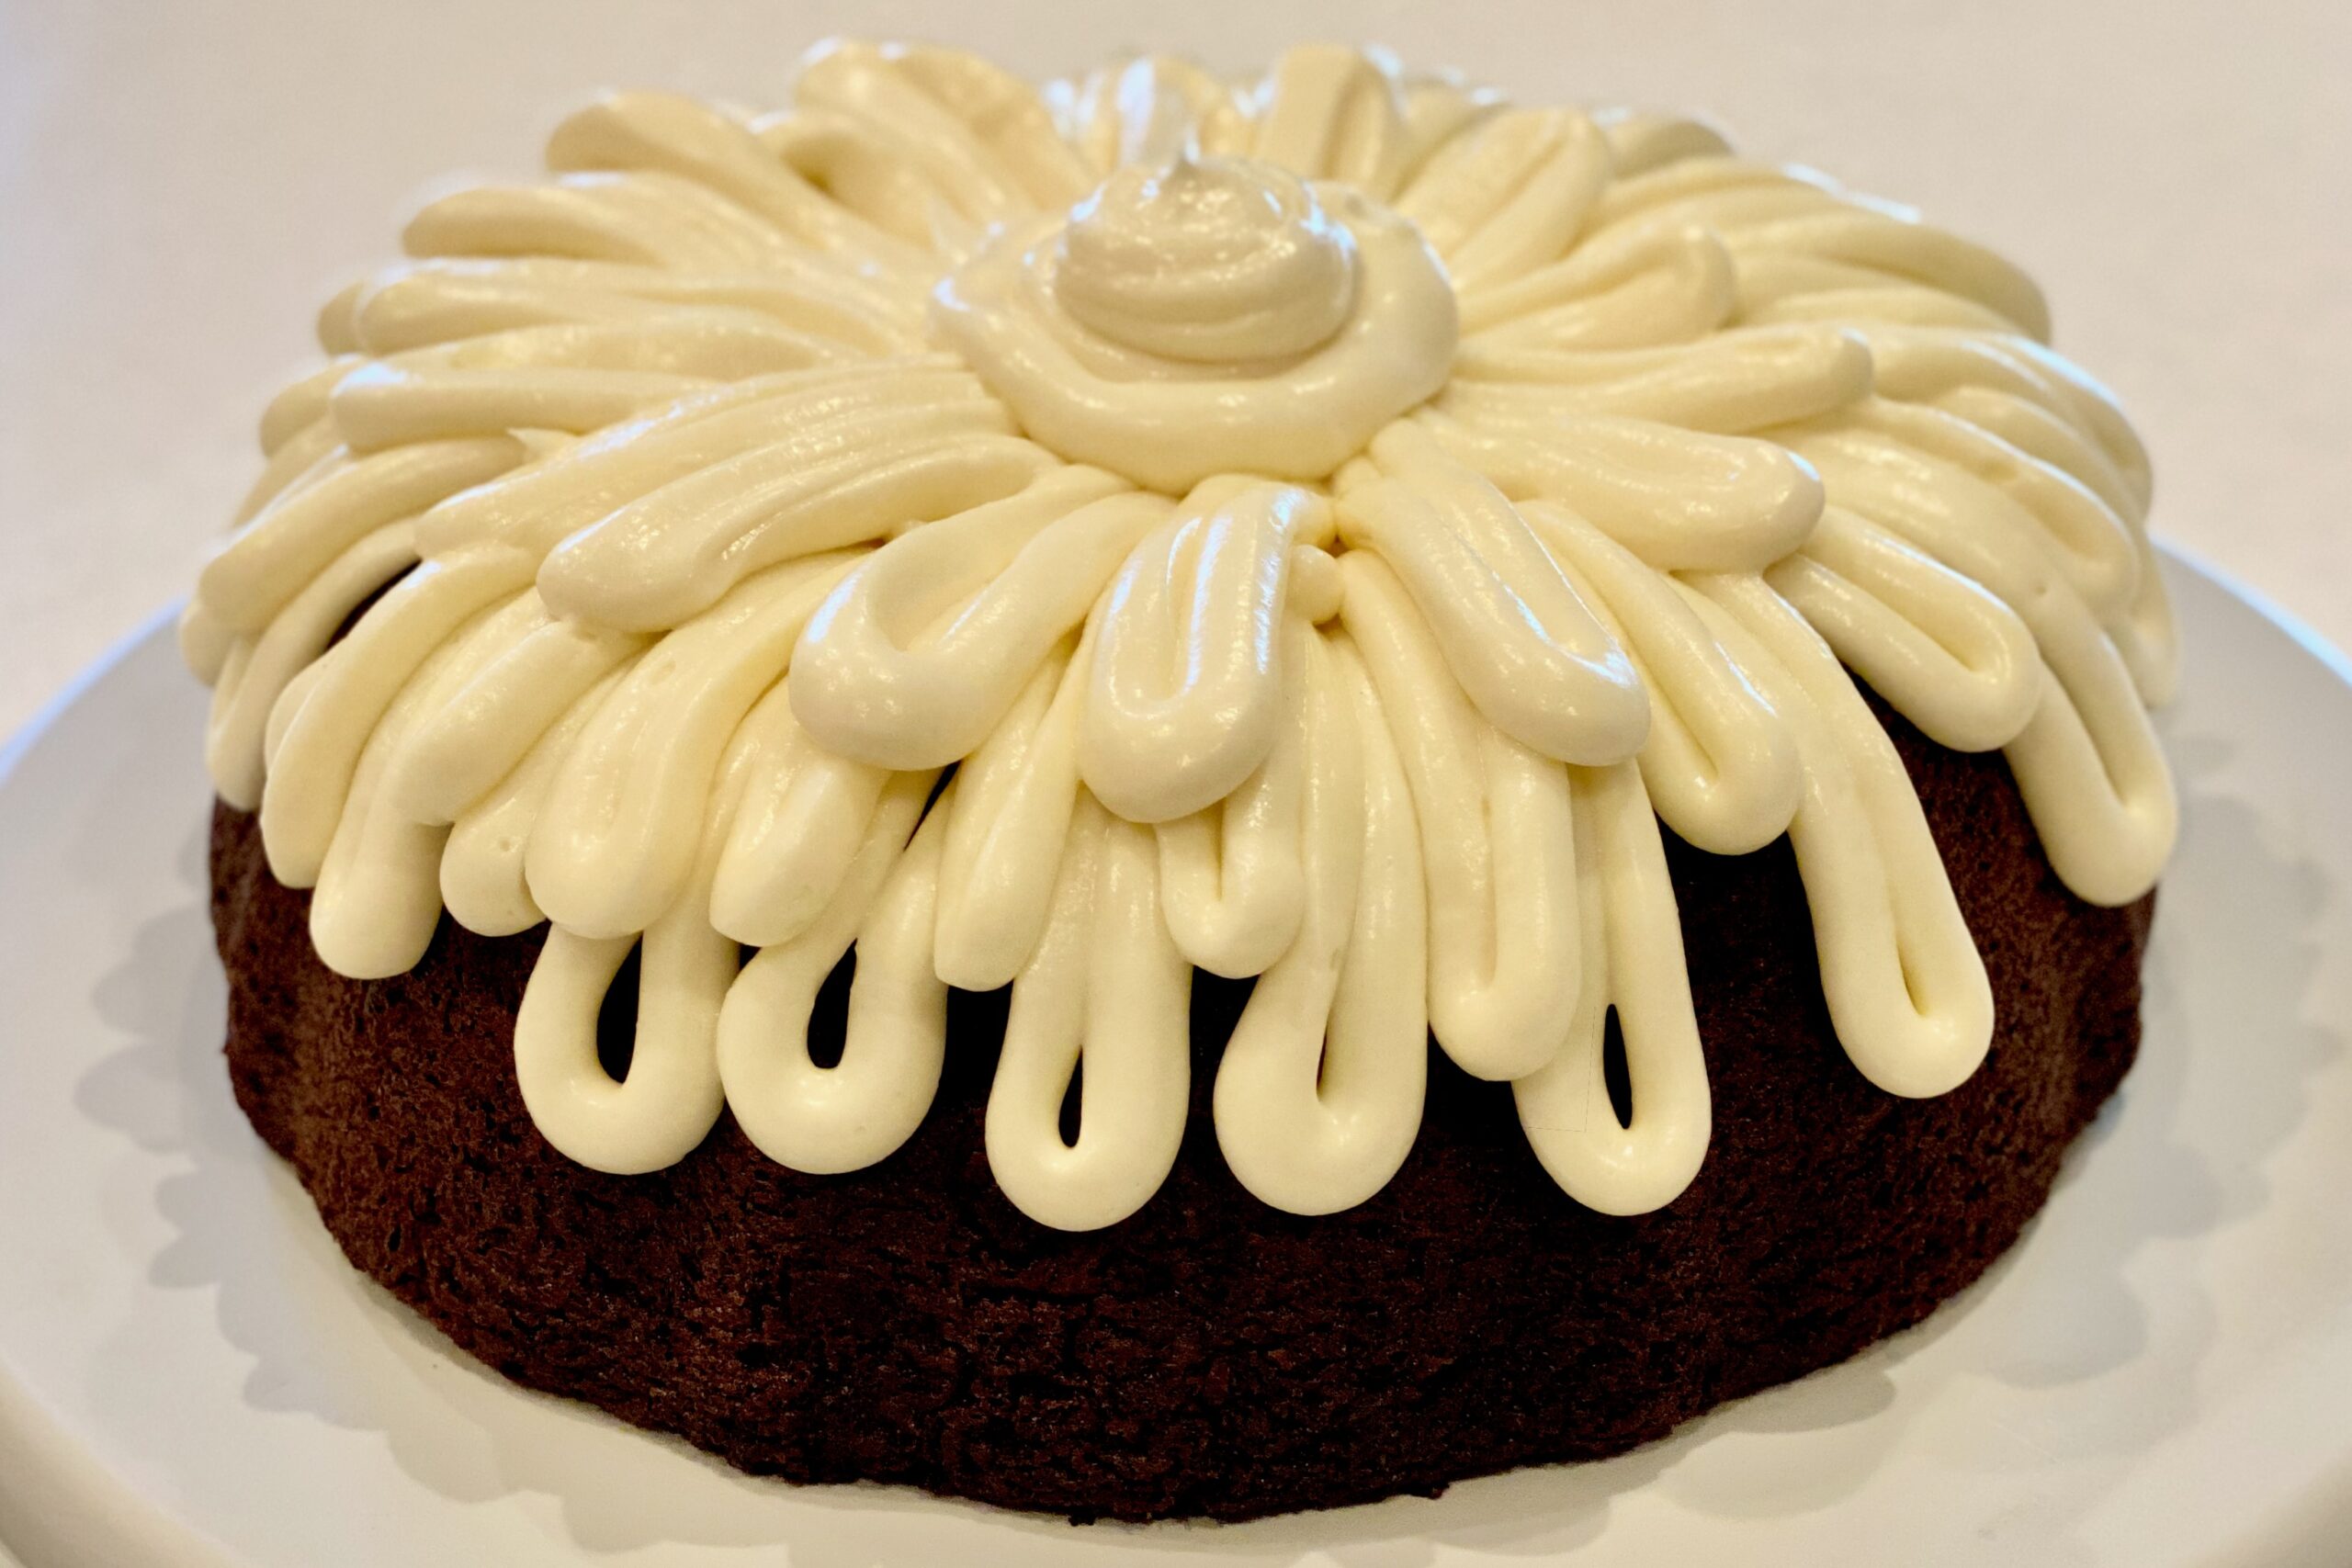
    This elevated box cake recipe transforms a simple chocolate mix into a deeply rich, ultra-moist Double Chocolate Bundt Cake with the help of sour cream, pudding, vanilla, and a touch of salt for balance. Chocolate chips melt into the tender crumb, while optional espresso powder intensifies the cocoa for bold, bakery-style flavor and a luxuriously soft texture.


    Ingredients

    • 1 pkg chocolate cake mix
    • 1 pkg (3.9 oz) instant chocolate pudding mix
    • ½ tsp table salt
    • 4 eggs
    • 1 cup sour cream
    • ½ cup water
    • ½ cup oil
    • 1 tsp vanilla extract
    • 1 tsp espresso powder (optional)
    • 1½ cups chocolate chips
    • 1 tbsp flour (for tossing chips)

    White Cream Cheese Frosting

    • 1 pkg (8 oz) cream cheese, softened
    • ¼ cup butter, softened
    • 1½ cups powdered sugar
    • 1–2 tsp vanilla extract
    • Pinch table salt

    Chocolate Frosting Option

    • 2–3 tbsp unsweetened cocoa powder

    Directions

    Prepare the Batter

    Preheat oven to 350°F. Grease the Bundt pan using your usual method.

    In a large bowl, whisk together the cake mix, pudding mix, table salt, and espresso powder (if using).

    In a separate bowl, whisk the eggs, sour cream, water, oil, and vanilla until smooth.

    Add the wet ingredients to the dry ingredients and mix just until smooth and fully combined. Do not overmix.

    Toss the chocolate chips with 1 tbsp flour, then fold them into the batter.

    Bake and Cool

    Pour batter into the prepared Bundt pan and smooth the top.

    Bake for 45–50 minutes, or until a toothpick inserted in the center comes out with moist crumbs (not wet batter).

    If the top browns too quickly, tent loosely with foil for the last 10–15 minutes.

    Cool in the pan for 20 minutes, then invert onto a rack and cool completely before frosting.

    Make the Frosting

    Beat the cream cheese and butter until smooth and creamy.

    Add the powdered sugar, vanilla, and pinch of salt, then beat until smooth. For the chocolate option, beat in 2–3 tbsp cocoa powder until fully incorporated.

    Finish

    Drizzle frosting over the cooled cake. Slice and serve.


    Notes

    Preparation

    Use room temperature eggs, sour cream, butter, and cream cheese for the smoothest batter and frosting.

    Small details make a big difference in a Bundt cake:

    • Mix just until combined to keep the crumb tender.
    • Tossing chips with flour helps them stay more evenly distributed in the Bundt.
    • Cool 20 minutes before inverting; too early can tear, too late can encourage sticking.

    Serving Suggestions

    For clean slices, chill the cake briefly after frosting, then let slices come back toward room temperature before serving.

    • Serve with fresh raspberries or strawberries for bright contrast.
    • A light dusting of powdered sugar over the frosting adds a classic Bundt finish.

    Variations

    Keep the frosting white for dramatic contrast, or turn it into a chocolate version with cocoa powder.

    • Chocolate frosting option: Beat in 2–3 tbsp unsweetened cocoa powder (add 1 tbsp powdered sugar if needed for sweetness).
    • Use mini chocolate chips for more even distribution throughout the cake.
    • Add ½ cup chopped toasted pecans or walnuts for crunch.
    • Add ¼ tsp cinnamon for subtle warmth.

    Make-Ahead & Storage

    This cake keeps well and slices nicely after a short chill.

    • Room temperature: Store covered up to 2 days.
    • Refrigerator: Store covered up to 5 days (let slices sit 15–30 minutes before serving for the best texture).
    • Freezer (unfrosted): Wrap tightly and freeze up to 2 months; thaw overnight in the fridge, then frost.
    • Frosting: Make up to 1 day ahead, refrigerate, then rewhip before using.
  • Melon Gelato

    Melon Gelato

    This melon gelato highlights the clean, refreshing flavor of cantaloupe with a light hand. Fresh melon purée is balanced with milk rather than heavy cream, a modest sweetness, and a touch of citrus to keep the profile bright and restrained. The base is blended smooth and gently stabilized for a soft, scoopable texture that lets the natural aroma of cantaloupe come through without becoming overpowering.


    Ingredients

      Melon Base:

    • 2½ cups cantaloupe purée (from ~550–600 g cantaloupe; ripe but not heavily perfumed)
    • 1 tbsp fresh lemon juice
    • pinch table salt
    • Dairy Base:

    • 1 cup whole milk
    • 2 tbsp heavy cream
    • 7 tbsp granulated sugar
    • 2 tbsp glucose syrup or light corn syrup
    • Stabilizer & Finish:

    • ⅛ tsp xanthan gum
    • ½ tsp vanilla extract (optional; omit for the cleanest melon profile)

    Directions

    Prepare the Melon

    Dice the cantaloupe and purée until completely smooth. Taste carefully—the flavor should be gently sweet and aromatic, not aggressively perfumed.

    Stir in the lemon juice and salt. Cover and refrigerate until well chilled.

    Make the Dairy Base

    In a small saucepan, combine the milk, cream, granulated sugar, corn syrup, and salt. Heat gently over medium heat until steaming and fully dissolved.

    Remove from heat and let cool 10–15 minutes.

    Combine & Stabilize

    In a blender, combine the cooled dairy base, chilled cantaloupe purée, and vanilla (if using).

    Sprinkle the xanthan gum evenly over the surface and immediately blend on high for 30–45 seconds until fully emulsified and slightly thickened.

    Chill the Base

    Transfer the mixture to a covered container and refrigerate until very cold, at least 4 hours or overnight.

    Churn & Freeze

    Churn the chilled base in an ice cream maker according to the manufacturer’s instructions until thick, smooth, and softly set.

    Transfer to a freezer-safe container, press plastic wrap directly onto the surface, cover, and freeze 1–2 hours to firm before serving.


    Notes

    Preparation

    • Choose cantaloupe that is sweet but not intensely fragrant; overly ripe melon can dominate the finished gelato.
    • Keeping the dairy light helps preserve a clean melon finish while improving texture.

    Serving Suggestions

    • Allow the gelato to soften 5 minutes before scooping for best texture.
    • Serve on its own or with fresh berries for contrast.

    Variations

    • Omit the vanilla for an ultra-clean melon profile.
    • Increase lemon juice to 1½ tbsp for a brighter, more sorbet-like finish.

    Make-Ahead & Storage

    • Best within 3–4 days; melon aroma fades with longer storage.
    • If fully firm, temper briefly at room temperature before serving.
  • Red Velvet Cream Cheese Bundt Cake

    Red Velvet Cream Cheese Bundt Cake

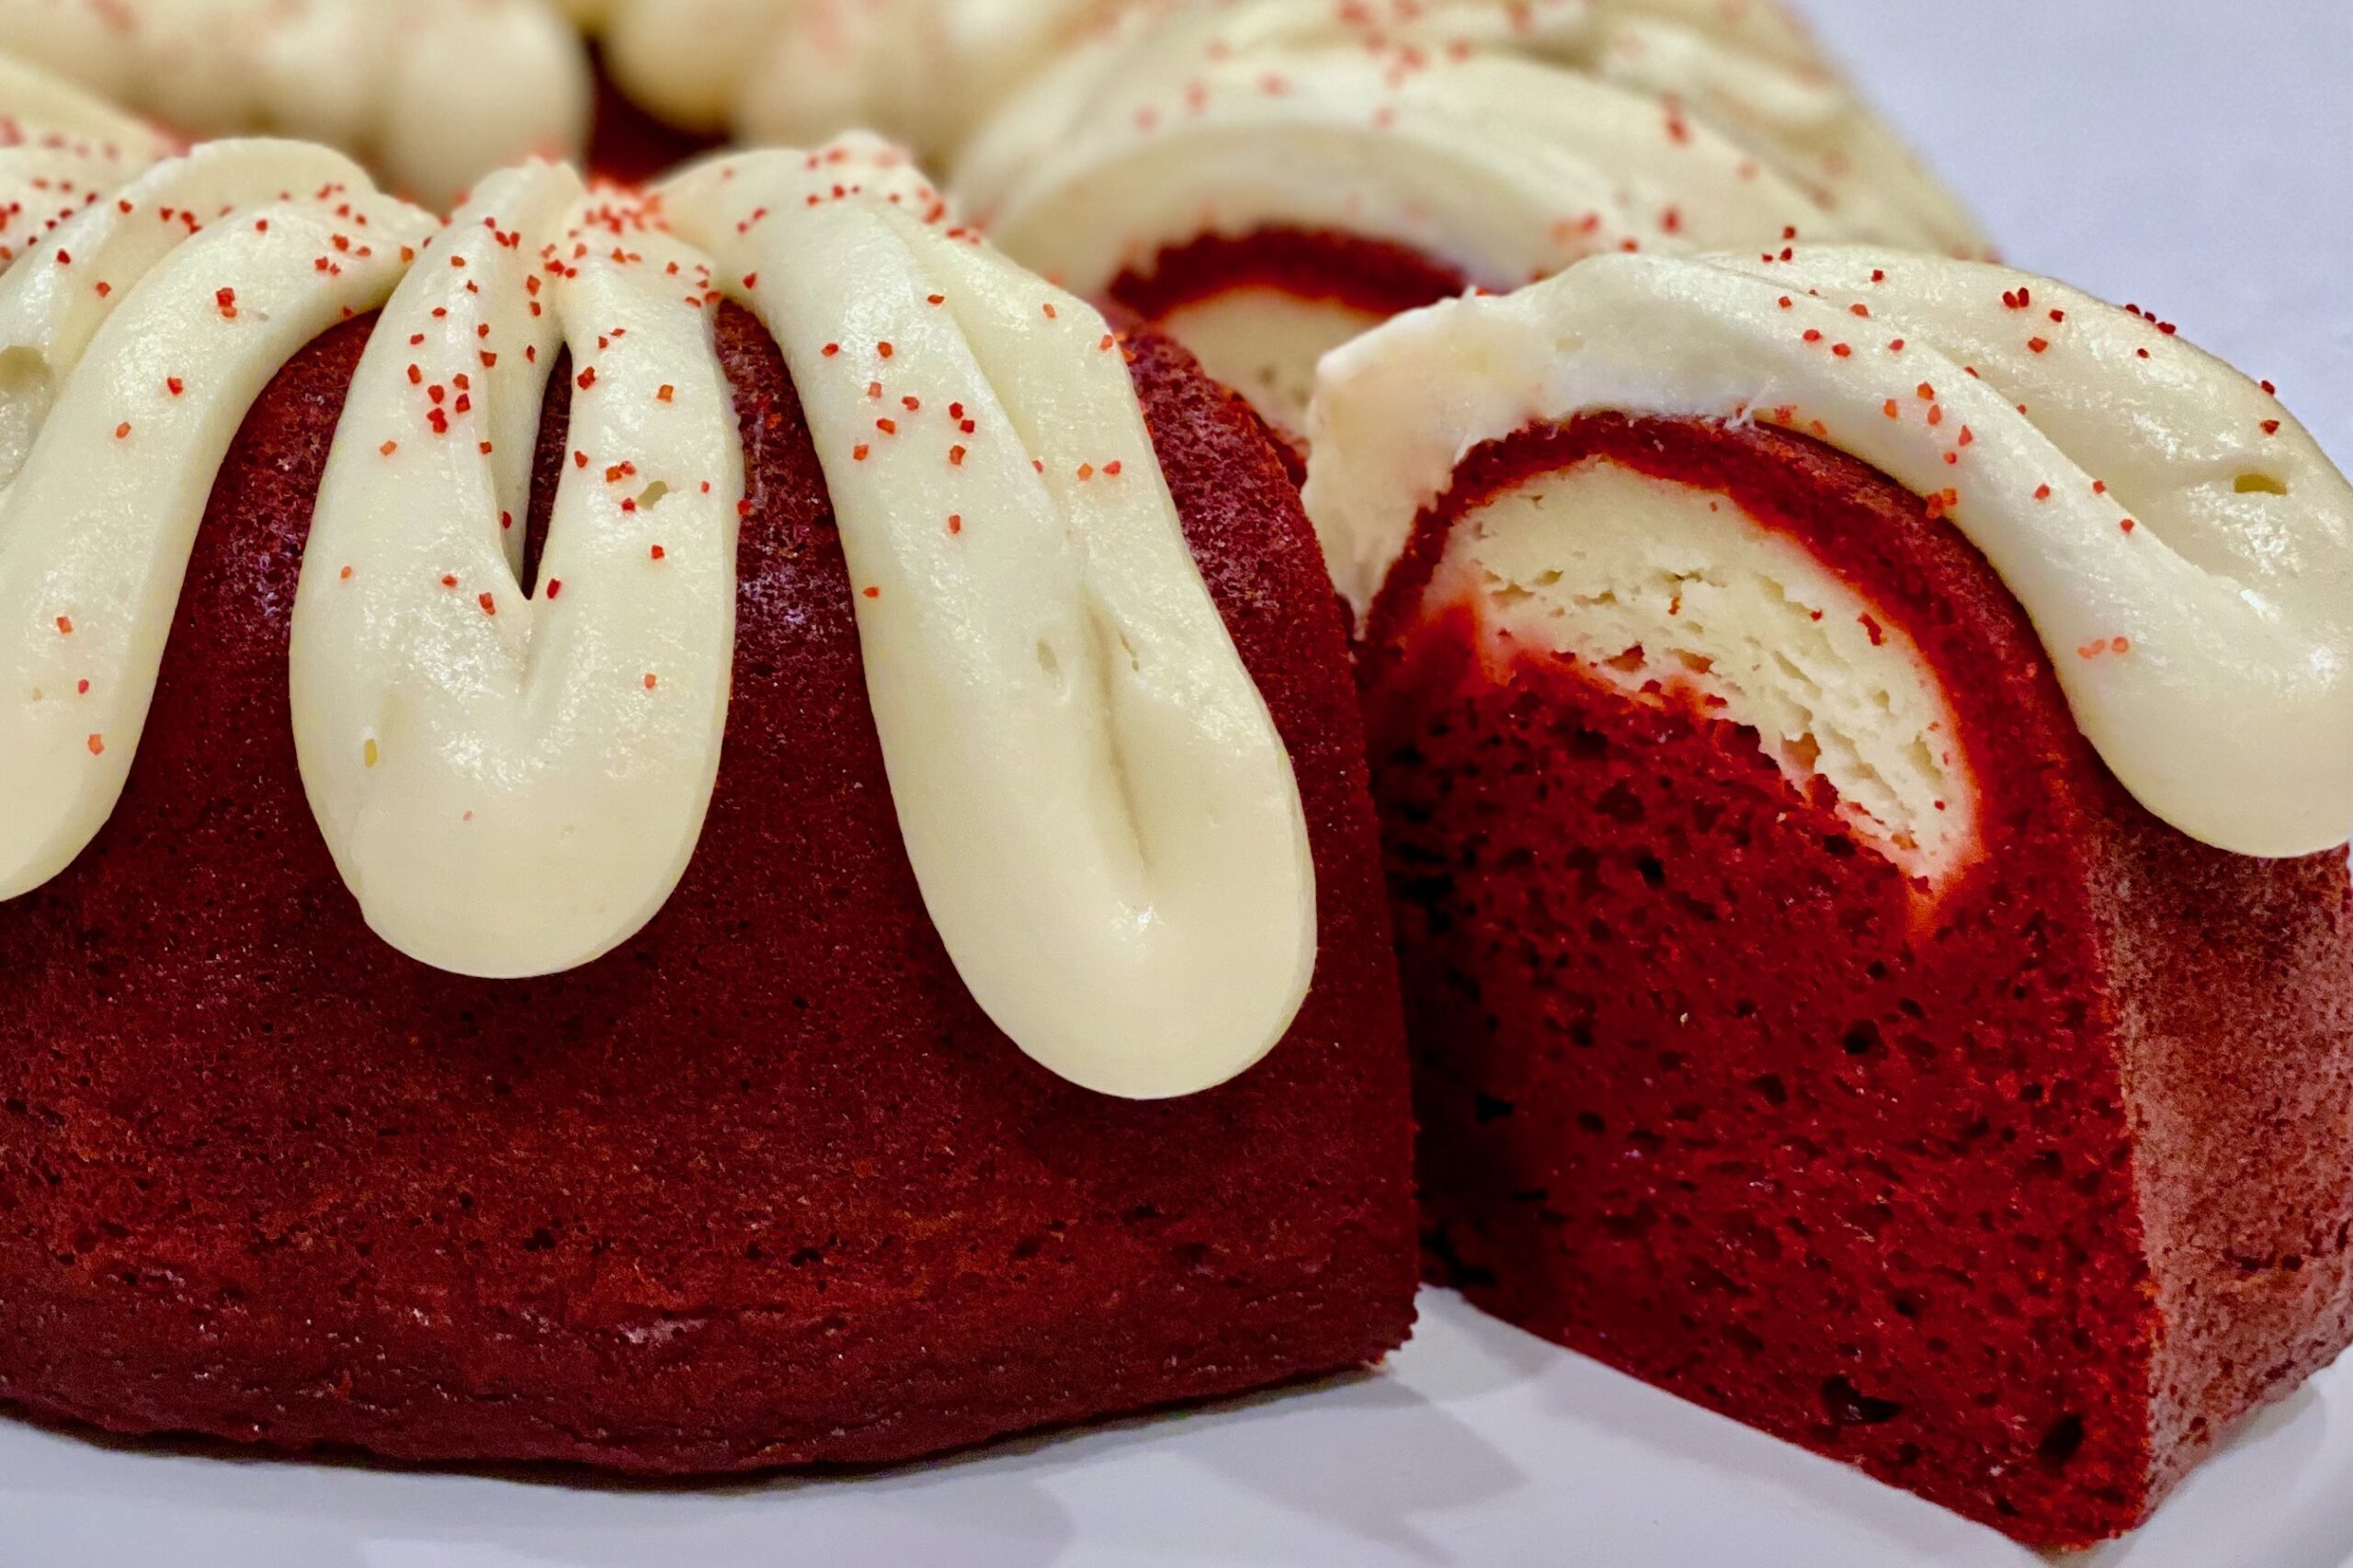
    This Red Velvet Cream Cheese Bundt Cake is a classic “improved box cake” done right — exceptionally moist, tender, and familiar, with a rich cream cheese ribbon baked through the center and a simple cream cheese drizzle on top. The method here preserves everything that makes the original so good, while preventing the filling from sinking before the cake has time to set.


    Ingredients

      Cream Cheese Filling

    • 1 pkg (8 oz) cream cheese, softened
    • 4 tbsp butter, softened
    • ½ cup sugar
    • 1 large egg
    • 2 tbsp flour
    • 2 tsp vanilla extract
    • Cake

    • 1 pkg red velvet cake mix
    • 1 pkg instant vanilla pudding mix
    • 1 cup sour cream
    • 4 eggs
    • ⅓ cup water
    • ½ cup oil
    • ½ tsp table salt
    • Cream Cheese Frosting

    • 1 pkg (8 oz) cream cheese, softened
    • ¼ cup butter, softened
    • 1½ cups powdered sugar
    • 1–2 tsp vanilla extract
    • ⅛ tsp table salt

    Directions

    Make the Cream Cheese Filling

    In a stand mixer or with a hand mixer, beat cream cheese, butter, and sugar until smooth and creamy, about 1–2 minutes.

    Beat in the egg, flour, and vanilla just until fully incorporated.

    Refrigerate the filling for 20–30 minutes, until thickened but still spoonable.

    Prepare the Cake Batter

    Heat oven to 325°F. Generously grease a Bundt pan.

    In a large bowl, whisk together sour cream, eggs, water, oil, and table salt until smooth.

    Add cake mix and pudding mix and beat just until combined, scraping down the bowl as needed. Do not overmix.

    Assemble

    Pour about half of the cake batter into the prepared Bundt pan.

    Spoon the chilled cream cheese filling evenly over the batter, keeping about a ¾-inch border from the edges.

    Pour the remaining cake batter over the filling and gently smooth the top.

    Bake

    Bake at 325°F for 60–70 minutes, until a toothpick inserted into the cake portion (not the filling) comes out clean.

    Cool in the pan for 20 minutes, then invert onto a rack and cool completely.

    Finish

    Beat cream cheese and butter until smooth. Beat in powdered sugar, vanilla, and table salt until creamy.

    Drizzle frosting over the cooled cake.


    Notes

    Preparation

    • Chilling the filling before assembly helps prevent it from sinking before the cake structure sets, without changing its flavor or texture.

    Serving Suggestions

    • For the cleanest slices, chill the cake for several hours after cooling, then slice with a long knife wiped clean between cuts.

    Variations

    • A teaspoon of espresso powder added to the cake batter deepens the cocoa notes without making the cake taste like coffee.

    Make-Ahead & Storage

    • Store covered in the refrigerator.
    • Keeps well for up to 5 days.
    • Unglazed cake can be frozen for up to 2 months; thaw overnight in the refrigerator and frost before serving.
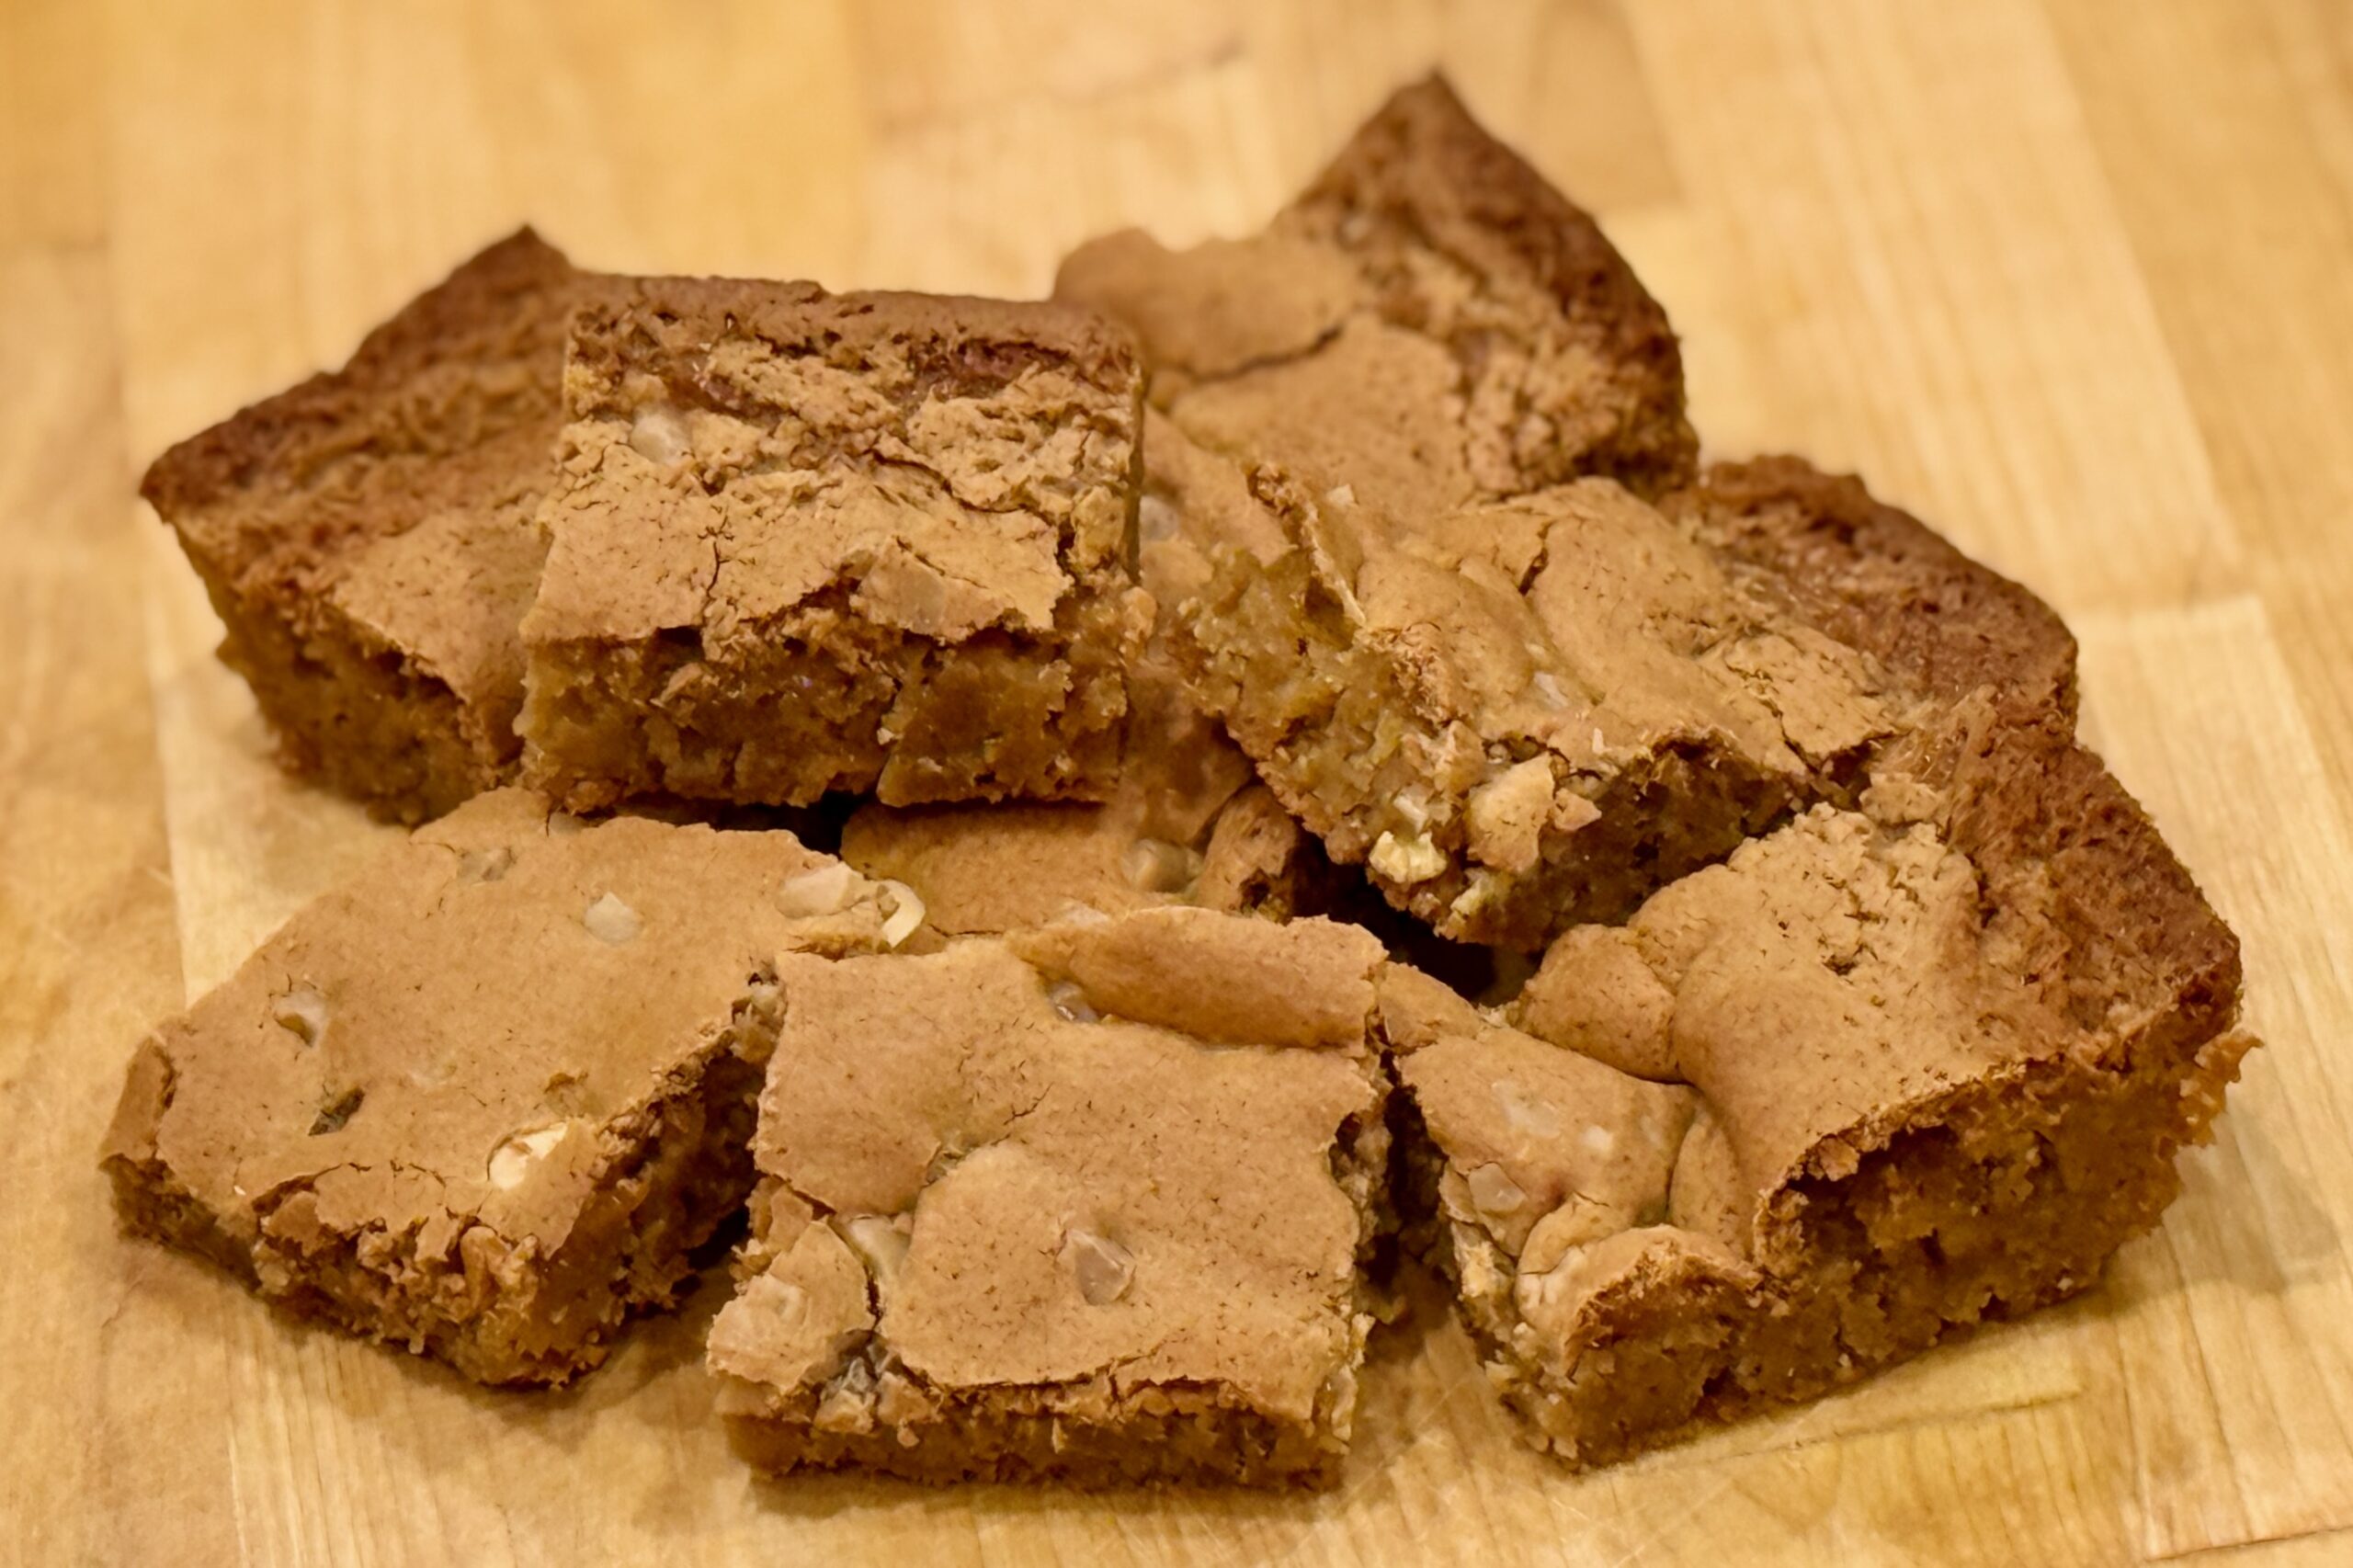
  • Brown Sugar Blondies

    Brown Sugar Blondies

    These brown sugar blondies are a simple, old-school bar cookie—rich with caramel notes, soft in the center, and the kind of dessert that disappears fast at family get-togethers. The base recipe is intentionally straightforward (one bowl, one pan), and it’s a perfect canvas for mix-ins like ginger + cranberry, chocolate chips, toasted nuts, or a cinnamon-sugar swirl.


    Ingredients

    • 2 cups brown sugar
    • 1⅔ cups all-purpose flour
    • ½ cup butter, melted
    • 3 eggs
    • 2 tsp baking powder
    • 2 tsp vanilla extract
    • ½ tsp table salt

    Directions

    Prepare the Batter

    Preheat oven to 350º. Grease a 9×13 baking dish.

    In a large bowl, combine all ingredients and mix until evenly incorporated. Spread batter evenly into the prepared pan.

    Bake and Cool

    Bake until the top is dry and the edges begin to pull away from the sides, about 25 minutes.

    Remove from the oven and cool completely before slicing.


    Notes

    Preparation

    These blondies are soft and lightly cake-like as written. For a chewier, denser blondie, make this one change:

    • Chewier Texture Option: Use 2 eggs (instead of 3) and 1 tsp baking powder (instead of 2 tsp). (All other ingredients stay the same.)

    Doneness is best judged by texture, not time:

    • A toothpick should show moist crumbs, not wet batter.
    • Overbaking will dry the bars quickly, so start checking a few minutes early if your oven runs hot.
    • For clean slices, cool completely and use a sharp knife, wiping between cuts.

    Altitude can affect baking results (especially dryness and rise):

    • High Altitude (~4,750 ft / 1400 m): Start checking 2–4 minutes early. If your blondies tend to bake up dry at altitude, add 1–2 tbsp extra melted butter to the batter.
    • Sea Level: Bake time is typically closer to the full time; keep the base butter amount as written.

    Serving Suggestions

    • Serve at room temperature for the cleanest texture and easiest slicing.
    • For a dessert-style presentation, warm individual squares briefly and serve with vanilla ice cream.

    Variations

    Stir the variation ingredients below into the batter unless otherwise noted.

    White Chocolate Toffee Blondies:

    • ¼ cup white chocolate chips (sprinkled evenly on top before baking)
    • 1 tbsp toffee bits (sprinkled evenly on top before baking)

    Ginger Cranberry Bars:

    • ½ tsp ground ginger
    • ¼ cup crystallized ginger, finely chopped
    • ½–⅔ cup dried cranberries, chopped
    • 8 oz white chocolate chips
    • Optional: ½ tsp orange zest

    Classic Walnut Blondies:

    • 1–1¼ cups walnuts, toasted and chopped
    • Optional: ½ tsp cinnamon

    Chocolate Chip Blondies:

    • 1½–2 cups semisweet or dark chocolate chips
    • Optional: a light sprinkle of flaky salt on top before baking

    Maple Pecan Blondies:

    • 1 cup pecans, toasted and chopped
    • ½ tsp cinnamon
    • Optional: add 1 tbsp maple syrup

    Espresso Toffee Blondies:

    • 1 tsp instant espresso powder
    • ¾ cup toffee bits

    Cinnamon Roll Blondies:

    Gently marble this swirl into the batter just before baking:

    • ¼ cup brown sugar
    • 1½ tsp cinnamon
    • 1 tbsp melted butter

    Apple Spice Blondies:

    • 1½ cups finely diced apple, tossed with 1 tsp flour
    • ¾ tsp cinnamon
    • ¼ tsp nutmeg

    Variation baking note:

    • Fruit-heavy or topped variations may need 1–3 additional minutes of bake time.
    • Toasting nuts before adding improves flavor and keeps them tasting fresh in the finished bars.

    Make-Ahead & Storage

    • Store tightly covered at room temperature for up to 3 days.
    • Freeze fully cooled bars (well wrapped) for up to 2 months; thaw at room temperature.
  • Vanilla Bean Ice Cream

    Vanilla Bean Ice Cream

    This lighter-style vanilla bean ice cream puts the spotlight squarely on the ingredients—fresh cream, whole milk, and a full Madagascar vanilla bean. Cooking the custard to a slightly higher temperature strengthens the structure without adding heaviness, allowing the vanilla to shine with clean, bright aroma and a naturally silky texture.


    Ingredients

      Ice Cream Base

    • 2 cups whole milk
    • 1 cup heavy cream
    • ⅔ cup granulated sugar, divided
    • 4 large egg yolks
    • 1 Madagascar vanilla bean, split and scraped
    • 1 tbsp vanilla extract
    • ¼ tsp fine salt
    • ⅛ tsp xanthan gum, optional

    Directions

    Prepare the Vanilla Base

    In a medium saucepan, combine the whole milk, half of the sugar, salt, vanilla bean seeds, and the scraped pod. Heat over medium until steaming but not boiling.

    In a separate bowl, whisk the egg yolks with the remaining sugar until well combined and slightly lightened.

    Slowly ladle some of the warm milk into the yolks while whisking, then return the tempered yolk mixture to the saucepan.

    Cook the Custard

    Cook over medium heat, stirring constantly with a rubber spatula, until the custard thickens enough to coat the spatula and reaches 174–176°F.

    Remove from heat and whisk in the heavy cream.

    If using the xanthan gum, sprinkle it over the warm custard and blend with an immersion blender, or whisk vigorously, until fully dispersed.

    Let the mixture steep for 20–30 minutes for maximum vanilla extraction.

    Chill the Base

    Strain the custard through a fine-mesh sieve into a bowl, removing the vanilla pod.

    Stir in the vanilla extract.

    Cover and refrigerate for at least 6 hours or overnight.

    Churn

    Churn the chilled base in your ice cream maker until it reaches a soft-serve consistency.

    Transfer to a container, press parchment against the surface, and freeze until firm.


    Notes

    Preparation

    • Cook the custard slowly to avoid scrambling the yolks; constant stirring ensures even thickening.
    • Allowing the custard to steep briefly after cooking extracts additional flavor from the vanilla bean.
    • The xanthan gum is optional. The cooked custard develops a naturally smooth, creamy texture without it, but a small amount can provide additional stabilization, help limit ice crystal formation, and keep the ice cream somewhat easier to scoop after extended freezer storage.
    • For a slightly creamier, more stable texture, whisk 1–2 tbsp nonfat dry milk powder into the sugar before heating the custard. This increases milk solids without making the base noticeably sweeter.

    Serving Suggestions

    • Serve alongside pies, crisps, or berry desserts—its lighter profile pairs beautifully with richer sweets.
    • For extra aroma, add a light drizzle of warm caramel or a spoonful of fresh berries.

    Variations

    • Vanilla Bean Paste: For a deeper, more pronounced vanilla flavor, replace the vanilla bean and vanilla extract with a generous 1 tbsp Madagascar vanilla bean paste. Add the paste to the saucepan with the whole milk, half of the sugar, and salt, then proceed with the recipe as written.
    • Improved Scoopability: Replace 3 tbsp of the granulated sugar with 3 tbsp light corn syrup or glucose syrup. This helps reduce ice crystal formation and keeps the ice cream a little softer straight from the freezer.
    • French Vanilla: Add an additional egg yolk and increase the sugar to ¾ cup for a richer, custard-forward style.
    • Tahitian Vanilla: Substitute Tahitian vanilla extract for the Madagascar vanilla extract for a more floral, fruity aroma.

    Make-Ahead & Storage

    • Ice cream keeps best for 1–2 weeks when stored in an airtight container.
    • To help prevent ice crystals, press parchment paper directly against the surface before freezing.
  • Soft Gingerbread Men

    Soft Gingerbread Men

    Cookies are serious business around our house. Baking dozens of cookies in all varieties is part of our holiday tradition. The box of cookies in the photo held just a sampling of treats baked for our annual Christmas Eve party—and these soft gingerbread men are always a crowd pleaser.


    Ingredients

    • 1 cup packed brown sugar
    • ½ cup butter + ¼ cup shortening (or ¾ cup shortening for a more traditional texture)
    • ¼ cup molasses
    • 1 tbsp honey or dark corn syrup (optional, for extra softness)
    • 1 large egg
    • 2 tsp baking soda
    • 1 tsp ground cinnamon
    • 1 tsp ground ginger
    • 1½ tsp ground cloves
    • ¼ tsp table salt
    • 2¼ cups all-purpose flour

    Directions

    Make the Dough

    In a large bowl, beat together brown sugar, butter, shortening, molasses, honey (if using), and egg until smooth and creamy. Stir in baking soda, cinnamon, ginger, cloves, and salt. Gradually mix in flour until fully incorporated.

    Cover dough and chill for at least 3 hours or overnight, until firm enough to roll.

    Roll and Cut

    Preheat oven to 375°F (190°C). Roll chilled dough between sheets of parchment paper dusted with confectioners’ sugar (instead of flour) to about ¼-inch thickness. Cut into desired shapes using cookie cutters.

    Transfer cookies to a baking sheet lined with parchment paper or release foil.

    Bake

    Bake for 10–12 minutes, or until cookies are fragrant and edges are just set—they’ll continue to bake on the sheet after removal. Avoid overbaking to keep them soft.

    Cool cookies on the baking sheet for several minutes before transferring to a wire rack to cool completely.

    Optional Glaze

    For a glossy finish, whisk together 1 cup confectioners’ sugar, 1–2 tbsp milk, and ½ tsp vanilla or lemon juice. Brush lightly over warm cookies and allow to set.


    Notes

    Preparation

    • Rolling between parchment prevents sticking and eliminates the need for added flour, keeping cookies tender.
    • Adding honey or corn syrup creates a slightly chewier texture.
    • For an even softer cookie, slightly underbake and store while still a bit warm.

    Serving Suggestions

    • Decorate with royal icing, sanding sugar, or a drizzle of glaze.
    • Serve alongside hot cocoa, Anijsmelk, or Aunt Laurie’s Pumpkin Spice Steamer for a cozy holiday pairing.

    Make-Ahead & Storage

    • Dough can be chilled up to 3 days or frozen up to 1 month; thaw in the refrigerator before rolling.
    • Baked cookies keep for about 1 week in an airtight container at room temperature.
    • To retain softness, store with a slice of bread or a piece of apple in the container.
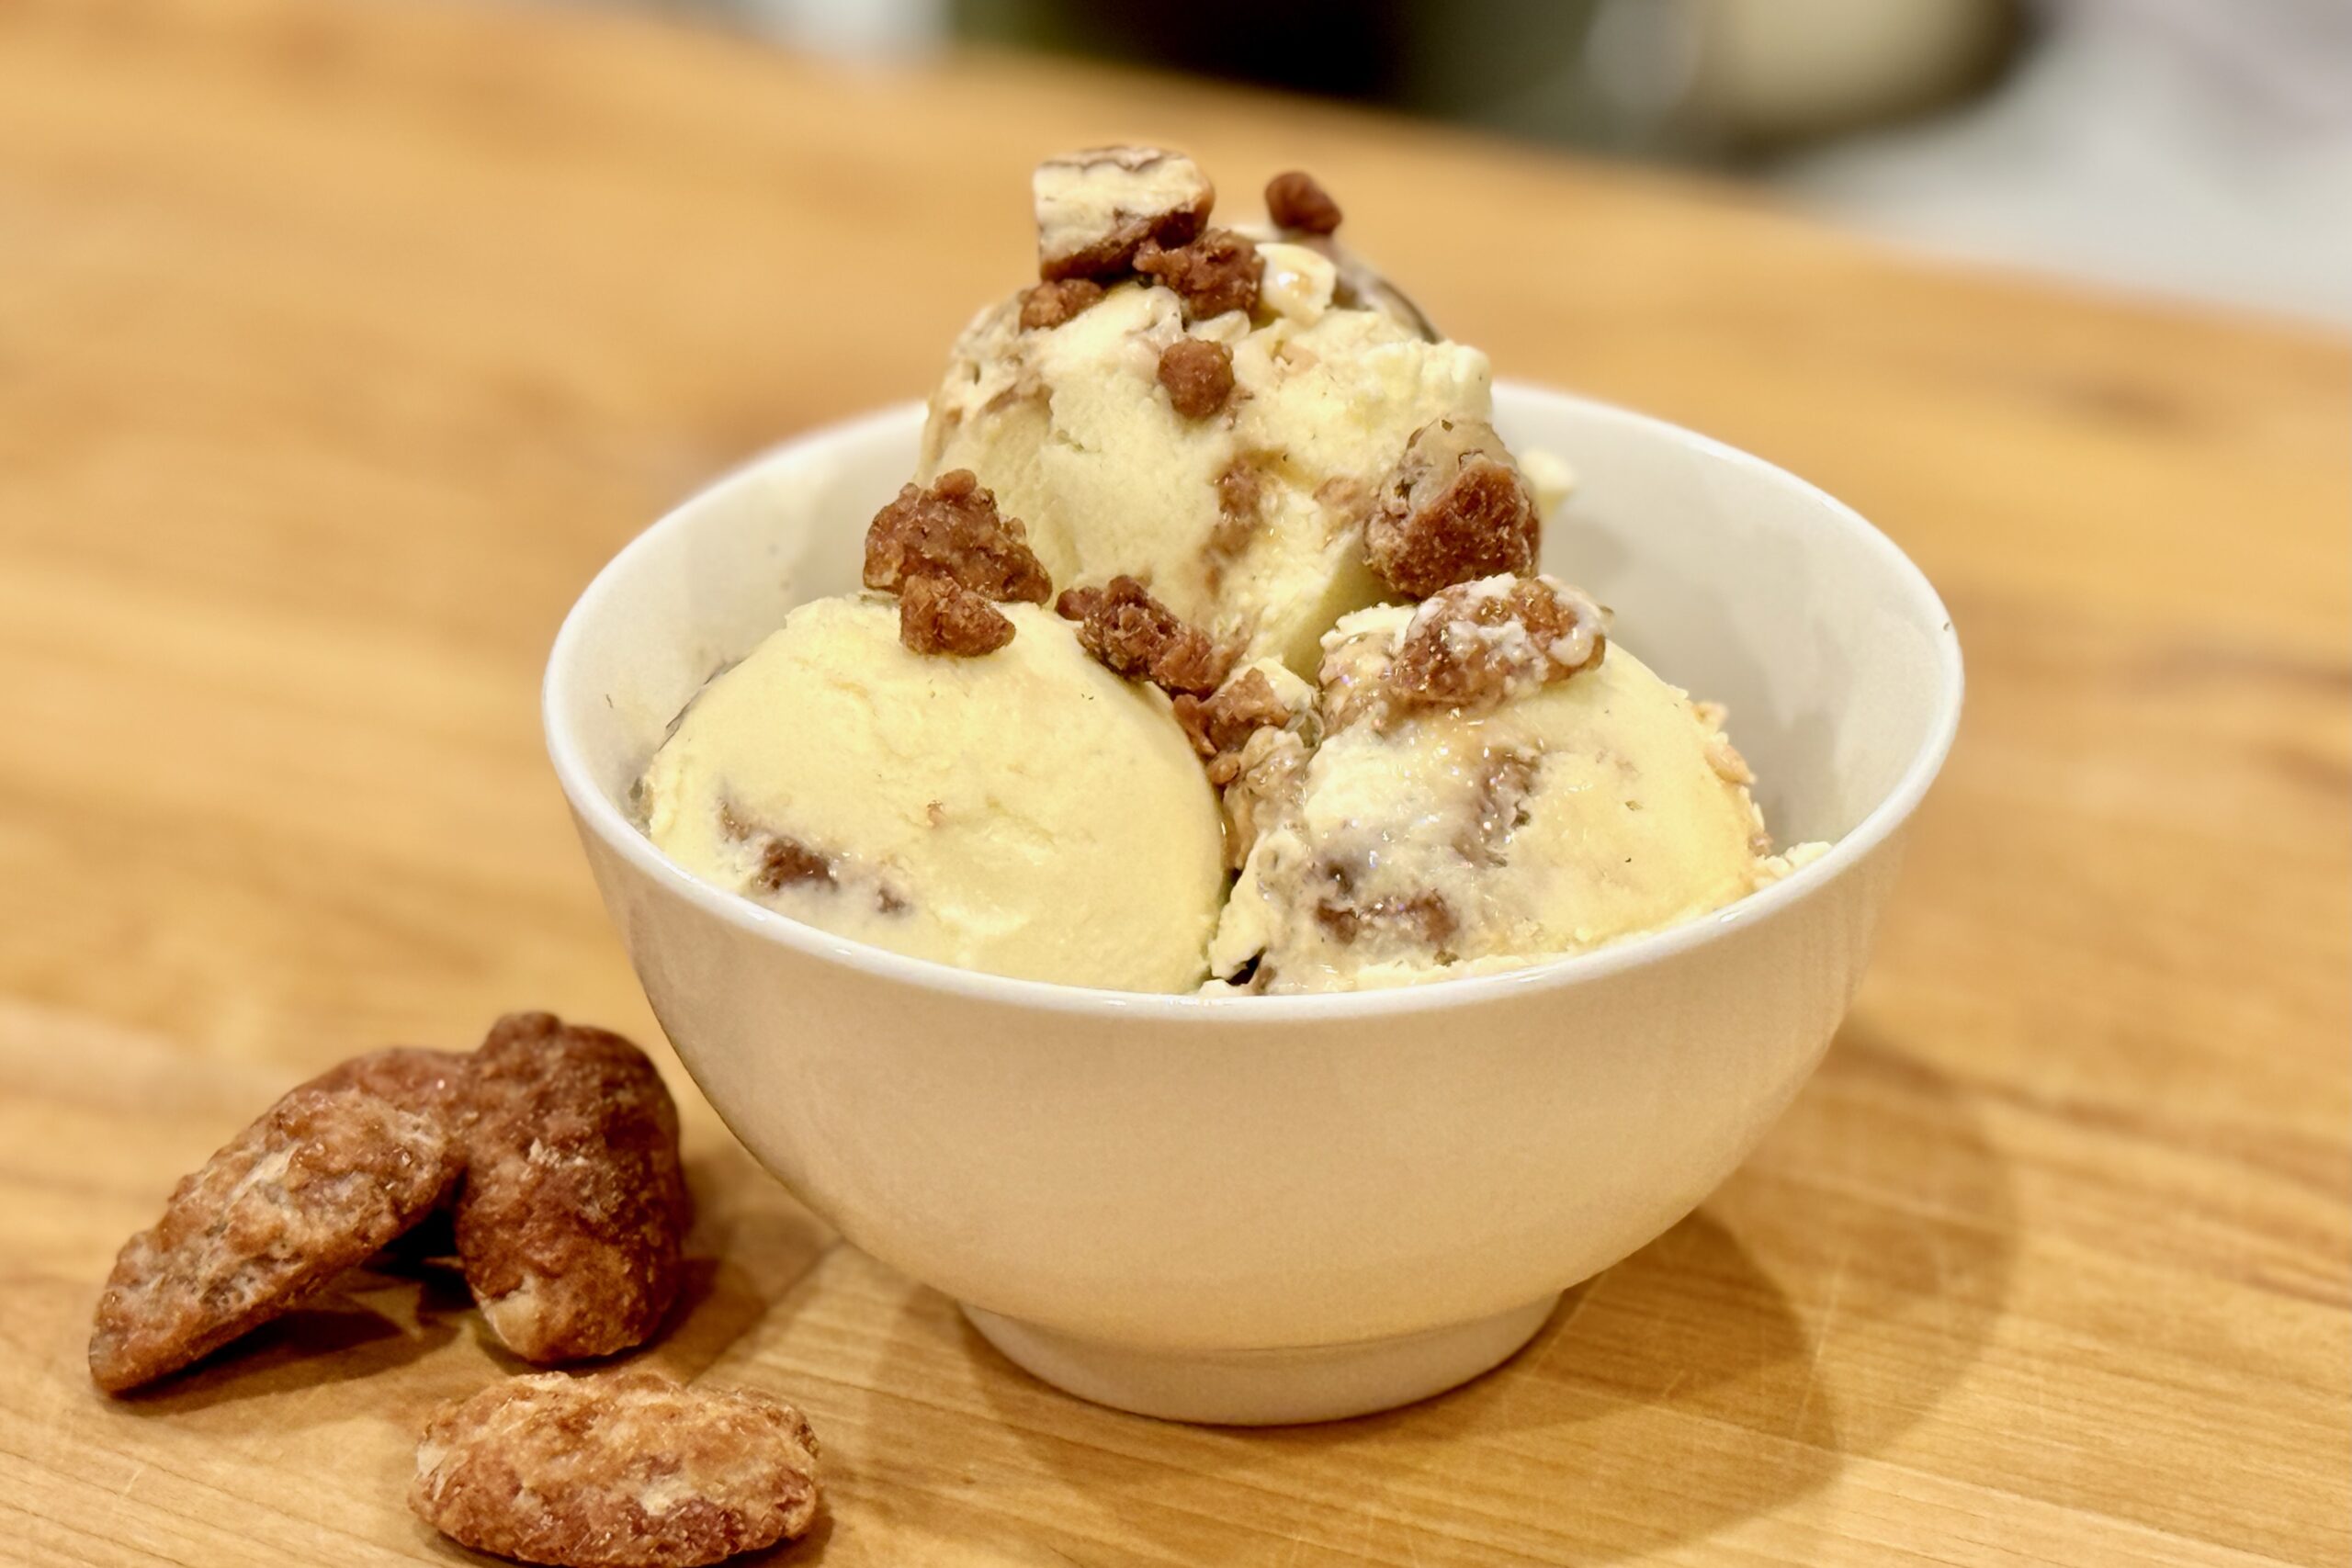
  • Pralines & Cream Buttermilk Ice Cream

    Pralines & Cream Buttermilk Ice Cream

    The Huggins Family traces its roots to some of the earliest settlers in the American South, and although several generations have since made their homes in the West, many of the foods we love still reflect that Southern heritage. Pralines—those sweet, buttery pecan confections tied to countless Southern kitchens—capture that legacy perfectly. This ice cream honors that connection with a silky buttermilk custard base swirled with ribbons of praline cream and studded with crisp pecan pralines for a nostalgic, balanced, unmistakably Southern flavor.


    Ingredients

    • Custard Base:

    • 2 cups heavy cream
    • ½ cup whole milk
    • ½ cup buttermilk (added after cooking)
    • ½ cup sugar, divided
    • 5 egg yolks
    • ½ tsp vanilla extract
    • ¼ tsp table salt
    • Praline-Cream Swirl:

    • ¼ cup butter
    • 6 tbsp brown sugar
    • 2 tbsp heavy cream
    • ½ tsp table salt
    • 1 tsp vanilla extract
    • Mix-Ins:

    • 1 cup chopped pecan pralines, frozen before use

    Directions

    Cook the Custard

    In a medium saucepan, whisk together the cream, whole milk, ¼ cup sugar, and salt. Warm over medium heat until mixture begins to steam and the sugar dissolves.

    Temper the Yolks

    In a separate bowl, whisk the egg yolks with the remaining ¼ cup sugar until thick and pale. Slowly temper with ½ cup of the warm cream mixture, then return everything to the saucepan.

    Finish the Base

    Cook gently over low heat, stirring constantly, until the custard coats the back of a spoon (170–175°F / 77–80°C). Do not boil. Strain through a fine mesh sieve, stir in vanilla, and let cool slightly. Add the buttermilk, then chill thoroughly—preferably overnight.

    Make the Praline-Cream Swirl

    In a small saucepan, melt butter with brown sugar and cream. Simmer 1–2 minutes until lightly thickened. Remove from heat, stir in salt and vanilla, and cool completely before layering.

    Churn & Assemble

    Churn the chilled custard in an ice cream maker according to manufacturer instructions. When nearly finished, fold in the frozen chopped pralines. As you transfer to a container, alternate layers of ice cream and thin ribbons of praline-cream swirl. Gently marble with a butter knife and freeze until firm.


    Notes

    Preparation

    • Freeze pralines before folding them in to preserve their crisp texture.
    • Buttermilk provides a gentle tang that balances caramel sweetness; replace with whole milk for a richer, sweeter version.
    • Ensure the praline swirl is fully cooled before layering to avoid melting the churned base.

    Serving Suggestions

    • Top with extra chopped pecan pralines for added crunch.
    • Serve alongside warm apple or pecan pie.
    • Add a drizzle of warm caramel sauce for an extra-sweet presentation.

    Variations

    • Add ¼ tsp cinnamon to the swirl for a deeper Southern praline flavor.
    • Swap half the pralines for toasted pecans for a nuttier variation.

    Make-Ahead & Storage

    • Refrigerate the unchurned custard up to 2 days before freezing.
    • Store praline-cream swirl refrigerated up to 1 week.
    • Finished ice cream keeps 1 week for best texture.
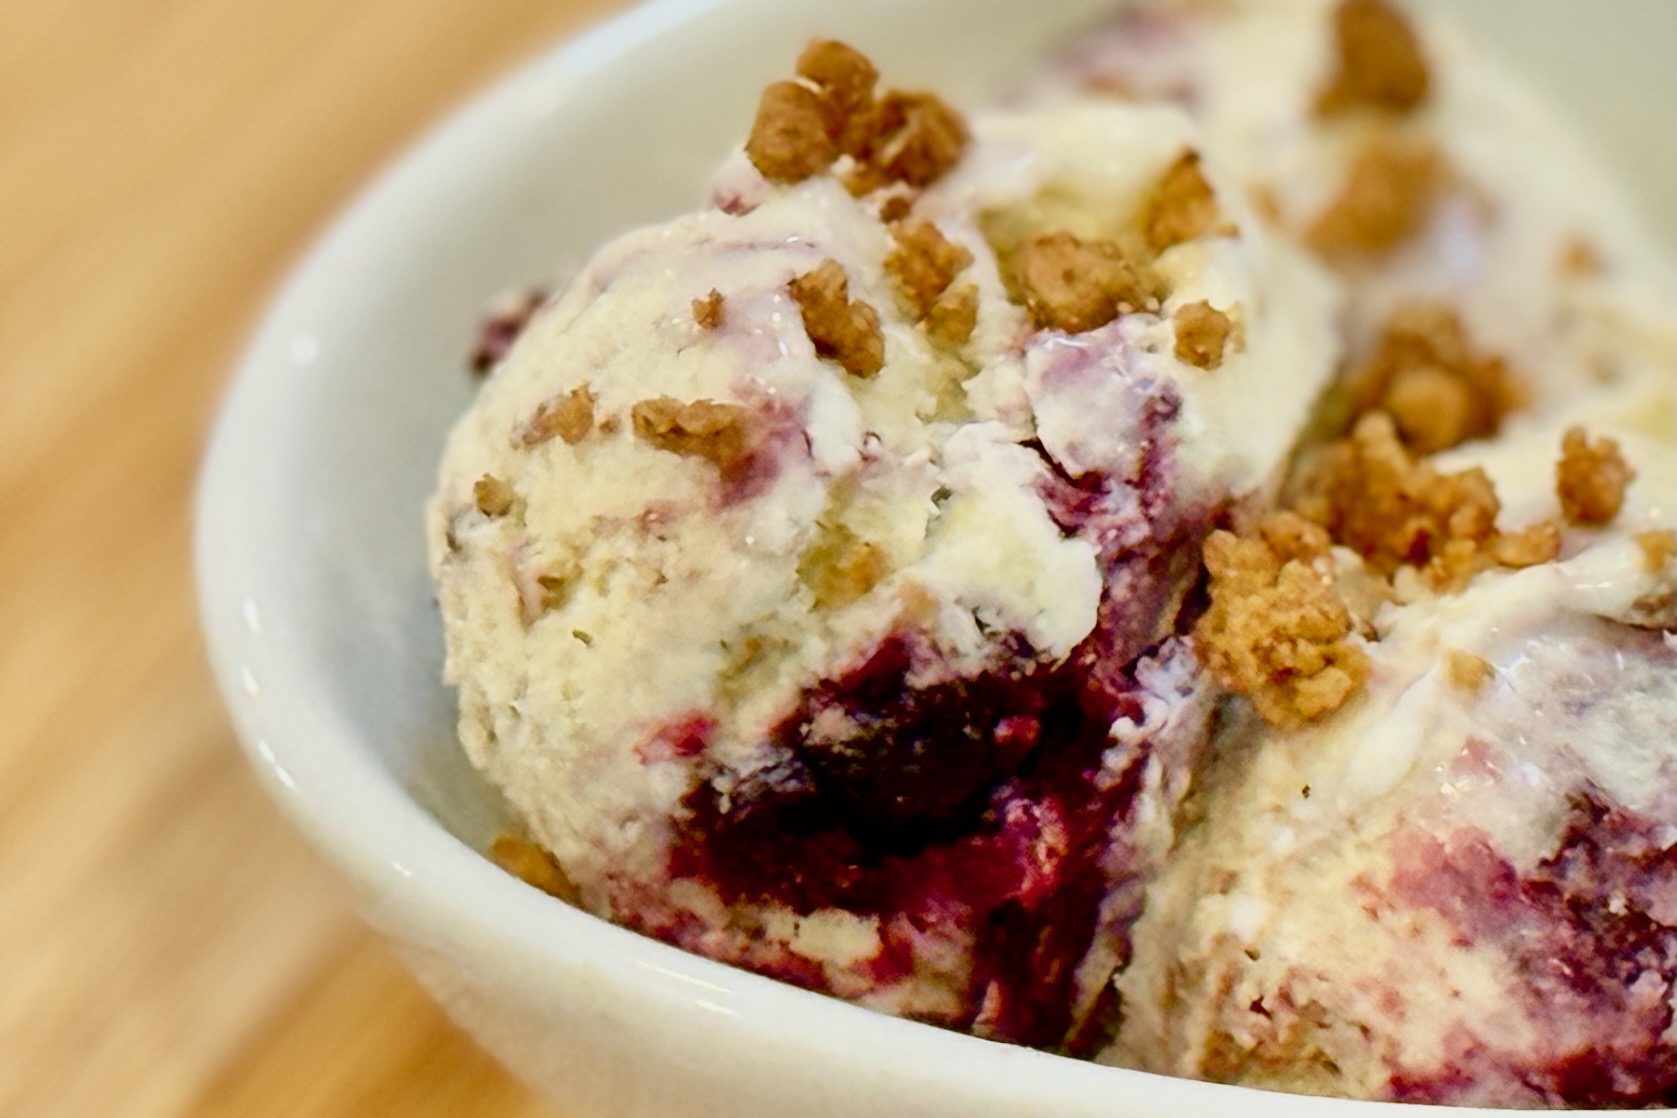
  • Blueberry Cheesecake Ice Cream

    Blueberry Cheesecake Ice Cream

    This Blueberry Cheesecake Ice Cream captures all the comfort and flavor of a classic cheesecake in frozen form—tangy, creamy, and just sweet enough. A silky cream cheese custard base provides authentic cheesecake flavor, balanced by a bright blueberry swirl and crunchy browned-butter graham crumble that evokes a perfectly toasted crust.


    Ingredients

    Blueberry Swirl

    • ¼ cup sugar
    • 1 tbsp cornstarch
    • ½ cup water
    • 1¼ cups blueberries (fresh or frozen)
    • 1 tbsp lemon juice
    • pinch table salt

    Browned Butter Graham Crumble

    • 2 cups graham cracker crumbs
    • 1 tbsp sugar
    • ½ tsp cinnamon
    • ½ cup (1 stick) unsalted butter
    • ½ tsp vanilla extract
    • pinch table salt

    Cheesecake Ice Cream Base

    • 6 oz cream cheese, softened
    • 1½ cups whole milk
    • 1½ cups heavy cream
    • ¾ cup sugar
    • 4 egg yolks
    • ½ tsp vanilla extract
    • 1 tsp lemon zest (optional)
    • pinch table salt

    Directions

    Prepare the Blueberry Swirl

    In a small saucepan, combine sugar, cornstarch, and salt. Gradually whisk in water until smooth, then stir in blueberries and lemon juice.

    Bring to a gentle boil and simmer for 5–6 minutes, stirring occasionally, until thickened and jam-like.

    Cool completely before using.

    Make the Browned Butter Graham Crumble

    In a small saucepan over medium heat, melt butter and cook, swirling occasionally, until it turns golden and smells nutty (about 4–5 minutes). Immediately remove from heat and stir in vanilla and a pinch of salt.

    In a large bowl, combine graham cracker crumbs, sugar, and cinnamon. Pour the browned butter mixture over the crumbs and stir until evenly coated.

    Spread on a parchment-lined baking sheet and bake at 350°F for 10–12 minutes, stirring once, until fragrant and lightly toasted. Cool completely, then crumble into small clusters.

    For best texture, spread the cooled crumble on a parchment-lined baking sheet and freeze for 20–30 minutes before mixing into the ice cream.

    Prepare the Cheesecake Ice Cream Base

    In a saucepan, warm milk and cream over medium heat until steaming.

    In a separate bowl, whisk yolks and sugar until pale and thick. Slowly temper with ½ cup of the warm milk mixture, whisking constantly, then return everything to the saucepan.

    Cook gently over low heat, stirring constantly, until the custard coats the back of a spoon (170–175°F / 77–80°C).

    Remove from heat and whisk in cream cheese, vanilla, lemon zest, and salt until smooth. Strain through a fine mesh sieve if needed for texture.

    Chill thoroughly, preferably overnight.

    Churn & Assemble

    Churn the chilled custard in an ice cream maker according to the manufacturer’s instructions. When nearly finished, fold in the frozen graham crumble.

    In a freezer-safe container, layer the churned ice cream with alternating spoonfuls of blueberry swirl and additional crumble.

    Swirl gently with a butter knife (do not overmix). Freeze until firm.


    Notes

    Preparation

    • Freeze the graham crumble before folding it into the ice cream to help preserve crunch and prevent softening.
    • Chilling the blueberry swirl thoroughly helps prevent it from bleeding into the custard during layering.
    • For an extra-cheesecake tang, replace ¼ cup of the milk with buttermilk (stir it in after cooking the custard).
    • Browning the butter is essential for a warm, nutty aroma that mimics a true cheesecake crust.

    Serving Suggestions

    • Serve with fresh blueberries, strawberries, or raspberries.
    • Add a drizzle of warm blueberry sauce for a sundae-style presentation.
    • Top with extra graham crumble for added texture.

    Variations

    • Swap the blueberries for raspberries, strawberries, or blackberries using the same proportions.
    • Add a **lemon cheesecake** twist by doubling the lemon zest and adding 1 tsp lemon juice to the custard after cooking.
    • For a swirl-forward ice cream, increase the blueberry mixture to 1½× the recipe.

    Make-Ahead & Storage

    • Refrigerate the custard base for up to 2 days before churning.
    • Store the blueberry swirl for up to 1 week in the refrigerator.
    • Keep graham crumble at room temperature for 3 days, or freeze for longer storage.
    • Store churned ice cream in an airtight container for up to 1 week for best texture.
  • German Chocolate Cake — Bakery Structure with Box Convenience

    German Chocolate Cake — Bakery Structure with Box Convenience

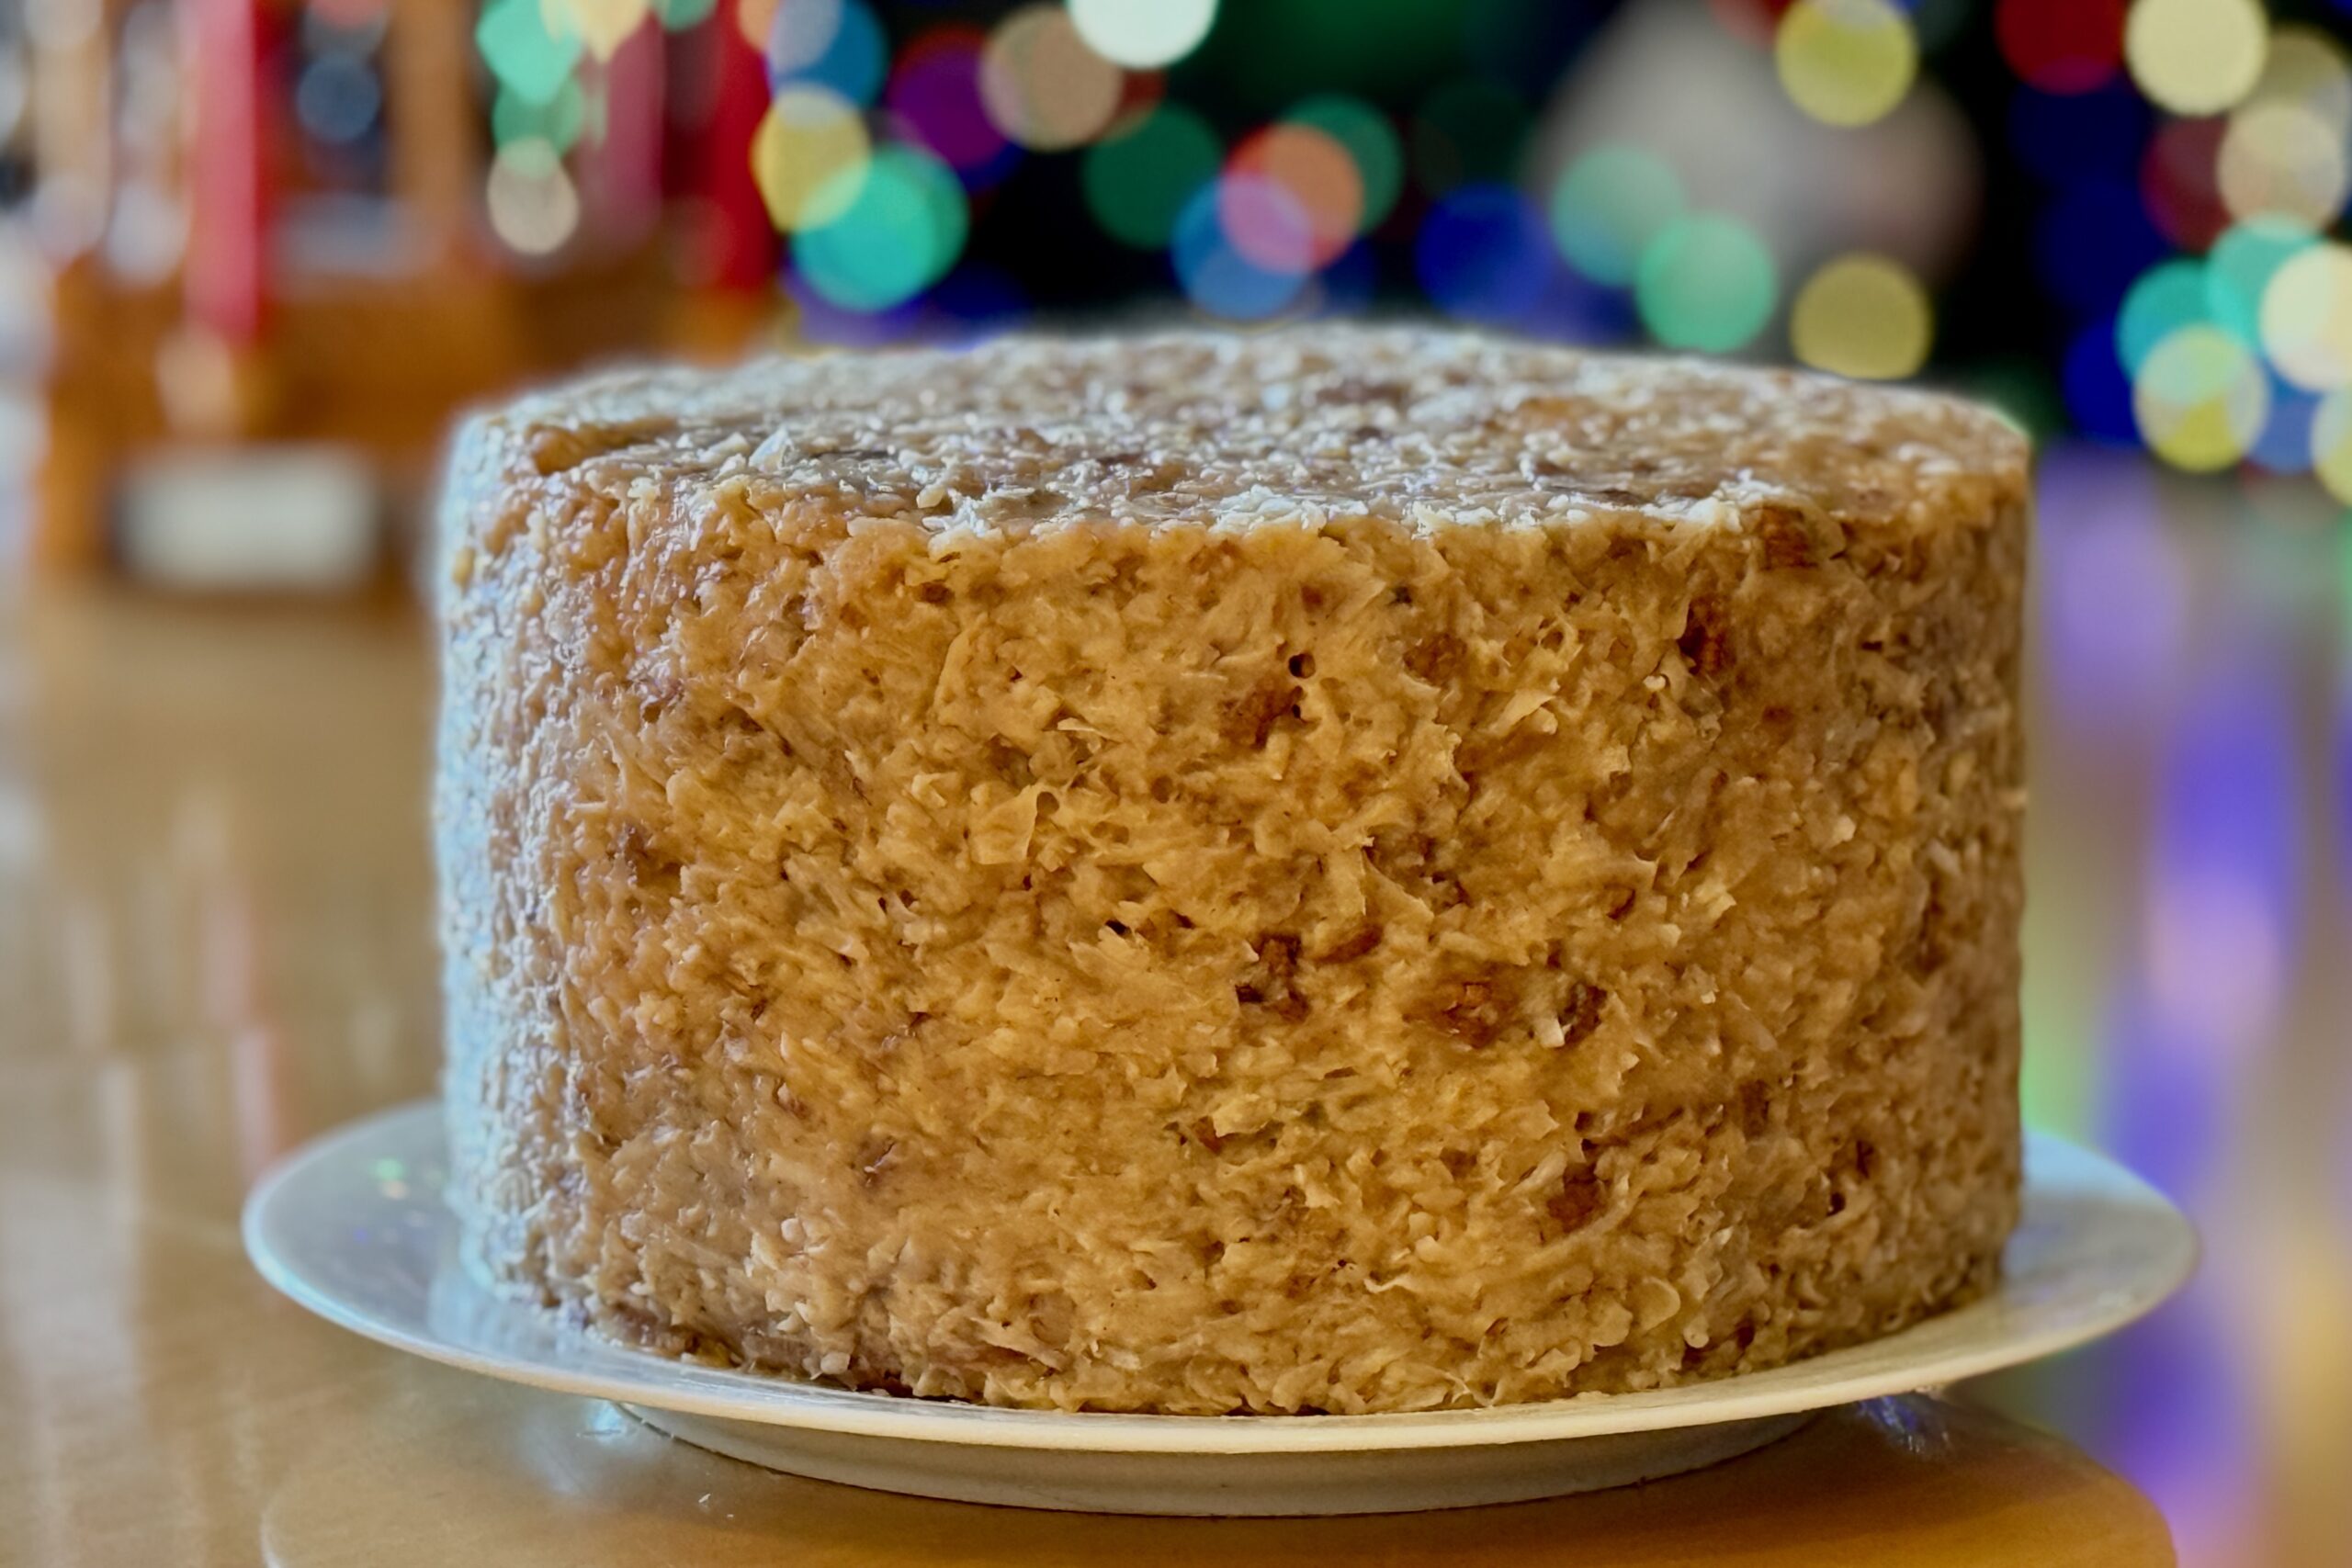
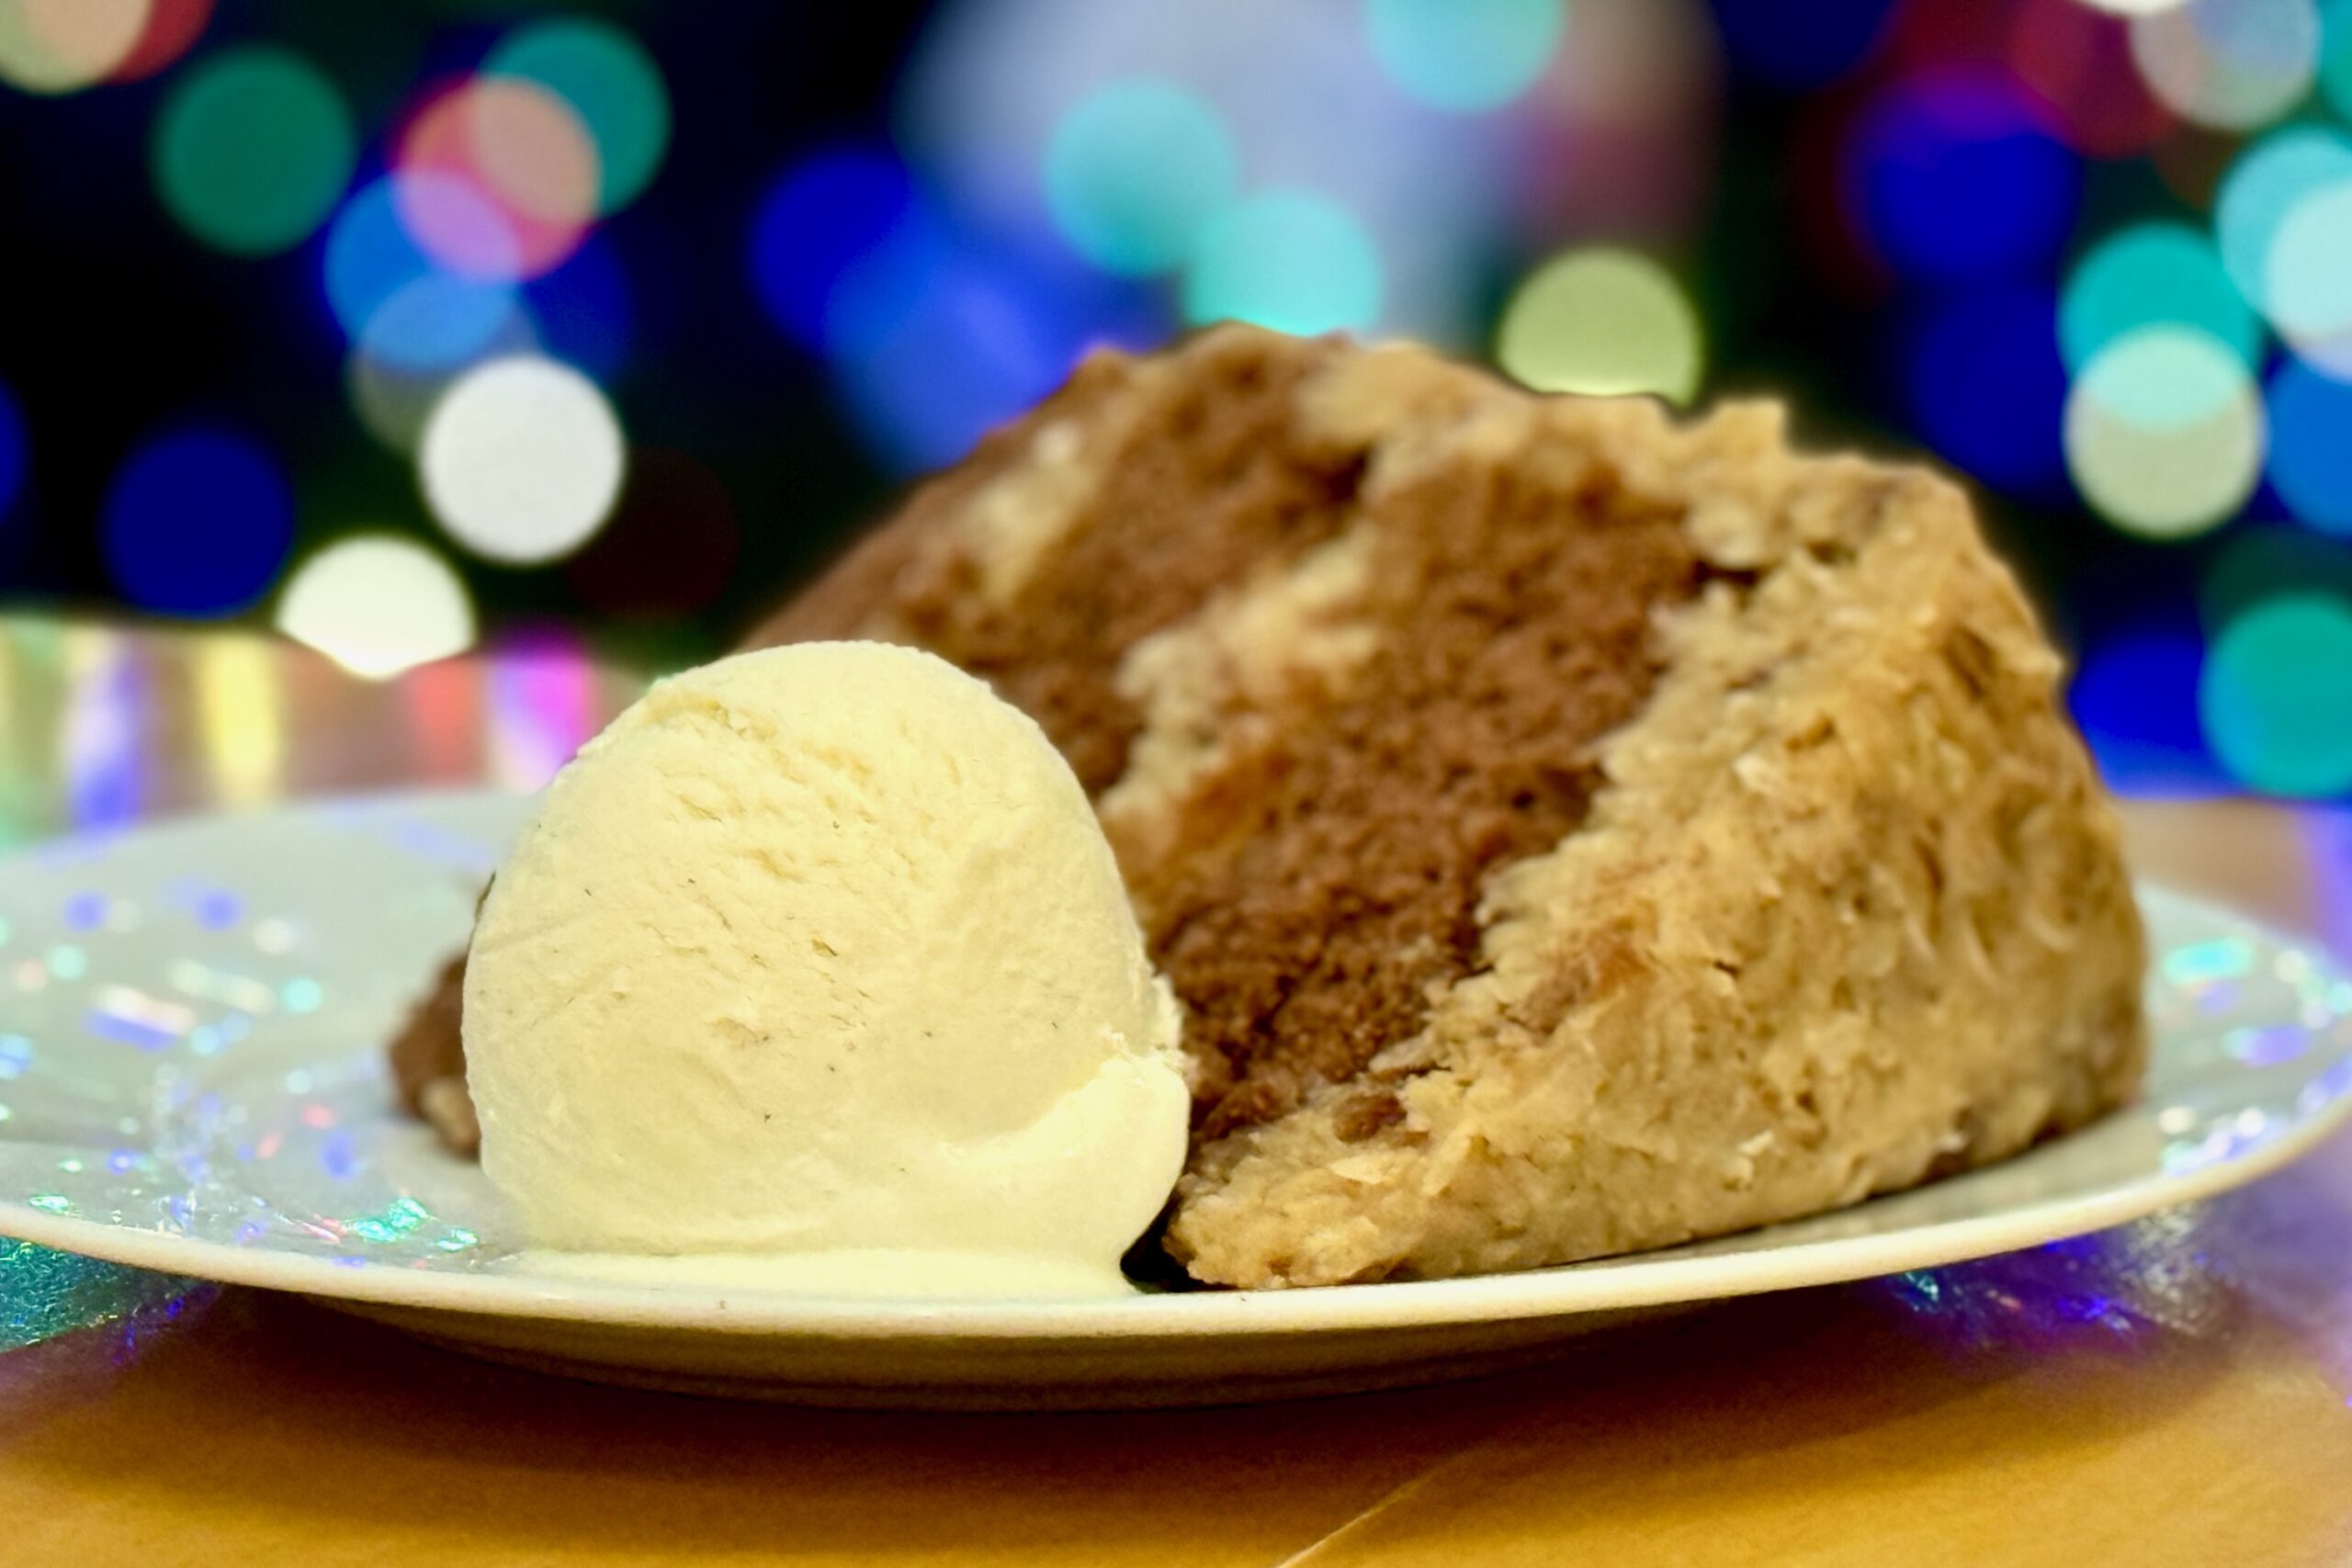
    Every year on my wife’s birthday, there’s only one request — German chocolate cake. It’s become one of our family traditions, the kind of ritual you never change because it carries as much sentiment as flavor. But over time I also realized that while boxed mixes make the process easy, they often fall short of the tall layers, defined slices, and deep chocolate-and-coconut flavor we’ve come to expect. So this version became the answer: a handful of smart upgrades that turn a simple mix into something closer scratch-made, with richer flavor, a sturdier crumb, and bakery-worthy presentation. The layers bake up taller and slice beautifully, the frosting wraps the cake without slipping, and the whole thing feels celebratory without adding hours of prep. It’s the shortcut I make every year for my wife, and the version that finally gives us the flavor we love with the structure a three-layer cake needs.


    Ingredients

    Cake Layers

    • 1 boxed German chocolate cake mix (prefer one that calls for milk; if not, substitute whole milk for the water)
    • 1 cup (240 ml) whole milk (use 2–3 tbsp less than the package amount if milk is listed)
    • 1 cup (225 g) melted butter plus 2 tbsp (28 g) extra
    • 4–5 large eggs (two more than the box calls for; 4 for softer crumb, 5 for maximum stability)
    • ½ cup (60 g) all-purpose flour
    • 1 tbsp (8 g) cornstarch
    • ½ tsp baking powder
    • 1 tbsp Dutch-process cocoa powder
    • ½ tsp instant espresso powder (enhances chocolate depth without adding coffee flavor)
    • 1 tsp powdered gelatin, bloomed in 1 tbsp warm water
    • 2 tbsp (30 g) sour cream or Greek yogurt

    Coconut–Pecan Frosting

    • 8 egg yolks
    • 2 cans (each 12 oz / 354 ml) evaporated milk
    • 3 cups (600 g) sugar
    • 1½ cups (340 g / 3 sticks) butter
    • 5⅓ cups (about 400 g) unsweetened shredded coconut (sweetened coconut also works with no measurement changes; frosting will simply be sweeter)
    • 3 cups (300 g) chopped pecans
    • 2 tbsp finely ground pecans
    • ½ tsp table salt
    • 1 tbsp (15 ml) vanilla extract

    Directions

    Prepare the Cake Layers

    Bloom the gelatin by sprinkling it over 1 tbsp warm water in a small bowl. Let stand 5 minutes to fully hydrate. If the gelatin has set very firmly, gently warm it in the microwave for a few seconds until fluid before adding to the batter.

    Preheat the oven to 320°F (160°C). Grease three 8-inch round cake pans lightly and dust with flour, then line the bottoms with parchment rounds for best release and to help prevent overbrowning on the base.

    In a medium bowl, whisk together the cake mix, all-purpose flour, cornstarch, baking powder, Dutch-process cocoa powder, and instant espresso powder until evenly combined.

    In a separate large bowl, whisk together the melted butter, eggs, milk, bloomed (and fluid) gelatin, and sour cream or Greek yogurt until smooth.

    Add the dry ingredients to the wet ingredients and mix just until incorporated. Avoid overbeating to keep the crumb tender.

    Divide the batter evenly among the three prepared pans, smoothing the tops.

    Bake for about 24–30 minutes, or until the tops spring back lightly when touched, a toothpick inserted in the center comes out with moist crumbs (not wet batter), and the internal temperature in the center of each layer registers around 195°F (90°C) for the best balance of structure and moisture.

    Cool the cakes in the pans for 10 minutes, then turn out onto wire racks to cool completely. For the cleanest slices, wrap and chill the cooled layers before assembly.

    Make the Frosting

    In a large saucepan, whisk together the egg yolks and evaporated milk until smooth and well combined.

    Add the sugar and butter to the pan.

    Cook over medium heat, stirring constantly, until the mixture reaches a gentle simmer. Once simmering, continue to cook for about 12 minutes, stirring frequently to prevent scorching and to develop a thicker, more stable frosting.

    Remove the pan from the heat and stir in the salt first, making sure it dissolves fully in the warm mixture.

    Add the vanilla extract and stir until fully incorporated.

    Stir in the chopped pecans, finely ground pecans, and shredded coconut until evenly distributed.

    Allow the frosting to cool completely; it will thicken significantly as it cools and will be much easier to spread on the cake.

    Assemble the Cake

    If needed, level the chilled cake layers using a serrated knife so they stack evenly.

    Place the first layer on a serving plate. Spread a very thin “seal coat” of frosting over the top to trap crumbs, then chill briefly. Follow with a more generous layer of frosting for the filling.

    Repeat with the second layer: add the layer, apply a thin seal coat, chill briefly, then spread on a full layer of frosting.

    Place the third layer on top and apply a thin coat of frosting over the top and sides to lock in crumbs. Chill briefly again, then finish with a final, even layer of frosting over the top and sides. The extended cook time and finely ground pecans help the frosting cling well to the sides.

    Chill the assembled cake for at least 2 hours (or overnight) before slicing for the cleanest, bakery-style cuts.


    Notes

    Preparation

    • Choose a German chocolate cake mix that calls for milk when possible. If your mix uses water, substitute whole milk and reduce the amount slightly (about 2–3 tbsp less than the listed water volume).
    • The added Dutch-process cocoa and espresso powder deepen the chocolate flavor without making the cake taste like coffee, helping the chocolate stand up to the rich coconut–pecan frosting.
    • Using 4 eggs will give a slightly softer crumb, while using 5 eggs increases structure and height, which is ideal for very clean slices and tall layers.
    • Fully blooming the gelatin and incorporating it with the wet ingredients strengthens the slice without making the cake dense or rubbery. If the gelatin sets too firmly, gently warm it until fluid before whisking it into the wet mixture.
    • This cake was tested at a higher altitude using dark metal pans and a baking temperature of 320°F (160°C), with doneness judged by the spring of the cake, a clean toothpick with moist crumbs, and an internal temperature around 195°F (90°C) in the center of each layer.
    • Frosting distribution: For evenly layered, bakery-style assembly, divide the frosting into four equal portions. Use about 25% between the first and second layers, 25% between the second and third layers, 25% on top of the cake, and the remaining 25% for the sides.

    Serving Suggestions

    • For the cleanest, restaurant-style slices, cut the cake while it is well chilled using a thin, sharp knife dipped in hot water and wiped dry between cuts.
    • Let individual slices rest at room temperature for 10–15 minutes before serving so the crumb and frosting soften slightly and the flavors bloom.
    • This cake pairs nicely with lightly sweetened vanilla or coconut ice cream, or with a dollop of softly whipped cream to balance the richness.

    Make-Ahead & Storage

    • Cake layers can be baked, cooled, wrapped tightly, and refrigerated for up to 2 days or frozen for up to 1 month before assembly.
    • The coconut–pecan frosting can be made up to 2–3 days in advance and stored in an airtight container in the refrigerator. Bring it to a cool room temperature and stir until spreadable before using.
    • The fully assembled cake should be stored covered in the refrigerator and is best enjoyed within 3–4 days.
    • Extra frosting can be refrigerated for up to 1 week or frozen for longer storage; it works well as a topping for brownies, cupcakes, or ice cream.

  • Buckeyes

    Buckeyes

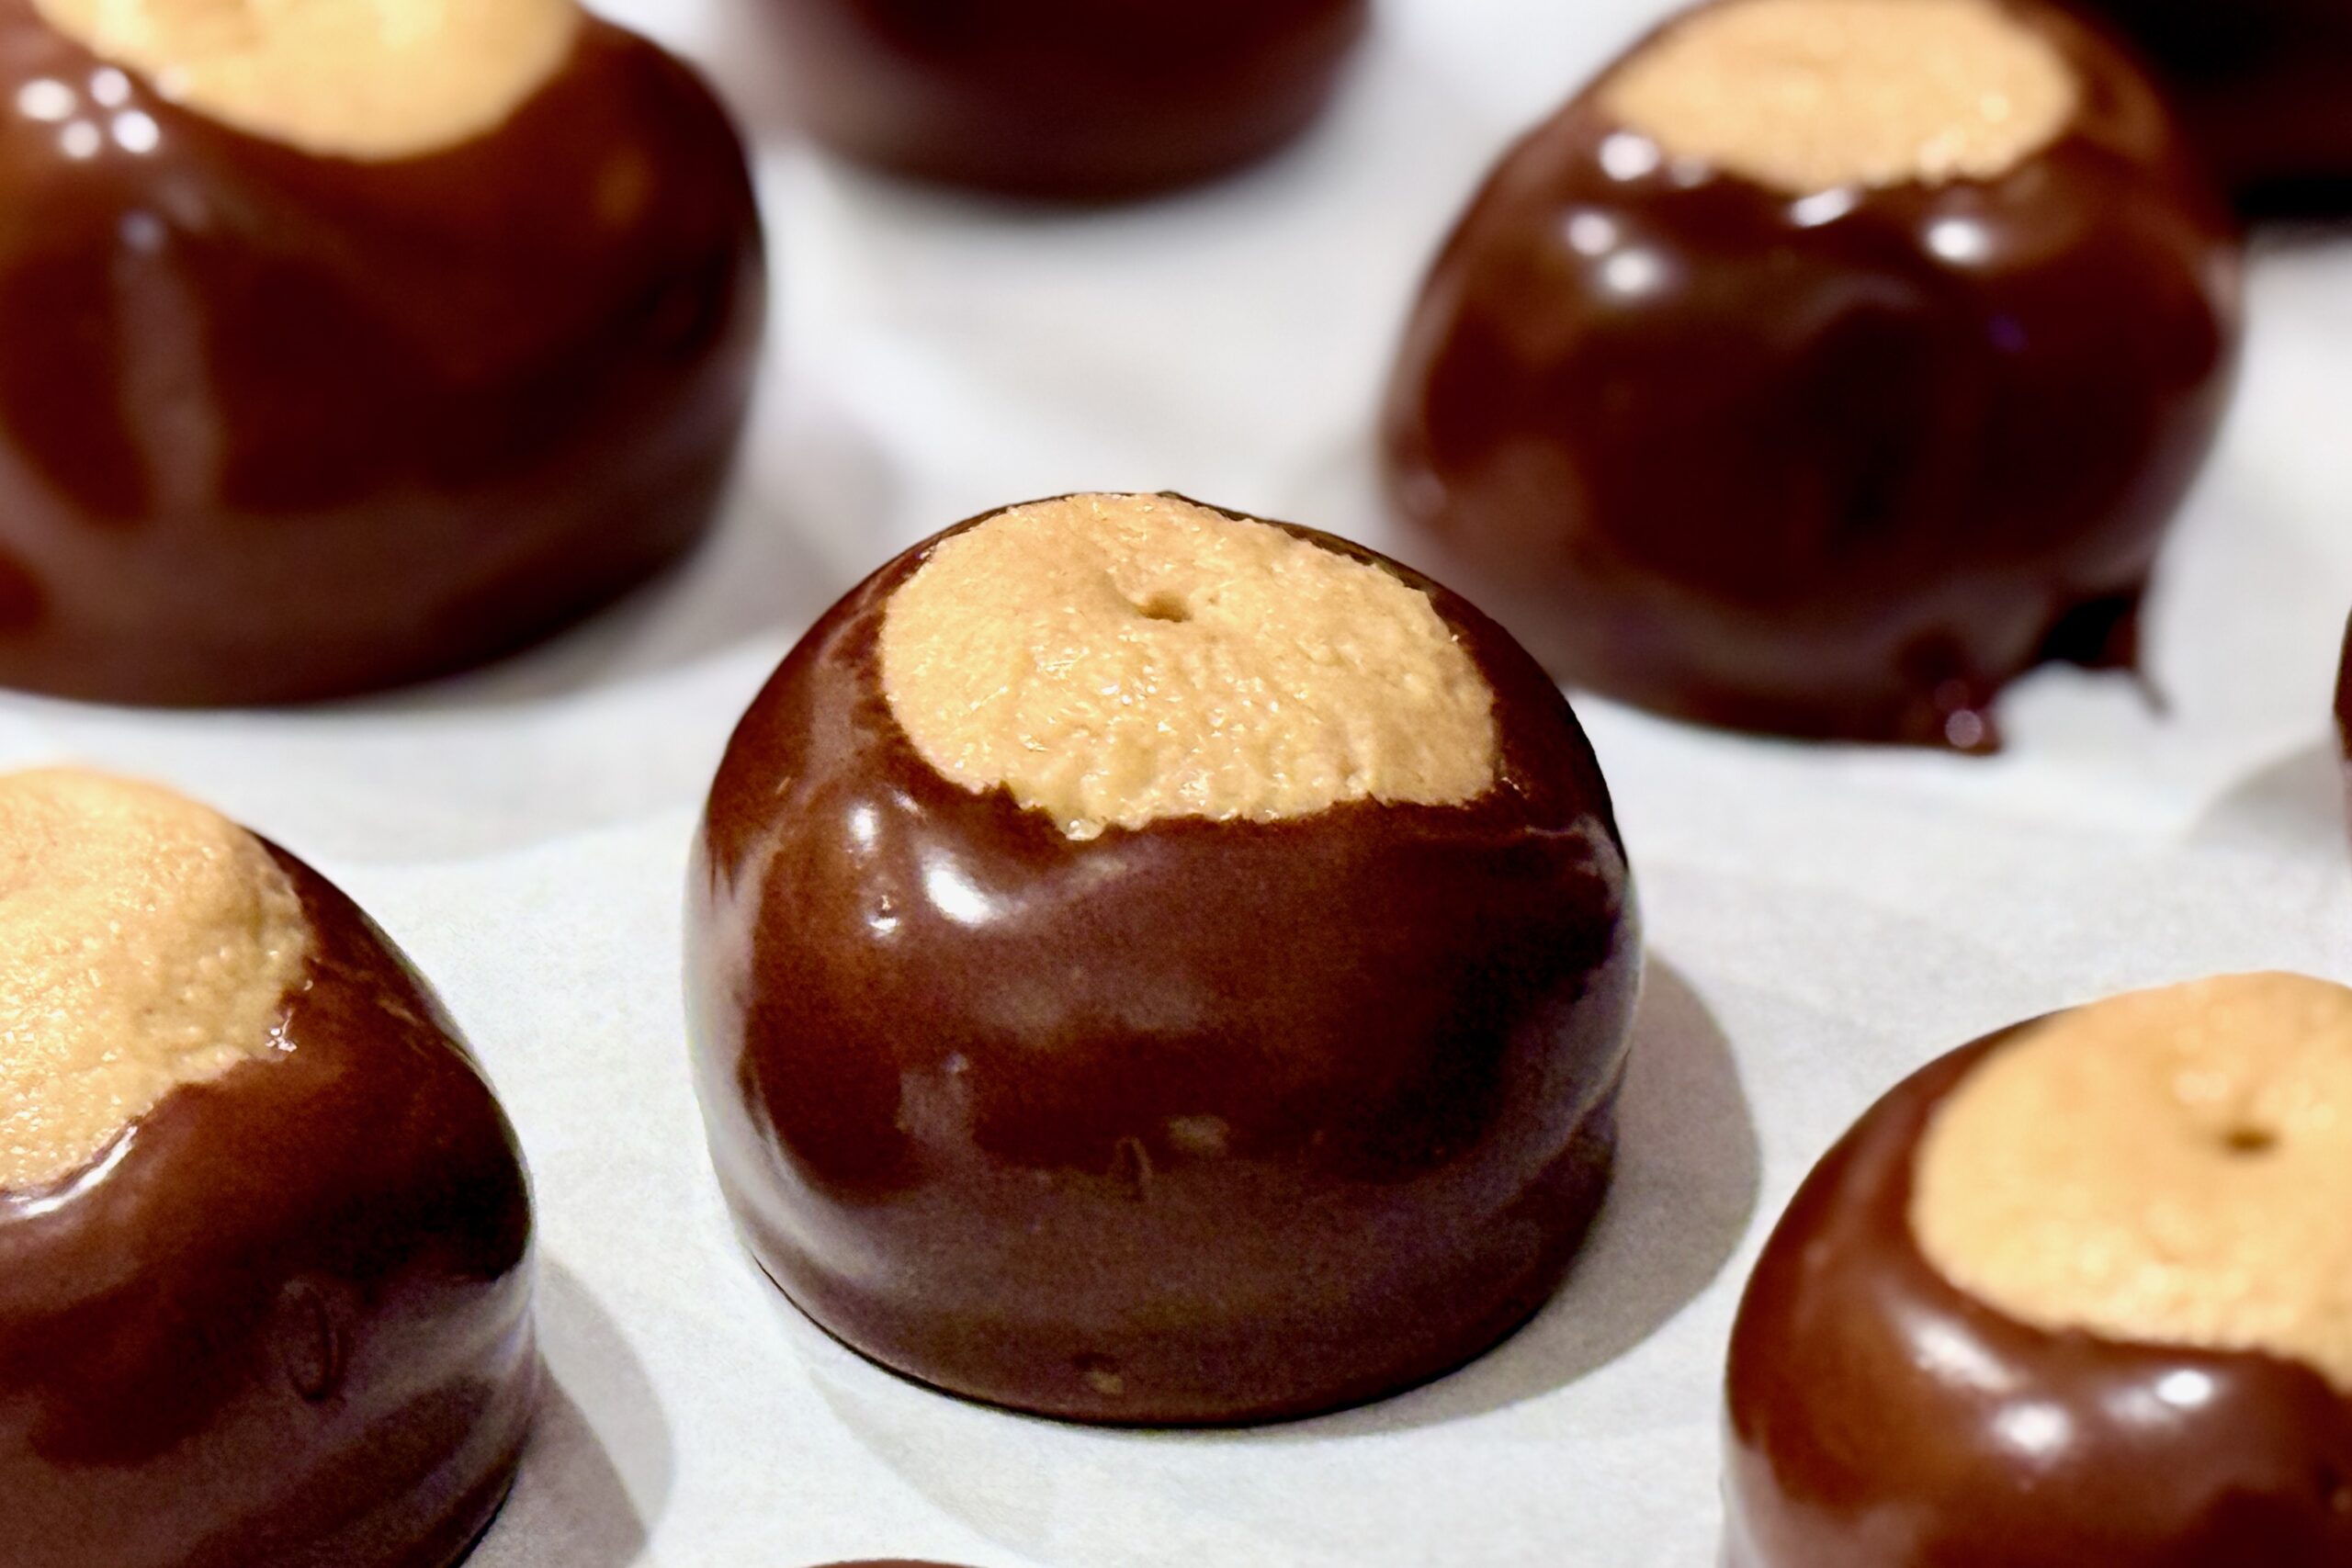
    These classic peanut-butter-and-chocolate Buckeyes are rich, creamy, and nostalgic—perfect for holidays, family gatherings, or anytime you want an easy, crowd-pleasing treat with minimal fuss.


    Ingredients

    • 1 cup creamy peanut butter
    • ½ cup butter, softened
    • ½ tsp vanilla
    • ¼ tsp table salt
    • 2½ cups confectioners sugar
    • 12 oz (340g) semisweet chocolate chips
    • 1 tsp vegetable shortening

    Directions

    Make the Peanut Butter Centers

    In the bowl of a stand mixer, combine peanut butter, butter, vanilla, and salt. Mix on medium speed until just combined.

    Reduce speed to low and slowly mix in confectioners sugar in installments until a soft dough forms.

    Refrigerate to firm slightly (15–20 minutes).

    Shape

    Line a baking sheet with parchment paper. Scoop the dough into 1 tbsp portions and roll into smooth balls.

    Insert a toothpick into the top of each ball and freeze until solid (about 1 hour).

    Melt the Chocolate

    Place chocolate chips and shortening into a microwave-safe bowl. Microwave in 30-second increments, stirring between each, until mostly melted (2–3 minutes). Stir until completely smooth.

    Dip & Finish

    Dip each peanut butter ball into the chocolate, coating about ⅔ of the way up. Return to the parchment.

    Refrigerate until the chocolate is set and the centers are no longer frozen.

    Remove toothpicks. Optionally smooth over the tops to cover the hole. Serve chilled or at room temperature.


    Notes

    Preparation

    • For the smoothest texture, be sure the butter is fully softened before mixing.
    • Creamy commercial peanut butter (like Jif or Skippy) gives the most consistent results.
    • If the dough seems too soft to roll, chill longer or add up to ¼ cup additional confectioners sugar.

    Serving Suggestions

    • Serve as a holiday treat, on dessert trays, or as sweet bites for parties.
    • They pair beautifully with hot cocoa, coffee, or cold milk.

    Variations

    • Dip fully in chocolate for “chocolate-covered peanut butter balls.”
    • Use dark chocolate or milk chocolate instead of semisweet.
    • Add ¼ tsp almond extract to the peanut butter mixture for a subtle twist.
    • Top with flaky sea salt before the chocolate sets for a sweet-salty finish.

    Make-Ahead & Storage

    These candies store exceptionally well and are perfect for preparing ahead of time.

    • Refrigerator: Store in an airtight container for 2 weeks.
    • Freezer: Freeze for up to 3 months; thaw in the fridge before serving.
    • Do not store at warm room temperatures—chocolate may soften or bloom.
  • Coconut Gelato

    Coconut Gelato

    There’s a quiet beauty to coconut when you let it stand on its own—clean, fragrant, and naturally sweet. This gelato leans into that simplicity with a smooth, silky texture and a pure coconut flavor that shines without distraction. Lightly toasted coconut infuses the base for depth, then strains away to keep every bite incredibly smooth.


    Ingredients

    Coconut Base

    • 1 can (13.5–14 oz) full-fat coconut milk
    • 1 cup whole milk
    • ⅔ cup granulated sugar
    • 3 large egg yolks
    • ⅛ tsp xanthan gum
    • ½ cup unsweetened shredded coconut, lightly toasted
    • ¼ tsp fine salt
    • 1 tsp vanilla extract
    • ¼ tsp coconut extract (optional)

    Directions

    Prepare the Coconut Base

    Toast the shredded coconut in a dry skillet over medium heat until lightly golden and fragrant. Set aside.

    In a medium saucepan, whisk together the coconut milk, whole milk, half the sugar, and salt. Warm over medium heat until steaming but not boiling.

    In a separate bowl, whisk the remaining sugar with the egg yolks until pale. Slowly ladle in some of the warm coconut milk mixture while whisking constantly, then return everything to the saucepan.

    Cook gently over medium heat, stirring constantly, until the custard reaches 175–178°F and thickens slightly, just enough to coat the back of a spoon (nappe consistency). Do not boil.

    Infuse, Strain, Stabilize & Chill

    Remove from heat, stir in the toasted coconut, cover, and let steep for 20–30 minutes.

    Strain the custard through a fine mesh sieve to remove the coconut solids. While the base is still warm, stir in the vanilla extract and optional coconut extract.

    Sprinkle the xanthan gum evenly over the surface and blend with an immersion blender (or regular blender) for 10–15 seconds to fully disperse.

    Chill completely, preferably overnight.

    Churn

    Churn the gelato in your ice cream maker until smooth and thick. Transfer to a lidded container and freeze for 4–6 hours to set.


    Notes

    Preparation

    • Lightly toasting the coconut deepens flavor without adding texture, since it is strained out.
    • Xanthan gum prevents iciness and preserves a clean coconut profile without thickening the custard.
    • Use an instant-read thermometer to monitor the custard temperature; keeping it in the 175–178°F range ensures safety and proper thickening without curdling the yolks.

    Serving Suggestions

    • Serve with fresh pineapple or mango.
    • Pair with chocolate sauce or shaved dark chocolate.
    • Excellent alongside tropical cakes or fruit tarts.

    Variations

    • Dark Chocolate Coconut Gelato: Fold in ¾ cup chopped dark chocolate during the last minute of churning. Optional: add ½ tsp almond extract for an Almond-Joy style profile.
    • Pineapple Swirl: Simmer 1 cup pineapple with 2 tbsp sugar and a pinch of salt for 5–7 minutes. Blend smooth, chill, and layer into the gelato as you transfer it from the machine.
    • Mango Swirl: Blend 1 cup ripe mango with 2–3 tbsp sugar, chill fully, and swirl into the gelato for a marbled effect.

    Make-Ahead & Storage

    • Best texture is within the first 3–4 days.
    • Store tightly covered to prevent absorption of freezer odors.