Bags of Spices

Favorite Recipes

Treats

Desserts and sweet indulgences — cakes, ice cream, cookies, and holiday favorites shared across generations.

  • German Chocolate Cake Ice Cream

    German Chocolate Cake Ice Cream

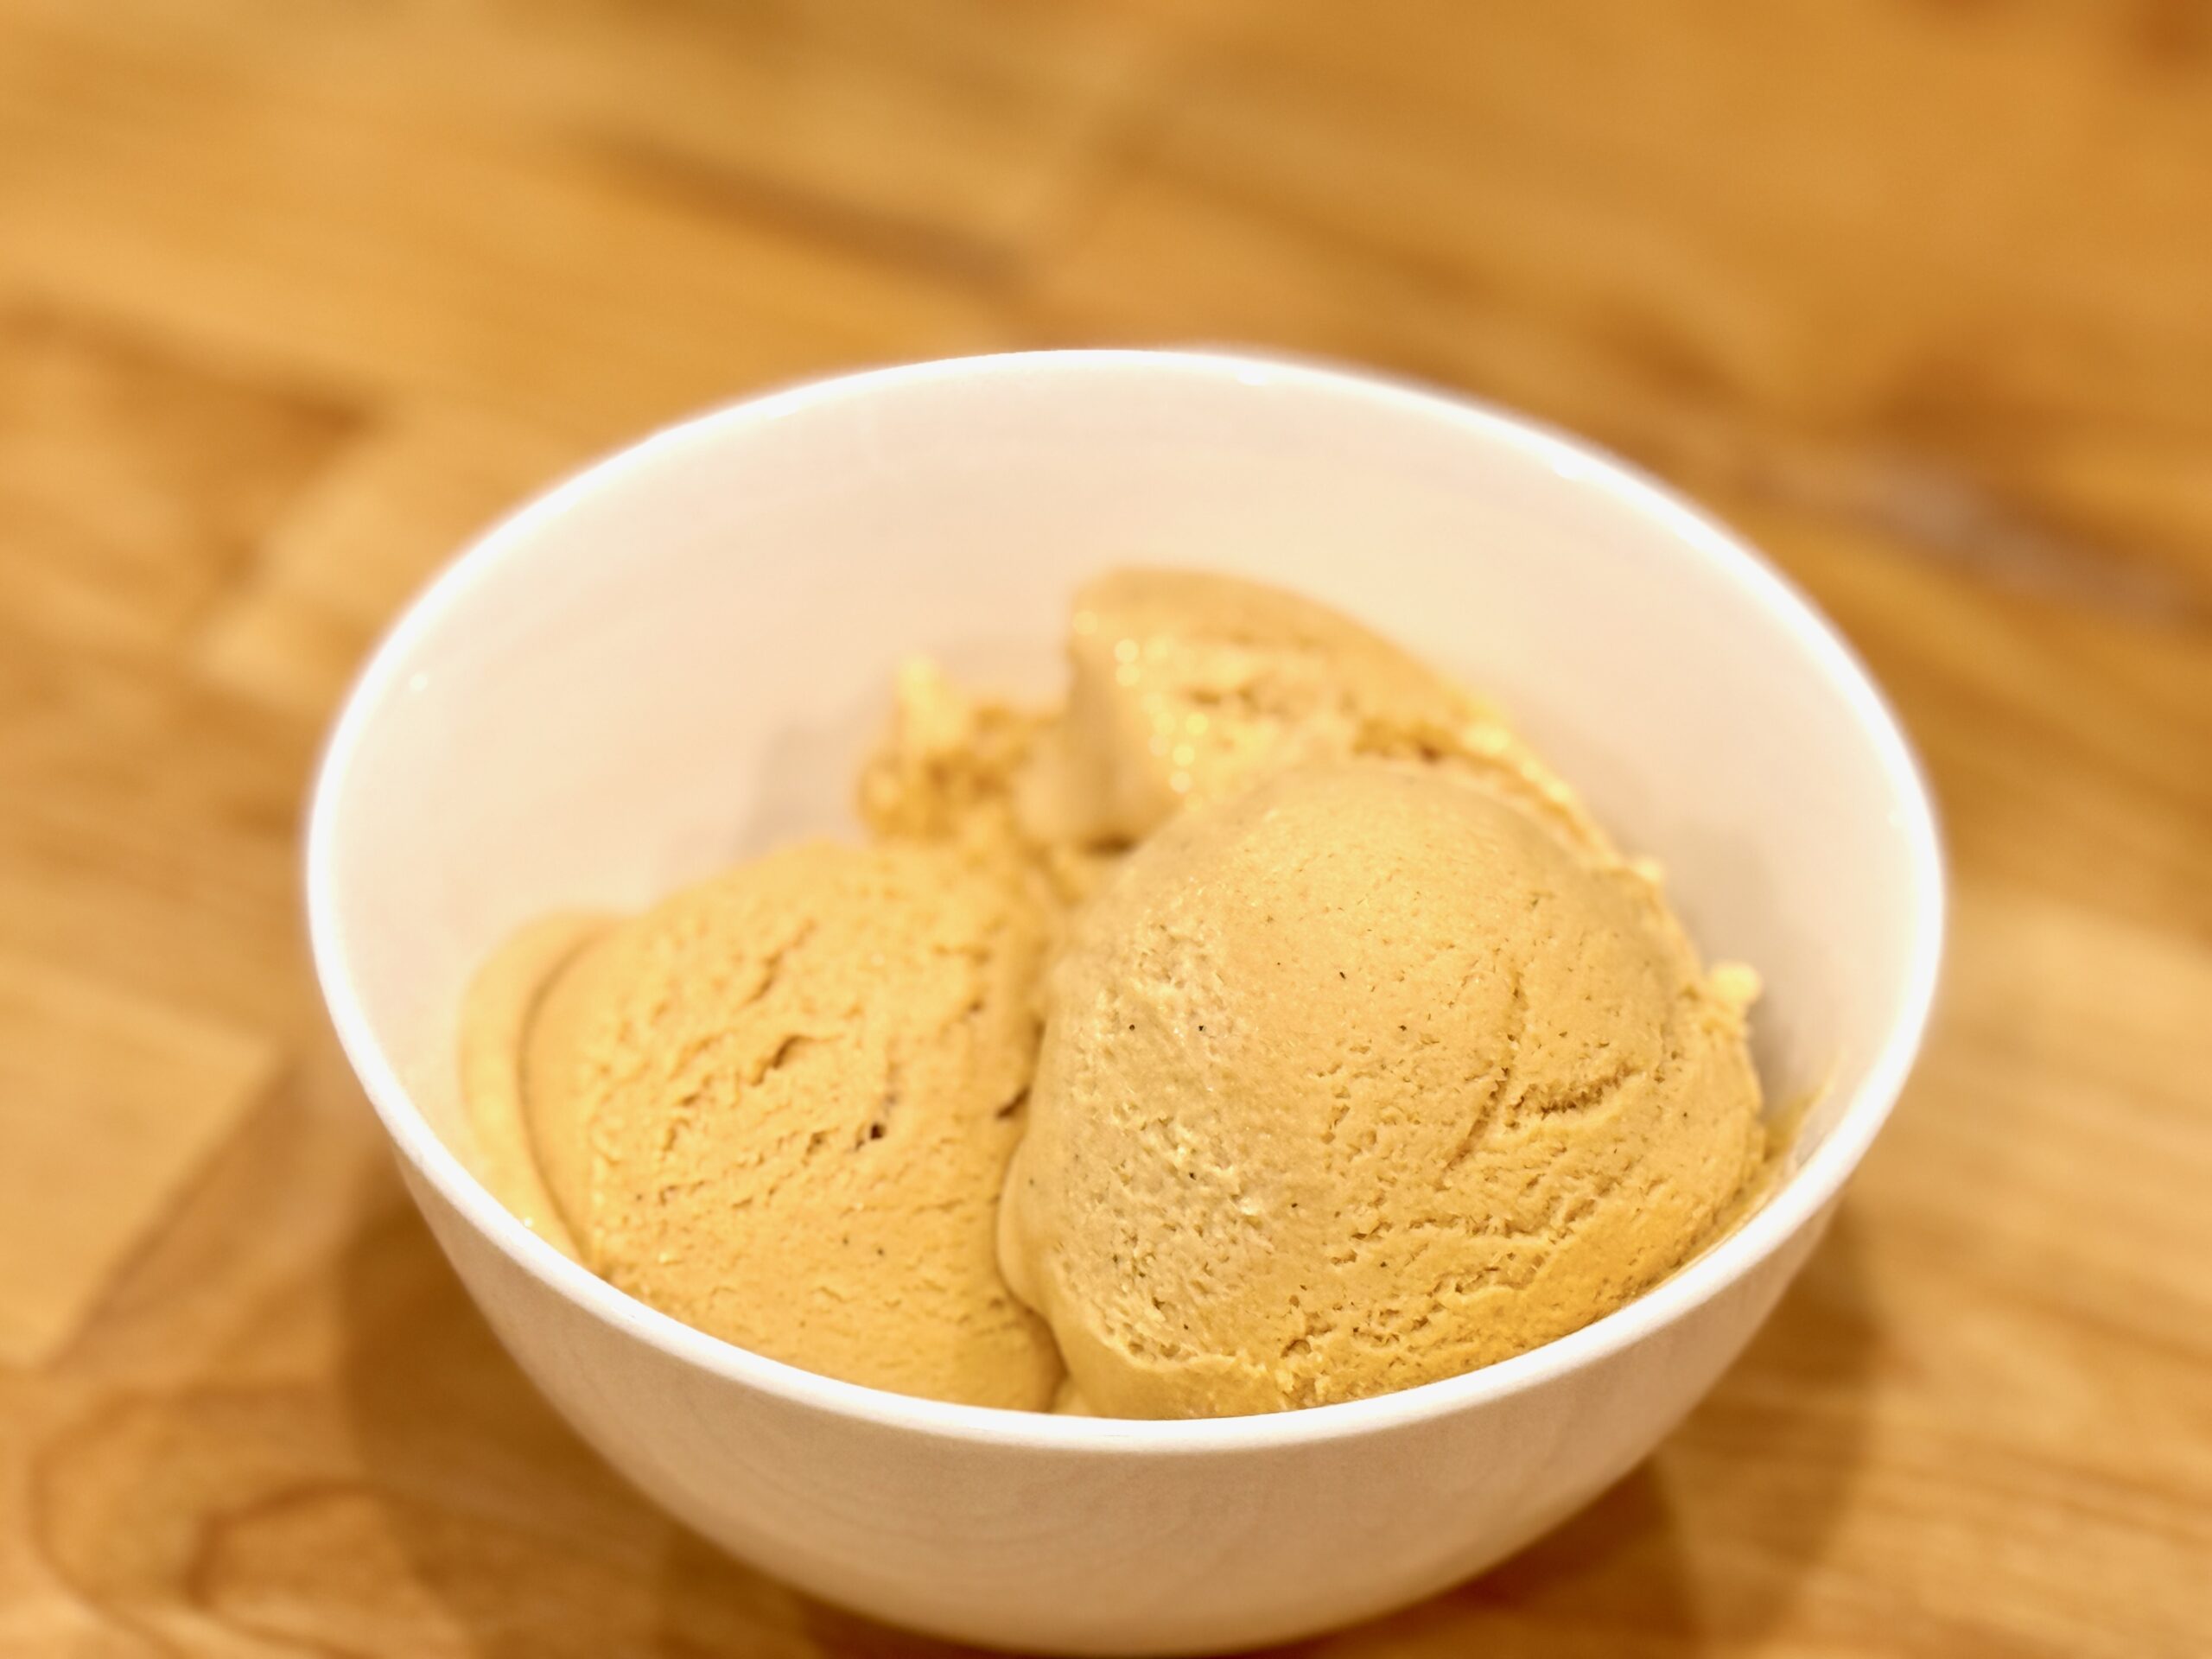
    Hearing the name German Chocolate Cake has always made me smile, especially knowing that this “not-so-German German Chocolate Cake” is actually an American invention. Its mild, sweet chocolate and caramel-laced coconut-pecan frosting were staples of family celebrations, and those flavors translate beautifully into ice cream. This version captures the essence of the classic cake with a softer milk chocolate base and a swirl of silky coconut-pecan frosting, giving you all the nostalgia in a cold, creamy scoop.


    Ingredients

      German Chocolate-Style Ice Cream Base

    • 1½ cups heavy cream
    • 1½ cups whole milk
    • ½ cup sugar
    • ¼ cup light brown sugar
    • 4 large egg yolks
    • ¼ tsp table salt
    • 2 oz milk chocolate, finely chopped
    • 2 oz semisweet chocolate (55–60%), finely chopped
    • 1 tbsp cocoa powder (Dutch-process preferred)
    • 1 tsp vanilla extract
    • Coconut–Pecan Frosting Swirl

    • ⅓ cup evaporated milk
    • ⅓ cup sugar
    • 2 tbsp butter
    • 1 large egg yolk
    • ⅛ tsp table salt
    • ¼ tsp vanilla extract
    • ⅓ cup sweetened shredded coconut, lightly toasted
    • ⅓ cup toasted pecans, chopped fine
    • Optional Mix-In

    • ½–1 cup brownie pieces, very cold or frozen

    Directions

    Make the Ice Cream Base

    In a medium saucepan, heat the heavy cream, whole milk, and cocoa powder over medium heat, whisking until smooth. Bring just to steaming.

    In a separate bowl, whisk together the egg yolks, sugar, brown sugar, and salt. Slowly ladle in about 1 cup of the hot dairy mixture while whisking constantly to temper the yolks.

    Return the tempered mixture to the saucepan. Stir over medium-low heat until the custard thickens slightly and reaches 175–178°F (80–81°C).

    Remove from heat and add the milk chocolate and semisweet chocolate. Let sit for 1 minute, then whisk smooth.

    Strain through a fine-mesh sieve into a clean container, stir in the vanilla, and refrigerate until fully chilled (at least 4 hours or overnight).

    Toast the Coconut

    Spread shredded coconut on a parchment-lined baking sheet. Toast at 325°F for 6–8 minutes, stirring once, until just lightly golden at the edges. Cool completely before using.

    Alternatively, dry-toast in a skillet over medium heat, stirring constantly, until lightly golden.

    Prepare the Coconut–Pecan Frosting Swirl

    In a small saucepan, whisk together evaporated milk, sugar, egg yolk, and salt. Add the butter and cook over medium-low heat, stirring constantly, until slightly thickened (4–6 minutes). Do not allow a hard boil.

    Remove from heat and stir in vanilla, toasted coconut, and chopped pecans.

    Cool completely, then refrigerate until thick, cold, and spoonable.

    Churn & Assemble

    Churn the chilled chocolate base in an ice cream maker until it reaches soft-serve texture.

    Spoon a layer of ice cream into a container, add thin ribbons of the coconut–pecan swirl, and gently feather it in with a spoon. Repeat layers until filled.

    If using brownies, fold them in during the layering stage. Freeze 3–4 hours to firm.


    Notes

    Preparation

    • Lightly toasting the coconut adds deeper caramel notes and improves texture, keeping it tender rather than chewy when frozen.
    • The chocolate blend (milk + semisweet + cocoa) recreates the classic sweetness of Baker’s German Sweet Chocolate.
    • The frosting swirl is intentionally softer and less sugary than traditional cake frosting so it remains scoopable when frozen.
    • For stronger coconut flavor, add an extra 1–2 tbsp toasted coconut to the swirl.
    • Altitude Adjustments: At high altitude (~4,750 ft), custards thicken slightly faster; monitor temperature closely. At sea level, follow standard heating cues.

    Serving Suggestions

    • Serve with warm brownie pieces or chocolate cake crumbs.
    • A drizzle of caramel sauce enhances the classic cake flavor.
    • Top with toasted coconut for visual flair and extra texture.

    Variations

    • Make it more caramel-forward by adding 1–2 tbsp caramel sauce during layering.
    • Increase pecans to ½ cup for a nuttier finish.
    • Swirl in a thin ribbon of chocolate fudge for a richer cake-like texture.

    Make-Ahead & Storage

    • Store ice cream in an airtight container for up to 1 week for best texture.
    • The frosting swirl can be made up to 3 days ahead and kept refrigerated.
    • For longer storage, press parchment directly against the ice cream surface to minimize ice crystals.
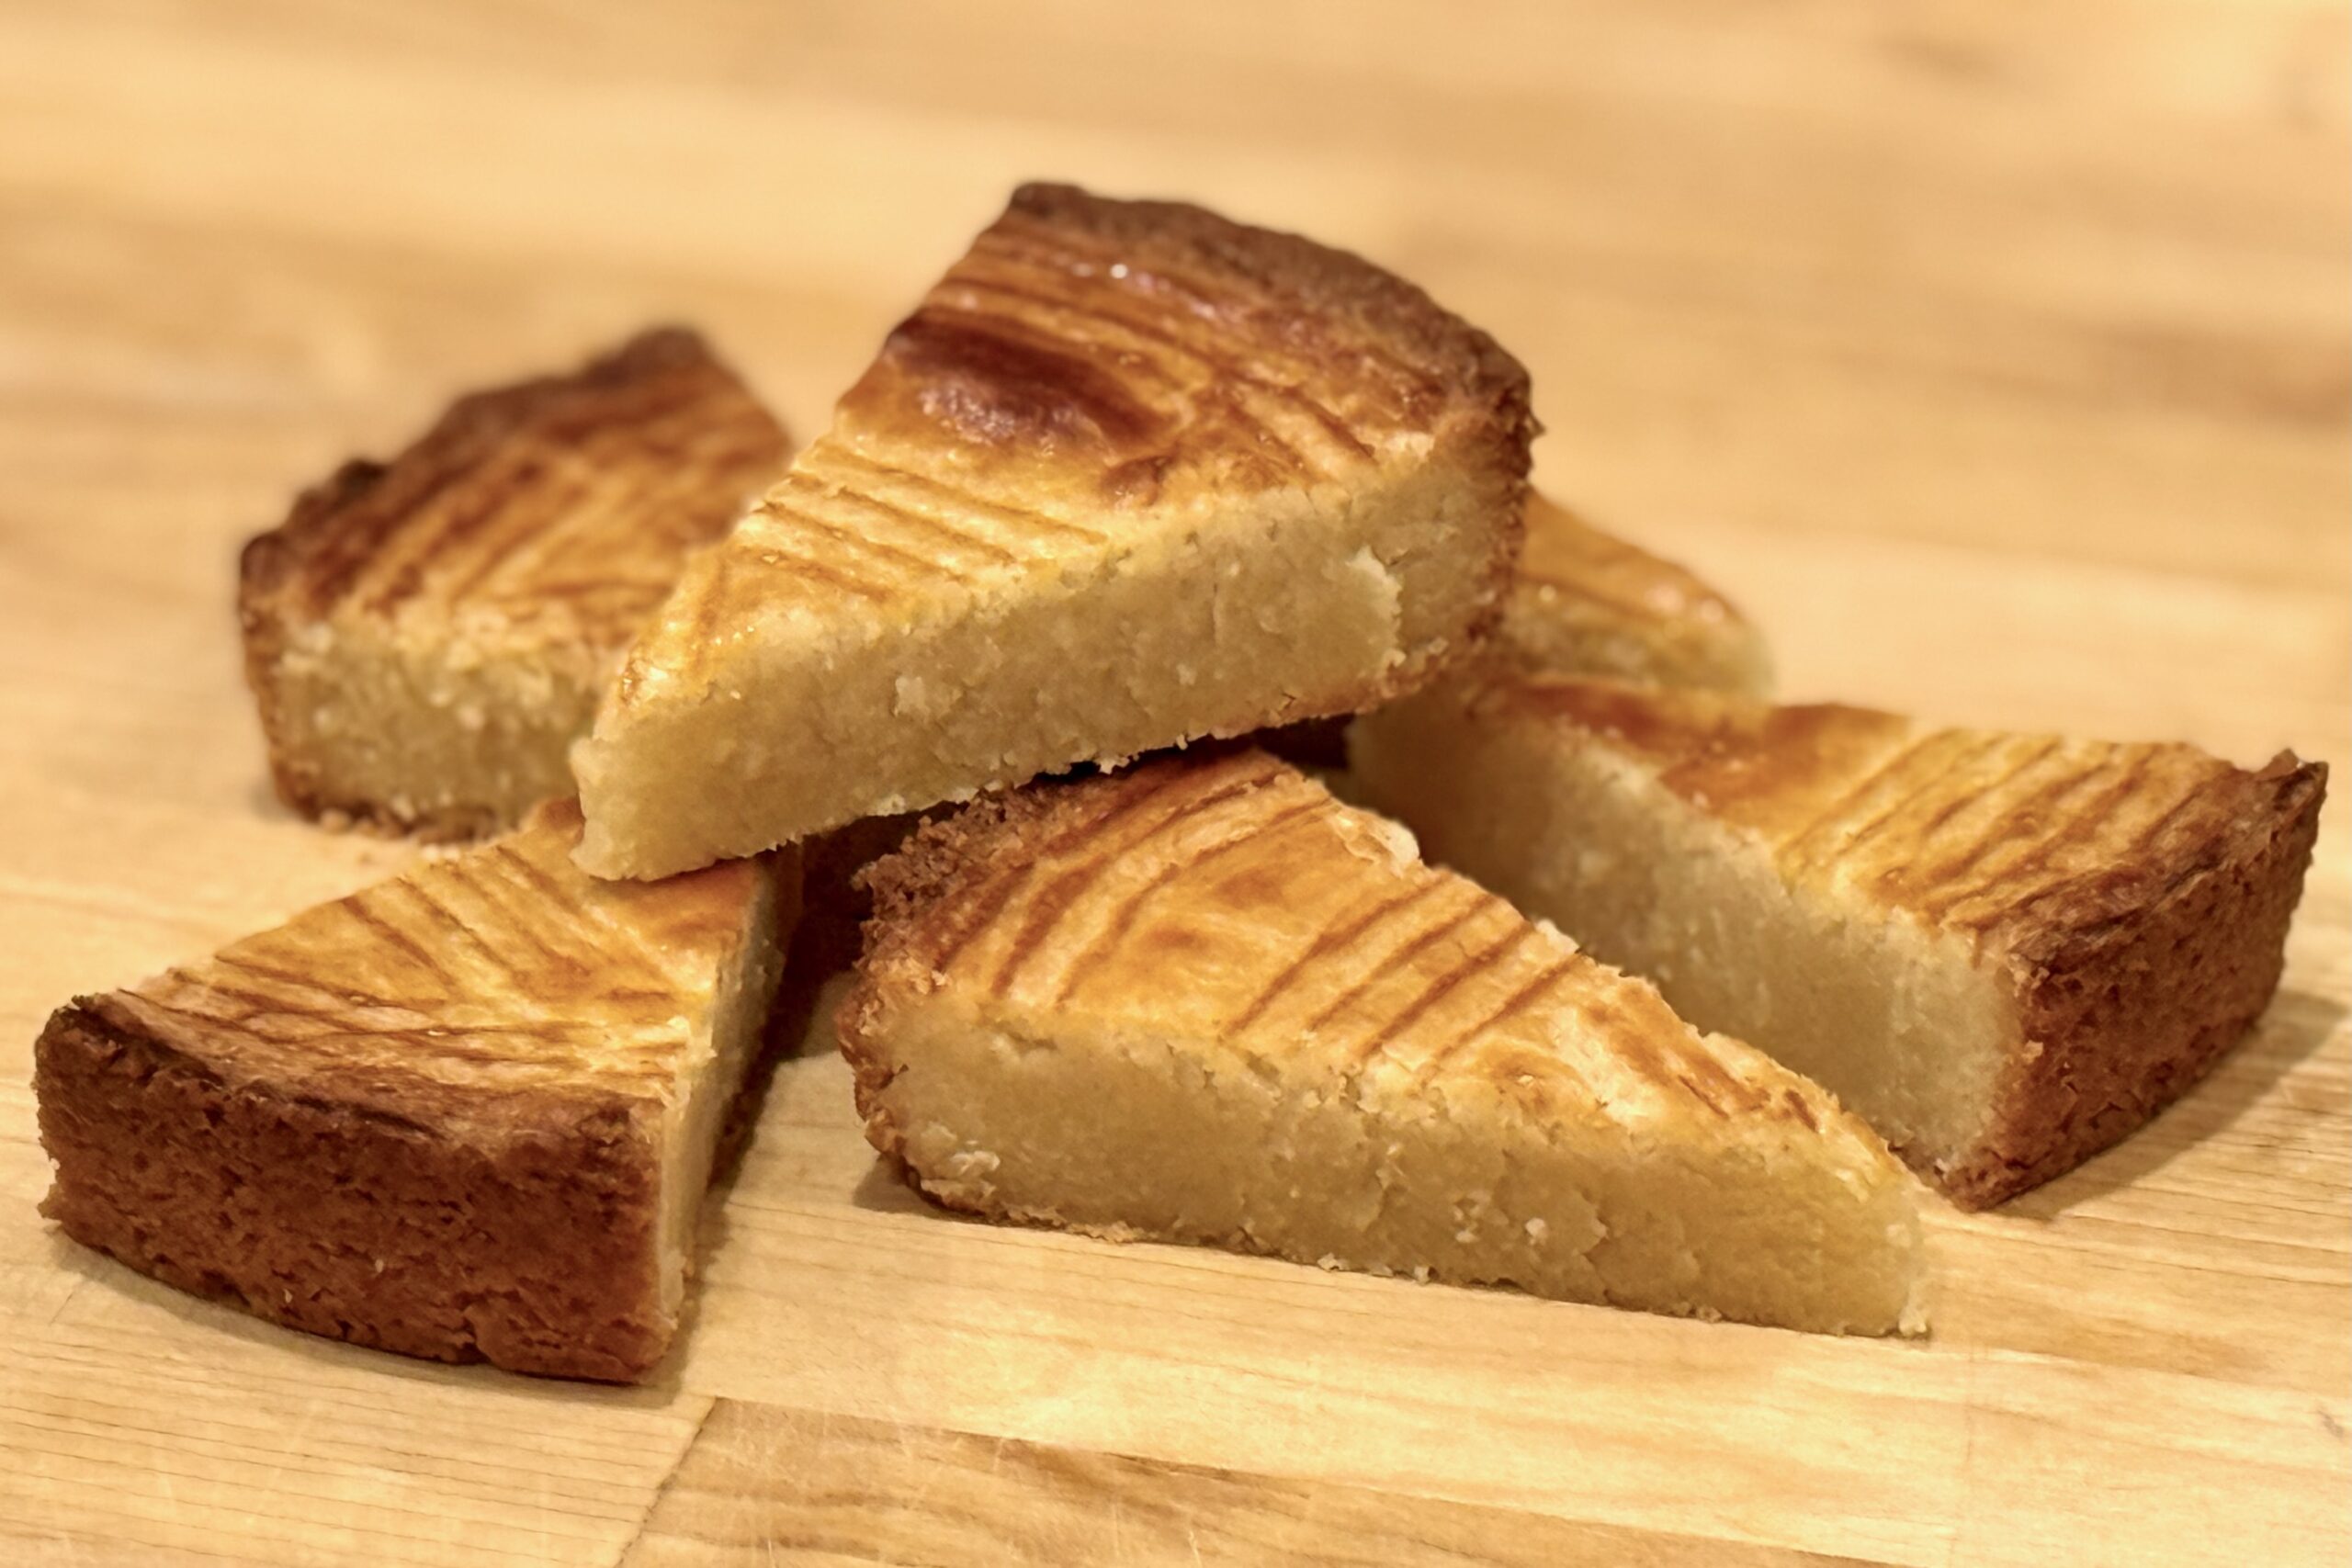
  • Boterkoek

    Boterkoek

    Oma Rasch was a spunky little lady, full of equal parts sugar and spice. I fondly remember the fun we had while I lived in her second-story row house on Krugerstraat in Den Helder, at the northernmost point of North Holland. Even in her 80s, she climbed the steep, treacherous staircase each day and set off on her bicycle to run errands. She was always willing to help as I worked to learn Dutch, once telling me, after I repeated a particularly colorful word, “There are no bad words, just words you shouldn’t use around nette mensen (respectable people).” A common treat in her home was homemade boterkoek—rich, golden, and fragrant. Whenever we walked in and smelled that buttery aroma, we knew we were in for ‘een lekker toetje’, a truly ‘heerlijk’ dessert.


    Ingredients

    • 1 cup (2 sticks) unsalted butter, at room temperature
    • 1 cup sugar
    • 2 cups all-purpose flour
    • ¼ tsp table salt
    • 1 large egg, lightly beaten, divided
    • ½ tbsp milk or buttermilk (for egg wash)
    • Optional Flavor Variations:

      • Citrus: Zest of ½ a lemon, lime, or orange, plus a small splash of juice
      • Almond: ½–1 tsp almond extract, topped with almond halves before baking
      • Speculaas: 1–1½ tsp speculaaskruiden (Dutch speculaas spice blend)
      • Ginger: 1–2 tbsp finely chopped crystallized ginger folded into the dough
      • Vanilla Sugar: 1–2 tbsp vanilla sugar mixed into the dough or sprinkled lightly on top

    Directions

    Prepare the Pan and Oven:

    Preheat the oven to 350°F (175°C). Butter an 8- or 9-inch round cake pan, then line the bottom with a circle of parchment paper. Lightly dust the sides with flour and tap out any excess. A springform or removable-bottom pan makes unmolding and slicing easier, but a standard pan works as well.

    Mix the Dough:

    In a small bowl, lightly beat the egg with a fork. Transfer about 1 tbsp of the beaten egg to a separate small bowl, add the milk or buttermilk, and whisk to combine for the egg wash. Set aside.

    In a medium mixing bowl, combine the butter and sugar. Beat just until smooth, creamy, and well combined (do not whip until light and fluffy—you want a dense boterkoek, not a cake). Add the remaining beaten egg (from the larger portion) and mix only until incorporated. If using any flavorings (citrus zest, almond extract, speculaaskruiden, crystallized ginger, or vanilla sugar), mix them in at this stage.

    Add the flour and salt. Using a spatula or wooden spoon, fold and stir just until no dry flour remains and the dough comes together. The dough will be stiff but cohesive; avoid overmixing.

    Chill the Dough:

    Scrape the dough onto a sheet of plastic wrap and pat it into a thick disk. Wrap tightly and refrigerate for 20–30 minutes, until firm but still pliable. Overchilling will make the dough harder to press evenly into the pan.

    Press, Crosshatch, and Glaze:

    Transfer the chilled dough to the prepared pan. Using your fingertips or the back of a spoon, press it evenly into the pan, smoothing the surface and making sure it reaches all the way to the edges.

    Using the tines of a fork, lightly score a crosshatch pattern across the top of the dough. For the cleanest lines, wipe the fork between strokes as needed.

    Gently brush the surface with a thin, even layer of the egg wash. Avoid pooling, especially around the edges, which can create hard spots as it bakes.

    Bake:

    Bake at 350°F (175°C) for 25–35 minutes, until the edges are deep golden brown and the center is just set and a lighter golden color. The top should not puff dramatically. Begin checking around 25 minutes, rotating the pan if needed for even browning. The boterkoek will continue to firm as it cools.

    Cool, Rest, and Serve:

    Remove the pan from the oven and place it on a wire rack. Let the boterkoek cool completely in the pan. Once cool, run a thin knife around the edge to loosen, then invert or release from the pan and remove the parchment.

    For the best flavor and texture, allow the boterkoek to rest for several hours or overnight before slicing. Cut into small wedges (it is rich) and serve at room temperature.


    Notes

    Preparation

    • Use unsalted butter for the cleanest flavor and better control over salt. The butter should be cool room temperature—soft enough to press a finger into, but not greasy or melting.
    • Be careful not to over-aerate the butter and sugar; mixing just until smooth (rather than light and fluffy) keeps the boterkoek dense and tender, as it should be.
    • For easy release and clean slices, butter the pan and line the bottom with parchment. A springform or removable-bottom pan is especially handy if you plan to unmold it for serving on a platter.
    • Approximately equal amounts of butter, sugar, and flour by weight are used in this recipe, which is traditional for Dutch boterkoek and gives it its rich, close-crumb texture.
    • Altitude adjustments (high altitude ~4,750 ft / 1,450 m): Because this is a dense, non-leavened cake, ingredient changes are usually unnecessary. Begin checking for doneness a few minutes early and remove from the oven once the edges are deep golden and the center is just set. At sea level, follow the base recipe and bake until the center is just set and no longer looks wet.

    Serving Suggestions

    • Cut into small wedges or narrow bars—boterkoek is rich and meant to be enjoyed in modest slices.
    • Serve alongside afternoon coffee, as is common in Dutch homes.
    • For a simple dessert, pair with lightly sweetened whipped cream and fresh berries or stone fruit.
    • Include on a cookie or dessert tray with other Dutch favorites such as speculaas or stroopwafels.

    Variations

    • Citrus Boterkoek: Add the finely grated zest of ½ a lemon, lime, or orange, plus a small splash of juice, to the dough along with the egg. This adds a bright, fragrant edge that balances the richness.
    • Almond Boterkoek: Add ½–1 tsp almond extract to the dough, then press blanched or sliced almonds gently into the top before baking. Almond is a very traditional flavor; start with the smaller amount of extract and increase to taste.
    • Speculaas Boterkoek: Add 1–1½ tsp speculaaskruiden (Dutch speculaas spice blend) with the flour for a warm, spiced version that’s especially nice around the holidays.
    • Ginger Boterkoek: Fold 1–2 tbsp finely chopped crystallized ginger into the dough before pressing it into the pan for pockets of sweet, spicy heat.
    • Vanilla Sugar Boterkoek: Replace 1–2 tbsp of the sugar with vanilla sugar, or sprinkle a light dusting of vanilla sugar over the top right after baking for extra aroma.

    Make-Ahead & Storage

    • Boterkoek is an excellent make-ahead dessert. The flavor and texture actually improve after resting for several hours or overnight.
    • Once completely cool, wrap tightly or store in an airtight container at room temperature for up to 3–4 days.
    • For longer storage, wrap wedges or the whole boterkoek well and freeze for up to 2 months. Thaw at room temperature in the wrapping to preserve moisture.
    • If the surface softens slightly after storage, a brief rest uncovered at room temperature will help the top regain a gentle firmness.
  • Bananas Foster

    Bananas Foster

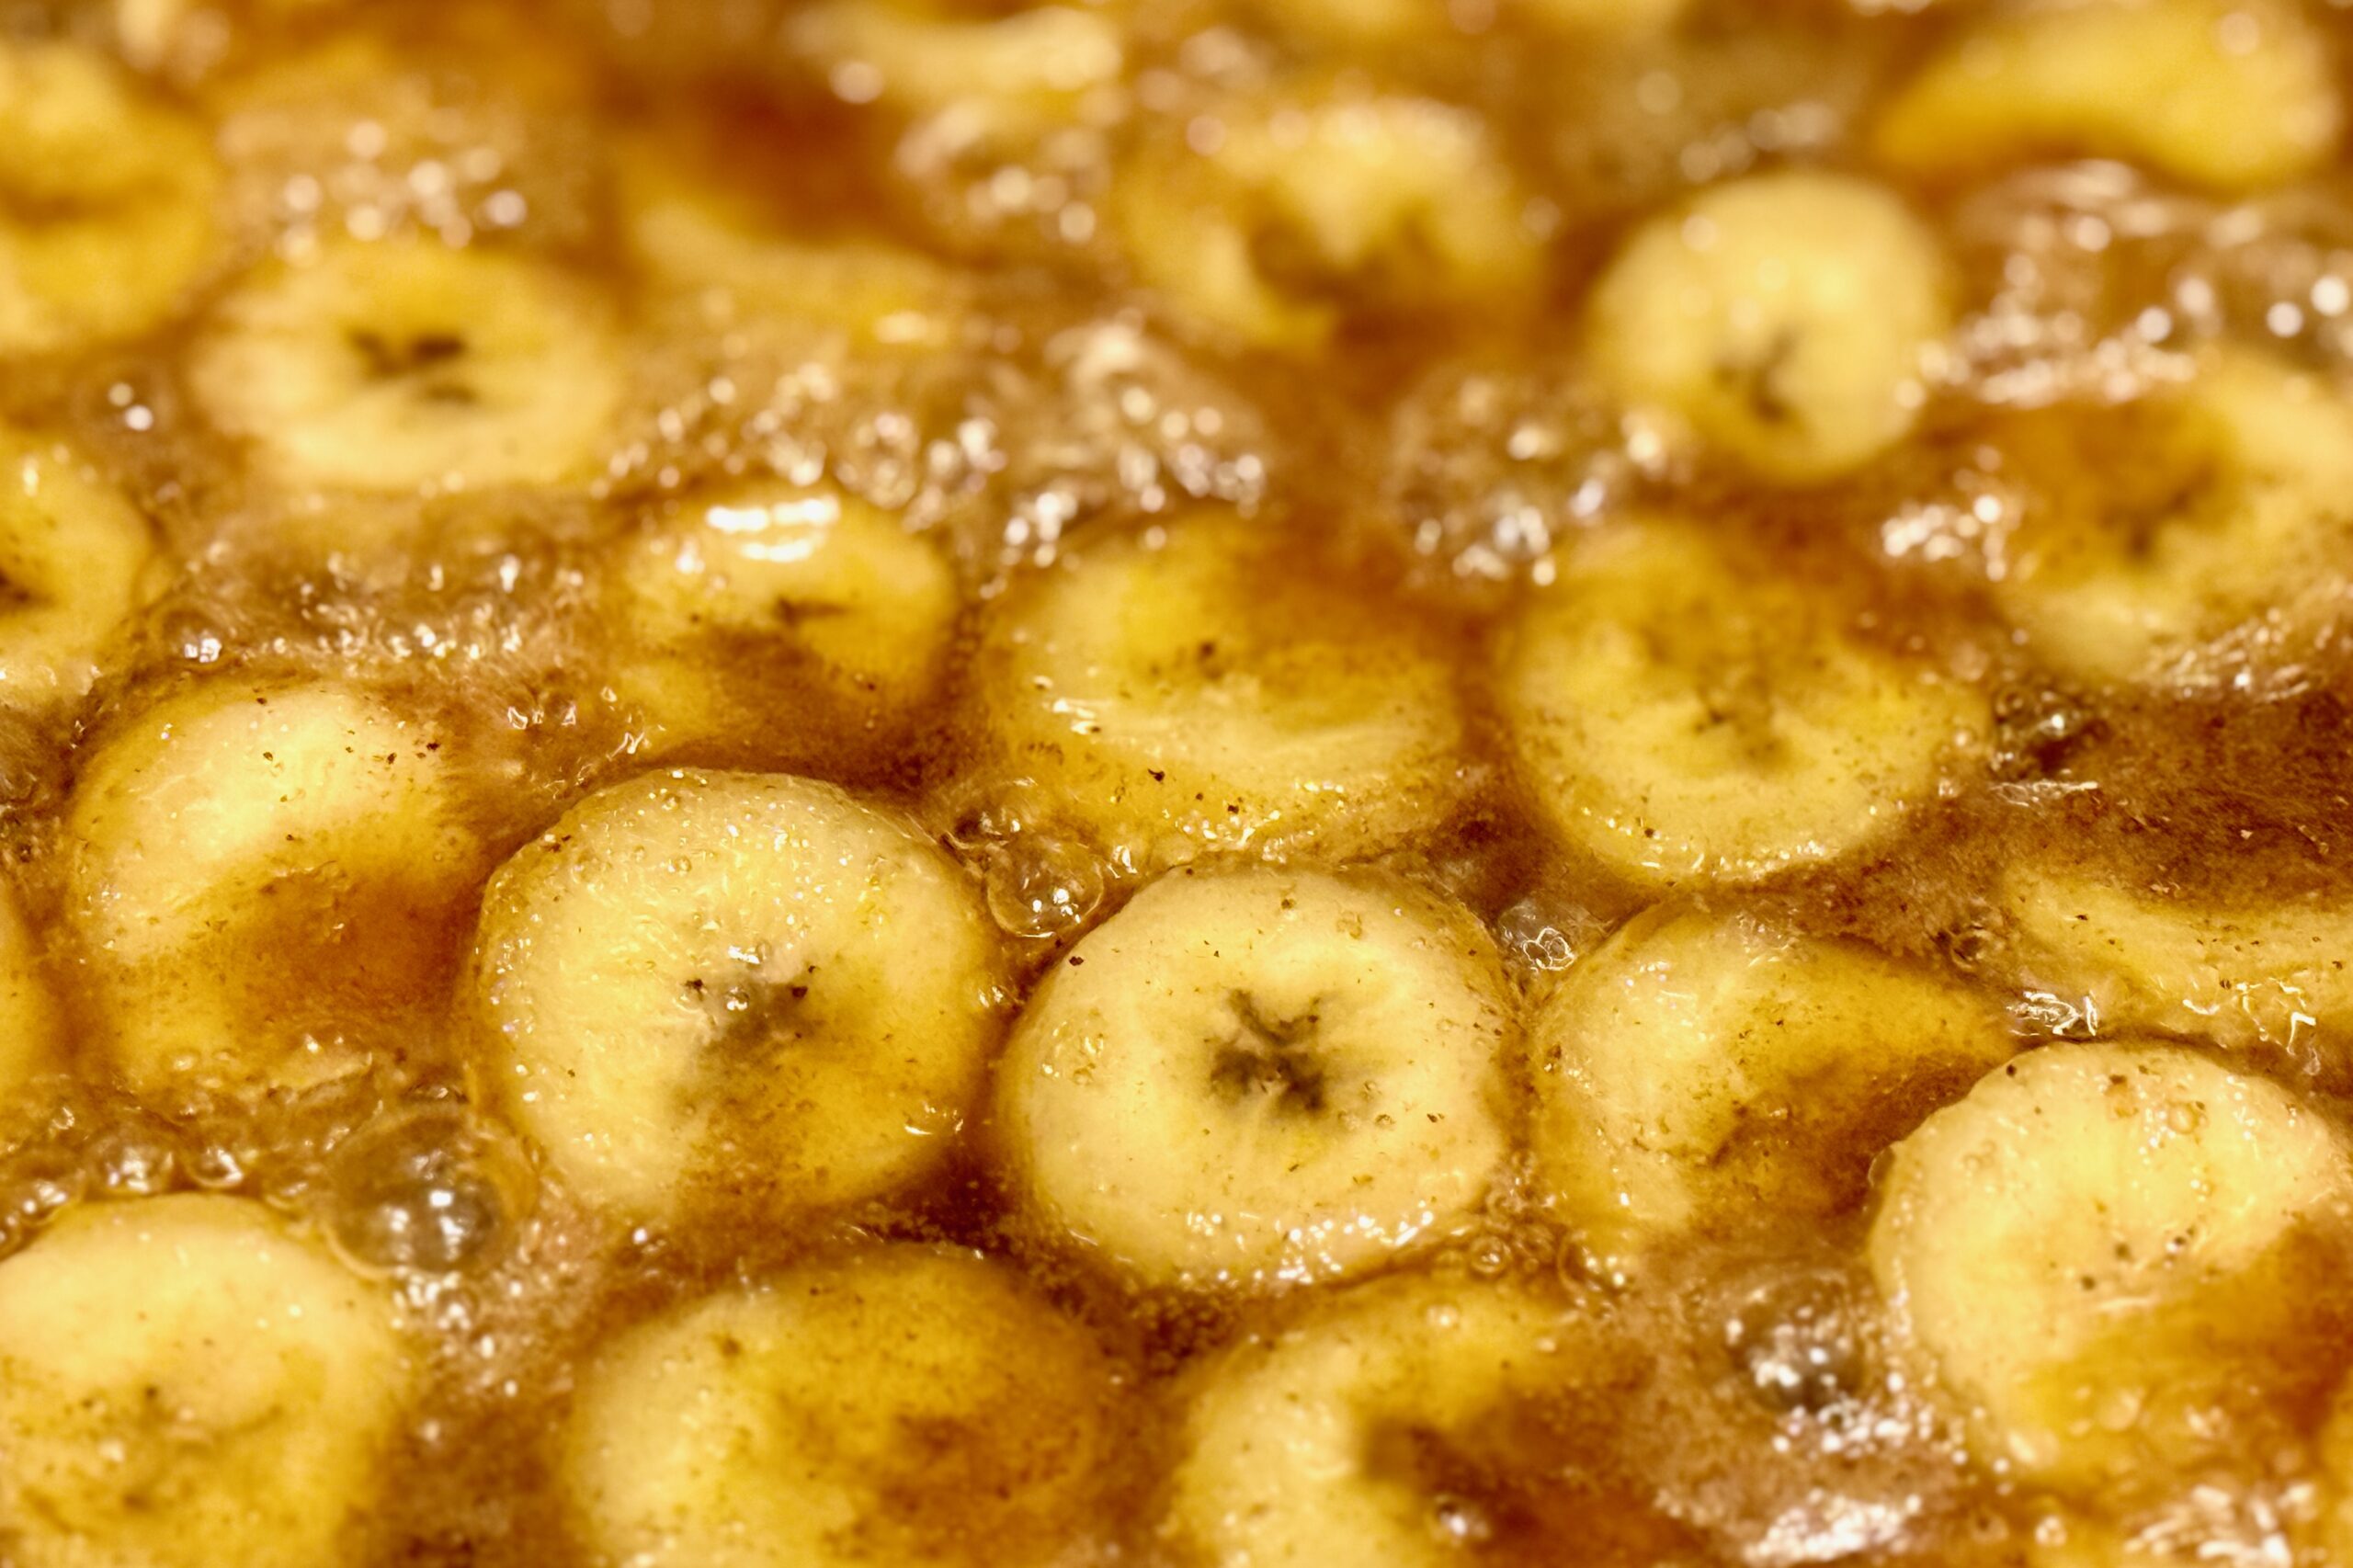
    Rich, buttery, and unmistakably indulgent, this Bananas Foster brings a taste of New Orleans to your table. Created in 1951 at Brennan’s in the French Quarter—at the height of the city’s banana-import boom and named for civic leader Richard Foster—it’s crafted from ripe bananas, rich caramel, rum, and banana liqueur. The flambéed presentation still thrills diners today, while the warm bananas and syrupy sauce spooned over creamy vanilla ice cream evoke both drama and comfort. In our family, it’s a go-to when we want something classic, bold, and effortlessly shared—every bite layered with caramel sweetness, a hint of cinnamon, and the smooth warmth of rum, all wrapped up in an experience that can make a simple dinner feel like a celebration.


    Ingredients

    • 2 tbsp butter
    • ¼ cup packed brown sugar
    • ⅛ tsp ground cinnamon
    • 1 banana, firm-ripe, sliced lengthwise or into thick rounds
    • ¼ cup crème de banane (banana liqueur)
    • 3 tbsp Grand Marnier (or other orange liqueur)
    • 3 tbsp dark or amber rum
    • vanilla ice cream, for serving

    Directions

    Prepare the Sauce:

    In a large sauté pan over medium heat, melt butter. Stir in brown sugar and cinnamon, cooking until the sugar dissolves and the mixture bubbles into a smooth caramel (1–2 minutes).

    Add the Liqueurs and Bananas:

    Stir in crème de banane and Grand Marnier. Bring just to a gentle boil, then add sliced banana. Cook for about 2–3 minutes, turning occasionally until the bananas are lightly caramelized but still hold their shape.

    Flambé the Rum:

    Remove the pan from the flame before adding rum. Carefully ignite using a long lighter or match, allowing the flames to subside naturally. Return to the stovetop and simmer for 30–60 seconds until the raw alcohol flavor cooks off and the sauce slightly thickens.

    Serve:

    Spoon the warm bananas and caramel sauce over vanilla ice cream. Serve immediately.


    Notes

    Preparation

    • Use firm, ripe bananas so they hold their shape during cooking.
    • For a deeper caramel flavor, cook the sugar mixture an extra minute before adding the liqueurs.
    • If you prefer not to flambé, simmer the rum gently for a few minutes to cook off the alcohol instead.

    Serving Suggestions

    • Serve over classic vanilla ice cream, or try butter pecan for extra richness.
    • For a brunch twist, serve over pancakes, waffles, or French toast.
    • Top with toasted pecans or a light sprinkle of sea salt for added texture and contrast.

    Variations

    • For a tropical version, substitute some or all of the rum with coconut rum.
    • Add a splash of pineapple juice for a lighter, fruitier finish.
    • Use plantains instead of bananas for a heartier, more caramel-forward dessert.

    Make-Ahead & Storage

    • This dessert is best prepared and served immediately for optimal texture and presentation.
    • If you need to make ahead, prepare the sauce up to the flambé step, cool, and refrigerate up to 1 day; rewarm gently, add fresh bananas, and finish before serving.
  • Southern Sweet Potato Ice Cream

    Southern Sweet Potato Ice Cream

    Hearing the name Southern Sweet Potatoes has always made me smile—especially because it carries the warmth of Great Grandma Lena’s kitchen and the familiar aroma of roasted sweet potatoes, brown sugar, and butter. Turning those same comforting flavors into an ice cream feels a little unexpected, but the result is pure Southern magic: a silky sweet-potato custard ribboned with buttery praline cream and studded with crisp pecan pralines. It’s everything we love about the holiday casserole—just in a frozen, spoon-ready form.


    Ingredients

    Sweet Potato Ice Cream Base

    • 1 cup roasted sweet potato purée (from about 1 large roasted sweet potato)
    • 1 cup heavy cream
    • 1 cup whole milk
    • ¾ cup brown sugar
    • 4 large egg yolks
    • 2 tbsp unsalted butter
    • 2 tbsp buttermilk
    • 1 tsp vanilla extract
    • ½ tsp table salt
    • ⅛ tsp cinnamon (optional; keep subtle)
    • ⅛ tsp xanthan gum (optional, for extra smooth texture)

    Praline-Cream Swirl

    • ¼ cup unsalted butter
    • 6 tbsp brown sugar
    • 2 tbsp heavy cream
    • ½ tsp table salt
    • 1 tsp vanilla extract

    Mix-Ins

    • 1 cup chopped pecan pralines, frozen before use

    Directions

    Prepare the Sweet Potato Purée

    Roast a whole sweet potato at 400ºF (200ºC) until very soft, about 45–60 minutes. Scoop out the flesh and purée until completely smooth. Measure 1 cup and set aside.

    Make the Custard Base

    In a medium saucepan, whisk together brown sugar, egg yolks, and salt until well combined. Add the milk and cream and cook over medium heat, stirring constantly, until the custard thickens enough to coat the back of a spoon (170–175ºF / 77–80ºC). Do not boil.

    Remove from heat and whisk in the butter, sweet potato purée, vanilla, buttermilk, and cinnamon (if using). If using xanthan gum, sprinkle it in while blending with an immersion blender to avoid clumping.

    Chill the base for at least 4 hours or overnight.

    Make the Praline-Cream Swirl

    In a small saucepan, melt the butter with the brown sugar and cream. Simmer 1–2 minutes until lightly thickened. Remove from heat, stir in salt and vanilla, and cool completely. Refrigerate until cold.

    Churn & Assemble

    Churn the chilled sweet potato custard in an ice cream maker according to manufacturer instructions. When nearly finished, fold in the chopped frozen praline pecans.

    As you transfer the ice cream to a container, alternate layers of sweet potato ice cream and thin ribbons of praline-cream swirl. Gently marble with a butter knife and freeze until firm.


    Notes

    Preparation

    • Roasting sweet potatoes concentrates their natural sweetness and deepens flavor.
    • Adding buttermilk after cooking the custard keeps its flavor bright and prevents curdling.
    • Pecan pralines should be fully frozen before folding in to maintain crunch.
    • Keep the praline-cream swirl cold but pourable for clean ribbons.

    Serving Suggestions

    • Serve on its own as a holiday-inspired treat.
    • Pair with pecan pie, pumpkin pie, or warm apple crisp.
    • Add extra pralines or a warm caramel drizzle for richer servings.
    • Great with the Praline-Cream Swirl or just sprinkled with chopped pralines or roasted pecans.

    Variations

    • Add a toasted marshmallow swirl for a “sweet potato casserole” twist.
    • Use browned butter instead of regular butter in the custard for deeper caramel notes.
    • Swap praline pecans for toasted pecans if you prefer less sweetness.

    Make-Ahead & Storage

    • Ice cream keeps up to 2 months in an airtight container.
    • Store praline-cream swirl separately up to 1 week refrigerated or 2 months frozen.
    • Let ice cream sit at room temperature 5–10 minutes before scooping for best texture.
  • Crêpes

    Crêpes

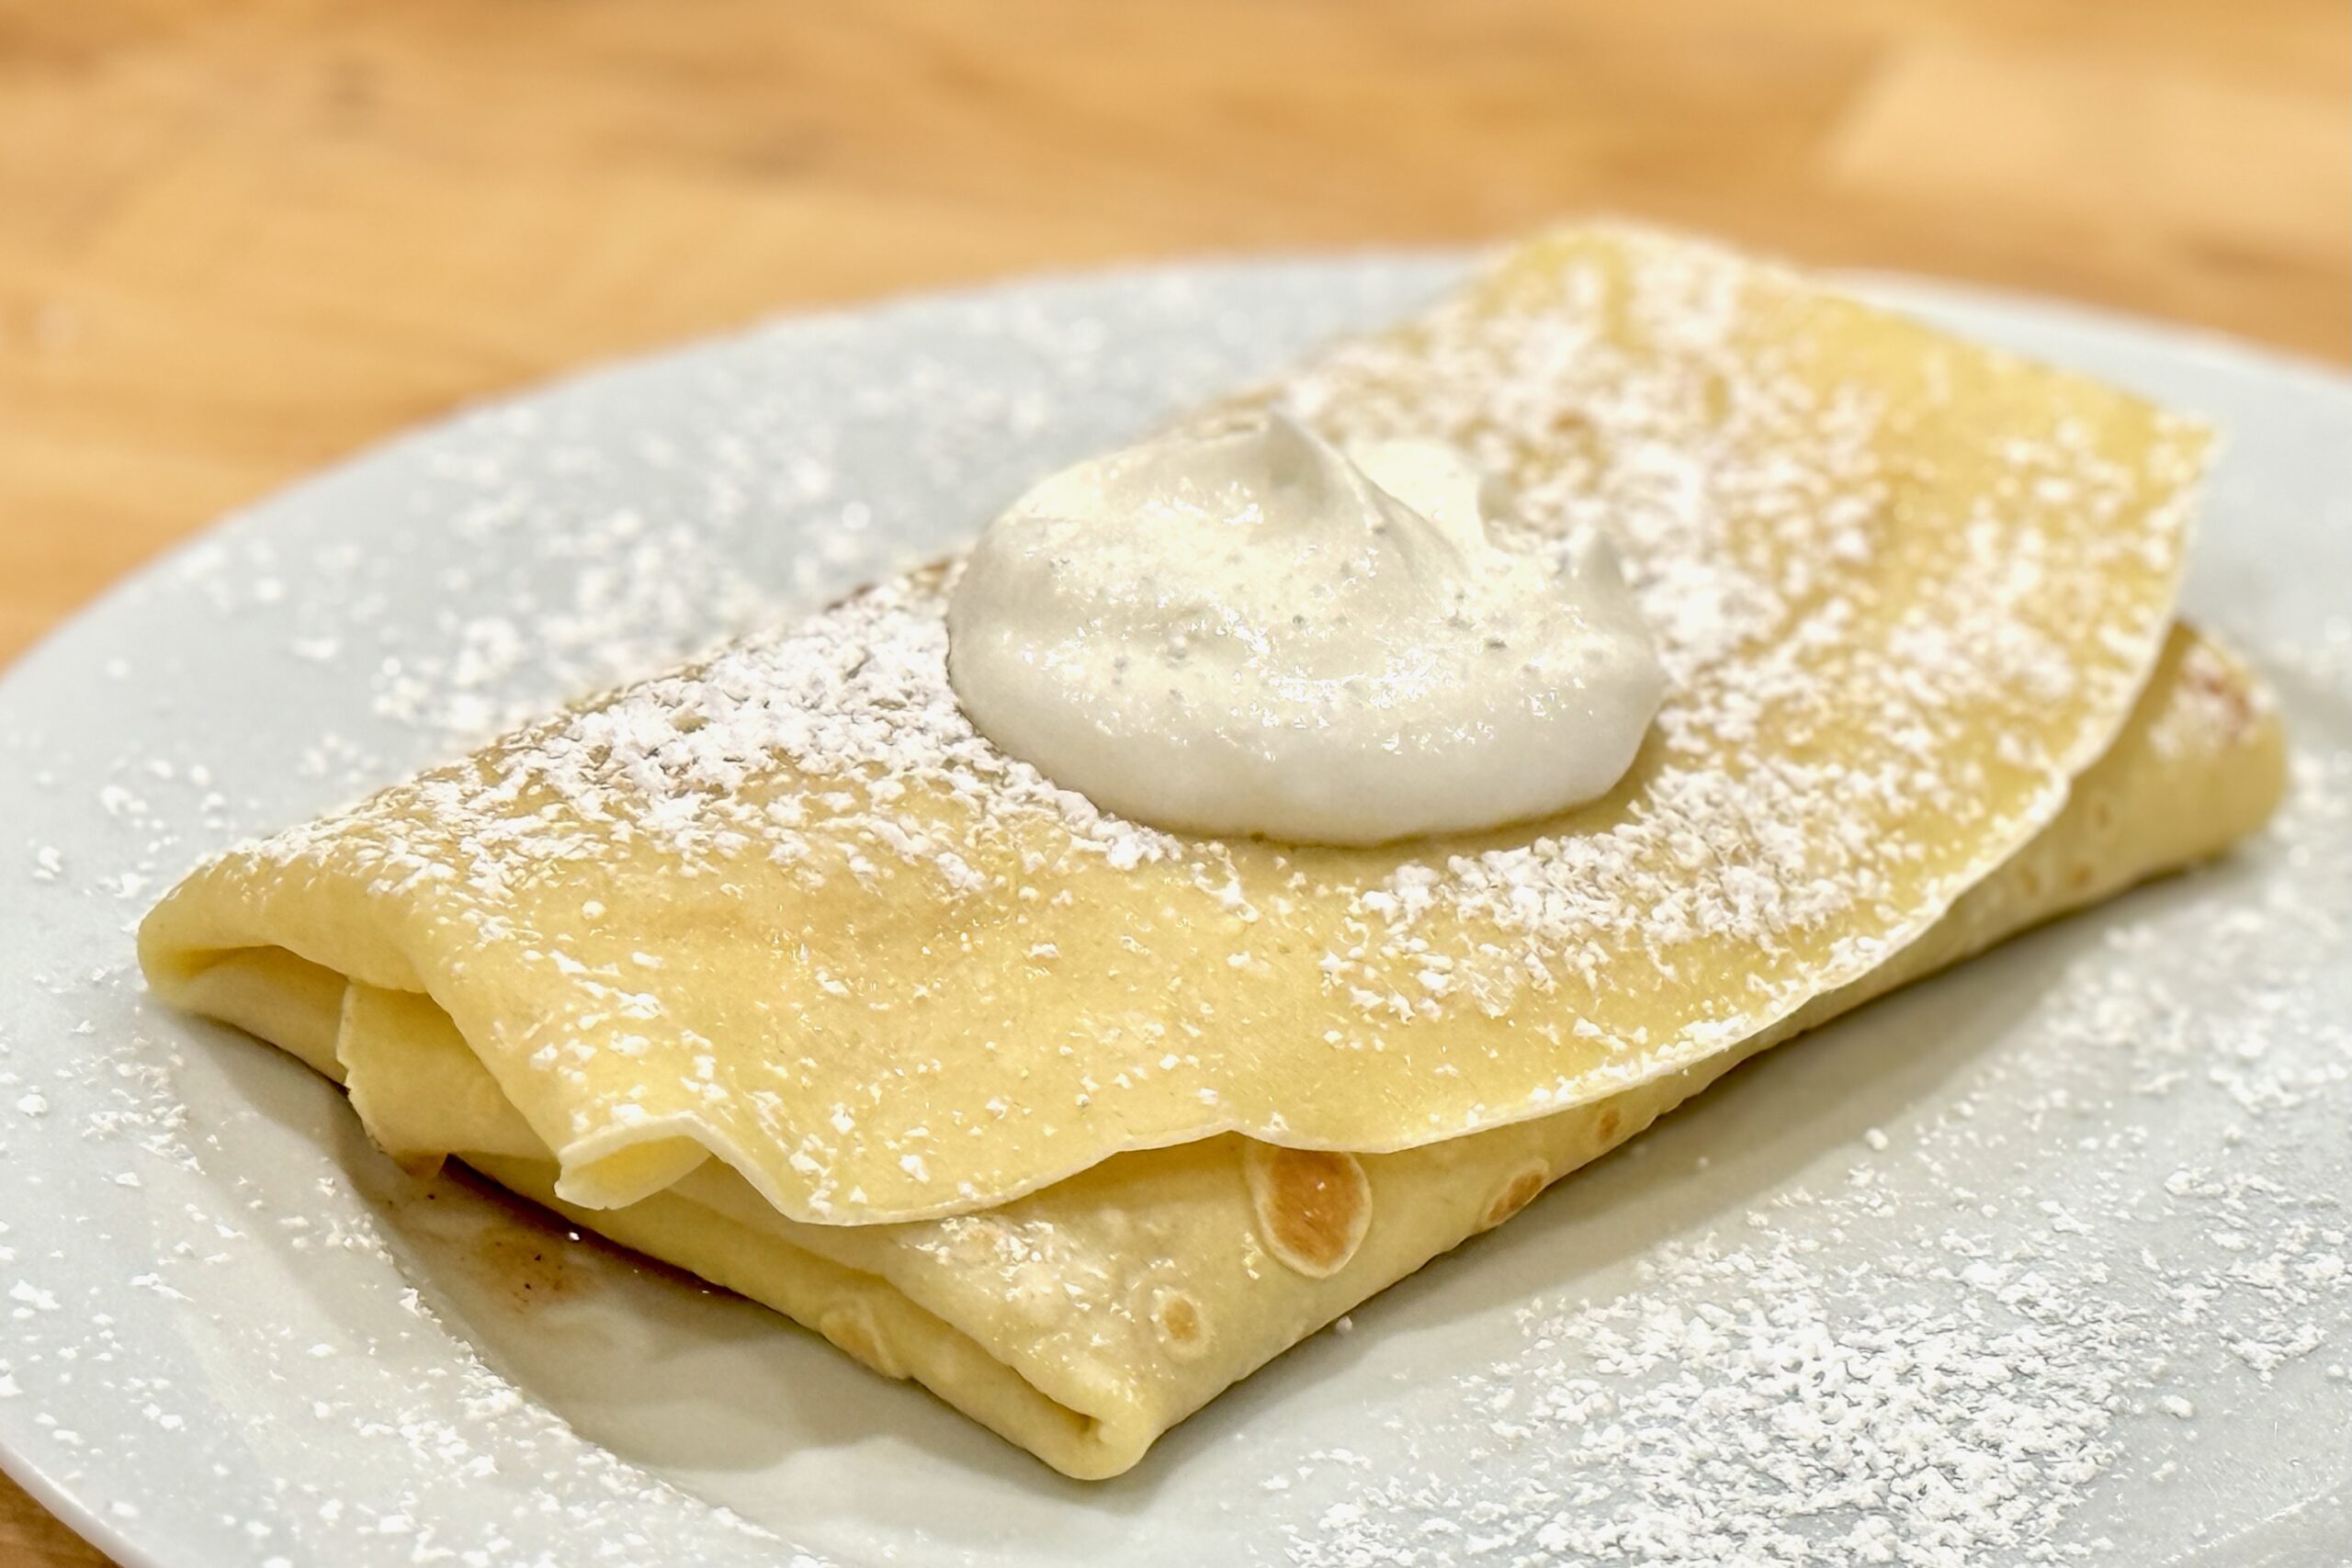
    Light, delicate, and endlessly versatile, these classic French crêpes strike the perfect balance between tender centers and gently crisped edges. This refined version builds on traditional technique with small upgrades—like melted butter in the batter, a touch of sugar for browning, and a splash of water for that signature lace-like edge—making them ideal for both sweet and savory fillings.


    Ingredients

    • 4 large eggs
    • 1½ cups milk
    • ¼ cup water
    • 1¼ cups flour
    • ¼ tsp table salt
    • 2 tbsp melted butter
    • 1 tsp sugar (optional, for browning)

    Directions

    Make the Batter

    In a large mixing bowl, whisk together flour, salt, and sugar (if using).

    Make a well in the center. Add eggs and about half of the milk. Whisk from the center outward, slowly drawing in the flour until a smooth, thick paste forms.

    Add remaining milk and the water; whisk until completely smooth.

    Whisk in melted butter until incorporated.

    Rest the Batter

    Strain through a fine-mesh sieve to remove any remaining lumps. Let the batter rest for at least 30 minutes, or refrigerate up to overnight. If resting overnight, thin with a splash of milk before cooking if it has thickened.

    Cook the Crêpes

    Heat a nonstick or crêpe pan over medium heat and brush lightly with melted butter.

    Pour about ¼ cup of batter into the center of the pan and immediately swirl to coat the bottom in a thin, even layer.

    Cook until the top surface looks dry and the edges lift from the pan. Flip and cook briefly on the second side.

    Repeat, brushing the pan with more butter as needed.


    Notes

    Preparation

    • Resting the batter relaxes gluten and improves spreadability and tenderness.
    • The splash of water helps create crisp, lacy edges—a classic French technique.
    • For savory crêpes, omit the sugar; for dessert crêpes, you may increase it to 2 tsp.
    • Altitude (~4,750 ft): Batter may thicken slightly during resting. Add 1–2 tbsp extra milk as needed before cooking.

    Serving Suggestions

    • Sweet: lemon and sugar, fresh berries, Nutella, jam, honey, or pastry cream.
    • Savory: ham and cheese, sautéed mushrooms, spinach and gruyère, or smoked salmon with crème fraîche.

    Variations

    • Add ½ tsp vanilla or 1 tbsp rum for dessert crêpes.
    • Swap ¼ cup of milk for ¼ cup heavy cream for richer, more custardy crêpes.
    • Use buckwheat flour for a rustic Breton-style crêpe (best for savory fillings).

    Make-Ahead & Storage

    • Refrigerate cooked crêpes for up to 3 days with parchment between each layer.
    • Freeze for up to 2 months; thaw and warm briefly in a pan before serving.
    • Batter can be made up to 24 hours ahead; stir and thin with milk before cooking if needed.
  • German Chocolate Cake — From Scratch

    German Chocolate Cake — From Scratch

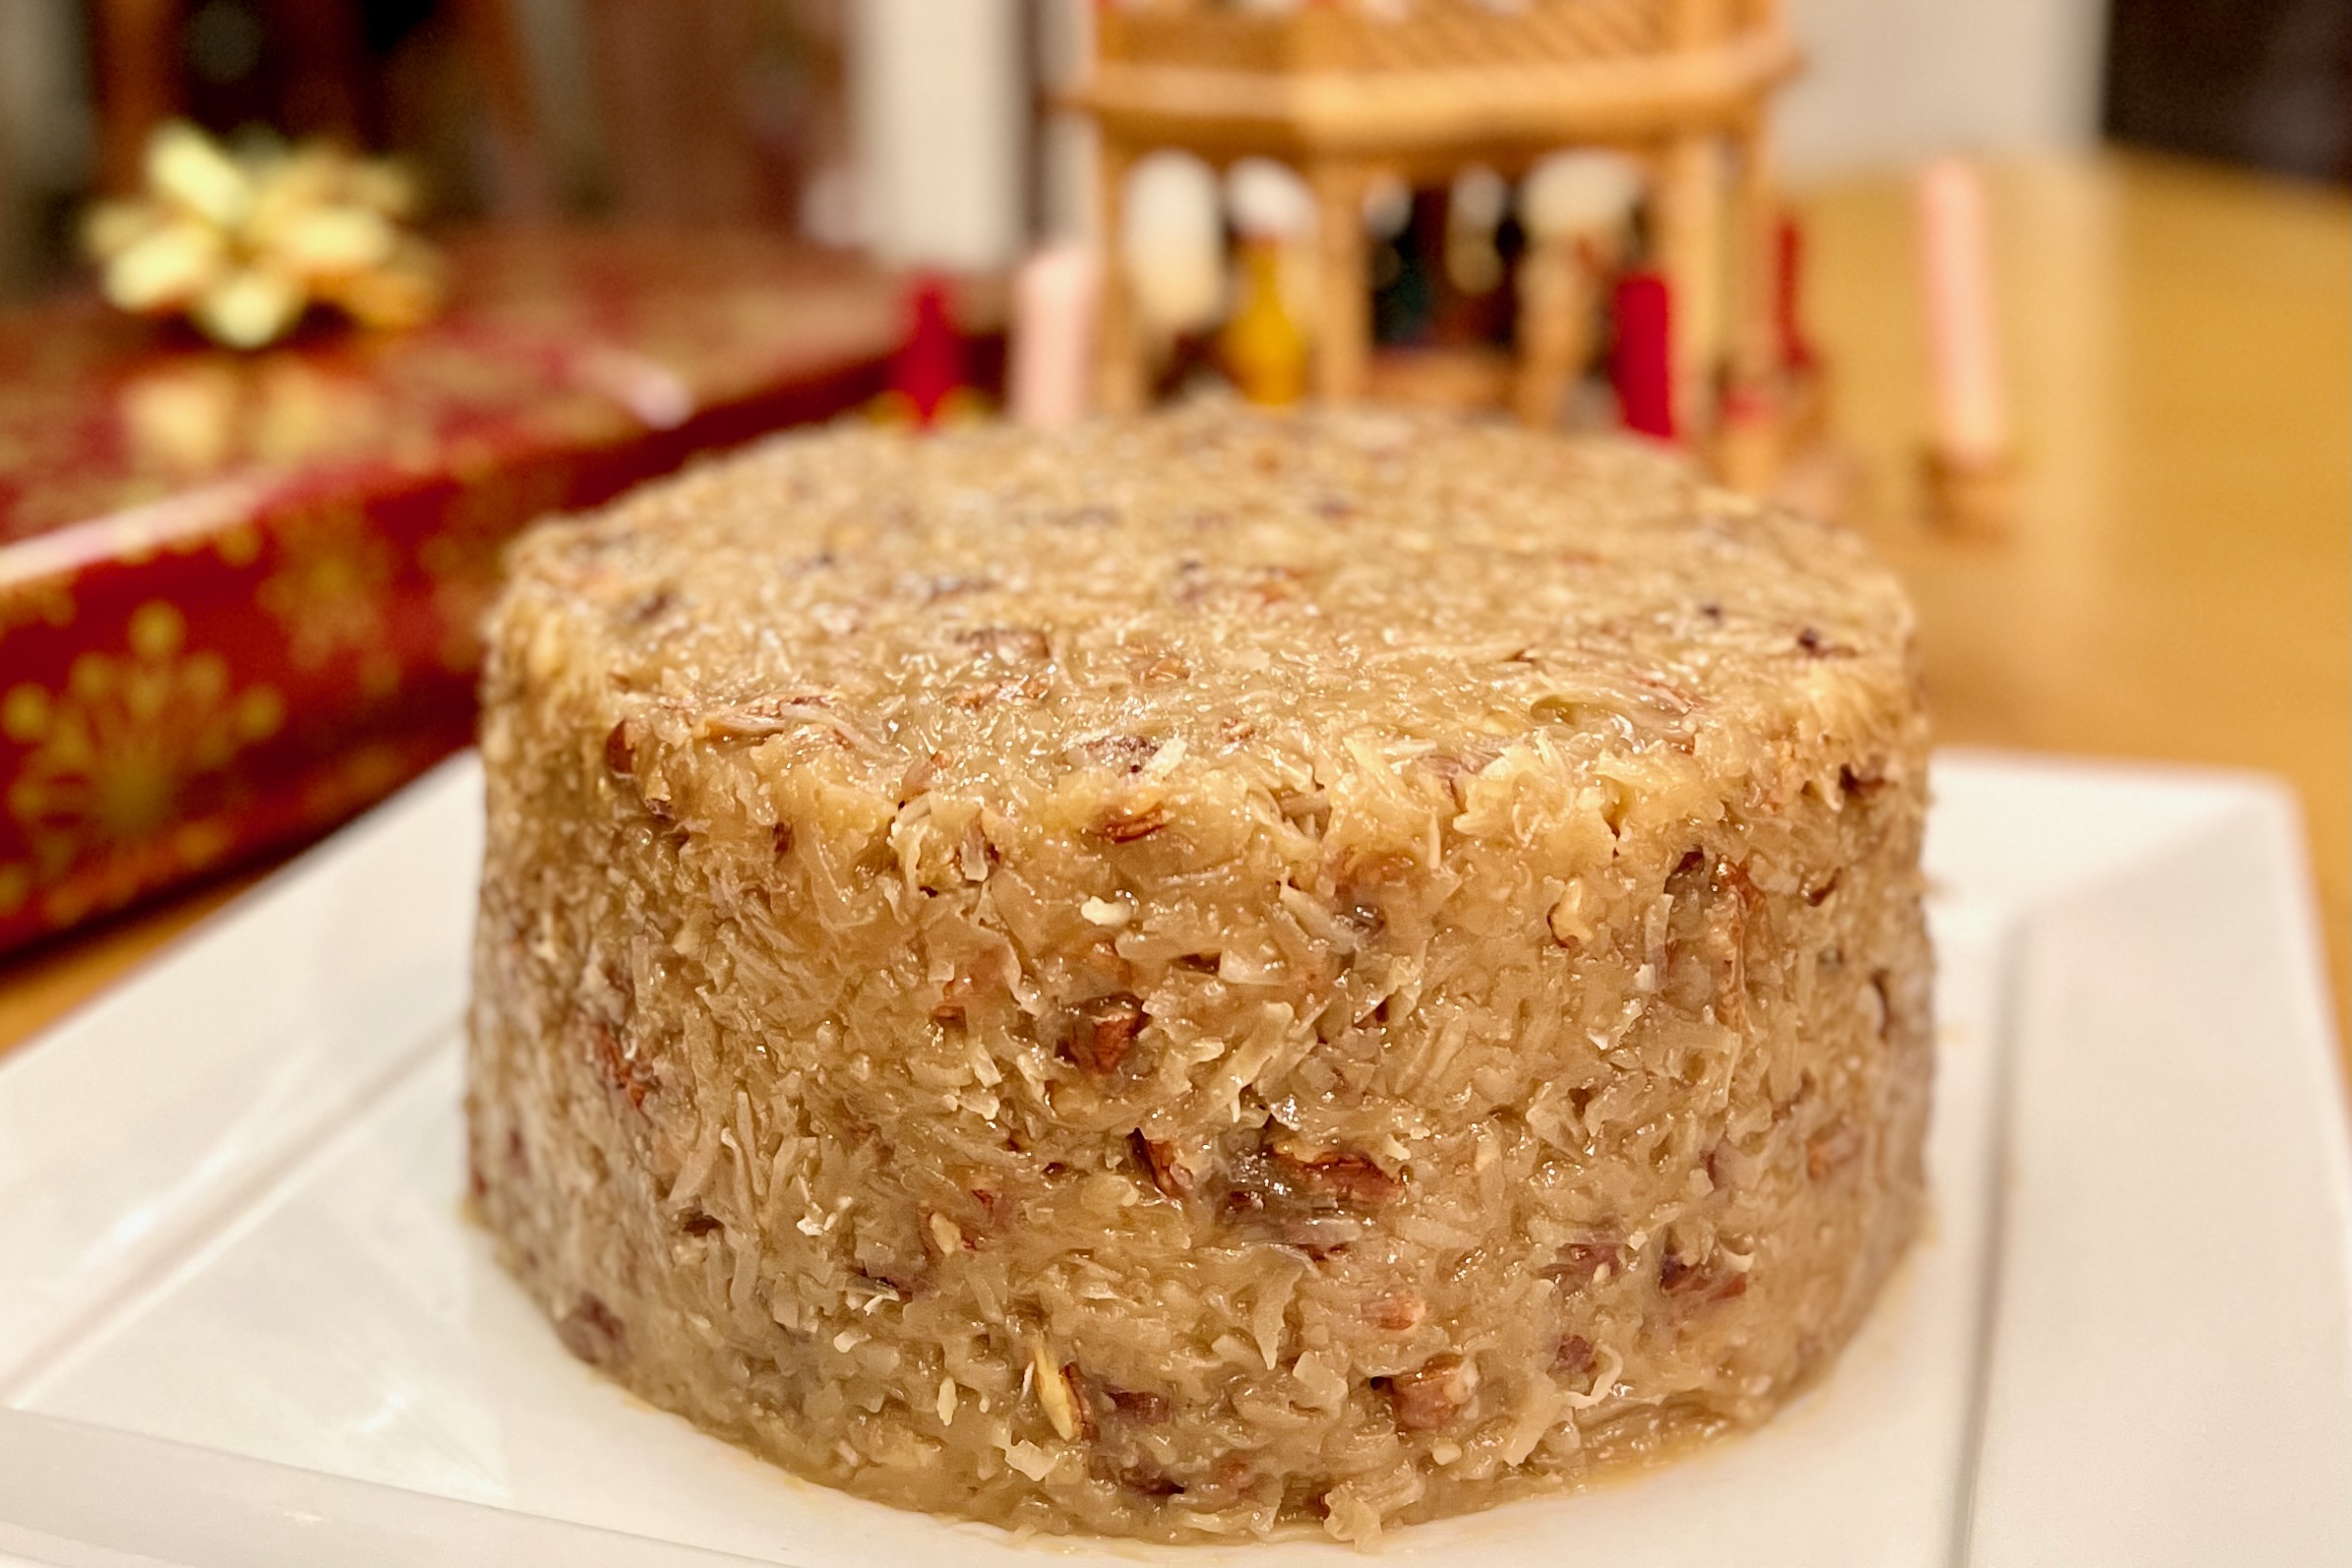
    The not-so-German, German Chocolate Cake is actually an American classic. The recipe comes from a Texas homemaker, Mrs. Clay, whose cake calling for German’s Sweet Chocolate was first published in the Dallas Morning News in 1957. German’s Sweet Chocolate itself was created much earlier, in 1852, by Samuel German—an American baker of English descent—for Baker’s Chocolate Company. Originally known as “German’s Chocolate Cake,” the possessive was eventually dropped, but the cake’s rich flavor and nostalgic charm have endured for generations.


    Ingredients

      Cake

    • 2¼ cups all-purpose flour
    • 1 pkg (4 oz) Baker’s German sweet chocolate
    • ½ cup water
    • 1 tsp baking soda
    • ¼ tsp table salt
    • 1 cup (2 sticks) butter, softened
    • 2 cups sugar
    • 4 eggs, separated
    • 1 tsp vanilla extract
    • 1 cup buttermilk
    • ⅛ tsp espresso powder (optional, enhances chocolate flavor)
    • Frosting

    • 4 egg yolks
    • 1 can (12 oz) evaporated milk
    • 1½ tsp vanilla extract
    • 1½ cups sugar
    • ¾ cup (1½ sticks) butter
    • 2⅔ cups unsweetened shredded coconut
    • 1½ cups pecans, chopped
    • ¼ tsp table salt (optional, to balance sweetness)

    Directions

    Prepare the Cake

    Preheat oven to 350°F (175°C). Line the bottoms of three 9-inch round cake pans with parchment or wax paper and lightly grease the sides.

    Microwave chocolate and water in a heatproof bowl for 1½–2 minutes, stirring every 30 seconds until almost melted. Stir until smooth and set aside to cool slightly.

    In a medium bowl, whisk together flour, baking soda, salt, and espresso powder (if using). Set aside.

    In a large mixing bowl, beat butter and sugar with an electric mixer on medium speed until light and fluffy, about 3 minutes. Add egg yolks one at a time, mixing well after each addition. Blend in melted chocolate and vanilla.

    Add the flour mixture alternately with the buttermilk, beginning and ending with flour, and beat until just combined.

    In a separate bowl, beat egg whites until soft peaks form. Gently fold into the batter using a spatula until evenly incorporated.

    Bake

    Divide batter evenly among prepared pans. Bake for 30 minutes or until a toothpick inserted in the center comes out clean. Immediately run a thin knife around the edges to loosen the cakes.

    Cool in pans for 15 minutes, then remove from pans and transfer to wire racks. Discard parchment and cool completely before frosting.

    Make the Frosting

    In a medium saucepan, whisk together egg yolks, evaporated milk, and vanilla until blended. Add sugar and butter. Cook over medium heat, stirring constantly, until the mixture thickens and turns golden brown (about 12 minutes).

    Remove from heat and stir in coconut, pecans, and salt (if using). Mix well and cool completely before spreading. The frosting will thicken as it cools.

    Assemble the Cake

    Spread frosting between layers and on top of the cake. Garnish with extra pecans if desired. This recipe yields about 16 servings. (For generous layers, we often double the frosting recipe — a must for a three-layer cake!)


    Notes

    Preparation

    • Ensure chocolate has cooled slightly before mixing into batter to prevent scrambling the eggs.
    • Adding espresso powder enhances chocolate depth without changing flavor.
    • Frosting thickens as it cools—spread only when fully cooled for best texture.
    • Double the frosting for a three-layer cake.

    Serving Suggestions

    • Serve at room temperature for the best flavor and texture.
    • Top with extra toasted pecans or a drizzle of melted chocolate for an elegant finish.

    Make-Ahead & Storage

    • Frosting can be made up to 3 days in advance; refrigerate and bring to room temperature before using.
    • Cake layers freeze beautifully—wrap individually and freeze up to 2 months. Thaw completely before frosting.
    • Store frosted cake covered at room temperature for up to 2 days, or refrigerated for up to 5 days.

    Shortcut Option

    • For a simpler approach with equally impressive results, try our German Chocolate Cake — Bakery Structure with Box Convenience, which upgrades a boxed mix for richer flavor, taller layers, and beautifully clean slices.
  • Raspberry Sorbet

    Raspberry Sorbet

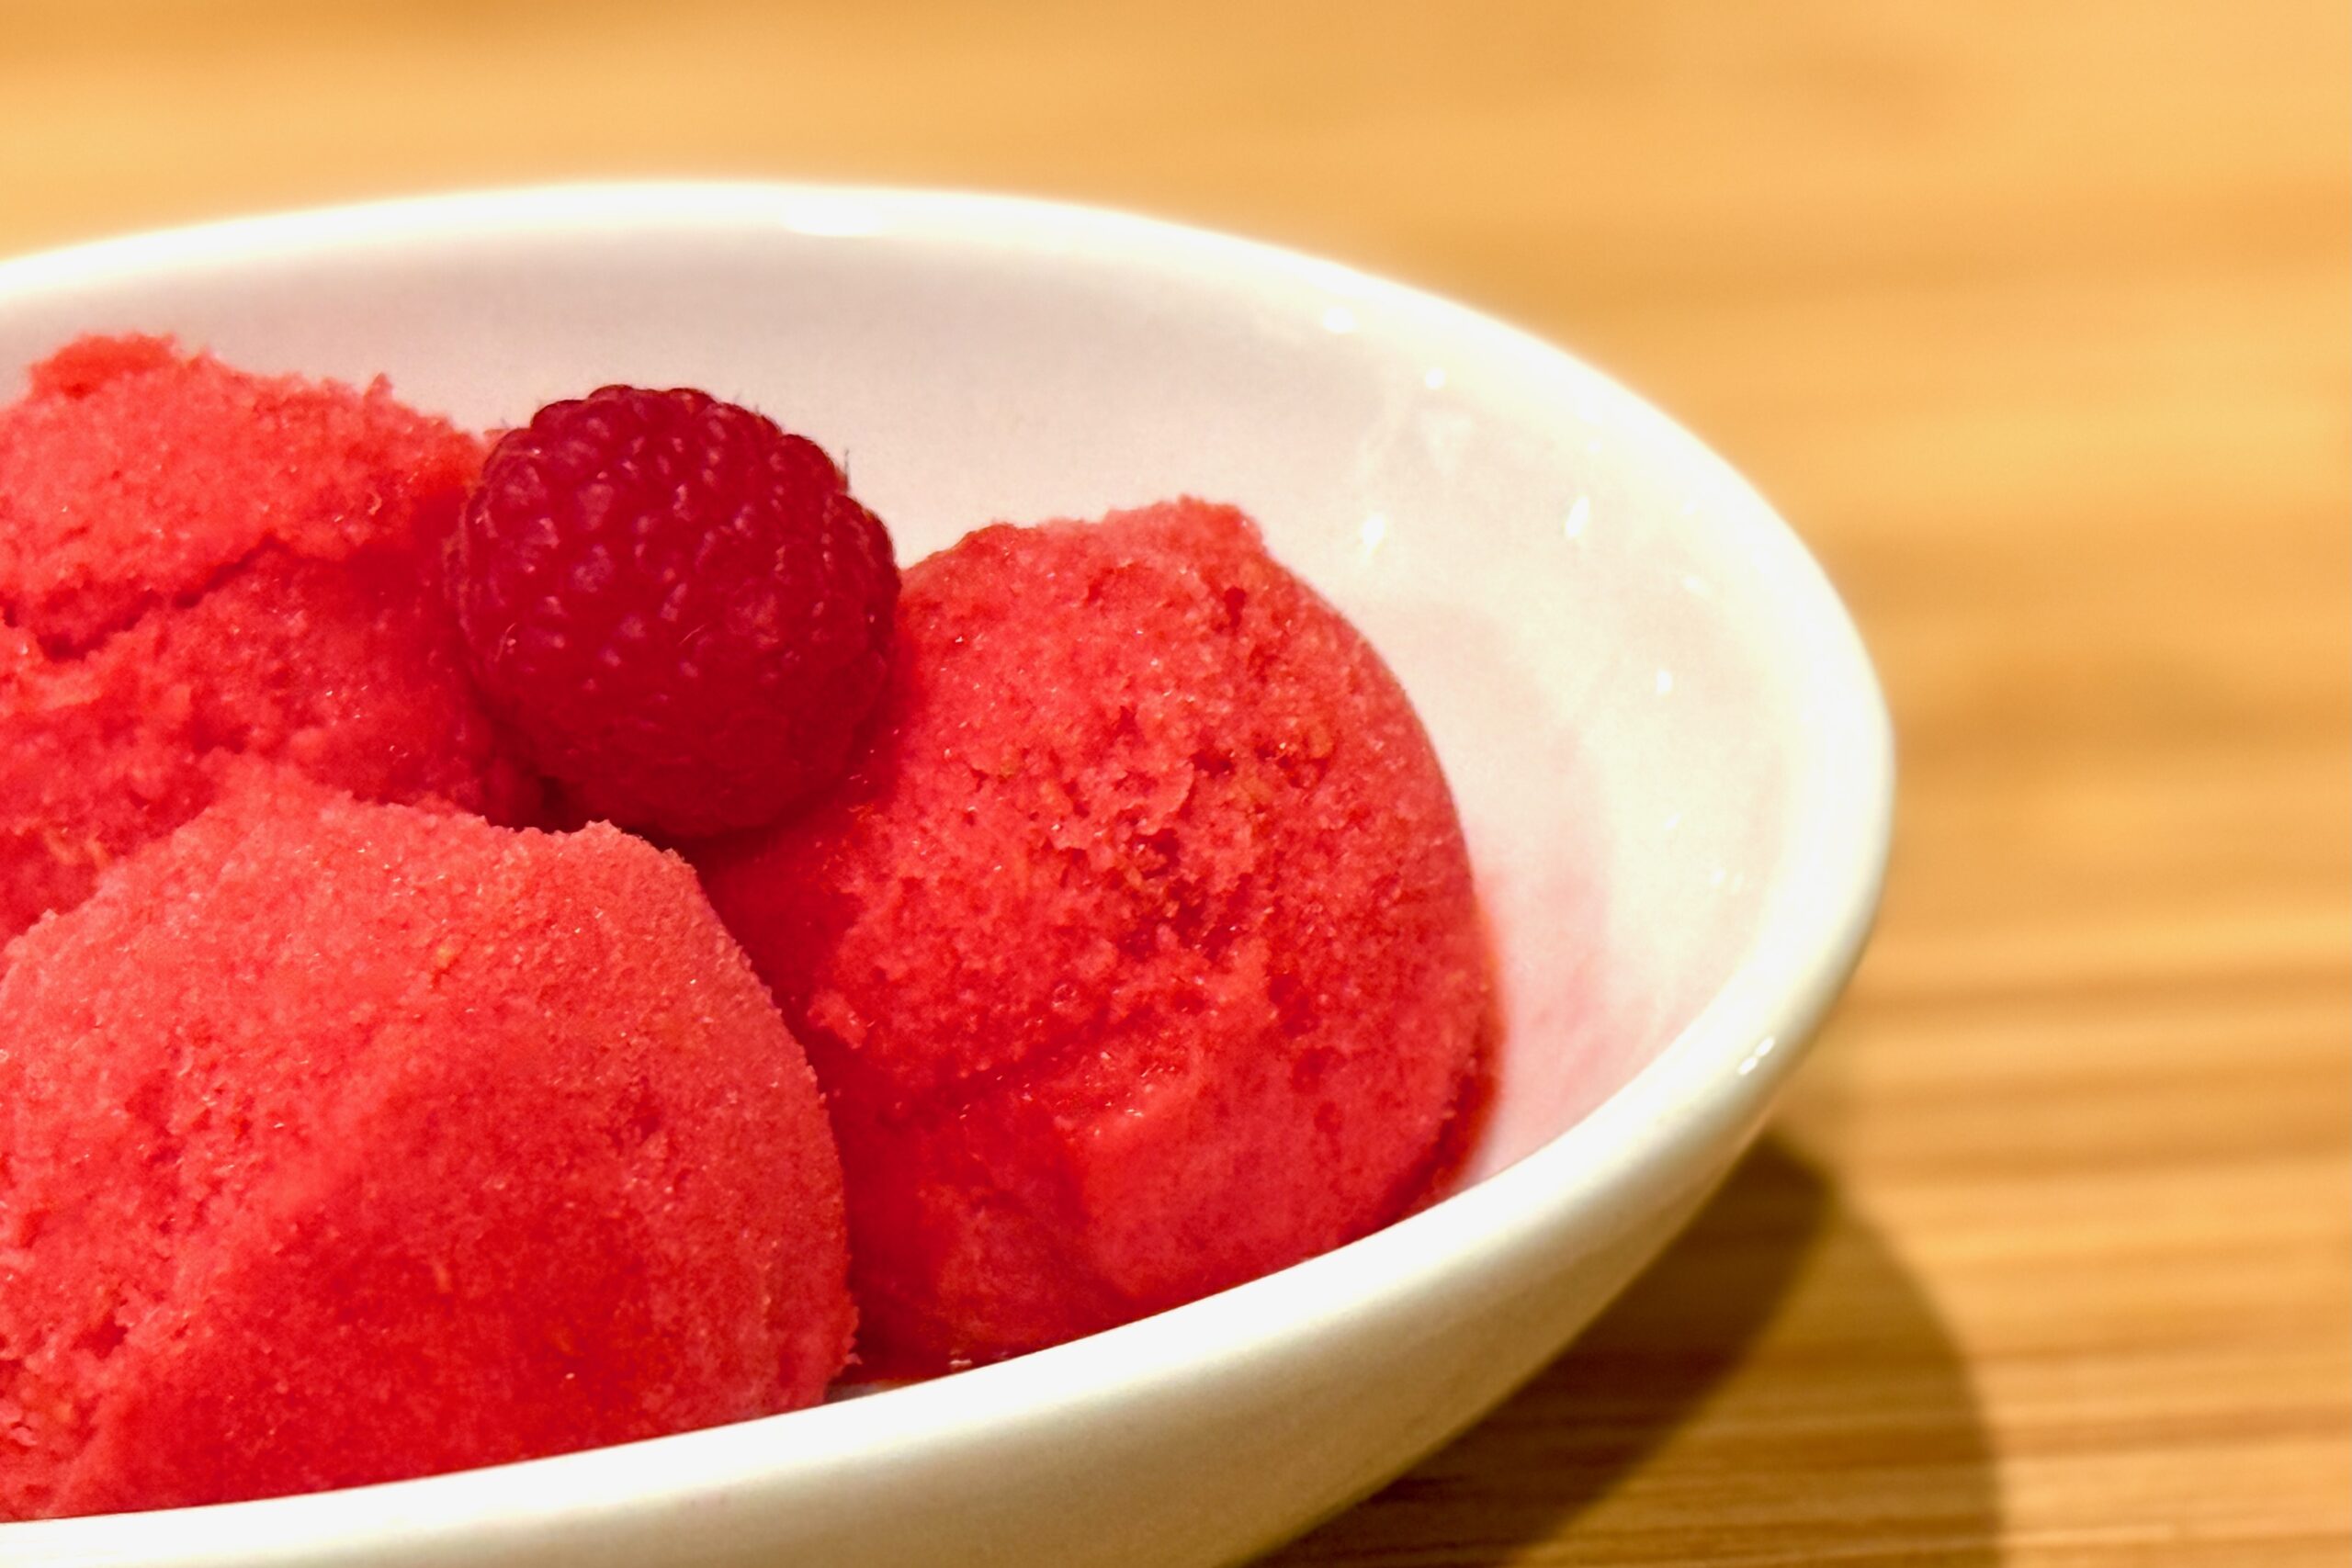
    Fresh raspberries, some sugar, a bit of water — that’s pretty much the whole idea here. Blend, freeze, and the result is a sorbet that tastes like summer in the best way: straightforward, refreshing, and honest.


    Ingredients

      Fruit Base:

    • about 600 g (≈ 4½ cups) fresh raspberries, OR
    • about 600 g frozen raspberries (thawed and drained)
    • Simple Syrup:

    • 250 ml (≈ 1 cup) water
    • 200 g (≈ 1 cup) granulated sugar
    • Brightening & Finishing:

    • 2 tbsp fresh lemon or lime juice (optional, to brighten)
    • 1 tsp vanilla extract (optional, for a subtle warm note)
    • Pinch of fine salt

    Directions

    Prepare the simple syrup

    In a saucepan, combine the water and sugar. Warm gently, stirring, just until the sugar fully dissolves (no need to boil vigorously). Remove from heat and let it cool to room temperature (you can speed this by placing the saucepan in an ice-bath or refrigerating).

    Prepare the raspberries

    If using fresh raspberries: rinse and drain them well. If using frozen: thaw fully and drain any excess liquid—reserve any juice released during thawing.

    Place the raspberries in a blender or food-processor and purée until smooth.

    For a smoother texture, strain the raspberry purée through a fine-mesh sieve into a bowl to remove seeds (this improves final mouth-feel).

    Combine the mix

    Stir the cooled simple syrup into the raspberry purée. Then add the lemon (or lime) juice, vanilla (if using), and the pinch of salt. Taste and adjust—if the raspberries are very tart, you might add a little more syrup (but avoid adding extra water, which can lead to icier texture).

    Chill the mixture

    Cover and refrigerate the mixture for at least 1 hour (or until completely cold). This helps the freezing process and improves texture.

    Freeze / churn

    Follow your ice-cream maker or freezing method instructions. Pour in the chilled raspberry mixture and churn or freeze until it reaches a smooth, scoopable consistency (typically about 20 minutes of churning, depending on machine).

    After churning, transfer the sorbet into a freezer-safe container, press a piece of plastic wrap directly onto the surface (to prevent ice crystals), then cover and freeze for an additional 2–3 hours to firm up.

    Serve

    Remove sorbet from the freezer about 5–10 minutes before serving so it softens slightly and is easy to scoop. Serve in chilled bowls or cones, optionally garnished with fresh raspberries or a mint sprig.


    Notes

    Preparation

    • Using a sieve to remove raspberry seeds significantly improves texture—especially for such a delicate dessert.
    • Make sure your fruit base is very cold before churning or freezing—it helps yield a smoother final result.
    • Be cautious about reducing sugar too far: insufficient sugar may lead to a very icy texture.

    Serving Suggestions

    • Serve as a palate-cleanser after a rich meal: the tart raspberry flavor is perfect to refresh the palate.
    • Pair with fresh raspberries and a drizzle of raspberry coulis or a crisp cookie for contrast.
    • For a touch of indulgence: serve alongside a small piece of dark chocolate or a shortbread crumb.

    Variations

    • Mixed Berry Sorbet: Use half raspberries, half strawberries or blueberries—keep total fruit at ~600 g.
    • Low-Sugar Version: Reduce sugar to about 170 g. The texture will be a little firmer and possibly icier, but still flavorful.

    Make-Ahead & Storage

    • Sorbet can be prepared up to 3 days ahead and stored in a well-sealed container in the freezer. Remove ~10 minutes before serving to soften.
    • If you notice ice crystals forming on the surface during storage, press plastic wrap directly onto the surface next time before sealing.
    • For best texture, consume within one week—after that, ice-crystal growth may degrade mouth-feel and flavour.
  • Melon Sorbet

    Melon Sorbet

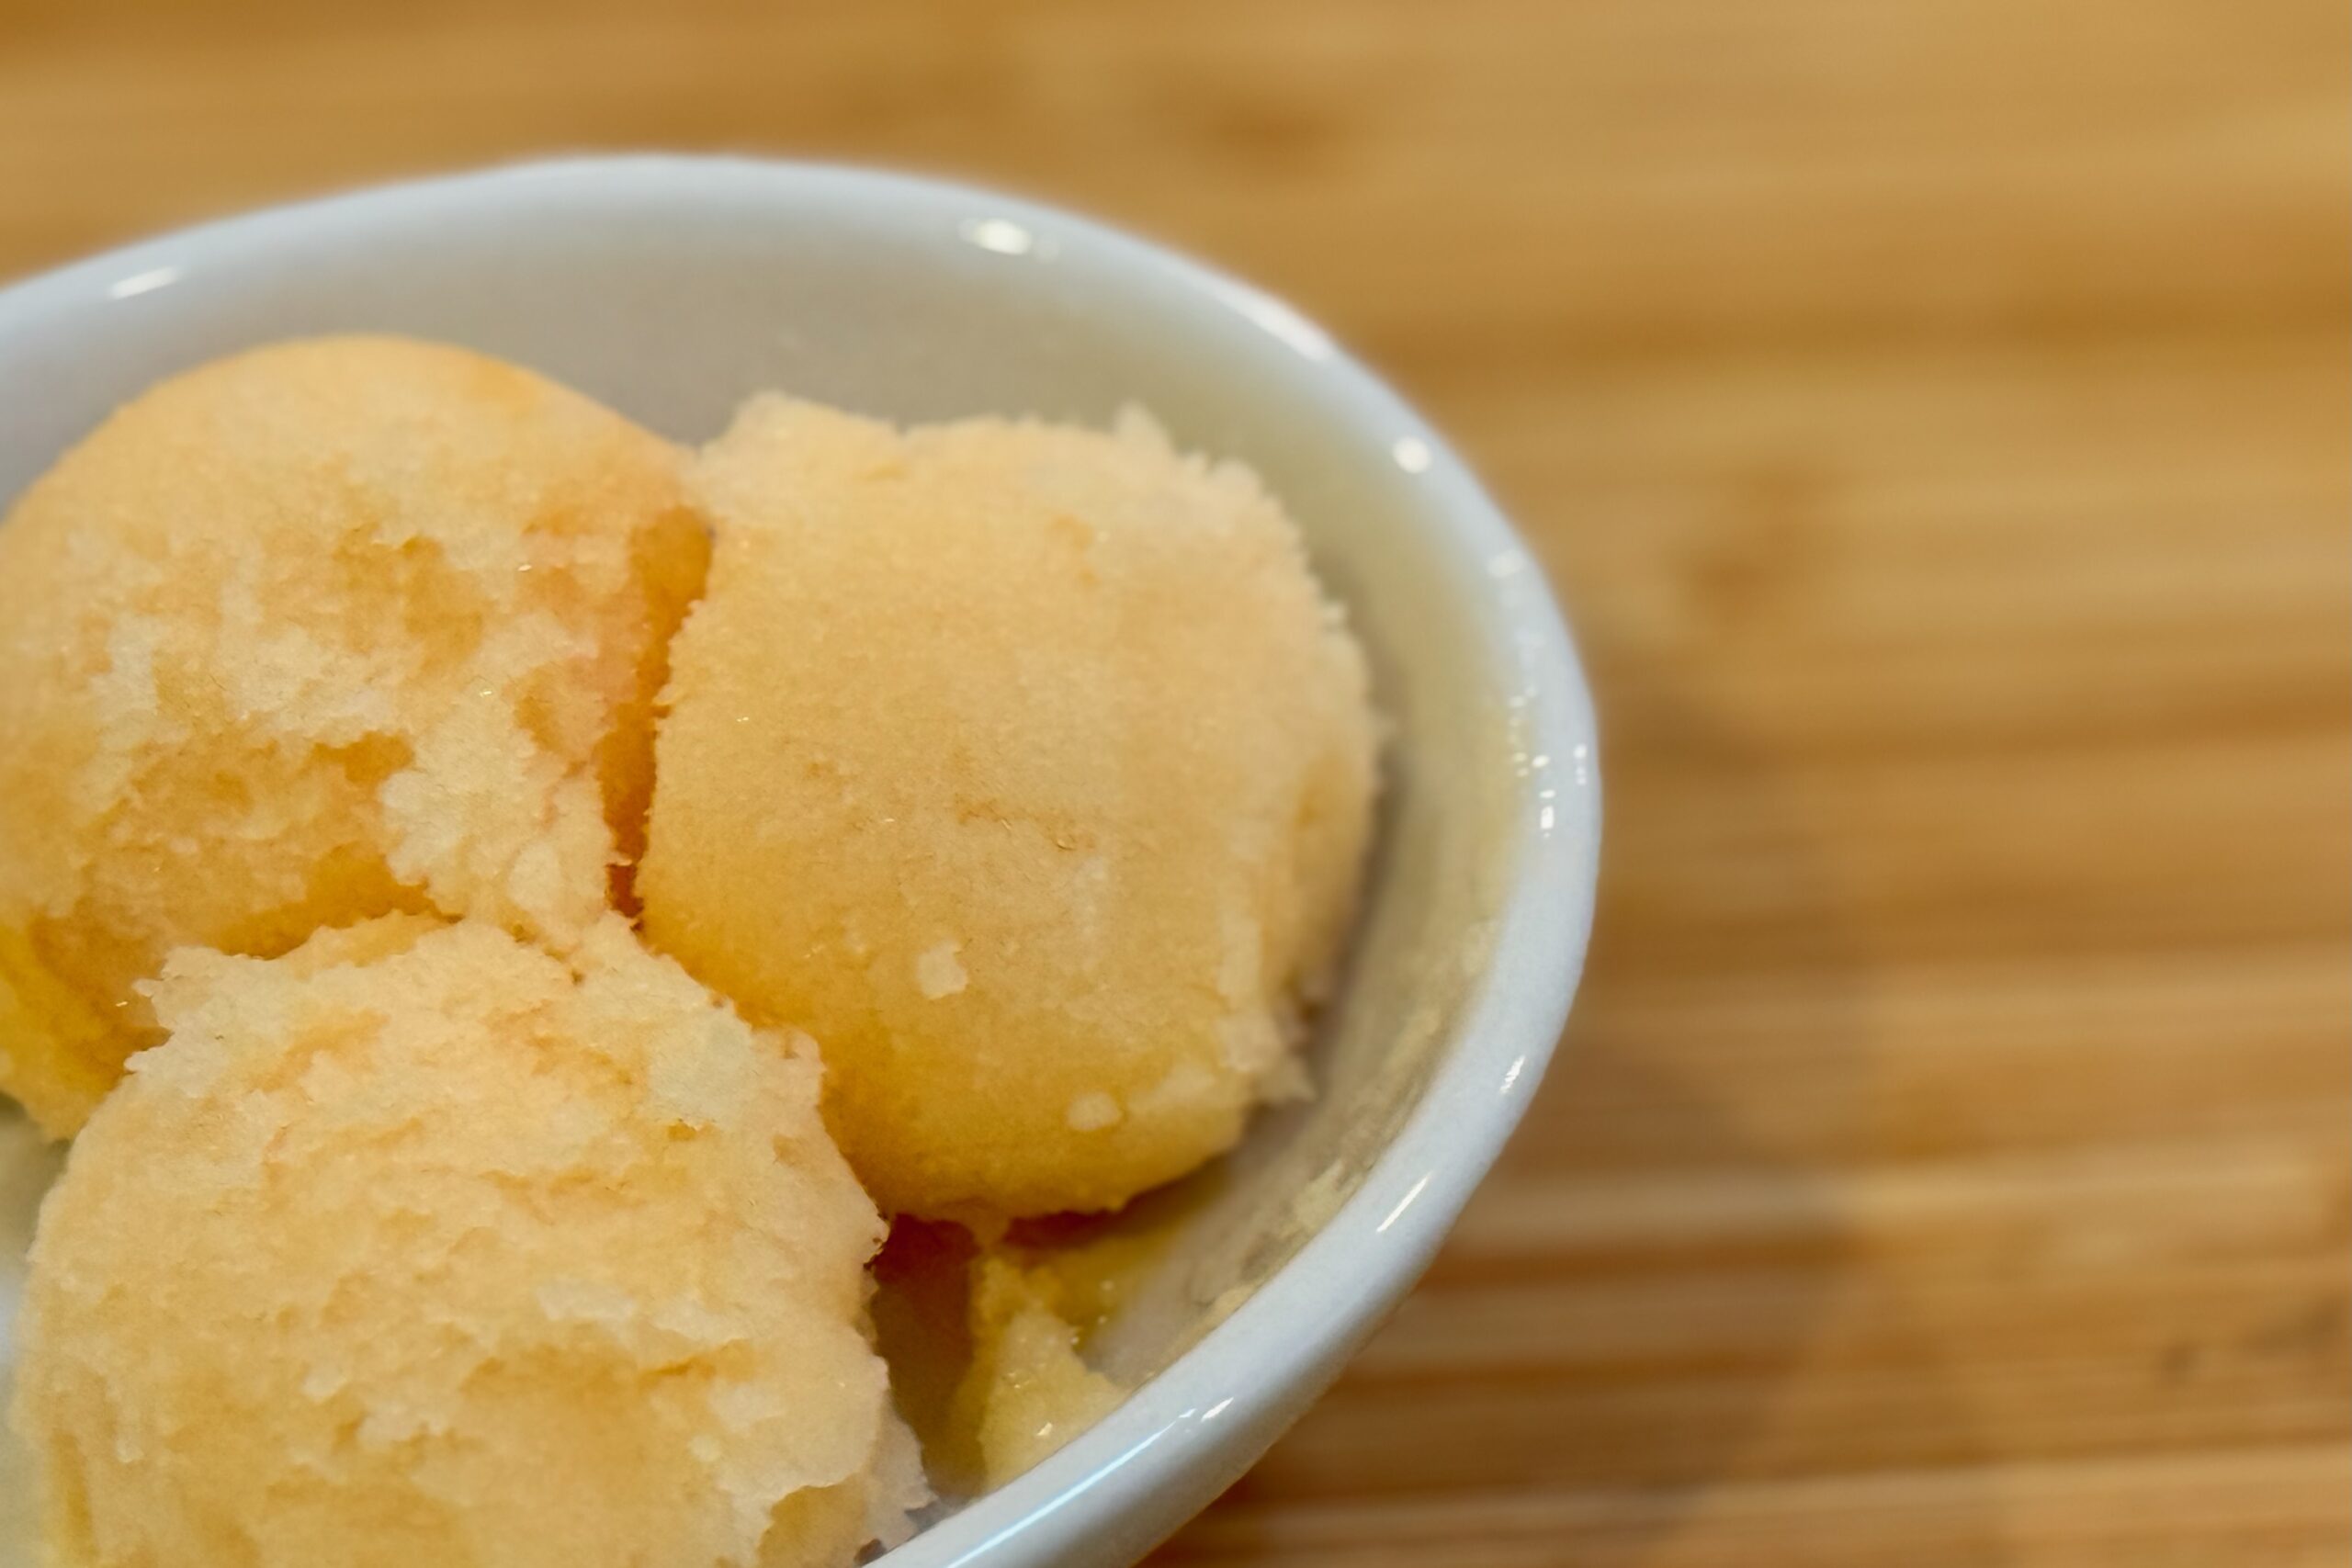
    There’s something unmistakable about the smell of a ripe cantaloupe on a hot day—it fills the kitchen and tells you it’s time for something cold and refreshing. This sorbet brings that moment to life: sweet melon, a clean simple syrup, and just enough citrus to sharpen the flavor. It’s bold, bright, and every bit as satisfying as cutting into a perfect summer melon.

    Ingredients

      Fruit Base

    • about 600 g (≈ 4½ cups) diced ripe cantaloupe
    • Simple Syrup

    • 250 ml (≈ 1 cup) water
    • 200 g (≈ 1 cup) granulated sugar
    • Brightening & Finishing

    • 2 tbsp fresh lemon juice (or lime juice)
    • Optional: 1 tsp vanilla extract (for a subtle warm note)
    • Pinch of fine salt

    Directions

    Prepare the Simple Syrup

    In a saucepan, combine the water and sugar. Warm gently, stirring, just until the sugar fully dissolves (no need to boil vigorously). Remove from heat and let it cool to room temperature. You can speed the process by using an ice bath or refrigerating the syrup.

    Ensure the syrup is completely cool before combining with the fruit.

    Prepare the Melon

    Dice the cantaloupe and place it in a blender or food processor. Purée until completely smooth. Taste—if your melon is extremely ripe, you may not need much additional sweetening beyond the syrup already included.

    Combine the Mix

    Stir the cooled simple syrup into the melon purée. Add the lemon (or lime) juice, vanilla (if using), and a pinch of salt.

    Taste and adjust—if the melon is particularly mild, a little extra citrus can help brighten the flavor.

    Chill the Mixture

    Cover and refrigerate the mixture for at least 1 hour, or until completely cold, to improve freezing and texture.

    Freeze / Churn

    Follow your ice-cream maker or freezing method instructions. Pour in the chilled melon mixture and churn until smooth and thick, usually about 20 minutes depending on your machine.

    Transfer the sorbet to a freezer-safe container, press plastic wrap directly onto the surface, cover, and freeze for 2–3 hours to firm up.

    Serve

    Let the sorbet sit at room temperature for 5–10 minutes before scooping. Serve in chilled bowls, optionally topped with fresh melon or mint.


    Notes

    Preparation

    • Melons vary in sweetness; always taste the purée before combining with the syrup. Adjust citrus as needed for balance.
    • Ensure the fruit mixture is fully chilled before churning—this noticeably improves texture.
    • A small pinch of salt enhances the natural melon flavor and keeps the sorbet from tasting flat.

    Serving Suggestions

    • Serve with fresh cantaloupe or honeydew for a layered melon experience.
    • A drizzle of honey or a squeeze of lime adds brightness and contrast.
    • Pair with shortbread, vanilla cookies, or a small square of white chocolate for a richer dessert.

    Variations

    • Honeydew Sorbet: Substitute honeydew or a blend of honeydew and cantaloupe.
    • Mint-Melon: Add 4–6 fresh mint leaves before blending for a cool herbal twist.
    • Low-Sugar Version: Reduce sugar to 170 g; final texture will be firmer and slightly icier.

    Make-Ahead & Storage

    • Store sorbet in a sealed container for up to 3 days for best texture.
    • Press plastic wrap directly onto the surface before sealing to minimize ice-crystal formation.
    • For easiest scooping, let the sorbet sit 5–10 minutes at room temperature before serving.
  • Nutty Coconut Ice Cream

    Nutty Coconut Ice Cream

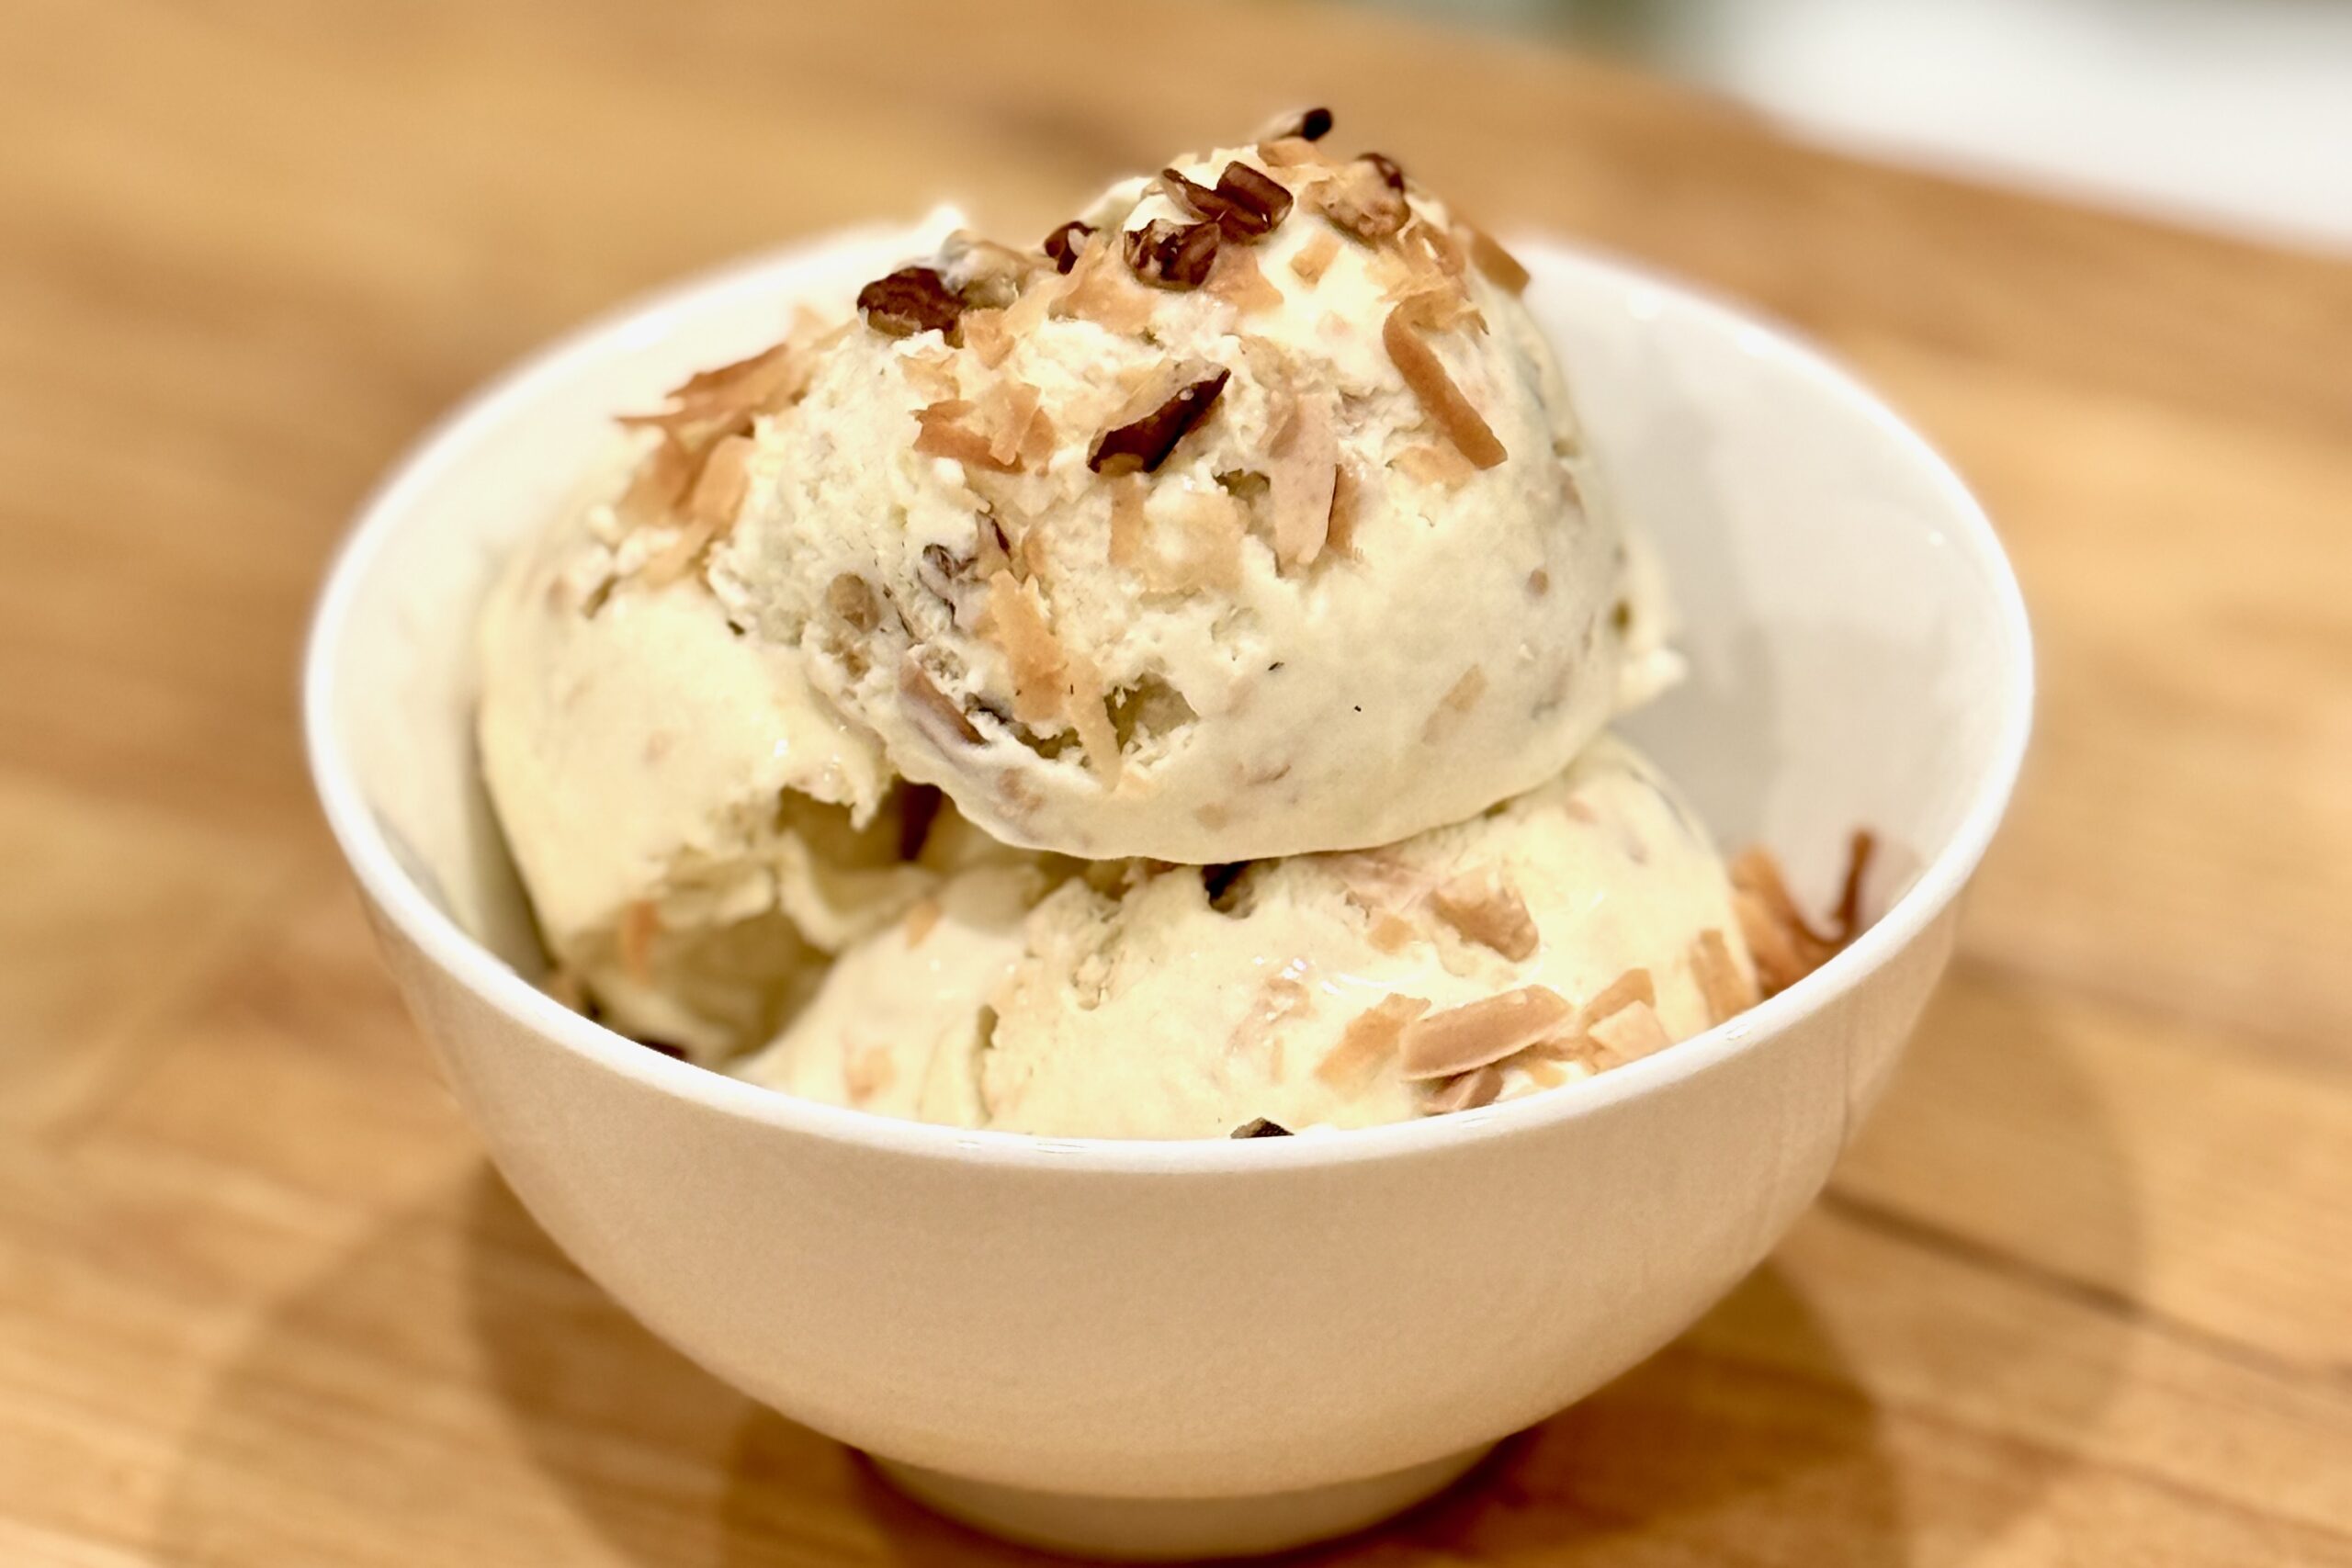
    Jane’s favorite ice cream, and Opa’s, has always been Nutty Coconut—a flavor that balances creamy coconut sweetness with the satisfying crunch of toasted nuts. This homemade version captures that nostalgic combination in a silky coconut custard base, layered with toasted coconut, almonds, and pecans. Smooth, nutty, and tropical, it’s a rich yet refreshing treat that brings a little taste of the islands to every scoop.


    Ingredients

    Coconut Custard Base:

    • 1 can (14 oz) full-fat coconut milk
    • 1 cup heavy cream
    • ¾ cup sugar
    • 4 large egg yolks
    • pinch table salt
    • ½ tsp coconut extract
    • ½ tsp vanilla extract

    Add-Ins:

    • ¾ cup sweetened shredded coconut, toasted
    • ½ cup chopped toasted pecans
    • ½ cup chopped toasted almonds

    Directions

    Prepare the Toasted Nuts & Coconut

    Spread the shredded coconut, pecans, and almonds on a parchment-lined baking sheet. Toast at 325°F until fragrant and golden—about 5–8 minutes for coconut and 8–10 minutes for nuts. Cool completely and set aside.

    Make the Coconut Custard Base

    In a medium saucepan, whisk together coconut milk, heavy cream, half the sugar, and salt. Heat until steaming but not boiling.

    In a separate bowl, whisk egg yolks with the remaining sugar until pale and thick. Slowly temper with ½ cup hot coconut mixture, then return everything to the saucepan.

    Cook over low heat, stirring constantly, until the custard coats the back of a spoon (170–175°F / 77–80°C). Do not boil.

    Finish & Chill

    Strain through a fine mesh sieve into a clean bowl. Stir in coconut and vanilla extracts. Cover and chill thoroughly—preferably overnight.

    Churn & Add Mix-Ins

    Churn the chilled custard in an ice cream maker according to manufacturer’s instructions. Add toasted coconut and nuts during the last minute of churning. Freeze until firm, about 4 hours.


    Notes

    Preparation

    • Use full-fat coconut milk for best texture; light coconut milk makes the base thinner.
    • Replace half the heavy cream with coconut cream for deeper coconut flavor.
    • Lightly salt the toasted nuts before cooling to balance sweetness.
    • Strain the custard to ensure a perfectly smooth base.

    Serving Suggestions

    • Top with extra toasted coconut for crunch.
    • Pair with warm caramel sauce or pineapple compote.
    • Serve alongside grilled fruit for a tropical dessert.

    Make-Ahead & Storage

    • Refrigerate the custard base up to 2 days before churning.
    • Store churned ice cream in an airtight container for up to 1 week.
    • Let soften 5–10 minutes before scooping.
  • Vanilla Poached Pears

    Vanilla Poached Pears

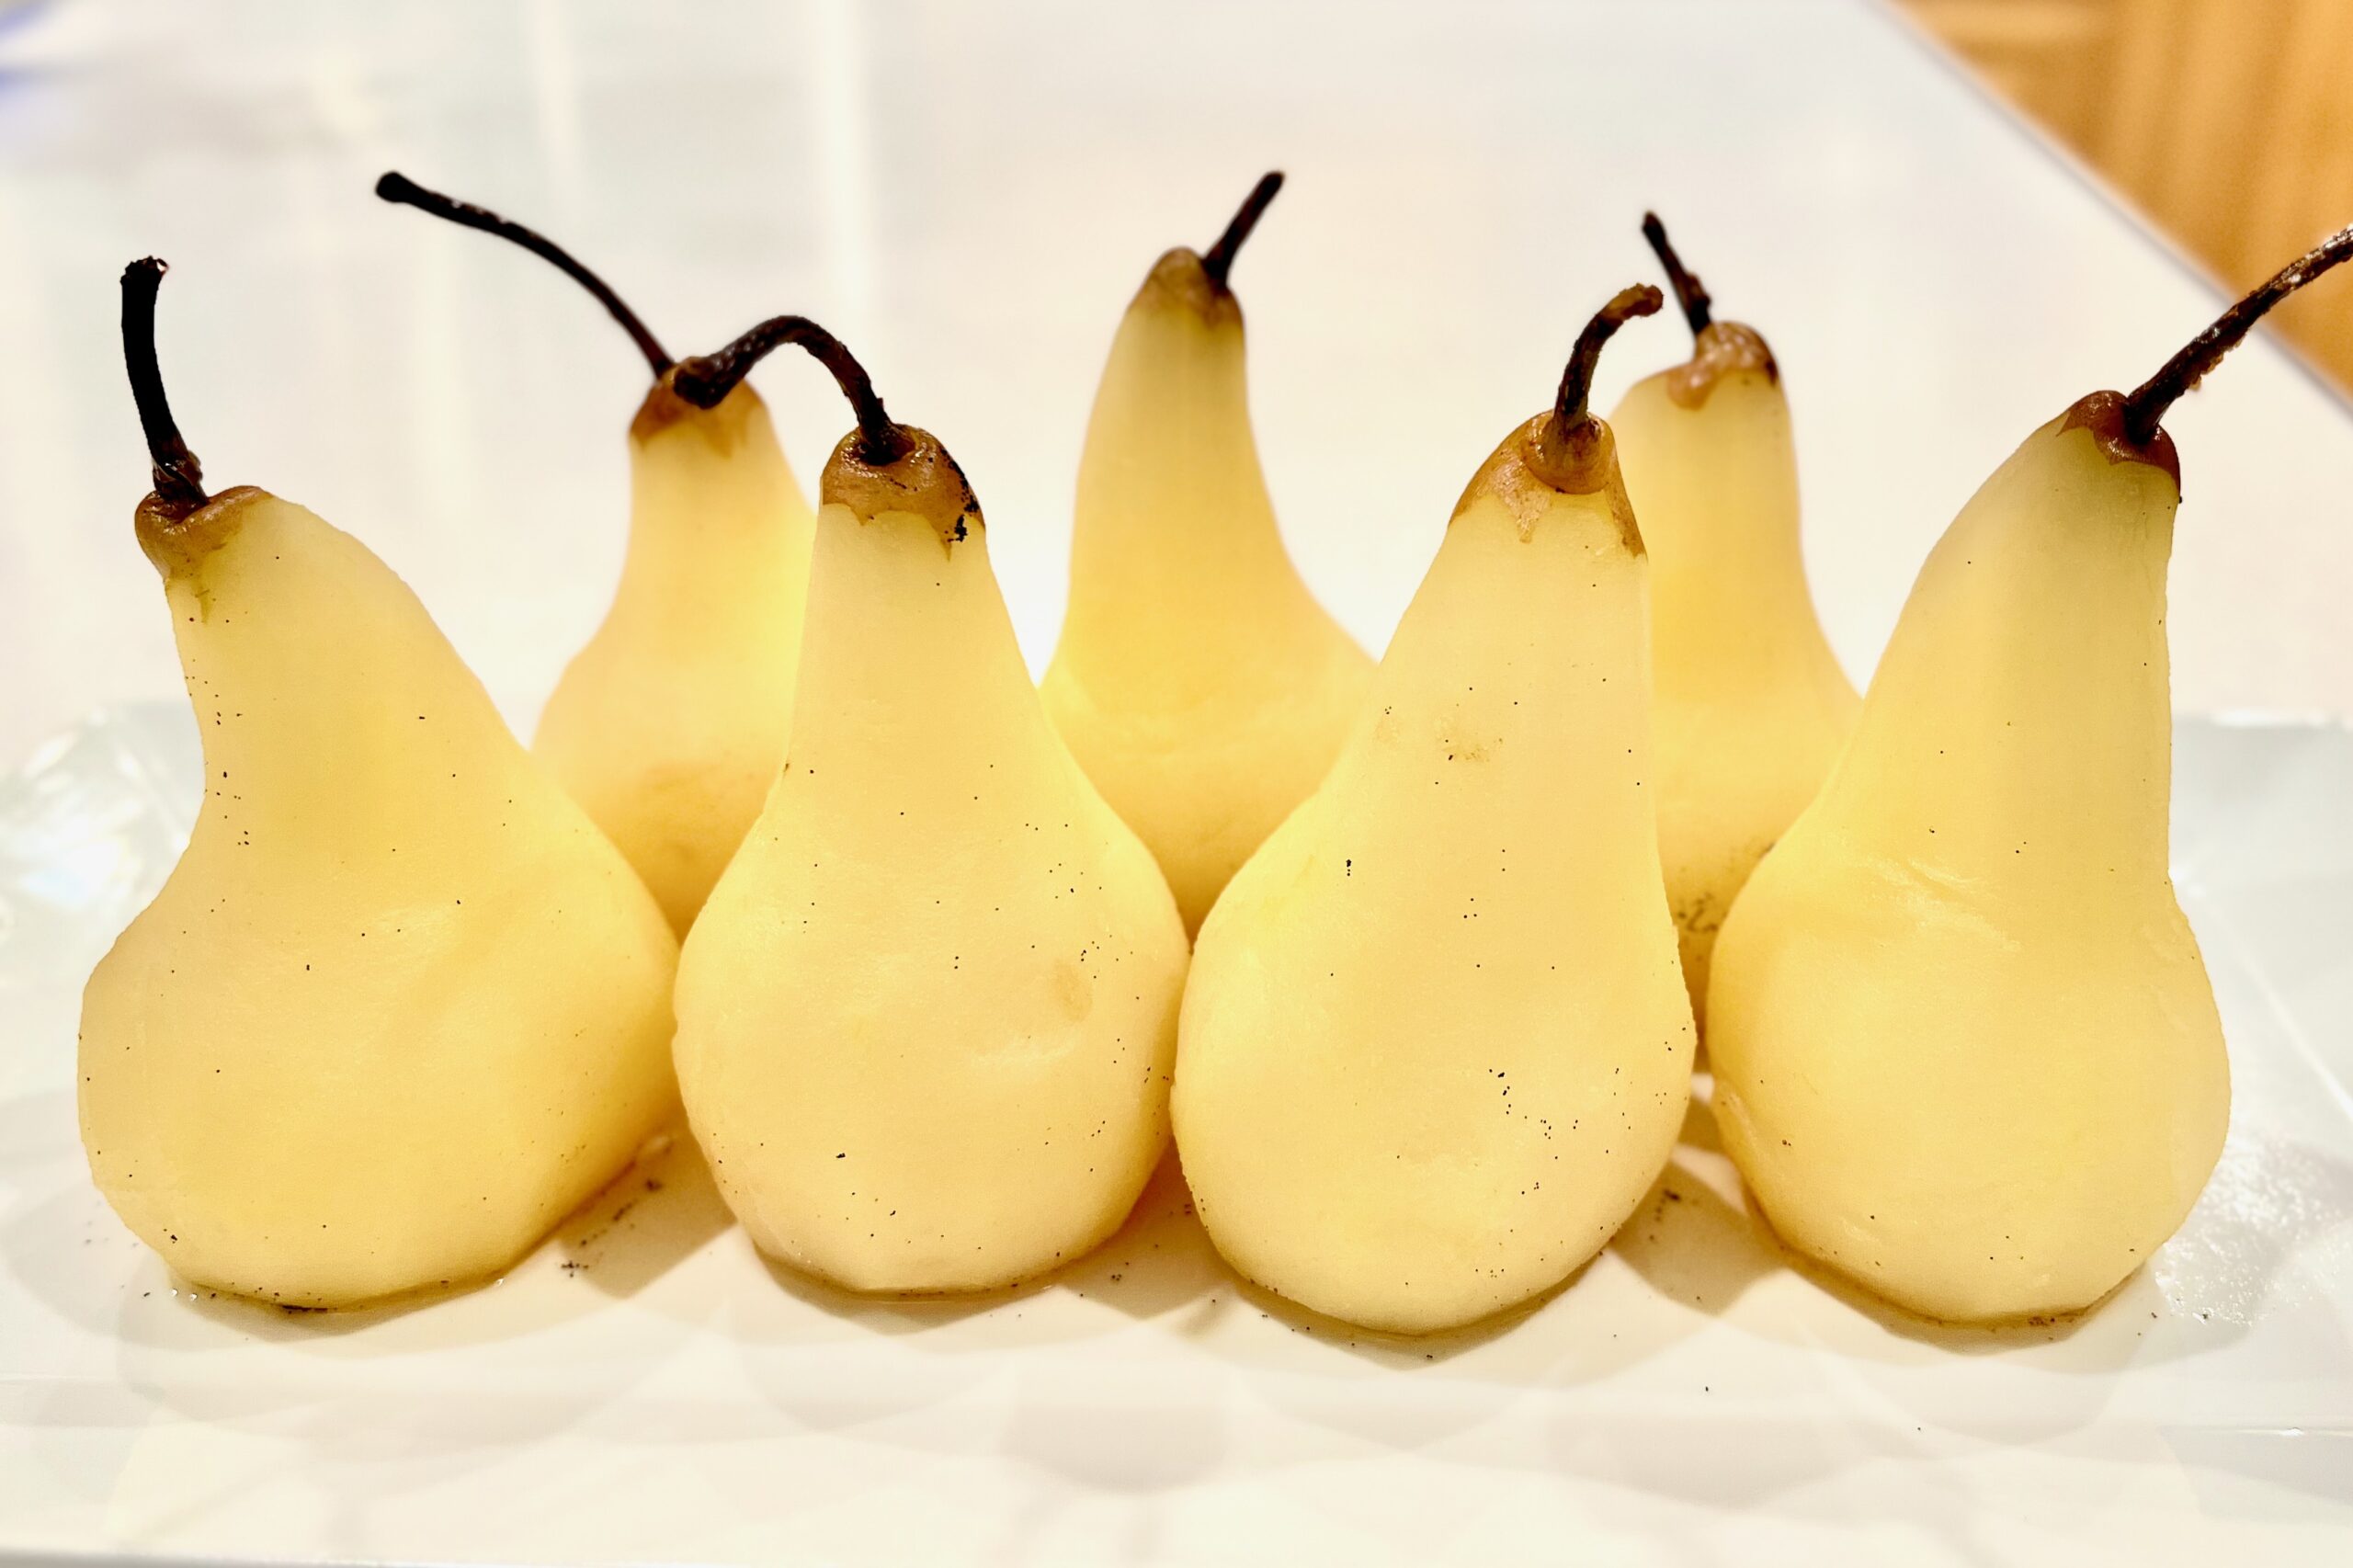
    Delicate Bosc pears are gently poached in a fragrant blend of Pinot Gris, vanilla, and cinnamon, then filled with a silky vanilla bean pastry cream. Served upright with a drizzle of reduced poaching syrup, these elegant pears make a stunning and lightly indulgent finale to any meal.


    Ingredients

      Pears

    • 1 bottle (750 ml) Pinot Gris
    • 1 cup water
    • ¾ cup sugar
    • 1–2 vanilla beans, split and seeded
    • ¼ tsp ground cinnamon
    • 6 Bosc pears, peeled with stems intact
    • Crème Pâtissière Filling

    • 1 cup whole milk
    • 1 vanilla bean, split and seeded (or 1 tsp pure vanilla extract)
    • 3 egg yolks
    • ¼ cup sugar
    • 2 tbsp cornstarch
    • 1 tbsp butter
    • Pinch of salt
    • Optional: ¼ cup lightly whipped cream, folded in after chilling for a softer texture

    Directions

    Poach the Pears

    In a large saucepan, combine Pinot Gris, water, sugar, vanilla seeds and pods, and cinnamon. Bring to a gentle boil over medium-high heat.

    Core pears from the bottom, keeping stems intact. Lower heat to maintain a steady simmer and add pears to the liquid. Cover and poach 30 minutes, or until tender when pierced with a skewer.

    Using a slotted spoon, transfer pears to a shallow dish, standing them upright. Refrigerate until cool.

    Return the poaching liquid to high heat and reduce to about 1 cup (20–25 minutes). Strain and chill for serving.

    Prepare the Crème Pâtissière

    In a saucepan, heat milk, vanilla bean seeds and pod (if using), and salt just to a simmer. Remove from heat; steep 10 minutes. Remove pod.

    In a bowl, whisk egg yolks, sugar, and cornstarch until pale and smooth.

    Gradually whisk in some of the warm milk to temper, then return mixture to the saucepan.

    Cook over medium heat, whisking constantly, until thickened and just beginning to bubble (1–2 minutes).

    Remove from heat and whisk in butter until smooth. Transfer to a bowl; cover surface with plastic wrap. Chill completely (about 1 hour).

    For a lighter texture, fold in whipped cream before using.

    Fill and Serve

    Cut a thin slice from the base of each chilled pear so it stands upright.

    Spoon or pipe the chilled crème pâtissière into the cored centers of the pears.

    Drizzle each pear with a few spoonfuls of the cooled poaching syrup. Serve upright on dessert plates, optionally garnished with a few vanilla bean flecks or edible flowers.


    Notes

    Preparation

    • The poaching syrup can be made ahead and refrigerated for up to 1 week.
    • The pastry cream can be prepared 1 day in advance; stir gently before using.
    • To help pears stand upright, cut a small flat section from the base before filling and plating.

    Serving Suggestions

    • Serve as a light finish to an elegant dinner, paired with crisp white wine or sparkling water.
    • Garnish with whipped cream, toasted almonds, or a sprig of mint for added presentation.

    Variations

    • Substitute crème fraîche or lightly sweetened whipped cream for a lighter filling.
    • Use Bartlett or Anjou pears instead of Bosc for a softer texture and milder flavor.

    Make-Ahead & Storage

    • Assemble pears up to 4 hours before serving; keep refrigerated until ready to plate.
    • Leftovers may be refrigerated up to 2 days; drizzle with syrup just before serving.
  • Soft Pretzels

    Soft Pretzels

    These homemade soft pretzels bake up golden brown, chewy, and buttery—just like the ones from a pretzel shop. The dough can be made quickly for a same-day bake or rested in the refrigerator for a richer, malty flavor and more authentic bakery-style texture.


    Ingredients

    • 1½ cups warm water (105–110°F)
    • 1 packet (2¼ tsp) active dry or instant yeast
    • 1 tsp table salt
    • 1 tbsp brown sugar (or 1 tbsp barley malt syrup for classic flavor)
    • 1 tbsp butter, melted and slightly cooled
    • 3½–4 cups all-purpose flour
    • ½ cup baking soda (see note for enhanced version)
    • 9 cups water
    • kosher or coarse sea salt, for topping
    • 2 tbsp butter, melted (for brushing after baking)

    Optional Egg Wash (for Soft, Glossy Pretzels)

    • 1 egg, beaten with 1 tbsp water

    Directions

    Prepare the Dough

    In a large bowl, combine warm water and yeast. Let stand for about 1 minute until slightly foamy. Stir in table salt, brown sugar, and melted butter.

    Add 3½ cups of flour, one cup at a time, mixing with a wooden spoon until a soft dough forms. If dough is sticky, add up to ½ cup more flour gradually until smooth and slightly tacky but not wet.

    Knead and Rest

    Turn dough onto a lightly floured surface and knead for about 3 minutes until elastic and uniform. Shape into a ball.

    • Quick Version: Cover lightly and let rest for 10 minutes before shaping.
    • Bakery-Style Version: Cover the bowl with plastic wrap and refrigerate 1–2 hours (or up to overnight). Bring to room temperature for 10–15 minutes before shaping.

    Shape the Pretzels

    Preheat oven to 425°F (220°C). Line baking sheets with parchment paper or silicone baking mats.

    Divide dough into 8–10 equal pieces (about 90–100 g each). Roll each piece into a 20-inch rope and twist into a pretzel shape. Place on prepared baking sheets.

    Boil in Baking Soda Solution

    In a large pot, bring 9 cups water and ½ cup baking soda to a gentle boil. For deeper color, bake the baking soda first (spread on a tray and bake at 250°F for 1 hour) before adding it to the water.

    Drop pretzels, one or two at a time, into the boiling solution for 20–25 seconds. Remove with a slotted spoon, drain well, and place on prepared baking sheets.

    Top and Bake

    For traditional bakery-style pretzels, sprinkle with kosher or coarse sea salt immediately after boiling, then bake as directed.

    For a softer, fair-style pretzel, brush with the optional egg wash before sprinkling with salt. Bake for 11–13 minutes, or until deep golden brown with a shiny crust and soft interior.

    Finish

    Brush warm pretzels with melted butter immediately after baking for a glossy finish and tender bite. Serve warm with mustard, cheese sauce, or butter.


    Notes

    Preparation

    • Lower hydration (3½ cups flour to 1½ cups liquid) produces the classic tight, chewy crumb.
    • A short cold ferment (1–2 hours) develops malty depth and improves shaping.
    • Bake baking soda before boiling for more intense pretzel color and flavor.
    • Brushing with butter right after baking adds shine and a soft finish without dulling color.

    Egg Wash vs. Baking Soda Finish

    • Without Egg Wash (Traditional): Deep mahogany color, chewy crust, classic pretzel flavor.
    • With Egg Wash (Soft & Glossy): Lighter golden color, slightly softer texture, mild sheen.
    • Both versions can be brushed with melted butter after baking for extra flavor and softness.

    Serving Suggestions

    • Serve warm with mustard, cheese dip, or honey butter.
    • Top with coarse salt, everything bagel seasoning, or cinnamon sugar for sweet pretzels.
    • Use smaller portions to make pretzel bites or sandwich rolls.

    Make-Ahead & Storage

    • Shaped pretzels can be refrigerated for up to 6 hours before boiling.
    • Freeze shaped, unboiled pretzels up to 1 month; boil directly from frozen before baking.
    • Store baked pretzels airtight up to 2 days; reheat at 350°F for 5–7 minutes to refresh.
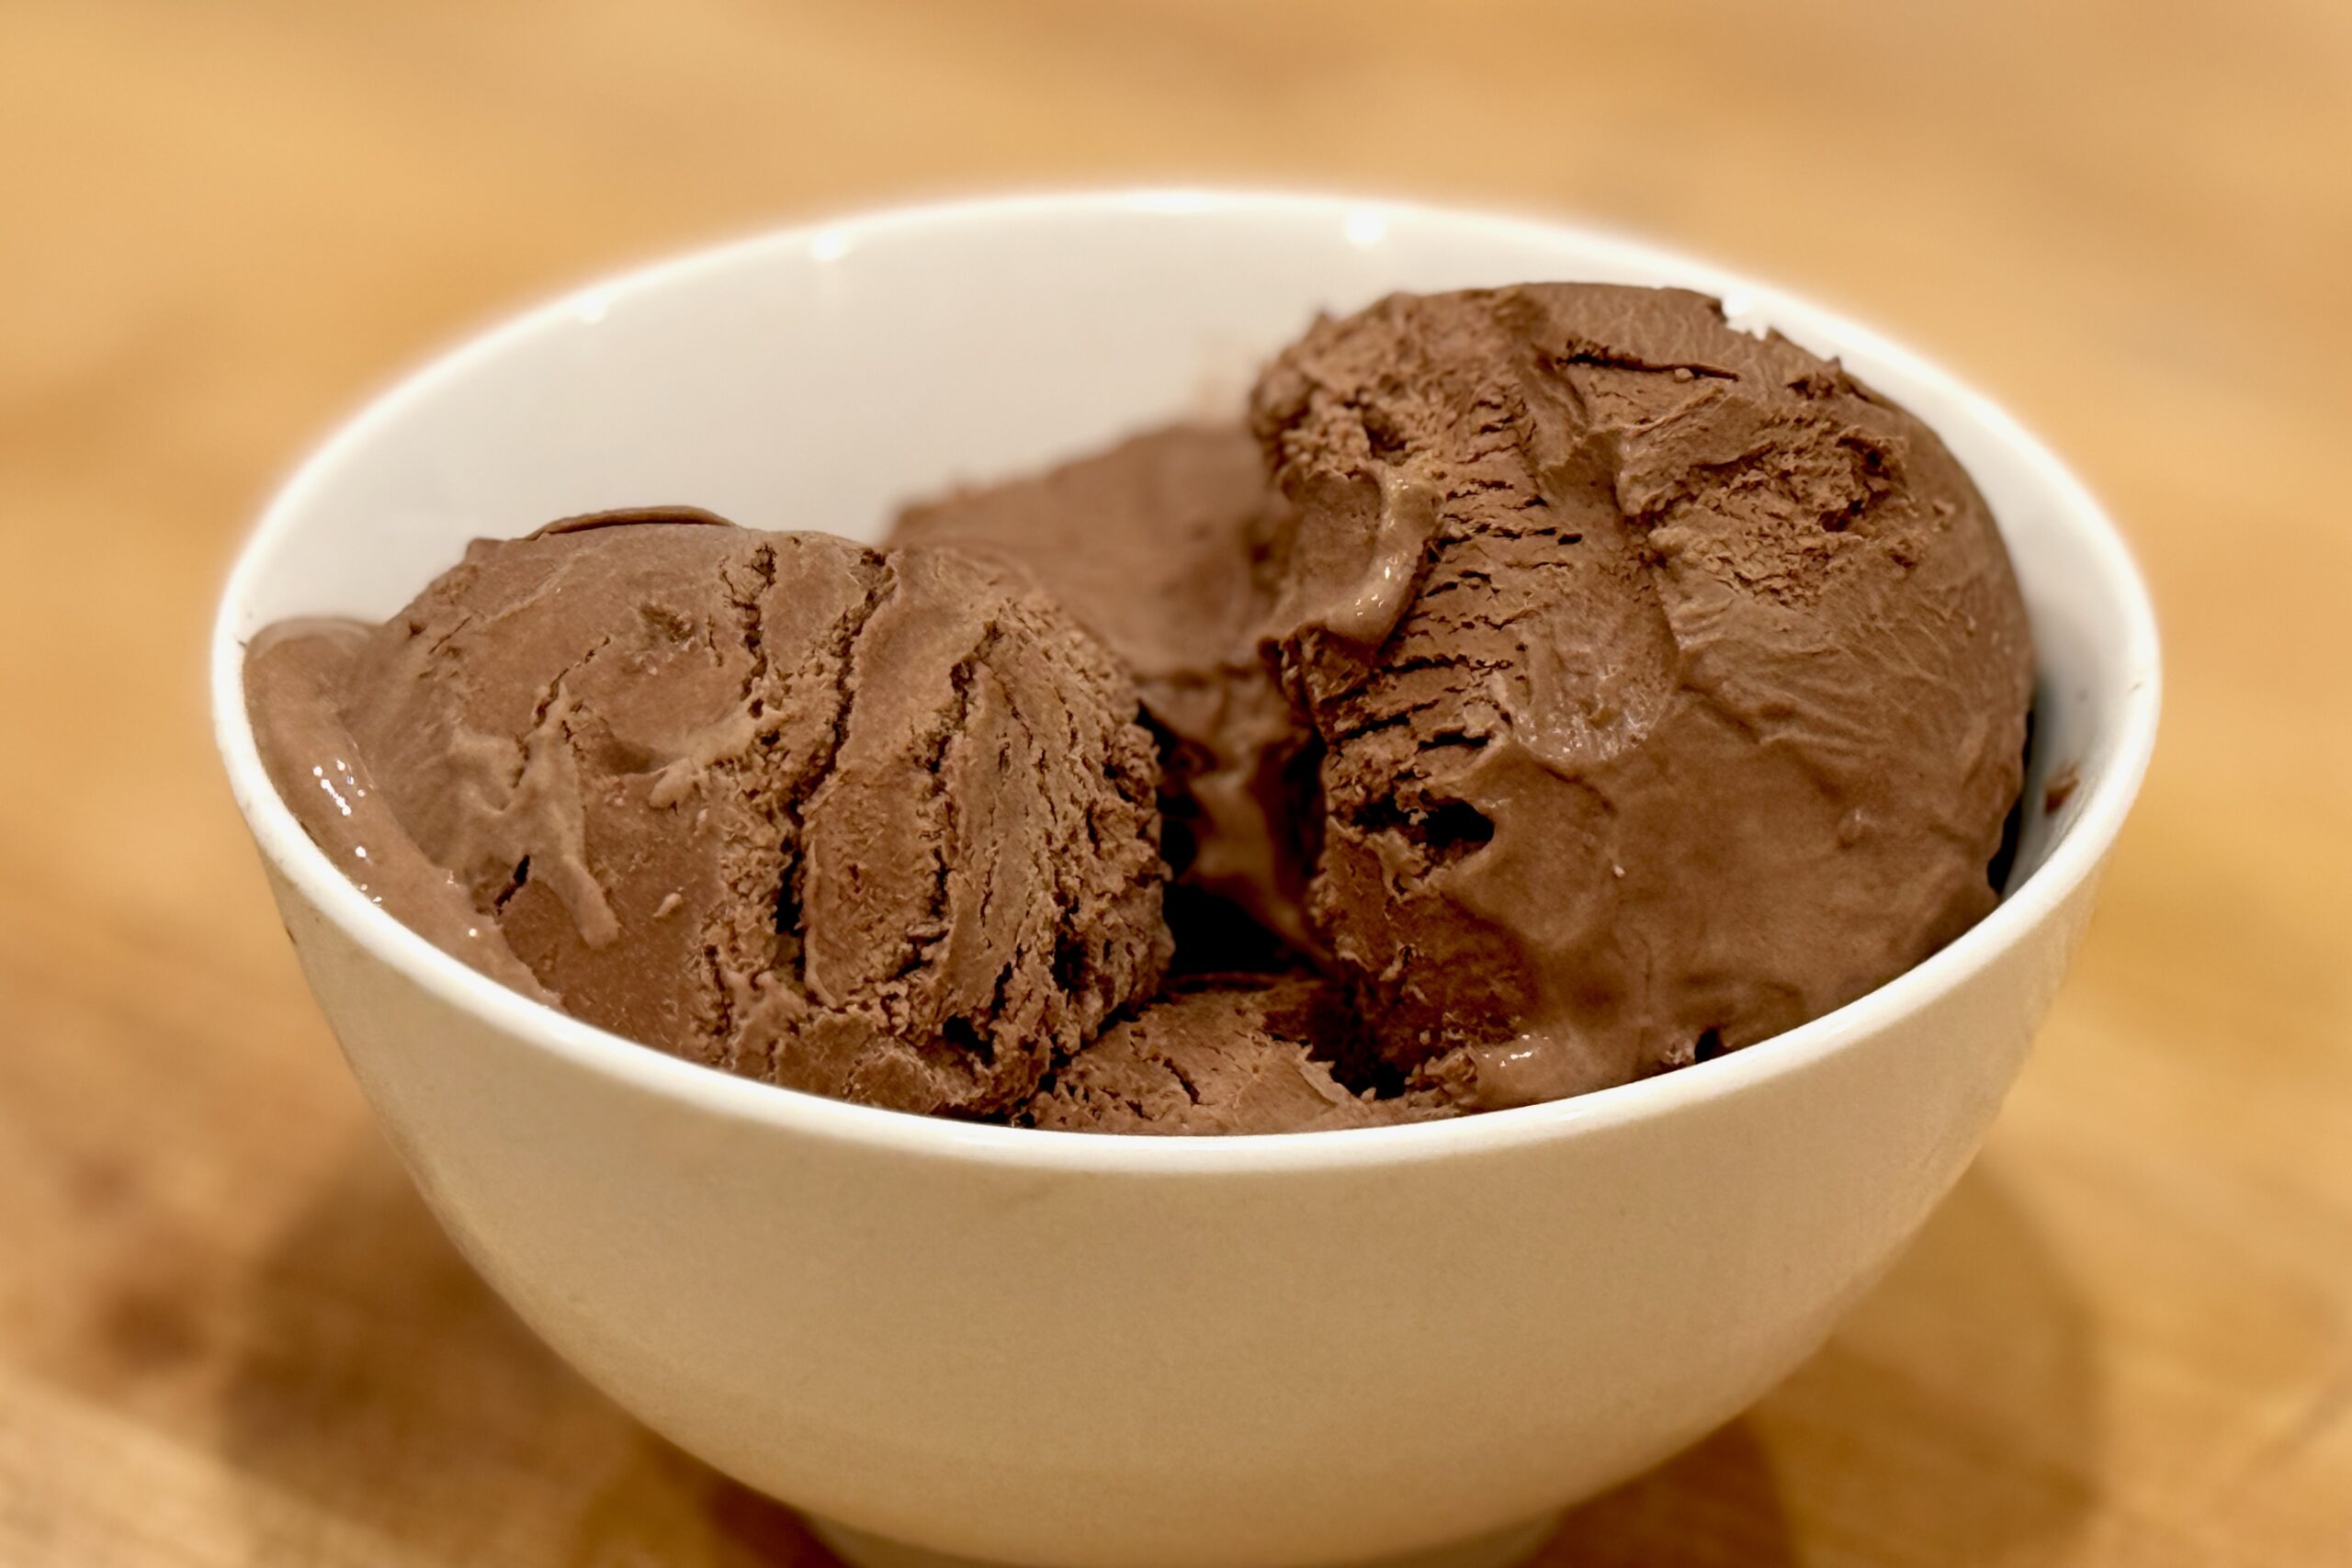
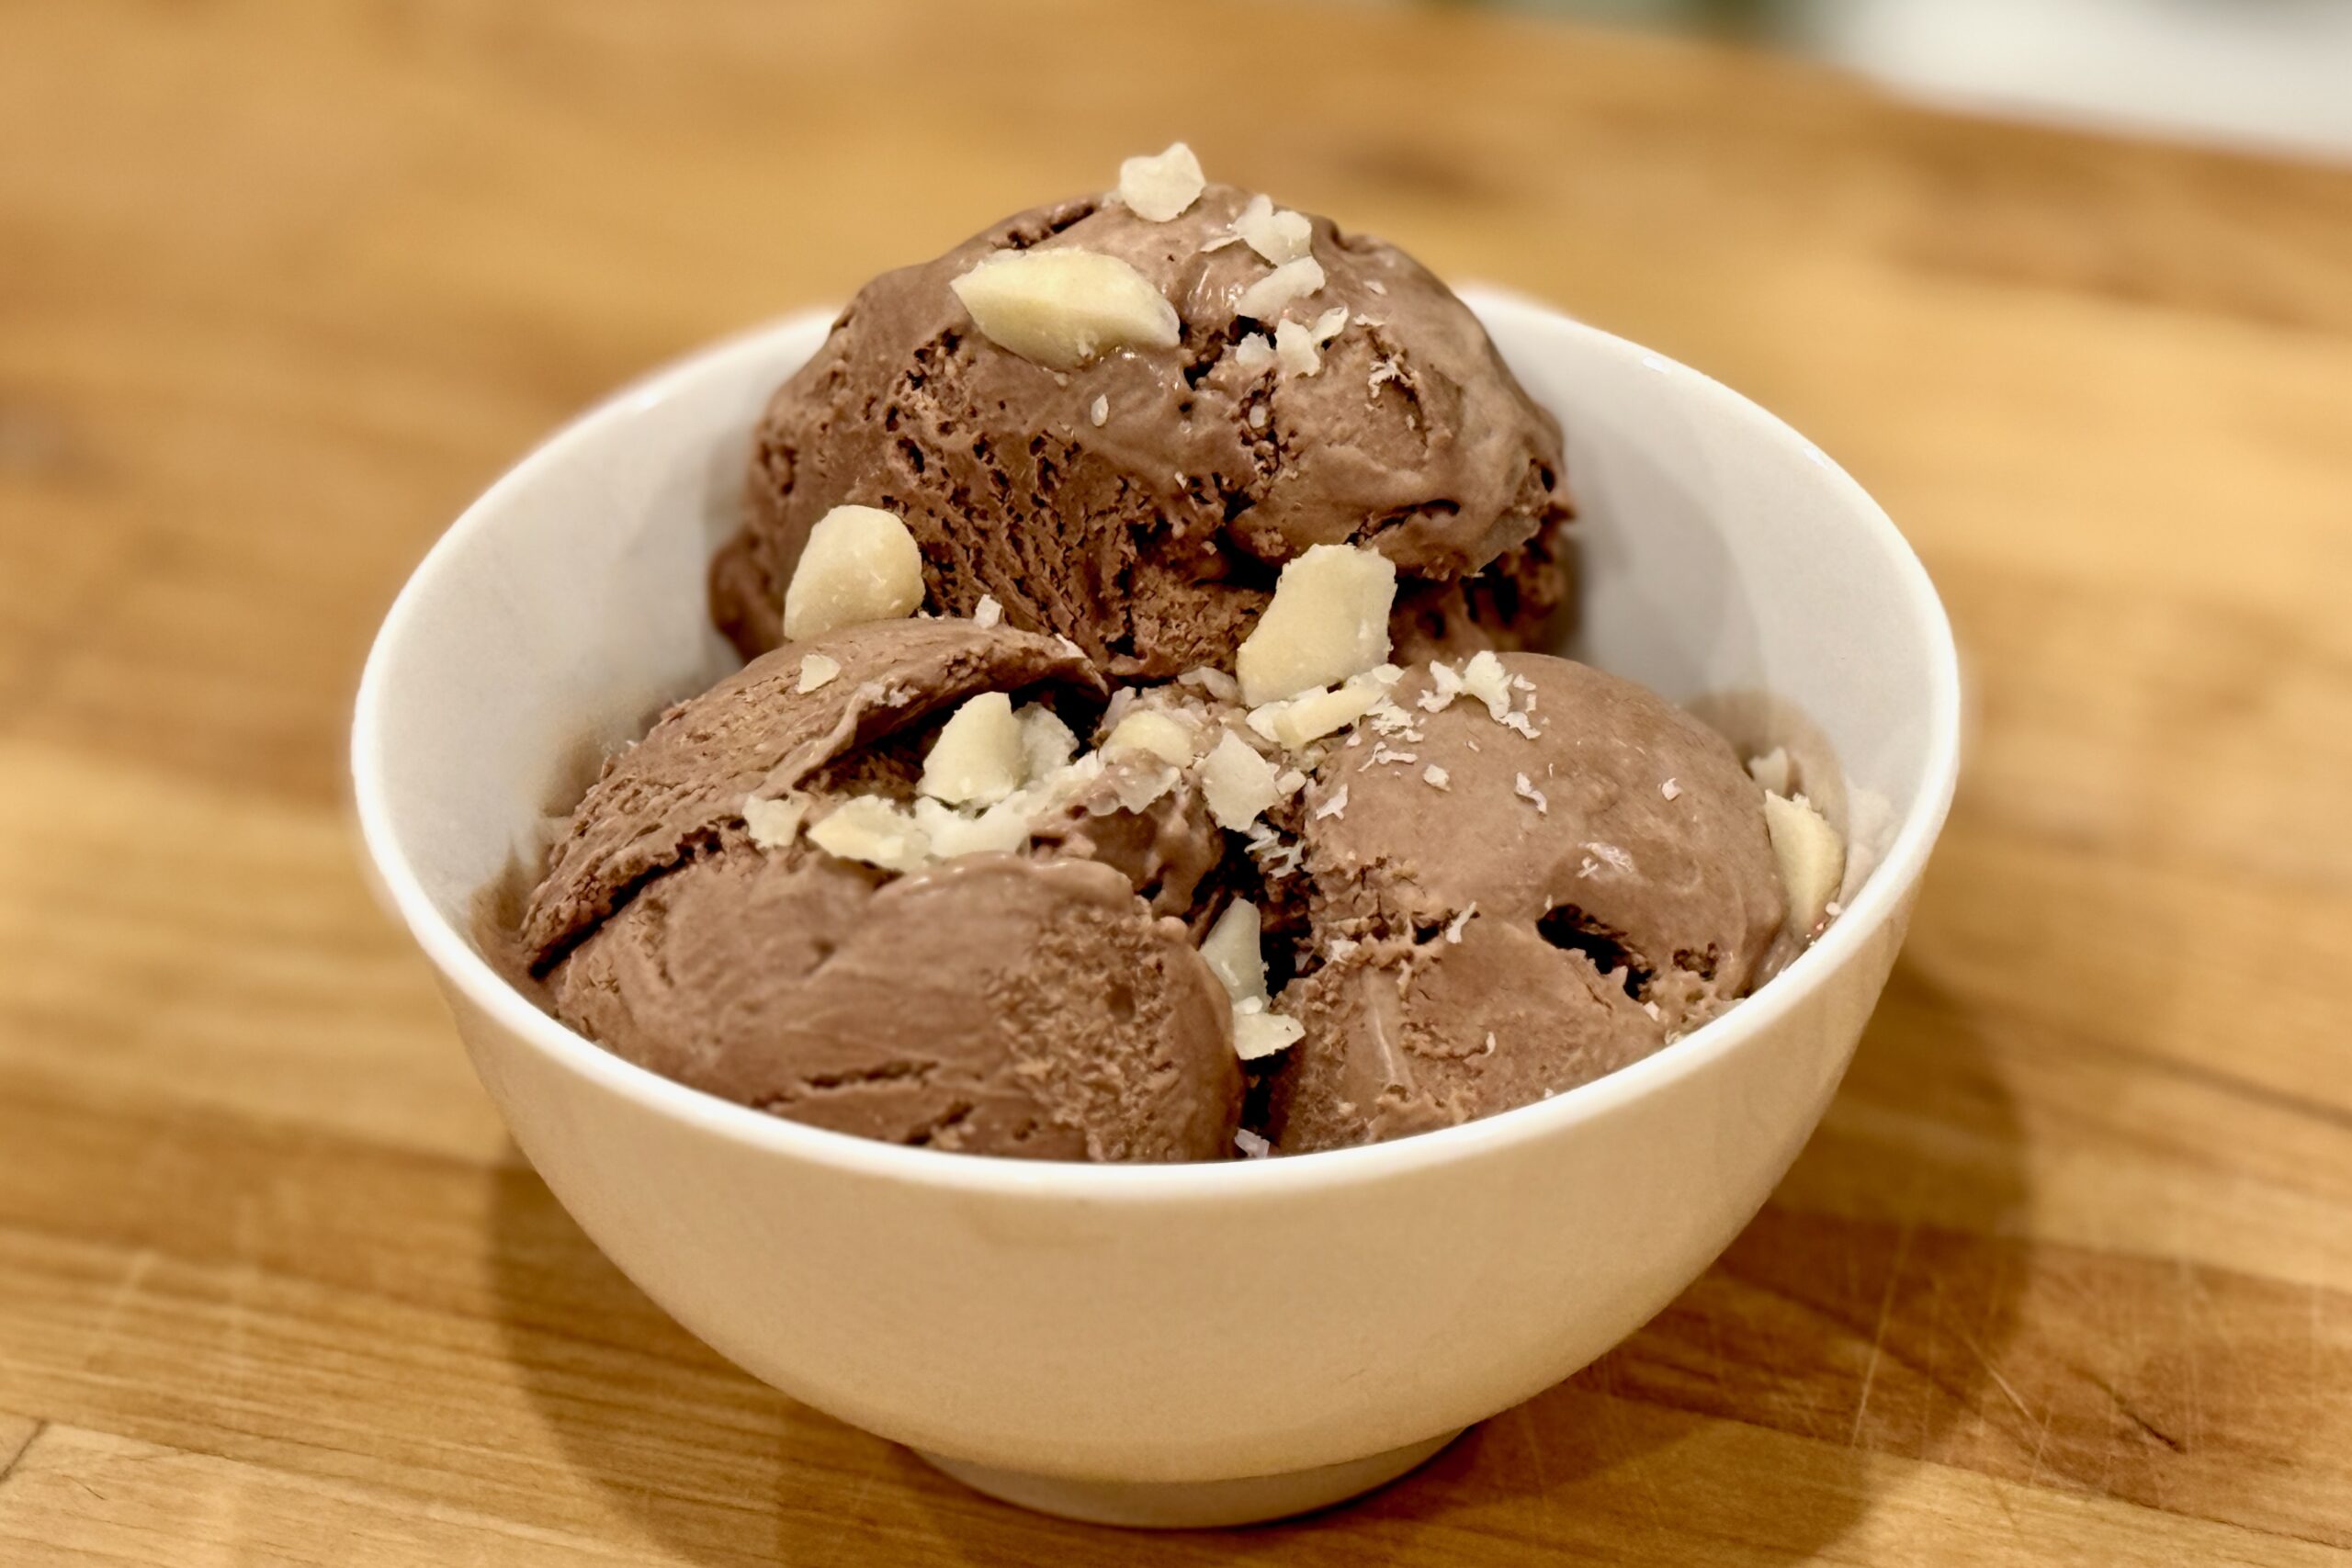
  • Chocolate Mocha Ice Cream

    Chocolate Mocha Ice Cream

    Deeply rich and smooth chocolate ice cream infused with bold espresso and a subtle tang of buttermilk for balance. The result is café-level mocha flavor—decadent yet refined—with a clean, refreshing finish that highlights both the chocolate and espresso notes.


    Ingredients

    • Chocolate–Mocha Custard:

    • 2 cups heavy cream
    • ½ cup whole milk
    • ½ cup buttermilk (added after cooking)
    • ½ cup sugar, divided
    • 5 egg yolks
    • 4 oz bittersweet or semisweet chocolate (60–70%), finely chopped
    • 2 tbsp unsweetened cocoa powder
    • 2 tsp instant espresso powder, divided (see directions)
    • ½ tsp vanilla extract
    • pinch table salt

    Directions

    Make the Chocolate Base

    In a medium saucepan, whisk together whole milk, cream, ¼ cup sugar, cocoa powder, 1½ tsp espresso powder, and salt. Warm gently over medium heat until steaming and the sugar dissolves. Remove from heat and whisk in the chopped chocolate until smooth.

    Temper the Yolks

    In a separate bowl, whisk egg yolks with the remaining ¼ cup sugar until pale and thick. Slowly temper with ½ cup of the warm chocolate mixture, whisking constantly, then return everything to the saucepan.

    Cook the Custard

    Cook gently over low heat, stirring constantly, until the custard coats the back of a spoon (170–175°F / 77–80°C). Do not boil.

    Finish the Flavoring

    Strain through a fine mesh sieve into a clean bowl. Stir in vanilla. Dissolve the remaining ½ tsp espresso powder in 1 tbsp hot water or cream, then whisk it into the warm custard for a final espresso boost.

    Add the Buttermilk & Chill

    Allow the custard to cool slightly, then stir in the buttermilk. Cover and chill thoroughly—at least 4 hours or overnight.

    Churn

    Churn the chilled base in an ice cream maker according to the manufacturer’s instructions. Transfer to a container and freeze until firm.


    Notes

    Preparation

    • Buttermilk adds brightness and keeps the mocha flavor balanced.
    • For a sweeter, richer result, replace the buttermilk with whole milk.
    • For a darker mocha profile, add 1 tsp more espresso powder or swap 1 oz chocolate for unsweetened baking chocolate.
    • For an ultra-smooth texture, whisk in ⅛ tsp xanthan gum while the base is warm (before chilling).

    Serving Suggestions

    • Serve affogato-style with a shot of hot espresso.
    • Pair with biscotti, chocolate cake, or almond cookies.
    • Top with shaved dark chocolate for extra intensity.

    Variations

    • Add ½ cup chocolate-covered espresso beans during the last minute of churning.
    • For a mocha-ripple version, swirl in ½ cup chocolate-fudge sauce before freezing.
    • For a tiramisu-inspired twist, add 1 tbsp mascarpone to the warm custard before chilling.

    Make-Ahead & Storage

    • Refrigerate the unchurned base up to 2 days before freezing.
    • Store churned ice cream in an airtight container up to 1 week.
    • For ideal scooping, let rest at room temperature 5–10 minutes before serving.
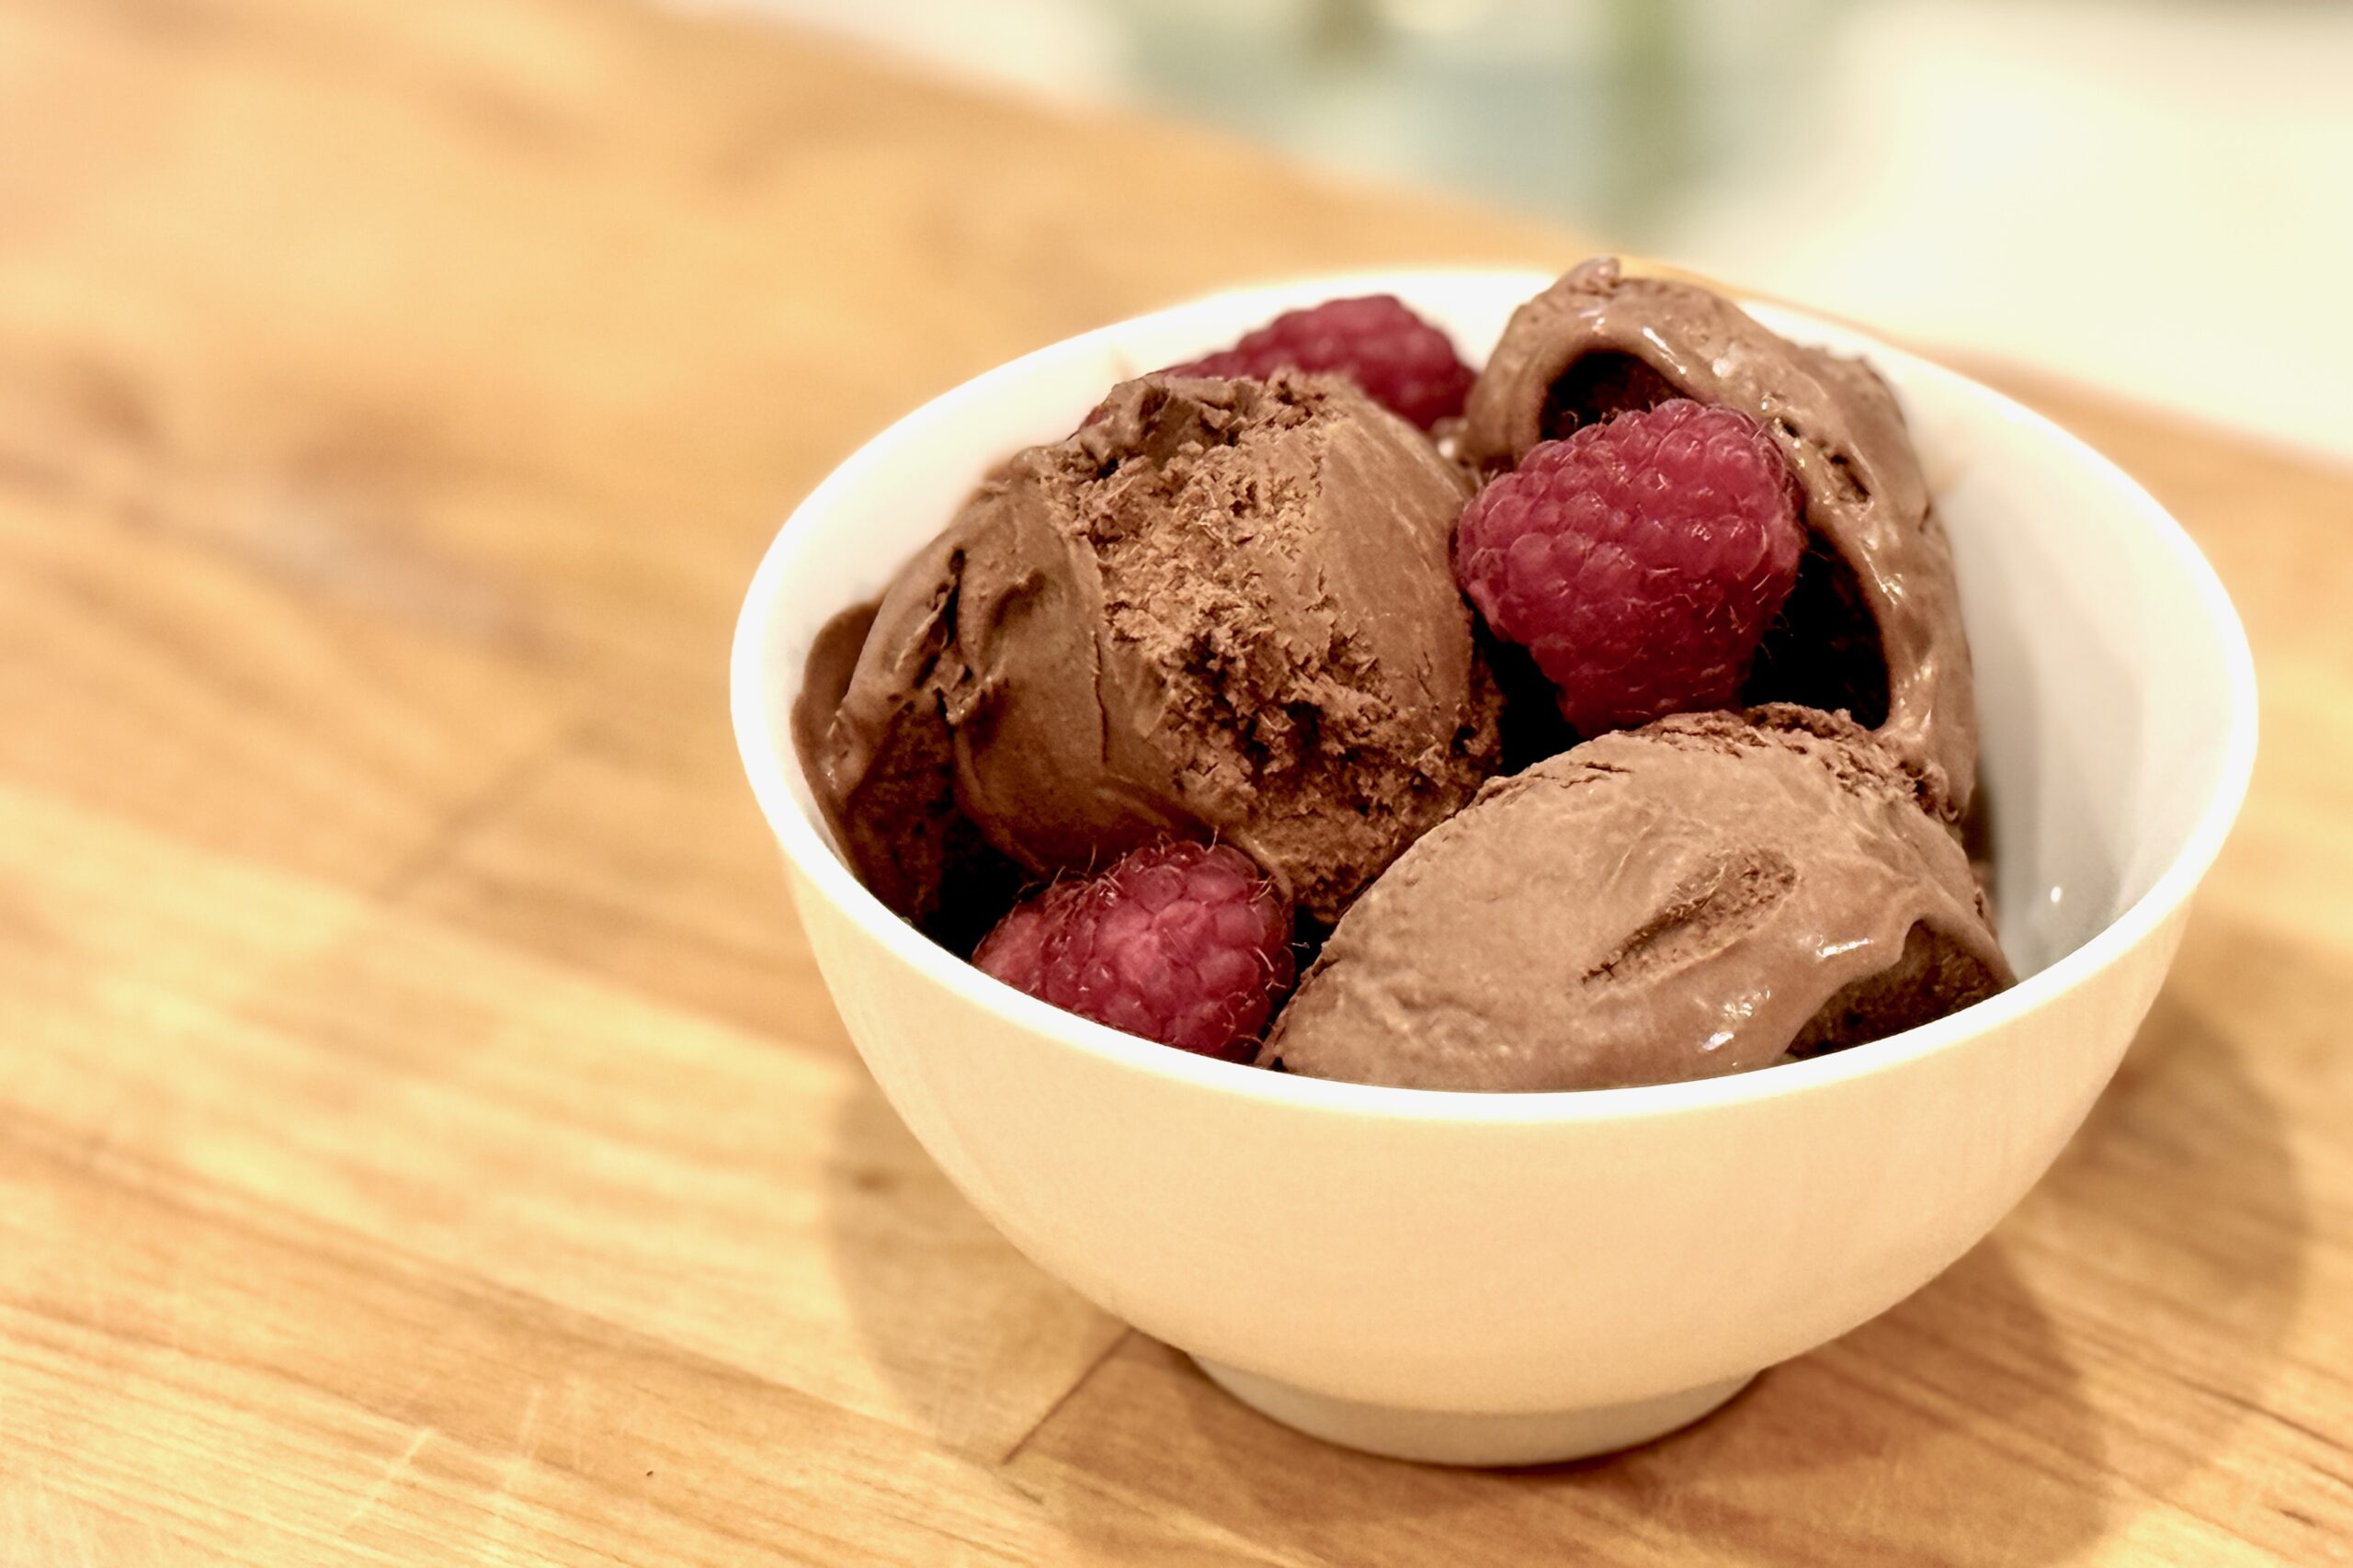
  • Dark Chocolate Buttermilk Ice Cream

    Dark Chocolate Buttermilk Ice Cream

    Rich, silky, and deeply flavored, this dark chocolate ice cream balances Dutch-process cocoa and melted dark chocolate with the subtle tang of buttermilk for a clean, sophisticated finish. Smooth, scoopable, and layered with complex cocoa notes, it evokes the character of fine European chocolate.


    Ingredients

    Chocolate Custard Base:

    • 1½ cups heavy cream
    • 1 cup whole milk
    • ¾ cup sugar, divided
    • ½ cup Dutch-process cocoa powder
    • 4 oz dark chocolate (60–70%), finely chopped
    • 4 egg yolks
    • ½ tsp instant espresso powder (optional, for depth)
    • ½ tsp vanilla extract
    • pinch table salt
    • ⅛ tsp xanthan gum (stabilizer)

    After Cooking:

    • ¾ cup cold buttermilk
    • 1 tbsp light corn syrup (optional, for slightly softer texture)

    Directions

    Bloom the Cocoa

    In a medium saucepan, whisk cocoa powder with ½ cup of the milk and ¼ cup sugar to form a smooth paste. Add remaining milk, heavy cream, espresso powder (if using), and salt. Heat over medium until steaming and sugar is dissolved.

    Melt the Chocolate

    Remove from heat and whisk in the chopped dark chocolate until melted and glossy. Return briefly to low heat only if needed to melt fully.

    Make the Custard

    In a separate bowl, whisk egg yolks with remaining ½ cup sugar until pale and thick. Temper slowly with ½ cup warm chocolate mixture, then return mixture to the saucepan.

    Cook gently over low heat, stirring constantly, until custard coats the back of a spoon (170–175°F / 77–80°C). Do not boil. Remove from heat and stir in vanilla and optional corn syrup.

    Add the Xanthan Gum

    While custard is warm (below 160°F / 70°C), sprinkle xanthan gum evenly over the surface and immediately blend with an immersion blender or whisk vigorously until fully dispersed. Strain through a fine mesh sieve.

    Incorporate the Buttermilk

    Cool mixture to lukewarm (below 110°F / 43°C). Whisk in buttermilk to preserve fresh tang and prevent curdling. Chill thoroughly, preferably overnight.

    Churn & Freeze

    Churn in an ice cream maker according to manufacturer’s instructions. Transfer to a container and freeze until firm, about 4 hours.


    Notes

    Preparation

    • Xanthan gum gives smoother body and reduces iciness—use sparingly.
    • If using corn syrup, reduce total sugar to ⅔ cup to maintain balance.
    • Espresso powder intensifies chocolate flavor without adding coffee notes.
    • For extra richness, replace ½ cup of the whole milk with half-and-half.
    • Using Natural Cocoa Powder: Add ⅛ tsp baking soda during the “Bloom the Cocoa” step to reduce acidity and deepen color. Increase chocolate to 4½ oz and reduce buttermilk to ⅔ cup.

    Serving Suggestions

    • Top with dark chocolate curls or shavings.
    • Pair with espresso caramel, berries, or almond biscotti.
    • Finish with a pinch of flaky sea salt for contrast.

    Make-Ahead & Storage

    • Refrigerate the custard base up to 2 days before churning.
    • Store churned ice cream in an airtight container up to 1 week.
    • Soften 5–10 minutes at room temperature before serving.
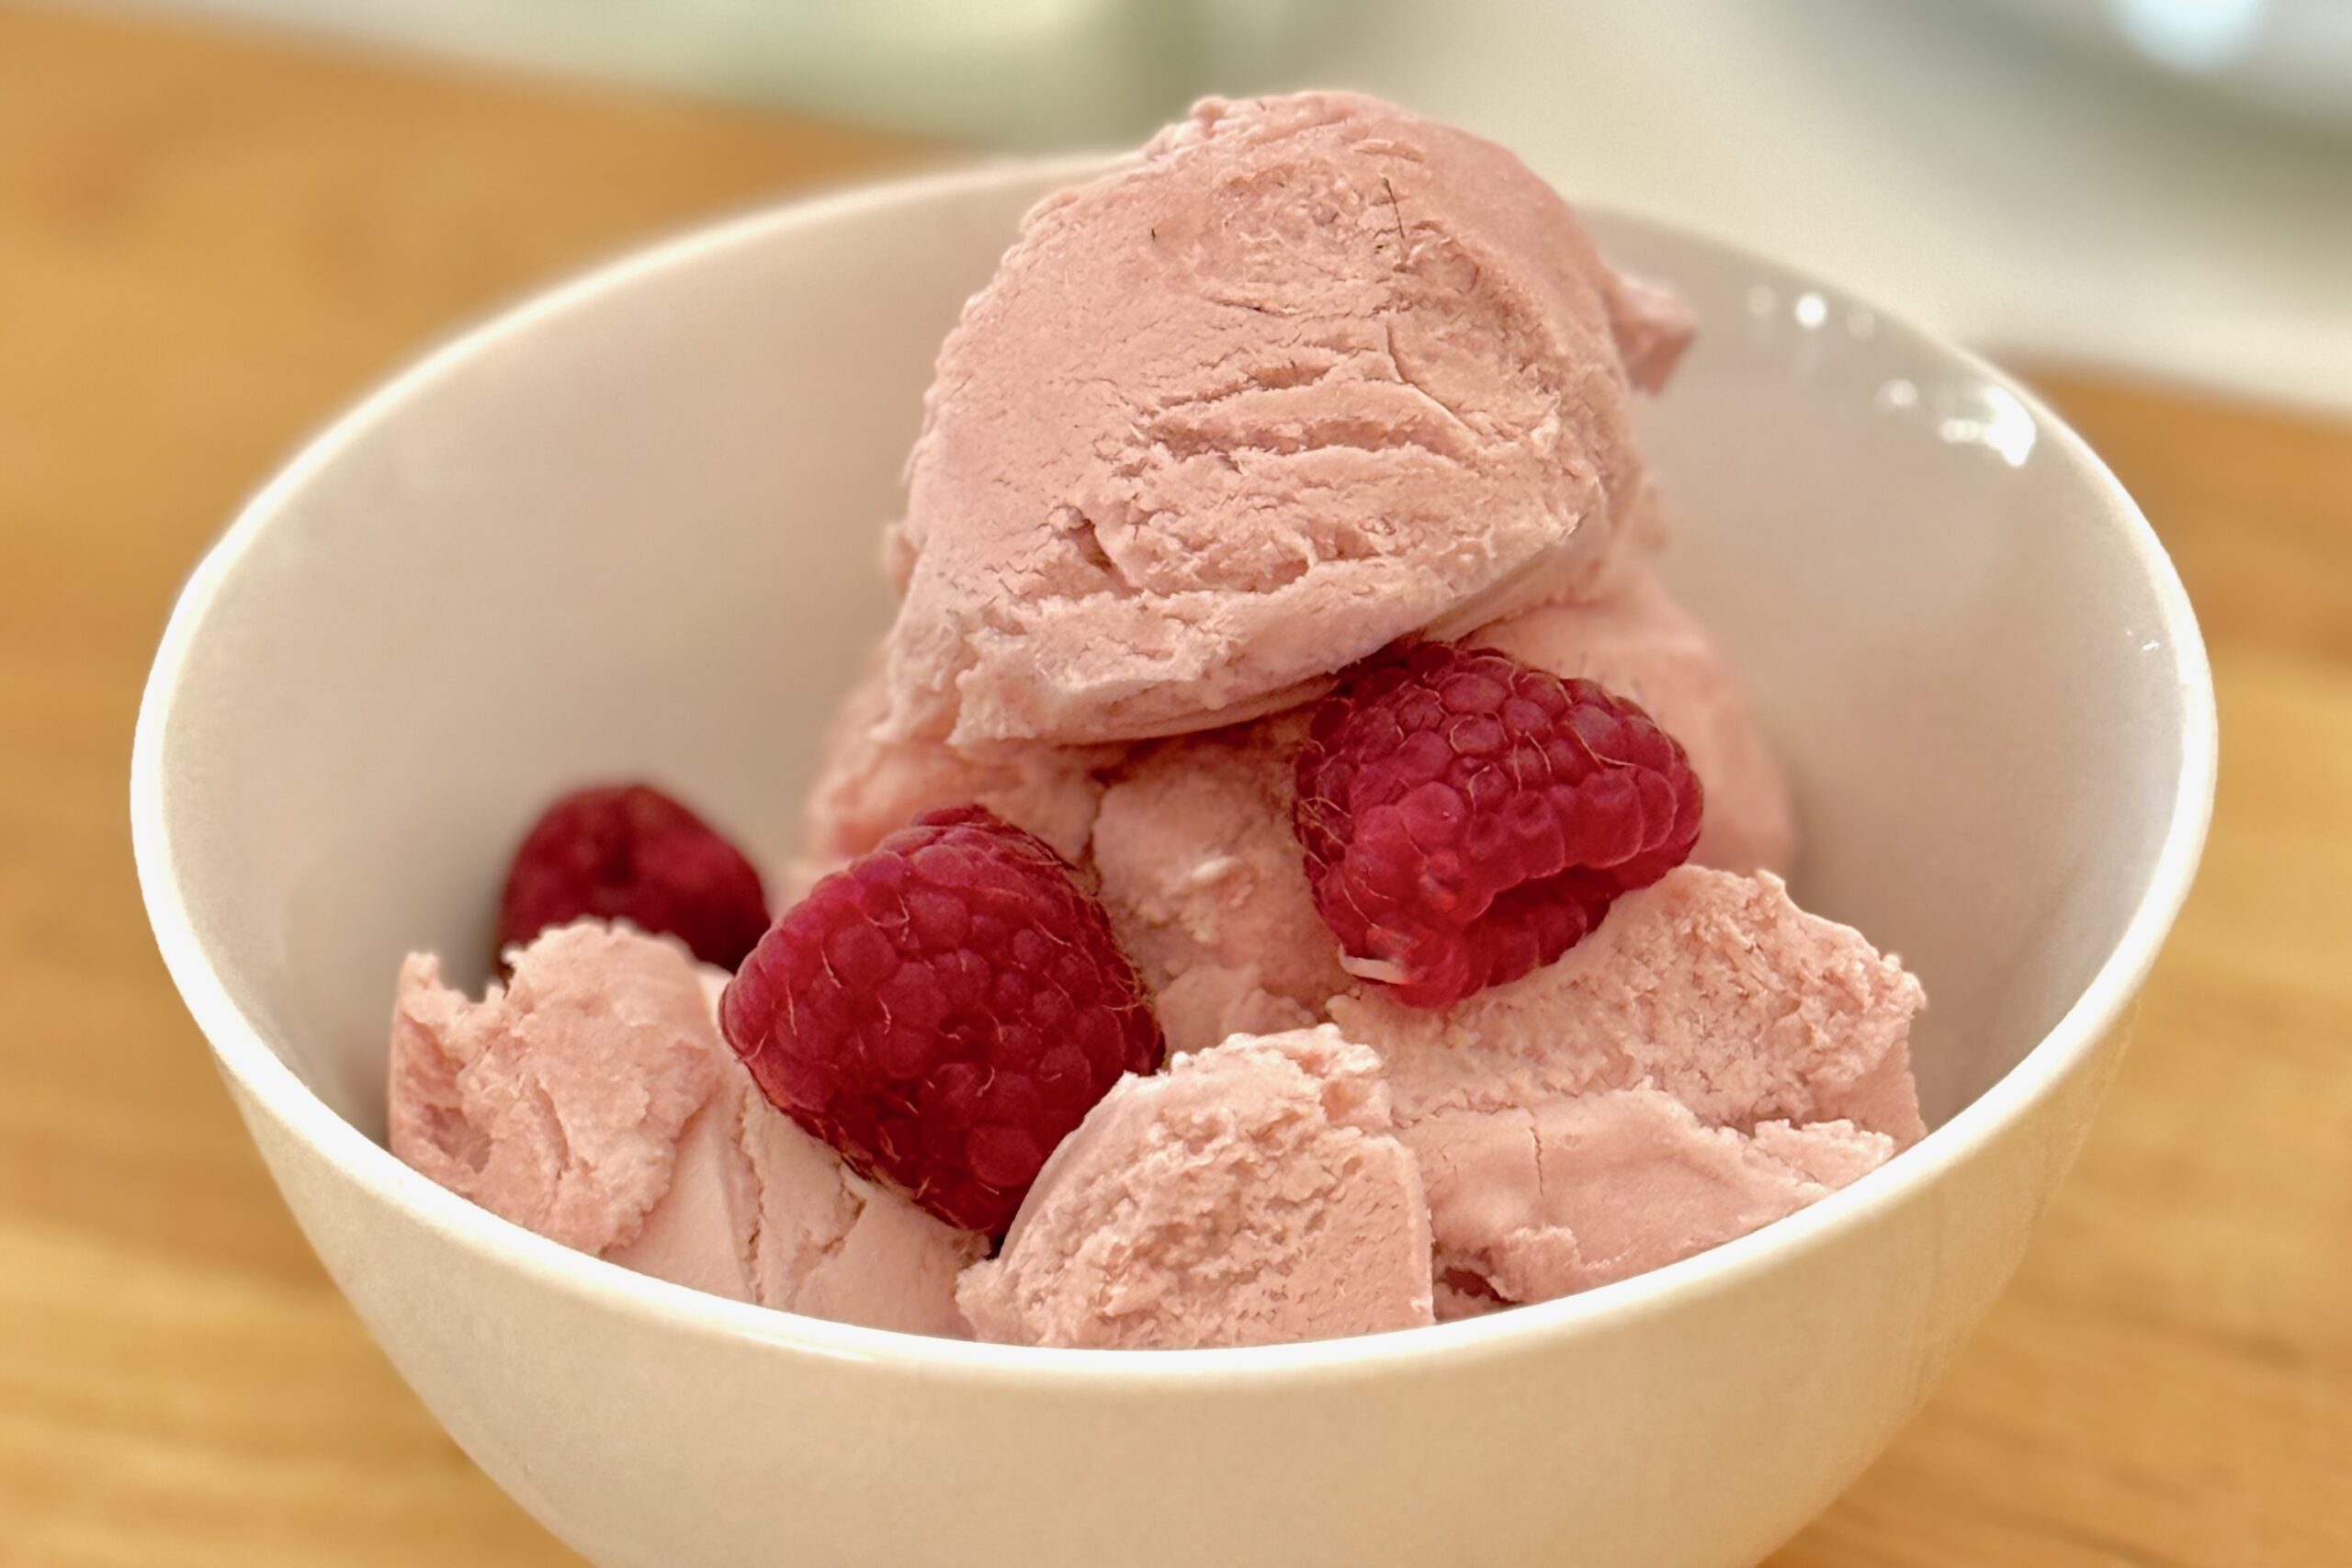
  • Raspberry Buttermilk Ice Cream

    Raspberry Buttermilk Ice Cream

    This raspberry buttermilk ice cream is creamy, tangy, and fruit-forward. The rich custard base is tempered carefully to avoid any eggy flavor, while the buttermilk adds refreshing tartness that enhances the bright, fresh taste of raspberries. Inspired by a recipe shared by our friend Holly (her version here), this variation delivers a silky, balanced ice cream with just the right mix of sweetness and tang.


    Ingredients

    Custard Base:

    • 3 large egg yolks
    • ¾ cup sugar
    • 1 cup milk
    • 1 cup heavy cream
    • 1 cup cold buttermilk
    • ½ tsp vanilla extract

    Raspberry Purée:

    • 1½ cups fresh or frozen raspberries
    • 2 tbsp sugar (adjust to taste)
    • ½ tsp lemon juice (optional, brightens flavor)

    Directions

    Prepare the Raspberry Purée

    In a small saucepan, combine raspberries, sugar, and lemon juice. Cook over medium heat, stirring occasionally, until the berries break down and the mixture thickens slightly (about 5–7 minutes). Strain through a fine-mesh sieve to remove seeds. Cool completely.

    Prepare the Custard Base

    In a medium saucepan, heat the milk and sugar over medium heat until steaming (do not boil). In a separate bowl, whisk egg yolks until smooth. Slowly pour about ½ cup of the hot milk into the yolks while whisking constantly to temper. Return the mixture to the saucepan.

    Cook the Custard

    Cook over medium-low heat, stirring constantly, until the mixture thickens slightly and coats the back of a spoon (170–175°F / 77–79°C). Do not boil. Immediately strain the custard through a fine-mesh sieve into a bowl set over an ice bath. Stir until cooled to room temperature.

    Chill & Combine

    Once completely cool, stir in the heavy cream, buttermilk, vanilla, and raspberry purée. Refrigerate at least 4 hours or overnight.

    Freeze

    Churn in an ice cream maker according to the manufacturer’s instructions. Transfer to a freezer-safe container and freeze until firm, about 4–6 hours.


    Notes

    Preparation

    • Keep the custard below 175°F / 79°C to avoid eggy flavor and preserve raspberry aroma.
    • Strain both the purée and the custard for a silky, seed-free texture.
    • Adjust sugar based on the sweetness of your raspberries.

    Serving Suggestions

    • Serve with fresh raspberries or a raspberry coulis.
    • Top with crushed shortbread or vanilla wafers for crunch.
    • Pairs beautifully with lemon bars or angel food cake.

    Make-Ahead & Storage

    • Raspberry purée can be made 2–3 days ahead and refrigerated.
    • Custard base can be refrigerated up to 2 days before churning.
    • Store churned ice cream up to 1 week in an airtight container.
    • Let soften 5–10 minutes before serving.
  • Hot Fudge Sauce

    Hot Fudge Sauce

    This classic hot fudge sauce delivers the rich, chewy texture and glossy finish of an old-fashioned ice cream parlor fudge. Thick and silky when warm, it sets with just a hint of chew where it meets cold ice cream—perfect for sundaes or swirling into homemade ice cream. A small batch of true nostalgia, made from real chocolate, cocoa, and butter.


    Ingredients

    • ½ cup sugar
    • ⅓ cup light corn syrup
    • ⅓ cup water (for chewier texture, reduce to ¼ cup)
    • ¼ cup Dutch-process cocoa powder
    • 2 oz dark chocolate (60–70%), finely chopped
    • 2 tbsp unsalted butter
    • ¼ tsp vanilla extract
    • pinch table salt

    Directions

    Make the Fudge Base

    In a small saucepan, whisk together the sugar, corn syrup, water, and cocoa powder until smooth. Bring to a gentle boil over medium heat, stirring constantly. Continue cooking 3–5 minutes, until the mixture thickens slightly and develops a glossy sheen. Longer cooking creates a chewier, old-fashioned texture.

    Finish the Sauce

    Remove from heat and whisk in the chopped chocolate, butter, vanilla, and salt until melted and smooth. Avoid excessive stirring as the sauce cools to maintain gloss and elasticity.

    Cool & Store

    Let cool to your preferred consistency before using. The sauce thickens as it cools but should remain spoonable. For nostalgic, chewy fudge, drizzle slightly warm over cold ice cream.


    Notes

    Preparation

    • For deeper chocolate flavor, increase chopped chocolate to 3 oz.
    • Cooking the syrup mixture longer produces a chewier, more traditional fudge texture.
    • If using natural cocoa instead of Dutch-process, add ⅛ tsp baking soda during heating to neutralize acidity and preserve smoothness.
    • Use dark chocolate between 60–70% cacao for ideal balance.

    Serving Suggestions

    • Drizzle over ice cream for a glossy, chewy hot fudge topping.
    • Layer into homemade ice cream as a ripple.
    • Serve warm over brownies, cheesecake, or banana splits.
    • Pairs beautifully with peppermint, peanut butter, vanilla, or coffee ice creams.

    Make-Ahead & Storage

    • Store in a sealed jar up to 2 weeks.
    • Warm gently before serving using a double boiler or short microwave bursts.
    • If too thick after chilling, whisk in 1–2 tsp warm cream or milk to loosen.
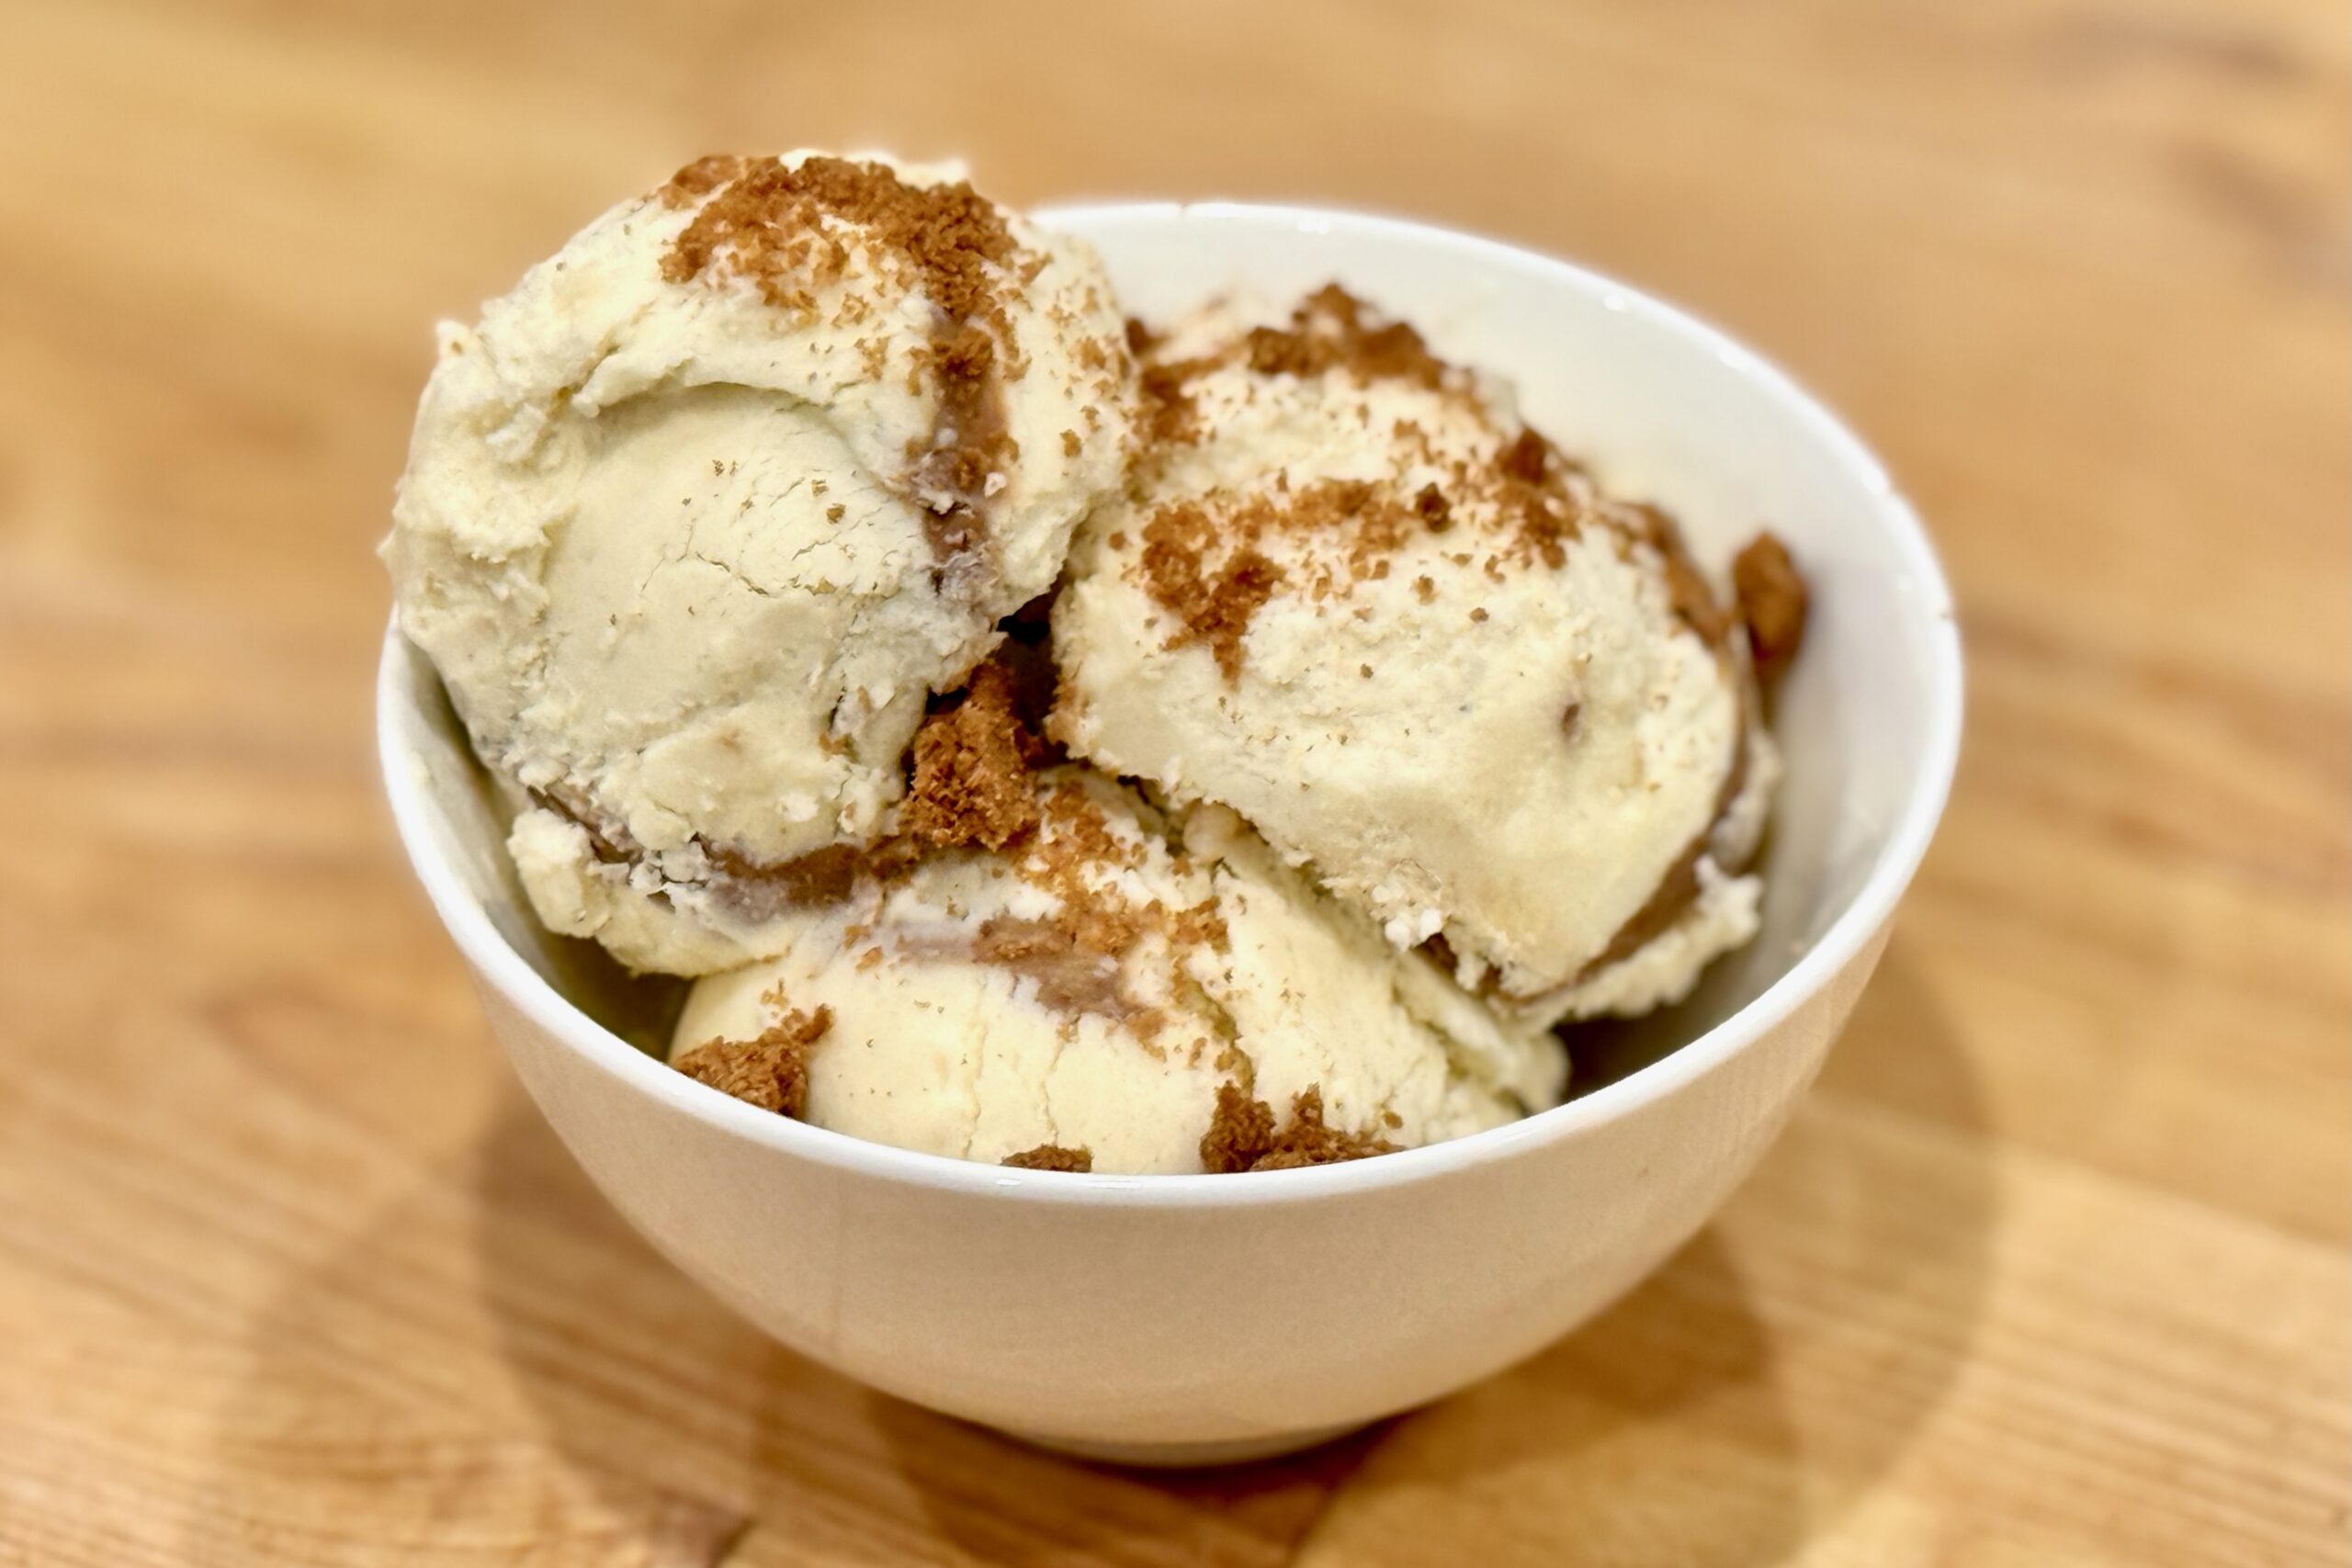
  • Speculoos Ribbon Ice Cream

    Speculoos Ribbon Ice Cream

    I first fell in love with speculaas while living in The Netherlands—those crisp, caramelized cookies scented with cinnamon, nutmeg, and clove were unlike anything I’d tasted before. Though the rest of our family has only visited, our Dutch and German ancestry, and our holiday traditions, have long reflected this heritage. Each Christmas, we bake homemade speculaas as part of our celebration, their aroma filling the house with warm spice and nostalgia. This ice cream captures that same spirit in a creamy, elegant dessert: a smooth vanilla–buttermilk base swirled with ribbons of cookie butter and flecked with crushed speculaas for texture and depth.


    Ingredients

      Ice Cream Base

    • 2 cups heavy cream
    • ½ cup whole milk
    • ½ cup buttermilk (added after cooking)
    • ½ cup sugar
    • 5 egg yolks
    • ½ tsp vanilla extract
    • pinch table salt
    • ⅛ tsp cinnamon (optional)
    • pinch nutmeg (optional)
    • Mix-Ins

    • ⅔ cup Speculoos or Biscoff cookie butter
    • ½ cup crushed speculaas or Biscoff cookies (for layering and garnish)

    Directions

    Make the Custard Base

    In a saucepan, warm the milk, cream, sugar, salt, and optional spices over medium heat until steaming and the sugar dissolves.


    Temper the Yolks

    In a medium bowl, whisk the egg yolks until thick and pale. Slowly temper with ½ cup of the hot milk mixture, whisking constantly, then return all to the saucepan.


    Cook the Custard

    Cook gently over low heat, stirring constantly, until the custard coats the back of a spoon (170–175°F / 77–80°C). Do not boil.


    Finish & Chill

    Strain through a fine mesh sieve into a clean bowl. Stir in the vanilla. Allow to cool slightly, then stir in the buttermilk. Chill thoroughly, preferably overnight.


    Churn & Layer

    Churn the chilled base in an ice cream maker according to the manufacturer’s directions.

    Warm the cookie butter just until pourable. As you transfer the churned ice cream to its container, alternate layers of ice cream, drizzled cookie butter, and crushed cookies. Swirl gently with a butter knife without overmixing. Freeze until firm.


    Notes

    Preparation

    • The buttermilk brightens the flavor and balances the sweetness of the cookie butter.
    • Use whole milk instead of buttermilk for a richer, sweeter ice cream.
    • Add a pinch of cinnamon, clove, or ginger for extra “speculaas” aroma.
    • Reserve some crushed cookies for topping—they soften over time in the ice cream.

    Serving Suggestions

    • Top with freshly crushed speculaas for added crunch.
    • Serve with warm caramel sauce or cinnamon whipped cream.
    • Excellent alongside apple pie, poached pears, or Dutch-style oliebollen.

    Variations

    • Cookie Butter Crunch: Toss crushed cookies with a little melted butter and freeze before layering.
    • Swirl Boost: Melt an additional ¼ cup cookie butter and drizzle through the top third before freezing.
    • Speculoos Latte: Add 1 tsp espresso powder to the warm custard base.

    Make-Ahead & Storage

    • Refrigerate the unchurned custard for up to 2 days.
    • Store churned ice cream airtight for up to 1 week.
    • Let soften at room temperature 5–10 minutes before serving.
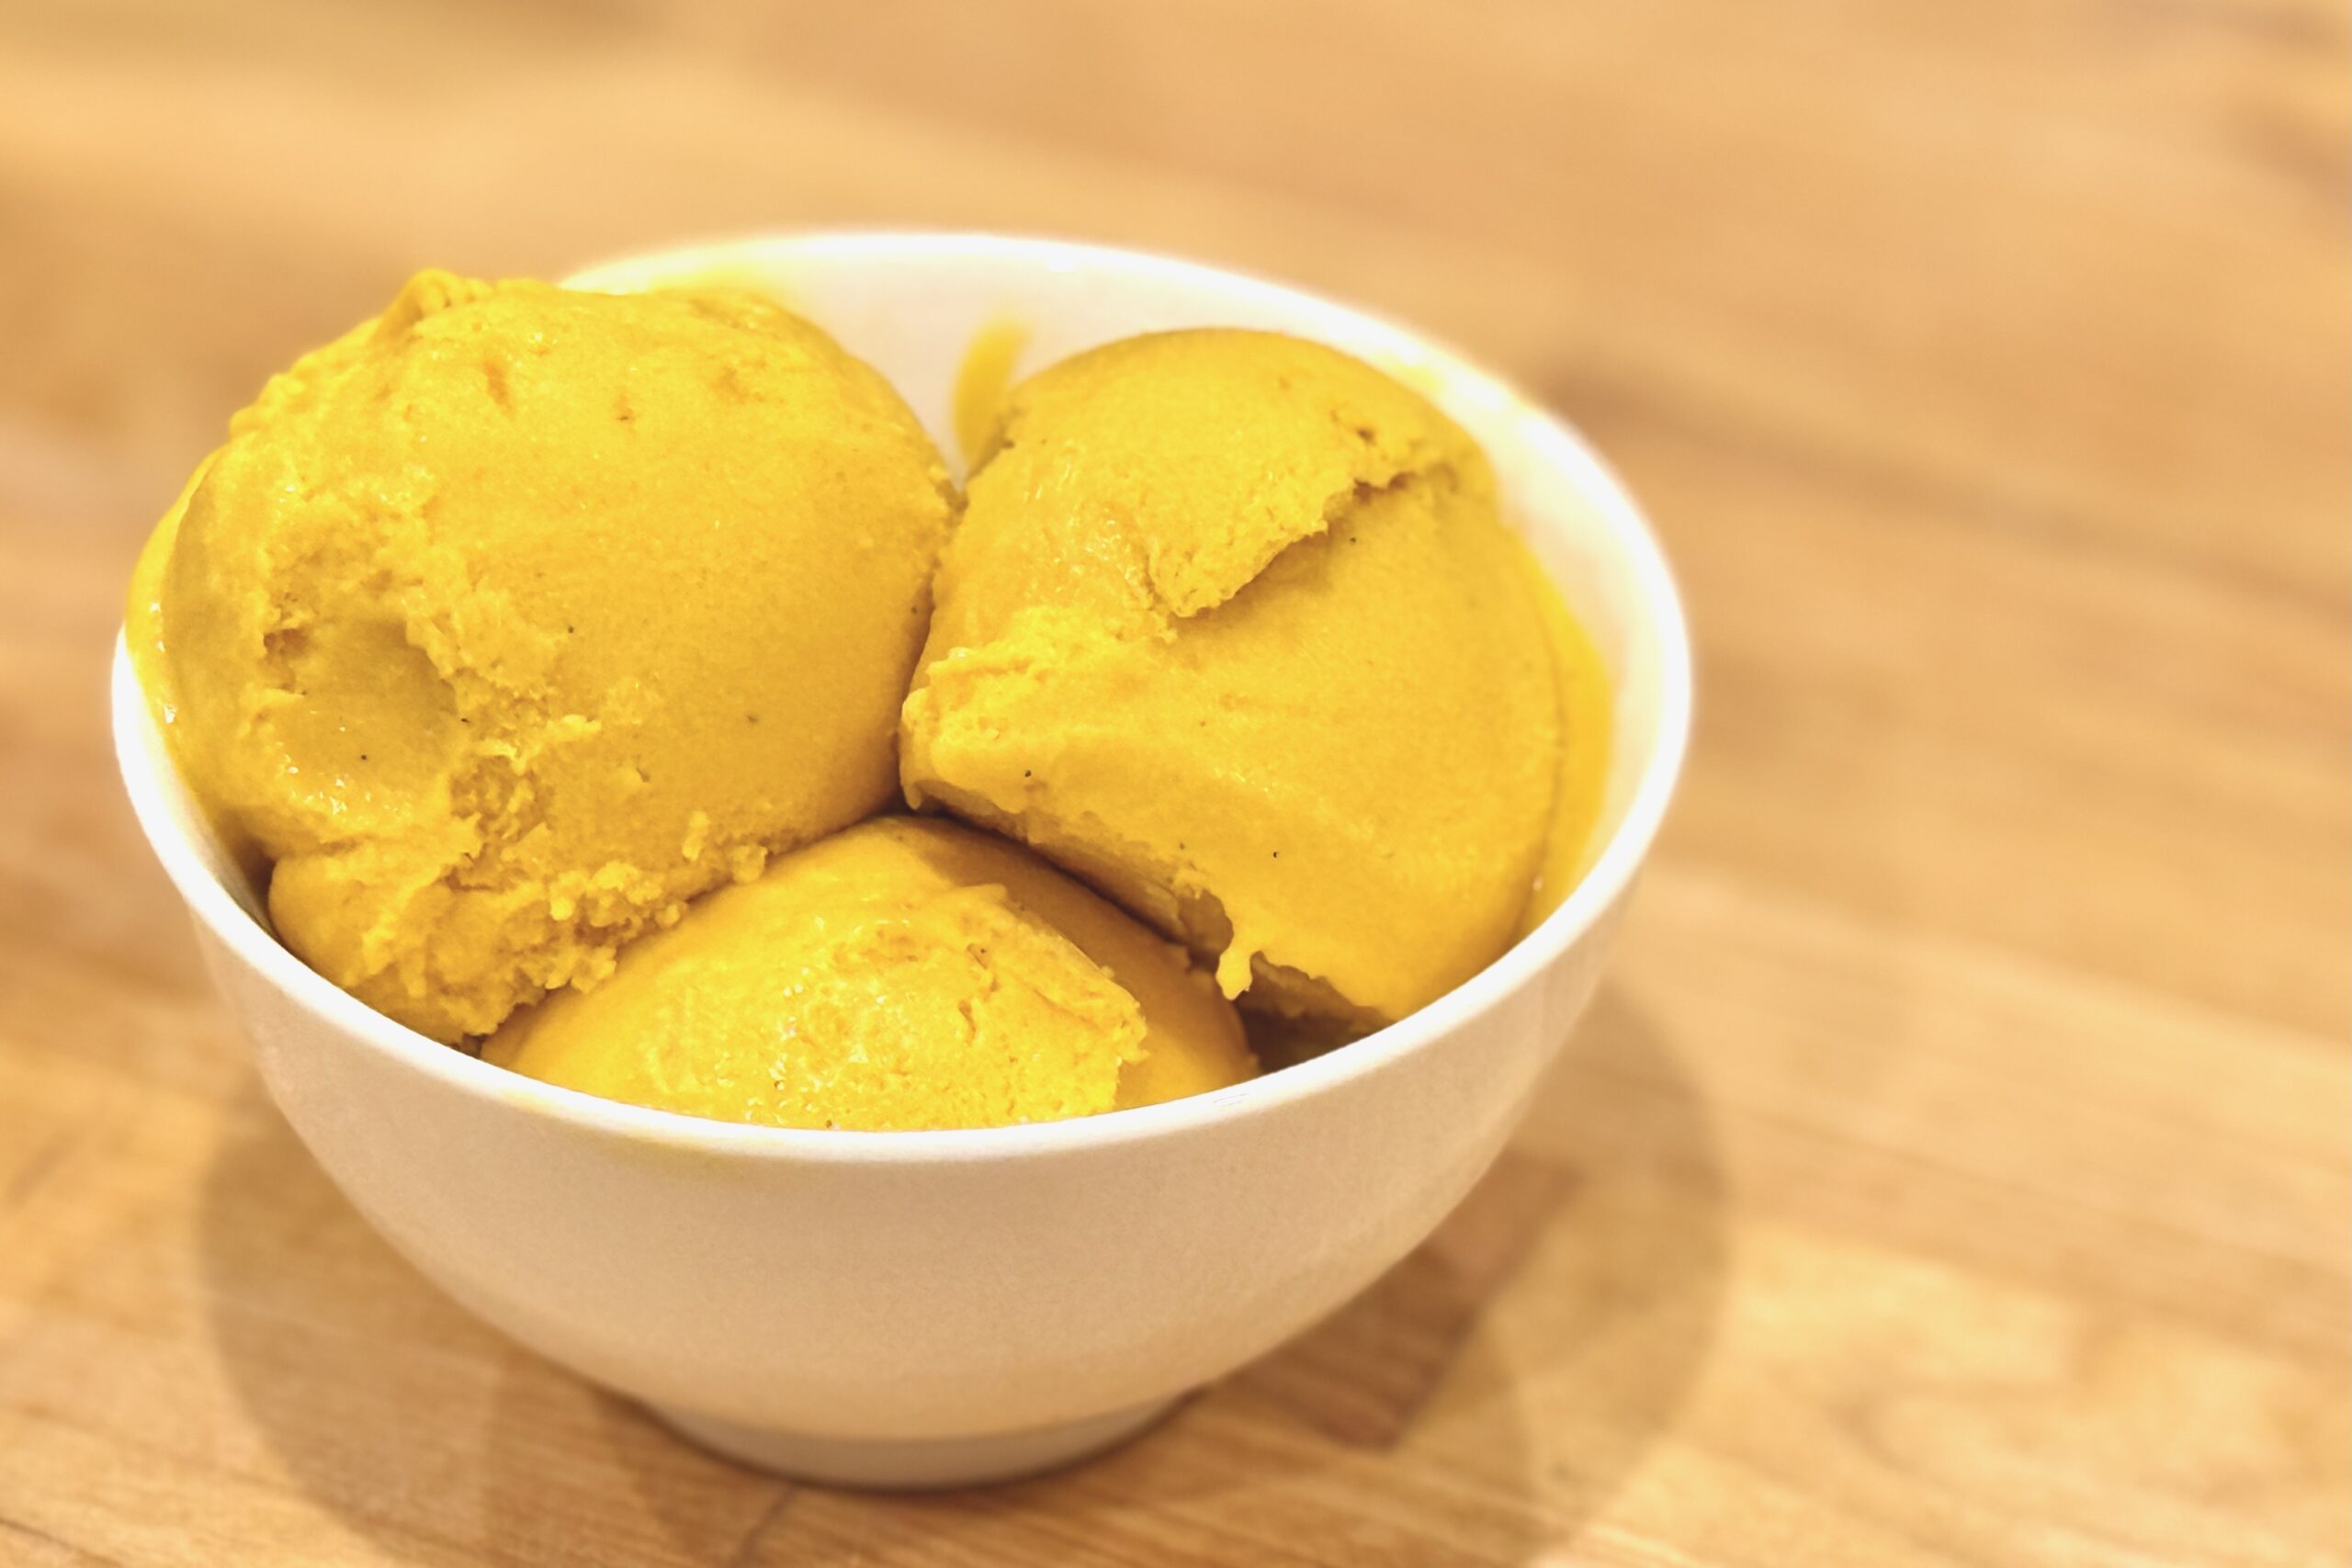
  • Mango Gelato

    Mango Gelato

    This bright and silky gelato captures the pure flavor of ripe mangoes in classic Italian style—smooth, dense, and refreshingly balanced. The natural sweetness of the fruit shines through a light dairy base, while a touch of vanilla or spiced rum adds warmth and depth. Each scoop feels like a taste of summer, golden, fragrant, and intensely mango-forward.


    Ingredients

      Base:

    • 2 cups ripe mango purée (strained to remove fibers; from about 3–4 large mangoes or 16 oz frozen mango)
    • 1 cup whole milk
    • ¼ cup heavy cream
    • ⅔ cup sugar
    • ⅛ tsp xanthan gum (stabilizer)
    • 1 tbsp fresh lemon juice
    • pinch table salt
    • ½ tsp vanilla extract (optional; rounds flavor)
    • 1 tbsp spiced rum (optional; softens texture and adds warmth)

    Directions

    Prepare the Mango Purée

    Peel and cube ripe mangoes, or use thawed frozen mango chunks. Purée until completely smooth in a blender or food processor, then strain through a fine mesh sieve to remove fibers. Measure 2 cups purée, cover, and refrigerate.

    Make the Dairy Base

    In a small saucepan, whisk together milk, cream, sugar, and salt. Heat gently over medium heat until steaming and the sugar is fully dissolved. Remove from heat and cool slightly, about 10–15 minutes.

    Combine & Stabilize

    In a blender, combine the cooled milk mixture, mango purée, lemon juice, vanilla, and rum (if using). Sprinkle xanthan gum evenly over the surface and immediately blend on high for 30–45 seconds until emulsified and slightly thickened.

    Chill the Base

    Transfer to a covered container and refrigerate until very cold, at least 4 hours or overnight for best texture.

    Churn & Freeze

    Churn the chilled base in an ice cream maker according to manufacturer instructions until thick and velvety. Transfer to a container and freeze 3–4 hours to firm fully.


    Notes

    Preparation

    • Xanthan gum improves creaminess and prevents iciness; a little goes a long way.
    • Lemon juice brightens the mango flavor and balances natural sweetness.
    • If mangoes are less sweet, increase sugar slightly (up to ¾ cup total).
    • For a richer variation, substitute coconut milk for the whole milk.

    Serving Suggestions

    • Serve with diced fresh mango or mango coulis for extra fruit intensity.
    • Top with toasted coconut flakes or macadamia nuts for added texture.
    • Pair with lime cookies or shortbread for contrast.

    Make-Ahead & Storage

    • Refrigerate the blended base for up to 2 days before churning.
    • Store churned gelato in an airtight container for up to 1 week.
    • Allow to soften at room temperature for 5–10 minutes before scooping.
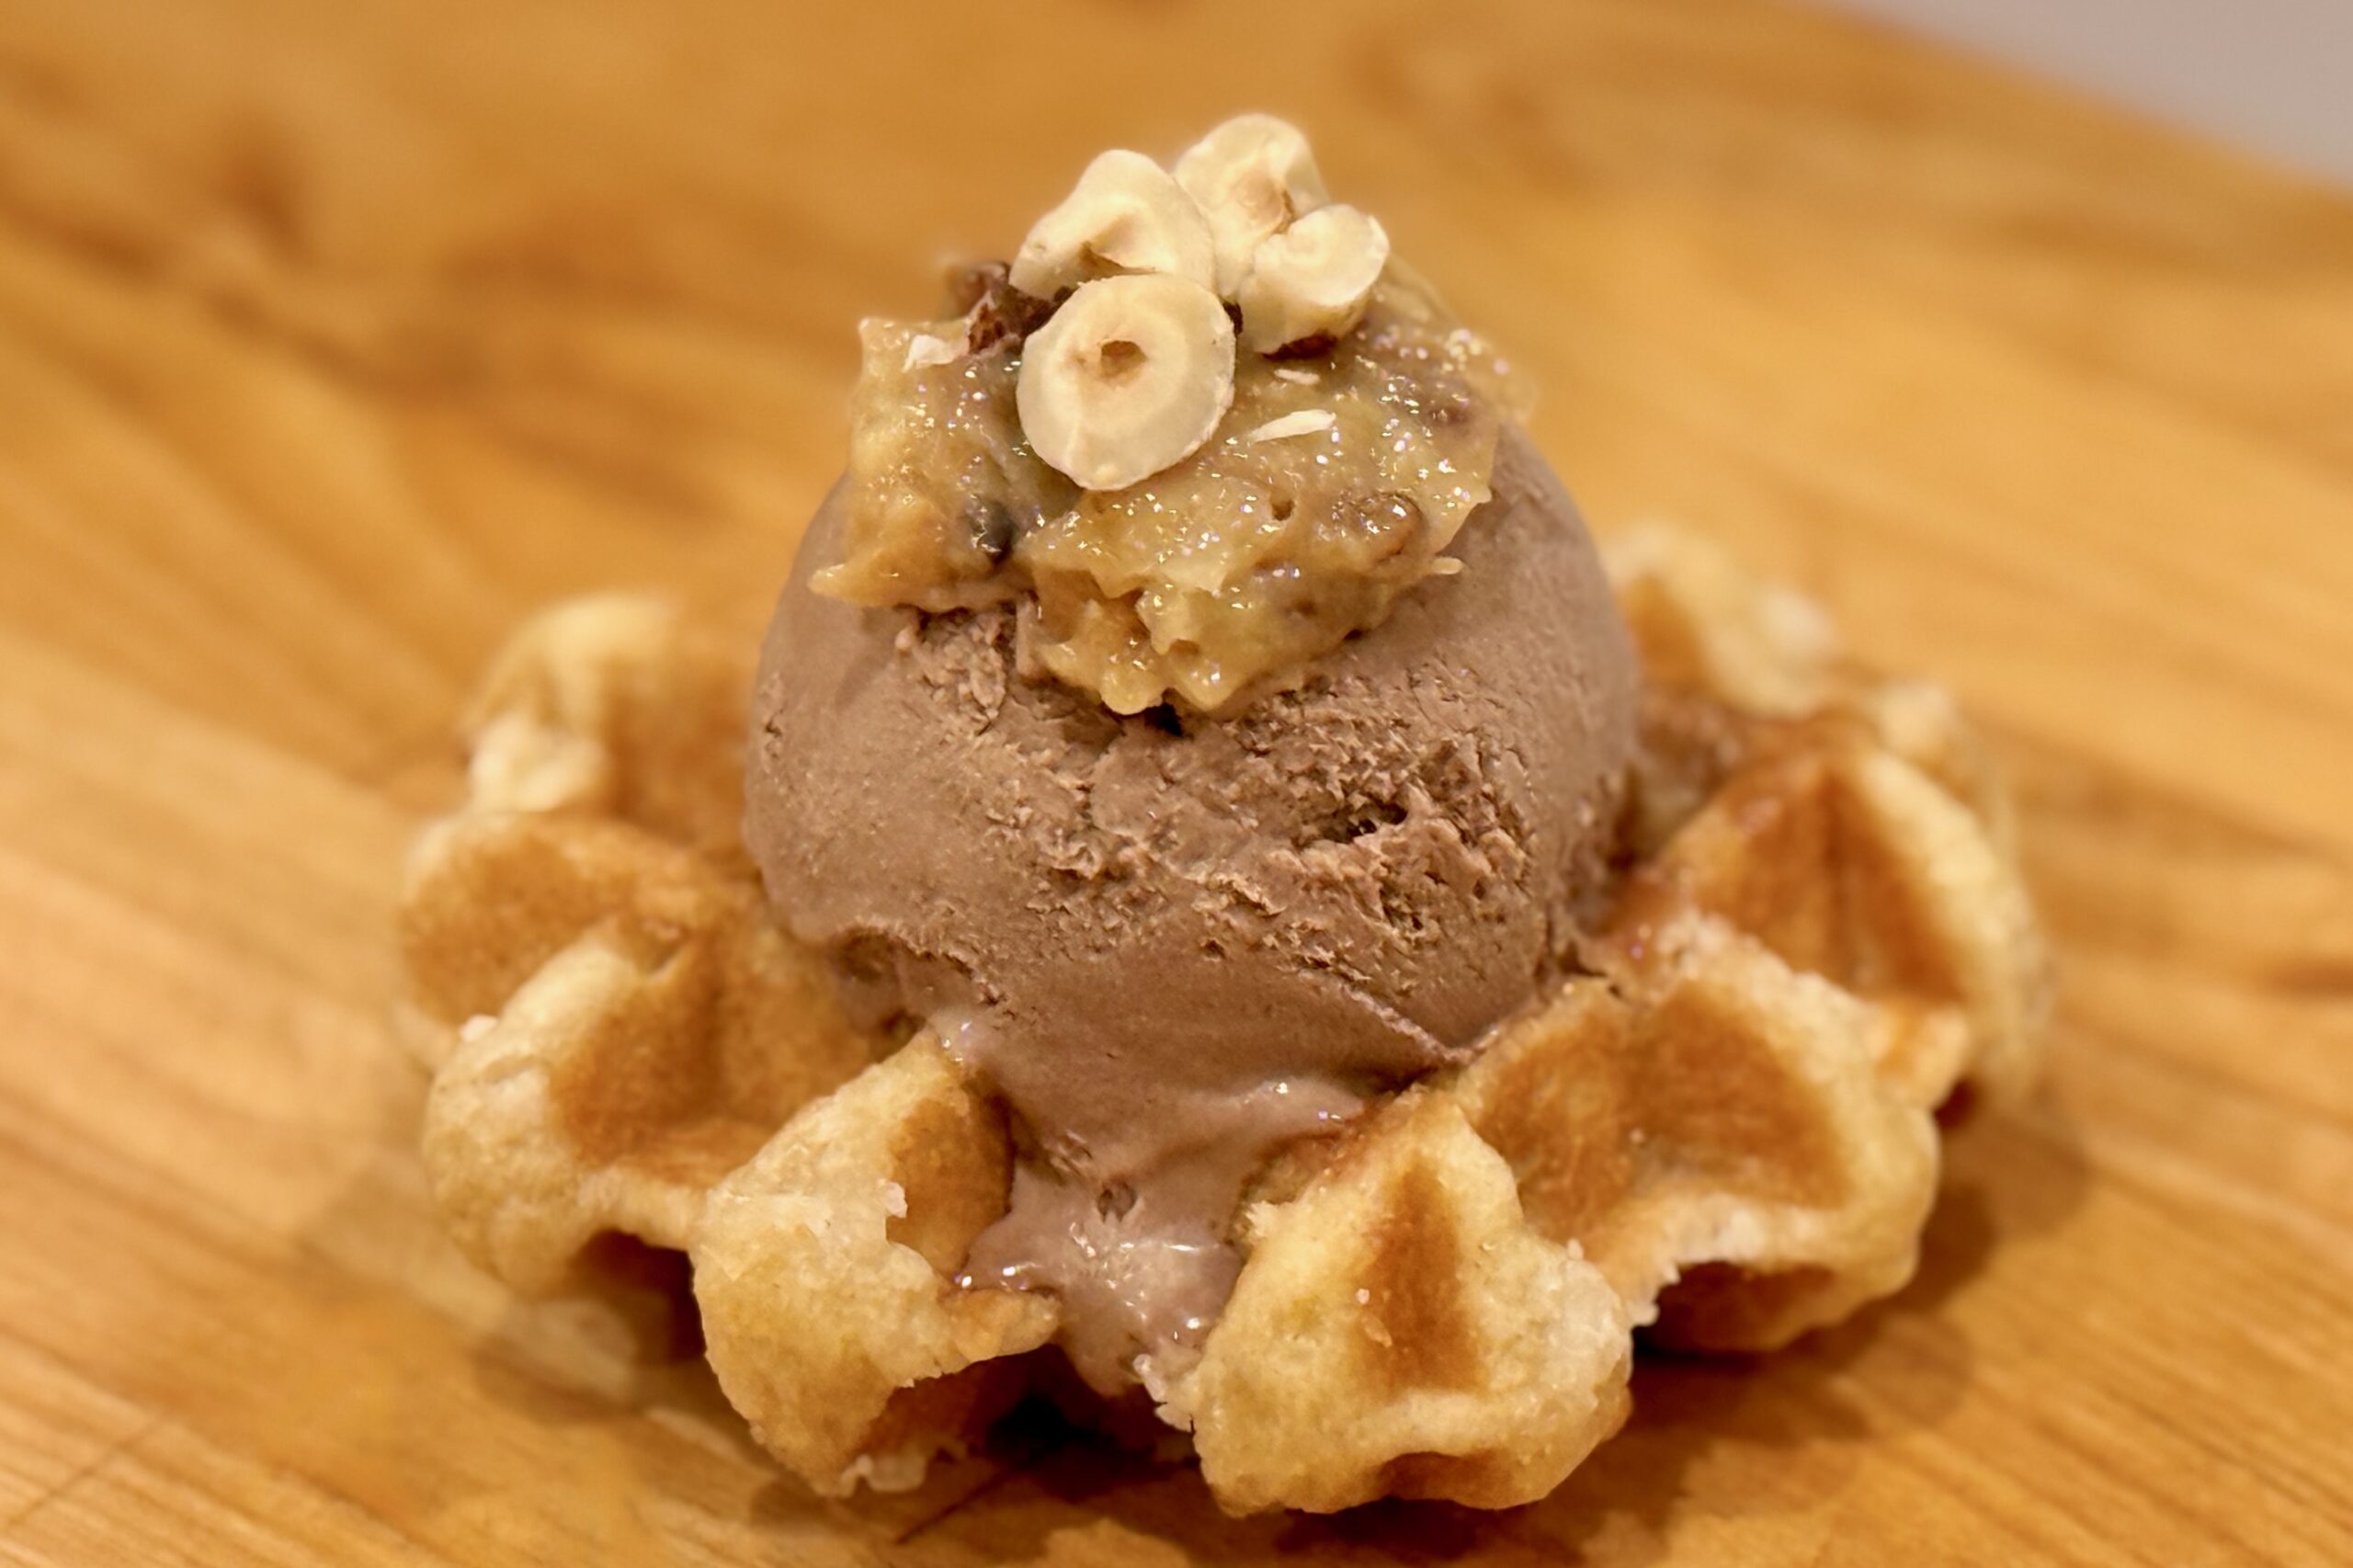
  • Chocolate Hazelnut Ice Cream

    Chocolate Hazelnut Ice Cream

    Creamy and decadent, this chocolate hazelnut ice cream blends the richness of dark chocolate and toasted hazelnuts with the smooth sweetness of Nutella. A silky custard base creates luxurious texture, while cocoa deepens the chocolate flavor and balances the sweetness beautifully. It’s a family favorite—one that every member agrees on without debate—its velvety texture and nutty aroma reminding us of fine Belgian chocolates. Whether shared after Sunday dinner or enjoyed quietly by the fire, this ice cream captures both indulgence and comfort in every scoop.


    Ingredients

    Chocolate Custard Base:

    • 2 cups heavy cream
    • 1 cup whole milk
    • ½ cup sugar, divided
    • 5 egg yolks
    • ½ tsp vanilla extract
    • ½ cup Nutella (or other chocolate-hazelnut spread)
    • 2 tbsp unsweetened cocoa powder
    • pinch table salt
    • ½ cup toasted hazelnuts, coarsely chopped (for folding in or topping; optional)

    Directions

    Warm the Chocolate Base

    In a saucepan, whisk together the milk, cream, ¼ cup sugar, cocoa powder, and salt. Warm over medium heat until steaming and the sugar dissolves.

    Make the Custard

    In a medium bowl, whisk the egg yolks with the remaining ¼ cup sugar until pale and thick. Slowly temper with ½ cup of the warm chocolate mixture while whisking constantly, then return everything to the saucepan.

    Cook over low heat, stirring constantly, until the custard coats the back of a spoon (170–175°F / 77–80°C). Do not boil.

    Finish & Chill

    Strain through a fine mesh sieve into a clean bowl. Whisk in vanilla and Nutella until smooth and fully blended. Chill thoroughly, preferably overnight.

    Churn & Add Hazelnuts

    Churn the chilled base in an ice cream maker according to manufacturer’s instructions. Fold in toasted hazelnuts or use them as a topping when serving.


    Notes

    Preparation

    • For richer chocolate flavor, replace ¼ cup of the Nutella with 2 oz melted dark chocolate (60–70% cacao).
    • For a smoother texture, add ⅛ tsp xanthan gum to the warm base before chilling.
    • Straining ensures a velvety custard and removes any curdled bits.

    Serving Suggestions

    • Top with toasted hazelnuts or shaved dark chocolate.
    • Pair with mocha brownies, vanilla shortbread, or salted caramel sauce.
    • Serve with fresh berries for a bright contrast.

    Make-Ahead & Storage

    • Refrigerate the custard base up to 2 days before churning.
    • Store churned ice cream for up to 1 week for best texture.
    • Let soften 5–10 minutes at room temperature before serving.
  • Dark Chocolate Almond Fudge Ribbon Ice Cream

    Dark Chocolate Almond Fudge Ribbon Ice Cream

    Deep, velvety chocolate ice cream brightened with a touch of espresso and balanced by creamy buttermilk, swirled with a glossy chocolate–almond fudge ribbon that stays silky even when frozen. The result is rich, spoonable, and layered with dark chocolate flavor and fragrant almond.


    Ingredients

      Chocolate Custard Base

    • 2 cups heavy cream
    • 1 cup whole milk
    • ½ cup sugar, divided
    • 5 egg yolks
    • 4 oz bittersweet chocolate (60–70%), finely chopped
    • 2 tbsp unsweetened cocoa powder
    • ½ tsp instant espresso powder
    • ½ tsp vanilla extract
    • pinch table salt
    • ½ cup cold buttermilk (added after cooking)
    • Chocolate–Almond Fudge Ribbon

    • ½ cup sugar
    • ⅓ cup unsweetened cocoa powder (Dutch-process recommended)
    • ⅓ cup heavy cream
    • ¼ cup water
    • 2 tbsp light corn syrup
    • 2 tbsp butter
    • ¾–1 tsp almond extract (to taste)
    • ½ tsp vanilla extract
    • pinch table salt
    • Optional Garnish

    • Chopped toasted almonds
    • Flaky sea salt

    Directions

    Prepare the Chocolate Custard Base

    In a saucepan, whisk together the milk, cream, cocoa powder, ¼ cup sugar, espresso powder, and salt. Warm over medium heat until steaming and the sugar dissolves. Remove from heat and whisk in the chopped chocolate until smooth.

    In a separate bowl, whisk the egg yolks with the remaining ¼ cup sugar until thick and pale. Slowly temper with ½ cup of the warm chocolate mixture, whisking constantly, then return everything to the saucepan.

    Cook over low heat, stirring constantly, until the custard coats the back of a spoon (170–175°F / 77–80°C). Do not boil. Strain through a fine mesh sieve into a clean bowl, then stir in the vanilla. Allow to cool slightly, then stir in the cold buttermilk. Chill completely, preferably overnight.

    Make the Chocolate–Almond Fudge Ribbon

    In a small saucepan, whisk together sugar, cocoa powder, water, and corn syrup. Bring to a gentle simmer and cook for 1–2 minutes. Remove from heat; whisk in butter, cream, vanilla, almond extract, and salt. Let cool completely, then refrigerate until thickened but still pourable.

    Churn and Layer

    Churn the chilled chocolate custard in an ice cream maker according to the manufacturer’s instructions. As you transfer it to a container, alternate layers of ice cream and thin ribbons of the fudge sauce. Swirl lightly with a butter knife for a marbled effect without overmixing. Freeze 4–6 hours until firm.


    Notes

    Preparation

    • Chill the fudge ribbon fully before layering; warm sauce will sink instead of ribboning.
    • For a deeper chocolate profile, replace 1 tbsp cocoa with 1 tbsp Dutch-process cocoa.
    • Increase almond extract up to 1 tsp to intensify almond flavor.

    Serving Suggestions

    • Top with chopped toasted almonds for crunch.
    • Add flaky sea salt for contrast and brightness.
    • Serve with biscotti, chocolate cake, or espresso in an affogato.

    Variations

    • Mocha Almond: Increase espresso powder to 1 tsp.
    • Black Forest: Replace almond extract with kirsch; swirl in cherry compote.
    • Chocolate–Orange: Add ½ tsp orange zest; replace almond extract with orange extract.

    Make-Ahead & Storage

    • Refrigerate churn-ready custard up to 48 hours.
    • Store churned ice cream up to 1 week for best texture.
    • Let stand 5–10 minutes before serving for optimal scoopability.
  • Bua Loy Nam Khing

    Bua Loy Nam Khing

    This comforting Thai dessert pairs soft, chewy sesame glutinous balls with a fragrant, mildly spicy ginger syrup. Served warm, it is soothing, aromatic, and especially welcome on cool evenings or after a rich meal. The ginger broth is simple but deeply flavorful, highlighting the contrast between the syrup’s warmth and the tender, nutty rice balls.


    Ingredients

      Sesame Glutinous Balls:

    • 1 recipe Sesame Glutinous Balls, prepared (or one 15-count package frozen sesame glutinous balls)
    • Ginger Syrup:

    • 7 cups (1650 ml) water
    • 2 cups (400 g) packed brown sugar (or use half brown sugar, half palm sugar for a more traditional flavor)
    • ¼ tsp table salt
    • 4 inches (10 cm) fresh ginger, peeled, sliced into coins, and lightly bruised
    • Garnish:

    • 1–2 tsp toasted sesame seeds

    Directions

    Make the Ginger Syrup

    In a medium pot, bring the water to a boil. Add the sugars and salt, stirring until dissolved. Reduce heat to a gentle simmer, then add the bruised ginger slices. Simmer 15–25 minutes until the syrup becomes fragrant, slightly spicy, and a deep amber color. Taste and adjust for strength; simmer longer for stronger ginger flavor.

    Finish the Dessert

    Remove from heat and strain out the ginger slices. Add the prepared sesame glutinous balls to the warm syrup and allow them to heat through for 2–3 minutes.

    Serve

    Ladle the warm syrup and glutinous balls into small bowls. Sprinkle with toasted sesame seeds and serve immediately.


    Notes

    Preparation

    • Palm sugar deepens the flavor and gives the syrup a more traditional Thai character.
    • Lightly bruising the ginger releases more flavor without overpowering the syrup.
    • If using frozen sesame balls, boil them until they float before adding to the syrup.

    Serving Suggestions

    • Add a splash of coconut milk for a creamy variation.
    • Serve with extra toasted sesame seeds for added aroma.
    • Pair with fresh fruit like sliced pear or steamed pumpkin for contrast.

    Make-Ahead & Storage

    • Ginger syrup keeps up to 5 days refrigerated.
    • Store glutinous balls separately to maintain texture.
    • Rewarm syrup gently; add balls immediately before serving.