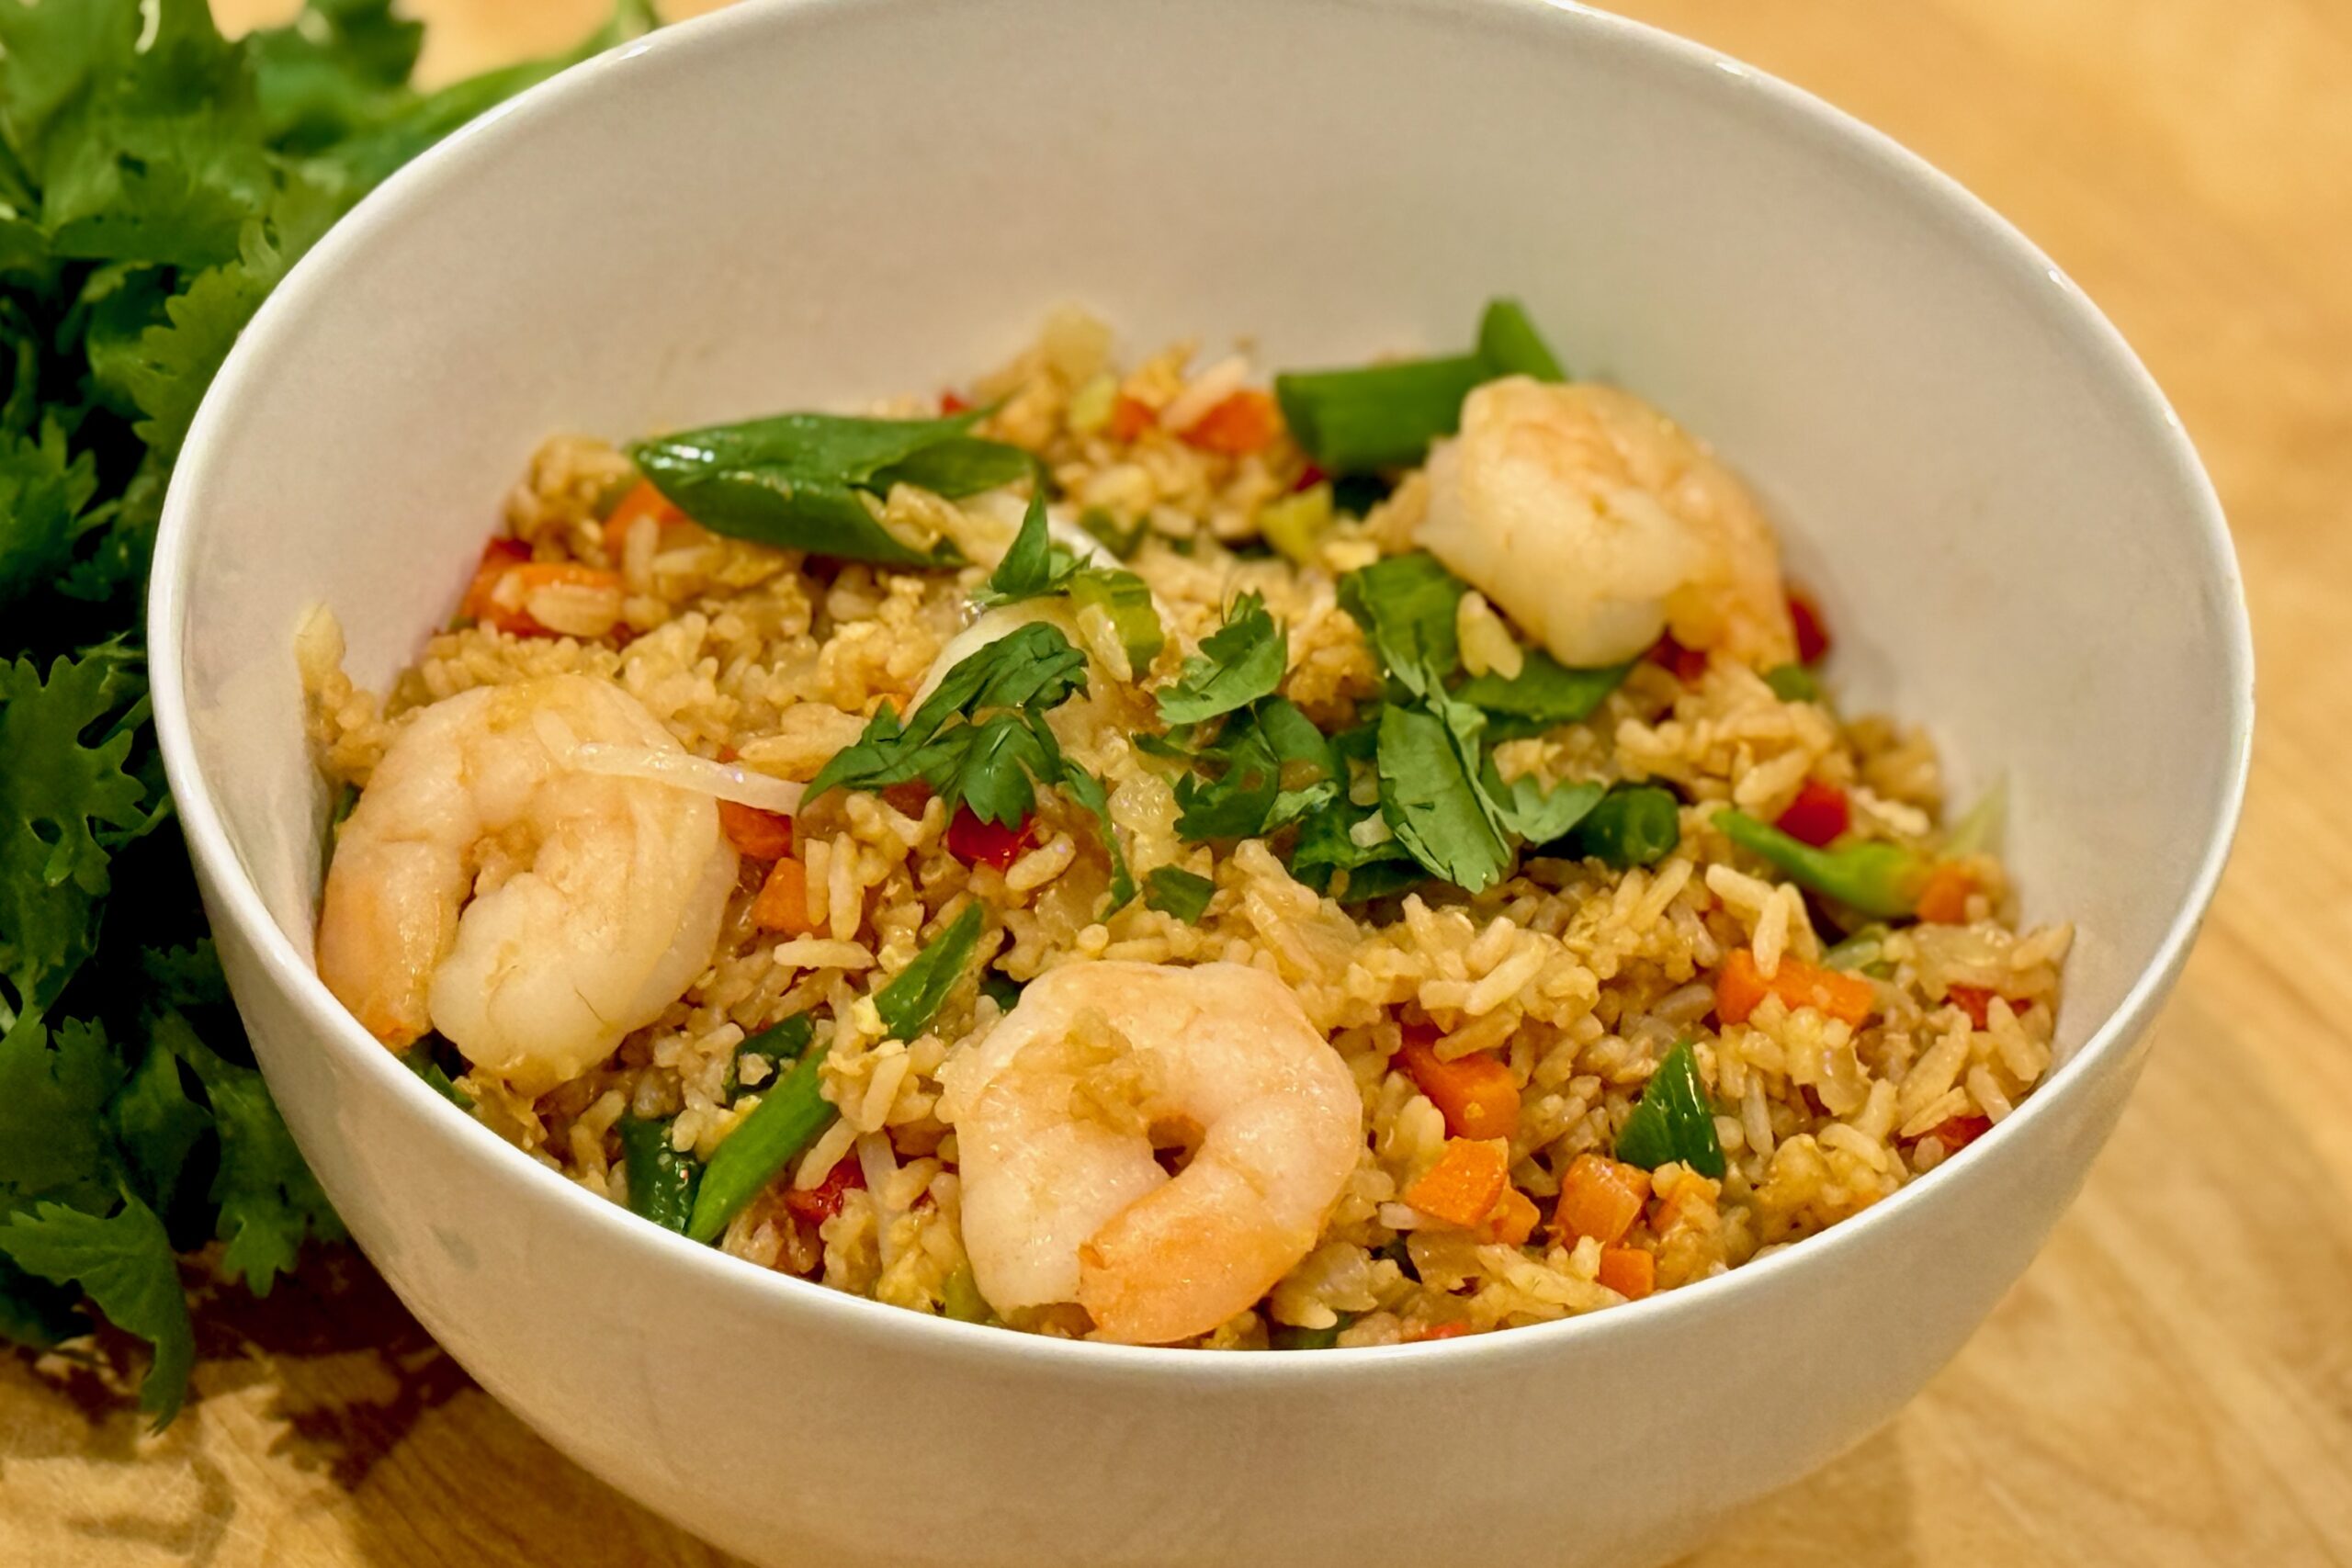
Fried rice has always held a place of honor in our family meals—a dish that somehow feels both humble and celebratory at once. This version, with smoky char siu pork, tender shrimp, and crisp-tender vegetables, brings bold flavor and perfect balance to the table. The rice stays dry and lightly toasted, the shrimp are just sweet enough, and every bite carries the deep, savory notes that only come from a hot wok. It’s the kind of meal that fills the house with warmth and pulls everyone to the table—laughing, reaching for seconds, and sharing stories long after the plates are empty. Simple in spirit, but rich in tradition, it’s one of those dishes that reminds us why we love gathering together for a family meal.
Ingredients
- 3 tbsp water
- 2 tbsp light soy sauce
- 1 tbsp dark or mushroom soy sauce
- 1 tbsp oyster sauce
- 1½ tbsp Shaoxing wine (or michiu)
- 1 tsp sugar
- ½ tsp chicken bouillon powder
- ½ tsp white pepper
- ½ tsp MSG (optional, for depth)
- Slurry: 1 tsp cornstarch + 1 tsp water (optional, for thicker coating)
- ½ tsp toasted sesame oil (add off heat, at the end)
- 2–3 tbsp high-heat neutral oil (vegetable, peanut, or canola)
- 1 medium onion, diced
- 2 jalapeños, seeded and finely diced
- 1 red bell pepper, diced small
- ½ cup carrots, diced or julienned, blanched & patted dry
- ½ cup celery, finely diced, blanched & patted dry
- ½ cup green beans, cut into 1-inch pieces, blanched & patted dry
- 2 cloves garlic, minced
- 1 tbsp fresh ginger, grated or minced
- ⅔ cup green onions (scallions), sliced — white parts for cooking, green parts for garnish
- 16 oz shrimp, cleaned, deveined, and thoroughly dried
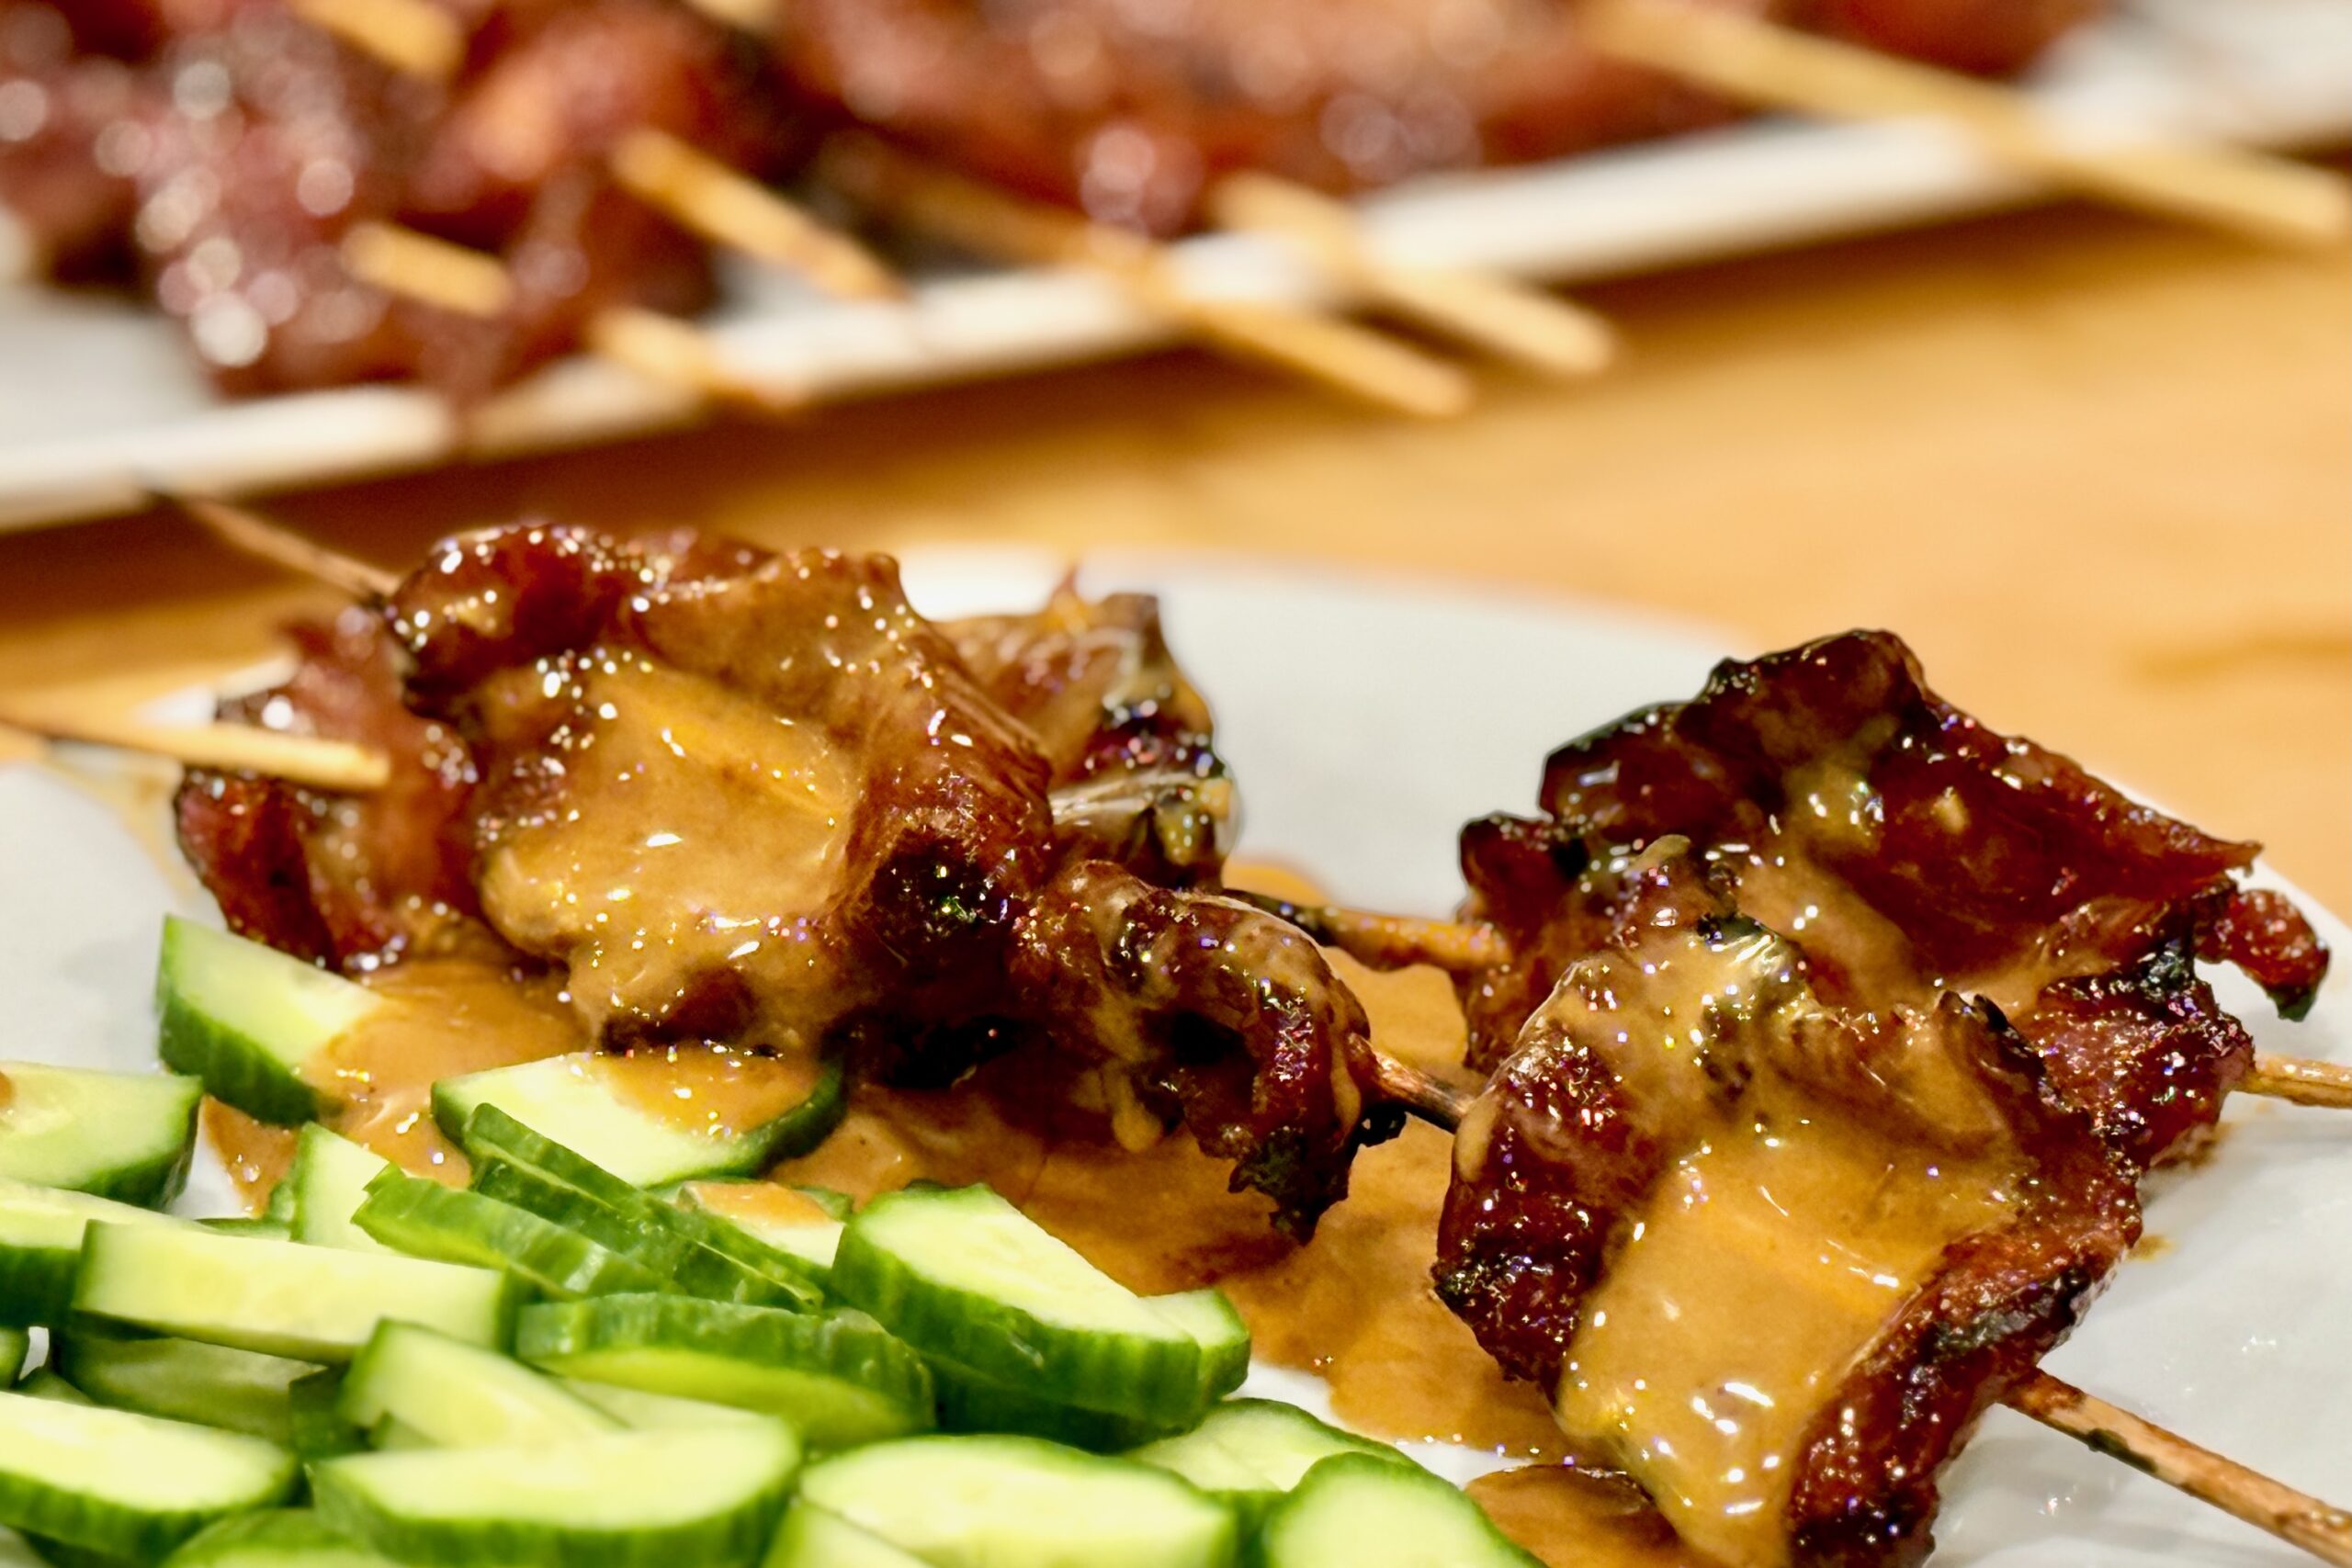
- 16 oz Char Siu, diced small
- 3 large eggs, beaten
- ~5 cups day-old jasmine rice (about 40 oz cooked), chilled and separated
- Chopped cilantro
- Reserved green onion tops
- Lime wedges or a light squeeze of fresh lime juice
- Optional: pinch of chili flakes or splash of fish sauce
Sauce / Seasoning Mix
Vegetables & Aromatics
Proteins
Rice
Fresh Garnishes
Directions
Prepare the Sauce
In a small saucepan, combine water, both soy sauces, oyster sauce, Shaoxing wine, sugar, chicken bouillon, white pepper, and MSG (if using). Bring to a gentle simmer and reduce slightly to concentrate flavor. Add slurry only if a thicker coating is desired. Remove from heat, stir in sesame oil, and set aside.
Blanch & Dry the Vegetables
Blanch carrots, celery, and green beans briefly (carrots & celery ~1 min; green beans ~2–3 min). Drain well, spread on paper towels, and pat dry completely before stir-frying.
Cook Proteins Separately
Heat wok over high heat. Add 1 tbsp oil and sear shrimp until just pink and cooked through; remove and set aside. Add char siu to the hot wok and fry until lightly caramelized on the edges; remove and set aside.
Scramble the Eggs
Add a drizzle of oil, then pour in beaten eggs. Let them set slightly before breaking into bite-sized curds. Remove and set aside.
Stir-Fry Aromatics & Vegetables
Wipe the wok clean if needed, then add 1 tbsp oil. Add onion and jalapeños; stir-fry until softened. Add garlic and ginger, cooking just until fragrant. Add bell pepper, carrots, celery, and green beans. Stir-fry until crisp-tender and slightly dry. Add white parts of the scallions and toss briefly.
Fry the Rice
Add more oil if needed. Increase heat to high. Add chilled rice, breaking up clumps with a spatula. Spread across the wok and let it rest for 20–30 seconds between stirs to allow slight browning and remove moisture. The rice should fry, not steam.
Combine & Sauce
Push rice aside to clear the center. Pour in sauce directly onto the hot metal to reduce briefly before folding into rice until evenly coated. Add shrimp, char siu, and scrambled eggs; toss rapidly to combine. Cook another 1–2 minutes over high heat.
Finish & Garnish
Turn off heat. Add a light squeeze of lime juice, toss once more, and taste for seasoning. Garnish with cilantro, scallion greens, and optional chili flakes. Serve hot.
Notes
Preparation
- Well-dried, day-old rice is key. If using freshly cooked rice, spread it on a tray and refrigerate uncovered for at least 2 hours to dry out.
- Use minimal oil and ensure vegetables are dry before stir-frying to prevent steaming.
- Only add enough sauce to lightly coat the rice — start with about ¾ of the mix and add more as needed.
- For better heat control at home, cook in two smaller batches to avoid steaming and maintain wok heat.