Bags of Spices

Favorite Recipes

Method

Browse recipes by cooking method — ideal when you’re planning around equipment, time, weather, or technique.

  • Tom Kha–Style Soup with Meatballs & Rice

    Tom Kha–Style Soup with Meatballs & Rice

    This comforting Thai-style soup bridges the gap between Tom Kha Gai and Khao Tom. Like Tom Kha Gai, it features fragrant aromatics—lemongrass, galangal, and kaffir lime leaves—for the signature balance of tangy, savory, and lightly sweet flavors. But instead of a coconut-rich broth, it leans toward the clear, soothing style of Khao Tom, with tender pork (or pork-and-chicken) meatballs and a small scoop of rice added just before serving. The result is a light yet aromatic soup that feels familiar and refreshingly different.


    Ingredients

    Meatballs:

    • ¾ lb (340 g) ground pork
    • ¼ lb (115 g) ground chicken (or use all pork)
    • 1 tbsp chili-garlic sauce (garlic sambal oelek)
    • 1 tsp fresh ginger or galangal, finely grated
    • 1 tbsp fish sauce
    • 1 tsp white pepper (or black pepper)
    • ½ tsp table salt
    • 1 tsp cornstarch (optional — improves springy texture)
    • 1 tbsp finely chopped cilantro stems or scallion whites (optional)

    Soup Base:

    • 1 tbsp neutral oil (vegetable, canola, or peanut; or lard)
    • 3 large shallots, halved and thinly sliced
    • 2 stalks lemongrass, white parts only, bruised and halved
    • 3 slices fresh galangal (or 1½ tsp thin-sliced ginger)
    • 1 tbsp fresh ginger, grated
    • 3 kaffir lime leaves, torn in half
    • 3–4 cloves garlic, smashed
    • 1–2 small Thai chiles, lightly crushed (optional)
    • 6 cups (1.4 L) chicken stock or light broth
    • 1 tbsp fish sauce (to taste)
    • 1 tsp palm sugar or light brown sugar
    • 1–2 tsp soy sauce (optional, for depth)
    • ½ cup fresh cilantro, chopped (added at the end)
    • juice of 1 lime (1½–2 tbsp, added at the end)
    • optional: ¼–½ cup coconut milk, for a lightly creamy finish
    • 1 cup cooked jasmine rice, warmed (added to bowl before serving)

    Garnishes:

    • 1–2 tsp coconut cream from the top of an undisturbed can (optional)
    • fresh cilantro leaves
    • thinly sliced scallions
    • fried shallots or garlic
    • soft-, medium-, or hard-boiled eggs, halved
    • lime wedges
    • thinly sliced red chiles or chile oil (optional)

    Directions

    Prepare the Meatballs

    In a medium bowl, combine pork, chicken, chili-garlic sauce, ginger, fish sauce, white pepper, salt, cornstarch (if using), and cilantro stems or scallion whites. Mix gently until combined but not sticky. Roll into small ¾–1 inch balls.

    Build the Aromatic Broth

    Heat oil in a large saucepan over medium. Add shallots and sauté until golden. Add lemongrass, galangal, kaffir lime leaves, garlic, and chiles. Stir until fragrant, then add chicken broth. Simmer 15 minutes to infuse.

    Cook the Meatballs

    Remove lemongrass. Add meatballs and simmer 5–6 minutes until cooked through. Skim any foam.

    Season & Finish

    Add fish sauce, palm sugar, soy sauce, and cilantro. Adjust seasoning. Remove from heat and stir in lime juice.

    Assemble the Bowls

    Place ¼–½ cup warm jasmine rice in each bowl. Ladle soup and meatballs over top. Garnish with coconut cream, cilantro, scallions, fried shallots, sliced chiles, and lime.


    Notes

    Preparation

    • Sautéing shallots first adds sweetness and depth.
    • Use both galangal and kaffir lime leaves if possible for true Tom Kha flavor.
    • For a creamier finish, stir in coconut milk at the end.
    • For porridge-like consistency, simmer a small amount of rice in the broth before serving.

    Serving Suggestions

    • Top generously with fried shallots or garlic.
    • Add soft- or medium-boiled eggs for a heartier meal.
    • Serve with lime wedges for brightness.

    Make-Ahead & Storage

    • Meatballs can be formed 24 hours ahead and refrigerated.
    • Broth can be made ahead and reheated, adding herbs and lime at the end.
    • Stores 2–3 days; keep rice separate to avoid mushiness.
  • Chocolate Meringues

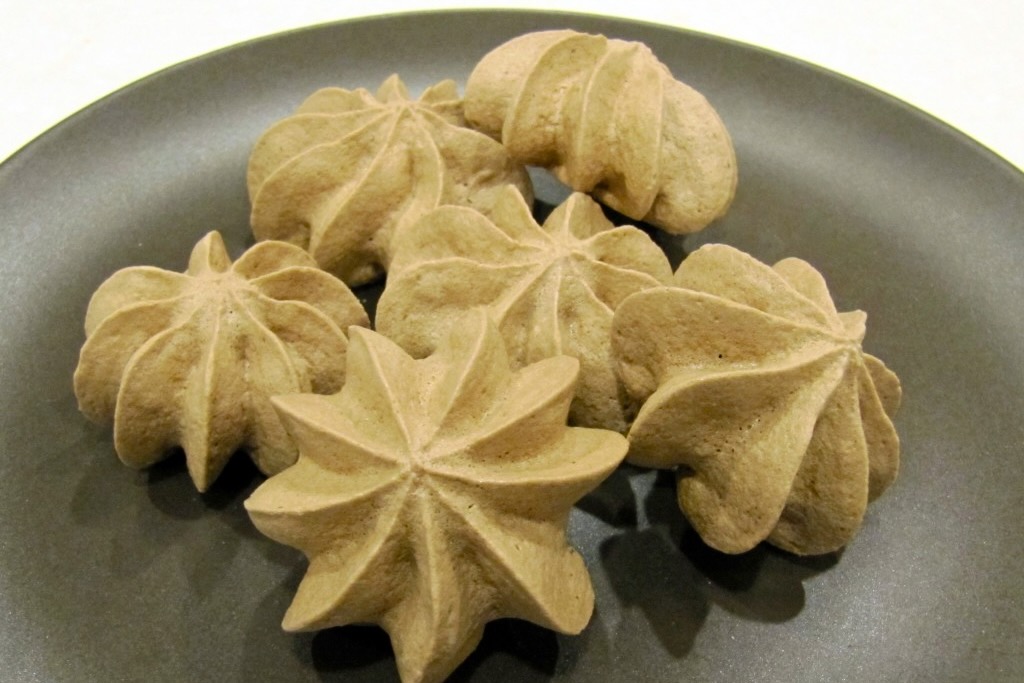
    Chocolate Meringues

    These Chocolate Meringues are light, crisp, and deeply chocolatey—fun to make, and bakery-fancy when piped into little stars. They’ve long been part of our Christmas Eve tradition, shared alongside several other homemade cookies during an evening spent with family and friends. Our Christmas Eve typically gathers 45–75 people for dinner, a Christmas program, and a spread of treats, and these meringues are always among the first to disappear. Expect a delicate, crisp exterior with a slightly chewy center (especially when they’re fresh). For the most reliable structure and brightest chocolate flavor, use natural cocoa powder rather than Dutch process.


    Ingredients

    • 3 egg whites (room temp)
    • ¾ tsp vanilla extract
    • ¾ cup sugar
    • ¼ cup natural cocoa powder (recommended; see notes)

    Directions

    Prepare the Pan and Bag

    Preheat oven to 300°F. Line baking sheets with parchment paper and cover with foil. Fit a pastry bag with a large open star tip (i.e. #8b).

    Whip the Meringue

    Place egg whites and vanilla in a very clean stainless steel mixing bowl. Beat on low speed until bubbles begin to form on the top of the eggs (like a bubble bath).

    Increase speed to high and beat until the egg whites form soft peaks.

    Gradually add sugar, about 2 tbsp at a time, beating until stiff peaks form (egg whites will be shiny, heavy, and stiff—don’t over beat).

    Add Cocoa and Pipe

    Gently fold in cocoa by hand until evenly incorporated.

    Pipe stars about 1½ in. diameter onto the foil.

    Alternatively, drop by rounded tsp if you don’t want to pipe.

    Bake and Cool

    Bake for about 30-35 minutes, or until lightly browned.

    Remove from foil and cool on wire racks.

    Store in a non-reactive uncovered bowl.


    Notes

    Preparation

    • Use a very clean stainless steel (or glass) bowl and clean beaters—any trace of grease can prevent the egg whites from whipping properly.
    • A stand mixer (kitchenaid) works best for consistent volume and texture.
    • Do not double this recipe—larger batches are less reliable and don’t hold structure as well.
    • Natural vs Dutch-Process Cocoa: Natural cocoa is slightly acidic and helps stabilize the egg-white foam, while also providing a brighter, sharper chocolate flavor. Dutch-process cocoa is darker and smoother in flavor but can be slightly more prone to deflating if over-folded.
    • Because cocoa powder contributes to both structure and drying, this recipe is designed specifically for chocolate meringues. Plain or non-cocoa meringues require additional stabilization (such as cream of tartar) and are best treated as separate recipes.

    Serving Suggestions

    • Add to cookie trays or dessert platters for contrast alongside butter cookies, spritz, or shortbread.

    Make-Ahead & Storage

    • Store in a cool, dry place. Humidity will soften meringues over time.
    • Best enjoyed within 1–3 days, though texture may vary depending on weather and storage conditions.
  • Mushroom Bisque

    Mushroom Bisque

    A deeply savory, velvety mushroom bisque built on layers of browned mushrooms, aromatic garlic, gentle herbs, and a touch of sherry. A slow simmer develops richness without heaviness, while soy sauce adds depth and umami. Finished with a swirl of crema, it is earthy, comforting, and elegant—perfect for cool evenings or a refined first course.


    Ingredients

      Soup Base

    • 4 tbsp (55 g) unsalted butter, divided
    • 1 medium onion, finely diced
    • 2 lbs (900 g) mixed fresh mushrooms, sliced (see Notes)
    • 1 tsp table salt, plus more to taste
    • ¼ tsp freshly ground black pepper
    • 2–3 cloves garlic, finely chopped
    • 2 tbsp dry sherry (or more to taste)
    • 4 cups (950 ml) chicken stock, divided (or vegetable stock)
    • 3 tbsp (25 g) all-purpose flour
    • 1 cup (240 ml) half and half or light cream
    • 1 large bay leaf
    • ⅛ tsp dried thyme (or ¼ tsp fresh)
    • 1 tsp soy sauce (increased from ½ tsp for deeper umami)
    • ½–1 tsp sambal oelek (optional, for gentle heat)
    • Optional Enhancements

    • ½ oz dried porcini mushrooms, rehydrated and chopped, with soaking liquid strained
    • To Serve

    • Crema for drizzling (plain or flavored—see Notes)
    • Thyme sprigs, sautéed mushroom slices, or chives for garnish

    Directions

    Sauté the Aromatics and Mushrooms

    In a large saucepan or Dutch oven, melt 2 tbsp butter over medium heat. Add the onion and cook 3–4 minutes until softened. Add mushrooms, salt, and pepper. Cook 10–12 minutes, stirring occasionally, until mushrooms release their liquid and begin to brown. Add garlic and cook 1 minute until fragrant.

    Deglaze and Simmer

    Add sherry and cook 1 minute, scraping up browned bits. Add 3 cups chicken stock, bay leaf, thyme, soy sauce, and optional porcini mushrooms with their strained soaking liquid. Bring to a gentle simmer, cover, and cook 20 minutes to deepen flavor. Remove bay leaf.

    Prepare the Roux Base

    In a separate saucepan, melt remaining 2 tbsp butter over medium heat. Whisk in flour and cook 2–3 minutes until lightly golden. Slowly whisk in remaining 1 cup chicken stock, then the half and half, cooking until smooth and slightly thickened.

    Combine and Purée

    Add the mushroom mixture to the roux base. Purée with an immersion blender until smooth, or blend in batches. For a rustic texture, reserve 1 cup mushrooms before blending and stir them in afterward.

    Season and Finish

    Return soup to low heat. Add sambal oelek if using. Taste and adjust with salt, pepper, sherry, or soy sauce as desired. Simmer 5 minutes to meld flavors.

    Serve

    Ladle into bowls and finish with a light drizzle of crema. Garnish with sautéed mushrooms, thyme, or chives.


    Notes

    Preparation

    • Browning mushrooms before adding liquid deepens flavor significantly.
    • Use a mix of mushrooms for depth—cremini, shiitake, oyster, or button.
    • Porcini add a noticeable boost of umami; highly recommended.
    • Blend smooth for a classic bisque or leave some mushroom pieces for texture.
    • Simmering longer (rather than adding more flour) develops richness naturally.

    Serving Suggestions

    • Drizzle with crema to balance richness and add gentle tang.
    • For enhanced crema, whisk in a splash of sherry, white pepper, thyme oil, or a pinch of soy sauce.
    • Serve with crusty bread, garlic croutons, or a simple green salad.
    • Add a few sautéed mushrooms or a swirl of mushroom oil for presentation.

    Variations

    • Vegetarian: Use vegetable stock and a splash of soy sauce for depth.
    • Rustic Mushroom Soup: Blend only half the soup and keep the rest chunky.
    • Truffle Version: Finish with a few drops of truffle oil.

    Make-Ahead & Storage

    • Refrigerate up to 3 days; flavors deepen overnight.
    • Freeze without dairy addition; add half and half after reheating for best texture.
    • Rewarm gently over low heat to avoid separation.
  • Braised Fennel

    Braised Fennel

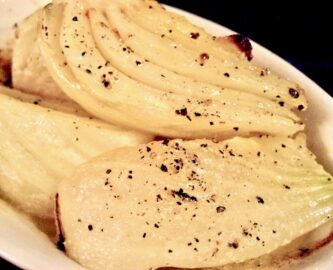
    This elegant side transforms fennel’s natural sweetness into something truly special. Lightly caramelized and gently braised with shallots, garlic, and white wine, the tender fennel is finished with butter, lemon zest, and fresh fennel fronds for a glossy, aromatic dish worthy of any restaurant table.


    Ingredients

    • 2–3 fennel bulbs, trimmed and quartered lengthwise (cores intact)
    • 2 tbsp olive oil or butter
    • 1 shallot, thinly sliced
    • 1 clove garlic, thinly sliced
    • ¼ cup dry white wine or 1 tbsp lemon juice
    • 1 cup chicken stock
    • ½ tsp honey (optional)
    • 1 tbsp butter (for finishing)
    • salt and freshly ground black pepper, to taste
    • zest of ½ lemon, for garnish
    • chopped fennel fronds or parsley, for garnish

    Directions

    Brown the Fennel

    In a large sauté pan, heat olive oil or butter over medium-high heat. Add fennel quarters cut-side down and cook until deeply golden on both cut sides, about 3–4 minutes per side. Remove and set aside.

    Build the Aromatic Base

    Add shallot and garlic to the pan; sauté 30 seconds, just until fragrant. Deglaze with white wine (or lemon juice), scraping up any browned bits.

    Braise

    Add chicken stock and honey, if using. Return fennel to the pan, cut-side up. Bring to a simmer, reduce heat to low, and cover. Braise gently for 15–20 minutes, turning once, until fennel is tender but still holds its shape.

    Glaze & Finish

    Remove the lid and simmer uncovered for 5–7 minutes more, allowing the liquid to reduce into a glossy glaze. Stir in butter off heat to finish the sauce and season with salt and pepper.

    Serve

    Transfer fennel to a serving dish and drizzle with the reduced pan juices. Garnish with lemon zest and chopped fennel fronds or parsley before serving.


    Notes

    Preparation

    • Proper browning is essential—golden edges enhance both flavor and appearance.
    • Use vegetable stock for a vegetarian version.
    • Finishing with butter gives the glaze a rich, silky texture.

    Serving Suggestions

    • Serve as a side with roasted chicken, fish, or creamy polenta.
    • For a richer presentation, finish with freshly grated Parmesan or a drizzle of aged balsamic.
    • Add a sprinkle of toasted breadcrumbs or flaky salt for texture.

    Make-Ahead & Storage

    • Can be braised up to 1 day ahead; cool and refrigerate in its cooking liquid.
    • Reheat gently over low heat, spooning juices over the fennel to re-glaze.
    • Best served warm, but can also be enjoyed at room temperature as part of an antipasto spread.
  • Refried Beans

    Refried Beans

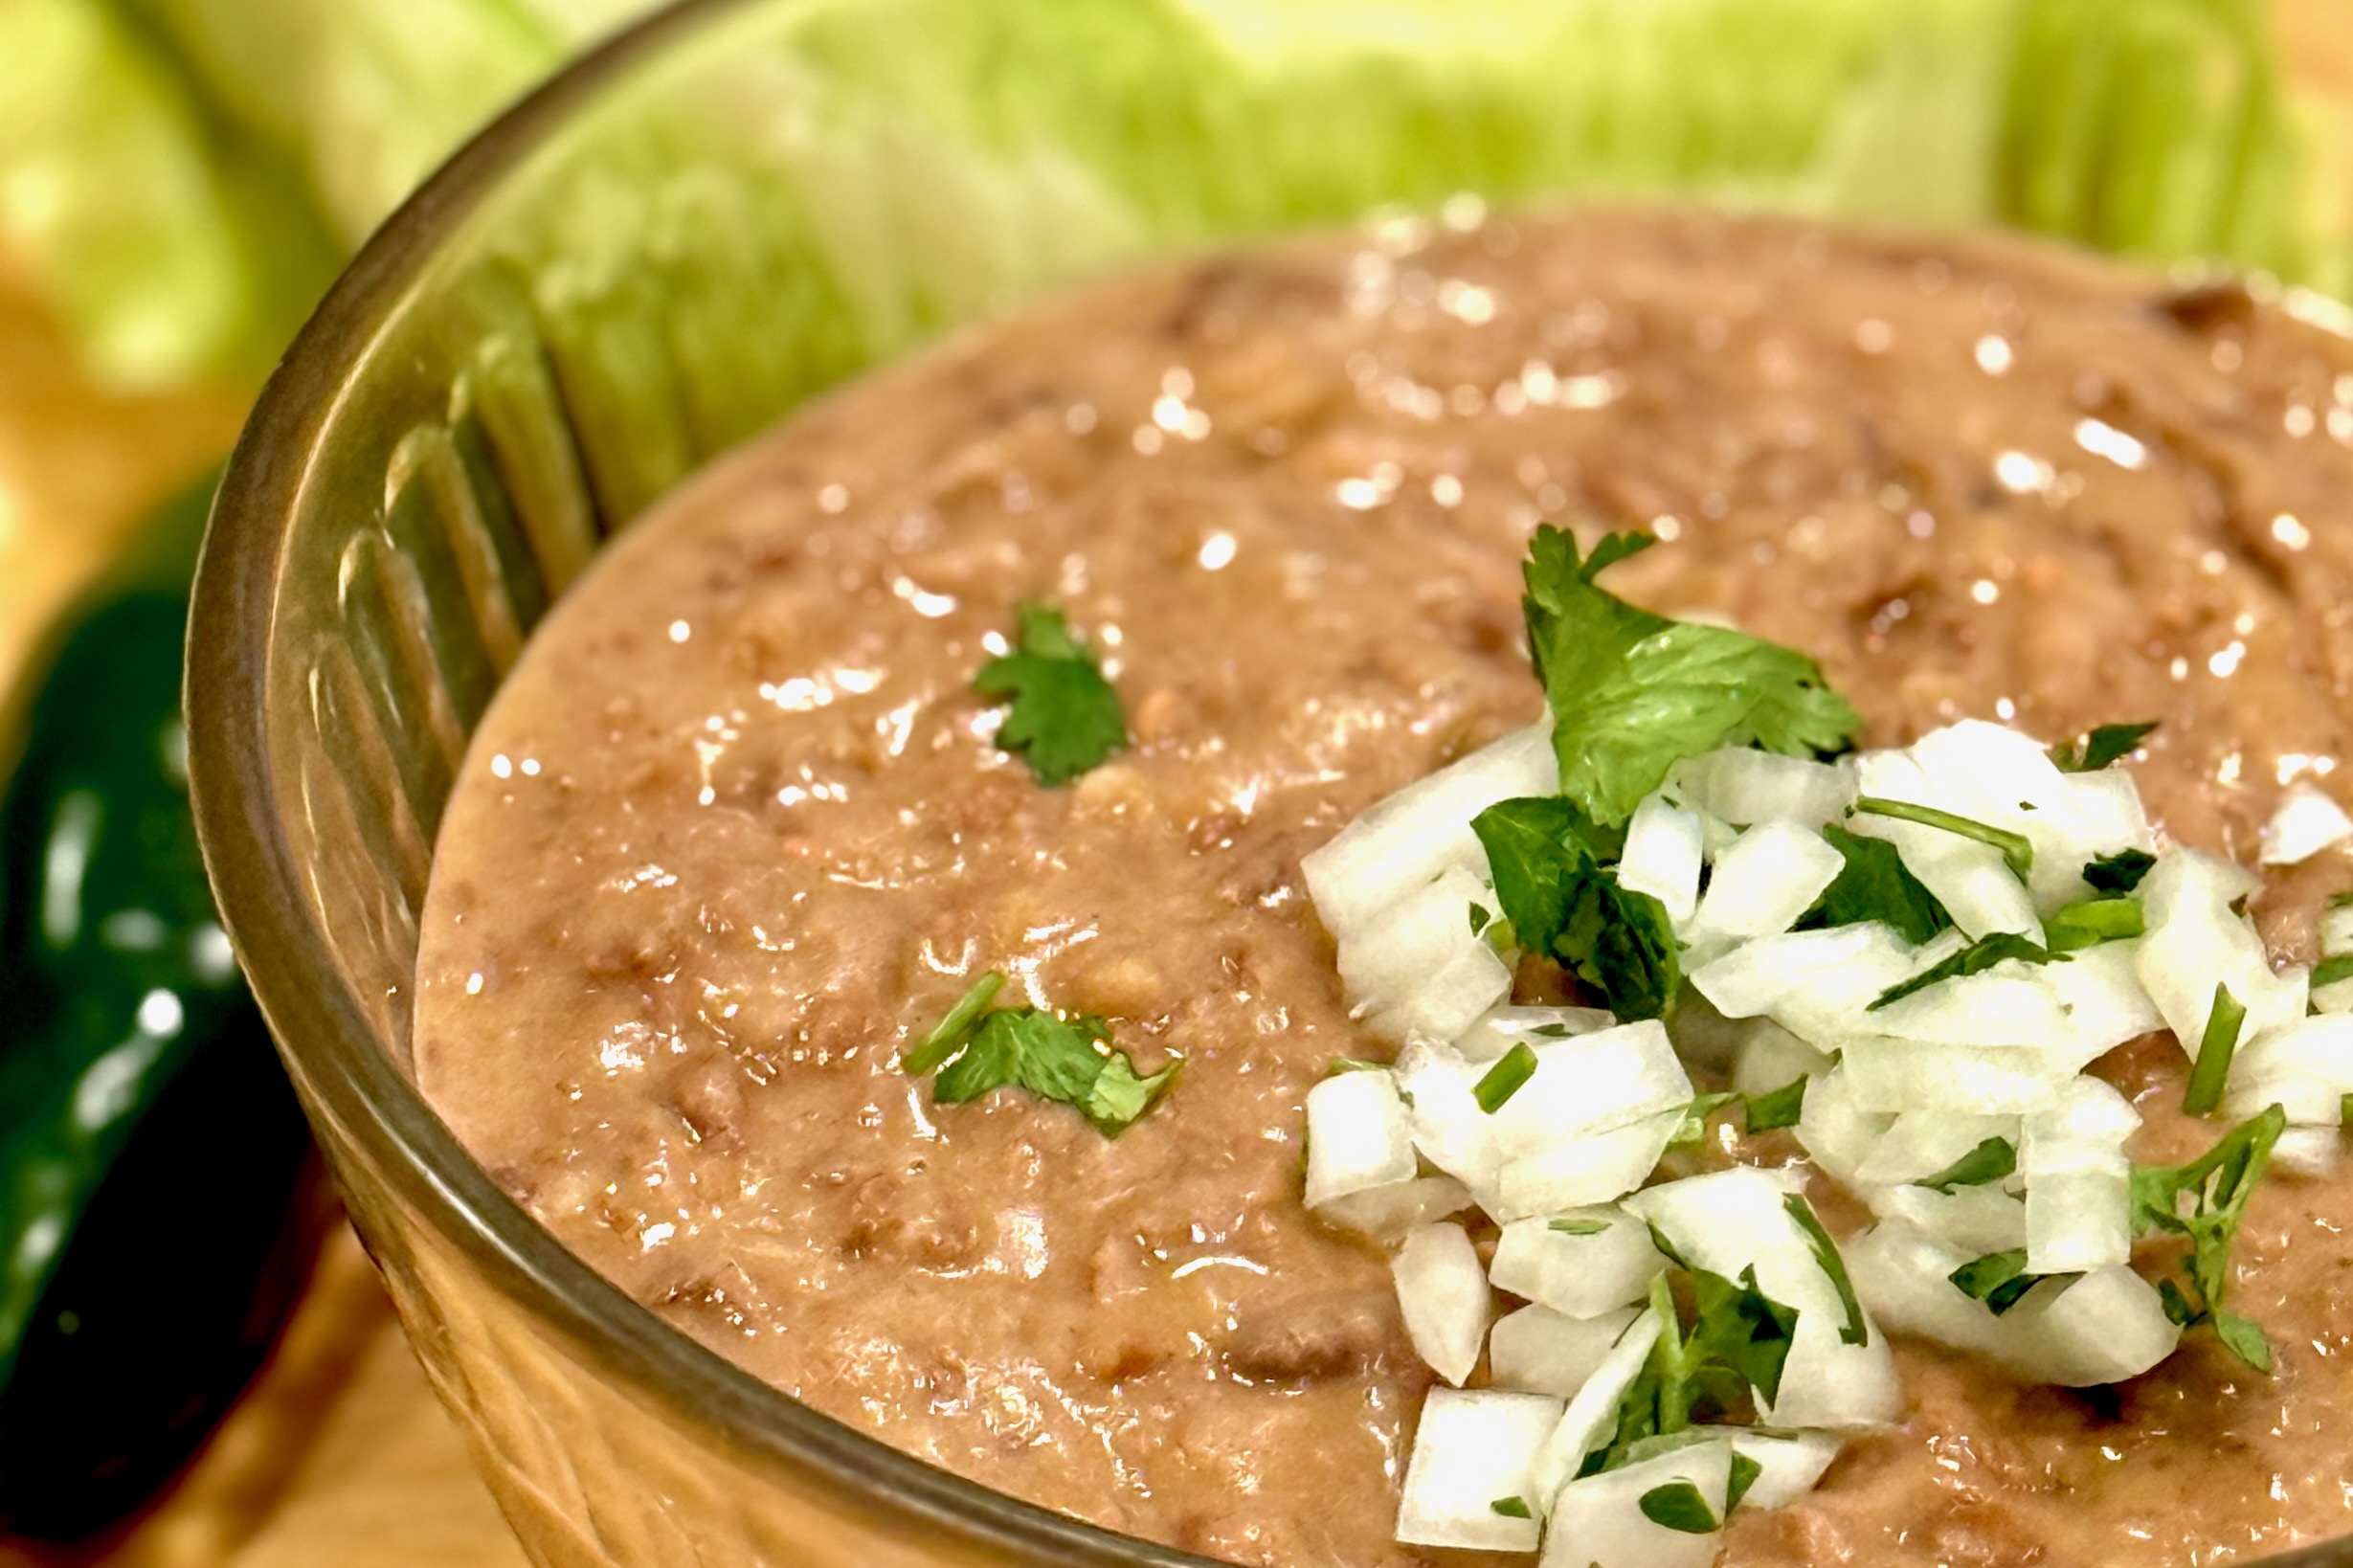
    Rich, creamy, and deeply savory, our family’s recipe for refried beans captures the heart of traditional Mexican cooking with a fraction of the usual time. Each bite balances earthy depth and a hint of sweetness from slow-simmered pinto beans. Whether tucked inside burritos, layered beside Mexican rice, or served simply with warm tortillas, they bring comfort and authenticity to any meal—and once you’ve made them this way, you may never reach for canned beans again.


    Ingredients

      Beans

    • 2 cups dry pinto beans, rinsed and drained
    • 1 onion, diced (or 1 tbsp onion powder)
    • 1 tsp table salt (omit if using tomato bouillon)
    • ½ tsp ground cumin
    • 4½ cups chicken broth or water
    • Fat (Choose One or a Blend)

    • 2–3 tbsp avocado oil, lard, butter, or a combination
    • Optional Flavor Boosters

    • ¼ cup Mexican Tomato Sauce (recommended for deeper flavor)
    • OR 1 tbsp tomato bouillon (omit salt)
    • OR ½ tsp soy sauce or Maggi (for umami depth without tomato flavor)
    • Optional Add-Ins

    • ⅛ tsp Mexican oregano
    • 1 tsp garlic powder (add after cooking)
    • 1 sachet ham bouillon or sazón (optional, for savory richness)

    Directions

    Sauté Aromatics (Optional but Recommended)

    Using the Sauté function, heat 1 tbsp of the fat in the Instant Pot. Add diced onion and cook 2–3 minutes until translucent and fragrant. If using onion powder, add with cumin.

    Deglaze with a splash of broth if any browning occurs.

    Cook the Beans

    Add pinto beans, broth, cumin, and salt to the pot. If using butter, reserve it for after cooking. If using Mexican Tomato Sauce for integrated flavor, stir it in now—or stir it in later during the refry step as a finisher.

    Set to Pressure Cook – High for 60 minutes. When complete, allow natural release for 10–15 minutes, then release remaining pressure manually.

    Mash or Refry

    Mash to desired smoothness using a potato masher, hand mixer, or immersion blender. Add liquid as needed for consistency. For authentic refried texture, heat remaining fat in a large skillet over medium-high heat. Add mashed beans to skillet, stirring occasionally until thickened and slightly toasty, about 5 minutes. If using Mexican Tomato Sauce as a finisher, add 2–3 tbsp during this stage and cook until slightly reduced and glossy.

    Rest and Serve

    For best flavor, refrigerate overnight and reheat before serving. The beans thicken slightly as they cool, deepening both flavor and texture.


    Notes

    Preparation

    • For richer flavor, add ¼ cup Mexican Tomato Sauce during cooking or mashing, OR ½ tsp soy sauce/Maggi during mashing, OR 1 tbsp tomato bouillon during cooking. Omit these boosters if serving entrées with green sauce bases.
    • Mashing the beans in hot fat develops a nutty flavor and glossy, restaurant-style finish.
    • Beans improve overnight as flavors meld and starches set.

    Serving Suggestions

    Variations

    • Use lard for the most traditional flavor, butter for a richer finish, or avocado oil for a cleaner everyday version.
    • For a deeper red-style bean, use Mexican Tomato Sauce or tomato bouillon. For a more neutral bean, use soy sauce or Maggi instead.

    Make-Ahead & Storage

    • Refrigerate up to 5 days in an airtight container.
    • Freeze up to 3 months; thaw overnight in the refrigerator before reheating.
    • Reheat gently on the stovetop or in the microwave, adding a splash of broth or water to loosen if thickened.
  • Chicken Fajitas

    Chicken Fajitas

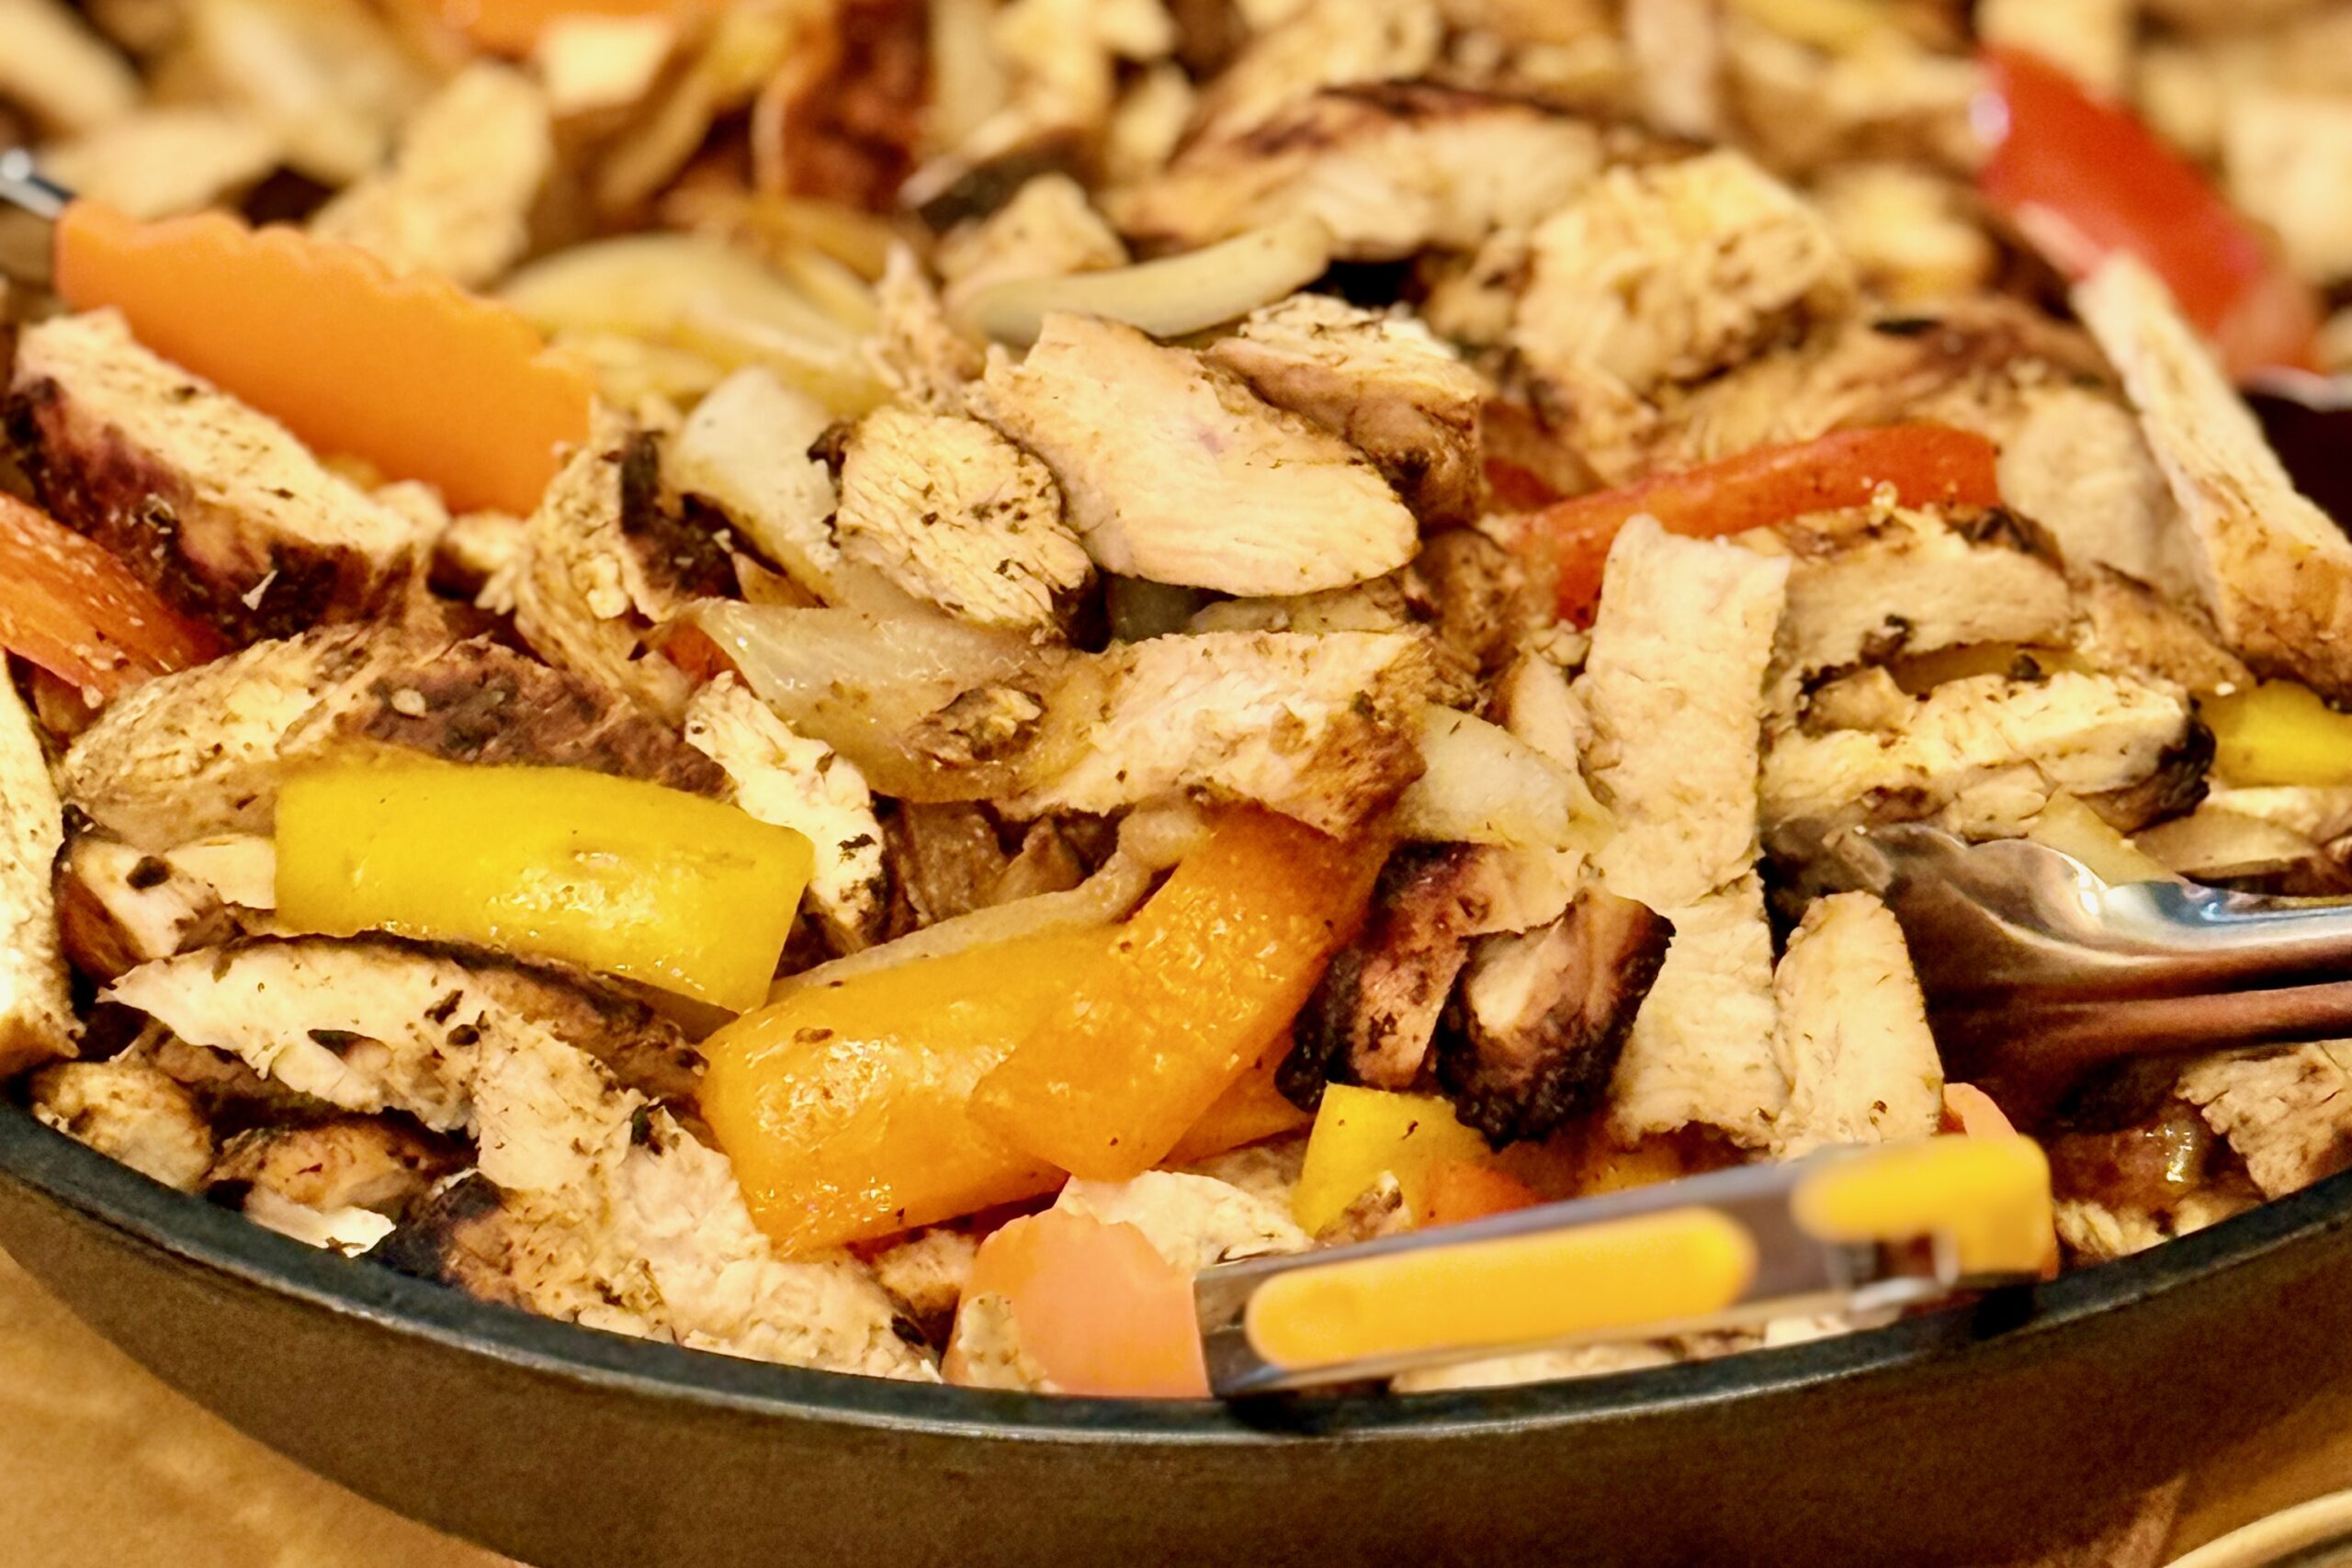
    Juicy, smoky chicken tossed with sizzling peppers and onions—these restaurant-style fajitas bring the flavor and drama of a classic Mexican grill to your table. Balanced citrus marinade, caramelized edges, and a final squeeze of lime create a bright, sizzling finish.


    Ingredients

    • 1½ lbs skinless, boneless chicken thighs and/or breasts (1 part thighs and 1 part breasts recommended)
    • Marinade

    • 3 tbsp canola oil
    • 2 tbsp lime juice
    • 1 tbsp orange juice
    • 1 tbsp soy sauce
    • 1 tbsp water
    • 2 garlic cloves, minced
    • ½ tsp chipotle chile powder
    • 1 tsp ancho chile powder
    • 1½ tsp ground cumin
    • ¼ tsp ground coriander
    • ¹⁄₁₆ tsp ground cinnamon
    • 1 tsp smoked paprika
    • 1 tsp dried Mexican oregano
    • 1 tsp kosher salt
    • ½ tsp black pepper
    • 1 tsp brown sugar (optional, helps caramelization)
    • ½ tsp liquid smoke (optional, if not cooking over charcoal)
    • Vegetables

    • 1 red bell pepper, sliced
    • 1 green bell pepper, sliced
    • 1 yellow bell pepper, sliced
    • 1 large white onion, sliced
    • 1–2 tbsp oil
    • Pinch of kosher salt
    • Squeeze of lime juice
    • To Serve

    • Warm flour tortillas
    • Pico de gallo
    • Guacamole or avocado slices
    • Crema or sour cream
    • Shredded cheese (cheddar, Monterey Jack, or Oaxaca)
    • Refried Beans
    • Mexican Rice
    • Fresh lime wedges
    • Fresh cilantro, chopped
    • Cotija cheese, crumbled (optional for garnish)

    Directions

    Marinate the Chicken

    Combine marinade ingredients in a bowl or resealable container. Add chicken and coat thoroughly, reserving 1–2 tbsp of the marinade for use later with the vegetables.

    Cover and refrigerate for 4–12 hours, turning occasionally.

    Prepare the Serving Skillet

    Preheat oven to 450–500°F (230–260°C). Place a large cast-iron fajita platter or skillet in the oven to heat for at least 15 minutes before serving.

    Cook the Chicken

    Heat a grill or cast-iron skillet over high heat. Cook chicken until nicely charred on the outside and reaches 160–165°F internally.

    Transfer to a plate, tent loosely with foil, and rest 5 minutes. Slice into thin strips across the grain.

    Caramelize and Combine

    Return the hot skillet to the stove (or use the same grill pan). Add sliced chicken and about 1 tbsp of the reserved marinade. Toss over high heat for 30–45 seconds to lightly caramelize and glaze the edges. Remove from heat and keep warm.

    Cook the Vegetables

    In a separate large skillet (or grill pan), heat 1–2 tbsp oil over high heat. Add sliced peppers and onions. Cook until blistered and tender-crisp, stirring occasionally, about 4–5 minutes.

    Add a pinch of salt and a squeeze of lime juice at the end of cooking for brightness and balance.

    Assemble and Serve

    Combine the vegetables with the sliced chicken. Carefully remove the preheated cast-iron skillet from the oven and transfer the chicken and peppers into it.

    Add a final squeeze of fresh lime juice—the skillet will sizzle and steam. Serve immediately on a heat-safe surface with warmed tortillas and all accompaniments.

    Garnish

    Sprinkle with fresh chopped cilantro and a light dusting of cotija cheese just before serving.


    Notes

    Preparation

    • The balanced 3:3 oil-to-citrus ratio prevents over-acidification and improves browning.
    • Adding 1 tbsp water ensures even coating and full marinade coverage.
    • Optional liquid smoke adds authentic char aroma when not using a charcoal grill.
    • A brief toss of sliced chicken in reserved marinade creates a restaurant-style glossy finish.
    • Seasoning vegetables with salt and lime at the end enhances flavor and color.
    • The sizzling lime finish releases steam and aroma when the hot skillet hits the table.

    Serving Suggestions

    • Serve with warm tortillas, Mexican rice, and refried beans.
    • Offer pico de gallo, guacamole, crema, or cheese for build-your-own fajitas.
    • Top with extra cilantro, cotija, and a squeeze of lime just before serving.

    Make-Ahead & Storage

    • Marinate chicken up to 12 hours in advance for maximum flavor.
    • Cooked chicken and vegetables can be refrigerated for up to 3 days.
    • Reheat gently in a skillet or oven before serving; add a squeeze of lime to refresh flavor.
  • Browned Butter Sage Sauce

    Browned Butter Sage Sauce

    A quick, elegant sauce that pairs beautifully with ricotta or potato gnocchi. Simple to prepare, it highlights the nutty aroma of browned butter and the earthy perfume of fresh sage. When served with gnocchi, a pinch of nutmeg in the dough adds warm, slightly sweet notes that complement the savory depth of the sage. This classic combination appears throughout Italian cooking—in pasta, meatballs, gnocchi, and creamy soups—where sage contributes its herbaceous edge and nutmeg lends a subtle, cozy warmth.


    Ingredients

    • 6 tbsp unsalted butter (85 g)
    • 8–10 fresh sage leaves
    • ⅛ tsp table salt (or to taste)
    • freshly ground black pepper (to taste)
    • 2 tbsp grated parmesan (optional, for finishing)
    • ½ tsp lemon juice (optional, brightens flavor)

    Directions

    Brown the Butter

    In a medium skillet or saucepan, melt the butter over medium heat. Add the sage leaves and cook, swirling occasionally, until the butter turns deep golden and smells nutty, about 4–5 minutes. The sage will crisp slightly as it fries.


    Finish the Sauce

    Remove from heat and stir in salt, black pepper, and lemon juice if using. Serve the sage leaves whole or remove them depending on preference.


    Serve

    Toss hot, drained gnocchi directly in the pan with the brown butter sauce until evenly coated. Serve immediately with freshly grated parmesan.


    Notes

    Preparation

    • Watch closely—brown butter goes from nutty to burnt quickly. Remove from heat as soon as the milk solids turn golden.
    • Create a silkier sauce by swirling in 1–2 tbsp pasta or gnocchi cooking water to form a light emulsion.
    • For deeper sage flavor, crisp the leaves for an extra 30 seconds before removing the pan from heat.

    Serving Suggestions

    • Drizzle over ricotta gnocchi, potato gnocchi, or sweet potato gnocchi.
    • Excellent on cheese ravioli, butternut squash ravioli, or spinach ravioli.
    • Also delicious over roasted vegetables, grilled chicken, or sautéed mushrooms.

    Variations

    • Garlic Brown Butter: Add one lightly crushed garlic clove to the skillet during browning; remove before serving.
    • Brown Butter & Walnut: Stir in ¼ cup toasted chopped walnuts for added crunch.
    • Lemon-Sage Butter: Increase lemon juice to 1 tsp and add ½ tsp lemon zest for brightness.

    Make-Ahead & Storage

    • Best served immediately after browning.
    • Refrigerate leftover sauce up to 3 days; rewarm gently over low heat before serving.
    • Sage leaves soften in storage—crisp fresh leaves separately if reheating.
  • Grandma Lena’s Green Beans

    Grandma Lena’s Green Beans

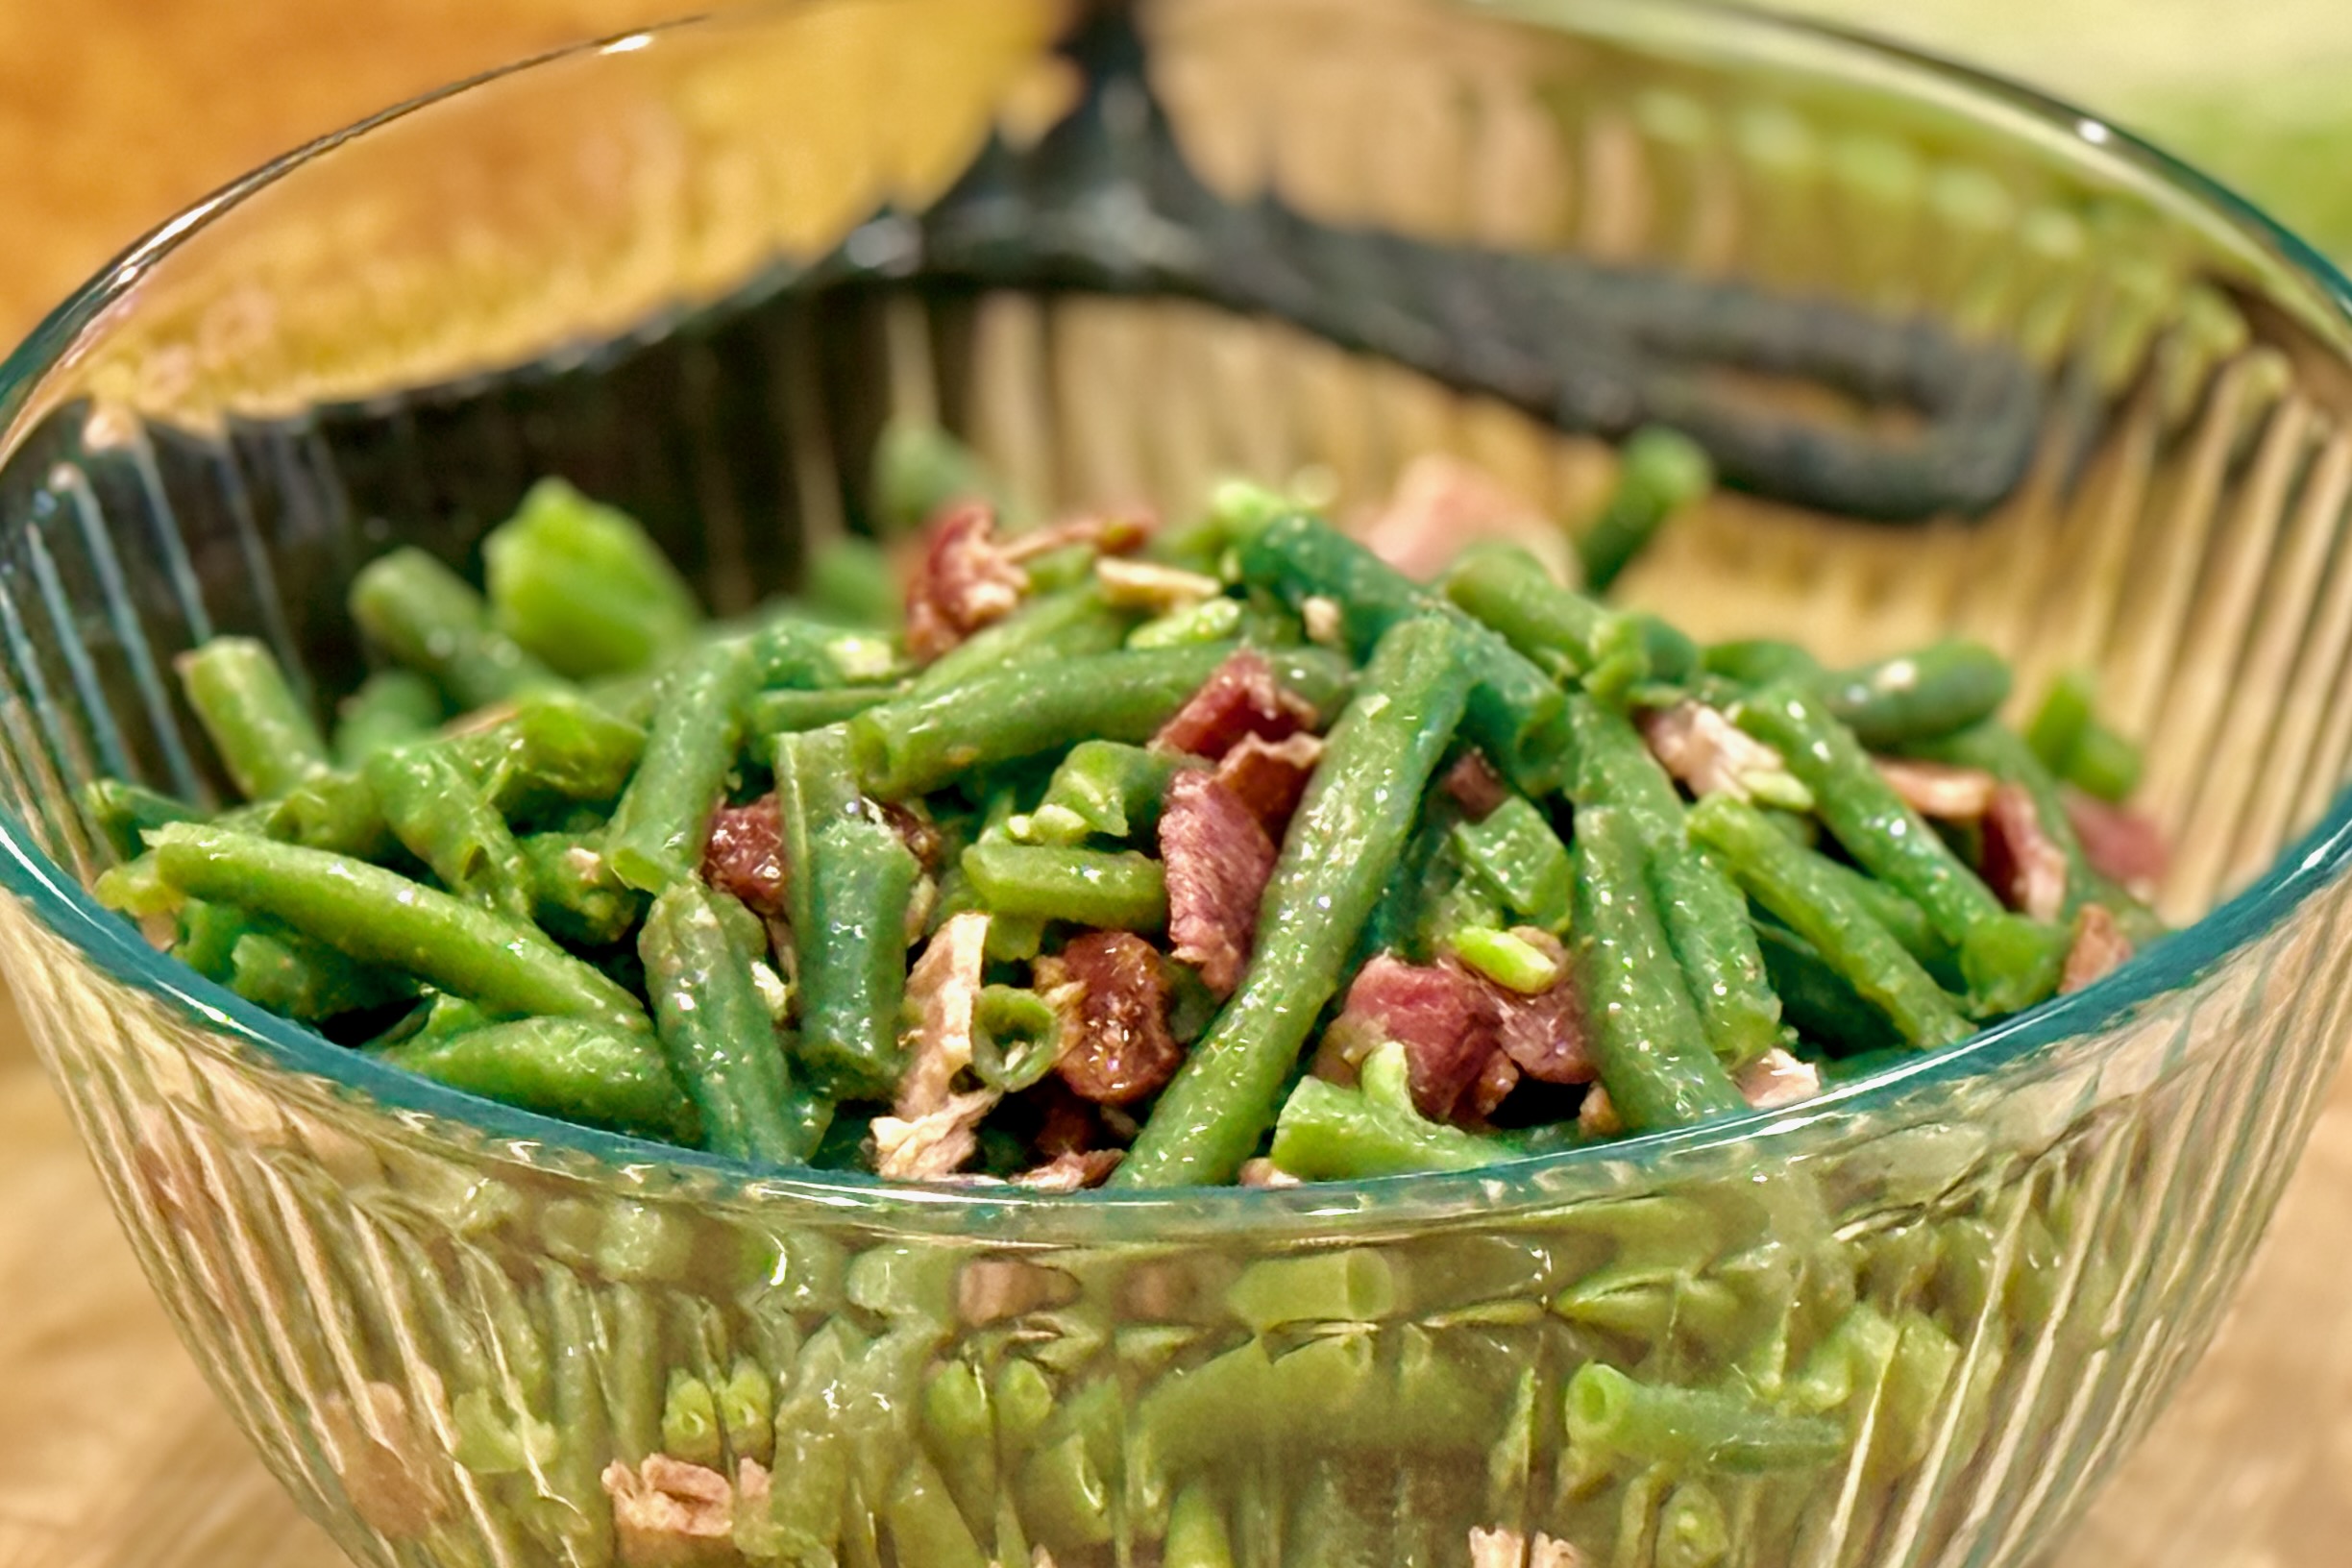
    Grandma Lena’s green beans were a fixture at family dinners. She always made them with flat Italian green beans when she could find them, simmering them slowly with bacon until they became perfectly tender and full of flavor. They were never sautéed, never buried under a cream sauce, and never meant to steal the spotlight. Instead, they quietly complemented everything else on the table. Today I still follow Grandma Lena’s method of seasoning the beans through the cooking broth, but finish them with a little butter, reserved bacon drippings, and freshly crisped bacon for a richer finish that honors the original while adding just a little extra depth.


    Ingredients

    • 2 lbs fresh green beans, trimmed
    • 4 slices thick-cut bacon
    • Water, enough to cover the beans (about 6–8 cups)
    • 1 tsp Better Than Bouillon Roasted Chicken Base
    • ½ tsp liquid smoke
    • Pinch of MSG (optional)
    • 6 slices thick-cut bacon, cooked until crisp and chopped
    • 1 tbsp butter
    • 1–2 tsp reserved bacon drippings
    • Freshly ground black pepper, to taste

    Directions

    Prepare the cooking broth.

    Place 4 slices of bacon in a Dutch oven or large saucepan and cover with water. Bring to a gentle simmer and cook for about 30 minutes to create a flavorful broth.

    Stir in the Better Than Bouillon, liquid smoke, and optional MSG until dissolved.

    Cook the beans.

    Add the green beans to the simmering broth. Continue cooking until the beans reach your preferred tenderness, about 20–25 minutes for tender-crisp beans or 35–45 minutes for a more traditional Southern-style texture.

    While the beans cook, prepare 6 additional slices of bacon until crisp. Reserve 1–2 teaspoons of the bacon drippings, then chop the bacon into bite-sized pieces.

    Finish the beans.

    Remove and discard the simmered bacon. Drain the beans, reserving 2–3 tablespoons of the cooking broth in the pot.

    Add the butter and reserved bacon drippings, tossing until the butter melts and the beans are lightly coated.

    Fold in the chopped crispy bacon and season with freshly ground black pepper to taste. Serve immediately.


    Notes

    Preparation Tips

    Taste the cooking broth before adding the green beans. It should taste well-seasoned with a gentle smoky bacon flavor. The broth is what seasons the beans from the inside out, so a flavorful broth produces flavorful beans.

    Grandma Lena always used flat Italian (Romano) green beans when they were available. Their meatier texture and slightly sweeter, less grassy flavor make them especially well suited to slow simmering. Because they’re often difficult to find, regular fresh green beans are an excellent substitute and are what we usually use today.

    Serving Suggestions

    These green beans are especially good alongside barbecue, roast beef, ham, fried chicken, meatloaf, or holiday dinners. They pair beautifully with mashed potatoes, cornbread, baked beans, and other traditional family favorites.

    Variations

    For a pork-free version, omit the simmered bacon and increase the liquid smoke slightly if desired. Finish the beans with butter and serve without the crispy bacon, or substitute cooked smoked turkey for a similar flavor profile.

    Make-Ahead & Storage

    The beans may be cooked several hours ahead and refrigerated in a small amount of the cooking broth. Reheat gently, then finish with the butter, bacon drippings, and crispy bacon just before serving. Leftovers keep well in the refrigerator for up to 4 days.