Working in the office in the city of Bussum in The Netherlands, we’d often order take-out from our favorite Chinese-Indonesian restaurant, Tong Fong, in the neighboring city of Hilversum. One stand-out item was their delicious Babi Panggang, which was always a part of our order. I later learned that Babi Panggang is the most ordered main dish at Indonesian restaurants throughout the Netherlands. This is my attempt to recreate the vibrant flavors and textures of this delicious dish.
Ingredients
- 2 lb pork shoulder or belly
- ¼ cup ketjap manis
- 2 tbsp hoisin sauce
- 2 tbsp rice cooking wine
- 1 tbsp brown sugar
- 1 tbsp fresh ginger, grated
- 1 tbsp fish sauce
- ½ tbsp sambal oelek
- ½ tbsp sambal badjak
- ½ tsp toasted sesame oil (optional)
- ¼ tsp Chinese five spice (optional)
- 2 cloves garlic, minced
- Juice and zest of 1 lime
- 1 tbsp vegetable oil
- 1 small onion, finely chopped
- 2–3 cloves garlic, minced
- 2 tsp grated ginger
- ½ tsp sambal oelek
- 3 tbsp tomato paste
- ¼ tsp chicken powder
- ¼ cup sweet chili sauce
- 3 tbsp ketchup
- 2 tbsp lime juice
- 2 tbsp seasoned rice vinegar
- 1 tbsp tamarind paste
- 1 tbsp ketjap manis
- 1 tsp fish sauce
- ¾ cup chicken stock or water
- ¼ cup brown sugar (adjust to taste)
- 1 tbsp cornstarch mixed with 1 tbsp water
Marinade
Sweet & Sour Red Sauce
Directions
Marinate the Pork
Combine all marinade ingredients, stirring until the sugar has completely dissolved. Pour into a resealable container or vacuum-seal bag. Add the pork, coating thoroughly. Seal and marinate in the refrigerator for 4–12 hours.
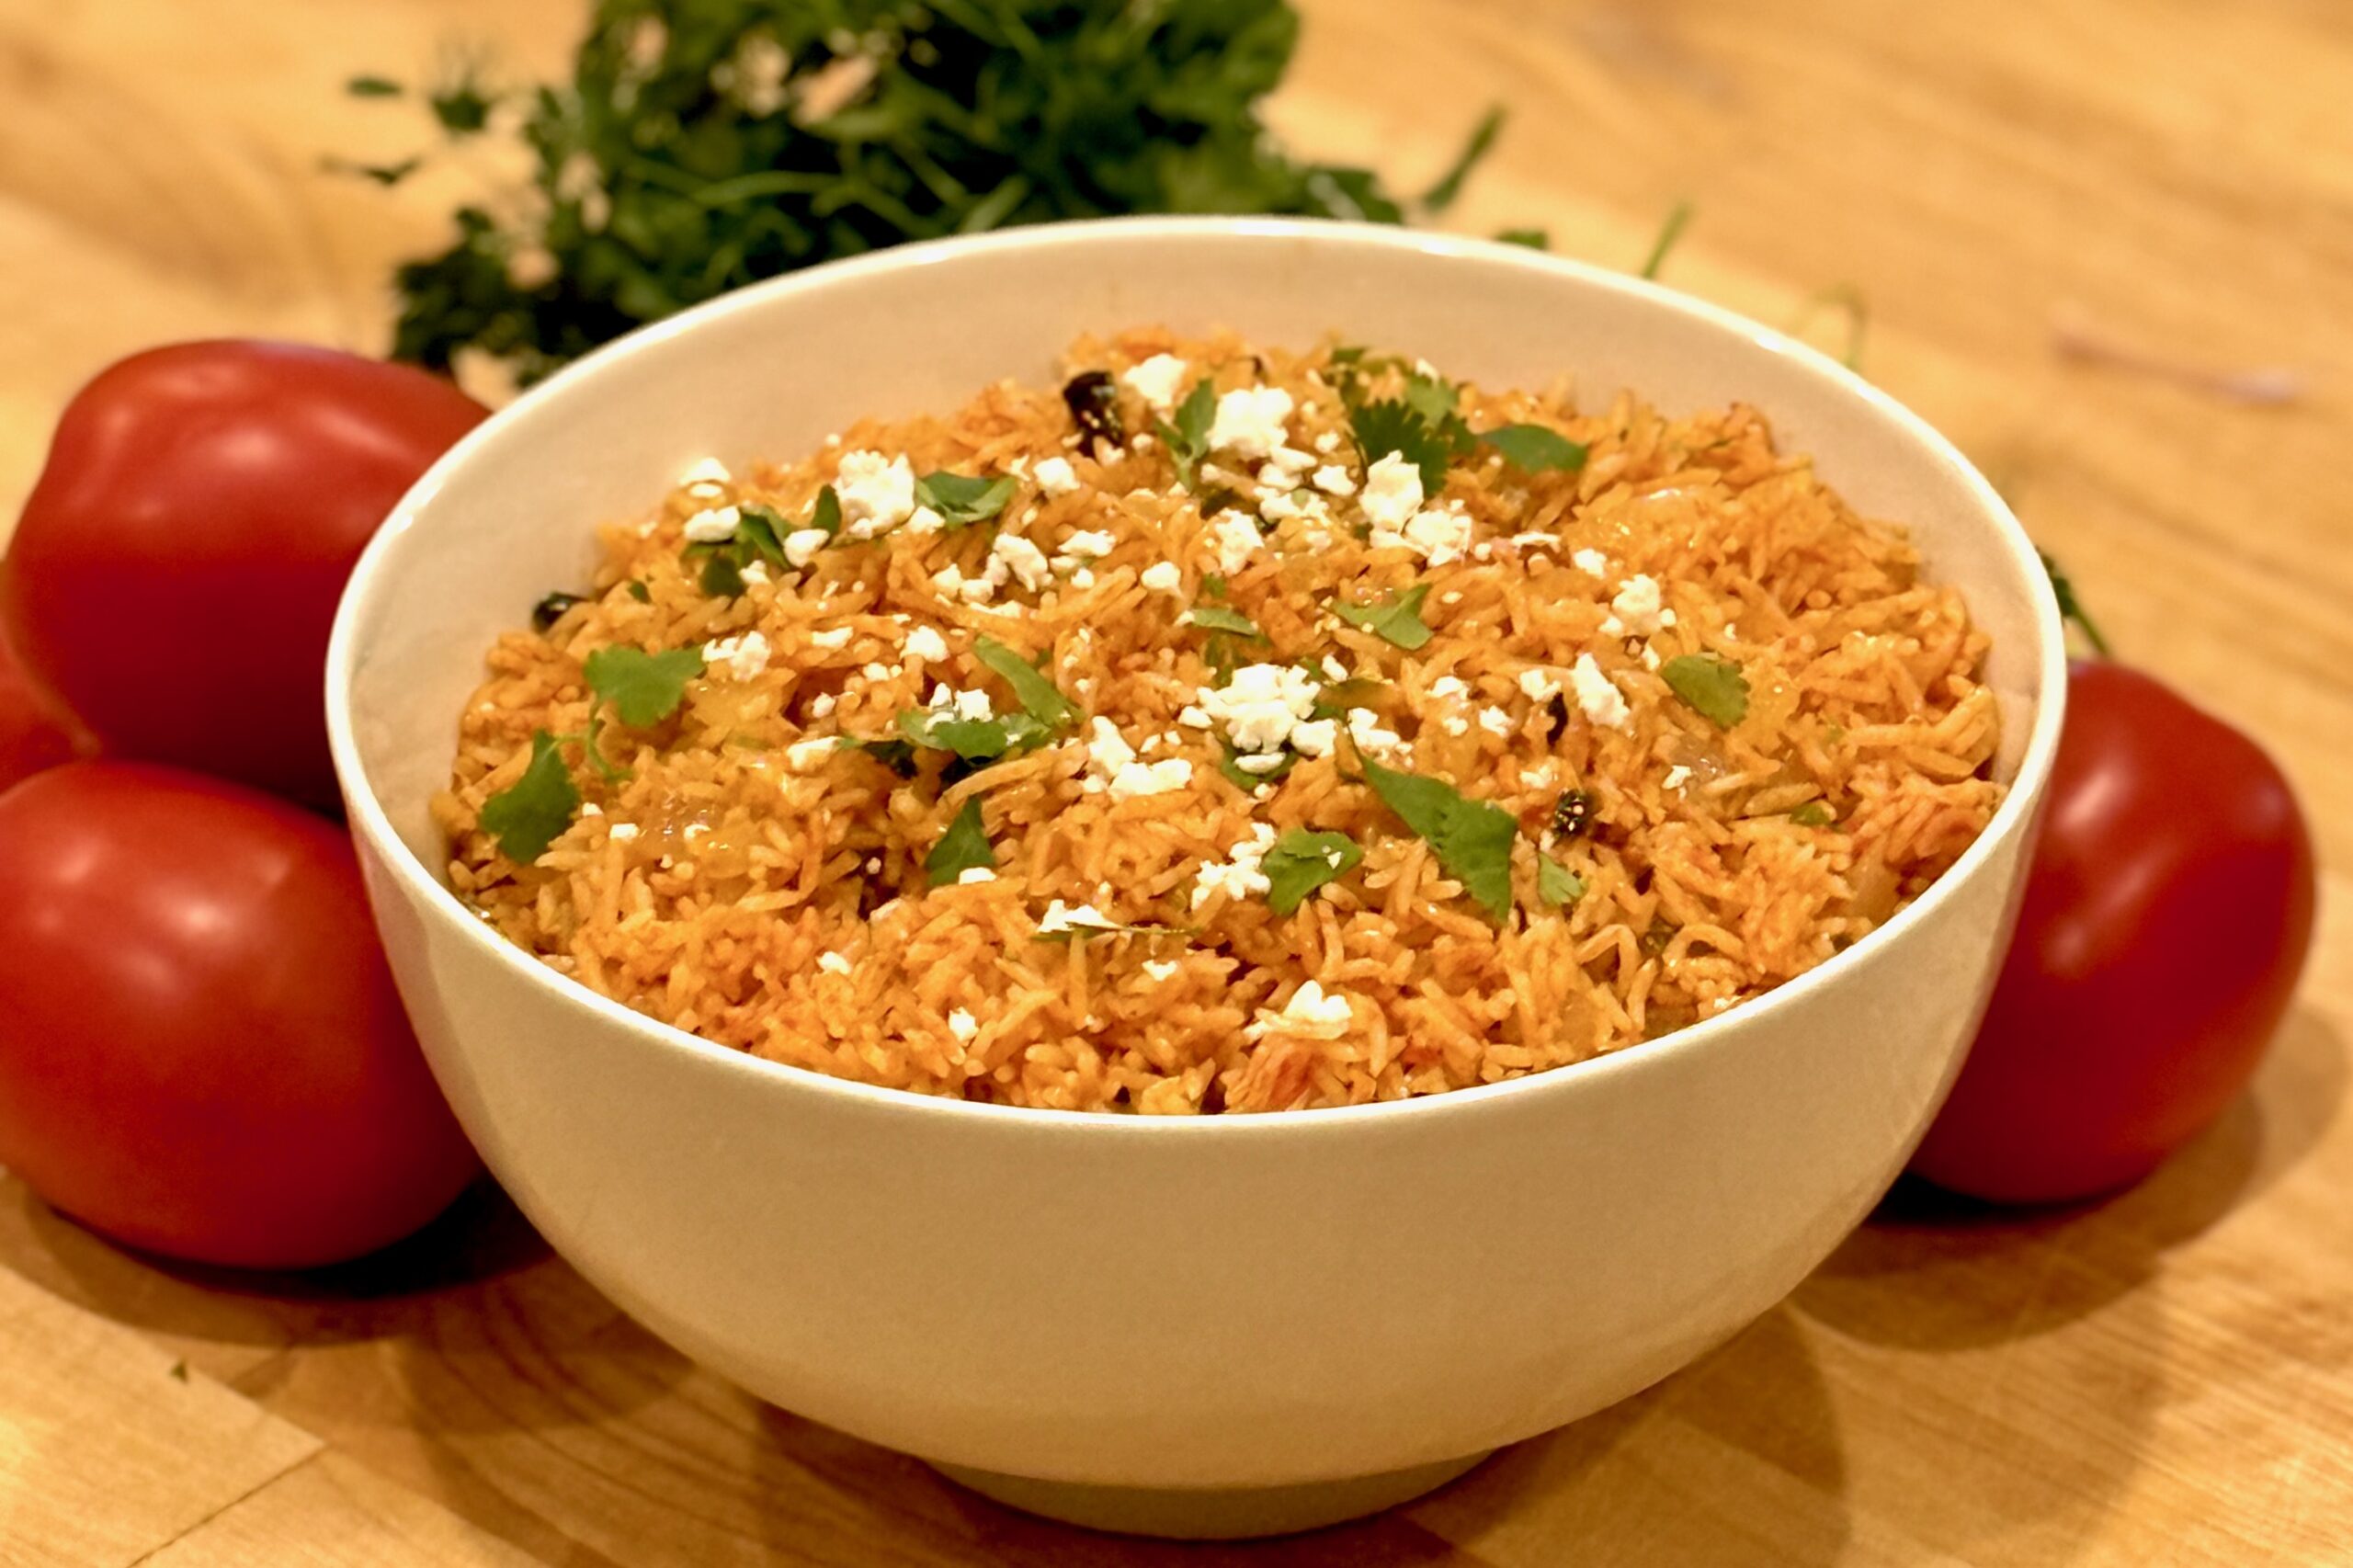
Sweet & Sour Red Sauce
Heat oil in a saucepan over medium heat. Sauté onion until lightly browned; add garlic, ginger, and sambal, and cook until fragrant. Add tomato paste and chicken powder; cook 1 minute to develop sweetness.
Stir in sweet chili sauce, ketchup, lime juice, vinegar, tamarind, ketjap manis, fish sauce, stock or water, and brown sugar. Simmer 10 minutes to allow flavors to meld. Add the cornstarch slurry and simmer until glossy and thickened. Blend with an immersion blender and adjust thickness with additional stock, if needed.
Preparation #1: Sous Vide
Preheat sous vide bath to 170°F / 77°C for pork shoulder (130°F / 55°C for pork loin or tenderloin; 150°F / 65°C for pork belly). Submerge vacuum-sealed pork and marinade in the water bath and heat for 12–24 hours (2–8 hours for pork loin or tenderloin).
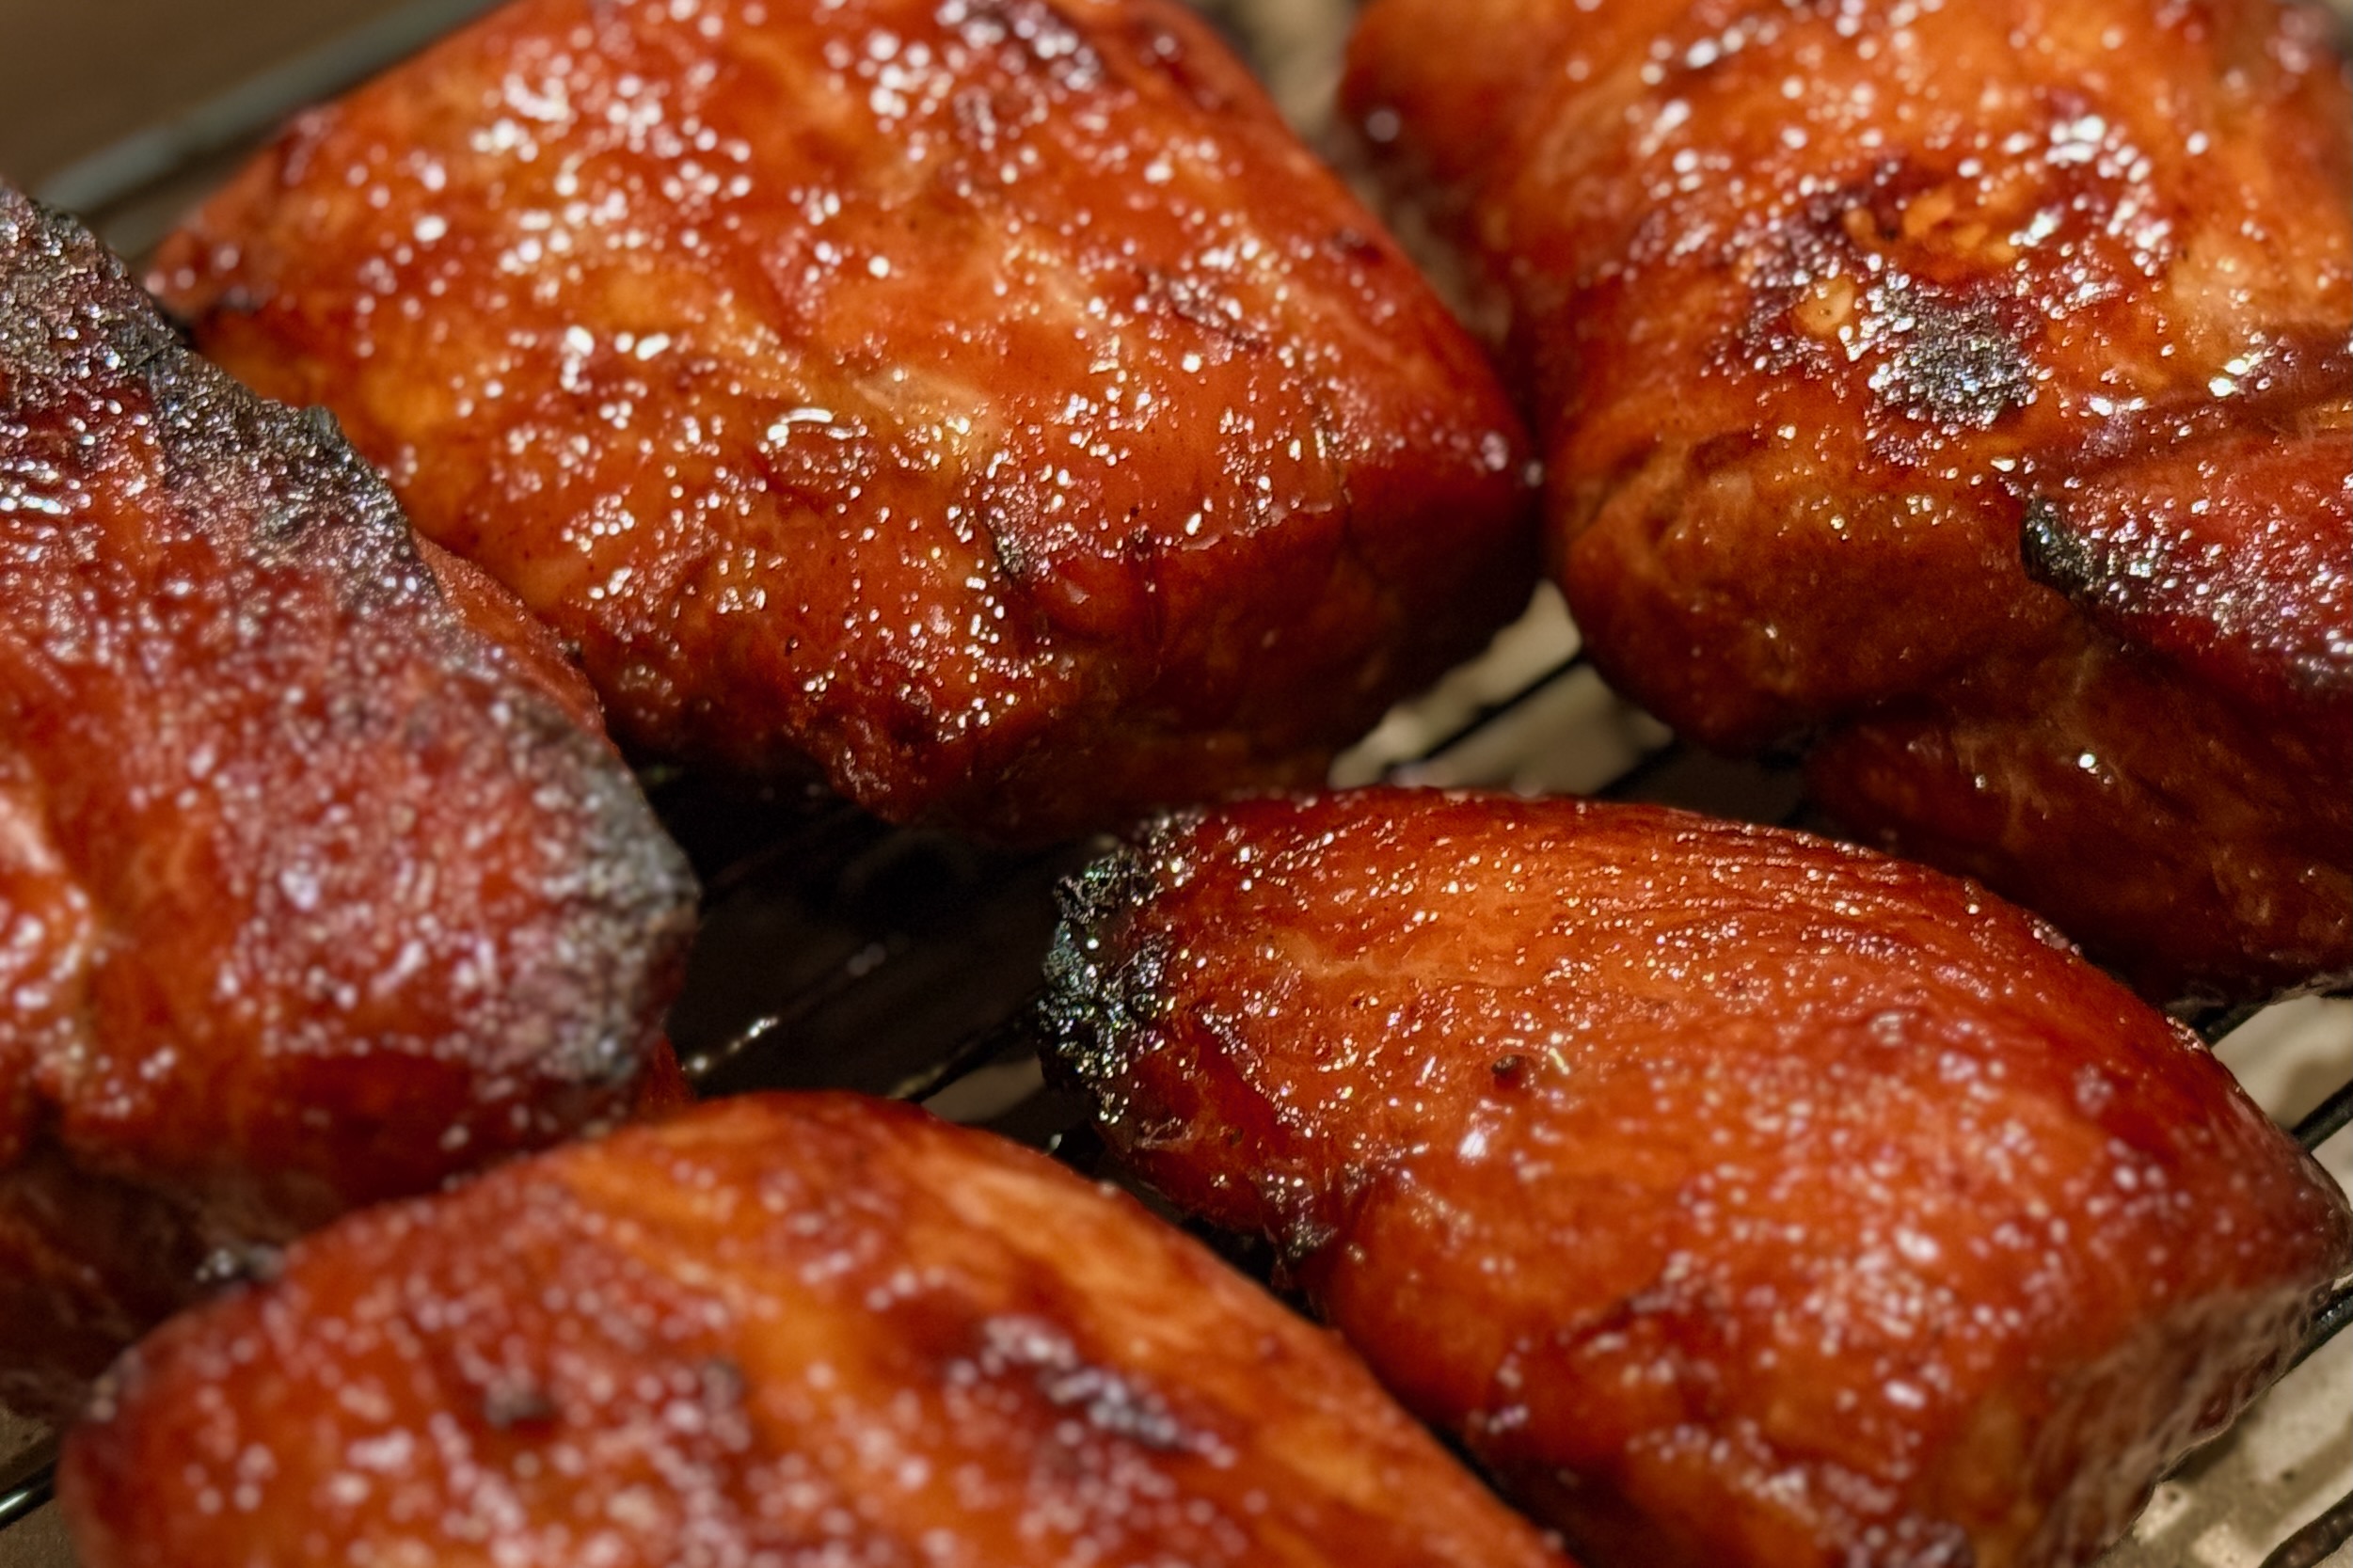
Remove from the bag and pat dry. Brush with oil and finish under a broiler set to high for 4–5 minutes to crisp the top. Brush with red sauce during broiling and allow it to develop a few bits of char.
Slice and serve over rice with a generous amount of sauce. Serve with acar ketimun (pickled vegetables), cucumber salad, fried cabbage, and/or blanched green beans tossed with garlic and sesame oil.
Preparation #2: Oven
Preheat oven to 350°F / 177°C. Place pork on a rack in a baking tray. Reserve marinade and boil in a saucepan for 5 minutes. Roast pork for 30–40 minutes per pound, or until internal temperature reaches 190°F / 88°C, basting with the boiled marinade halfway through.
Rest pork for 20 minutes. Pat dry, brush with oil, and finish under a broiler set to high for 4–5 minutes to crisp the top. Optionally, baste with the red sauce while broiling and allow it to develop slight char.
Slice and serve over rice with a generous amount of sauce. Serve with acar ketimun, cucumber salad, fried cabbage, and/or blanched green beans tossed with garlic and sesame oil.
Preparation #3: Pellet Grill
Preheat pellet grill to 250°F / 120°C. Smoke until internal temperature reaches 187°F / 86°C, basting halfway through. Rest pork for 30 minutes.
Pat dry, brush with oil, and finish under a broiler set to high for 4–5 minutes to crisp the top. Optionally, baste with the red sauce while broiling and allow it to develop light char.
Slice and serve over rice with a generous amount of sauce. Serve with acar ketimun, cucumber salad, fried cabbage, and/or blanched green beans tossed with garlic and sesame oil.
Notes
Preparation
- Fattier cuts such as pork shoulder or belly are preferred, but pork loin or tenderloin (especially when using the sous vide method, with times and temperatures adjusted accordingly) can also be used. Take care not to overcook leaner cuts.
- Preparation #1, Sous Vide, is the preferred method for the most tender and flavorful result.
Serving Suggestions
- Serve sliced Babi Panggang over rice with plenty of red sauce spooned on top.
- Pair with acar ketimun, fried cabbage, cucumber salad, or blanched green beans with garlic and sesame oil.